

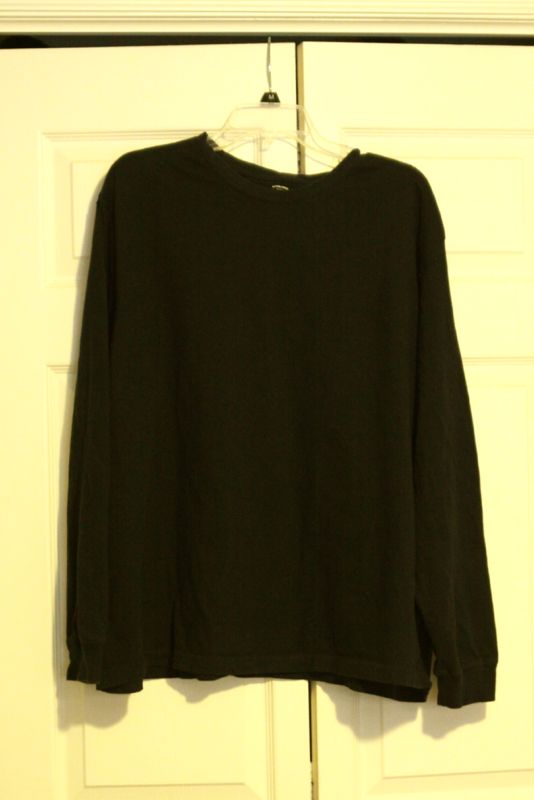
A few weeks ago I found a couple of mens long sleeved t-shirts on clearance at Walmart for $1 each. I used one to make a top for myself and I’ve been wondering what to do with the other one. When I saw that Project Run and Play was having a circle skirt remix sewalong this week, I knew what to do with my blue shirt. I decided to mix a circle skirt with my women’s top to baby dress refashion, adding in a cute ruffle down the front.
This dress was fairly quick, is completely adorable, and the soft knit fabric is perfectly comfortable on her baby skin. And it only takes about five minutes to make a matching ruffled headband. Want the full tutorial? Read on!
So, like I mentioned, I started with this:
I chopped off both the sleeves, then cut the front and back pieces apart. I began by drawing the circle that would become the top of the circle skirt. I measured loosely around my daughter’s hips and found I needed a circle with a 22 inch circumference. I found a bowl that had roughly the same measurement and traced it in the middle of the back piece of the shirt. (Since I was working with knit I wasn’t too worried about getting the measurements exact – I knew I could use the stretch in the fabric to make the skirt fit even if it was a little too big – but if I had been using woven fabric I would have been much more exact in my measurements.)

I traced the bowl to get the inner circle, then folded the shirt back in fourths so I could cut the circle out easily and evenly. I then trace another quarter circle 6.5 inches away from the first one, to make a skirt six and a half inches long (again, since I was using knit which doesn’t fray I didn’t worry about adding a hem allowance).
And here’s the circle skirt all unfolded:

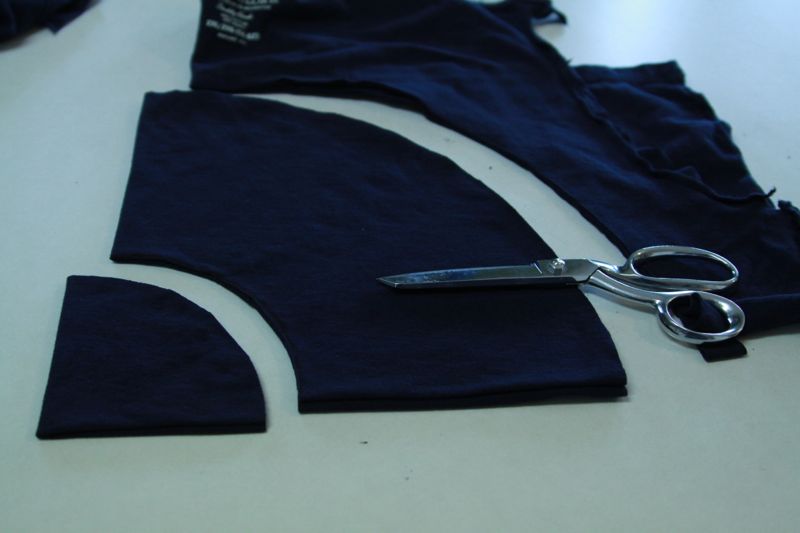
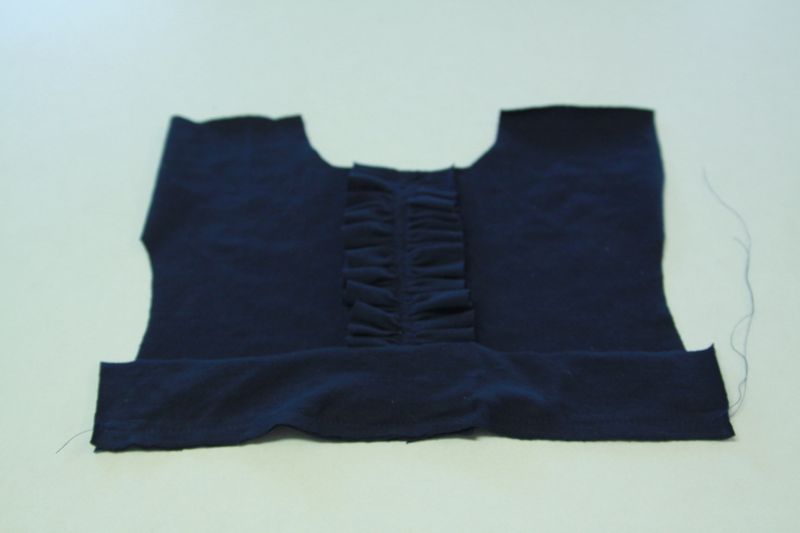
I used a dress I made a few weeks ago as a pattern to cut the bodice pieces from the front piece of the original shirt.
I also cut two waistband pieces about 2-3 inches tall and the same width as the bottom edge of the bodice. Make sure when cutting both the bodice and the waistband that your stretch is going side to side. Here’s the bodice, waistband pieces, and skirt ready to get put together:
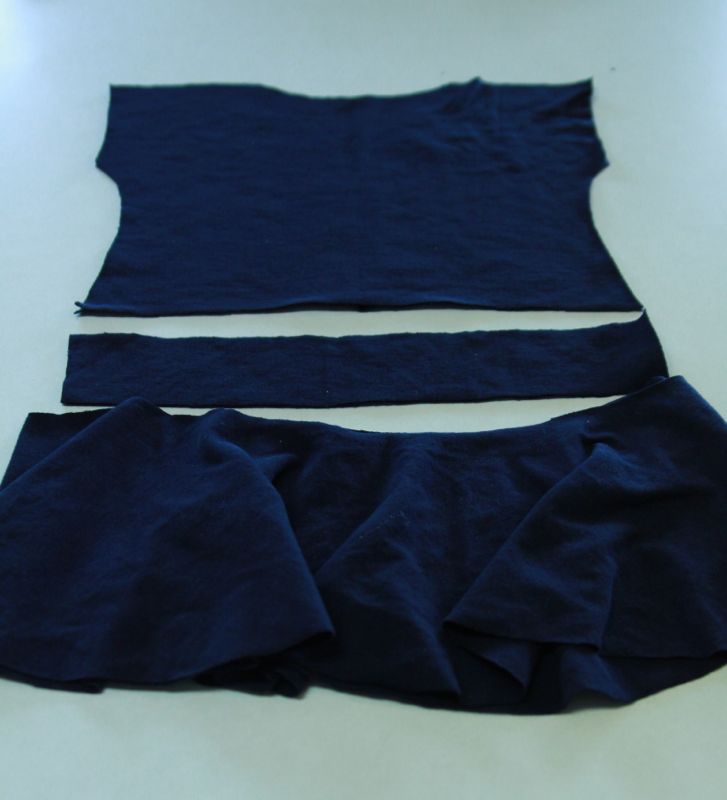
Lastly, I cut one more strip of fabric, this one a little bit more than twice as tall as the bodice, to use as a ruffle.
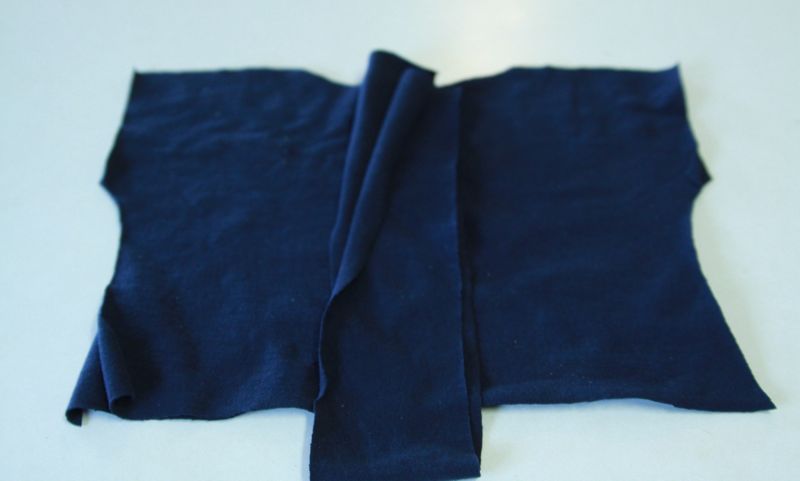
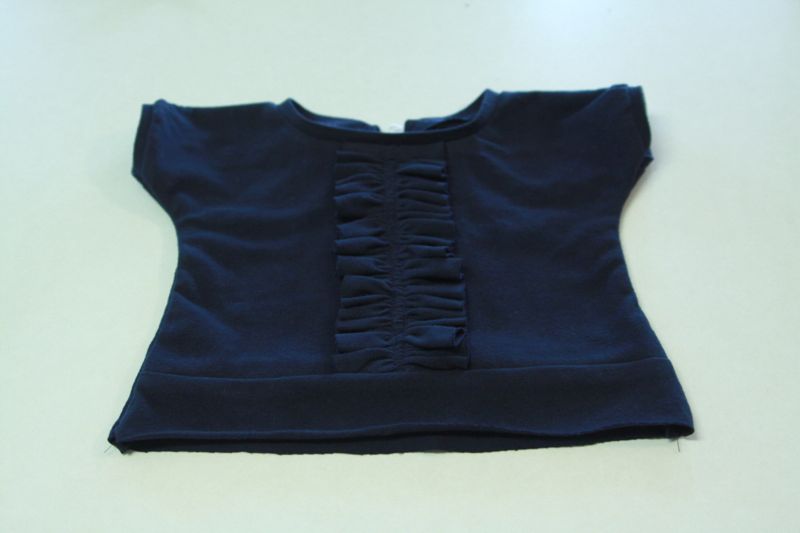
I sewed two rows of gathering stitches down the center of the ruffle strip (sewing two rows of gathering stitches makes for much more even gathers than just one), and gathered it up until it was about the same height as the bodice. To sew a gathering stitch, set your stitch length to the longest possible setting, and then turn your tension down very low. After sewing both rows of stitching you can pull on the bottom threads to gather the fabric.
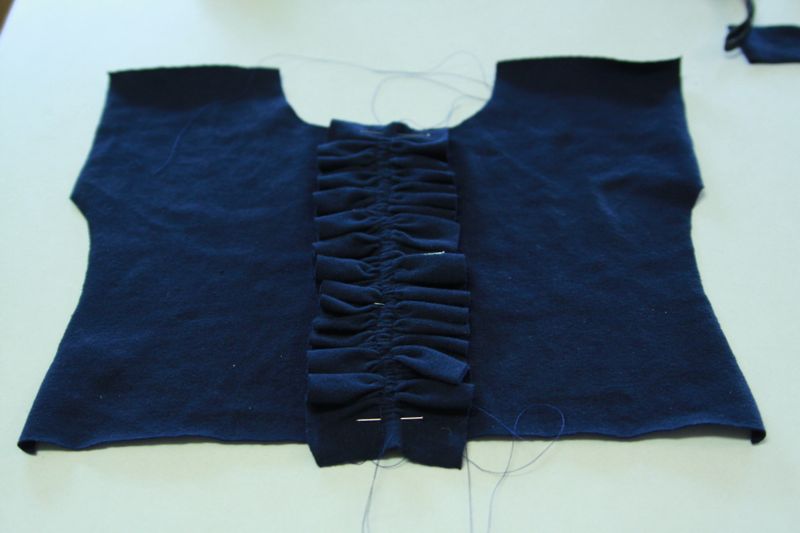
Then I pinned the ruffle down the front bodice and sewed it on with two rows of straight stitching, sewing right over my rows of gathering stitches. Whenever I sew on knit fabric I set my stitch length to the longest possible setting and keep my tension fairly high – this helps prevent stretching of the fabric as you sew.
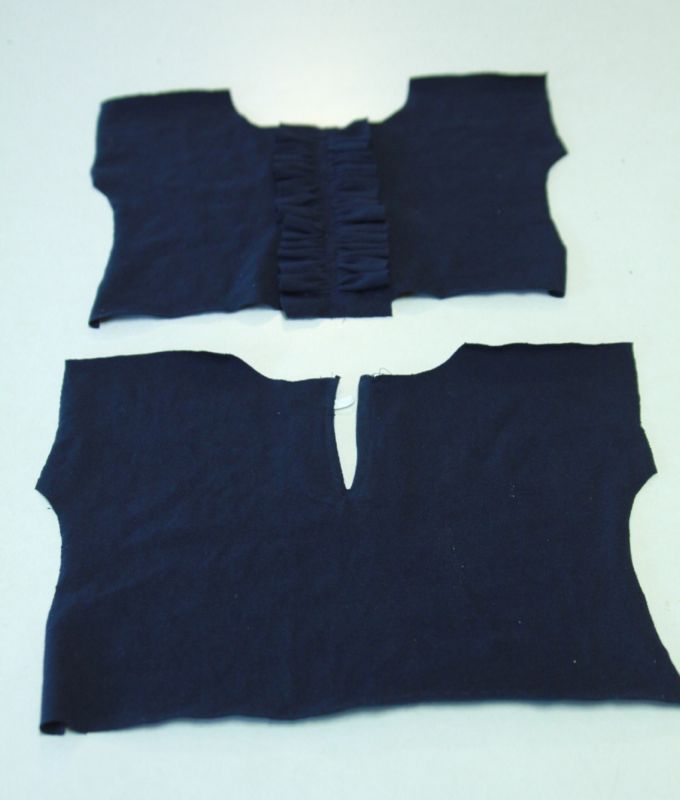
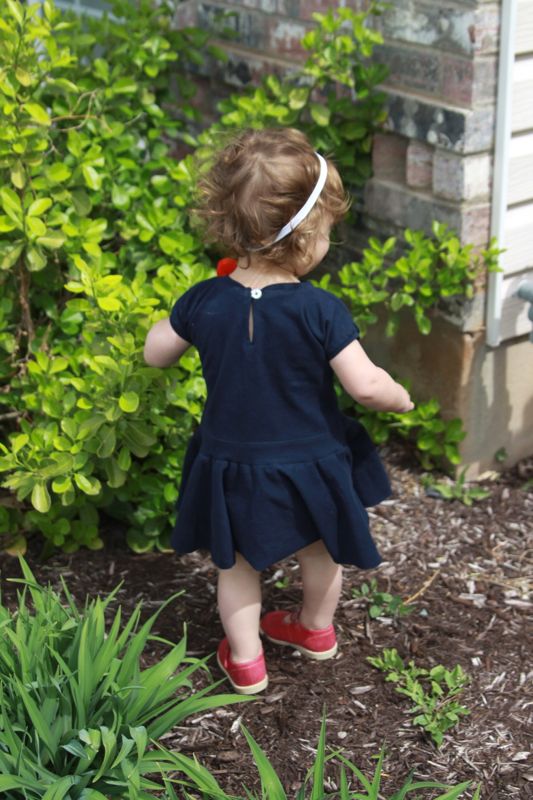
I also added a slit in the back with a tiny loop of elastic to make a back button closure.
Next I pinned one waistband strip to the bottom edge of the front bodice, RST, and sewed straight across.
I did the same with the second waistband strip and the back bodice piece. (Note: if this is going to be at all snug, meaning it will need to stretch, you should attach the waistband pieces using a narrow zig zag instead of a straight stitch.)

At this point I used the same method I used in my earlier shirt to dress refashion to bind the neckline and the armholes, and then sewed the side seams together and turned it all right side out.
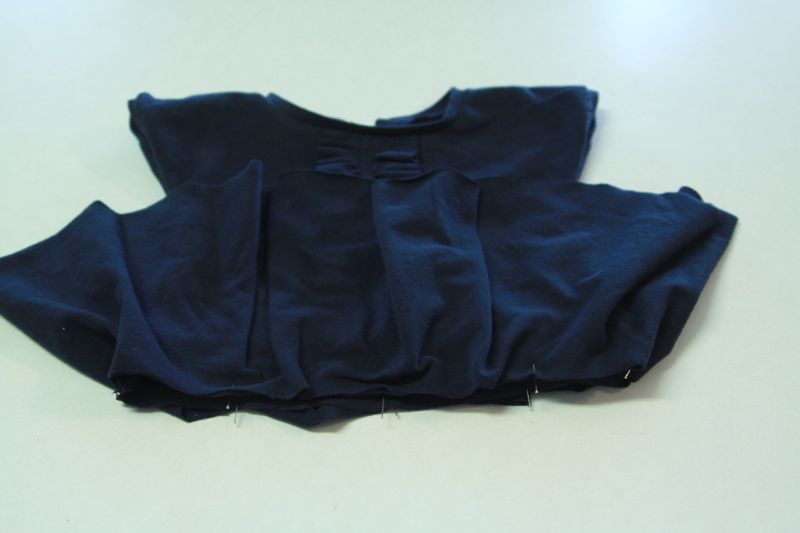
I slipped the skirt around the completed bodice (the bodice is right side out and the skirt is inside out, making the right sides of both pieces face one another), and pinned it to the bodice in eight places. My skirt was a little larger around than the bodice, but that wasn’t a problem. I just stretched the bodice as I sewed the two pieces together.
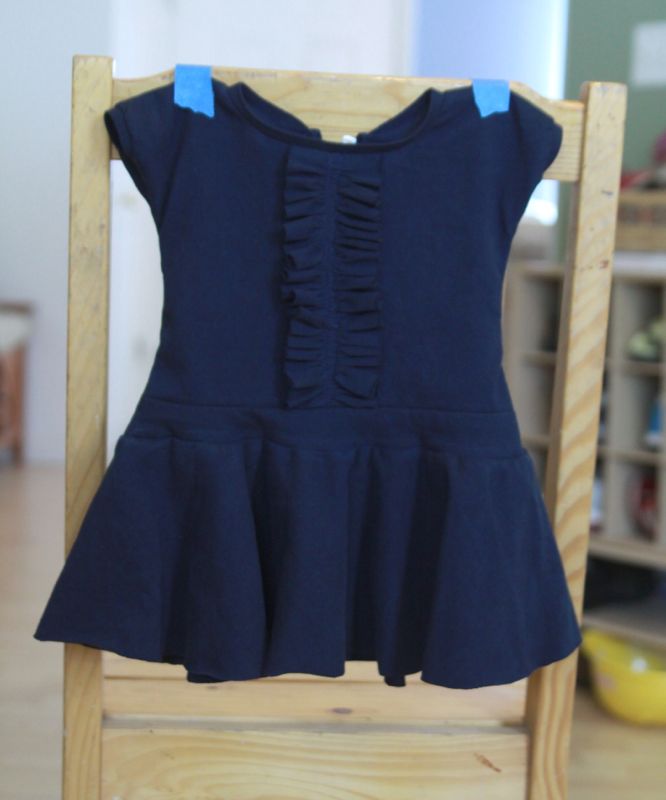
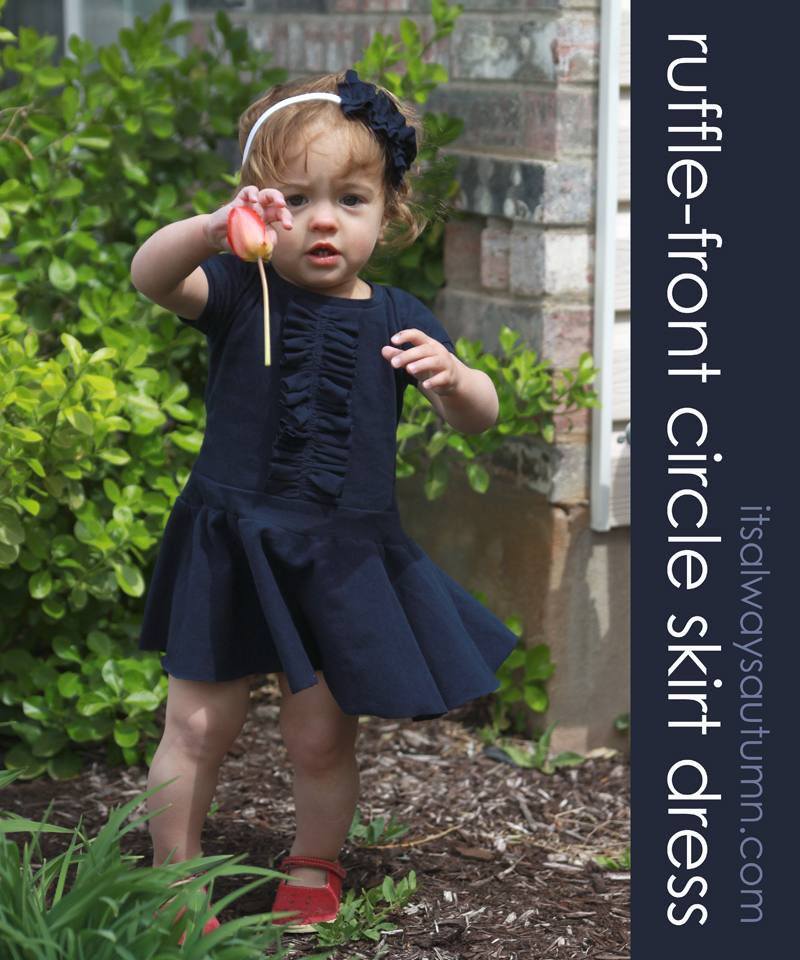
And here’s how it turned out:
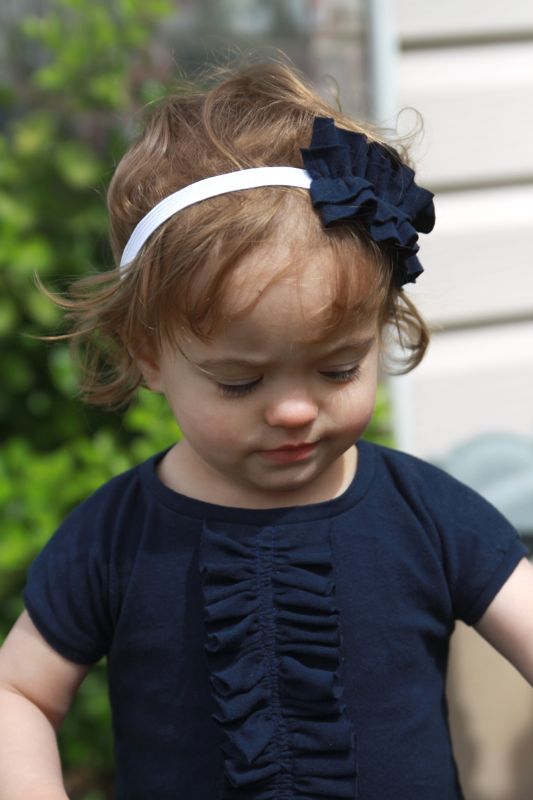
I decided I liked the ruffles so much I needed to make a quick ruffled headband to go with. I simply cut two strips of fabric and laid them on top of a piece of 1/2 inch elastic. As I sewed the strips on I pulled the elastic as long as I could. When I finished sewing the elastic shortened back up, causing the strips of fabric to ruffle on top of it. I used a quick zig zag stitch to sew the ends of the elastic together.
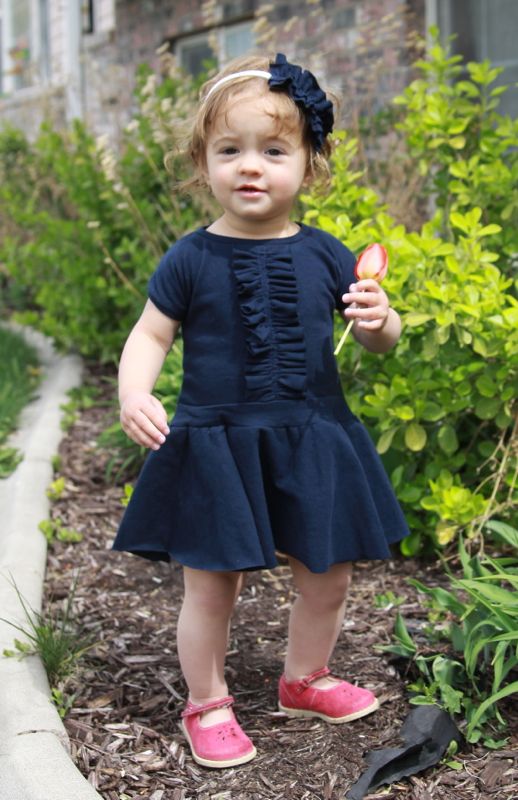
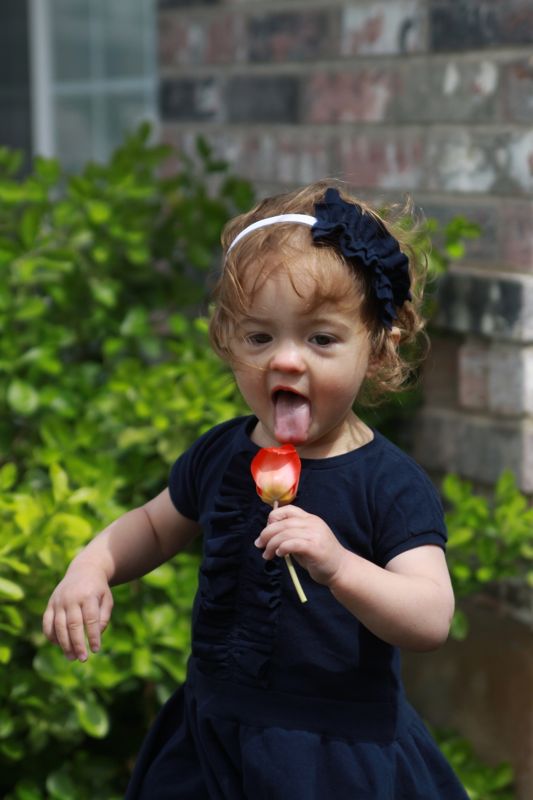
And then I picked the only tulip that has grown in our front yard so my daughter could hold it and be distracted long enough to forget about ripping the headband off her head.

Apparently the tulip looked good enough to eat.
I think she does too!
And the back:
Linked up at:
Fiordelisa says
Your daughter goes Classic Romantic very well. I also thought this when reading about the lace collar made from a doily. Have you ever visited the blog called Ginger Lily Tea and seen the girls’ clothing there? These two posts of yours remind me of her “Orangerie” posts and the mood and clothing there.
Paula says
love this pattern. I was looking for a skirt one to add to a tank top that I embroidered for my granddaughters. this will be perfect!! So glad I found you!!