
If you’re a repeat reader of this blog, you know I don’t like spending money on things I can do just as well on the cheap. Yearly school photos is one of those things. I have 5 kids, and the amount it would cost to order a portrait packet once or twice a year for each one is crazy, and would be way better spent (IMO) on something like fabric or ice cream or new shoes for my oldest who can’t seem to stay in the same shoe size for more than 4 months!
The only school photos I have ever purchased are class photos. Instead of purchasing portraits, I do a mini photo shoot at home with each child once a year. It works so much better than school photos for so many reasons, the most important of which are: 1 – I can take as many pictures as I want and not get stuck with the one where their eyes are half closed or their smile looks more like an evil grimace; 2 – I can make sure their hair is actually combed; and 3 – I own the rights to the photos so I can print as many I please for pennies. Sound good? It is.
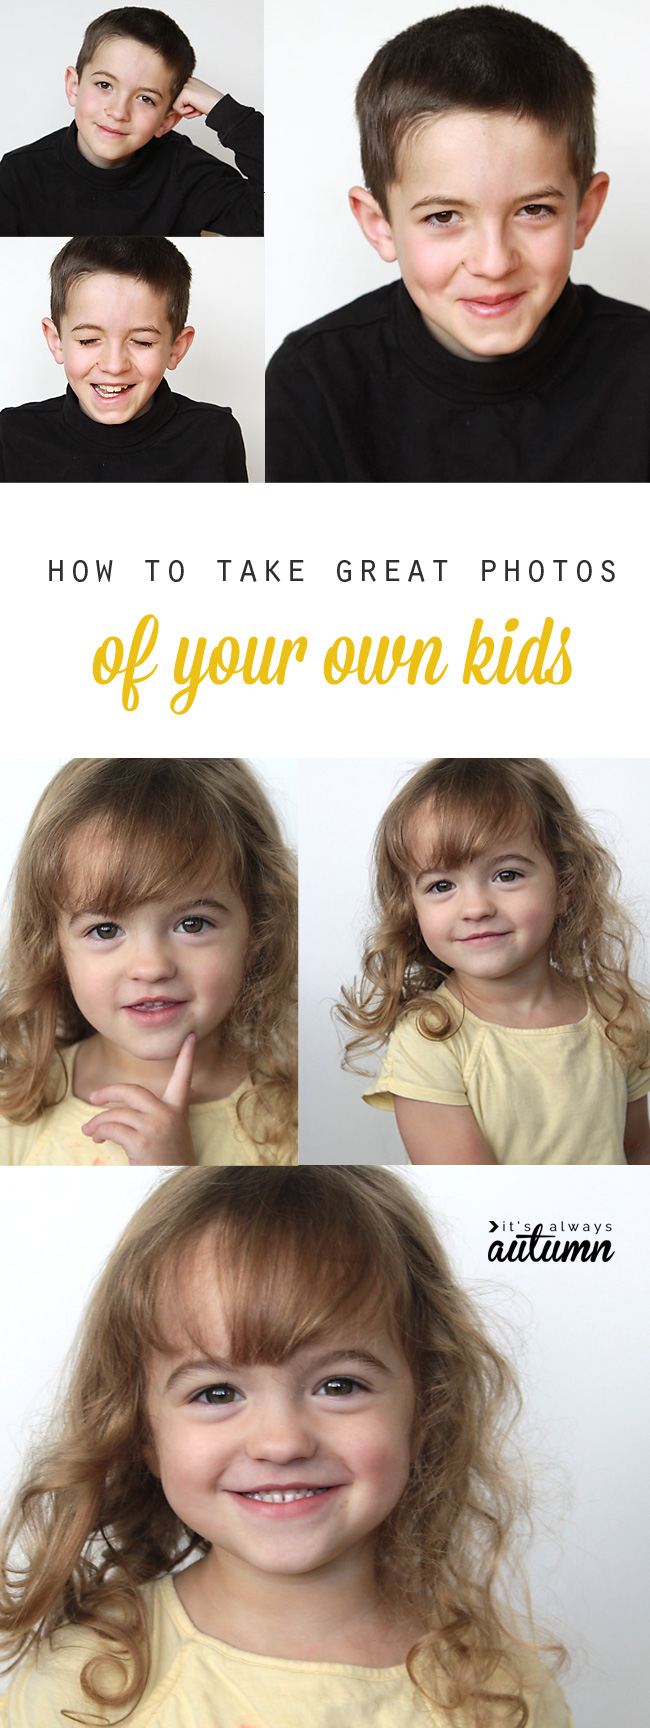
Want to learn how to take amazing photos of your kids in your own home? Here’s what you need to do
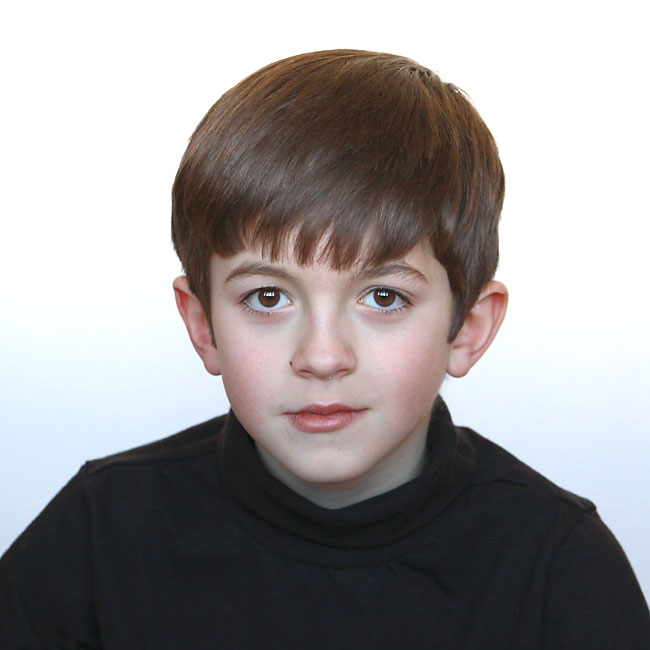
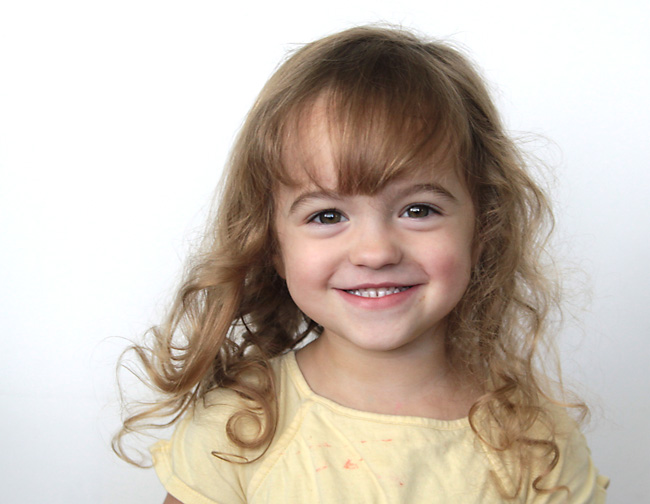
1 – Get yourself some good light. This is VITAL for a good photo. Take a look at the photo below – see how his skin practically glows, his eyes are bright, and his cheeks look rosy? That’s not editing – that’s good lighting. Find a room that gets good window light and turn off the overhead lights AND your flash. Read this post and this post for details on where and how to find great light in your home.
2 – Get yourself a nice background. A plain wall works well as a photo background IF it’s close enough to the window for good light. If not, make a simple background board that you can use just about anywhere, or use one of these 20 DIY photo backdrop ideas.

3 – Get your child on board. Kids don’t like being photographed. Kids REALLY don’t like being photographed when they’d rather be doing something else. Don’t drag them away from whatever they’re doing for a photoshoot and expect them to cooperate. Give them some advance notice, let them know you’ll be taking photos for 10-15 minutes, and (especially for younger kids) promise a small reward when you’re done. (Putting a PEZ dispenser on top of your camera always helps!)
4 – Get your child in a natural-looking position. I generally have my kids sit for portraits (helps keep them from trying to wander away) and I have them start sitting criss cross applesauce. Pay attention to the child’s posture. You’re looking for a happy medium between slouching and sitting up so straight it looks awkward. Ignore the grumpy expression in the “before” photo below – the slouchy posture would look bad even if he had a smile on his face. In the “after” photo he’s sitting up much straighter – but not so straight he looks uncomfortable.
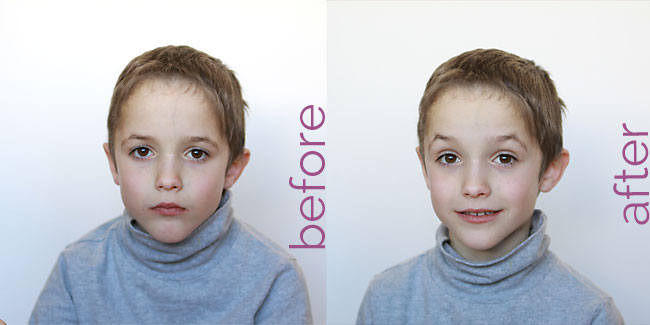
I find it’s easiest to ask kids to slouch, then to sit up straight, then to lower their shoulders and relax a little, and maybe do it all over again, so they can tell how each position feels and what you’re looking for. If your child is having a hard time sitting up straight without looking uncomfortable, try having him draw both knees up in front of him and wrap his arms around them, or put a chair next to him just out of the frame and ask him to rest his elbow on it:

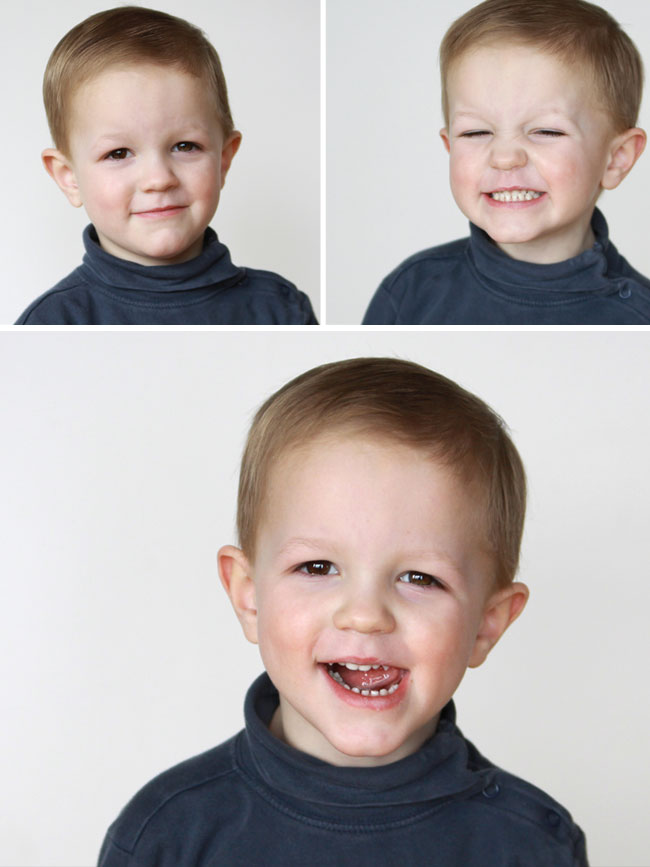
5 – Get your kids’ personalities to shine in the photos. The worst thing you can do with most elementary school aged kids is ask them to smile. That’s what school photographers do, and that’s why everyone always hates their school photos. It’s really hard to smile on command and have it look in any way natural (even for most adults!). To get natural-looking expressions, you’ll need to go a different route.
Start by getting your child talking. Ask about school, hobbies, TV shows, etc. Snap a few photos while your child is talking, but be sure to take pictures as soon as he or she stops talking – we often have a natural-looking smile on our face as we talk to someone who’s interested in what we have to say.

Be a little goofy – sing silly songs or tell ridiculous jokes. Better yet, ask your kid to tell you a joke – I don’t think any child can tell a joke without laughing themselves silly in the process.
Ask your child NOT to smile, then say “uh oh, I think you’re starting to smile. Don’t do it…don’t do it!” Keep going until they crack up. (I’ve recommended this for getting a great smile from your toddler, but it works surprisingly well with older kids, too!)

Ask a sibling to stand right behind you and be silly – this often works especially well. However, make sure your helper is as close to your camera as possible so the child being photographed still makes eye contact with the camera for at least some of the shots.
If all else fails, try the old “so, who’s your girlfriend?” question. You might get a grumpy face in response, but at least it will be a genuine expression instead of a cheesy smile.

Make sure you take photos continuously throughout your 10 or 15 minute mini shoot, even if the child is being silly, goofing off, or glaring at you. Take lots and lots of photos. Kids’ expressions change quickly, and if you wait for a good smile, chances are by the time you snap the shutter you’ll have missed it. So just keep hitting that shutter like crazy as you talk to and engage with your child. It doesn’t matter how many “bad ones” you get – if you take 150 photos and delete 140 of them, chances are you’ll end up with 10 amazing pictures.
Once your photoshoot is done, there are a few things to remember:
If you shot on AUTO, there’s a good chance your photos will be a little underexposed and will greatly benefit from some quick brightening. Even if your photo looks bright enough on your computer screen, it will likely look dark once printed (that’s why you should always view photos on your computer with your monitor’s brightness at least half of the way down). Brightening is fast and easy and makes your photos look much more professional. Find out how to do it here.
If you end up with a bunch of perfect smiling shots – great! If not, don’t feel too bad. There may be plenty of other shots with different expressions that are just as sweet, genuine, and meaningful as a smile would be.

A photo collage is a fantastic way to showcase all the different facets of your child’s personality that you captured in your mini photo shoot. Learn the best way to make a photo collage (using Photoshop Elements) in this post.
Remember – since you’re doing this at home (for free!), you have as many re-dos as you want – or at least as many as you can talk your kids into. Good luck!
For more practical photography tips, try one of these post:
Tips for photographing toddlers
Get great photos of your new baby in the hospital
8 steps to better photos on AUTO


Lauren Martin says
So true, I remember when people asked me to smile in photos when I was growing up, it just made me not want to. haha Great tips, I love how natural and candid your photos turned out to be!
Ivy Baker says
I liked that you pointed out that you should let the kid be in a natural position. When I was a kid I hated it when a photographer would put me in an odd pose for photos. It seems like letting kids be themselves in things like school photos could make the pictures turn out a lot better.
Karen says
I really appreciate this post! It is very clear and well-written. I’m going to share this with my budding photographer 15 year old and take pictures of my younger ones(& her!) using these techniques. Thanks for taking the time to write it! 🙂
autumn says
Thanks so much for your kind words! I hope your and your daughter have a good time taking photos together – I hope when my boys get older they’re interested in photography.