
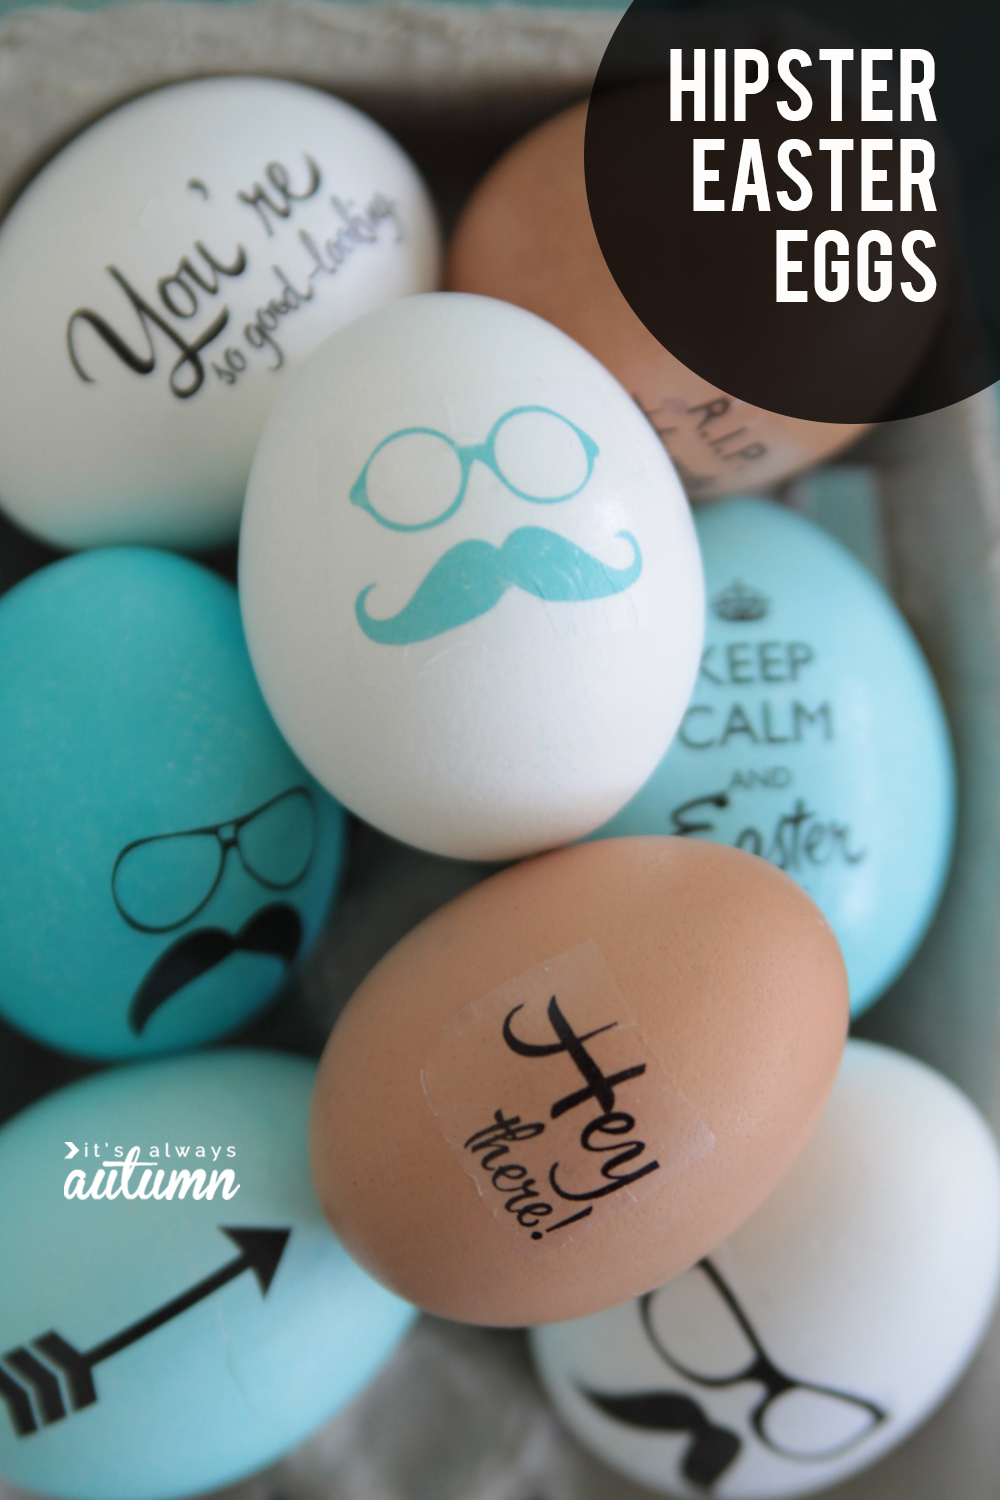
There are probably about a zillion different ways to decorate or dye eggs floating around the internet (yes, an actual zillion). So you really might not need one more idea, but we discovered this printable tattoo technique last year and my kids loved it (check out the LEGO eggs we made). So I’m back with one more tattoo’d egg idea: hipster Easter eggs. The idea is that this might be fun for older kids or teens who may be getting a little old to be excited about dipping eggs in mugs of dye.
But they’re also easy enough that little kids can make them too–with much less mess! It’s a great alternative to getting dye water sloshed all over the kitchen.
Temporary Tattoo Paper![]() (<–affiliate link) can be found on Amazon for about $7 for 2 sheets, and you can easily decorate 30 eggs from one sheet of paper. If you want to make hipster eggs, download the file you see below by clicking here, which you can print right onto the tattoo paper:
(<–affiliate link) can be found on Amazon for about $7 for 2 sheets, and you can easily decorate 30 eggs from one sheet of paper. If you want to make hipster eggs, download the file you see below by clicking here, which you can print right onto the tattoo paper:
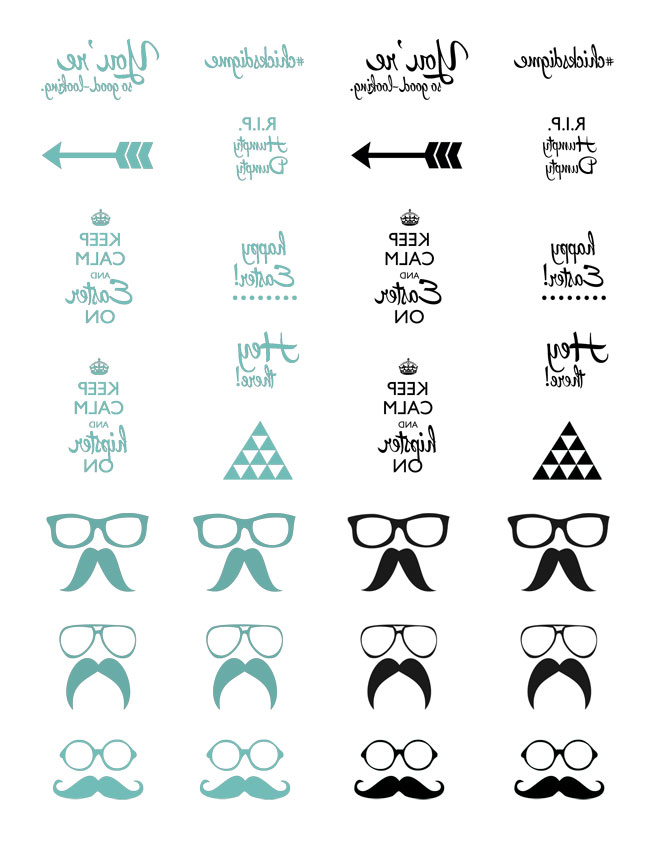
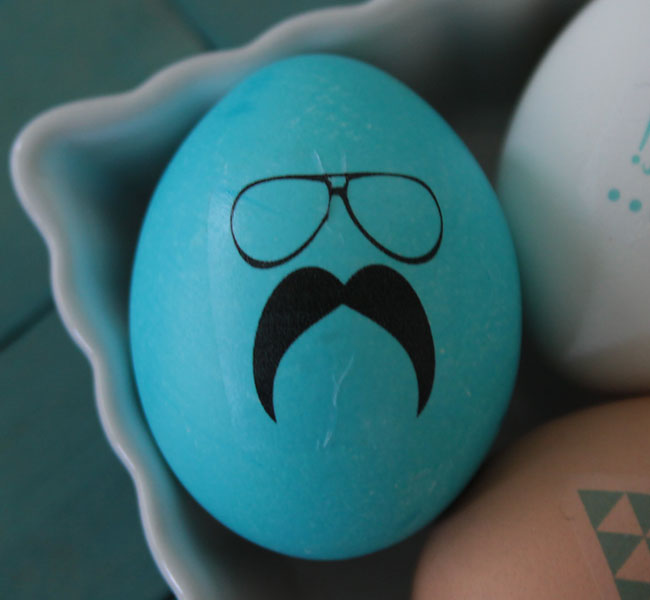
The images are designed backwards because they get reversed when you transfer them onto the eggs, so if you print out your own designs, be sure to reverse them first. You can use my printable to make eggs like these:
I dyed a few of my eggs first and mixed in a couple of brown eggs because they looked so pretty, but you can use this technique on plain old white eggs for a mess-free alternative to dyeing eggs. Want to see how easy this is? Here’s what you do:
The tattoo paper![]() comes with 2 printable sheets (white) and two adhesive sheets (clear with a green backing). Print out the designs on one of the white sheets and let it dry (mine only took a few seconds to dry). As directed on the package, cover the designs with one of the adhesive sheets and use something hard and flat (I used a pancake turner spatula) to rub the adhesive down onto the designs. The package instructions include directions for cutting your tattoos out using a cutting machine – just ignore that info.
comes with 2 printable sheets (white) and two adhesive sheets (clear with a green backing). Print out the designs on one of the white sheets and let it dry (mine only took a few seconds to dry). As directed on the package, cover the designs with one of the adhesive sheets and use something hard and flat (I used a pancake turner spatula) to rub the adhesive down onto the designs. The package instructions include directions for cutting your tattoos out using a cutting machine – just ignore that info.
At this point your tattoos are ready to be cut apart and applied.
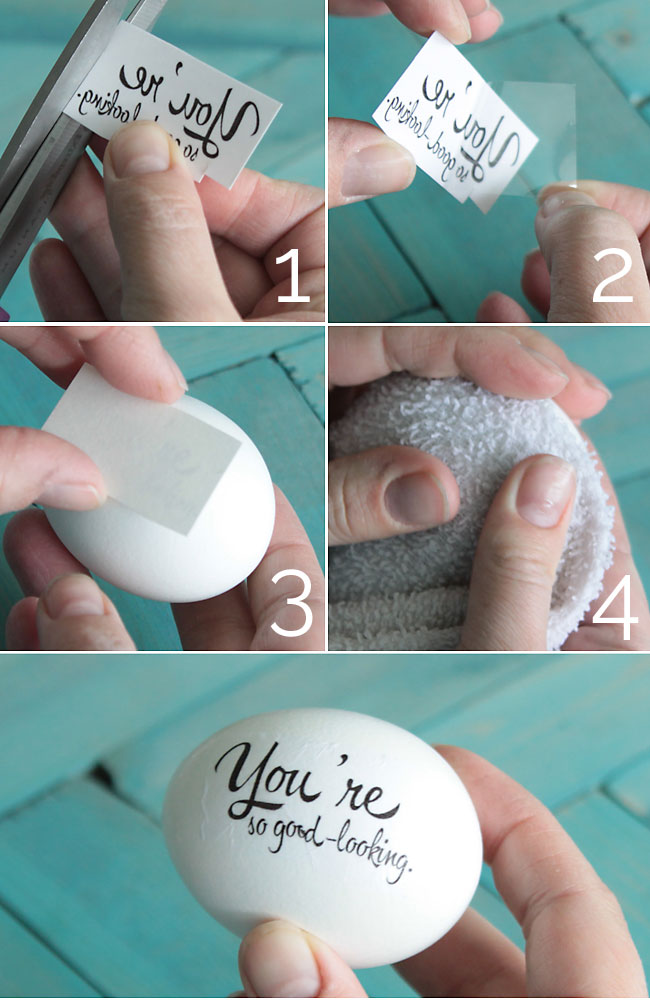
1 – Trim around your design, leaving a small border around it as shown. 2 – Peel off the clear plastic portion. As you peel, you should see adhesive on your printed design. 3 – Place the design where you want it on your egg. 4 – Cover the tattoo with a damp cloth, gently pressing down to form the tattoo paper to the curve of the egg. Wait 10-15 seconds. 5 – Carefully remove the paper, leaving your design on the egg.
It’s a really simple process – everyone’s probably applied a temporary tattoo before, but there are a few tips I learned:
First – DO NOT use super cold eggs straight from the fridge. The tattoos will not adhere. We hardboiled some eggs, let them cool to room temp in cold water, then dried them and applied tattoos and it worked great. I refrigerated a couple extra eggs and tried adding more tattoos the next day when they were straight out of the fridge: no go. If you’re using eggs from the fridge you can let them sit in warm water for a few minutes to bring them to room temperature before adding tattoos. (If you’re planning to eat the eggs, you might want to boil, cool to room temp, decorate, then refrigerate right away as opposed to chilling, warming back up, and chilling again.)
Next – temporary tattoos are made for flat surfaces and eggs aren’t flat, so you may end up with a few wrinkles in your designs once applied (look at the “good” on the first egg below). Use extra large eggs to minimize the chance of wrinkles.
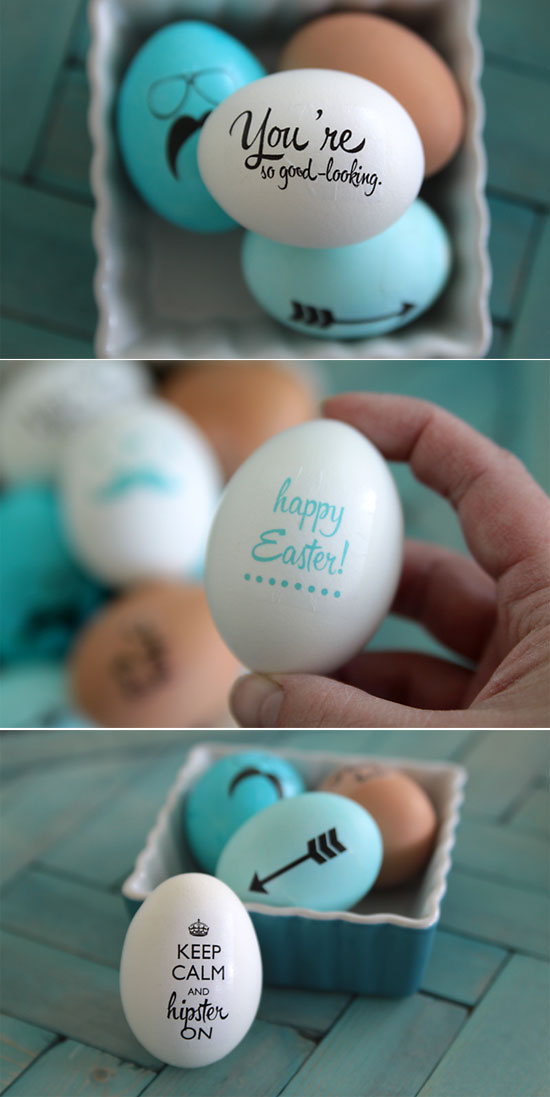
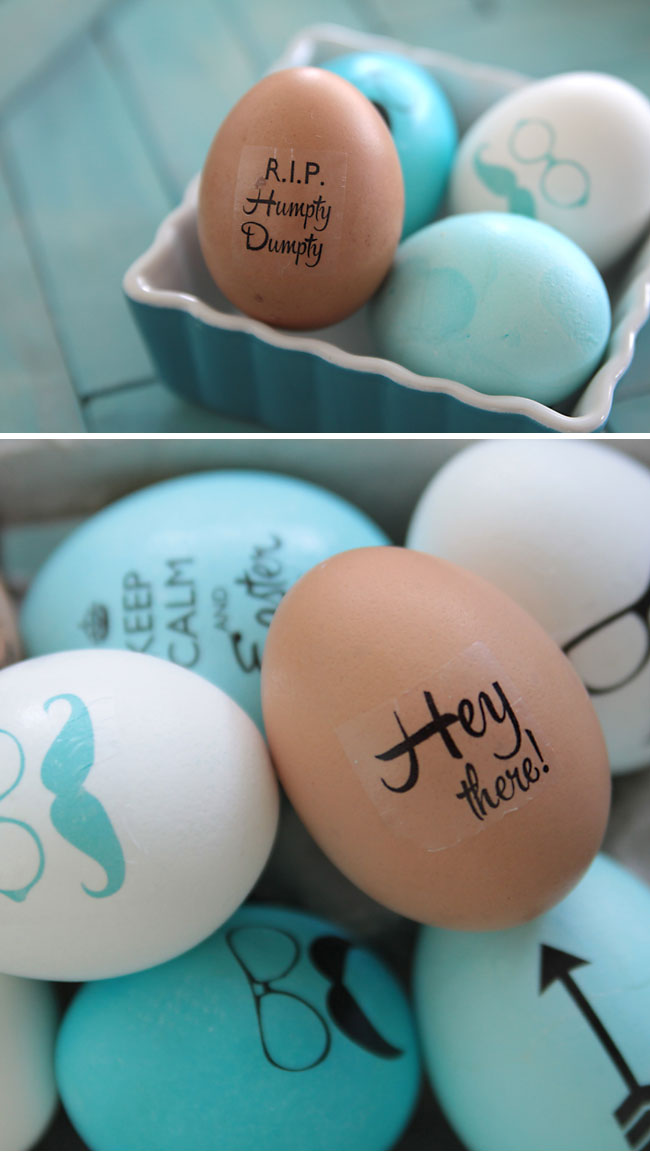
If you look closely you’ll see that there is a slightly visible “film” around the design – that film is a little bit more visible on brown eggs than white eggs, and was actually less visible on the dyed eggs.
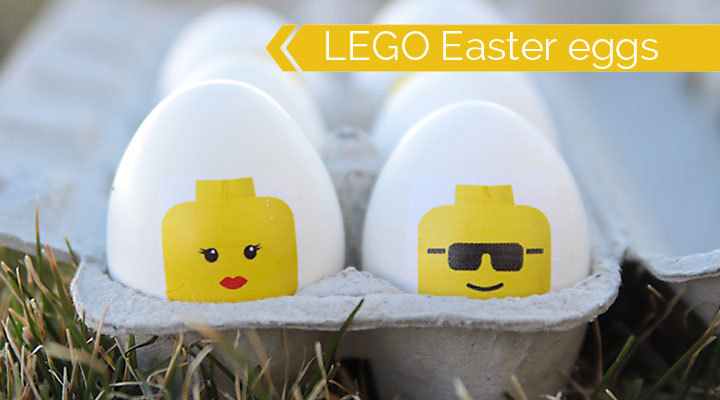
Remember, you can print ANYTHING and transfer it onto your eggs (just make sure you reverse the image before printing!). Don’t forget to check out the free printable to make LEGO Easter eggs:


Leave a Comment