
In today’s post: Learn how to make a modern wood and magnet photo frame.
I love decorating my home with photos, but since we moved (almost 2 years ago!) I still haven’t gotten around to hanging up many photos. It’s ok, I’ve been busy keeping five humans alive, but it’s really time to get more pictures of those humans on display. Today I’m sharing how to make this modern hanging photo frame: it’s super easy to make, super easy to hang, and (you guessed it) super easy to switch out the photo when it’s time for a change.
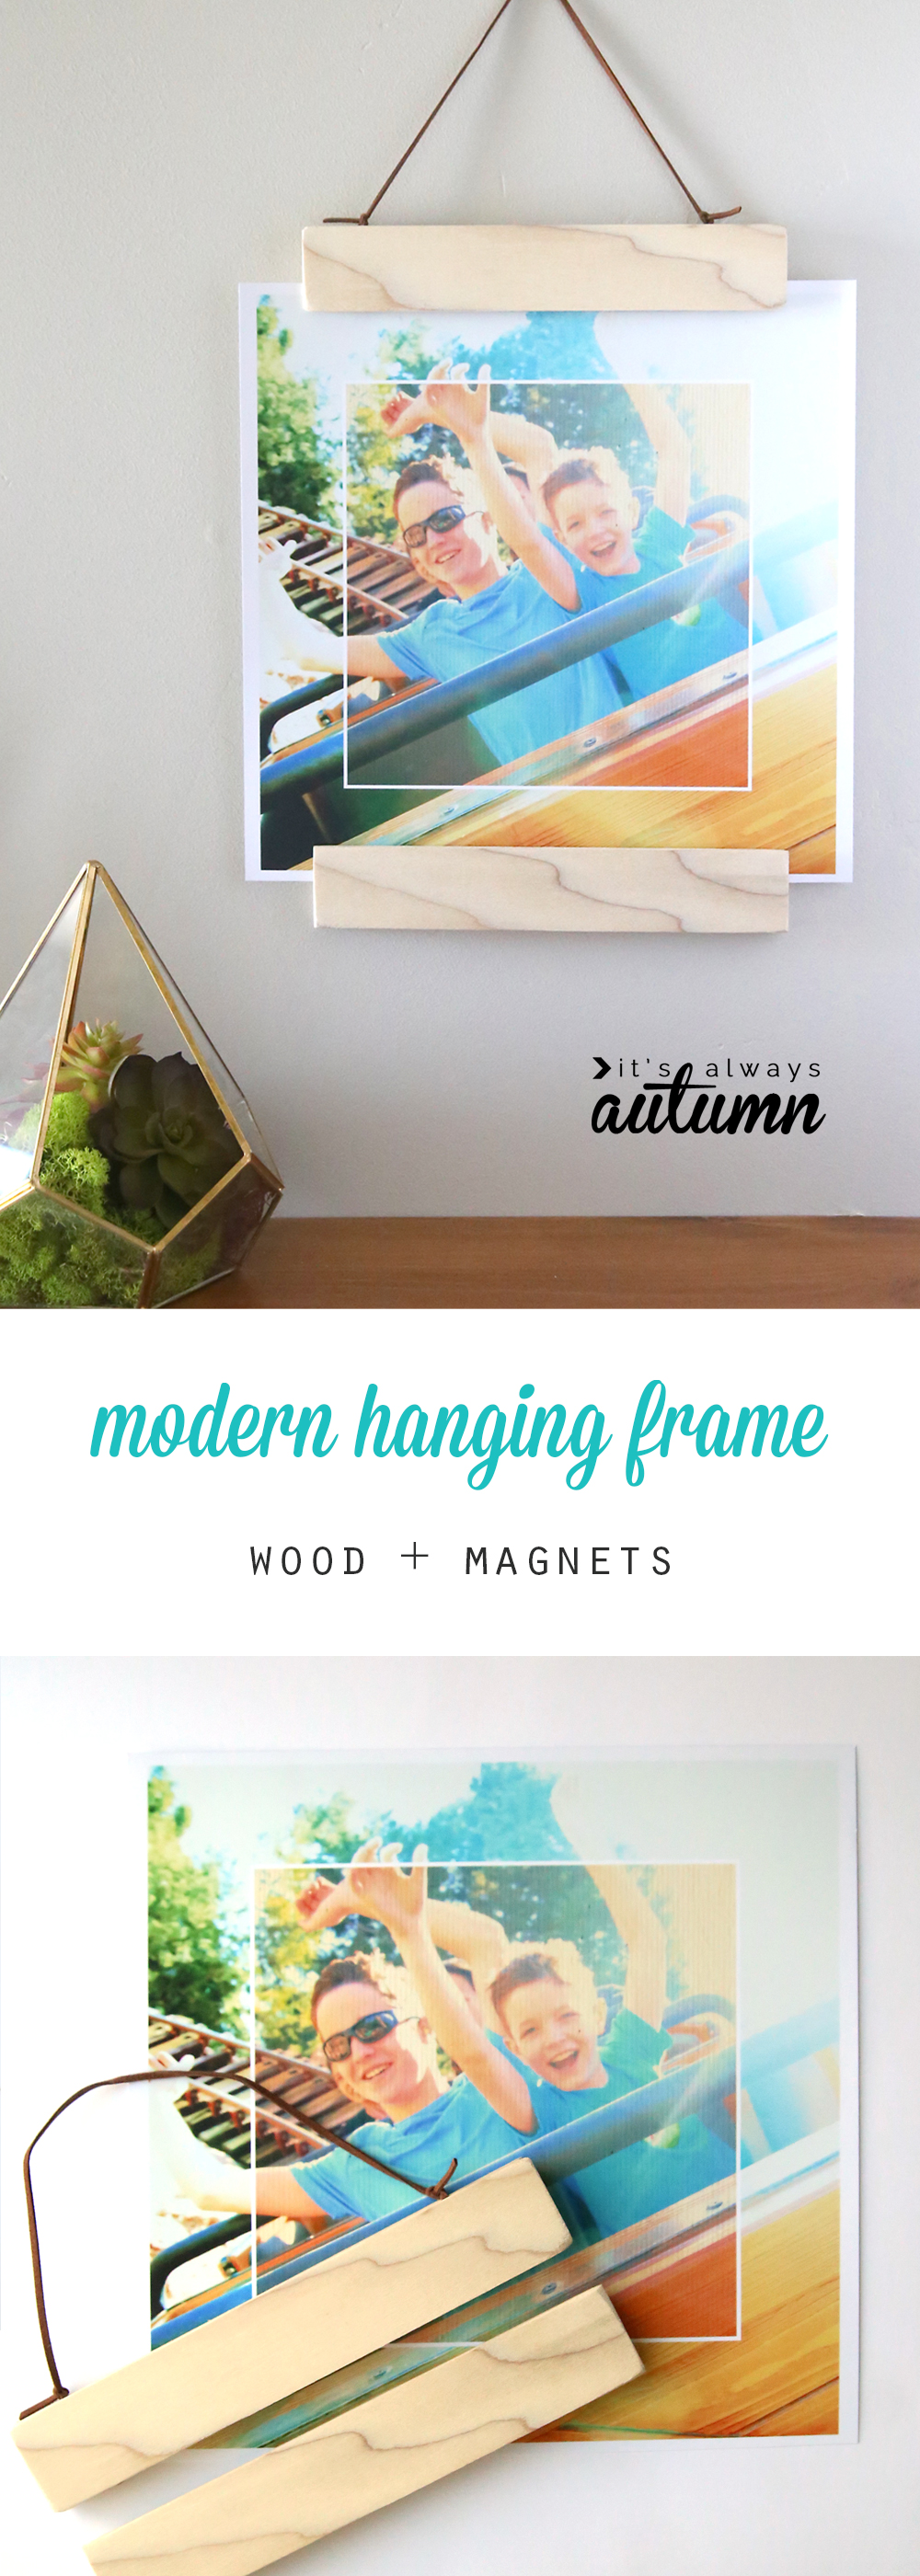
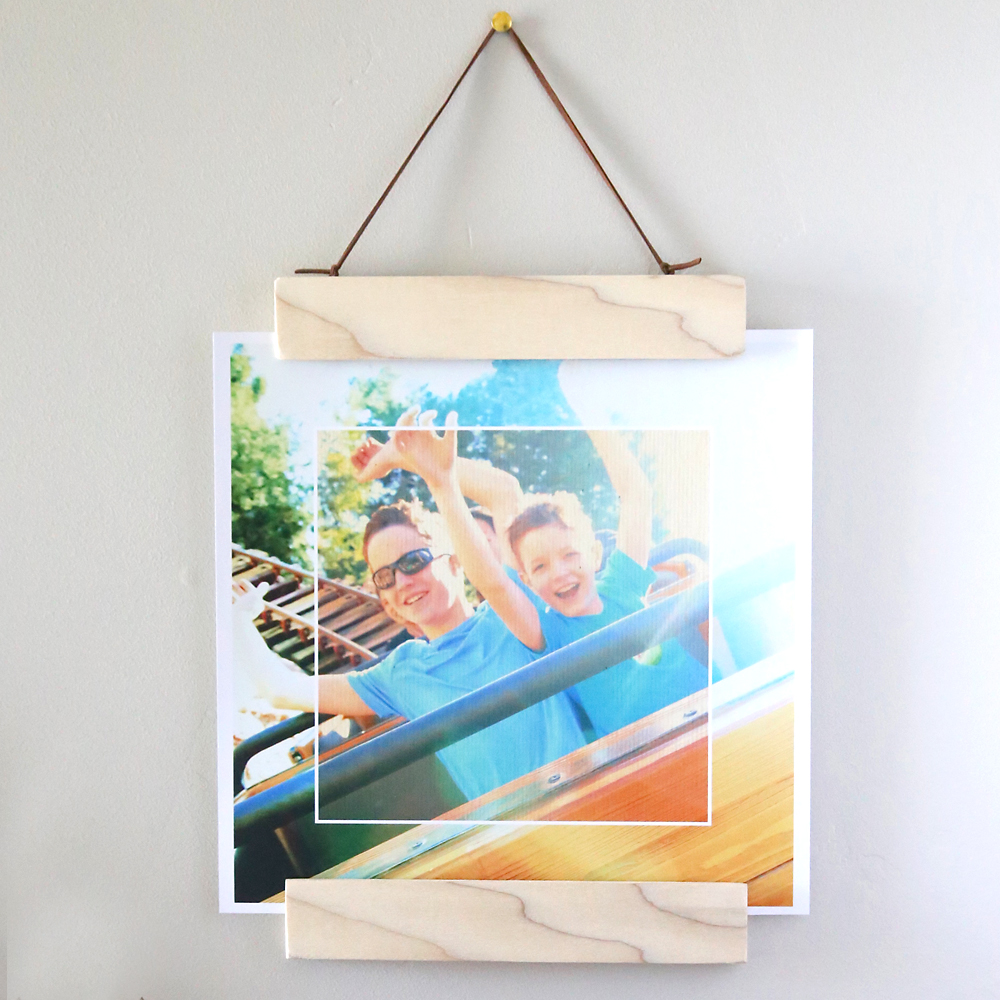
I’m using the frame to display this photo of my sons in Disneyland, which I took while turned around on Big Thunder Mountain Railroad. It totally made me sick to ride the ride backwards, but it was worth it since I love this shot!
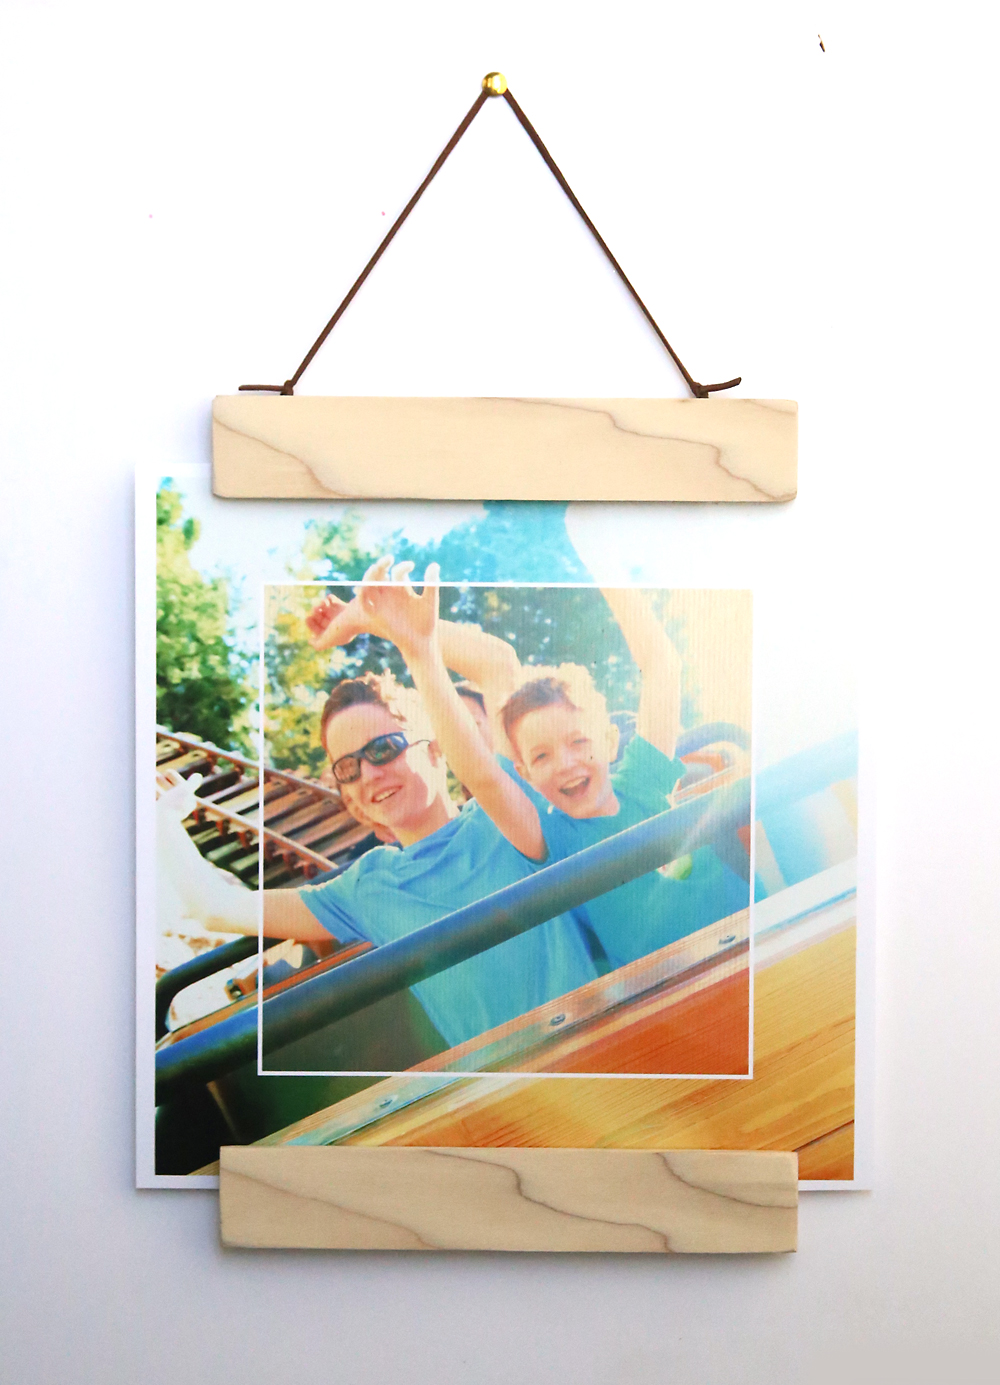
I like that this frame looks a little more interesting than your standard old photo frame, and it’s quite inexpensive to make. Plus you can customize it to any size. It’s basically a wood + magnet sandwich. Here are the supplies:
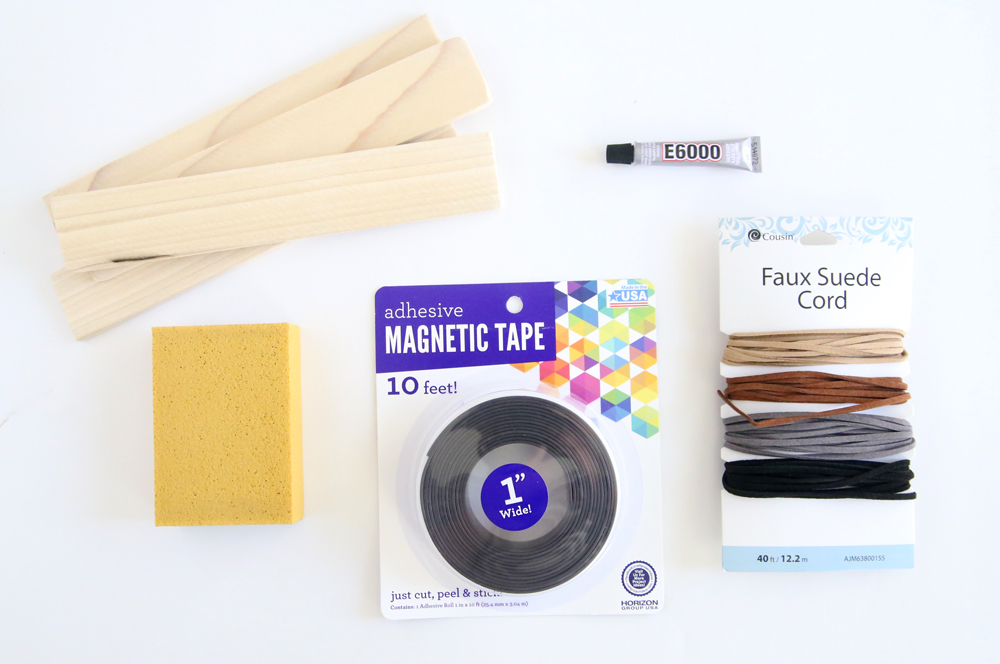
You’ll need:
- Two wood pieces that are 1.5 inches wide, .25 inches thick, and 2 feet long. I found these in Home Depot in the hobby wood section for a couple dollars each. You’ll need to cut these (or have an employee at the store cut them) to your desired length. For this specific frame, I cut four pieces that were each 8 inches long. This accommodates an 8×10 or 11×14 photo nicely. For a 16×20 photo, you’ll want to cut four pieces that are each 12 inches long.
- Sanding block or sandpaper
- Adhesive/glue (I used E6000, which I found in the craft section at Walmart)
- Magnet tape (craft section at Walmart)
- Leather or suede cord (I used imitation suede cord found in the jewelry making section at Walmart)
Watch this video to learn how to make the frame (it’s easy!):


Heather says
I found this post through searching on google and love how it’s adaptable to whatever size photo I have! Thank you for sharing this! It’s so simple (and affordable).