
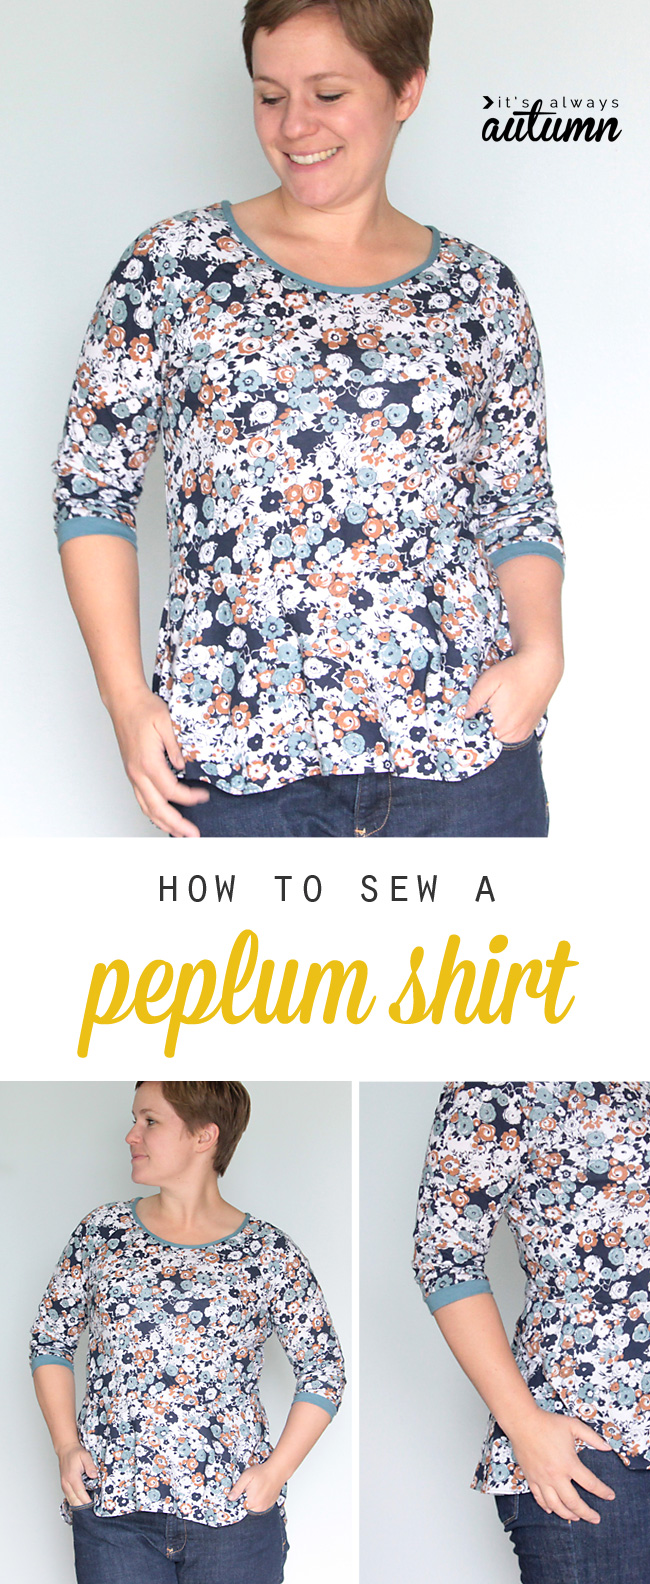
I know, peplum tops have been around for a while now, but I’m a little slow to pick up on trends, so this is my first attempt at making one. Turns out it’s not hard at all, especially if you already have a t-shirt pattern you like. If not, you can trace a shirt that fits well to make your own pattern for the top of the shirt – then the peplum is really just a half circle skirt added on. Keep reading for step-by-step instructions and photos.
Now, before we start with the tutorial, let me explain a bit first: there are two different types of peplums. One is a gathered peplum, which just consists of gathered fabric added onto the bottom of a shirt. It looks like this:
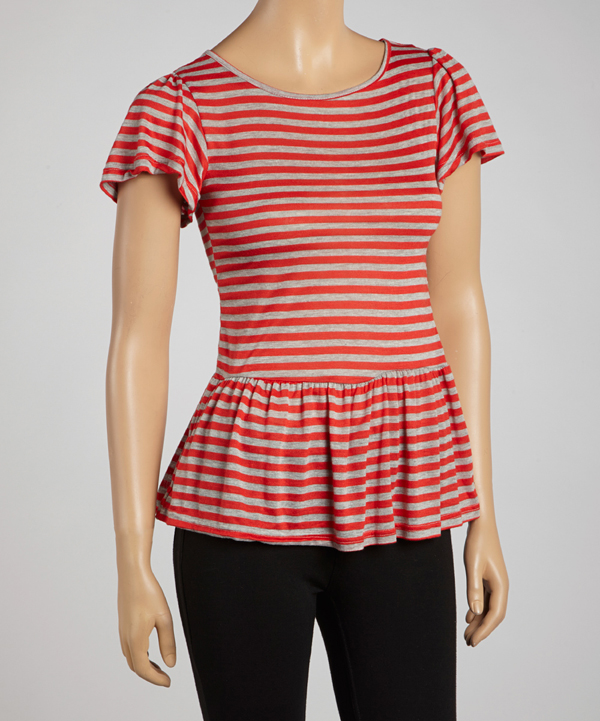
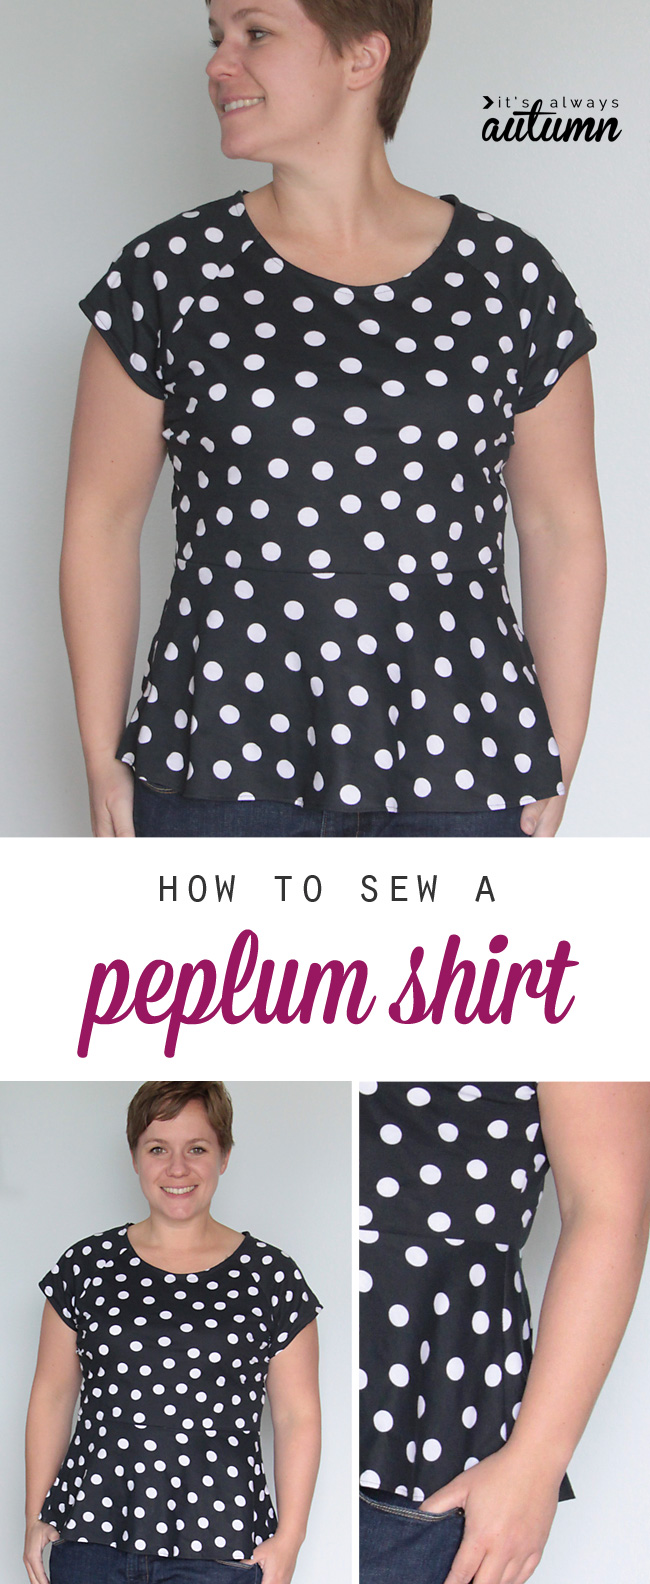
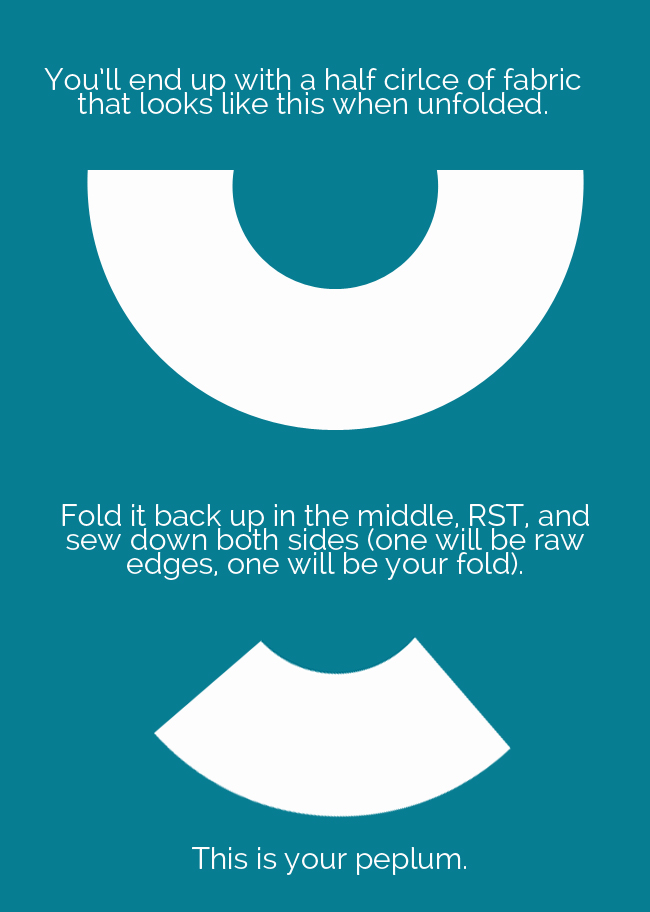
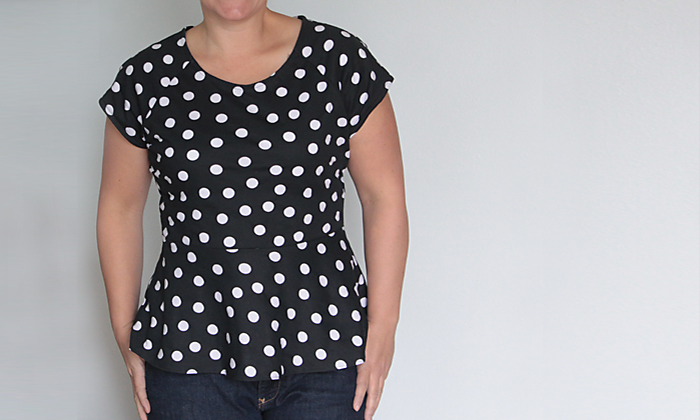
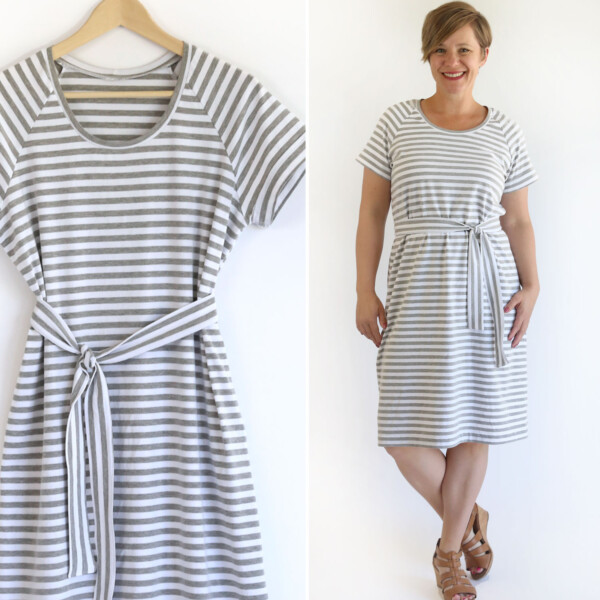
This is very easy to do. Unfortunately, it’s not always the most flattering look on those of us who might be a little thicker around the waist. The other type of peplum is what I like to call a half circle peplum, and it looks like this:
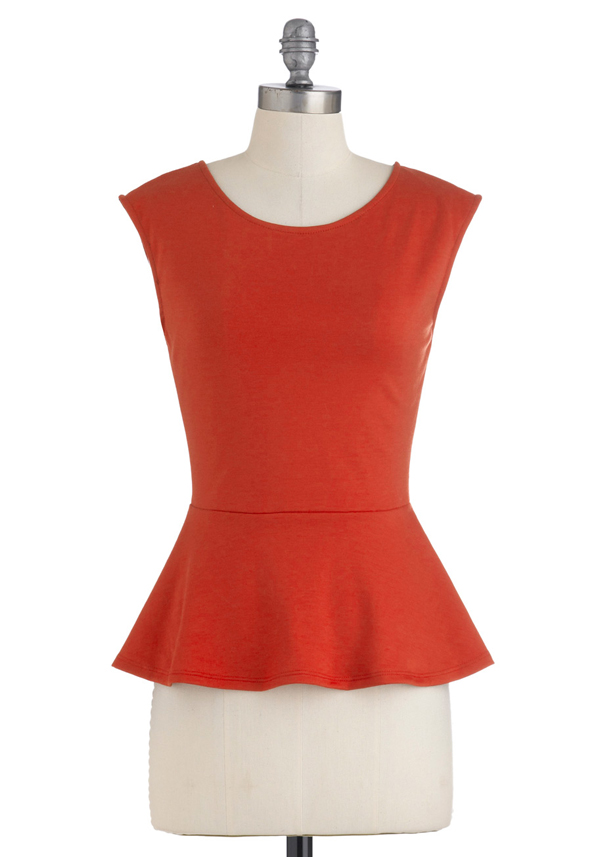
This is much more flattering on me because instead of adding extra fabric at my waistline like a gathered peplum, it creates the illusion of an hourglass figure. This type of peplum is a little more complicated than a gathered peplum, and it’s what I’m going to show you how to do today.
You’ll likely need more than one yard of fabric for a peplum top, so you might want to get one and a half to be sure. Here’s what you’ll do:

(I used my raglan sleeve easy tee pattern and took it in along the sides. You can print it out in size L. If you’re smaller than that, you’ll want to trace a tee to make your own pattern, like you can see in this post.)
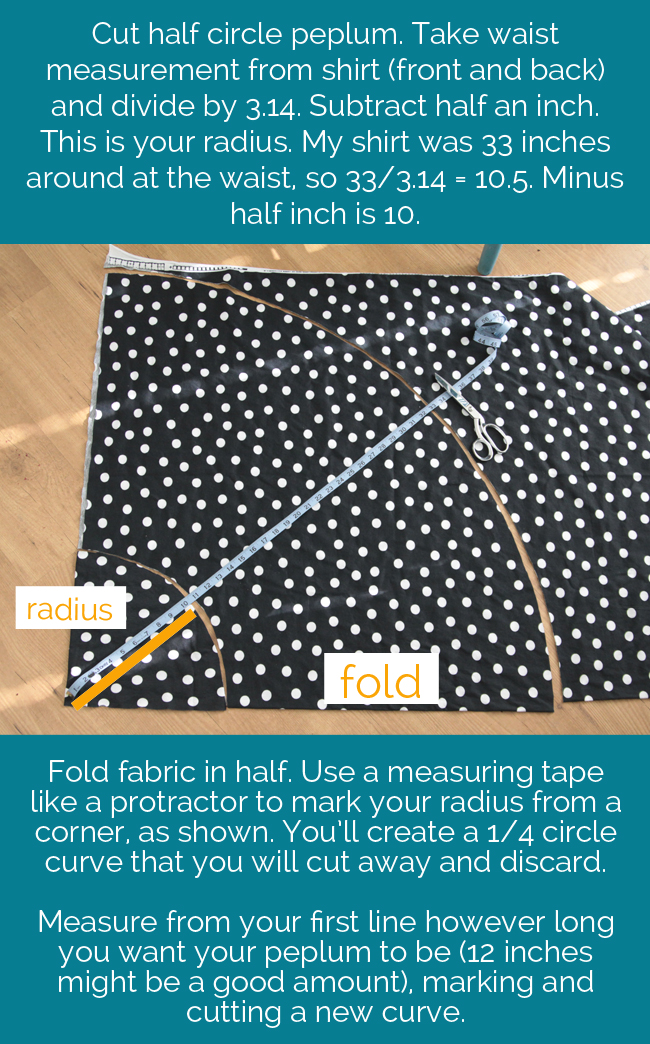
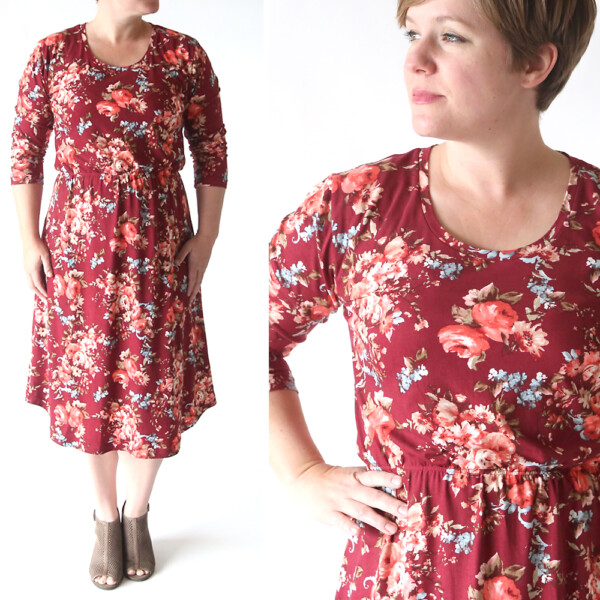
If you have to read that more than once, don’t feel bad. Half circle skirts (which is what this peplum is) are a little hard to wrap your head around, but once you give it a try it makes more sense. Oh, and I was originally planning to make this a dress, not a top, which is why the peplum looks so long in the photo above.
(Again, this looks like a dress in the next photo, not a shirt. Don’t worry, same concept, yours will just be shorter!)
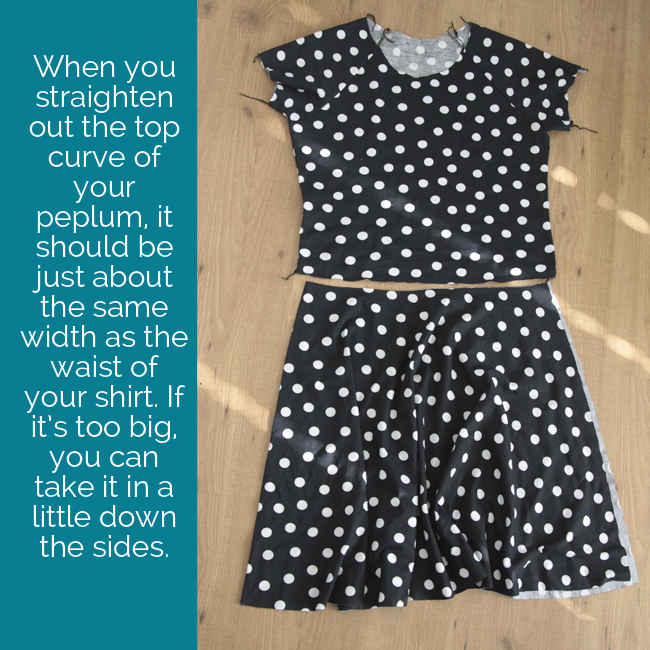
Depending on how stretchy your fabric is, the skirt might be bigger around the waist than the shirt is. No problem, just sew down the side seams to take it in. If it’s too small, just trim 1/4-1/2 inch off the top (the inside curve of your donut) to make it a little bigger.
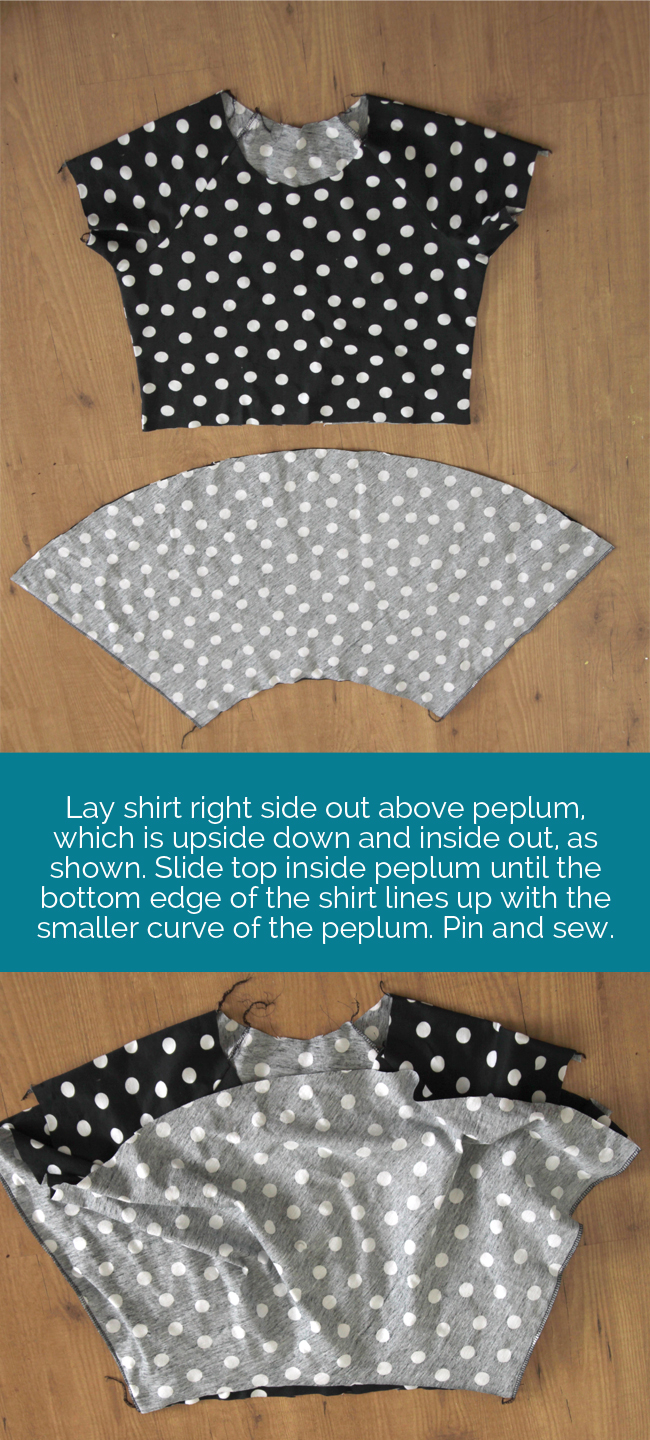
This is what your shirt will look like once it’s put together.
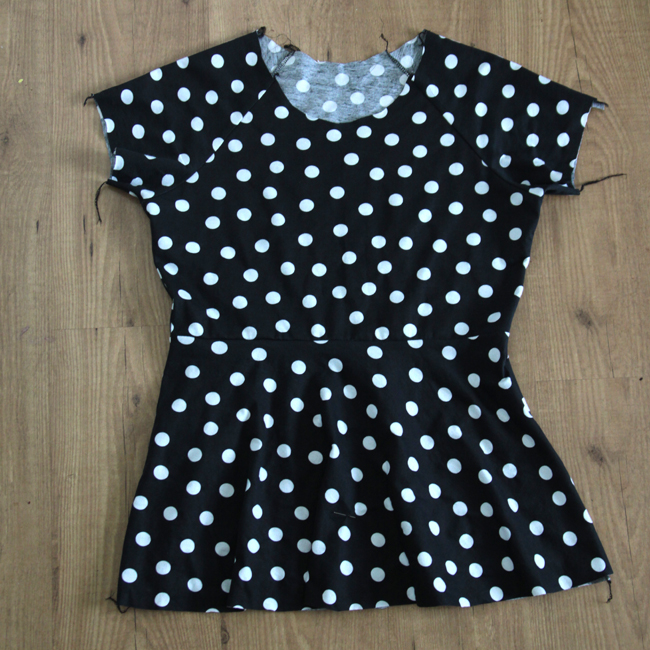
When I first sewed mine up, I didn’t like it much. I realized I needed the waist (where the shirt and peplum meet) to be a little bit higher. So I unpicked it, cut another inch or two off the shirt, and sewed it back together. I also took it in a little more along the side seams.
Then it’s just a matter of finishing the neckline and sleeves (as usual), and giving it a hem. Very narrow hems are easiest on peplums like this one.
And that’s it! A trendy new top for about $7.50. I used this fabric from Girl Charlee and I think it’s PERFECT for a peplum shirt. It stretches, but it’s a lot stiffer than many knits, which gives the peplum a little body and allows the shirt to be more fitted without being clingy. A softer knit will give a drapier peplum – check out an example of that in this post.
Never miss a post: f a c e b o o k | p i n t e r e s t | t w i t t e r | s u b s c r i b e
Sandy kindt says
I need a peplum top pattern that works with rayon challis fabrics. I noticed this is knit. Will it be good for rayon fabrics as well? Also, you mention a T-shirt pattern, and I don’t see where it can be downloaded. The gal I’m making this for is 6’1″ and is carrying a bit of baby weight. I need larger sizes and measurements. Will this even be flattering in a larger size? I need some help. Please give me a shout…
Patricia Garnham says
Thank you so much! I am going to try that today!
Mia says
Thank you!
I found this really helpful for a top i was sewing.
aishwarya says
Hi
Am a beginner and was yearning to create something. Found some stash. That too cotton but went about following your tutorial. Thanks a ton for the simple lucid explanations. It turned out perfect . The magic in your math! The peplum fits perfect to the bodice peice. Wow…
Nancy says
First, let me say that you have some phenomenal tutorials. So clearly stated and easy to use! I had already made a dress, using a remodeled t shirt and a piece of fabric I had bought. I didn’t like the way it turned out because of my thick waist. So I decided to add this peplum, after everything else was all put together. It was so bulky and hard to handle on the machine! I had to sew pieces of a black t shirt together to have enough to cut the half-circle properly, so I came out with these slanted seams on the peplum. Then, as I was sewing the peplum to the original t shirt top (I placed it a bit higher than the waistband) I found that I had to let it gather in places that I hadn’t planned. But – in for a penny/ in for a pound – I just kept sewing that seam. By a happy and serendipitous occurrence the gathers came out at some strategic places, coordinating with the slanted seams and I got an accidental great design.
Thanks for sharing your discoveries with us.