
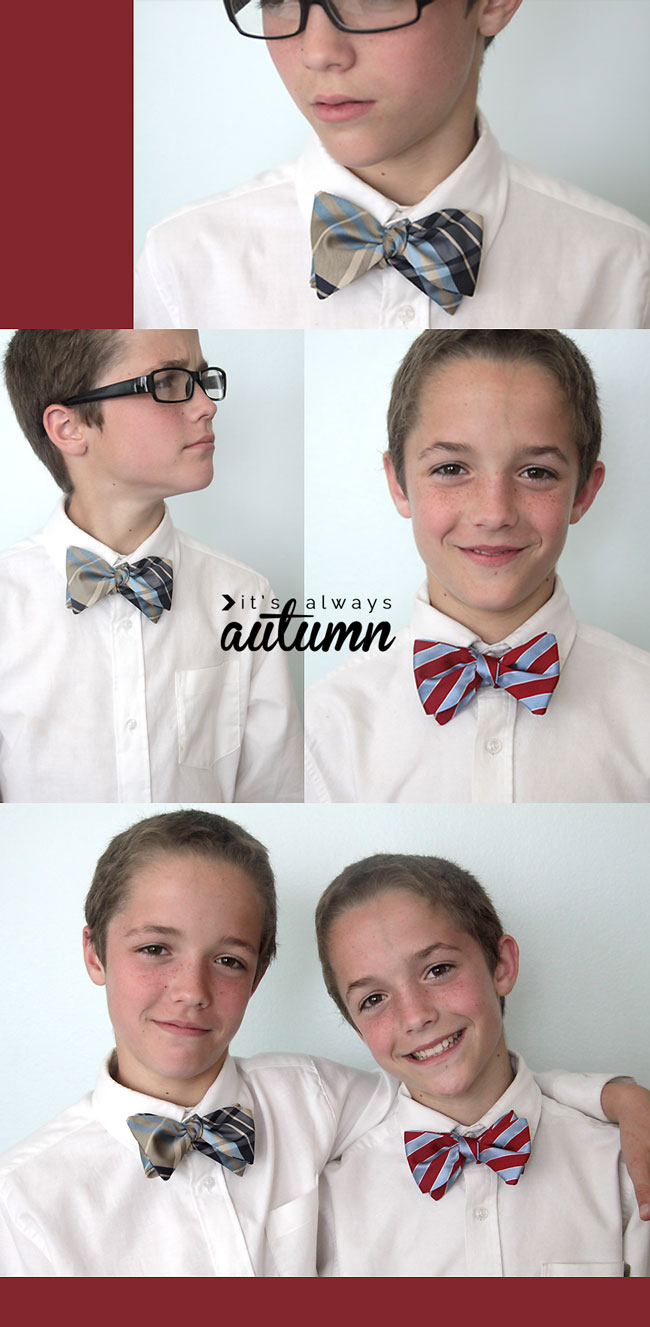
I’ve always enjoyed sewing Christmas gifts for my kids, but as they get older it’s gets harder and harder to come up with things they’ll actually like – especially since they’re boys. My boys have been wanting to start wearing bow ties to church, but it’s hard to find real bow ties in their neck size, so I figured I’d sew some up to tuck in their stockings this year. However, most homemade bow ties I’ve see are made from quilting cotton, which is readily accessible in lots of patterns. The only problem is that a tie made of cotton looks a lot different than store-bought ties, which are generally made of silk. But it’s really hard to find silk in traditional tie patterns at my local fabric store, so I figured out how to make a bow tie out of a necktie. Now Dad’s old ties (or thrifted ties) can become bow ties for teen and tween boys, and I have a new Christmas gift I can sew that my kids will actually like!

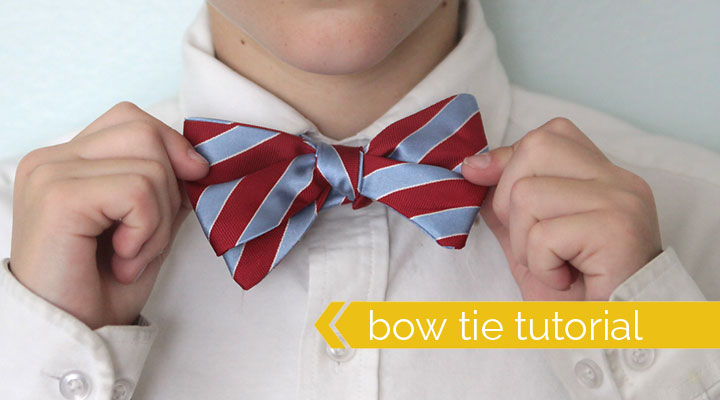
I absolutely LOVE quite how dapper these guys look in their new bow ties. Their great-grandpa, who was a bow tie aficionado, recently passed away and all the boys wore his bow ties to his funeral. Ever since, they’ve been asking me to get them some. Most bow ties are adjustable, but don’t go smaller than about a size 14 neck. While my 13 year old might be ok with a size 14, my 11 year old boys need a size 12.5 to 13 neck.
(Don’t know your boy’s neck size? Here’s a handy little video that shows you how to measure for a bow tie. Don’t know how to tie one? Find a good graphic for that here.)
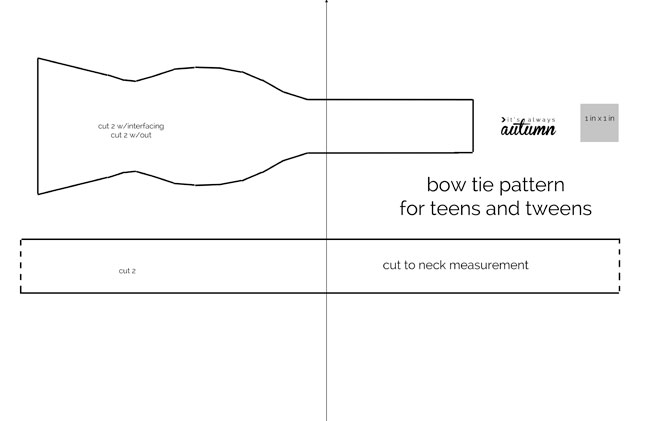
In order to make a bow tie from a necktie you’ll need: 1 standard necktie (not skinny!), my printable bow tie pattern, and a scrap of fabric about 4×15 inches.
Download and print the pattern (make sure you’re printing at 100% or actual size) and tape the two pages together. Don’t overlap them, just butt them together. You’ll have two pattern pieces: the bow portion of the pattern, and then the long strip which you’ll cut to the neck length measurement. Download bow tie pattern page 1 by clicking here. Download bow tie pattern page 2 by clicking here.
Start by unpicking the necktie and ironing it flat (it will look like the first photo below). You’ll need to cut 4 of the bow pattern piece from the tie, so figure out how that will work best. You should be able to cut 2 bow pieces from the widest end of the tie, then the other 2 from the rest of the tie. If you have to use any portion that has a seam, be sure the seam only crosses the narrowest part of the pattern (3rd photo below).
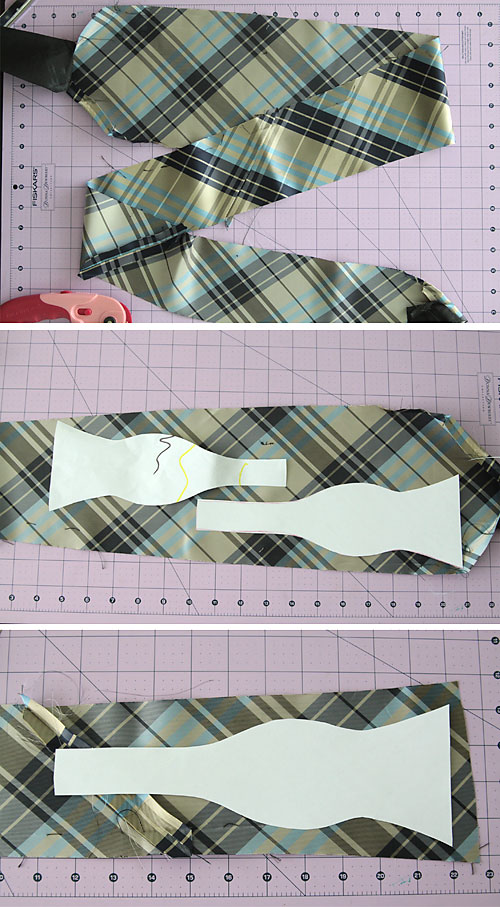
You’ll want two of these pieces backed with lightweight fusible interfacing. It’s easiest to iron this on before cutting out the pattern. Also, you want these pieces cut out as exactly as possible so they’ll all match up – I found it was easiest to do this on the slippery silk using a rotary cutter.
Next, cut out the two strips of fabric. Remember, they should be as long as the neck length measurement. It doesn’t matter what fabric you use for this – just something that’s fairly lightweight and doesn’t stretch. You can coordinate with the main tie fabric if you like, but it will all be hidden under the collar when worn.
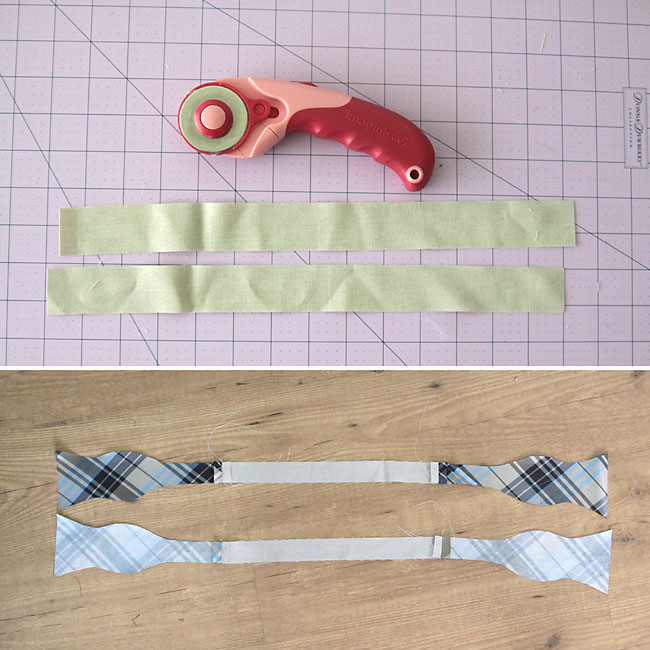
Sew a bow piece to each end of each long strip, as you can see above. Use an exact 1/2 inch seam allowance. Make sure seam allowances are on the wrong sides, and press them open.
Place your two bow tie pieces right sides together and pin VERY WELL. You’ll want LOTS of pins since silk is quite slippery. Sew all the way around the outsides of the bow tie, using an exact 1/4 inch seam allowance. Leave about 6 inches unsewn on one edge of the middle strip portion, as you can see if you look closely at the photo below:

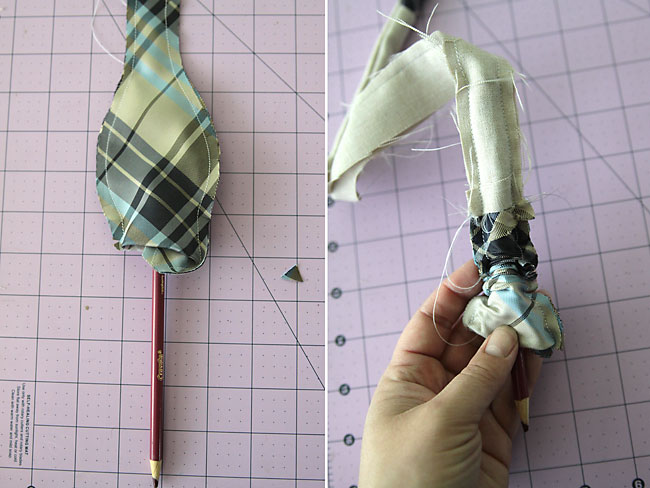
Clip the corners and curves (above) and then turn the tie right side out (below). I find it’s easiest to use the eraser end of a pencil to push one bow end inside itself, then gently shimmy the fabric down the pencil. Once you get to the opening, it’s pretty easy to pull the fabric right side out.
At this point, you just need to iron the bow tie flat, and sew the opening closed (I just used my machine here since that part of the bow tie won’t be visible).
Just for reference, if you’re sewing a bow tie for a size 13 neck, the finished length will be approximately 33 inches.
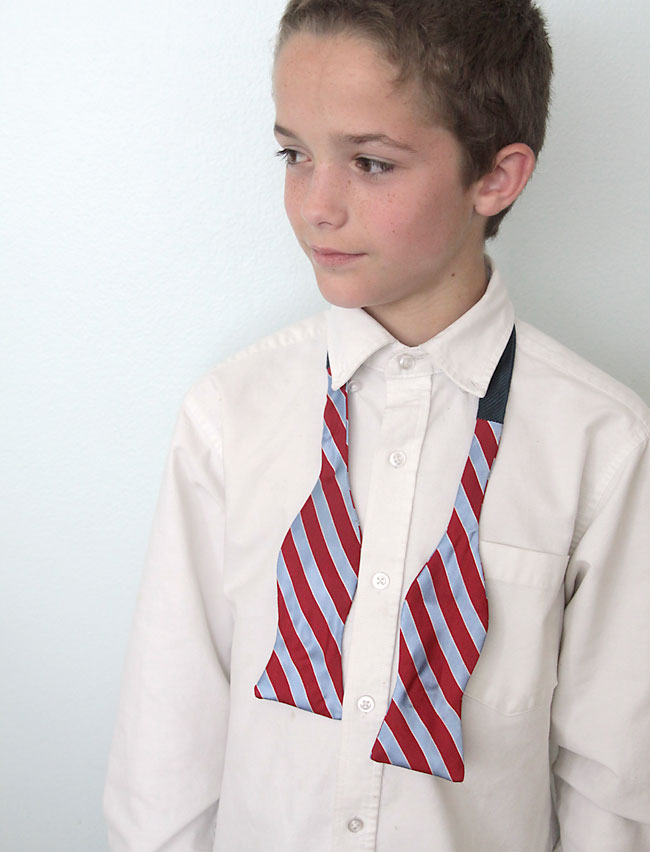
This is a pretty easy project; the only part that’s difficult is keeping the silk from slipping around as you sew. And it’s so much fun to see my tween boys looking so grown up! My husband better hide his neckties, or they might all start disappearing 🙂


Francesca says
I know you put this up some years ago but I just wanted to say thank you! Just what I needed, so easy to follow and it came out great.
Susan says
Your idea for repurposing men’s ties is a great one! My son is a professor at R. I. College and a bow tie is considered snazzy dress. (Or so the college girls tell him! LOL). For sewing slippery material, use wax or parchment paper under the fabric when sewing. It provides something for the “teeth” to grab. Just pull away after sewing is finished and wahlah! Hope this trick helps.
Petra says
Thanks for the pattern and the clear tutorial. It was done in no time. I even had enought fabric out of the tie for the part in between.