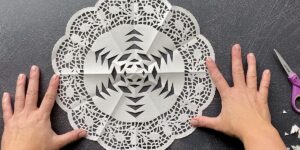
Paper Doily Snowflakes
Learn how to cut snowflakes from paper doilies. They're easy enough for kids to make and they turn out beautiful!
Ingredients
- Paper Doilies with 12 scallops around the edge
Instructions
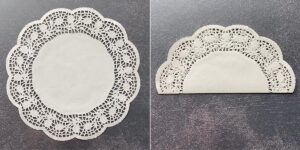
- Separate a single paper doily from the bunch. (They are thin, so be sure you just have one.) Fold it in half, matching the scalloped edges, and crease. None of the "arches" on the scalloped edge should be folded in half.
- Fold the doily in half again and crease.
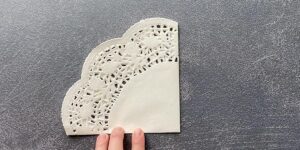
- You now have a triangle of paper that has 3 arches (or scallops) along the edge. Fold over the right third of the triangle, matching the arches on the edge.
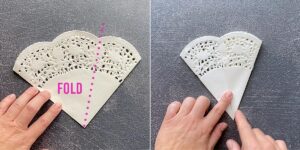
- Then flip the doily over and fold over the right third again, creating a narrow triangle with an arched edge. (The doily has been folded in 12ths at this point.)

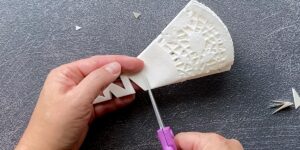
- Begin cutting your snowflake. Cut out shapes or designs from one straight side OR the other straight side of the snowflake. DO NOT cut all the way across from one side to the other, unless you are cutting very close to the point to create a circle or star shape in the center of the snowflake. You can leave the arched outside alone to keep the scalloped doily shape, or you may cut along the outside edge to change the shape.
- Unfold the doily to see your finished snowflake. Carefully iron the snowflake on medium heat to flatten out the creases.