Paper Doily Christmas Tree
These pretty paper doily Christmas trees can be made with inexpensive supplies. Fun, easy Christmas craft idea!
Ingredients
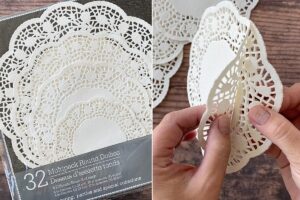
- Paper Doilies in 3-4 graduated sizes
- Wood Skewers
- Glue stick or Tape Runner Adhesive
- Hot Glue Gun
- Chipboard Star Sticker or Wood Star Cutout
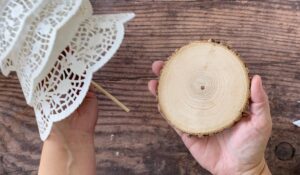
- Styrofoam Discs (found in the floral section)
- Wood Slices + a way to drill holes in them (as an alternative to styrofoam discs)
Instructions
- For each tree, you will need paper doilies in 3 or 4 different sizes. Because doilies are so thin, you will want to use 2 paper doilies in each size. Try to peel 2 doilies off each stack without separating them.
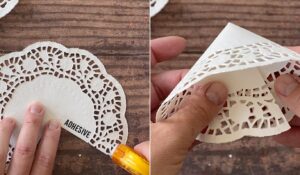
- Cut one quarter out of each size doily. Use adhesive to glue the two layers of each doily together. Be careful when adding adhesive because doilies are delicate. I like to use a tape runner; a glue stick would also work.
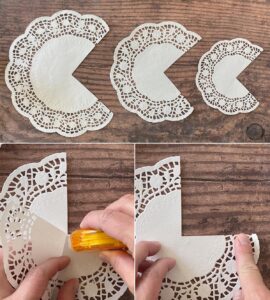
- Flip over the smallest doily and place adhesive along one cut edge. Overlap that cut edge with the other cut edge to create a cone shape. Adhere. Repeat with the other size doilies.
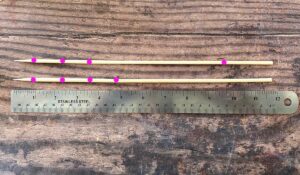
- Place a wooden skewer next to a ruler. Starting from the pointed end, make small marks with a pencil at 1 inch, 2.25 inches, 3.5 inches, and 4.75 inches (for a 4 layer tree). For a 3 layer tree, make small marks at 1 inch, 2.25 inches, 3.5 inches, and 9.5 inches. Use kitchen shears to cut off the skewer at the 9.5 inch mark.
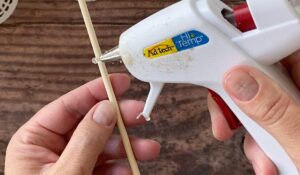
- Pick up the skewer with the pointed side up. Put hot glue all the way around the skewer at the lowest mark.
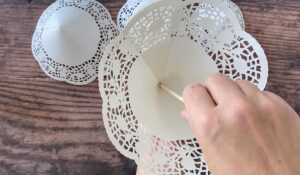
- Poke the skewer through the pointed end of the largest doily and bring the doily up until it touches the hot glue. Hold the doily there for a moment to allow the glue to cool and harden. Try to keep the skewer centered inside the doily while you wait for the glue to harden.
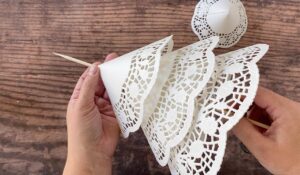
- Repeat with two or three more doilies, working from largest to smallest.
- Glue a chipboard star sticker or wood star cutout on top of the tree.

- Make a stand for the tree: drill a hole into a small wood slice that is the same size as the skewer OR stick the skewer into a floral foam disc. Secure with more hot glue.