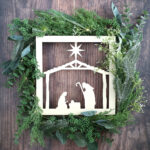
DIY Nativity Christmas Wreath
This pretty Nativity Wreath can be made using a wood nativity cutout and faux greenery.
Ingredients
- Wood Nativity Cutout
- Christmas Garland or Greenery Branches
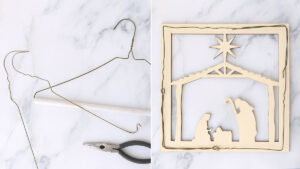
- 2 Wire Hangers
- Pliers
- Floral Wire
- Hot Glue Gun
- Ribbon, Twine, or Wreath Hanger
- String of Fairy Lights optional
Instructions
- Use pliers to unwind a couple of wire hangers. Shape them into a square that is just a little smaller than the nativity cutout. This square will be the base that you wire the branches onto to create your wreath. Do not attach the wood cutout to the base at this time.
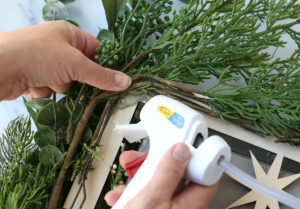
- Separate the garland into branches or sections (my garland separated into 6 sections). Lay them around the square base so you can decide how you want them to look.

- Use floral wire to attach the first branch to the square base, bending the branch if necessary. Because the square base is a little smaller than the nativity cutout, the branches should attach to the outside of the base rather than being wired right on top of it.

- Continue adding branches, wiring each one to the base, until the branches surround all outer edges of the square.

- Flip the cutout over and place it face side down on top of a book, box, or 9x9 cake pan to support it. Place the square wreath you’ve just made face down over the cutout. Move the branches outward so the square base touches the back of the cutout, at least at each corner.
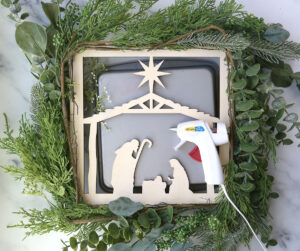
- Working on one corner at a time, use LOTS of hot glue the attach the square base to the wood cutout. Hold the square and cutout together until the hot glue hardens. Glue all 4 corners down.
- Add more glue to secure the cutout to the wreath. Use more glue than you think you need to make sure it is secure.
- Use twine to create a loop at the top of the wreath (make sure the twine goes around the star on the wood cutout) to hang the wreath on an over the door wreath hanger. OR glue a long piece of ribbon in between the square base and the wood cutout at the top of the wreath, and then staple the other end of the ribbon onto the top of your door.
- OPTIONAL: Twine a string a battery operated fairy lights into the wreath, hiding the battery pack in the back.