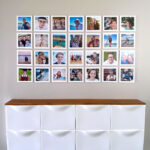
DIY Gallery Wall
Learn how to mount photos on foam core board for an inexpensive DIY gallery wall.
Ingredients
- Photo Prints 8x8 inches
- Foam Core Boards 1 per 6 prints
- Tape Runner Adhesive
- Exacto Knife with a new blade
- Large Ruler
- Large Cutting Mat
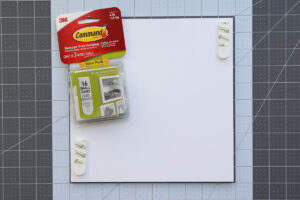
- Command Small Picture Hanging Strips or Photo Mounting Putty
Instructions
- Using an exacto knife with a very sharp blade, cut the foam core boards into 10 inch squares (you can get 6 from each 20x30 inch foam core board). Please note that if you would like to trim the outer 1/4 inch off your foam core, like I did, you will need to cut 9.75 inch squares.

- Use tape runner adhesive to adhere each photo into the center of a foam core square. If you want to be exact, the easiest way to do this is to lay the photo down on a foam core square and get it centered. Then lift just the right side of the photo, while holding the left side in place, and used the tape runner to add a line of adhesive on the foam core square under the right side of the photo. Press the right side of the photo down, then lift the left side and add adhesive on the foam core square on the left side. DO NOT press hard with the tape runner or you can dent the foam core board. Alternately, you can just flip over the photo and place adhesive around the edges on the back side, then place the photo in the middle of the foam core square.

- Your photos are now ready to be hung on the wall. You can use whatever mounting product you prefer, such as Command picture hanging strips or photo mounting putty. To use picture hanging strips, press together the velcro sides of two strips. Remove the backing from one side, and place the strip down on the back of the foam core board. I recommend using 2 sets of strips on each photo board.
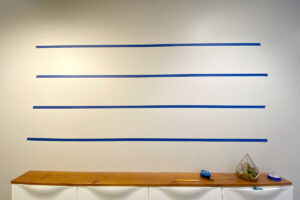
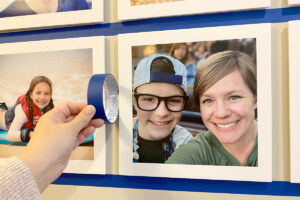
- Prep your wall by measuring and marking where the photo collage will go. Place masking tape on the wall at the height you want the bottom row of photos to go. Make sure that line of masking tape is level. Then measure 9.75 inches up from the first line of masking tape to place your second line of tape (or 10 inches up if your squares are 10 inches). Continue until you have marked all your rows of photos.
- Mount your first photo on the wall by removing the remaining backing from the picture hanging strips and pressing the photo to the wall.
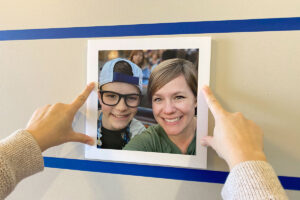
- Continue mounting photos in the collage, using the width of the masking tape roll to determine how far apart each photo should go.
- When all the photos in your collage have been mounted, remove the masking tape.