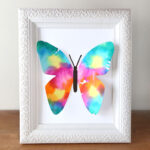
Tissue Paper Butterfly Art
Kids (and adults) can make butterfly art that's pretty enough to frame using this easy tissue paper transfer technique.
Ingredients
- White Cardstock
- Butterfly Template
- Bleeding Tissue Paper
- Spray Bottle with water
- Scissors
Instructions
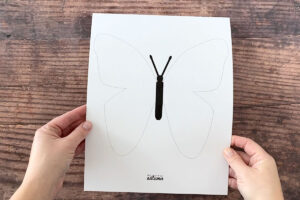
- Print the butterfly template onto a sheet of white cardstock (trim the cardstock if needed to fit into your printer). Print the template at 100% or full size.
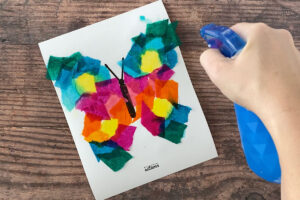
- Choose 6-8 colors of bleeding tissue paper and tear them into small pieces. Cut one color into circles if desired.
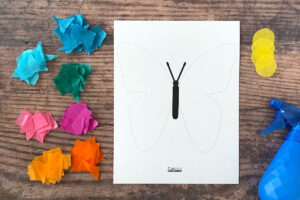
- Spray the cardstock with water, then begin laying pieces of tissue paper onto the butterfly. Completely cover both wings with different colors of tissue paper.
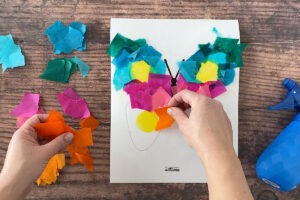
- Spray the tissue paper with water, and then wait 10 minutes.
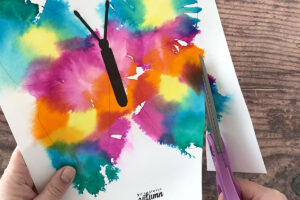
- Remove the tissue paper and allow the butterfly to dry completely. A toothpick can be helpful in removing the paper.

- Cut out the butterfly and fold the wings up.
- Adhere just the body of the butterfly onto another sheet of cardstock. Trim that cardstock to 8x10 first if you'd like to frame it.

Notes
Download the butterfly template here: https://www.itsalwaysautumn.com/wp-content/uploads/2021/02/butterfly-template.pdf