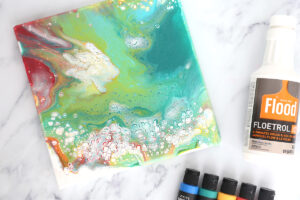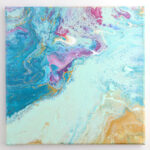
Paint Pouring
Learn the easiest way to create a gorgeous paint pouring art piece using a flip cup dirty pour.
Ingredients
- Acrylic Paint
- Floetrol
- Canvas
- Small Disposable Cups
- Popsicle Sticks
- Pouring Cup about 8 oz in size
- Kitchen Torch optional
Instructions
- Mix acrylic paint and Floetrol in a small disposable cup. Mixed paint should be the consistency of warm honey or chocolate syrup. When you scoop some up on a popsicle stick it should run down in a continuous stream, but not be super thin.Mix 4-5 colors of paint in separate small cups.

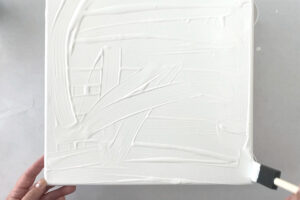
- Place a canvas on a covered work surface. Use a small cup under each corner of the canvas to prop it up away from the surace, or use push pins or a cooling rack to lift it. Optional: Paint a thin later of white thinned paint onto your canvas with a foam paintbrush. This isn't required, but I think it helps the paint to move more easily across the canvas.
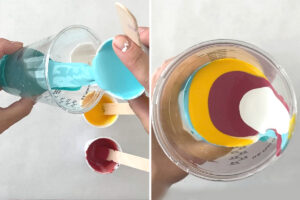
- Pour the first color into the bottom of your pour cup. Tilt the cup to the side, and pour in the next color of paint, letting the paint hit the side of the cup and and run down. This helps the different colors of paint to stay in separate layers instead of immediately start to mix in the cup. Continue until all your colors of paint are in your cup.
- Quickly flip your cup and hold it face down on the canvas. Wait for a moment, allowing the paint to flow down inside the cup.

- Then lift the cup and allow all the paint to flow out of it.
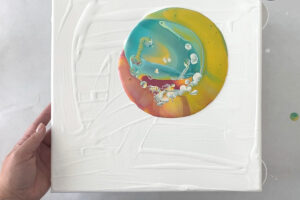
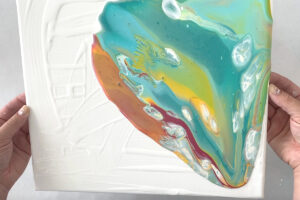
- This is the fun part! Pick up the canvas by the edges and begin tilting it to allow the paint to start for flow. Tilt the canvas back and forth, aiming to cover the entire canvas with paint. Don't allow too much paint to drip of the side right at first, but once the canvas is mostly covered you can allow the paint to drip off the sides and cover the edges as well. Once your canvas is covered you can stop, or you can continue tilting to see what happens.
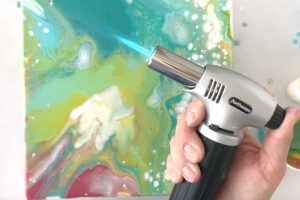
- Optional: When you like how your paint pour looks, set your canvas down on the plastic cups. Move a blowtorch quickly across the surface of the canvas - the heat will pop any bubbles in the paint and reveal more detail.
- When the edges of your paint pour have dried, set it somewhere you can leave it for 24-48 hours to dry completely (and keep it lifted on cups, drying rack, etc). The painting will look a little different once it's completely dry. For best results, wait at least 10 days before sealing with a poly spray or other non-yellowing finish.