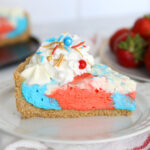
Red, White and Blue No Bake Cheesecake
This easy no bake cheesecake is the perfect dessert for Fourth of July or Memorial Day!
Servings: 10
Equipment
- Red and Blue Gel Food Coloring
- 9-10 inch Springform Pan
Ingredients
Crust
- 2 cups Graham Cracker Crumbs from 16 full sheets graham crackers
- 1/3 cup Brown Sugar
- 1/2 cup Butter melted
Filling
- 16 oz Cream Cheese softened; two bricks of cream cheese
- 1/3 cup Granulated Sugar not powdered
- 1 teaspoon Vanilla Extract
- 2 teaspoons Lemon Juice
- 1.5 cups Heavy Whipping Cream cold
Instructions
Make the Crust
- Optional: Place the heavy cream and a bowl you will whip it in inside the freezer while you make the crust. Be sure not to leave the cream in the freezer for more than 10-15 minutes.
- Mix the graham cracker crumbs with brown sugar and melted butter. The mixture will resemble wet sand. Dump the crumbs into a lightly greased 9 or 10 inch springform pan and press firmly across the bottom of the pan and halfway up the sides. Place crust in the freezer while you make the filling.
Make the Filling
- Beat together the softened cream cheese and the granulated sugar, then add in the vanilla and lemon juice and beat until smooth.
- In a separate bowl or a stand mixer, whip the cream into firm peaks. That means you’ll be able to see the tracks the beaters are making in the cream, and when you lift up a beater (or spoon) with cream on it, the point of the cream will stand straight up without bending back on itself. Depending on what you are using to whip your cream, this can take 5-8 minutes.
- Spoon about a third of the whipped cream into the cream cheese mixture and mix it in using low speed with a hand mixer. Then spoon in the rest of the whipped cream and fold it in gently by hand. If you stir too vigorously you will knock the air out of the whipped cream.
- Separate out a quarter of the filling and add blue food coloring. Separate another quarter of the filling and add red fool coloring. Be aware that this will take a good amount of food coloring. Stir the coloring in gently; again if you stir too vigorously you’ll lose some of the “lift” in your filling.
- Dollop spoonfuls of the filling into the prepared crust, alternating the colors. Use an offset spatula or a knife to gently smooth out the top of the filling. Try not to mix the colors much as you do this; you can clean off the spatula a couple of times as you spread the filling. Once the filling is spread all the way to the edges, use a toothpick to swirl the colors on top.
- Cover the springform pan with plastic wrap and place the cheesecake in the fridge for at least 8 hours before serving (overnight is even better).
- To serve, gently remove the collar (sides) of the springform pan and remove. Slice with a sharp, damp knife, cleaning the knife in between slices. Serve with sweetened whipped cream or your favorite berry pie filling.
Notes
Do not use the freezer to speed up the chilling process when making the cheesecake. However, once the cheesecake has been chilled for 8 hours you can freeze leftovers tightly covered.