
Wood Block Christmas Trees
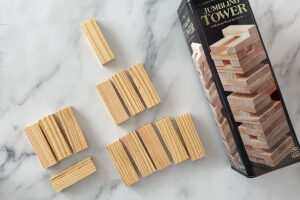
You can make these cute DIY Christmas trees in under an hour using wood blocks from a tower stacking game.
Ingredients
- Wood Blocks 13 for smaller tree, 17 for larger tree
- Stars
- Hot Glue Gun
- Paint + Paintbrush
- Sandpaper optional, for distressing
Instructions
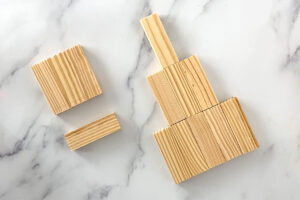
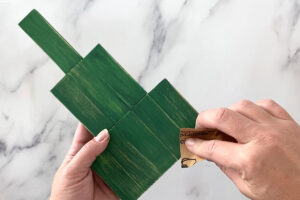
- Set out the blocks you will need to glue together. For the tree you'll need one block for the top, three blocks for the second row, and five blocks for the third row. For the base, you'll need three blocks, with one more for the trunk.
- Starting with the bottom row for the tree, place a line of hot glue on one side of a block. Work very quickly to press the block firmly to another block. Squeeze tightly so you don't end up with a gap in between the blocks. Continue to glue the blocks together as you had them laid out above.

- Once you have the blocks glued together in rows, glue them together to create a tree shape. Do not glue the trunk to anything yet.
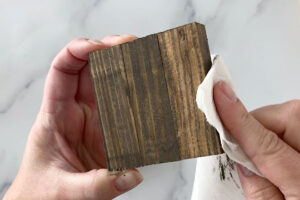
- Paint the base and the trunk. For a stained look using acrylic paint, water down the paint slightly. Paint it on and then immediately wipe some of it back off using a paper towel so you can see the wood grain.
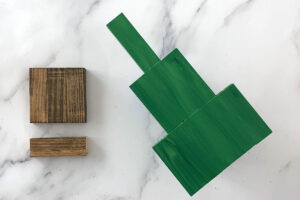
- Paint the tree whatever color you prefer. I used two different colors of green paint here to give it a little variation. Allow the paint to dry - you can use a hair dryer to speed the drying process.
- When the paint is completely dry, use coarse sand paper to sand off some of the paint, giving the tree a distressed look (optional).
- Hot glue the star to the top of the tree and allow the glue to cool and set.
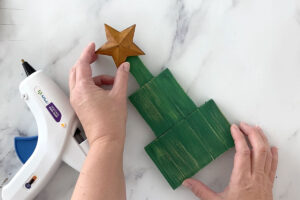
- Hot glue the trunk to the base of the tree, then hot glue the tree to the top of the trunk.
