
DIY Tiered Dessert Tray
Learn how to make an adorable DIY tiered dessert tray using plates from the thrift store. This easy craft project for adults can be completed in about half an hour.
Equipment
- Battery Powered Drill
- 1/4 inch Diamond Drill Bit
- Sharpie
- Ruler
- Towel or Wood Board
- Spray Bottle or Sponge
- Safety Goggles
Ingredients
- 3 Thrifted Plates dinner plate, salad plate, dessert plate
- Tiered Tray Hardware
Instructions
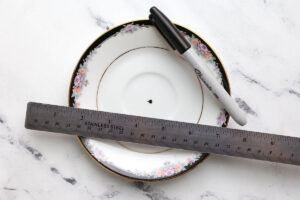
- Measure and mark the center of each plate.
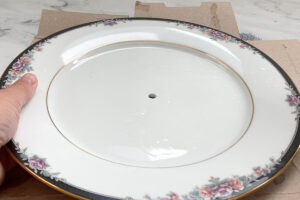
- While wearing safety goggles, drill a hole through the center of each plate. Start drilling at an angle and slowly bring the drill into a perpendicular position. Spray or drop water onto the plate as you drill to keep it cool and prevent cracking.
- Once you've drilled holes in each plate, open the tiered tray hardware.
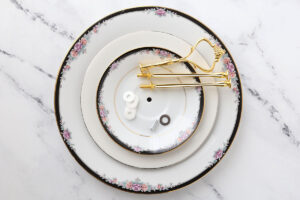
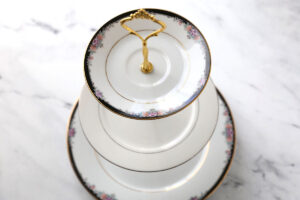
- Assemble the tiered tray, making sure that each plate has a soft washer above and below it. Tighten the hardware by hand.
Notes
Read the post for detailed information and a video showing you how to drill through the plates.
This is the hardware I used: tiered tray hardware