
Cupcake Liner Roses
You can make these beautiful paper roses out of cupcake liners! This easy craft is simple enough for kids and fun for teens and adults.
Ingredients
- 16 Cupcake Liners standard size
- Styrofoam Cup 16 oz
- Glue Stick
Instructions
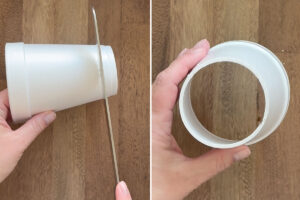
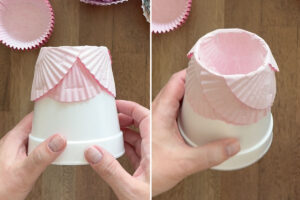
- Cut the bottom off the styrofoam cup to create a rim that is about 2.5 inches in diameter. Place if top down in front of you.
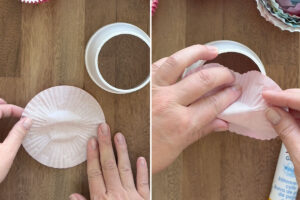
- Flatten out the first cupcake liner, and fold it over the cup rim, pressing half of the liner down inside the cup and half down outside the cup. The colored side of the liner will face the cup.
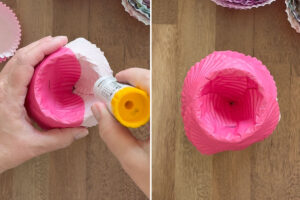
- Next you will layer another cupcake liner over the first one, overlapping about half of the first liner. Before you do that, apply glue stick to the area that will be overlapped, then press the second liner down.
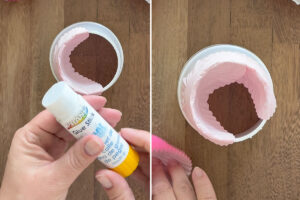
- Use glue stick to adhere a third cupcake liner where it will overlap both of the first two liners (make sure you only place glue on the other liners, not on the cup). At this point the bottom of the cup should be covered.
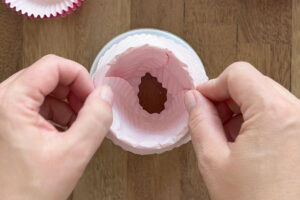
- Continue to add more cupcake liners to build your rose. Offset the liners a bit each time, working on way for a bit then skipping an area and working the other way. It helps to look at the cup from the side to see where to add the next petal.
- Continue adding cupcake liners, being sure to apply glue stick before each liner. As you work you’ll see that the hole in the middle of the cup is growing smaller.

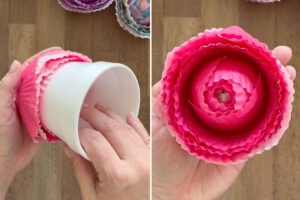
- When you get to the last three liners (meaning you have used 13 already), you will flip the liners and add them with the color up, or facing you. Make sure to space the last three liners so they cover the entire flower.
- Now you can tip the cup right side up and gently press the rose from the inside to slide it off the cup. Gently loosen the first few petals that make up the center of the flower if desired.
Notes
Handle the rose carefully for 10-15 minutes as the glue stick sets up.
Create a stem by gluing a wood ball knob or styrofoam ball to the end of a paper straw. Then glue the ball inside the flower.