
Doily Angel Ornament
You can make these cute little angel ornaments using paper doilies and buttons in about five minutes.
Ingredients
- 8 4 inch Paper Doilies
- 1 1 inch Button with two holes, not four
- 9 inches Baker's Twine
Instructions
- Pull 3-4 doilies off the stack of paper doilies, leaving them stuck together. Repeat.
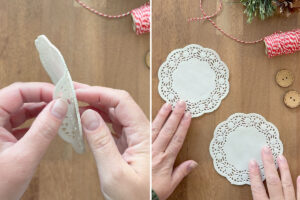
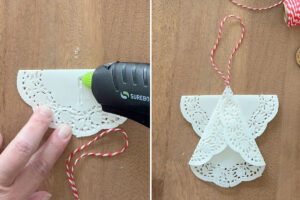
- Fold one doily stack in half and crease well. Add adhesive inside the fold to keep the doily folded over. These are the wings.
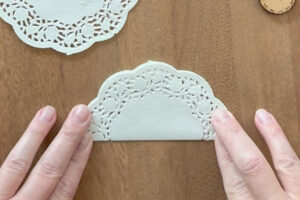
- Fold about a third of the second doily stack in toward the center. Fold in another third from the other side, creating a point at the top. You should have a triangle shape with scallops along the bottom. This is the body.
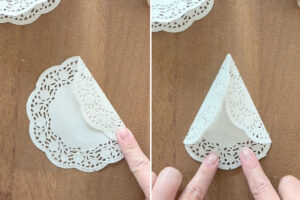
- Open up the folds in the body. Glue two ends of a 9 inch length of twine inside the folds at the point, then fold the doily back over. Use more glue as needed to keep the two sides folded in.
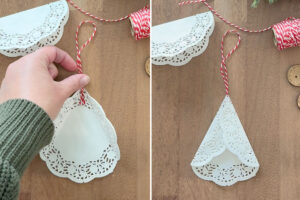
- Glue the body to the wings, with the point at the top of the body a little higher than the straight edge of the wings.
- Glue the button on as a head.
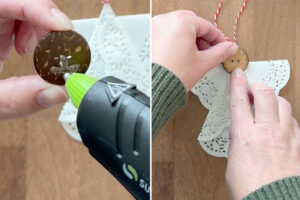
- Once the glue is dry, the ornament is ready to hang!

Notes
Hot glue is the easiest glue to use for this project because it adheres quickly. However, if you are making these with children you should use a different type of glue to make sure no one burns their fingers. You can also use silicone finger protectors if you choose to use hot glue.