
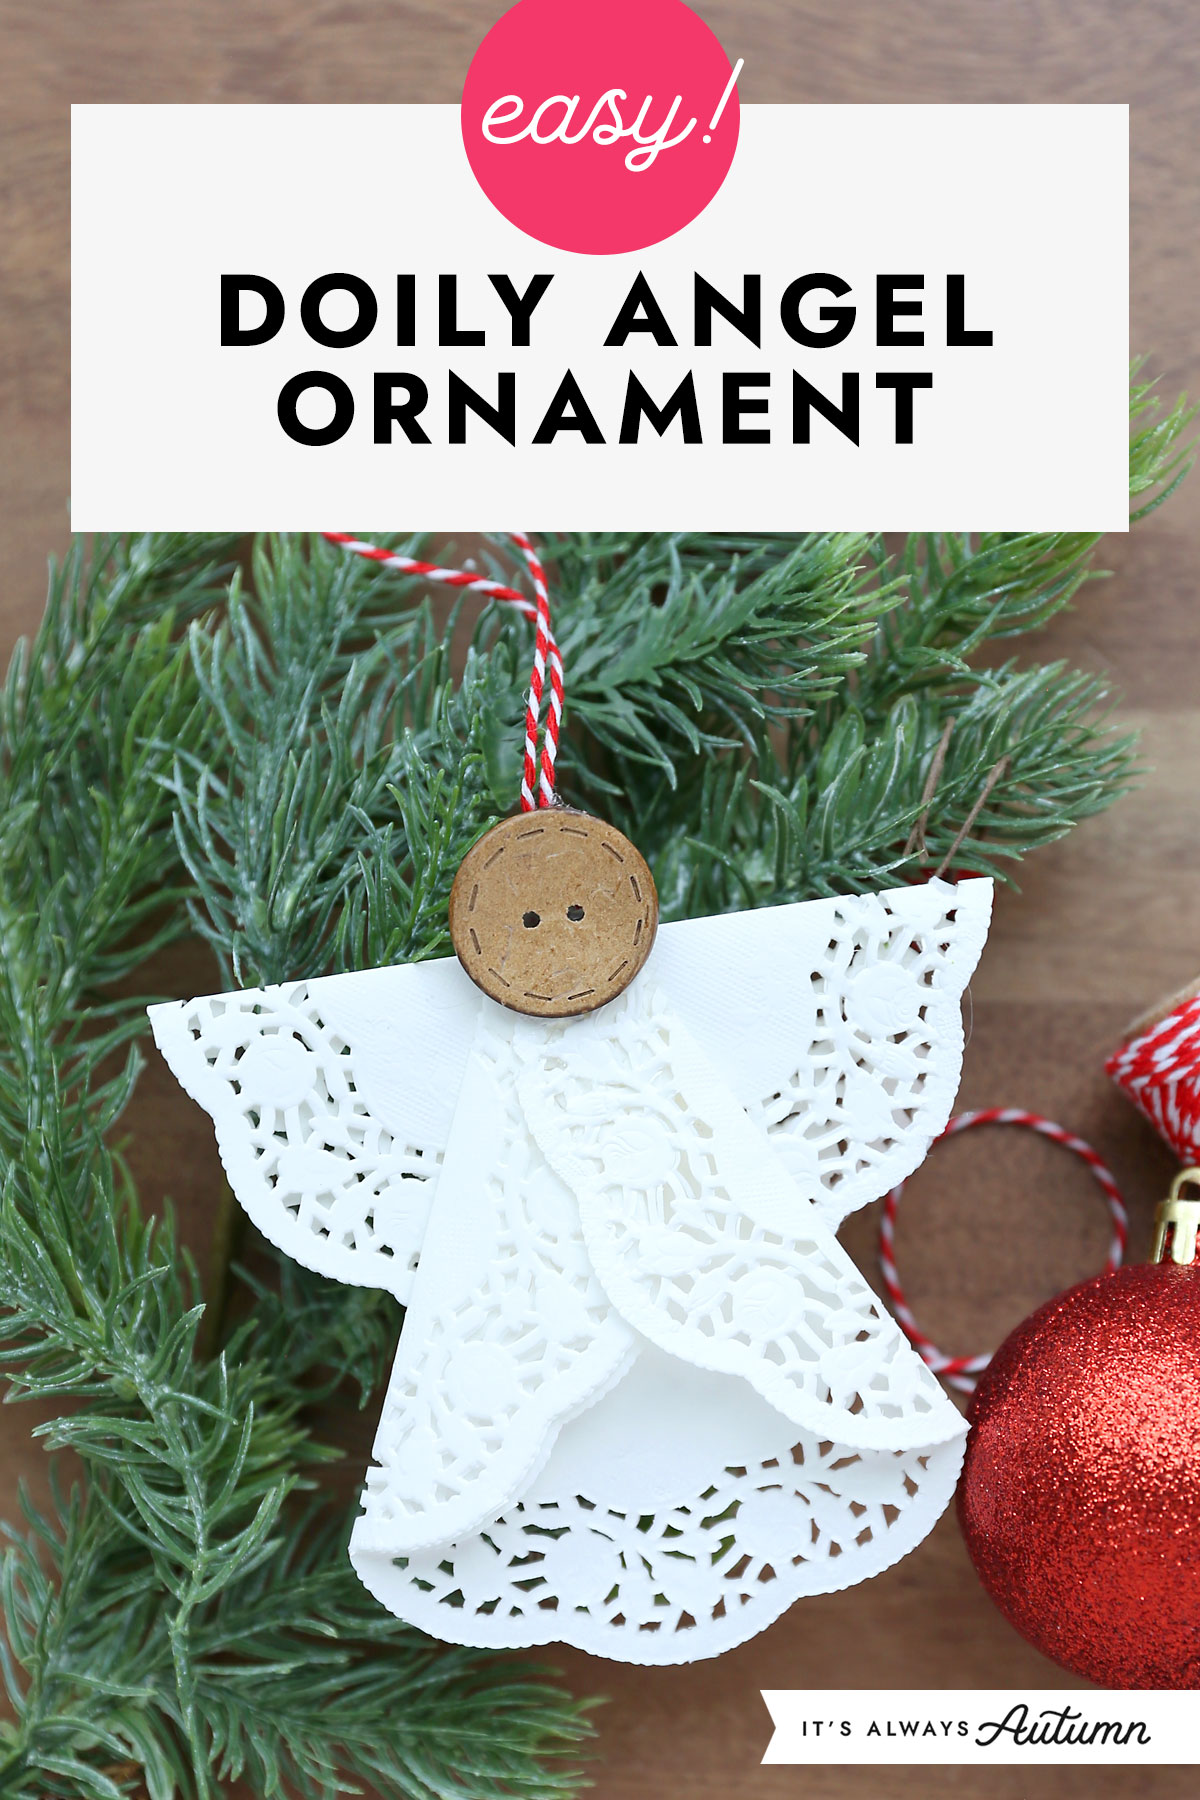
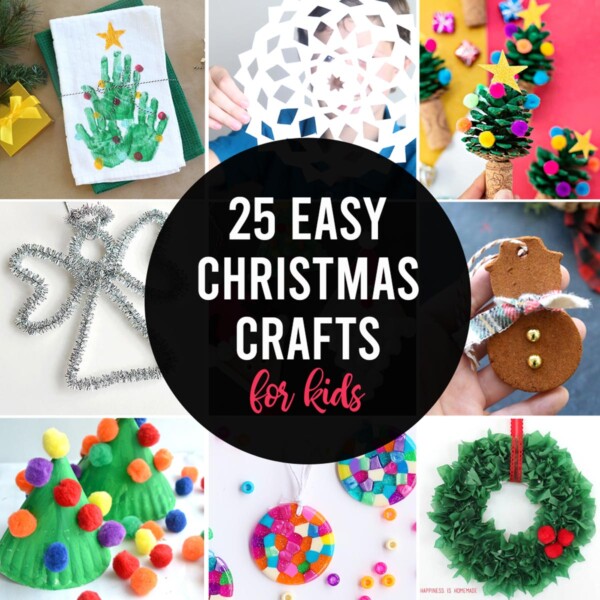
In today’s post: Learn how to make a cute angel ornament from paper doilies and a button. This is an easy DIY Christmas craft for kids or adults that only takes about five minutes per ornament.
Easy DIY Christmas Ornament
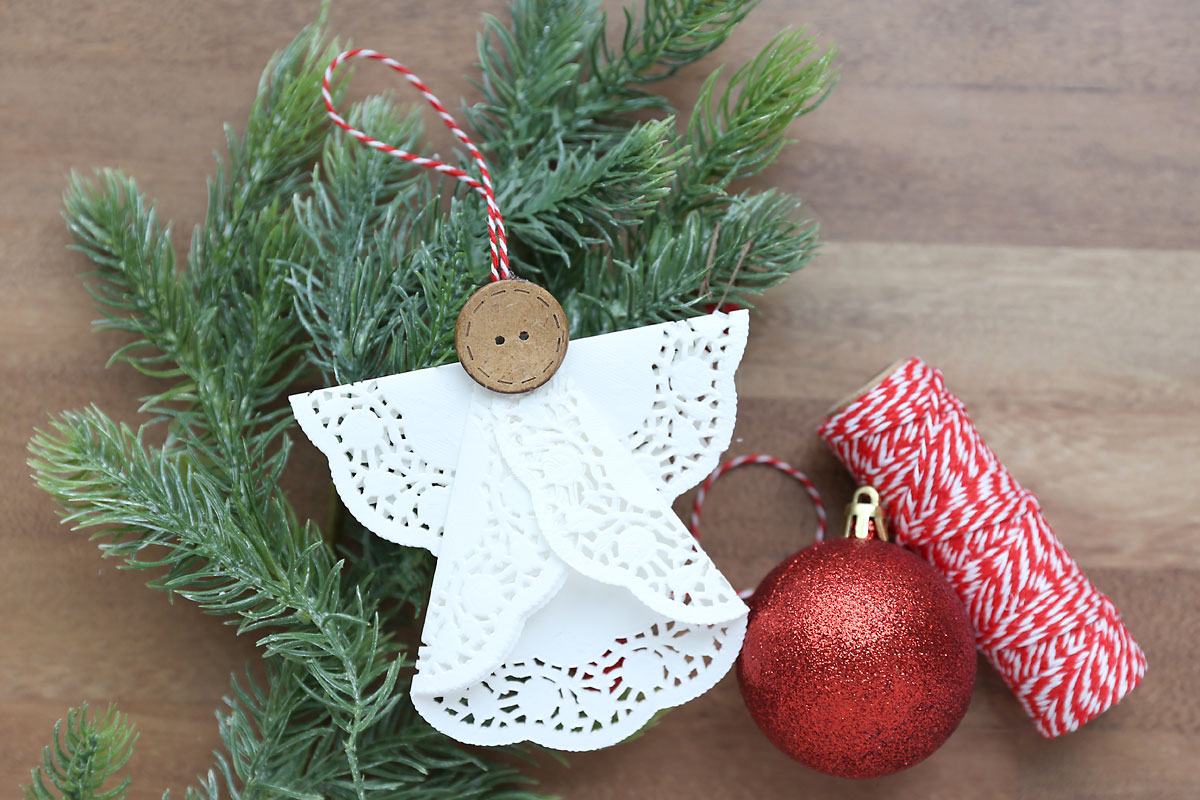
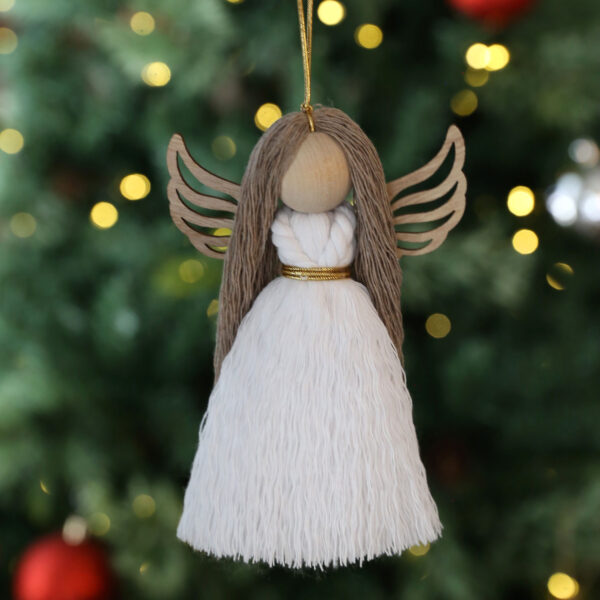
These doily angel Christmas ornaments are so easy to make and will look adorable on your Christmas tree! Because the assembly is so simple this would be a fun activity to do with your kids. Please note, I used hot glue to put the ornaments together – if you are doing this with children use a different type of glue or be certain an adult applies the hot glue. I also recommend using silicone finger caps to make sure no one burns their fingers.
Angel Tree
These cute little angels would be the perfect decoration for an “angel tree.” These are often organized by churches or schools. Each ornament has the age of a person someone else can buy a Christmas present for and donate through the organizers.
Supplies
You only need a few supplies to make doily angel ornaments. I got all the supplies I used at Hobby Lobby.
- 4 inch paper doilies
- 1 inch buttons with two holes (not four)
- Baker’s Twine or other thin twine/string

How to Make an Angel Ornament
Fold the Doilies
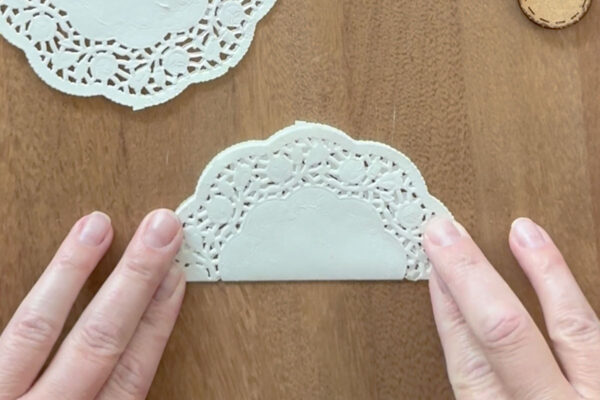
Assembly for these doily angels is super simple. Start with a stack of 4 inch paper doilies. Paper doilies come kind of stuck together and they are super thin, so it works best if you leave three or four doilies stuck together for each part of the angel. Pull off 3-4 doilies (leaving them stuck together) for the wings and another 3-4 doilies for the body.
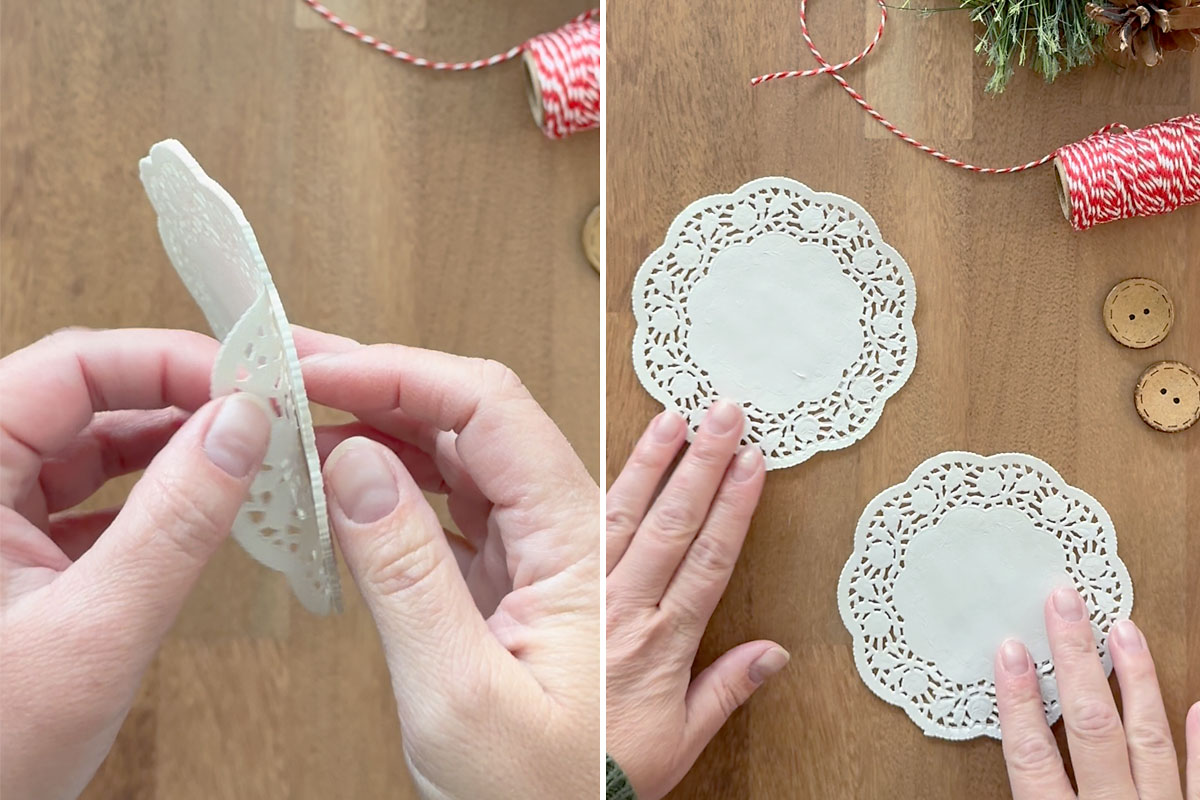
You will treat each doily stack as one doily from here on out. Fold one doily stack in half to create the wings, and place a bit of adhesive inside the fold to secure.
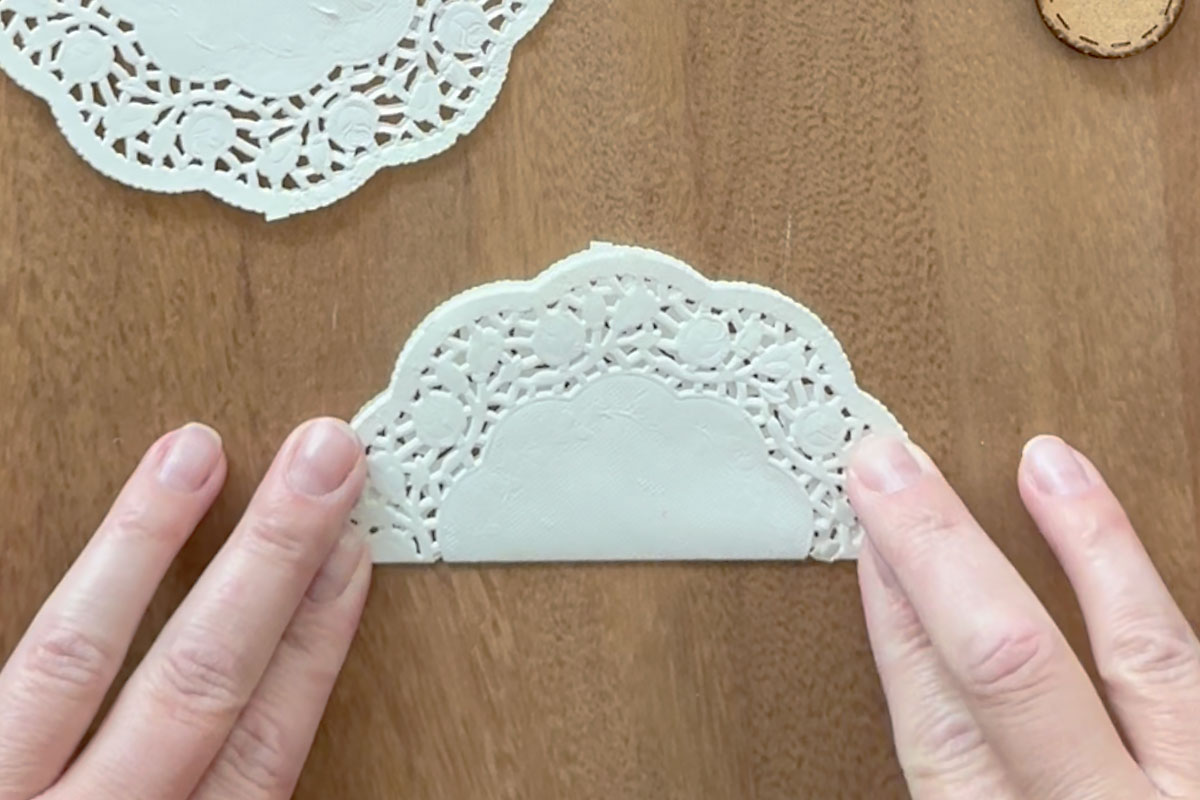
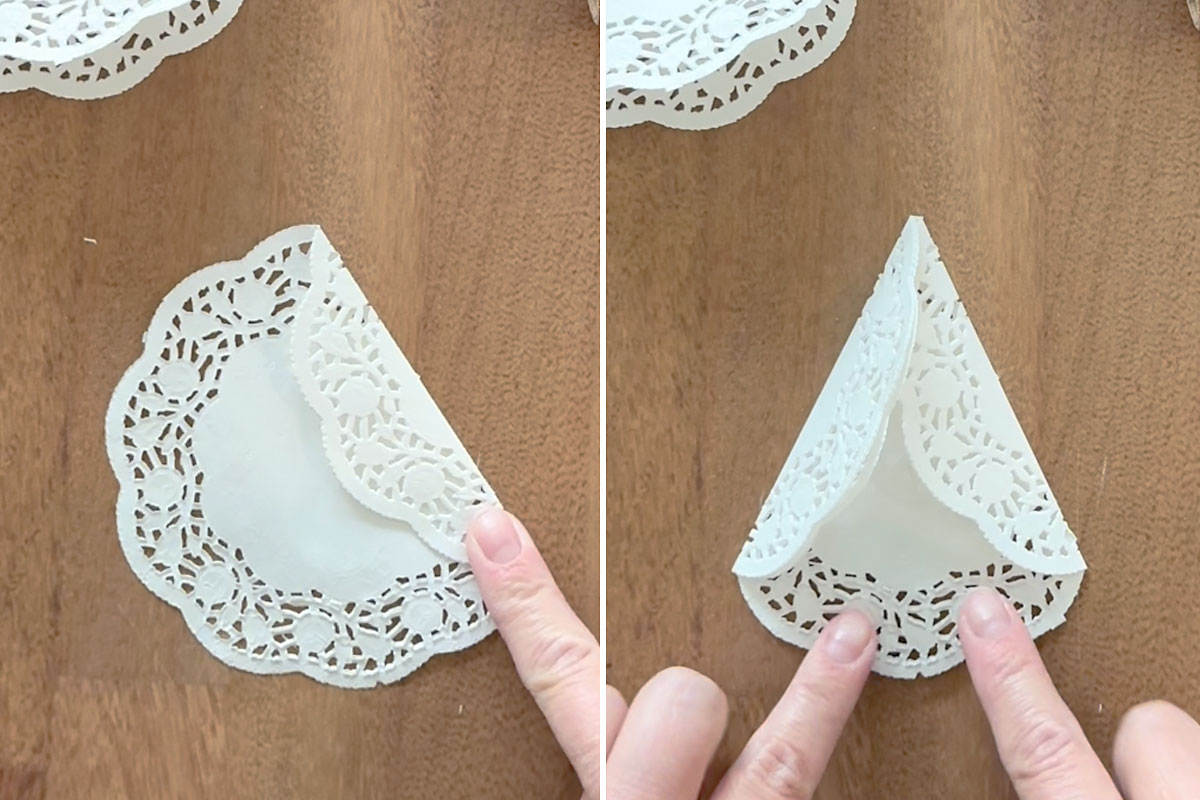
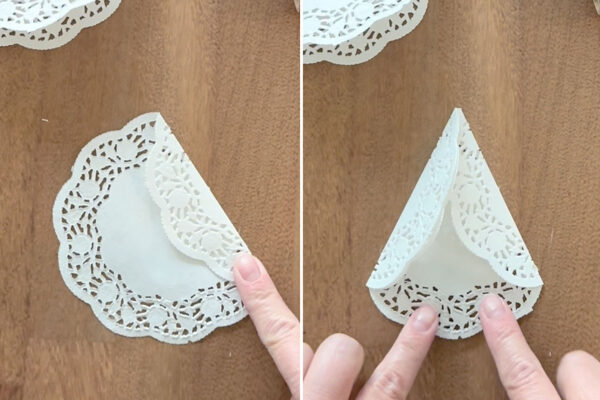
For the angel’s body you will fold in about a third of the doily from each side, as shown below, resulting in a shape like a triangle with a scalloped bottom.
Add the hanging loop
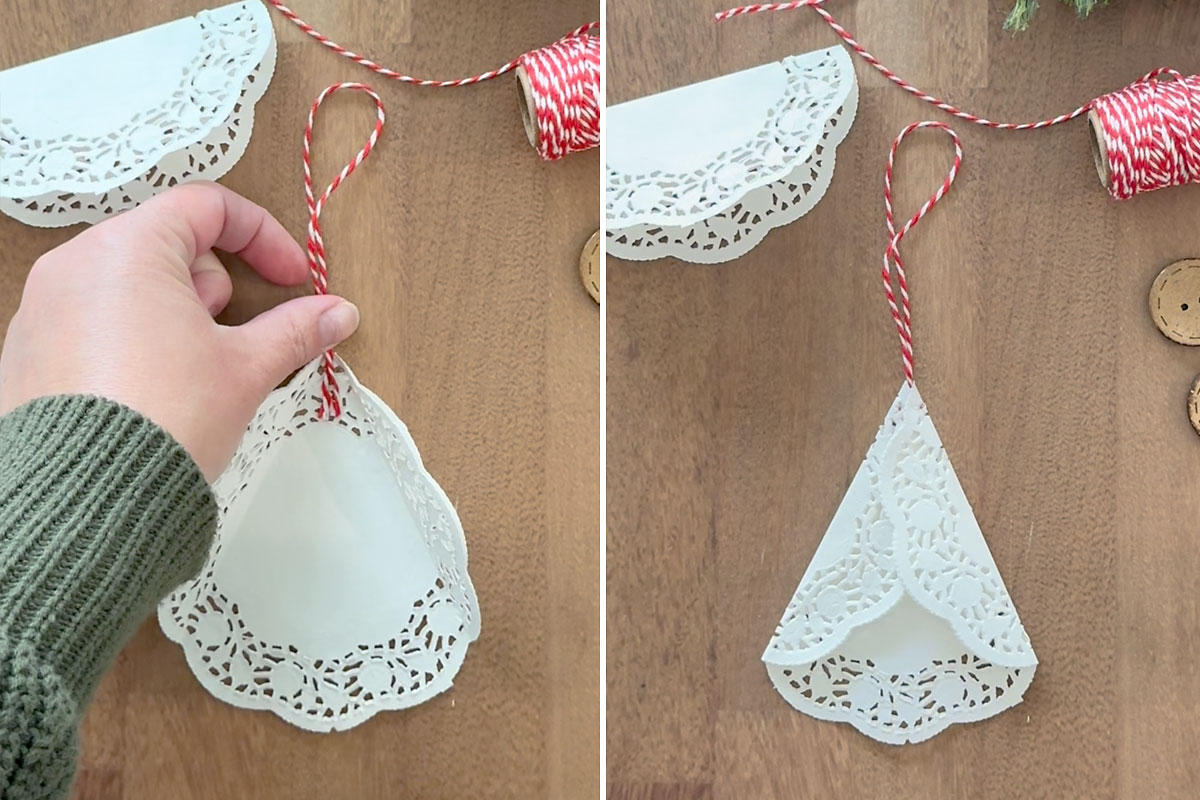
Open up the folds you just made for the angel’s body. Cut baker’s twine to about 9 inches. Glue the ends of the twine inside the folded doily where the folds make a point. Close the doily back up over the twine and add a little more glue if needed to keep it folded over.
Assemble the Ornament
Place the wings down in front of you with the straight side up. Place a line of glue down the center of the doily as shown below. Place the body doily over the glue, with the tip of the triangle a little higher than the straight edge of the wings.
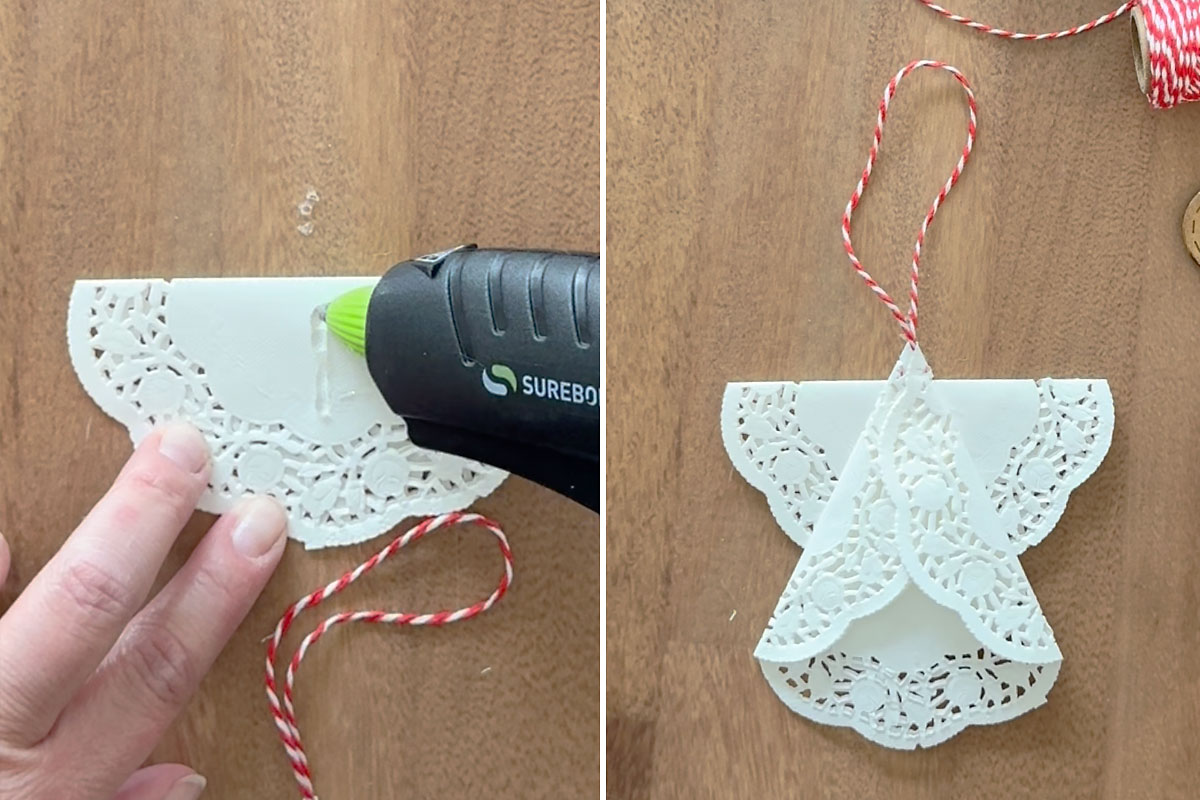
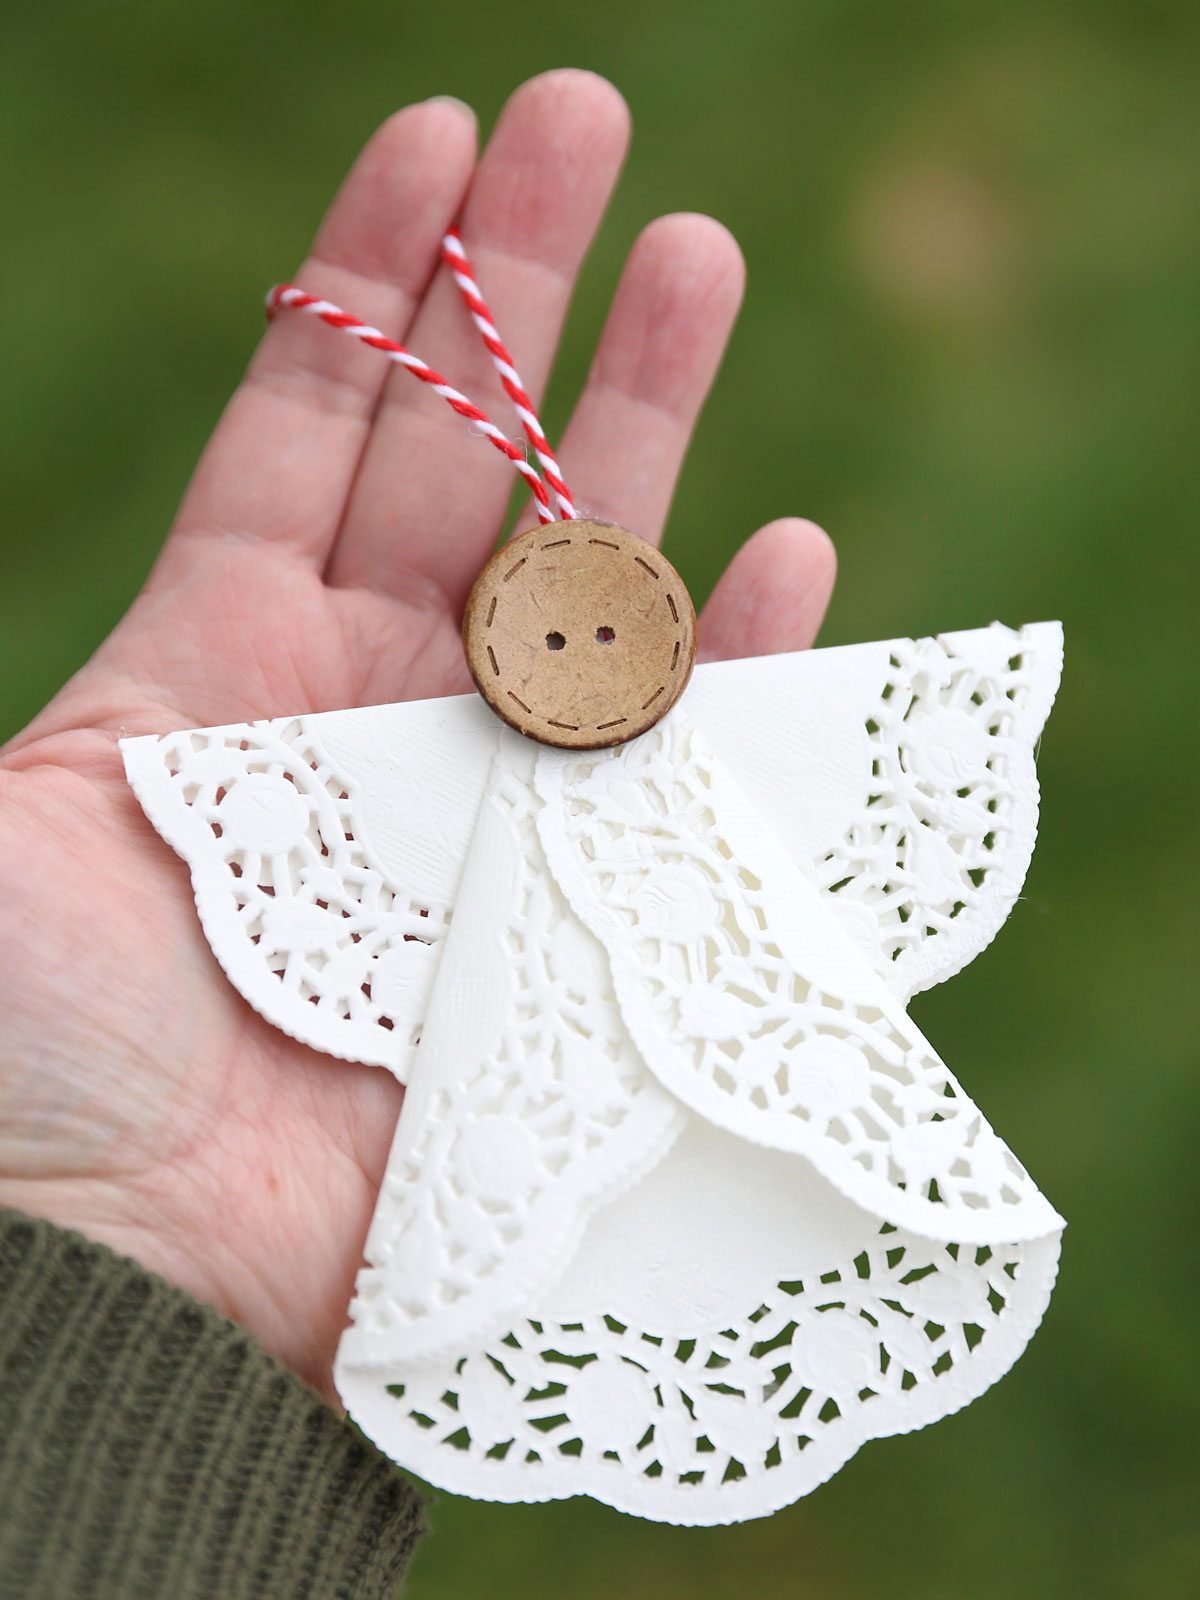
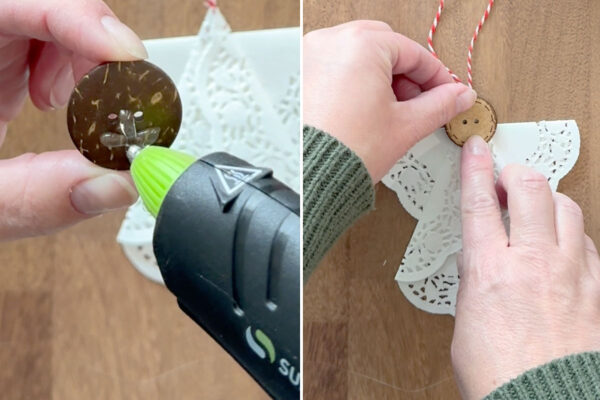
Finally, glue on a button for the head. Remember you only need glue on the bottom half of the button where it will touch the doilies.

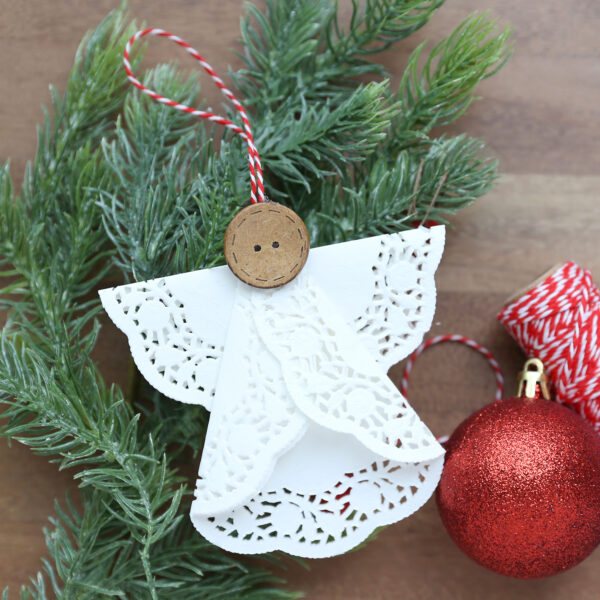
Doily Angel Ornament
Supplies
- 8 4 inch Paper Doilies
- 1 1 inch Button with two holes, not four
- 9 inches Baker's Twine
Want more project ideas? Sign up to get my favorite easy crafts and recipes straight to your inbox!
Instructions
- Pull 3-4 doilies off the stack of paper doilies, leaving them stuck together. Repeat.

- Fold one doily stack in half and crease well. Add adhesive inside the fold to keep the doily folded over. These are the wings.
- Fold about a third of the second doily stack in toward the center. Fold in another third from the other side, creating a point at the top. You should have a triangle shape with scallops along the bottom. This is the body.
- Open up the folds in the body. Glue two ends of a 9 inch length of twine inside the folds at the point, then fold the doily back over. Use more glue as needed to keep the two sides folded in.
- Glue the body to the wings, with the point at the top of the body a little higher than the straight edge of the wings.
- Glue the button on as a head.
- Once the glue is dry, the ornament is ready to hang!


Cheryl Bow says
I absolutely love your fun ideas. I have done several of them with my grandchildren – and they have loved doing them. So many smiles and giggles to remember. Thank you!
Gloria Burnley says
Love this angel!!
Janene says
Very effective as well as quick and simple for children to make. Thanks so much for sharing!
Jennifer Krouse says
Well, this is adorable! I have something very similar I received many years ago but instead of a button, my child’s kindergarten teacher glued a cutout of my child’s face. It goes on our tree each Christmas and I love it! Thank you. I believe I will make these as gifts for my 3 grandchildren’s parents this year. They will love them! Thank you so much!!