It's Always Autumn

creative tutorials for everyday life

  • Holidays
  • Holidays
    • back to school
    • birthdays
    • Christmas
    • Easter
    • Halloween
    • July 4th
    • Mother’s Day/Father’s Day
    • teacher appreciation
    • Thanksgiving
    • Valentine’s
  • Crafts
  • Crafts
    • crafts + DIY
    • handmade gifts
    • photo crafts
    • kid crafts + activities
  • Recipes
  • Recipes
    • bread
    • dessert
    • main dish
    • side dish
  • Sewing
  • Sewing
    • free sewing patterns
    • sewing for women
    • sewing for kids
    • how to sew
    • gifts
  • Photography
  • Photography
    • beginning photography tips
    • posing tips
    • photo editing tips
  • Tips
  • Tips
    • parenting tips
    • travel tips
    • books I love
  • FAQ

refashion sewing sewing for kids
May 25, 2015

cute shirt + cute fabric = easiest dress ever

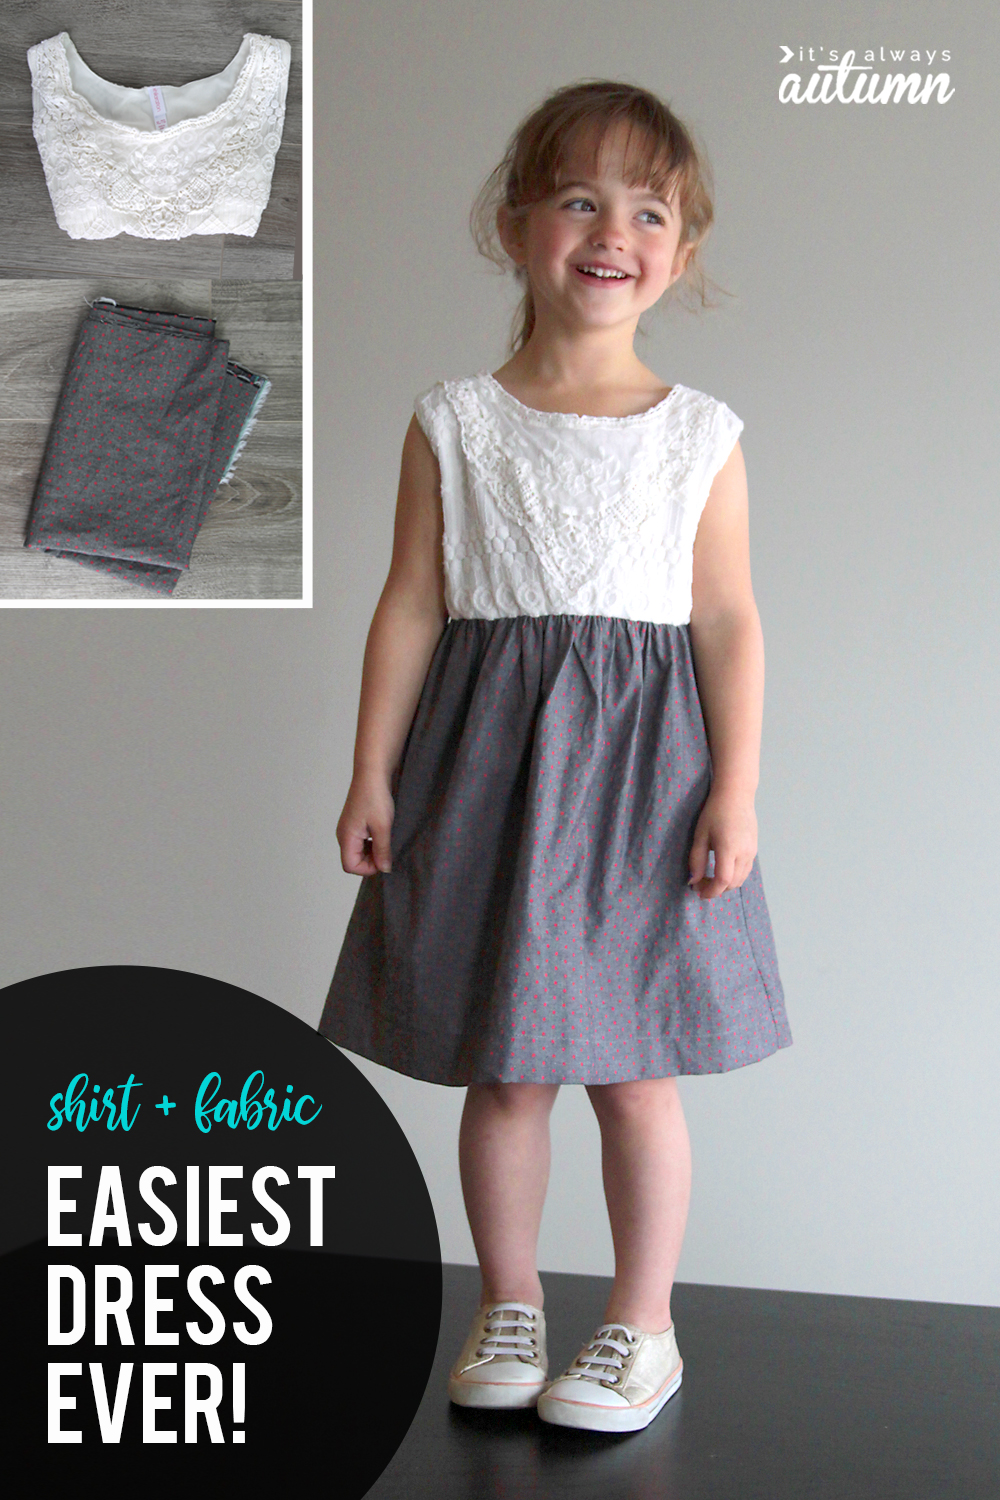
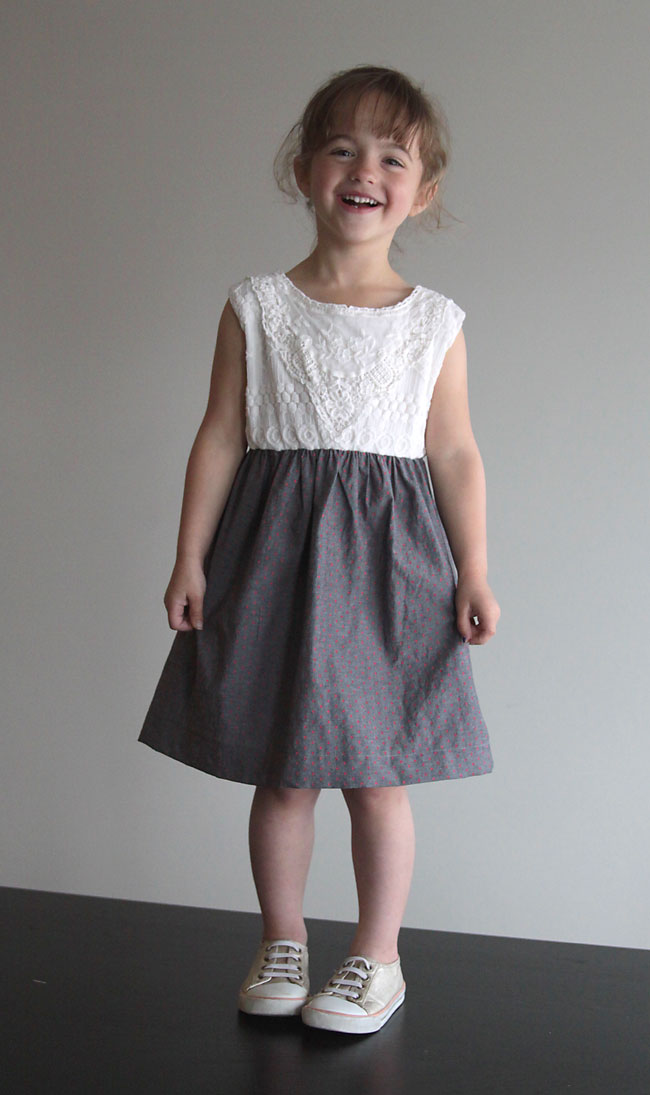
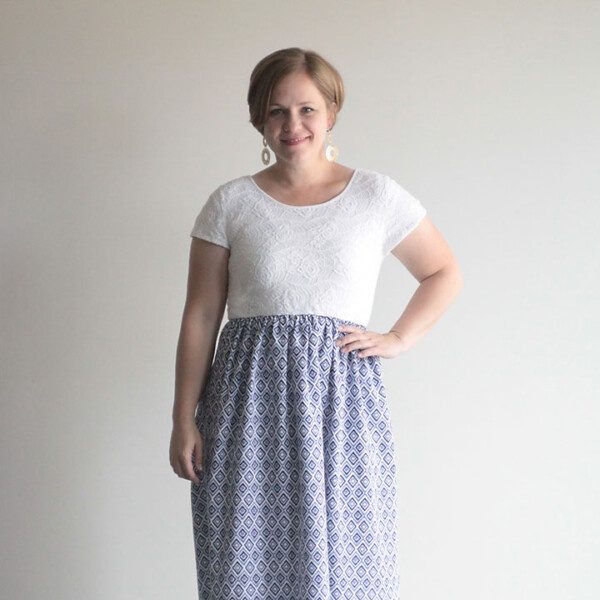
Today’s sewing tutorial is easy. Really easy. If you read blogs much you’ve probably seen it before: just sew some cute gathered fabric onto the bottom of a cute shirt to make an even cuter dress. Done. Mind-blowingly simple. But many of the tutorials I’ve seen for this type of dress skip one simple step that really adds to the professional look of a gathered skirt dress.

Make a super simple girls dress using a shirt and some cute fabric. Easy sewing tutorial. How to sew a dress.

If you look at commercial dresses that have a gathered skirt attached to a tee or tank top, you’ll always see elastic sewn right into the seam allowance between the skirt and top.

a little girl wearing a dress made from a shirt and attached skirt

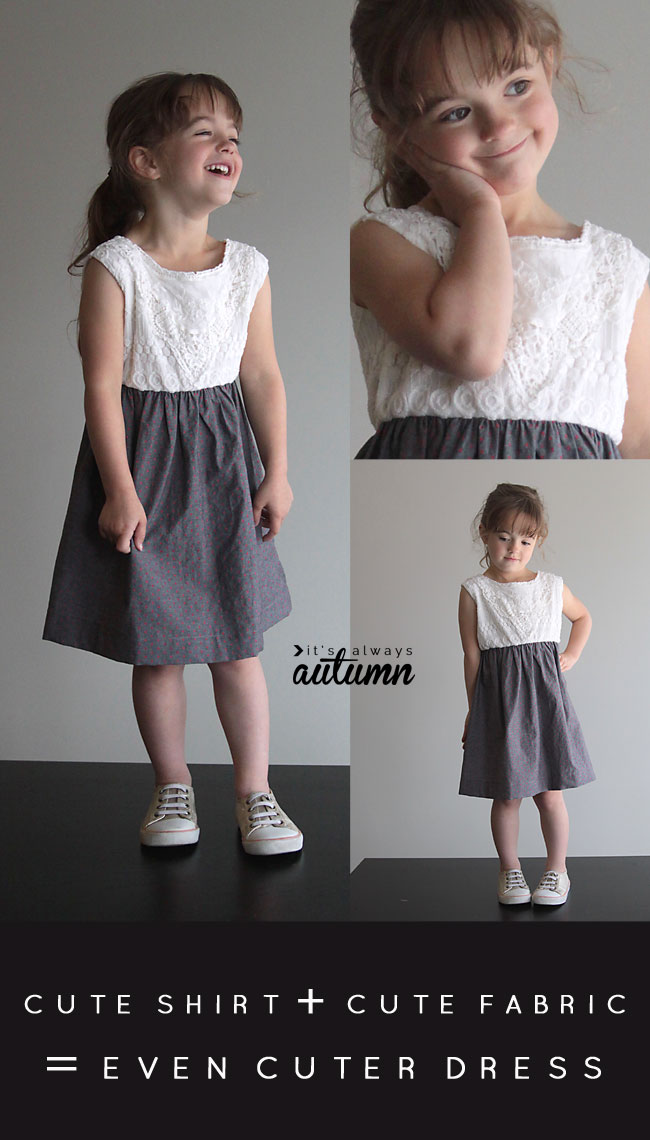
Adding elastic at the waist ensures that the gathered skirt won’t stretch out the top, leaving you with a shapeless dress. Also, it just makes the dress look a bit more professional.

A little girl wearing a dress with gathered skirt

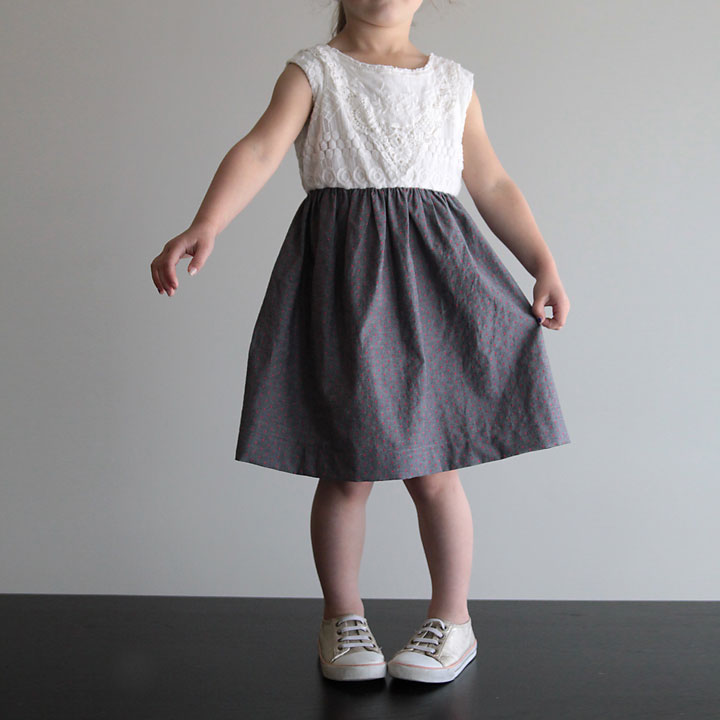
This is a great way to save tops that still fit but have gotten too short, or just an easy method to beef up your little girl’s Sunday wardrobe. Seriously, this will be the easiest dress you’ve ever made.

close up of a girls skirt

Here’s what you’ll do. Start with a tee or tank, and cut off enough of the bottom so it just reaches to your girl’s natural waist. Fold a piece of fabric in half (I used just over 1/2 yard of 44 inch wide chambray) and sew down one side to create a skirt.

tank top cut off at the waist and fabric pieces to make a skirt

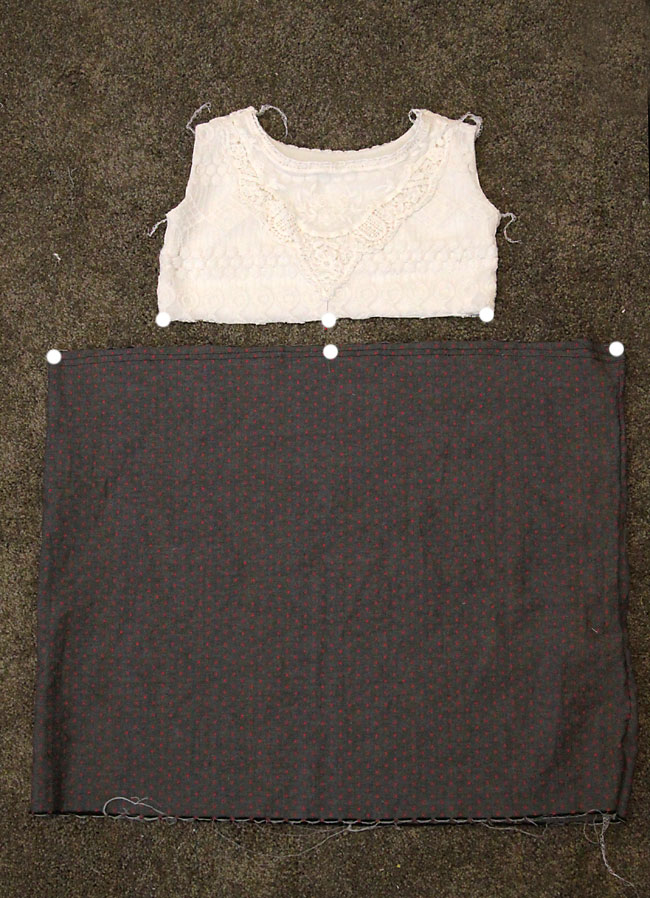
You’ll want to mark the center front, center back, and each side of both the top and the skirt piece – I just use pins. Marking these locations makes it easier to get your gathers even.

To gather the skirt, sew two rows of basting stitches along the top edge, about 1/2 inch and 3/4 inch away from the edge. Basting stitches are made with a long stitch length and a low stitch tension (upper photo below). Then you can grab the bobbin threads and pull to start gathering up the skirt (lower photo below).

Gathering stitches sewn around top of skirt pieces

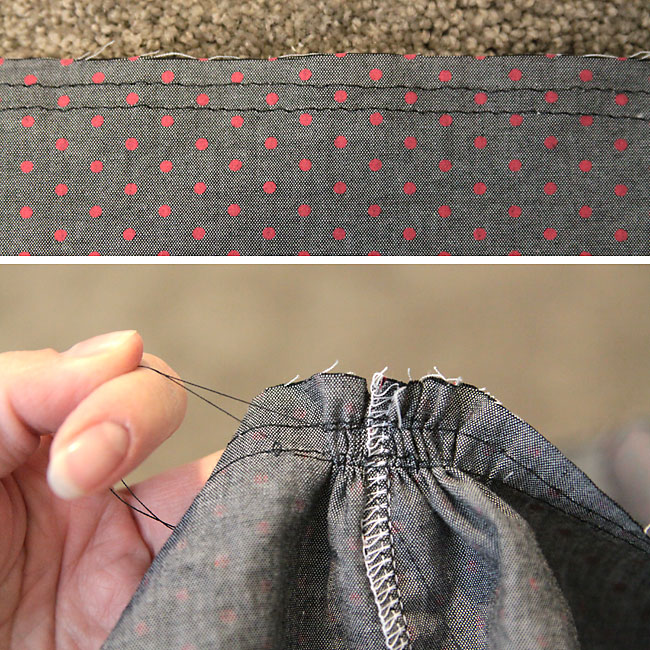
You want to gather the top of the skirt until it is the same size as the bottom of the tee you’re using. You also want to distribute the gathers evenly, so that the marks at the center front, center back, and sides of the skirt match up with the same marks on the shirt (as seen below).

Skirt gathered to be the same width as the bottom of the top

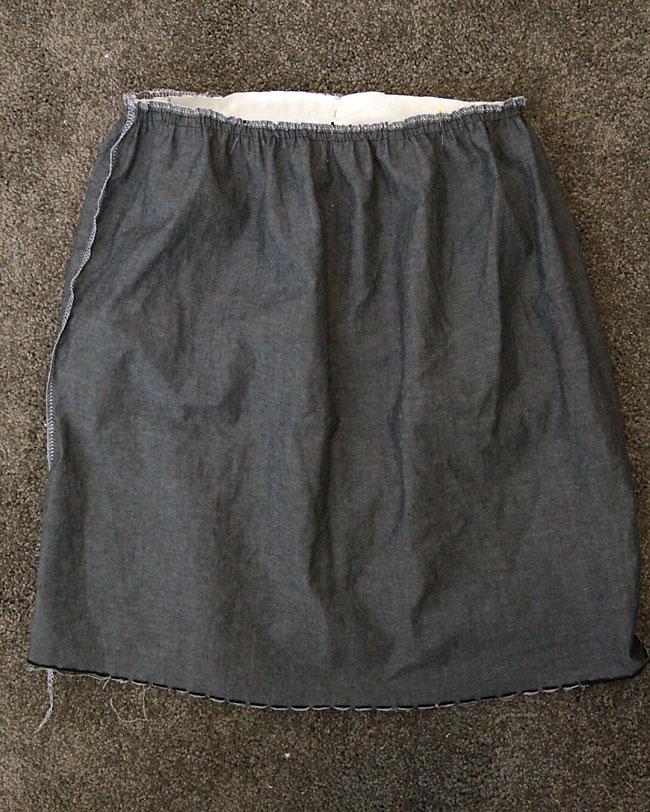
At this point you’ll keep you shirt right side out, but turn the skirt inside out. Slide the shirt inside the skirt (neckline of shirt is down) and match up the bottom of the shirt with the gathered edge of the skirt. Pin together, being sure to match the places you marked before, and evenly distributing the gathers between those spots. Sew to attach skirt to top, using a stitch that has some stretch (narrow zig zag, stretch stitch, serged stitch).

Top inside skirt, sewn together along raw edges

Now, to make the dress look more professional, you’re going to sew some elastic right into the seam you just sewed. Grab a piece of narrow (3/8 inch) elastic that’s about the length of your girl’s waist. Place it on top of the seam allowance and sew around again, giving the elastic a good stretch as you sew. I like to use a wide zig zag or serge stitch here to encase the elastic as I sew.

Sewing elastic into the waist on a sewing machine

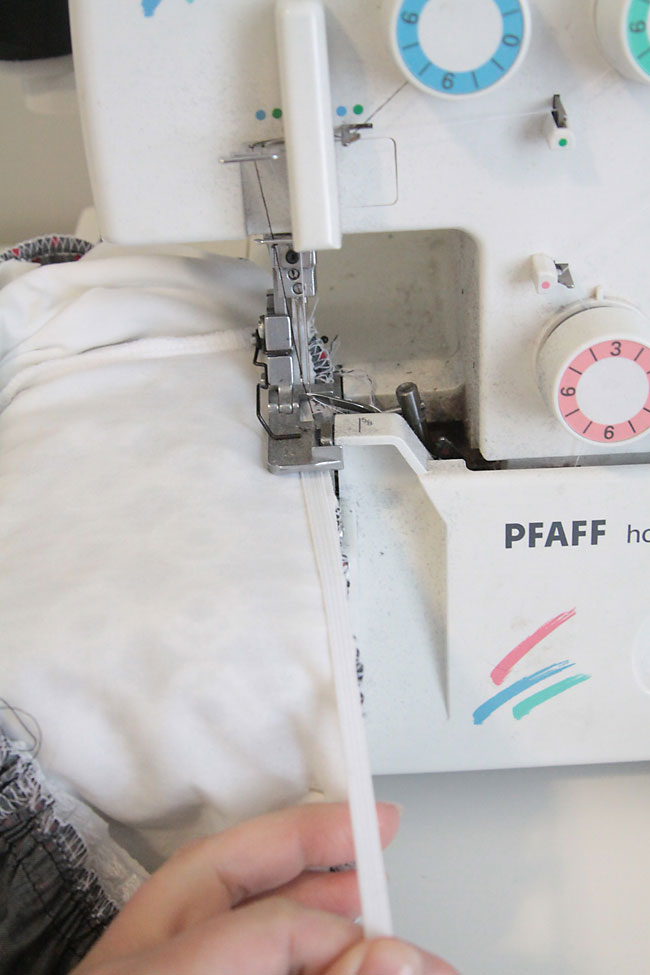
When you get all the way around, just overlap the elastic a bit and trim off any excess. Here’s what it looks like when you’re done (I used a serger, but again, you could just zig zag the elastic onto the seam allowance):

Close up of elastic sewn into waistline


This will pull the waistline in a little more and ensure that the gathered skirt doesn’t stretch out the waist of the dress over time.

A girl wearing a dress made from an easy sewing tutorial

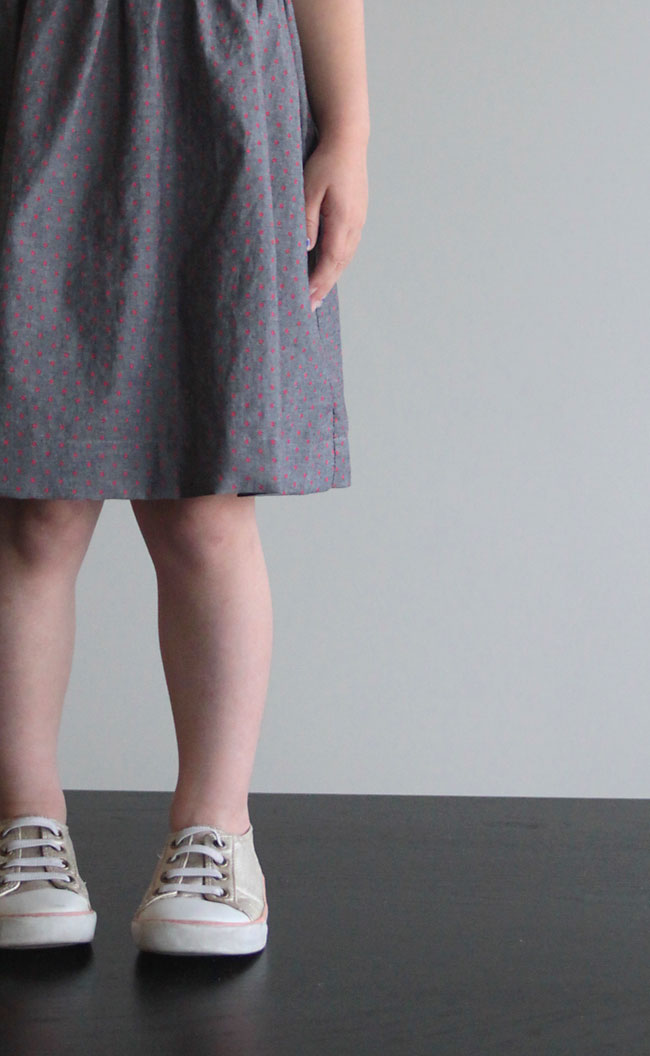
Your final steps are to pull out your gathering stitches and hem the dress. Easy!

PS – I sized down the top from a clearance find at Target, and the skirt is made from this adorable polka chambray from Jo-Ann.

Share this:

  • Tweet
  • Print

Home » sewing » refashion » cute shirt + cute fabric = easiest dress ever


22 Comments

free email series

NO FAIL CRAFTS + RECIPES

Get my favorite EASY craft and recipe ideas straight to your inbox!

« easy DIY race medal holder & display
what to expect when you build a new home »

Comments

  1. Jacqueline says

    May 25, 2015 at 10:27 am

    You know…I’ve noticed that elastic when taking apart a skirt for refashioning, but never before realized what its exact purpose was. Thank you for educating me!

    Reply
  2. Sarah Helene says

    May 25, 2015 at 11:28 pm

    BRAVO for sewing this FAB dress for your girl: white lacy bodice with elastic waist & tiny red polka dots on dark charcoal skirt! Certainly one of the most FANTASTIC little girl’s dresses I’ve seen. As you stated it’s so simple to sew. To know you purchased the top and cut it off so the bottom reaches only to the waistline and then added the gathered skirt with elastic — VOILA, a lovely dress! CLEVER indeed! Your photo shoot is COOL! Thanks for sharing your tutorial. Sarah in Minneapolis

    Reply
  3. Lori M. says

    May 26, 2015 at 12:58 pm

    Well you have done it again….Cute dress for a little girl,,,,but this grandma is going to make one for herself…As always your tutorials are so great to follow along……..

    Reply
  4. MJ says

    July 9, 2015 at 5:57 pm

    I keep checking out blogs looking for lengths or widths for this. How much wider does the skirt need to be than the waist of the shirt? Just personal preference? Also, could you do any of the gathering with the serger, or, better yet, combine the gathering and the elastic in one step? I think my serger or sewing machine has an elastic foot or a gathering foot, but I’m not sure which machine has which foot! I’m just trying to see how do best do this with what I have. Love the tutorial. Thanks.

    Reply
  5. Roopini says

    July 12, 2015 at 10:58 am

    Wow! Cute little dress for adorable girl 🙂 Great tutorial! Simple and fun to sew. Pinning 🙂 Thank you for sharing.

    Reply
  6. Nia says

    September 4, 2015 at 11:04 pm

    I love this. Thanks for the tutorial. I am making dresses for charity – this is just awesome!

    Reply
  7. Rebecca says

    February 23, 2016 at 6:02 am

    Thanks for the super easy tutorial! I used a sewing machine for the first time yesterday and made this dress with mermaid material. My daughter loves it! It seriously took me just about as long to figure out how to put the thread in the machine as it took to make this dress. Great instructions!!!

    Reply
    • autumn says

      February 23, 2016 at 10:40 am

      Thanks, Rebecca! I’m glad it worked for you!

      Reply
  8. Jennifer says

    July 1, 2016 at 4:59 am

    An easier option that I use is stirring elastic. Instead of gathering by hand just sew in two lines of shirring elastic close together. ( hand wind elastic onto bobbin) blast of steam and there it is gathered. Attached bottom to top and your done.

    Reply
  9. A says

    July 15, 2016 at 5:44 pm

    Love the dress. I’m a pretty new sewer and I’m not sure how I could pull out the gathering stitches if I’ve sewn over them to attach the elastic. Please explain a little.

    Reply
  10. Sherryl says

    February 10, 2017 at 5:40 am

    You only need to remove the basting thread that shows. SHERRYL

    Reply
  11. Pia andersen says

    June 11, 2017 at 8:15 am

    This is a beautiful dress. .Thank you for the idea and the tutorial.

    Reply
  12. Linda Sprinkle says

    March 29, 2018 at 7:38 pm

    We make T-shirt dresses with elastic, but we let the elastic do the gathering. We just “quarter match” the skirt and the elastic. (using the bottom of the t-shirt as a measure for the length of the elastic) Then we use a zigzag stitch to sew the elastic to the skirt. Sew on the shirt just like you did. This method makes the gathering easy and even. And the dresses will stretch to fit better.

    Reply
  13. Claire says

    April 16, 2019 at 5:15 pm

    I am sewing a jersey skirt onto a school shirt with collar and buttons, I hope I can do the gathering OK. Thanks very much.

    Reply
  14. Julieanne says

    August 3, 2019 at 5:17 pm

    Thanks so much for this, really helpful!

    Reply
  15. Deborah says

    November 26, 2019 at 6:50 pm

    Thank you so much for sharing these ideas. I will use this simple idea to sew dresses for my girls.

    Reply
  16. Kylee says

    March 11, 2020 at 11:42 am

    So cute!! Just wondering for the pattern, if I were to use eloflex stretch thread for this, would I still need to use a zig zag stitch, or could I use a normal stitch??

    Reply
  17. Rachel says

    April 16, 2020 at 5:44 pm

    I make a lot of dresses for charity and always struggle with the length of the skirt to add onto the top. I buy plain teeshirts, cut them shorter and add a skirt. Is there a rule of thumb for the length of the skirt relative to the length of the top. I do it by eye but sometimes think I don’t get it quite right. Thanks – Rachel

    Reply
  18. Teona says

    August 6, 2020 at 11:26 am

    Where’s the pattern I can use. I have found a lot of dresses that don’t have a pattern so can I have one.

    Reply
    • Bo says

      September 3, 2020 at 4:25 pm

      I don’t know if you still need it because it’s been a while, but this is a tutorial rather than a pattern because there aren’t any pieces you’d need to trace, you just get a rectangle that’s big enough to go around the girl’s waist about one and a half times, and a shirt and gather the rectangle until it’s the same size as the shirt.

      Hope this helps!

      Reply

Trackbacks

  1. 10 Creative Ways To Upcycle Old Clothing - Wild Tussah says:
    May 17, 2016 at 8:39 pm

    […] This is a very useful way to make something cute and fun for your kids to wear. By simply combining two different kinds of fabric with well-matched patterns, you can create a new lovely dress for your little girl to wear at home, or even at school. You can learn how to make it here. […]

    Reply
  2. Suknelės iš kirvio koto. Arba: kaip lengviausiai pasisiūti suknelę. – Akimirkų Gaudyklė says:
    May 12, 2020 at 8:14 am

    […] ši intrukcija:  https://www.itsalwaysautumn.com/cute-shirt-cute-fabric-easiest-dress-ever.html. Čia rasite dar gerą patarimą, kaip patobulinti dvejų dalių susiuvimo […]

    Reply

Leave a Reply Cancel reply

Your email address will not be published. Required fields are marked *

Recipe Rating


Hey, glad you’re here!

I'm Autumn, a mom of five who loves ice cream, Masterpiece Theatre, and clothes that hide the fact that I eat so much ice cream. When I was 18 I got a job at a craft store and told everyone (regularly) how much I hated crafts. Well, things change! Read More…

Find me here

  • Facebook
  • Instagram
  • Pinterest
  • Twitter

free email series

NO FAIL CRAFTS + RECIPES

Get my favorite craft + recipe ideas straight to your inbox!

Popular Posts

101 fun activities that kids can do at home list on a colorful striped background

101 Fun + Easy Activities kids can do AT HOME

50 easy crafts and activities kids can do indoors! Perfect for cold or rainy days.

50 best indoor activities for kids: easy crafts + games

Gorgeous art projects for kids! Easy art that turns out amazing.

20 easy art projects for kids that turn out AMAZING!

Collage of different paper flowers tutorials

How to make GORGEOUS paper flowers

Various flavors of baked mini donuts made from cake mixes

How to make mini donuts! {baked cake mix donuts recipe}

Blog policy

All posts and pictures are copyrighted by Autumn Baldwin and blog content may not be reposted elsewhere. However, linking back to my content is just fine. You may use one photo as long as you link directly back to the specific post. Thank you!

Please view our Privacy Policy here.

Also, please note that this blog is a participant in the Amazon Services LLC Associates Program, an affiliate advertising program designed to provide a means for sites to earn advertising fees by advertising and linking to Amazon.com.

Copyright © 2021 · Divine theme by Restored 316192.168.1.1 router login

Copyright © 2021 · Divine Theme on Genesis Framework · WordPress · Log in

free email series

NO-FAIL CRAFTS + RECIPES

Get my favorite EASY craft + recipe ideas straight to your inbox!

x