It's Always Autumn

creative tutorials for everyday life

  • celebrate
    • back to school
    • birthdays
    • Christmas
    • Easter
    • Halloween
    • handmade gifts
    • July 4th
    • Mother’s Day/Father’s Day
    • Valentine’s
  • recipes
    • bread
    • dessert
    • main dish
    • side dish
  • sewing tutorials
    • gifts
    • how to sew
    • kids
    • patterns
    • refashion
    • women
  • photography
    • photo display
    • photo editing
    • photography tips
    • posing
  • printables
    • holiday
    • LDS
  • books
  • fun for kids
  • tips & tricks
  • FAQ

recipes

cook: soft and chewy french bread with garlic spread

You can make amazing french bread at home with this fool proof recipe! Easy to follow step by step video included.

Hey, if you’re looking for updated photos and a step by step video for this recipe, click here for the updated post!

the best homemade french bread recipe + step by step photo directions on how to make

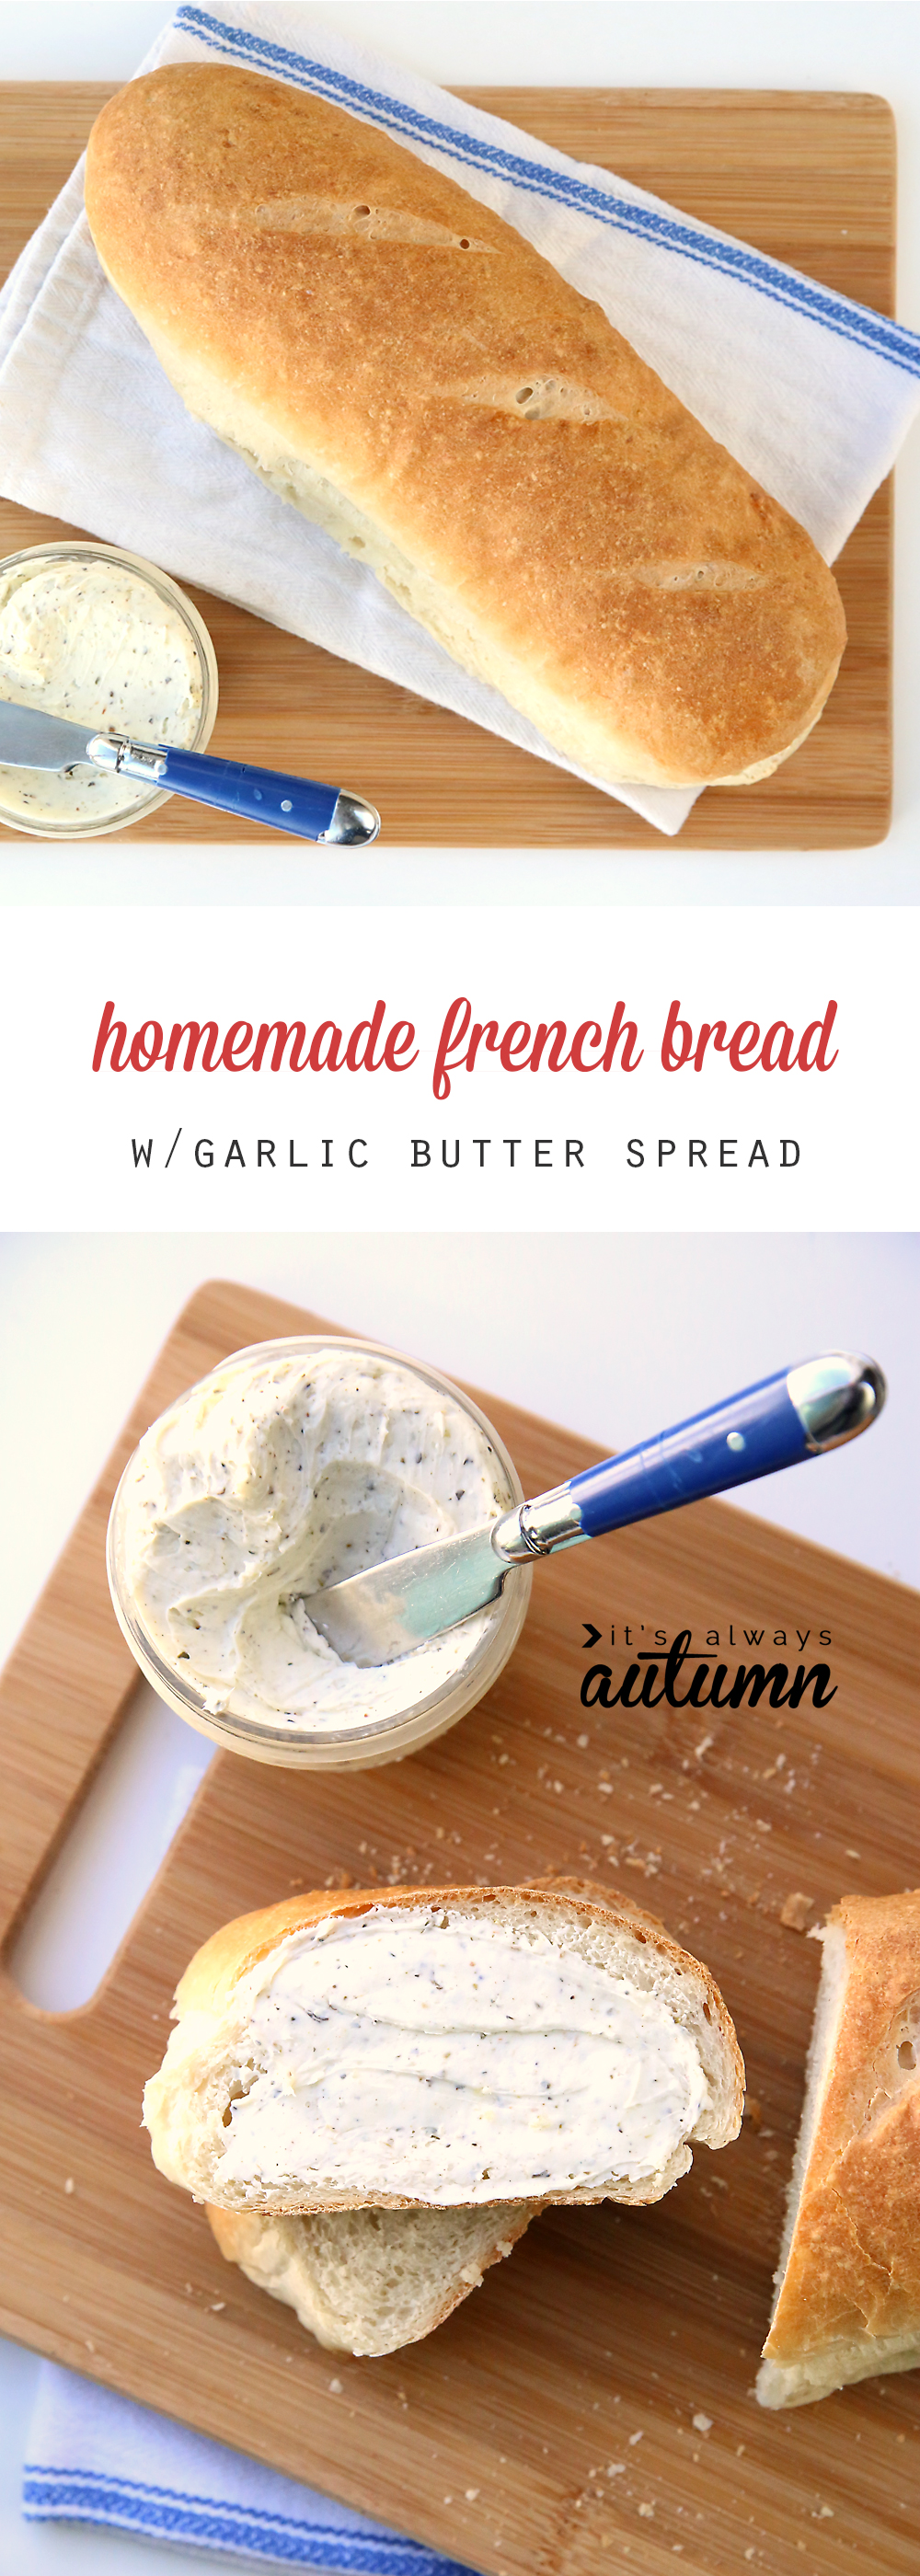
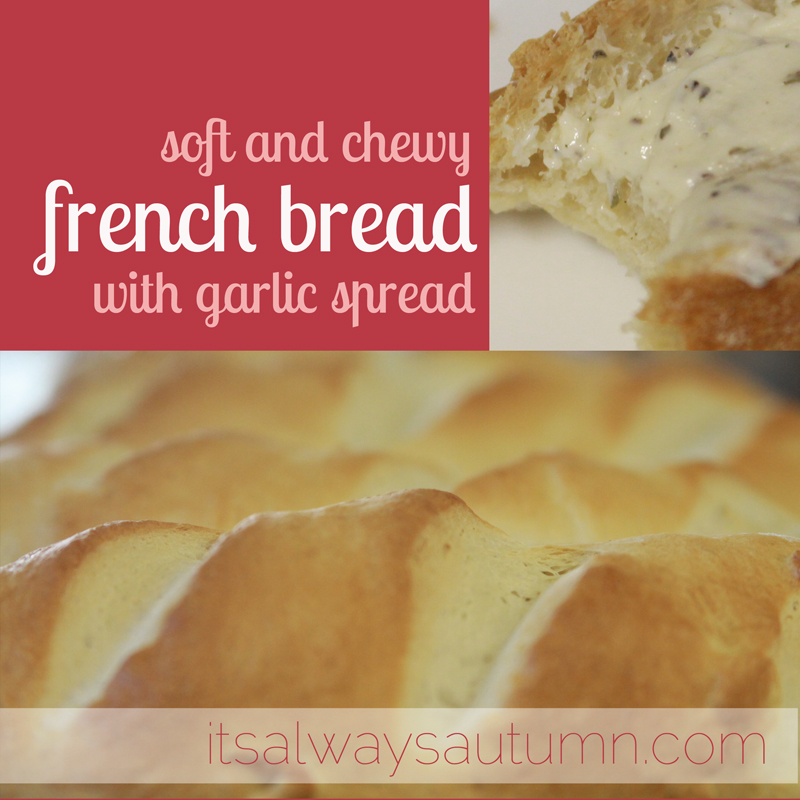
A few years ago on Christmas Eve I had just tucked my kiddos into bed when my doorbell rang. When I opened the door my good friend Cathy was standing there with a warm loaf of french bread and a little packet of what turned out to be the most unbelievably delicious garlic herb spread. She said she thought my husband and I might need a little snack as we were finishing up our last minute Christmas wrapping. And did we ever! We sat upstairs ripping hunks off the bread and slathering it with the butter spread as we we finished all the last minute Christmas Eve tasks (do you not have any of these? You must be more organized than I am.) This was, by far, the best neighbor Christmas gift ever!

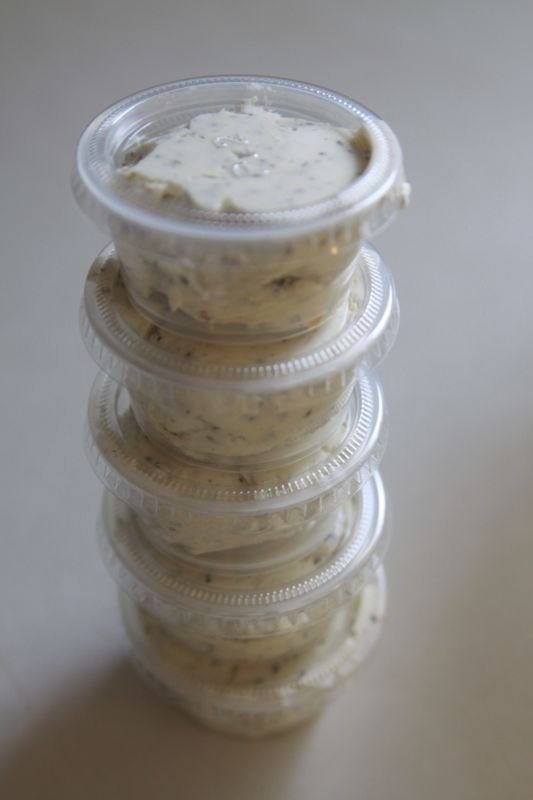
Months later I finally got the recipe from her and I’ve been making it repeatedly ever since. I don’t know if I’ll ever be organized enough to bake bread for my friends on Christmas Eve, but I love to give away one of these loaves every time I make it. Each batch makes 4 loaves and it’s super easy to double to make 8 loaves. One batch of the sinfully delicious garlic herb spread splits perfectly into 8 of these cute portion cups you can buy at the grocery store:

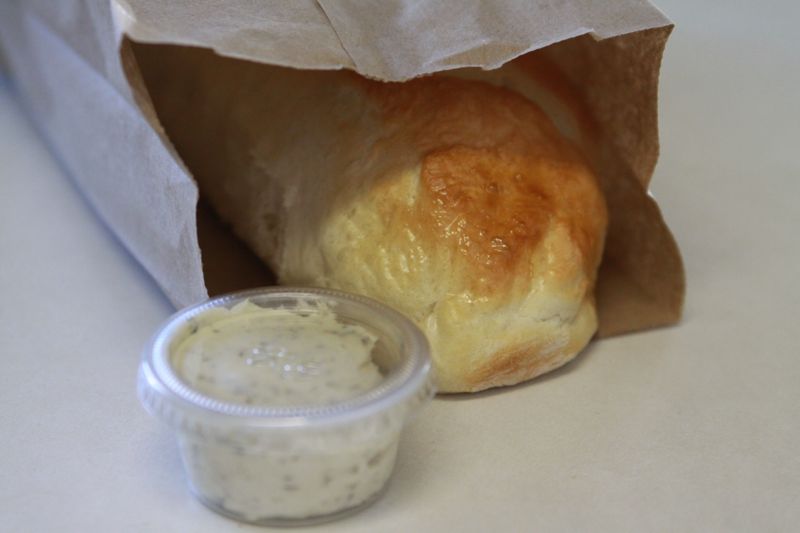
Which means with a little bit of work one afternoon, you can bake up 8 gorgeous loaves of bread and deliver them with garlic spread while they’re nice and warm to anyone you want to cheer up. Or anyone you’d really like a favor from 🙂

Enough rhapsodizing? On to the recipe? Alright, here you go. (I’ve written out the recipes first, then followed with some pictures and more detailed instructions.)

French Bread

1 1/2 T instant yeast

1/2 C very warm water

1 1/2 T sugar

2 C water

1 1/2 T oil

2 1/4 t salt

6 C flour

Combine the yeast, 1/2 C warm water, and sugar, and let proof for ten minutes. (I should admit I’ve skipped this step and thrown everything into the mixer at once, and it’s worked fine.) Then add remaining 2 C water, oil, salt, and 3 C of flour. Mix until flour is incorporated, then add remaining 3 C flour gradually. Knead about five minutes, then turn out onto generously floured surface. Every ten minutes for the next hour knead two or three times. Form into 4 loaves. Brush with beaten egg white. Slash 3 diagonal lines into tops. Raise until double or 30 minutes. Bake at 425 for 10 minutes, then at 375 for 20 minutes.

Boursen Cheese Spread (aka Garlic Herb Spread)

1/2 C butter

8 oz package cream cheese

1 clove garlic, minced

1/2 t oregano

1/2 t basil

1/8 t each dill, marjoram, thyme, and pepper OR 1/2 t poultry seasoning

Let butter and cream cheese come to room temperature, then stir all to combine.

And here are my additional comments:

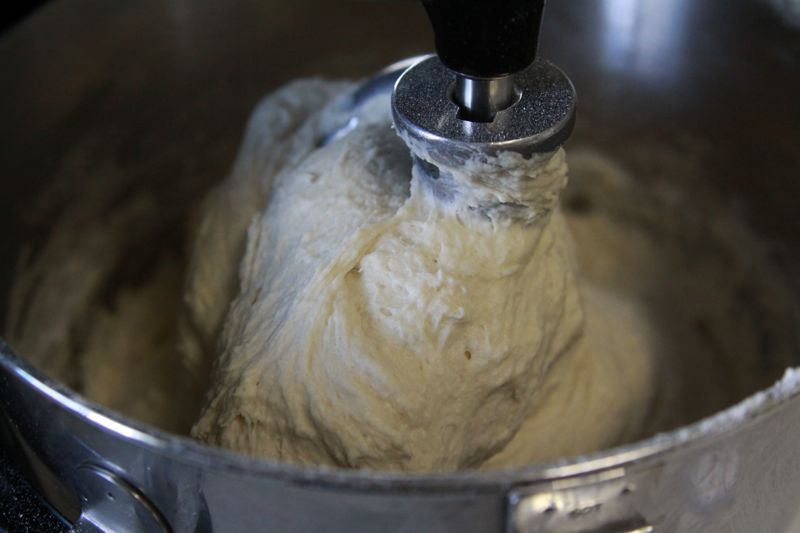
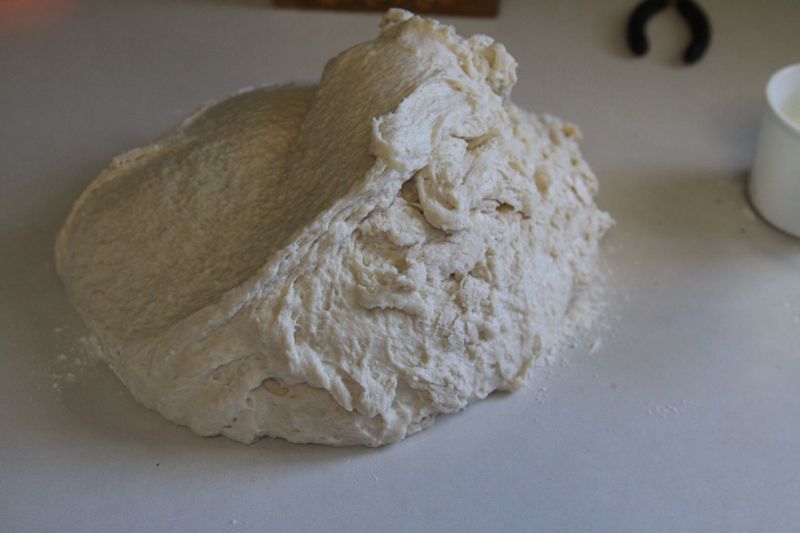
It can be hard to know just how much flour to add when you’re making bread. I use the scoop and level method to measure my flour, and 6 C always ends up being just right for me. Some bread recipes tell you to keep adding flour until the sides of your bowl come clean – don’t do that for this recipe! This bread is incredibly tender, which means the dough is going to be softer and stickier. You’ll see in the picture below that much of the dough is hanging onto my dough hook, but some is still stuck to the sides and bottom of the bowl.

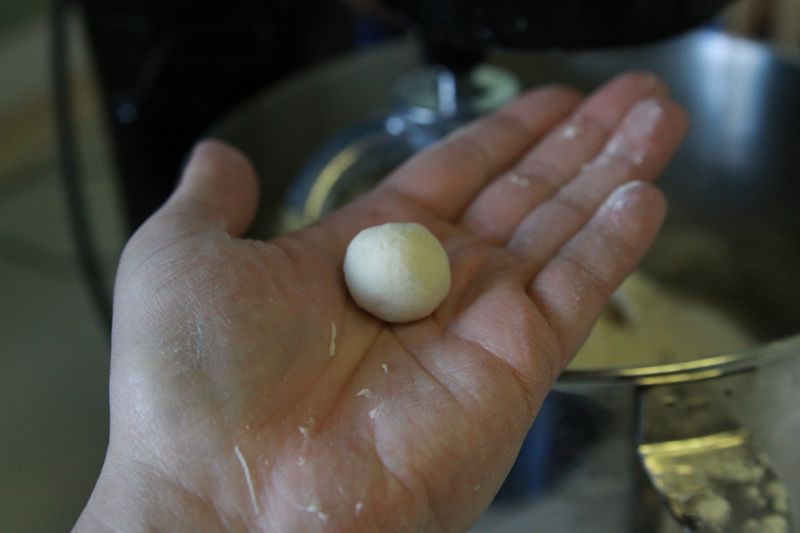
You can tell you’ve added enough flour and you’ve kneaded the dough long enough when you can pinch off a small bit and easily roll it into a little ball in the palm of your hand. It will still be a little sticky to the touch, but not so sticky you can’t roll it into a ball.

Because it’s a soft dough, I find a rounded plastic scraper handy in pulling it out of the bowl…

…and onto a well floured surface. It doesn’t look finished kneading yet…

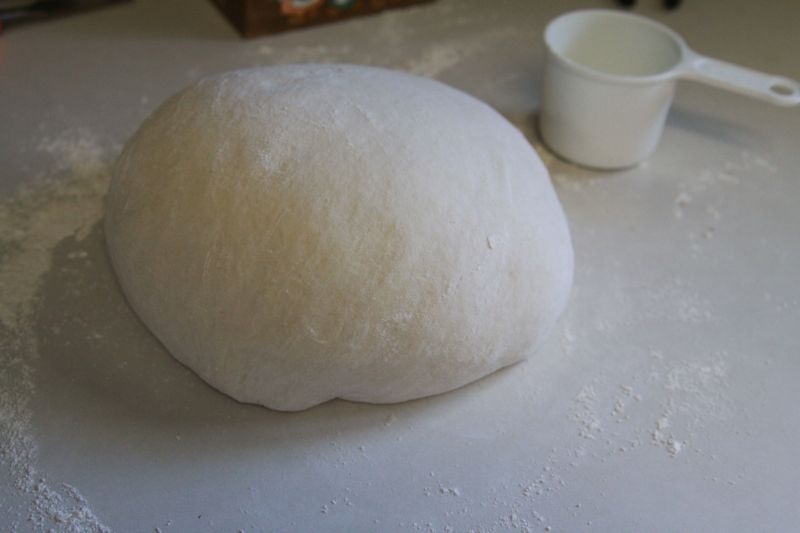
…but once you give it a quick roll in the flour you’ll be able to shape it into a nice ball.

Now comes the part that gives the crust a nice, characteristically french bread chewiness. Let the dough rest for 10 minutes, then come back and knead it two or three times. Just punch it down and fold it over a few times, then gather it back into a ball. Come back every ten minutes for an hour (so if you pulled the dough out of your mixer at 3:30, your last quick knead will be at 4:20 and the dough will be ready to shape at 4:30). It sounds like a lot of work, but if you’re going to be home anyway it only takes about 30 seconds to walk into the kitchen, knead three times, and walk back out. AND it’s not crucial that the kneading takes place at exact ten minute intervals, and it’s not crucial that you do it for exactly an hour. Just make sure you come back at least four times in the next hour to punch and fold it a few times.

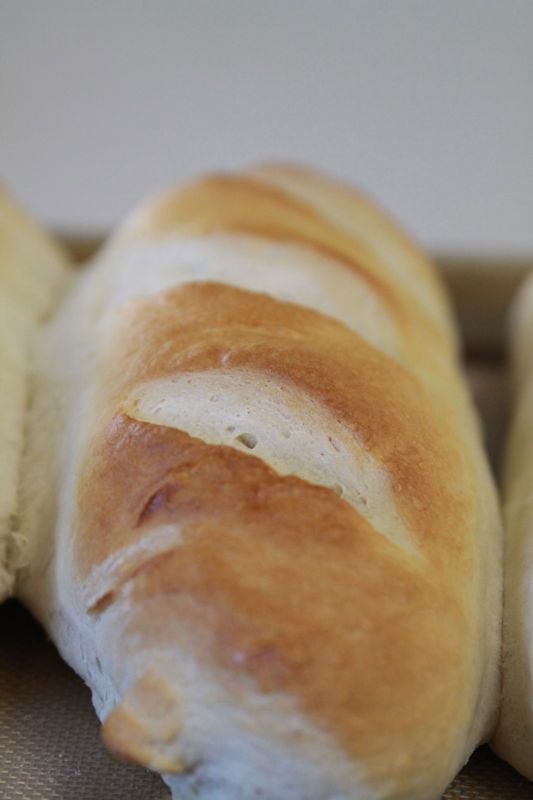
When you’ve hit an hour, divide the dough into four even pieces. Push each piece into a rough rectangle shape, then roll it up and pinch it so it stays together. Place it pinched side down on a greased or lined cookie sheet. Then beat one egg white with a dash of water and brush the egg mixture over the loaf (or just use your hands to spread it over the loaf like I do if you don’t have a pastry brush). Get it all covered – anything not covered with the egg mixture will end up pale and sickly looking.

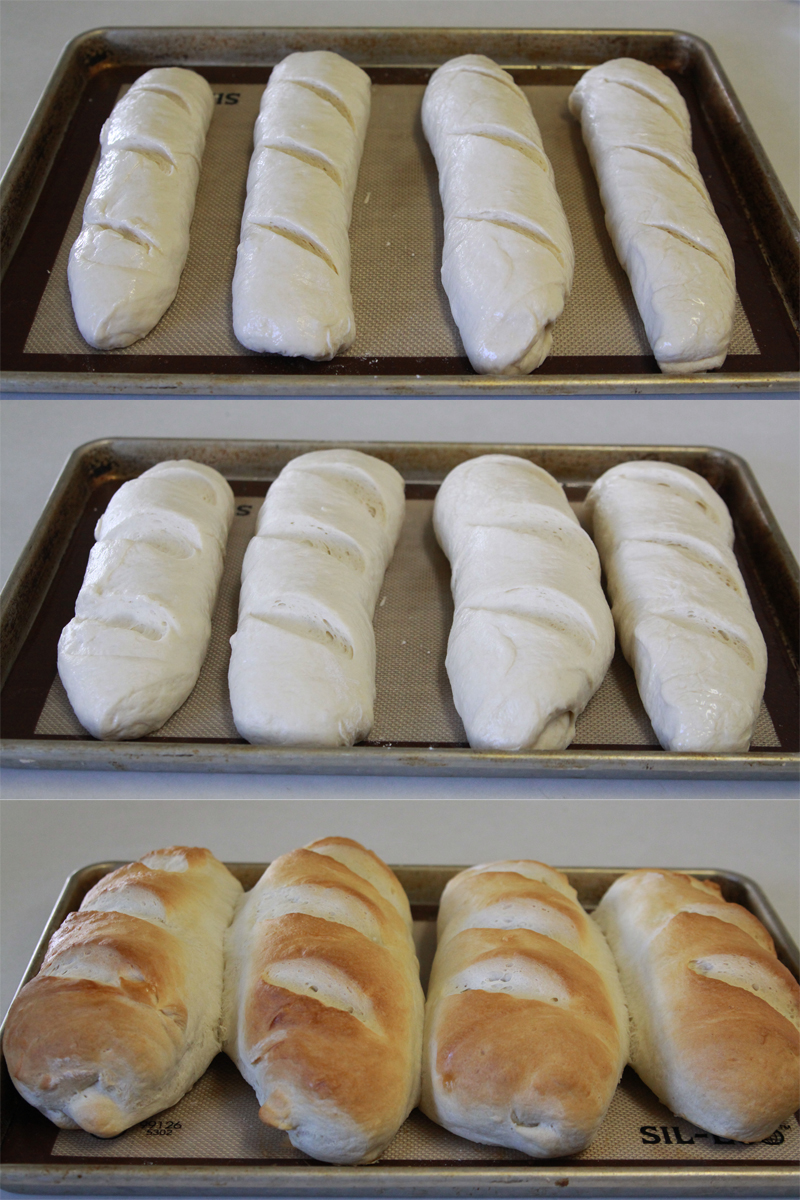
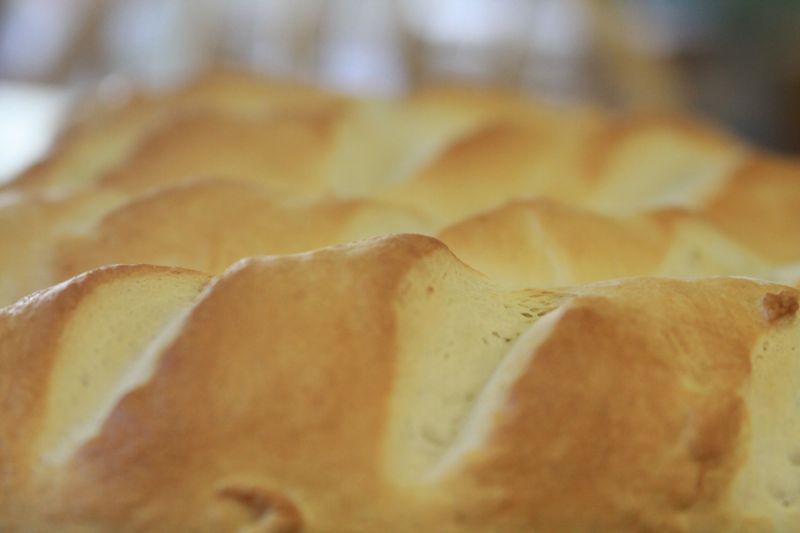
You’ll let it rise for about half an hour, (preheat the oven during this rise), then bake for 10 minutes at 425 degrees, then turn the oven down to 375 and bake for 20 more minutes. The picture above shows what the loaves look like when shaped, then after the 30 minute rise, then after baking time.

Your house is going to smell like heaven at this point.

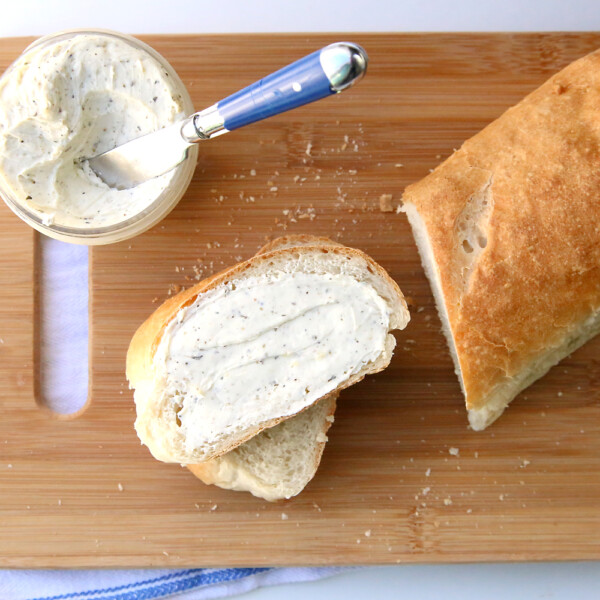
Hopefully, while the bread was rising you also mixed up your garlic herb spread…

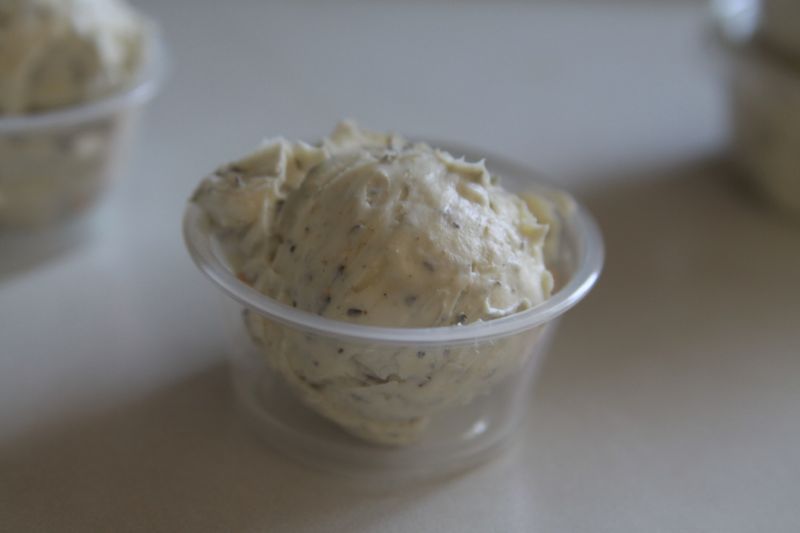
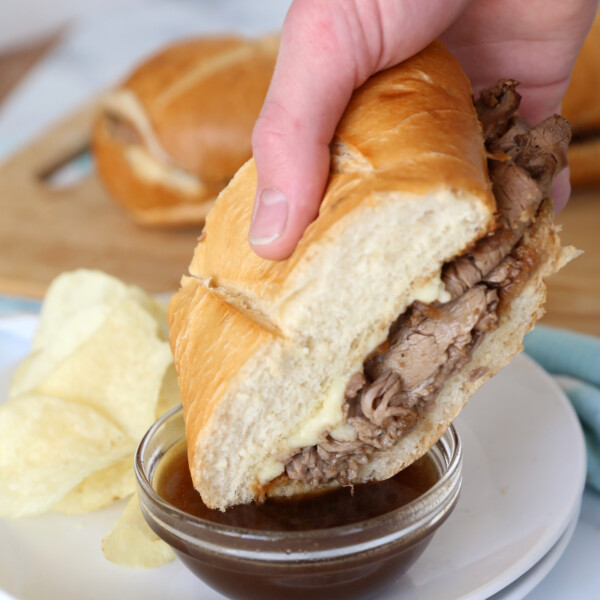
…so the devouring can begin immediately.

Note: If you decide to double the recipe, you can bake two sheets of loaves at once, but you may need to increase your bake time, and you’ll definitely want to switch which loaf is on the top rack at least once during baking time. Enjoy!

Linked up at:

Tickled Pink

Tatertots and Jello

Somewhat Simple

Whipperberry

Simple Kierste

You may also like:

  • amazing homemade french bread and garlic spreadamazing homemade french bread and garlic spread
  • the very best dinner rolls recipe + video tutorialthe very best dinner rolls recipe + video tutorial
  • Amazing braided bread recipe {easy + delicious!}Amazing braided bread recipe {easy + delicious!}
  • 20 delicious bread recipes20 delicious bread recipes

Share this:

  • Tweet
  • Print


190 Comments

« make: restore your sanity in 15 minutes {add loops to towels for easy hanging}
sew: the blue linen dress refashion »

Comments

  1. Melinda T says

    April 26, 2012 at 12:04 am

    Yum! I love french bread! And the garlic spread sounds delicious! Will have to give this a try!

    Reply
    • Cassidy says

      June 8, 2014 at 11:33 am

      Would it be okay to freeze the extra dough if I don’t need 4 loaves at one time?

      Reply
      • autumn says

        June 9, 2014 at 2:03 pm

        Cassidy – the answer is probably yes. I think someone else in the comments mentioned that she did just that. I’ve done that with lots of other bread recipes and it works out fine, but I haven’t tried it with this specific recipe. You’ll want to go all the way through shaping the loaves, then freeze the loaves you don’t want to bake (on a greased cookie sheet, then transfer to a freezer bag when hard). Then when you want to bake the frozen loaves take them out of a freezer and place back on a greased cookie sheet. It will probably take 4-5 hours at room temp for them to thaw completely and then rise. Then add the egg wash and bake as directed. If you try it, come back and let us know how it goes!

        Reply
        • Isa Kegel says

          September 30, 2015 at 8:12 am

          They came out fabulous! I baked the four loaves and froze two to use later in aluminum foil. Afterwards, thaw in the fridge and heat them in a warm oven. They taste as just baked!
          Also for the next time I would cut down on the salt as they came out a bit salty for other than garlic spread.

          Thanks so much for the recipe! It’s now a family favorite!

          Reply
        • Doreen J says

          December 30, 2017 at 12:14 pm

          Why can’t I print this recipe?

          Reply
  2. caprice says

    April 26, 2012 at 12:04 am

    so if I rub an egg/water mixture all over my body will it keep my legs from looking white and sickly on my cruise? just wondering… I’m taking lasagna to a friend tomorrow and this will be perfect to go with, thanks!

    Reply
  3. autumn says

    April 26, 2012 at 12:04 am

    I think that if you bake your legs for half an hour after you rub them with the egg whites they probably won’t like pale and sickly anymore! lol. I’m so jealous about the cruise!

    Reply
  4. Barbara says

    April 27, 2012 at 12:04 am

    I’ve never made bread but this is a recipe I think I can start with. I clicked over from Pinterest because of a jumper refashion that I loved. Enjoyed your blog. I’ll be back to visit.

    Reply
    • Isa Kegel says

      September 30, 2015 at 8:14 am

      I made them as my first bread ever and loved it! Good luck!

      Reply
    • Mary Howell says

      September 20, 2017 at 9:23 pm

      Me too! I’m hoping to start mixing this recipe up in about 20 minutes after i get my hubby hooked up and rolling on his dialysis machine. he loves homemade anything!

      Reply
  5. Denise says

    April 29, 2012 at 12:04 am

    Mmmmmm … if I weren’t feeling so lazy right now I’d go make it! 🙂

    Reply
  6. Kara says

    January 25, 2014 at 3:13 am

    Would it change the texture any if I was to use part whole wheat flour and part white flour?

    Reply
    • autumn says

      January 25, 2014 at 7:54 am

      Hi Kara! I’ve made this recipe before with half and half wheat and white and it only slightly changes the texture – they are still soft, but not quite as heavenly 🙂 I find it changes the taste more than the texture, but if you’re used to a whole wheat taste you might not even notice it. If you try it out come back and tell us what you think!

      Reply
  7. Amy says

    January 25, 2014 at 9:26 am

    Do you think you could skip the egg wash and brush with melted margerine instead? Or just skip it and maybe it wouldn’t look as pretty but still taste good? We have an egg/milk allergy and this is otherwise an allergy friendly recipe for us!

    Reply
    • autumn says

      January 25, 2014 at 3:46 pm

      Yes, I’m sure you could skip the egg wash – they’ll just be lighter in color and perhaps a little softer on top, but I don’t think they’ll taste any different. I’ve also read that heavy cream works great as an egg wash substitute, you know if you happen to keep that on hand 🙂

      Reply
      • Beth says

        May 26, 2014 at 11:34 pm

        Hi. Im hoping to try out this recipe. Im actually a baker for a living and do breads every day at work but have yet to do it at home. Who wants to go home and do the same thing theyve done all day at work. I was gonna use this recipe and tweak it a bit (mostly adding some things to it) but noticed this comment about an egg allergy. You can spray the loaves generously with water right before baking and that would help create a nice gold crust. We use steam at work but thats the closest thing you will get to steam without the proper oven. As far as heavy cream, we use half n half on scones to get them golden. Not sure it would work on bread. Hope this helps.

        Reply
        • autumn says

          May 27, 2014 at 7:18 am

          Thank you!

          Reply
        • Charity says

          October 31, 2015 at 5:46 am

          Hi! I have never made French bread, but am looking forward to trying this recipe!! Thanks also for your tips! I never knew about using the water to replace an egg wash!
          My favorite French bread is “everything” like an everything bagel. Any suggestions for adding the “everything” toppings? Thanks!! ???

          Reply
      • Jo Ann says

        June 15, 2014 at 12:15 am

        I make bread all the time and I never brush it with anything. I find it unnecessary. The crust is a beautiful color and texture without anything brushed on it. If you are looking for a hard crust, place hot water in a shallow pan in the oven with the bread while it cooks. The steam creates a hard crust on the bread. You can also squirt the bread every 5 minutes while it is cooking with a spray bottle filled with water. This will also create a hard crust.

        Reply
      • Michel says

        July 10, 2014 at 11:14 am

        You can use coconut oil melt and brush.

        Reply
  8. Tanya says

    January 25, 2014 at 8:17 pm

    Made this bread tonight and took over to friends for dinner while still hot, it was so delicious that 2 1/2 loves are gone already!!!!
    Thanks for the great recipe!

    Reply
    • autumn says

      January 25, 2014 at 10:05 pm

      Awesome! I bet you’re popular with your friends tonight 🙂

      Reply
  9. aly Britt says

    February 3, 2014 at 11:43 am

    The bread and cheese spread turned out wonderful. Great recipe and so easy. Great recipe to keep and share!

    Reply
    • autumn says

      February 3, 2014 at 11:50 am

      Thanks for letting me know – I love to hear that things work out well for people!

      Reply
  10. Nativa says

    February 3, 2014 at 12:54 pm

    That was sooo good and easy! I didn’t have the ingredients on hand for the spread but I plan on purchasing them for next time! Thank you for sharing! my 3 year old nearly ate an entire loaf. If I can make it with whole wheat and it still tastes good I won’t be purchasing bread anymore! Maybe whole wheat pastry flour will do the trick.

    Reply
    • autumn says

      February 3, 2014 at 3:10 pm

      Tell me if you try it with whole wheat flour – I’ve never tried that before and I’d love to know how it works. I’m glad you guys liked the bread so much – I can eat almost an entire loaf myself!

      Reply
    • Lynette says

      October 5, 2016 at 5:02 pm

      Nativa, I wouldn’t suggest that you use whole wheat PASTRY flour. The gluten (protein) content of pastry flour is low in order to make tender baked goods. You need the higher protein content of standard flour so that the bread rises and holds the air in the little carbon dioxide bubbles as it does so. But standard whole wheat flour would be wonderful in this recipe, I’m sure! It won’t be quíte as soft as all white flour, but much more tasty…and a lot more nutritious! Sorry this response is so tardy. Just discovered autumn’s blog! Saw it on pintrest!

      Reply
  11. LISA says

    February 17, 2014 at 8:16 am

    CAN YOU MAKE THIS RECIPE BY HAND? I DO NOT YET OWN A STAND MIXER, BUT WOULD LOVE TO GET ONE SOON

    Reply
    • autumn says

      February 17, 2014 at 5:16 pm

      Yes, Lisa, you can make just about any bread recipe by hand. Just use a wooden spoon to mix the all the ingredients together, (but start with 3 C of flour as described in the recipe). Add in the remaining 3 cups of flour gradually – you might get to the point that you can’t keep stirring with the spoon before you’ve added it all it, which is just fine. Just dump it out onto a floured surface and knead by hand, continuing to gradually add in flour as needed. It takes longer to knead by hand than with a stand mixer, but you certainly can do it!

      Reply
  12. Sharon says

    February 17, 2014 at 2:45 pm

    I wonder how this recipe would do in a bread machine for making the dough. Sounds delish!

    Reply
    • autumn says

      February 17, 2014 at 5:25 pm

      I’m sure you could use a bread machine to make the dough, but you’ll still want to let it rise on the counter so you can give it a few extra turns every 10 minutes for an hour. That’s what helps build the classic “french bread” structure (soft inside, crusty outside). Good luck!

      Reply
  13. SoozeM says

    February 17, 2014 at 9:48 pm

    Mmm it looks really good! If I was feeling really lazy and wanted to cheat could I leave the dough in the stand mixer and just turn it on for a few seconds every 10 minutes instead of doing it by hand? Not much bench space + kids + dough = disaster 😉

    Reply
    • autumn says

      February 18, 2014 at 7:09 am

      I don’t see why you couldn’t! Give it a try and let us know how it works. And BTW my daughter will totally eat bread dough that I’ve left out to rise – gross!

      Reply
    • Georgia says

      January 29, 2016 at 5:30 pm

      How did the bread turn out leaving it in the mixer as opposed to kneading it by hand?

      Reply
  14. Nichole says

    February 26, 2014 at 3:00 am

    Hi. So made this bread and my dough did not rise. I was wondering what could have caused it to not rise because I followed the instructions and my dough looked just like in the picture and yet, it still didn’t rise.. Although the dough didn’t rise, the bread still came out delicious! If you could please get back to me on what you think could have happened, that would be great! Thank you.

    Reply
    • autumn says

      February 27, 2014 at 6:05 am

      Hmmm – if it didn’t rise there must have been a problem with the yeast. I usually don’t “proof” my yeast first, just because it’s extra work (that’s the step when you let the yeast dissolve in warm water, usually with a bit of sugar, for 10 minutes to see if it starts to get bubbly) BUT you’ll probably want to do that next time you try this to make sure you’re yeast is still good. If it doesn’t start getting puffy as it dissolves, you need new yeast. The other reason could be that you used very hot water instead of warm water – very hot water will kill the yeast and then it won’t rise. My mom used to always tells me the water should be quite warm to the touch, but not so hot it’s uncomfortable to touch. Sorry it didn’t quite work out, although I’m glad it still tasted good. I made this once and forgot the salt and it was AWFUL! All that work for nothing. Anyway, better luck next time, right? 🙂

      Reply
    • July says

      May 27, 2014 at 4:52 pm

      It could be that you used active dry yeast, rather than instant yeast. If you use active dry yeast, then you need to let it proof by letting it sit in warm water with some sugar (leaving all stated measurements the same… in other words follow the recipes instructions for proofing.) for 10 minutes. I had to do this, too. Also, I used coconut sugar rather than refined sugar (a 1:1 sugar replacement) for both proofing yeast, and the actual bread.
      P.S. If your yeast doesn’t grow or double in size during those 10 minutes, then its no longer active. Basically, you need new yeast.

      Reply
      • Paula says

        June 1, 2014 at 1:17 pm

        I had the same issue with my bread not rising. I did proof my yeast and it did double in size but I think I may not have used enough. The ‘T’ is that for teaspoon or tablespoon? I went with teaspoon. My bread came out very heavy and dense, tastey but lol brick like.

        Reply
        • autumn says

          June 1, 2014 at 4:56 pm

          So sorry about that! Uppercase T is for tablespoon, and lowercase t is for teaspoon. I’ll have to start specifying that in my recipes so people don’t get confused. I hope you give the bread another try!

          Reply
  15. Graham Smith says

    February 28, 2014 at 7:26 pm

    So, I believe i’m a decent cook but far from a baker. This recipe was easy though and worked out wonderfully. The bread was great ( a little lumpy though, no mixer); light, fluffy and great taste. I really appreciate quality recipes like this one, which includes the photos and step by step instructions. Really made it easier for me and fun to make with my son. Thank you for the time you took to make this.

    Reply
  16. megan says

    March 1, 2014 at 12:01 pm

    Im using active yeast in the little pouches..would it be two ?

    Reply
    • autumn says

      March 1, 2014 at 12:20 pm

      Yep! Each pouch has 2 and a quarter teaspoons, so 2 pouches is 4.5 teaspoons – same as 1.5 tablespoons.

      Reply
      • megan says

        March 1, 2014 at 12:29 pm

        Thank you! ! 🙂 making tonight

        Reply
  17. Dawn says

    March 3, 2014 at 7:52 am

    Sometimes yeast will not proof if the water is too hot, you kill the yeast. I also made this by hand and it worked great!

    Reply
    • autumn says

      March 5, 2014 at 3:37 pm

      I’m so glad it worked out for you – thanks for letting us know!

      Reply
  18. Donna says

    March 15, 2014 at 3:13 am

    Hi … I’m just wondering if you could please clarify your measurement abbreviations … Is T a teaspoon or tablespoon? And is C a cup (and if so, is it a 250ml size cup).
    Thanks.

    Reply
    • autumn says

      March 17, 2014 at 1:30 pm

      Hi Donna! T is a tablespoon (lowercase t is a teaspoon) and C is a cup, which is the standard US 8 fluid oz cup (and I believe that is indeed 250ml). Thanks!

      Reply
      • July says

        May 27, 2014 at 4:47 pm

        1 cup (8 oz.) is 237 milliliters, or 16 Tablespoons if you wanna go through all that work. 🙂 Making this for my moms birthday dinner! with spaghetti and meatballs!

        Reply
  19. Colleen says

    March 16, 2014 at 9:50 am

    I made this bread last week and it was a HUGE hit with my family. I gave two loaves to my in-laws; my father-in-law ate an entire loaf in one sitting! I am making it again today- I only had regular yeast on hand. I subbed 2 TBSP of regular dry active yeast and followed the directions as you outlined. It seems to have produced the same results!

    After doing a little research, I think using the amount of yeast in the original recipe would probably work with regular yeast because the recipe calls for proofing the yeast. I’m curious to know if you’ve tried regular yeast and if so, how you altered the recipe and how was the final product. Thanks!

    Reply
    • autumn says

      March 17, 2014 at 1:25 pm

      Colleen – I think you’re right that you can use regular yeast – I’m pretty sure I’ve used regular dry active yeast and instant yeast interchangeably and had the same result. I’m so glad your family loved it!

      Reply
  20. Hannah Fogarty says

    March 16, 2014 at 11:20 am

    I’m making this for the second time in a week! I took half of the first batch to my Aunt and Uncle and their kids, the loaves were gone in about an hour. The butter spread is so amazing! I’m so glad I didn’t skip it! I used chive onion cream cheese and it added good flavor! We also spread it over the bread and then toasted it under the broiler for a few, it was so amazing!!

    Reply
    • autumn says

      March 17, 2014 at 1:23 pm

      Hannah you’re making me hungry! I best it’s amazing broiled with the spread, and adding chive onion cream cheese sounds like a stroke of genius.

      Reply
  21. KimbeRly says

    March 17, 2014 at 7:06 am

    What kind of oil do you use? Is it vegetable oil or olive oil?

    Reply
    • autumn says

      March 17, 2014 at 1:19 pm

      I used vegetable oil, but I’m sure olive would work just fine!

      Reply
  22. Meghan says

    March 20, 2014 at 3:17 pm

    I just made this for the first time, and I have to say, this bread was the easiest to make ever! Then the last step went wrong. My loaves expanded out and not up, So they are sort of flat looking, and got a little bubbly/bumpy. Any ideas? I have yet to taste them, though besides the mentioned deformities they look pretty good!

    Reply
    • autumn says

      March 24, 2014 at 4:13 pm

      Meghan, I’m not sure what caused the problem but my best guess would be that you didnt knead quite long enough. Kneading develops gluten, which is what helps the bread hold it’s structure as it rises, so if the loaves did expand but went out instead of up that might mean the gluten structure wasn’t strong enough. Let me know if you try again!

      Reply
  23. ceci says

    March 23, 2014 at 9:54 am

    I made some over the weekend for the first time, We had friends and family over and it was amazing. Thank you, so much for sharing it’s heavenly as you state. I paired it with the butter, lots & lots of complements. And, the aroma in the house as it baked, made every one even more excited. Dinner could have just been the bread & butter…………….. Thank you!!!!!!!!!!

    Reply
    • autumn says

      March 24, 2014 at 4:07 pm

      Isn’t it fun when everyone LOVES something you baked? And I would totally eat fresh baked bread and butter for dinner every night if I could et away with it 🙂

      Reply
  24. Kara says

    March 24, 2014 at 4:25 am

    Love this recipe! I was trying to prepare sunday dinner, clean up and help my kids plant seeds (they all want their own mini vegetable garden) while trying this recipe for the first time- I messed up and put too much water in. After panicking I just eyeballed and guessed adding ingredients to make up for the excess water and it still came out amazing. I will never buy store bought french bread again AND my family thinks I’m a culinary genius- THANK YOU! 🙂

    Reply
    • autumn says

      March 24, 2014 at 4:05 pm

      Oh I’m so glad it worked out! I know what it’s like trying to cook and do a thousand other things at once – I did that once with this bread and left out the salt and it tasted terrible 🙁 so I’m glad yours worked out.

      Reply
  25. Eva says

    March 29, 2014 at 8:53 am

    I have a silly question do you use bread flour or regular all purpose flour for this recipe

    Reply
    • autumn says

      March 29, 2014 at 7:56 pm

      I always just use regular all purpose flour – good luck!

      Reply
  26. Yvonne says

    April 4, 2014 at 7:06 pm

    If you don’t bake the entire batch, can you freeze or refrigerate the left over dough? If so, in an airtight container?

    Reply
    • autumn says

      April 8, 2014 at 6:37 am

      Hi Yvonne! I haven’t frozen this dough, but I regularly freeze dough for my other bread recipes, so I imagine it would work. I would make it through to the shaping, then put it on a greased cookie sheet and freeze until firm, then place the dough “log” into a ziplock freezer bag. Then you’ll have to experiment with how long it takes to defrost and rise – I’d take it out of the freezer and put it back on a greased cookie sheet and maybe cover with a barely-damp cloth and let it defrost/rise on the counter. It will likely take 4-5 hours or so. Then add egg wash and bake. If you give it a try, come back and let us know how it works! Oh, and one other thing – I find that if I leave bread dough in the freezer for too long (like longer than a month) it doesn’t rise as well anymore, so don’t wait too long before cooking the frozen dough!

      Reply
  27. olga says

    April 8, 2014 at 3:11 pm

    I don’t know if I posted comment before regrading this recipe or not, but I just want to share that this have become our family favorite bread recipe. Very easy to make, and taste awesome. Matterofact I barely buy bread now. Thank you! Haven’t made the butter yet though, but I’m going to try that as well.

    Reply
    • olga says

      April 8, 2014 at 3:13 pm

      I forgot to mention that I make two loafs instead of four and they come out perfect every time.

      Reply
  28. jesi says

    April 10, 2014 at 3:46 pm

    This recipe was super easy to make. I love to cook and to bake but for some odd reason I’ve always been intimidated by bread recipes. Thank you for helping overcome this hurdle 🙂 next time I make my baked potato soup I’m going to USA this recipe to make bread bowls

    Reply
    • jesi says

      April 10, 2014 at 3:48 pm

      Use not USA….stupid phone lol

      Reply
    • autumn says

      April 20, 2014 at 2:56 pm

      Thanks, Jesi! I’m glad it worked out – bread’s really not that hard once you get used to it!

      Reply
  29. Betsy says

    April 15, 2014 at 3:36 pm

    I just made this and it is so delicious! I just got a stand mixer and have been experimenting with pizza dough, but this was my first try at bread. Pretty easy and it comes out perfectly crispy on the outside and soft on the inside. I cut the recipe in half and just made two loaves. My dough was dry at first so I added a little water which was too much so I added flour teaspoon by teaspoon until the dough looked like the picture. It still worked great so it must be pretty forgiving! Didn’t make the cheese spread for fear my bread wouldn’t turn out, but next time I will.

    Reply
    • autumn says

      April 20, 2014 at 2:38 pm

      Oh, Betsy, you HAVE to try the cheese spread! It’s so crazy delicious. I’m glad your bread turned out so well!

      Reply
  30. Stephanie says

    May 7, 2014 at 10:50 pm

    I feel like this is a stupid question, but does the bread need to be in the warmish oven to rise, or can it rise at room temperature?

    Reply
    • Stephanie says

      May 7, 2014 at 10:56 pm

      Also, does margarine work for butter in the spread?

      Thanks!

      Reply
      • autumn says

        May 8, 2014 at 3:40 pm

        I don’t like margarine, so I’ve never tried it – but I don’t see why you couldn’t use it. I’ll bet it’s better with butter though 🙂

        Reply
    • autumn says

      May 8, 2014 at 3:39 pm

      Room temp is great!

      Reply
  31. dee says

    May 11, 2014 at 3:53 pm

    Seriously the best bread in creation. .I could not belive I really made it. .I added sesame seeds to 2 loaves. This was nice and crunchy on the outside and soft on the inside. . The only thing is. . It was fine after the first 10 min at 425…so delicious. .I froze 2 loaves… can’t wait to make again. .. thank you for the recipe…

    Reply
    • autumn says

      May 11, 2014 at 8:54 pm

      So awesome! Don’t you love when something turns out so well? Thanks for letting me know it worked!

      Reply
  32. dee says

    May 15, 2014 at 3:57 am

    How can it be that the frozen loaves were even more delicious….OMG!!!! Making 8loaves this weekend..you’ve created a monster!!!!

    Reply
    • autumn says

      May 15, 2014 at 3:26 pm

      Awesome! So did you freeze the dough, then let it thaw, rise and bake? Or did you freeze the actual bread after baking?

      Reply
      • Dee Freeman says

        May 17, 2014 at 2:43 pm

        The Bread After I Baked it…
        I’m making 8 loaves right now and will be freezing 6 of them

        Reply
  33. Dana says

    May 16, 2014 at 10:37 pm

    Hi,
    I just can’t wait to make this delicious looking french bread 😉 lots of gym time afterwards I am sure, but it will be worth it 🙂 will let you know how they turn out 🙂 BIG THANKS FROM A BREAD EATING MONSTER 😉 HAHAHA

    Reply
  34. La Nae Steele says

    May 24, 2014 at 6:17 am

    a lot of the recipes I have seen, I would love to have the recipes for They all look so delicious

    Reply
  35. Kristen says

    May 27, 2014 at 9:31 pm

    I just wanted to say that this is my all time favorite bread recipe! I make this at least once a week. However somehow I’m doing something wrong as no matter what I do, I only end up with enough dough for two-three loafs! However, they are the best loafs of bread ever!

    Reply
  36. JuliA rYan says

    May 30, 2014 at 11:39 am

    I’m making this bread right now, and am loving it! I have a big family, and I often make 8 loaves of regular bread. This evening we are going to have a campfire with hot dogs and with my wrist in a brace right now I couldn’t make actual hot dog buns. So, I thought “why not make French bread as a ‘sandwhich’ with the hot dogs?” 😀 At this moment, I’m just about to put it in the oven. This is the best bread dough I ever made! It was fluffy and airy. Very easy to make and I’m sure it is going to taste WONDERFUL with the cream cheese spread! 🙂 I’m going to have to be careful to make sure we will still have some for this evening. 😉

    Love in Christ,
    Julia Ryan

    Writingforhisgloryblog.blogspot.com

    Reply
    • JuliA rYan says

      May 30, 2014 at 12:27 pm

      The bread turned out AWESOME!!!!

      Reply
    • autumn says

      May 31, 2014 at 7:35 am

      So glad you love it! Great idea to use it with hot dogs – I think it would make campfire hotdogs taste a little gourmet!

      Reply
  37. melanie says

    May 31, 2014 at 9:31 pm

    Thank you for this great recipe. I had just made a roasted garlic butter so I opted to use that… great and easy recipe. I also only had the the dry active yeast so your tips were very helpful. I am giving one of the loaves to my neighbors that just moved in too.

    Reply
  38. Whitney says

    June 17, 2014 at 3:34 pm

    Hi, I was wondering if when shaping the loaves, I would be able to get more than 4 loaves from the dough(just smaller loaves)?

    Reply
  39. Jelli says

    July 8, 2014 at 2:16 pm

    Oh, this looks absolutely divine. I love making homemade bread, especially artisan loaves. Will have to give this a try.

    Reply
  40. Adeline says

    July 9, 2014 at 11:59 am

    Hi there! Can you tell me if the bread can be made a day before being served? I am planning an anniversary dinner for my folks and this bread would go perfect with the stuff shells I am making, but I would like to bake them the night before if possible so I am not trying to do it all on the day of. I know some breads are better the second day but I wonder if this will become stale almost like store bought french bread the next day if I make it Friday night.

    Thank you!!

    Reply
    • autumn says

      July 12, 2014 at 7:40 am

      Adeline, I’m trying to remember if I’ve ever had leftovers of this bread the next day but I can’t remember. I’m guessing it will go a little bit stale by the next day. Some of the other commenters have had good luck freezing the dough to bake for later, so you could read through the comments to see if that might work for you. I’m just realizing now that maybe your dinner is tonight and you’ve already had to figure something else out – sorry about that!

      Reply
      • bri says

        February 8, 2015 at 4:34 pm

        I tend to make this recipe quite often and I usually wind up with two bigger loaves, which I put in ziploc bags and keep for a week. It doesn’t go stale. But you could always reheat in the oven just to warm it again!

        Reply
  41. Alicia says

    July 11, 2014 at 10:23 am

    I wondered if you had ever put the bread back in the oven after you put the spread on? If so, did it work and how long did you keep it in the oven for?

    Reply
    • autumn says

      July 12, 2014 at 7:27 am

      I’ve never tried it this way, but I think it would make a great garlic bread. Let me know if you try it!

      Reply
  42. Taylor says

    July 16, 2014 at 1:15 pm

    What type of oil did you use for the bread recipe?

    Reply
  43. GJ says

    July 20, 2014 at 7:18 pm

    Found this recipe on Pinterest. I cut the recipe in half and made 2 loaves for me and my hubs to try. I pulled it out of the oven about 20 mins ago and one of the loaves is already gone! It was super easy and delicious. I didn’t have ingredients to make the spread so we just ate it with butter or jam. Thank you so much for sharing this recipe!

    Reply
  44. Julie says

    July 26, 2014 at 8:49 pm

    Hi!! I wondered if you can use bread flour for the regular flour?

    Reply
  45. Jenn says

    August 3, 2014 at 10:06 pm

    Just made these two recipes today. This was my first attempt ever at making bread & turned out pretty great thanks to your well explained instructions! my husband and I both enjoyed the spread on slices of breaf fresh out of the oven. Can’t beat that! Thanks for sharing!!

    Reply
  46. Jenn says

    August 3, 2014 at 10:07 pm

    *bread

    Reply
  47. mARNA MCMILLAN says

    August 5, 2014 at 5:42 pm

    I made this bread this weekend…..holy moly was it good! I used bread dough instead of all purpose & I ended up adding about 1/2 cup extra flour as bread flour soaks up more liquid, but the texture was AMAZING! So soft & chewy inside & crunchy on the outside! I’m making this again this week to have meatball subs on!!!! Thank you for the recipe!!

    Reply
  48. mARNA MCMILLAN says

    August 5, 2014 at 5:44 pm

    Also…..wanted to ask if you’ve ever made this recipe in loaf pans for making sandwich bread at all?

    Reply
  49. ELAINE c says

    August 7, 2014 at 2:27 am

    Hi I tried to read all the comments to pick up more tips before I really start to bake….and it is like never-ending and i am getting really hungry! Lol…
    By the way, just want to know if I need to knead until I achieve the window pane like all other bread or just according to your timing? Sorry…I am a beginner in baking:-) I will be using instant yeast…and skip the first step for proofing the yeast. Do I add the same amount of water into the mixture?
    Appreciate your advice. Thanks in advance 🙂

    Reply
  50. Phyllis @ verifiedmom says

    August 9, 2014 at 9:47 am

    Found this recipe on Pinterest and I am SO glad I did! I made it right away and all four loaves were gone over 2 days! My family loves bread and this was so quick and easy! I’ll definitely be adding it to my regular baking schedule! It’s that good! Thank you for sharing it!

    Reply
  51. Amy says

    August 16, 2014 at 5:17 pm

    I love love love this bread. I made some awhile back and it took approximately two days for my teens to eat all four loafs. My family owned and operated a bakery/restaurant for over forty years, so making bread is a traditional happening around here. But, this was my first French bread experience and it was super yummy! Thank you for the recipe and keep um coming. Would love one for a rye bread. 🙂

    Reply
  52. Caroline says

    August 19, 2014 at 9:28 pm

    I followed your bread recipe and it came out delicious ! We ate an entire loaf before it even cooled down 🙂 I definitely will be making more !

    Reply
  53. Claire says

    August 31, 2014 at 1:24 pm

    Would you suggest using bread flour or just regular all-purpose flour?

    Reply
  54. Carl says

    September 16, 2014 at 12:18 pm

    It has turned out to be an overcast, rainy day here in south Georgia. I was able to get my garden beds ready for some late planting before the rain started, but “What to do now?”, I pondered. Do laundry….NO. Vacuum….No. I know, read a book and bake bread! YES!!! Definitely YES! This recipe is so easy to make and is absolutely delicious. Of course, since the wife and children are at school, I get to have the hot end piece and not feel guilty at all. Thanks for sharing.

    Reply
  55. Sandra Bartram says

    September 30, 2014 at 9:13 am

    I made this bread last night and my kids said, “Oh Mama! This is the best bread I’ve ever eaten!!” So we ate the first loaf and they asked if we could cut the second one, which we did!! This is now my keeper French Bread recipe. I can’t imagine finding one any better. I would buy those French loaves from Wal-Mart, but not any more!! I did add half wheat flour to mine and it was SO good. Thank you so much for posting this incredible recipe.

    Reply
  56. Michele says

    October 1, 2014 at 8:28 am

    I made this bread last night for dinner and it came out perfect! Great recipe, one i will make again and again. Thanks for sharing!

    Reply
  57. Ella says

    October 27, 2014 at 10:22 pm

    Made this tonight! I pulled out my garlic to make the spread and it had gone bad so I used garlic powder instead, I’m also not a huge fan of pepper so I just shook in a tiny bit instead of using a whole 8th tsp, and I added a dash of salt and some Parmesan cheese… You are absolutely right, this stuff IS sinful! I kept “accidentally” getting tiny bits on my fingers so I had an excuse to lick it off. Thank you so much!

    Reply
  58. Jayme says

    November 8, 2014 at 3:52 pm

    Infortunatly I do not have as much time as need to complete this should I skimp on the hour long kneading the 30 min riding or could I transfer in the middle of cooking 🙁

    Reply
    • autumn says

      November 8, 2014 at 8:16 pm

      I probably wouldn’t skimp on any of the time needed or you’ll risk flat bread – sorry!

      Reply
  59. Katelin says

    November 16, 2014 at 6:09 pm

    So I made these amazing loafs tonight and oh my goodness were they delicious !!!
    One question.. What’s the best way to store them so they don’t get stale? Should I freeze one or keep them in a ziplock ? Thanks for this glorious recipe !!

    Reply
  60. Isabella says

    November 18, 2014 at 9:19 am

    I have never tried baking before and really a new cook! (Although I am quite good at following recipes down to the letter.) I’m really excited to try this recipe (nervous too!), but I am a little bit confused with this part:

    “punch it down and fold it over a few times, then gather it back into a ball”

    This is referencing the kneading every ten minutes for an hour. What does fold it over mean? Do you mean punch it down and then sort of tucking the outsides under to the middle and then rolling it into a ball? Or just pushing it into a ball? Also, do I need a rolling pin (since I don’t own one).

    Sorry for all these questions! Hopefully when I make this I can give a loaf to my friend’s family as a nice Thanksgiving gesture!

    Reply
  61. Kelly says

    November 19, 2014 at 2:13 pm

    I had NEVER made bread before and I was able to make this! Easy, kid friendly and wonderful! I followed the recipe with the only exception being that I used bread flour. I also made my own butter by mixing whipped cream cheese, butter and Adam’s Reserve holiday spices. Go ahead and try this one! You won’t be disappointed!

    Reply
  62. Belinda says

    November 20, 2014 at 3:38 pm

    I made this bread today using King Arthur whole wheat flour and it turned out yummy. My loafs were not at big as yours look so I’m sure the wheat bread is a but more dense than the white bread but still yummy. I also make the spread but personally didn’t care for it but that’s just me.. The bread was great! Thank you

    Reply
    • AILUY says

      February 17, 2015 at 10:43 am

      Hi, did you make it with all whole wheat flour or half whole wheat and half white? TY

      Reply
  63. Chloe says

    December 16, 2014 at 11:18 am

    I tried this recipe out just yesterday and there’s only one loaf left! Thanks for sharing this recipe. 🙂

    Reply
  64. sarah says

    December 30, 2014 at 9:52 am

    I just made this bread yesterday. I followed the recipe exactly, but there was only enough dough for 2 loaves, not 4. Also, I thought it was really dense and chewy, not light and fluffy as I hoped it would be.

    Reply
  65. debbie says

    December 31, 2014 at 1:25 pm

    Just made this bread! I love it! This recipe is so easy! Taking some to a dinner party tonight along with homemade butter! I didn’t do the garlic herb butter! Perfect!! ThAnks so much for sharing it! Will be making it again and again!!!

    Reply
  66. Beverly {Flamingo Toes} says

    January 19, 2015 at 6:34 pm

    I made this up today Autumn and it turned out soooo good!! Thanks for the recipe – this is now my go-to bread recipe! I love it!

    Reply
    • autumn says

      January 19, 2015 at 10:24 pm

      Glad you like it, Beverly! Thanks for stopping by.

      Reply
  67. bri says

    February 8, 2015 at 4:41 pm

    I make this quite frequently and have stopped buying bread from the store because I love this so much. I find I tend to make two big loafs using foil pans instead of four small ones. They’re more like sandwich bread sized loafs and they last me like a week and I always store them in ziploc bags that way. I also brush them twice with the egg wash, before and after the 30 minute rise.

    I also funnily enough bought Boursens cheese spread at the store a week ago and then realized this recipe had a homemade version of it (which is good since its not cheap to buy). I made it the other day and oh my its so good!

    Reply
  68. al rhode says

    February 12, 2015 at 9:45 am

    I made this today but I added garlic power and they came out great, for garlic bread for meatball. but iam going to have some pull pork with mind this is agreat recipe to have . also iam going to make hoogie rolls out this recipe . thank you for having a great French bread recipe

    Reply
  69. Ashley says

    February 25, 2015 at 4:46 pm

    Ok. I found this on Pinterest and I’ve made it twice- bread turns out so great- but I cannot get 4 loaves…. The first time I made 4, but they were tiny- this time i made 2, and they turn out smaller than yours! What am I doing wrong?!

    Reply
  70. Tobey says

    March 18, 2015 at 4:12 pm

    We love bread, but have recently gone Gluten Free. Do you know what adjustments need to be made to use the GF “Flour”? I can’t seem to get any GF breads to taste right. Thank you very much.

    Reply
  71. Mikayla says

    March 30, 2015 at 1:46 pm

    So yummy!! I made this following the recipe exactly and made 4 loaves. They turned out so delicious! I froze 3 loaves (of course we had to try one loaf out that night! Lol) and when I want to have any bread with dinner I just pop one from the freezer to the refrigerator in the morning. Half of one loaf is what my husband and I use per dinner when we have bread. Next time I make this I’ll double it and make 8 loaves (or bread for 16 dinners!). I didn’t make the garlic spread though, I’ll have to try it out sometime!

    Reply
  72. Jussy says

    March 31, 2015 at 1:09 pm

    I made this bread with my new Bread Maker ( bought from this fantastic website http://homegadgetsdaily.com/ ) it came out just perfect! Thank you for simple and yummy recipe. We liked it !

    Reply
  73. Kari says

    April 2, 2015 at 2:20 pm

    What should I do if I cannot roll the dough into a ball due to the stickiness of it?

    Reply
    • autumn says

      April 5, 2015 at 7:35 pm

      Sprinkle some extra flour on whatever surface you’re using and flour your hands well. It’s fine to knead a little extra flour into the dough until you can roll it into a nice ball. Good luck!

      Reply
  74. Katie says

    April 11, 2015 at 1:57 pm

    i made this bread today. Followed your instructions exactly and it turned out beautifully! I have made French bread using my bread maker many times and that does not come even a little bit close to how good this bread is! Oops! I used 1 1/2 tsp instead of tbsp yeast. I wouldn’t have known except I read the comments. For my taste, I would use only 1 tsp salt. One other thing, I have always covered my bread with a tea towel while it rises. Yeah, well, don’t do that, take my word for it!
    Thanks for a great recipe and very helpful tutorial!

    Reply
  75. Maria says

    April 23, 2015 at 9:37 am

    So that is 2 1/2 cups of water all together ?

    Reply
  76. Kennedy G says

    April 23, 2015 at 10:40 pm

    I am going to cook this next week for a special occasion (may practice in a few days and share) and have a few questions because I have never made bread before!
    1) What kind of oil? Probably vegetable oil I’m assuming?
    2) How exactly do u divide the bread? With your hands or with a knife? Just curious!
    Thanks for any tips!

    Reply
    • Kennedy Gessner says

      April 23, 2015 at 10:47 pm

      Oh man and I thought my phone was just acting up and didn’t post this one:( sorry for the spam of comments LOL

      Reply
  77. Kennedy Gessner says

    April 23, 2015 at 10:46 pm

    I want to make this next week for a special occasion and have a few questions-Iv’e never made bread before! (I also think I might practice and share before I officially make it)
    1) What kind of oil? I’m assuming vegetable?
    2) How exactly did you divide it? With your hands or a knife?
    Thanks for any tips-I’m a bit nervous!

    Reply
    • Carol says

      April 30, 2015 at 8:17 am

      I just make this today (and I didn’t read all of the instructions)…oops! But it turned out AMAZING!

      I used olive oil, but I bet you can use regular vegetable oil as well.

      I divided it using a knife. I just formed it into a ball and cut it in quarters. This is my first time making a formed bread (not breadmaker). The last time I attempted to make my own dinner rolls, they ended up not rising and tasted like pretzels. My family still makes fun of me for the pretzel dinner rolls. I haven’t made it since, but they keep reminding me they liked it.

      Reply
  78. Fatimah says

    May 10, 2015 at 2:19 pm

    I’ve made this sooo many times, It was so good!

    Reply
  79. Neuza gitana bielby de albuquerque says

    June 10, 2015 at 10:05 am

    Boa tarde !
    Adorei as receitas pena que são em inglês .

    Reply
  80. Erin says

    August 8, 2015 at 3:45 pm

    So, my bread didn’t so much rise as it did spread. The yeast proofed very well, so I know it’s not that. Did I need to add more flour? I added all 6 cups plus a little bit after it was on the table.

    Reply
  81. Jess says

    November 25, 2015 at 4:56 pm

    awful recipe. Followed recipe exactly. Came out so goopy and gross. I told my husband who loves to bake he restarted and it came out the same way. Looked like glop on tray. Burned on bottom before it was even in oven 5 min. Awful awful recipe and for the same thing to happen twice to two different people. It was a waste of time and money. Move on to a different one

    Reply
  82. Maddi says

    December 6, 2015 at 1:52 pm

    I don’t know what these negative comments Re all about but I followed your recipe and all 4 loaves came out great. I added the first step right in the kitchen mixture and went from there. I did have to add a few tbsp worth of flour while the mixture was kneading in the mixture. Kneaded 4 times, let rise longer bc I added active dry yeast instead of instant. they’re gorgeous looking and taste great. Very fluffy and crispy. The dip was wonderful as well. I didn’t wanted to buy dill and the others so I used poultry seasoning. I did use olive oil in the ingredients. No complaints about this recipe. People just need to make sure the oven is right and they follow the recipe to a T.

    Reply
  83. Gloria says

    December 27, 2015 at 12:54 am

    My mother used to make bread and buns and I helped her. I made bread once and it didn’t turn out well. I am going to try this . It looks so good, I can smell it baking already.

    Reply
  84. Shelly says

    January 1, 2016 at 5:41 pm

    I’m making your french bread recipe right now. How exciting!

    Reply
  85. Alana says

    January 25, 2016 at 10:42 am

    Does anyone know if I can use active yeast instead of instant yeast? I only have active yeast on hand 🙂 thanks in advance!

    Reply
  86. Alana says

    January 25, 2016 at 10:47 am

    Does anyone know if I can use active yeast instead of instant? And how I go about doing that? Thanks in advance!

    Reply
    • autumn says

      January 26, 2016 at 6:45 am

      Sure! Just make sure you don’t skip the first step of letting the yeast proof in the warm water.

      Reply
  87. Brittany says

    February 6, 2016 at 8:08 pm

    Hi, just wanted to thank you for this wonderful recipe. I make it every week. We use this bread for everything. I had never baked bread before, found this super easy recipe, and haven’t bought store bread since. It has seriously changed my life as silly as that sounds!

    Reply
  88. Janet says

    March 13, 2016 at 1:35 pm

    I LOVE this recipe…..it is very similar to other french breads I have made, but the method of raising is so great. I make it into 2 long loaves that fit on my 11×15 pan the long way. THANK YOU Autumn, this has been the key to the very best french bread. We have made it several times now.
    🙂

    Reply
  89. Dion snyman says

    April 27, 2016 at 8:03 am

    I found the dough to be a bit too dry. The crust of the bread was too hard. The inside however was soft.

    Reply
  90. Ashley says

    May 13, 2016 at 3:08 pm

    My husband loves french bread but the ones at our grocery store are too hard and I hate having to go to a second grocery store just for bread. I have never made bread before because for some odd reason I was terrified of tackling any recipe that required yeast. Well I decided to just give it a shot because I was too lazy to drive to another grocery store and making fresh bread seem to make more sense at the time. Granted I was running on 4 hours of sleep and no coffee.. Shockingly this was the easiest thing I have ever made! The only thing I will change is the baking time, it was just a few minutes too long for my oven. And oh my goodness, I am drying over the garlic herb butter! It was amazing! I am so glad I found this recipe as I will be making it way too often!

    Reply
  91. Brenda Hardy says

    September 26, 2016 at 4:39 am

    This bread is delicious, rose perfectly and baked beautifully. Will make it again for sure.

    Reply
  92. stephanie says

    October 3, 2016 at 8:35 pm

    This recipe was a total mess from the beginning, the dough was way too sticky (a lot more than normal) and I had to add flour several times because it looked more like cake batter. It needs more salt. It came out of the oven looking and feeling like a brick, inside it was pasty and looked kinda grey. Also, is it so hard to write “tbs” or” tsp” instead of “T” and “t”? The confusion with the amount of yeast ruined the entire recipe and all the hard work I put on it went to waste. I’m not a natural English speaker so excuse me if I couldn’t understand the oh so obvious “t and T” measures.

    Reply
  93. Ashley says

    October 7, 2016 at 12:13 pm

    I just love this bread recipe, and the spread is amazing! This was the first bread recipe I have ever used, and the first time I have ever made bread. I was surprised at how simple it was! Once I had used unbleached flour and the dough consistency was very different and super sticky. It still tasted great, it was just more of a mess when handling the dough. But so far I have made it 3 more times and each time they came out great!

    Reply
  94. Donna says

    October 27, 2016 at 2:12 pm

    Can you send me a pdf version of the french bread with garlic herb spread?
    I did not see anywhere on your site to “print It’ button.
    Thank you,
    Donna

    Reply
  95. Steph says

    November 2, 2016 at 4:58 am

    Please can you state what “T” stands for whether tsp or tbsp? and “C”? Thanks

    Reply
    • autumn says

      November 3, 2016 at 7:45 pm

      Capital T is tablespoon; lowercase t is teaspoon. Capital C is cup. Good luck!

      Reply
  96. Traci says

    December 27, 2016 at 4:39 pm

    This recipe is awesome! I have been buying the Walmart French bread for while. When I read the ingredients I get weasy! It’s good bread but I love baking my own. It is my therapy. Thanks for sharing this with us. Your instructions were great. This will be my good to.

    Reply
  97. Lavi says

    January 24, 2017 at 4:20 pm

    I don’t usually leave comments(I’m those subscribers that enjoy reading and not commenting) but I have made this French bread now 3 times and each time they came out great! Really enjoying this recipe and so glad you posted it. We are a family of 6, so milk and bread are usually the 2 things we run out of first. Now I can always have bread, as for the milk… I might need to buy a cow:) Thanks again!

    Reply
  98. Lisa says

    February 4, 2017 at 12:01 pm

    This bread is amazing and I have made it several times now! It is always a hit among friends and I plan to make a bunch to freeze in the next few weeks to have some on hand for all my friends having babies! With a baker in the family, I am a little intimidated to make things to take to family functions, but this did not disappoint. Oh, and the cheese spread. Totally delicious!

    Reply
  99. Silvia Knott says

    February 22, 2017 at 5:57 am

    Is T for teaspoon or tablespoon? Sorry not used to recipes with just a T

    Reply
    • autumn says

      February 23, 2017 at 7:39 pm

      sorry – T is for tablespoon. thanks!

      Reply
      • Hanna says

        April 3, 2017 at 10:12 pm

        Hello! I have a related question: CUP means 250 ml? 🙂 Thanks!
        The recipe looks awesome and the bread came out delicious ( in the pics):))

        Reply
  100. Julian says

    August 27, 2017 at 1:16 pm

    I would love to make this recipe but you provided the ingredients in volume. Can you please provide the recipe in weight rather than volume? I don’t think bread or any baking recipes should be measured in volume because of the inconsistent results. Weight is the most accurate way of ensuring people can replicate your recipes without error.

    Reply
  101. LIBBY says

    September 25, 2017 at 4:09 pm

    You have a lot of ads on your blog and it slows it down. The recipe is awesome, but I have a hard time accessing it because of the overload.

    Thanks. 🙂

    Reply
  102. Sara S says

    September 29, 2017 at 8:18 am

    Is it possibly to make this recipe without a bread hook/mixer? I don’t have one and I’ve been trying to find recipes I can’t make without it. Thanks so much! This looks amazing, I’d love to try it out!

    Reply
  103. Sara S says

    September 29, 2017 at 8:20 am

    Hi there I was wondering if it was possible to make this recipe without a bread hook/mixer? I don’t have one and have been looking for recipies I can make without it. This recipe looks amazing and I’d love to give it a try!! Thank you!

    Reply
    • autumn says

      September 29, 2017 at 1:42 pm

      Hi Sara! You can make this recipe without a mixer. You’ll mix everything in a large bowl with a wooden spoon – start with only half the flour. Keep mixing, adding flour in gradually, until it’s too thick to mix anymore. At that point you’ll need to turn the shaggy mixture out on a well floured surface and start kneading by hand. You will end up adding in the rest of the flour as you continue to knead. It takes longer to knead by hand than it does with a mixer, but you can actually do it to nearly any bread recipe as long as you’re willing to take the time! You could google “knead bread by hand” and probably find a video tutorial. Good luck!

      Reply
  104. Jas says

    December 13, 2017 at 11:09 am

    Hi Autumn,
    Is the “T” for tablespoon or teaspoon?
    Sorry, would be my first time to try baking if ever!

    Cheers,
    Jas

    Reply
    • autumn says

      December 14, 2017 at 10:17 am

      T is for tablespoon. Generally a lowercase t is for teaspoon. Good luck!

      Reply
  105. Heather says

    May 2, 2018 at 9:15 am

    Can I use just regular active dry yeast instead of instant yeast? Remember Not all people are as privileged as you are to just walk in their store and be able to find instant yeast.
    And if I can find it I will be using bread flour
    for this recipe if I make . And what is wrong with light golden brown. The finished picture
    for your bread looks too brown for me.
    Please let me know by e-mailing me
    at [email protected]

    Reply
  106. Denice says

    May 13, 2018 at 8:39 pm

    Sure would appreciate a button to just print the recipe and not all 65 pages. The bread looks great and I look forward to trying it.

    Reply

Trackbacks

  1. French Bread | matthannahfogarty says:
    March 18, 2014 at 1:08 pm

    […] So for the credit see this website: https://www.itsalwaysautumn.com/2012/04/26/cook-soft-and-chewy-french-bread-with-garlic-spread.html […]

    Reply
  2. French Bread- attempt 1 | thewolfofmountainside says:
    April 8, 2014 at 7:32 am

    […] So I had a hankering for bread, and no car to go to the grocery store. Luckily I had all the ingredients and found an awesome recipe for some French bread. This recipe was not nearly as time consuming as it sounds. Making the dough is really quick, some yeast, flour, water, sugar and salt was all it took. After I mixed all the ingredients, I kneaded the dough for about five minutes. Kneading is tricky because you don’t want to over knead it. I then let the dough chill and rise for an hour. The recipe only calls for letting it chill for 30 minutes, but I left it in for twice as long. I skipped the kneading it every ten minutes for an hour, and just kneaded it for five minutes before forming it into loaves. After letting the bread bake, it was time to test my creation. The bread looked beautiful. It was a light golden brown, and the crust was nice and crispy while the middle was soft. Taste wise, it was fantastic. The bread was delicious. However, it was still a little heavy. Next time I try this out, I will let the dough chill for a lot longer, and knead it every ten minutes for an hour like the recipe calls for. Recipe for French Bread […]

    Reply
  3. Seven Sisters » Seven Sisters Treasures #100 says:
    May 30, 2014 at 3:08 am

    […] via It’s Always Autumn […]

    Reply
  4. Homemade Bread Recipe Ideas - Moms & Munchkins says:
    June 8, 2014 at 10:27 pm

    […] Bread for French Toast. I love turning French Bread into garlic toast to go with spaghetti. This French Bread recipe by It’s Always Autumn comes with a delicious garlic spread […]

    Reply
  5. Homemade French Bread | Blessings, Bliss, and Bedlam says:
    August 19, 2014 at 5:14 am

    […] original recipe was found here and there’s a tasty looking spread to go atop the bread if you so […]

    Reply
  6. 7 Old-Fashioned Skills that Save you Money says:
    October 9, 2014 at 7:59 am

    […] Homemade Bread Recipes: Homemade Breadsticks, Loaf bread, French Bread […]

    Reply
  7. Easy French Bread | Living with Love and Medicine says:
    December 11, 2014 at 6:02 pm

    […] My favorite type of9 bread since I’ve been a child has been french bread. It always reminds me of  when I lived at home with my parents and every weekend that my dad was off from work, he’d wake up earlier than me and would go to get me some french bread along with some other assorted goodies for breakfast. But my favorite was always the french bread that had just been done that same morning with some butter and a latte. Hands down my favorite breakfast. Naturally, living here in Grenada, I don’t have the luxury of going to the bakery at the corner in the morning and being able to have guaranteed french bread every weekend. There is french bread on island in plenty of places, but its just not the same and find the good ones not very consistent. So I decided to search Pinterest for a simple to follow recipe for french bread that I can make as a beginner. My friend Kate came over my house after having done this same recipe herself just a few days before me, and also brought her awesome camera to take amazing photos of the process and the final product.  The original recipe and instructions came from this lovely website: https://www.itsalwaysautumn.com/2012/04/26/cook-soft-and-chewy-french-bread-with-garlic-spread.html […]

    Reply
  8. French Dip Sandwiches with homemade French Bread | says:
    February 3, 2015 at 8:15 am

    […] Here is the link to the recipe.  Just like the cheesecake recipe, it is long and wordy so I’m not going to write it all out.  It’s better to read it straight from the source. […]

    Reply
  9. Wellness Wednesday and more french bread (P.S. It’s a new favorite!) | Hudman Honey Farm says:
    February 4, 2015 at 12:33 am

    […] recipe: Soft and Chewy French Bread.  The recipe also includes a delicious sounding garlic spread but alas, I am out of cream cheese […]

    Reply
  10. Bakery Style French Bread | simplydelicious says:
    February 18, 2015 at 6:23 pm

    […] Recipe adapted from ItsAlwaysAutumn […]

    Reply
  11. Easy Pulled Beef Sandwich Recipe - Coupon Cravings says:
    September 3, 2015 at 11:26 am

    […] dive in… sad, but true. FYI, my friends over at It’s Always Autumn have a recipe for Homemade French Bread for Pulled Beef Sandwiches that you can try if you’re feeling […]

    Reply
  12. It's a Lovely Life®, Family Travel. Fitness, Food, Lifestyle Blog | 50 Of The Best Homemade Bread Recipes says:
    September 18, 2015 at 7:17 am

    […] 12. French Baguette Soft and chewy. Makes 3-4 loaves in one recipe. Recipe […]

    Reply
  13. Irresistible French Bread | Muffins & Mischief says:
    October 19, 2015 at 1:54 pm

    […] to me. Which is why I set out to find a recipe for this homemade wonder. And I found that recipe here and it was wonderful! I should say that this recipe makes 4 loaves of bread (which is fabulous for […]

    Reply
  14. 7 Time-Tested Skills To Save Money - Daily View says:
    January 21, 2016 at 9:08 am

    […] Homemade Bread Recipes: Homemade Breadsticks, Loaf bread, French Bread […]

    Reply
  15. How To Make Chicken French | says:
    June 19, 2016 at 11:17 am

    […] how to make homemade french bread … – Learn how to make soft and crusty french bread at home with this recipe that includes easy to follow step by step. herbed garlic butter recipe included. […]

    Reply
  16. How To Make Nutritious Meals for $1 – $2 a Day Per Person | Budgets Are Sexy says:
    July 22, 2016 at 3:04 am

    […] think most people could learn to make this: https://www.itsalwaysautumn.com/2012/04/26/cook-soft-and-chewy-french-bread-with-garlic-spread.html [Have not made the spread so can’t comment on that part, but the french bread itself we’ve made […]

    Reply
  17. February Monthly Menu: 28 Dinner Ideas - Our Kerrazy Adventure says:
    February 1, 2017 at 10:45 am

    […] Chopped Salad with French Bread  (leftover […]

    Reply
  18. French Bread – Eagar Kitchen Concoctions says:
    February 25, 2017 at 7:27 am

    […] https://www.itsalwaysautumn.com/2012/04/26/cook-soft-and-chewy-french-bread-with-garlic-spread.html […]

    Reply
  19. 4 Easy to Make Bread Recipes – Keeping Myself Busy says:
    May 3, 2017 at 12:49 pm

    […] It’s Always Autumn’s Soft and Chewy French Bread […]

    Reply

Leave a Reply Cancel reply

Your email address will not be published. Required fields are marked *

Hey, glad you’re here!

I'm Autumn, a mom of five who loves ice cream, Masterpiece Theatre, and clothes that hide the fact that I eat so much ice cream. When I was 18 I got a job at a craft store and told everyone (regularly) how much I hated crafts. Well, things change! Read More…

Find me here

  • Facebook
  • Instagram
  • Pinterest
  • Twitter

Get the latest

Get the latest

Popular Posts

How to make mini donuts! {baked cake mix donuts recipe}

This artisan bread recipe is so easy to make and turns out amazing! It only takes 4 ingredients and 5 minutes of hands on time for crusty, delicious bread! How to make bread.

Crazy easy homemade artisan bread {only 4 ingredients!}

Tissue transfer art is not only gorgeous, it's totally easy enough for kids to make! Fun kid's art project - perfect indoor activity for rainy days.

tissue transfer art {easy kid art project!}

20 pretty DIY paper flower tutorials

girl’s flutter sleeve dress or top sewing tutorial & free pattern in 4T

Blog policy

All posts and pictures are copyrighted by Autumn Baldwin and blog content may not be reposted elsewhere. However, linking back to my content is just fine. You may use one photo as long as you link directly back to the specific post. Thank you!

Please view our Privacy Policy here.

Also, please note that this blog is a participant in the Amazon Services LLC Associates Program, an affiliate advertising program designed to provide a means for sites to earn advertising fees by advertising and linking to Amazon.com.

Copyright © 2019 · Divine theme by Restored 316