
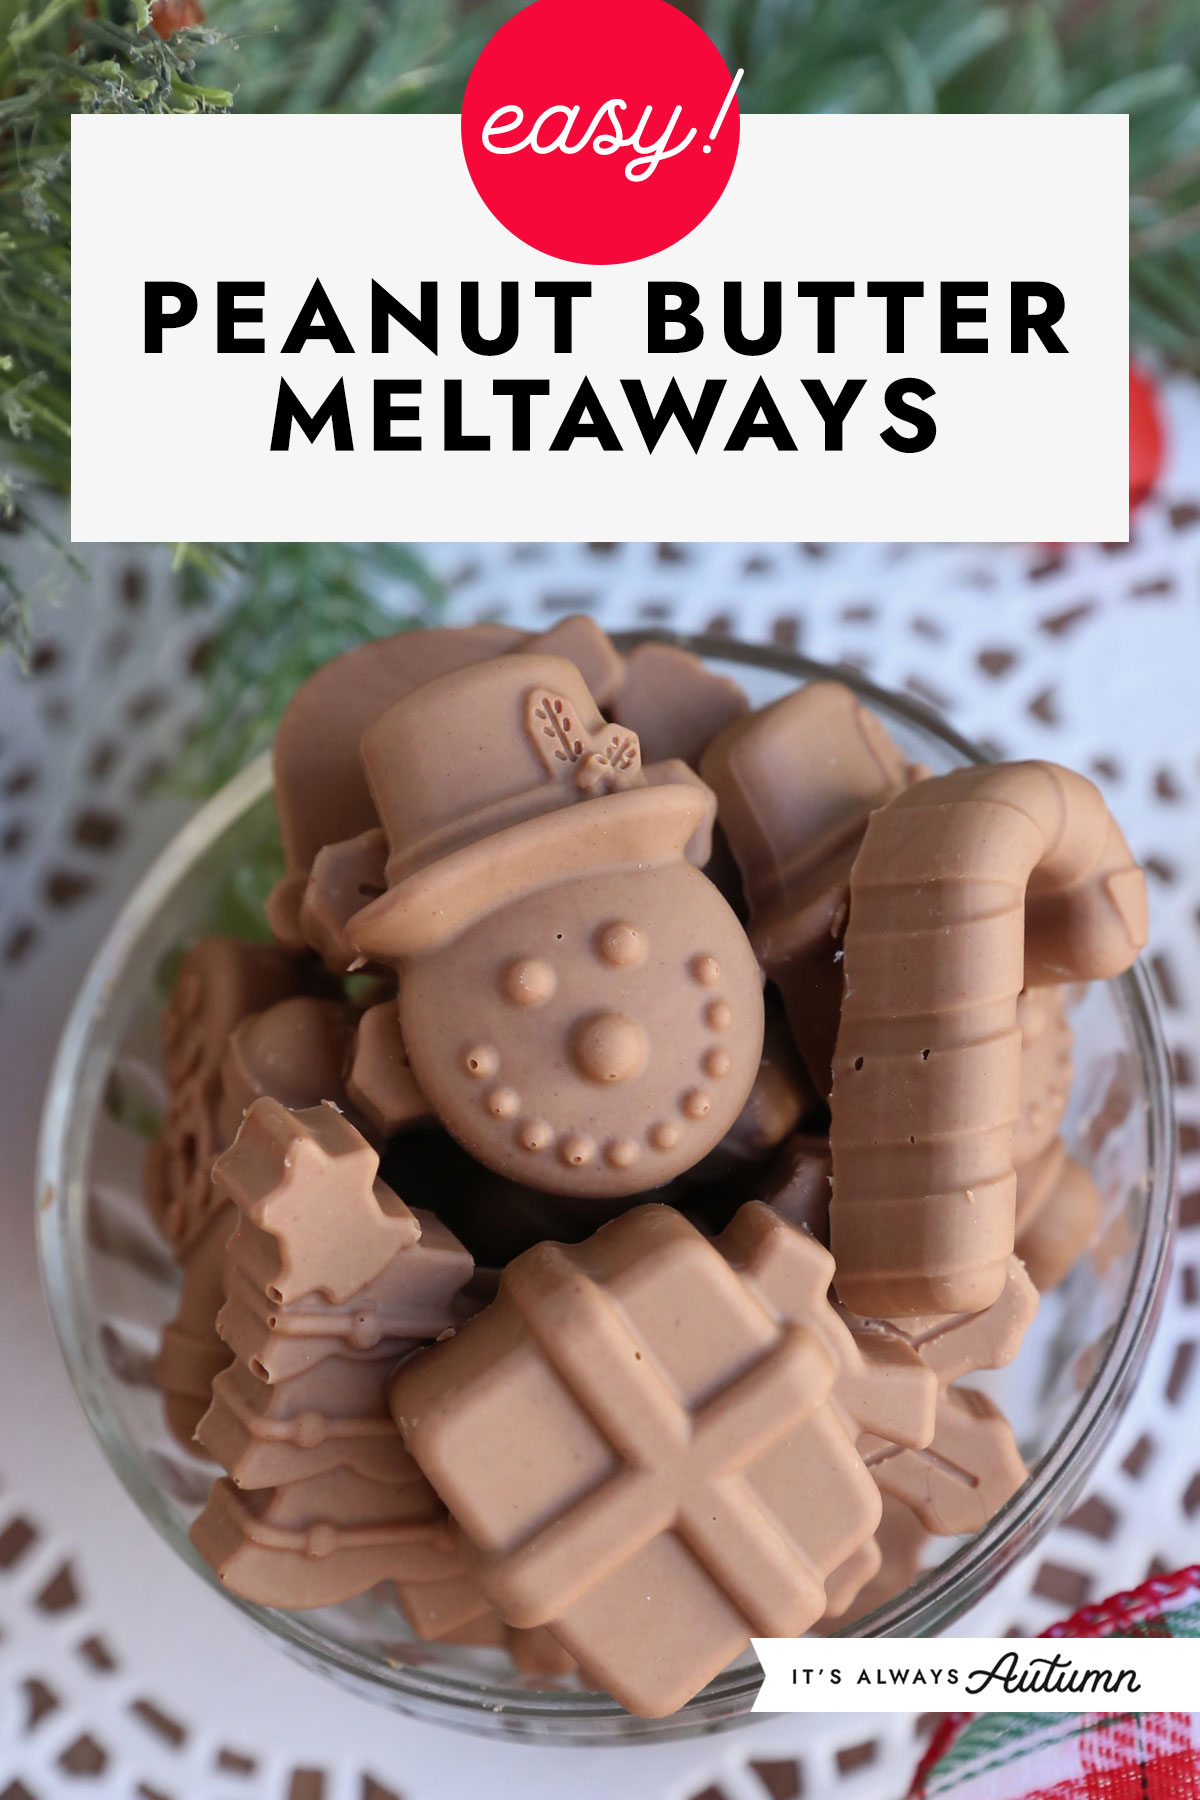
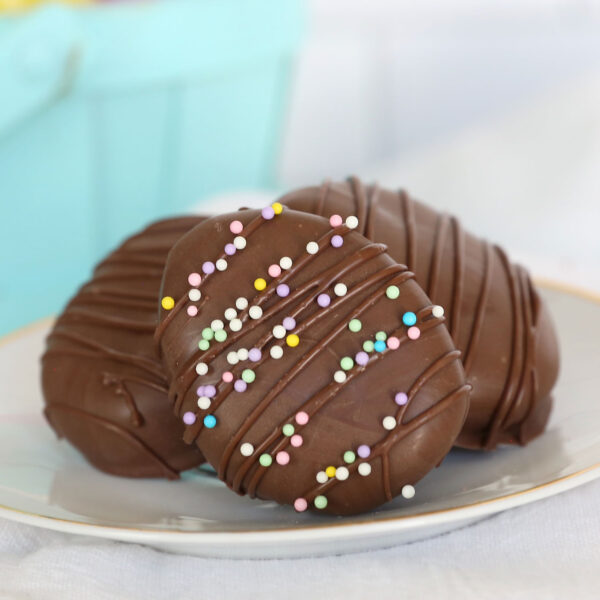
In today’s post: Peanut Butter Meltaways are easy to make with just three ingredients and they taste amazing! This may be your new favorite Christmas candy recipe.
Easy Christmas Candy
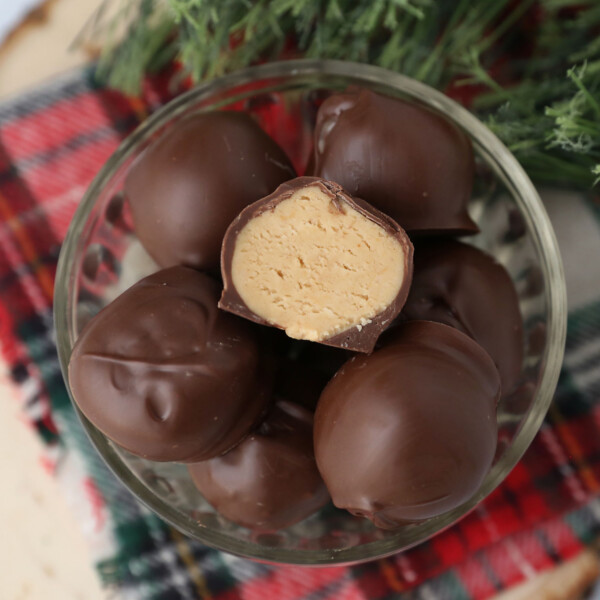
I can’t believe I’ve just discovered the amazingly easy Christmas candy known as Peanut Butter Meltaways. I saw a Facebook post about them and was intrigued – could they really be as good as everyone was saying they were? The answer is a resounding YES! Meltaways deliver the unbeatable flavor of a peanut butter cup in a completely smooth bite that melts beautifully in your mouth. I won’t stop making my famous Peanut Butter Balls, but I’ll definitely be adding these meltaways to the Christmas candy making plan.
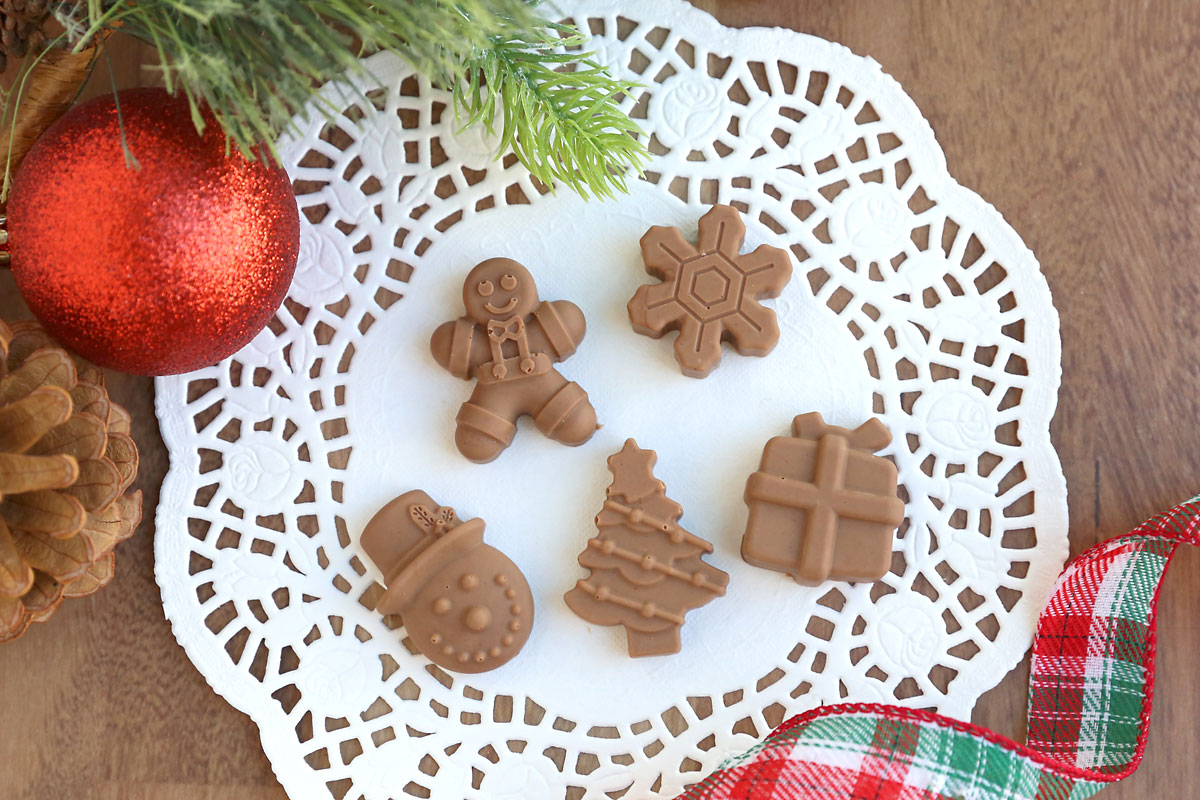
Perfect Molds for Meltaways
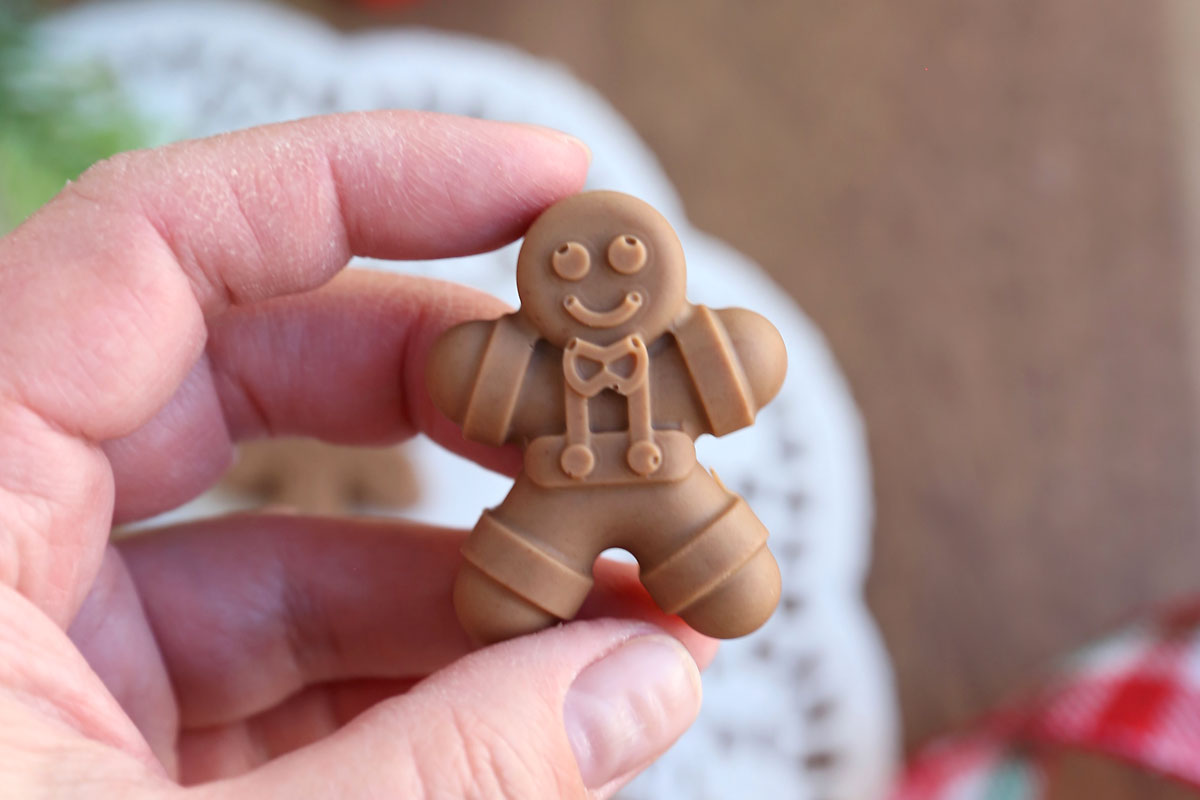
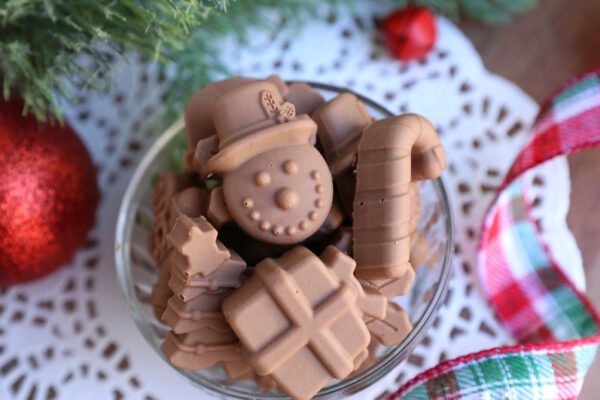
Before we get to the recipe, we have to talk about how cute these little guys are! If you want to keep things simple, you can make your meltaways in mini cupcake liners, but if you want them to be absolutely adorable, order a set of silicone Christmas molds. The set I ordered was only $10 and it worked perfectly for making the meltaways. They were easy to fill and the chocolates were super simple to remove from the molds. Seriously these candies could not be cuter!
Note: I tried a different set of molds first, and they were very small, making them hard to fill. I definitely recommend this sicilone Christmas mold set.
Ingredients
You only need three ingredients for these adorable Christmas candies!
- Milk Chocolate Melting Wafers
- White Melting Wafers
- Creamy Peanut Butter
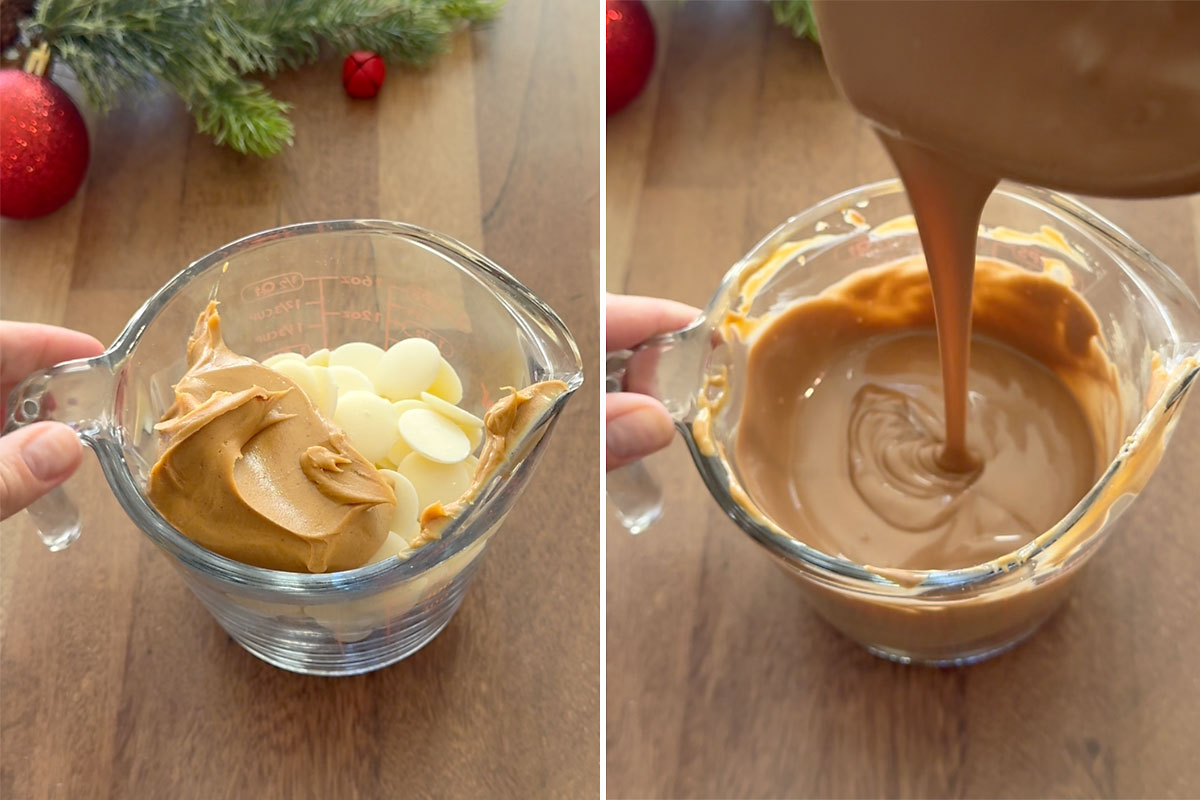
You’ll notice I’m using melting wafers instead of chocolate chips or dipping chocolate, and that’s intentional. Melting wafers are made to melt easily and set up nicely, while real dipping chocolate is much more finicky to work with, requiring specific melting and cooling temperatures to get a nice finish. Milk chocolate and white chocolate chips could probably be used instead of the melting wafers here, but they will result in a thicker mixture and may need a little bit of vegetable or coconut oil stirred in to get a nice pouring consistency. So for best results, I recommend using the melting wafers.
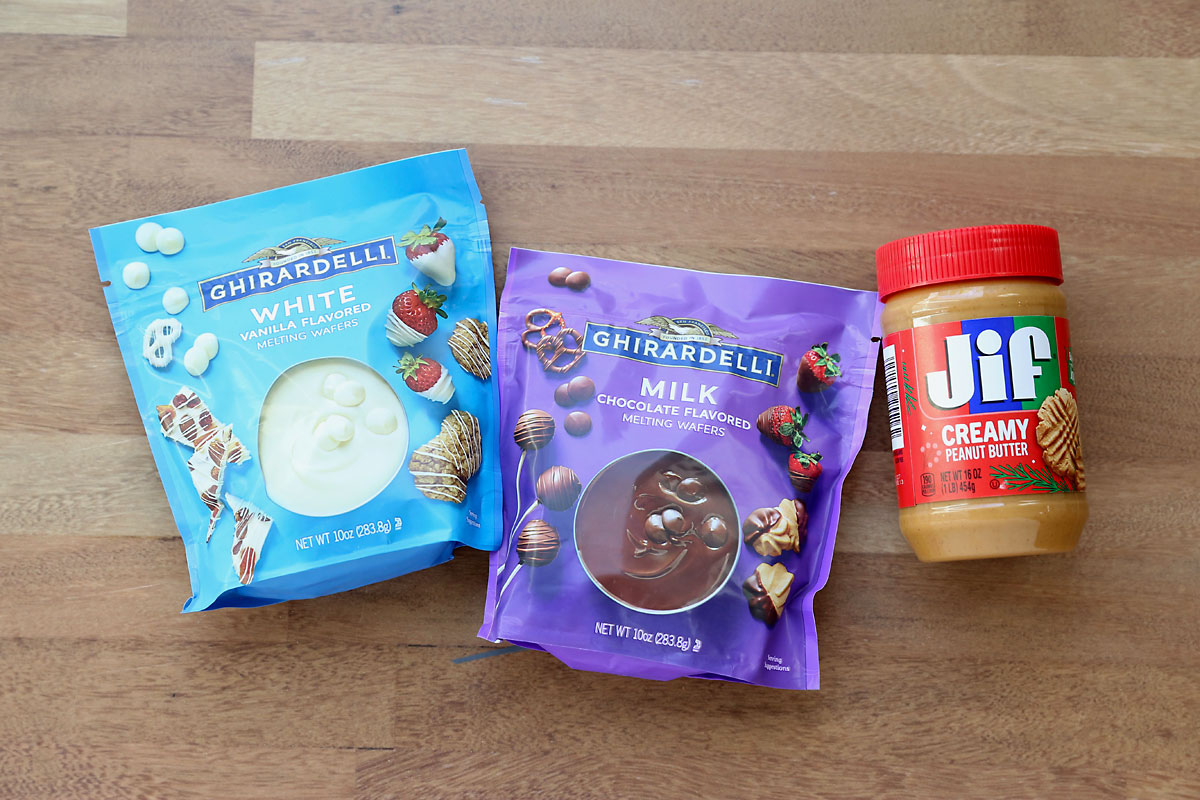
Why Milk chocolate and white?
You might be wondering why we use both milk chocolate wafers and white wafers in this recipe. I tested the recipe as written (milk+white) and using only milk chocolate wafers. We found that the batch that used milk+white wafers allowed the peanut butter taste to come through better than the one using only milk chocolate. We all liked the meltaways better using milk+white wafers. However, if you want a stronger chocolate taste and a more mild peanut butter taste, you could use all milk chocolate wafers. I don’t recommend using semi sweet or dark chocolate.
How to Make Peanut Butter Meltaways
Melt Ingredients Together
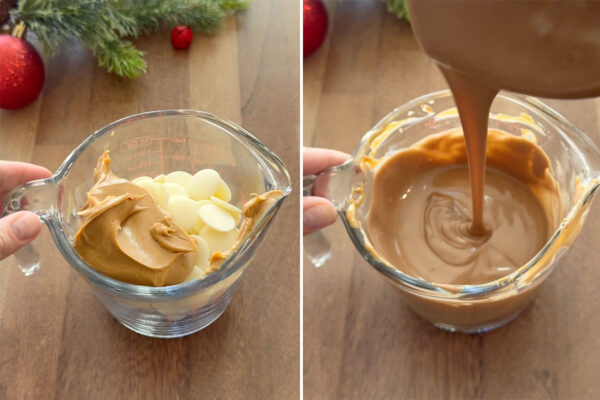
Begin by placing the milk chocolate melting wafers, white melting wafers, and creamy peanut butter in a glass measuring cup (or other microwave proof bowl). Microwave for thirty seconds, stir, then microwave for another thirty seconds. Stir thoroughly; the mixture should be smooth and completely incorporated.
Pour into Molds
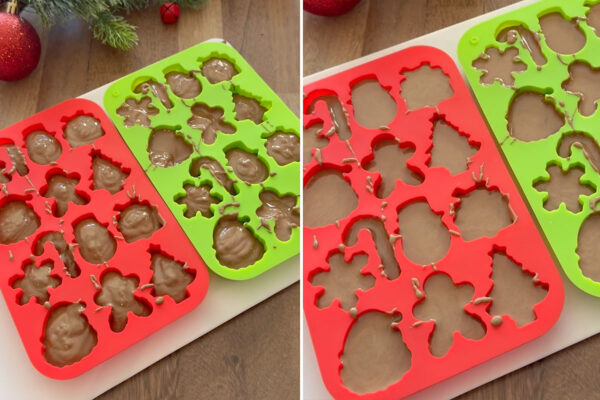
Place the silicone molds on a cutting board or cookie sheet to make them easy to move when full. Pour the chocolate mixture into each mold, filling molds about two thirds of the way full. DO NOT fill them all the way up or you will end up with a mess.
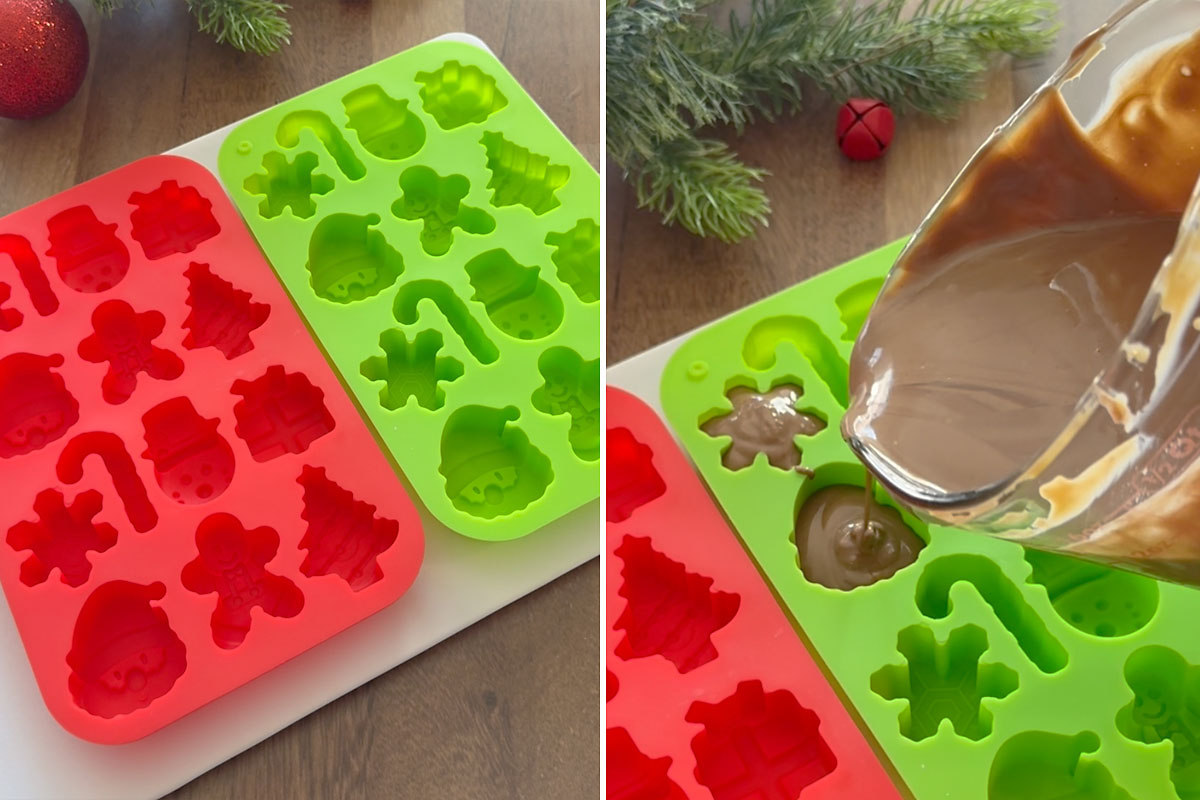
Once you have filled all your molds, lift the cutting board about an inch off the table and drop it so it taps down against the table. Repeat three or four times until the chocolate mixture has flattened completely.

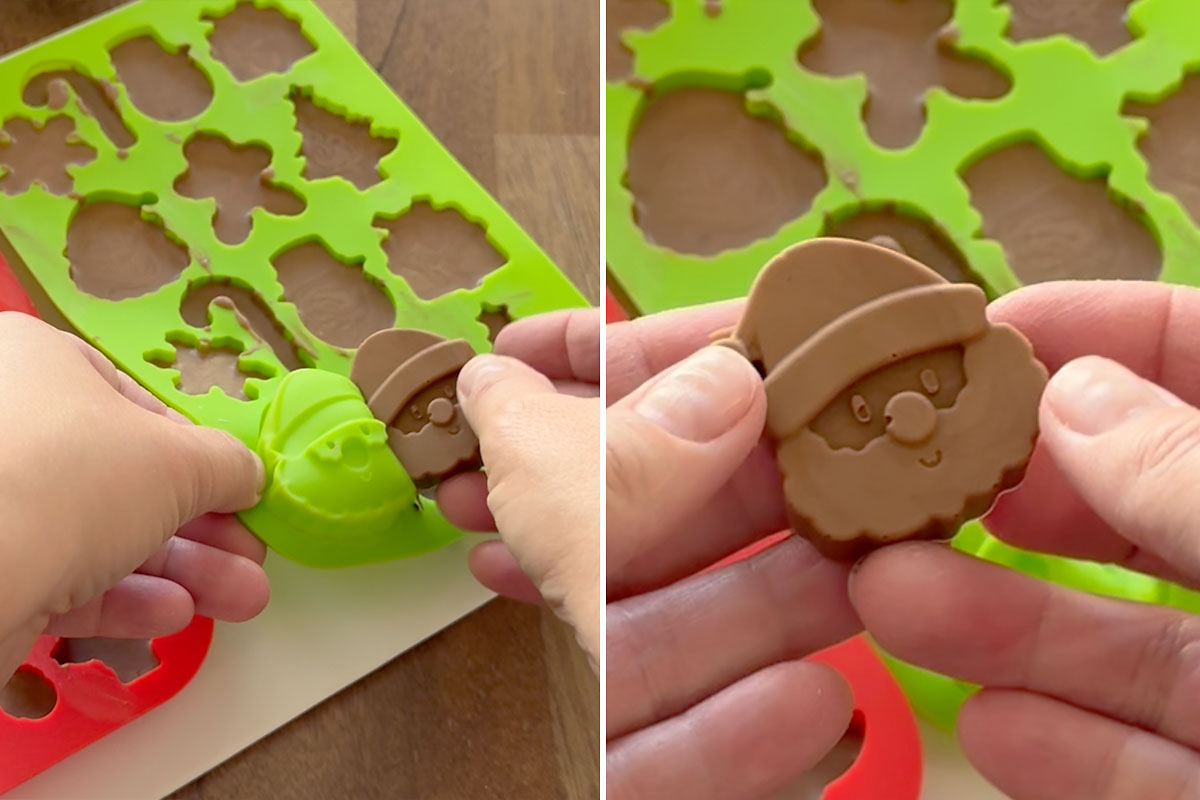
Chill and Unmold
Immediately place the molds in the fridge and allow the meltaways to set up until they are completely firm, about an hour. Then it’s very easy to pop each candy out of the molds.
Storage
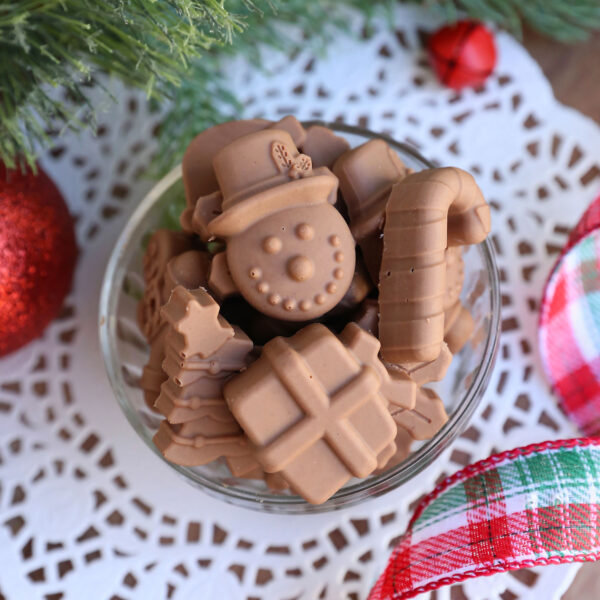
I like to store the meltaways in the fridge until I am ready to serve them, but you don’t have to. They do fine in a small bowl on the counter and hold their shape well as long as your house is not too warm.

Peanut Butter Meltaways
Ingredients
- 4 oz Milk Chocolate Melting Wafers
- 4 oz White Melting Wafers
- 4 oz Creamy Peanut Butter approx 7 tablespoons
Want more project ideas? Sign up to get my favorite easy crafts and recipes straight to your inbox!
Instructions
- Place all ingredients in a glass measuring cup or microwave proof bowl. Microwave for thirty seconds, then stir. Microwave again for thirty seconds and stir thoroughly. Mixture should be smooth and completely combined at this point.

- Place mold on a cutting board or cookie sheet. Pour chocolate mixture into the molds, filling them about two thirds of the way full (DO NOT overfill).
- Lift the cutting board about an inch off the table and drop it so it taps down. Repeat a couple of times until the chocolate mixtures settles smooth.
- Refrigerate about one hour until meltaways are completely set up before removing from molds.
- Store in the fridge or on the counter for 3-4 days.


Christine Shipley says
Excellent recipe and so easy to melt together and make. I made heart shape meltaways for a wedding and they were a hit. Thanks for the recipe!
Beckr says
Thank you for the recipe and the tips. It made it so easy to quickly make the recipe and a great idea to use a measuring cup. Last time I tried making meltaways the whole kitchen was a mess and I wasted as much as I got in the molds. I made a batch with the 2 chocolates and shredded coconut. It was pretty good but next time I’ll use way less white. It was very very sweet.
Gloria Wilson says
These turn out wonderful! The molds work perfectly.