
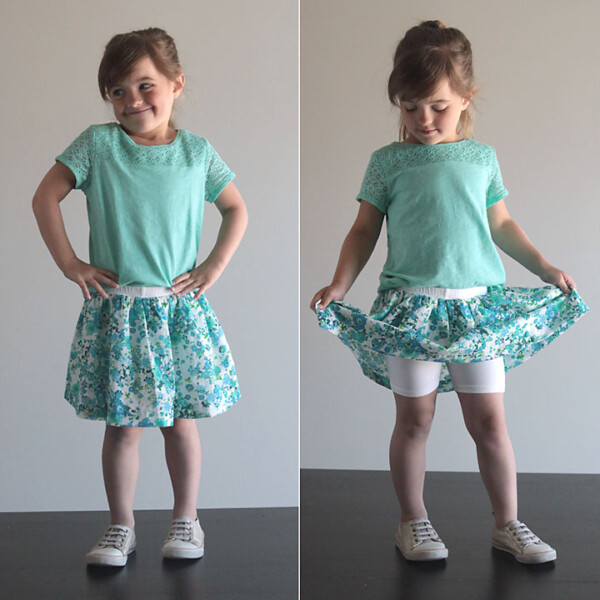
In today’s post: Learn how to sew a cute gathered skirt with shorts attached! Perfect for your active little girl over the summer. Also called a scooter skirt.
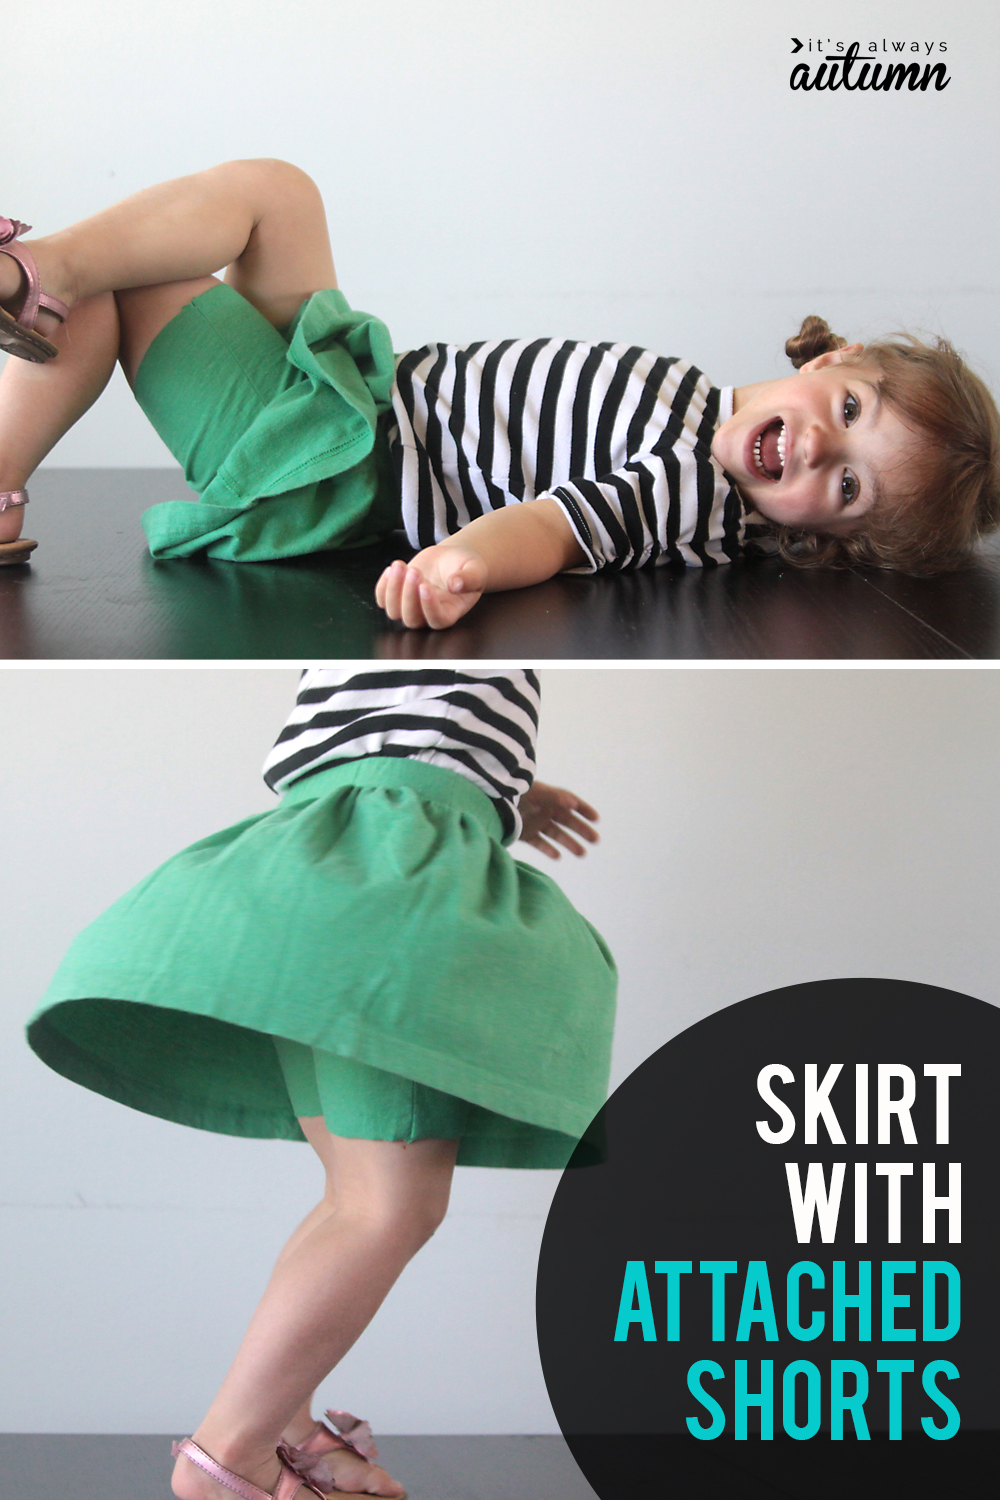
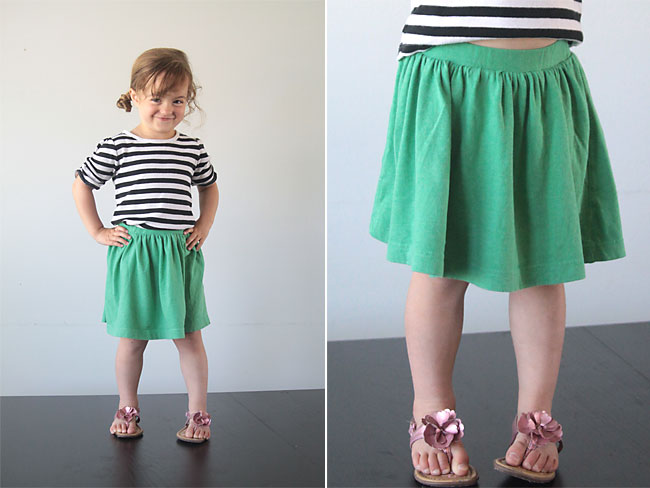
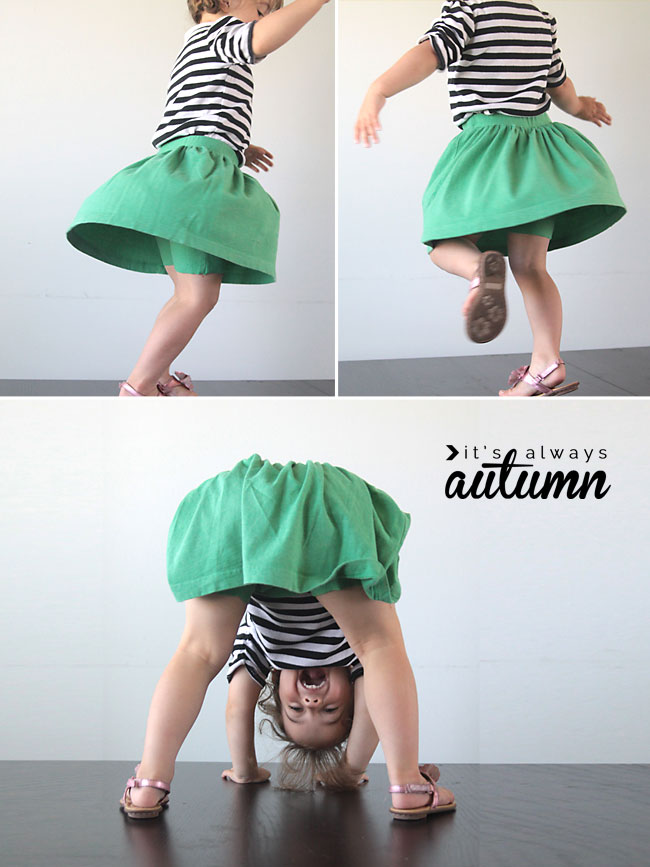
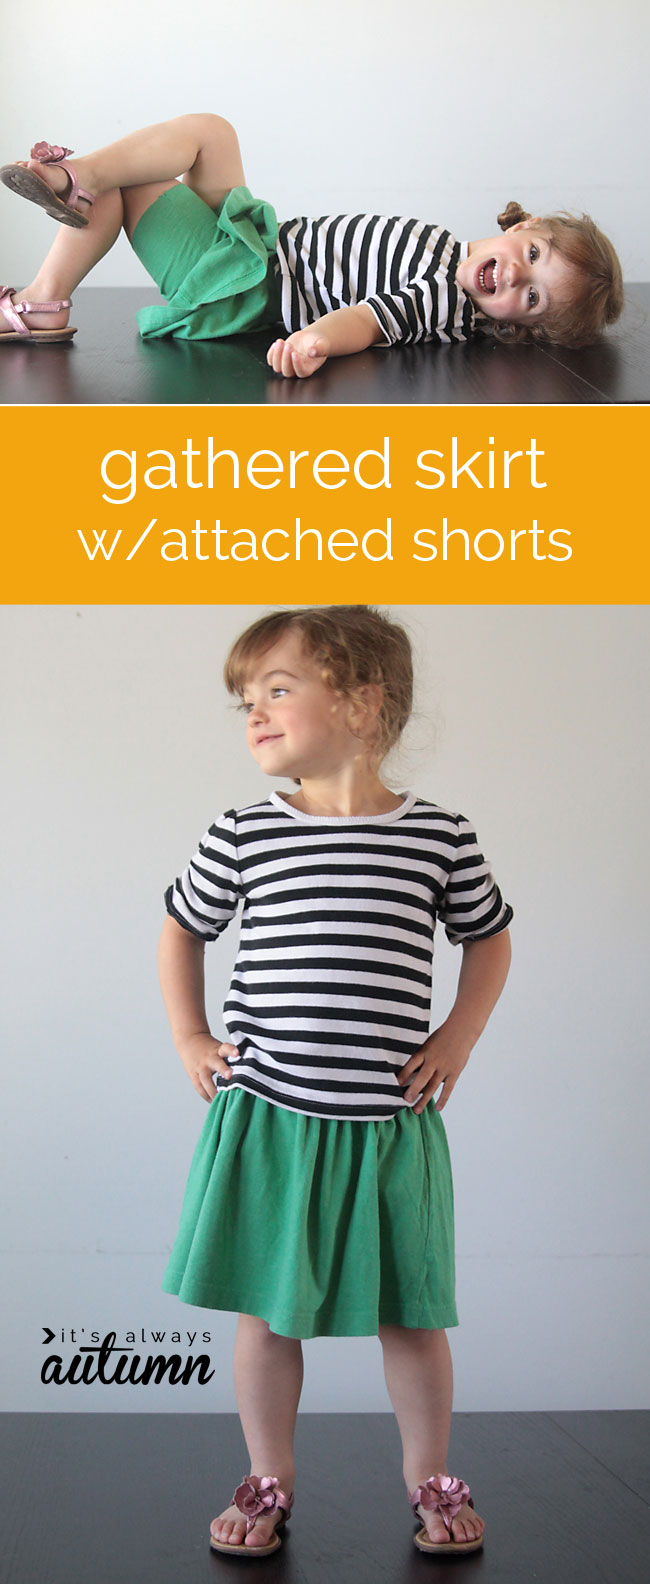
My little girl loves dresses and skirts, and lately she’s been insisting that they “float up” when she twirls. Gathered skirts are easy enough to make, but I end up spending the whole day reminding her to put her skirt back down and make sure her undies are covered. So I figured out how to make a simple gathered knit skirt with shorts attached! It’s all one piece, so it looks like she’s just wearing a cute, twirly skirt:
But when she actually twirls (or hangs upside down on the jungle gym) you see the shorts underneath instead of her Minnie Mouse undies.
I’ve seen these skirt with shorts attached in stores lately called “scooters” or “scooter skirts”.
How to make a skirt with shorts attached
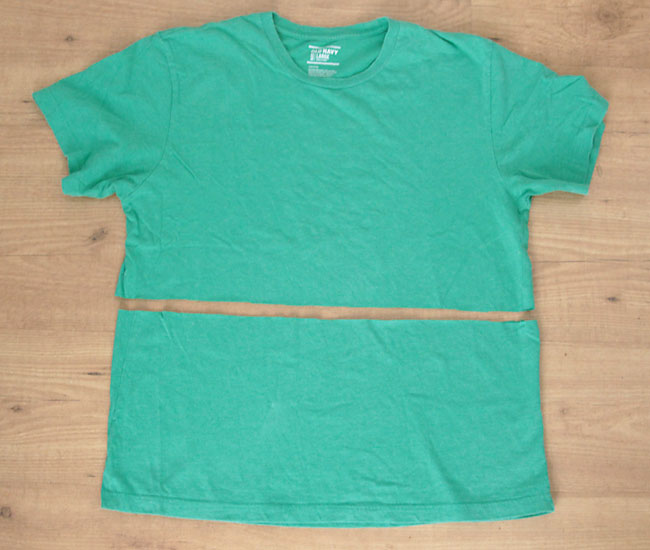
I made this skirt/shorts combo from a thrifted men’s tee, meaning it only cost $1! Thrifted men’s shirts are a GREAT way to buy cheap fabric!
NOTE: I made another version of this project using storebought bike shorts to make it even easier! Check out that skirt with shorts attached here.
Here’s how I made this easy gathered skirt with attached shorts:
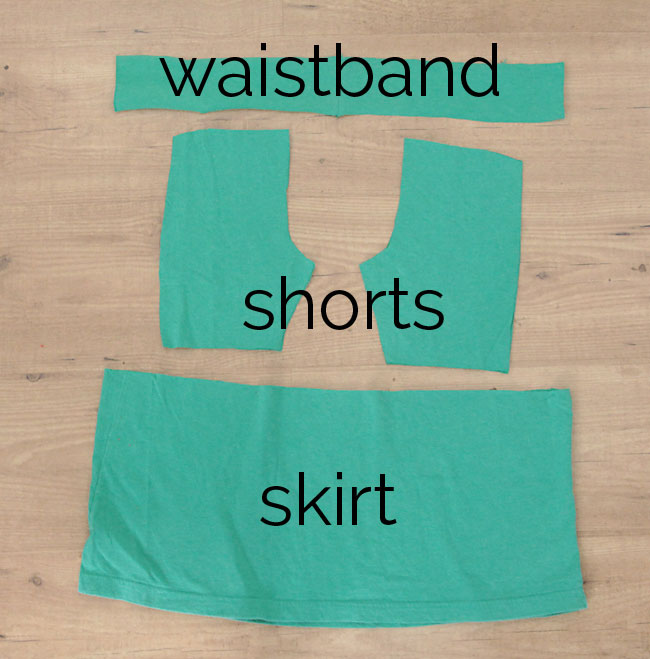
I measured from my daughter’s waist to just above her knee (10 inches) and cut that much off the bottom of the tee to use for the skirt.
Next, I used a pair of leggings that fit her well to cut shorts pieces from the top of the shirt (remember to add seam allowance). There will be 4 pieces for the shorts.
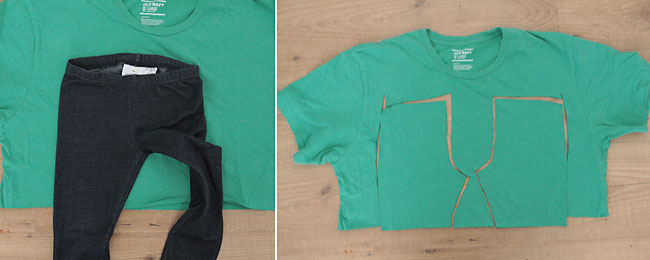
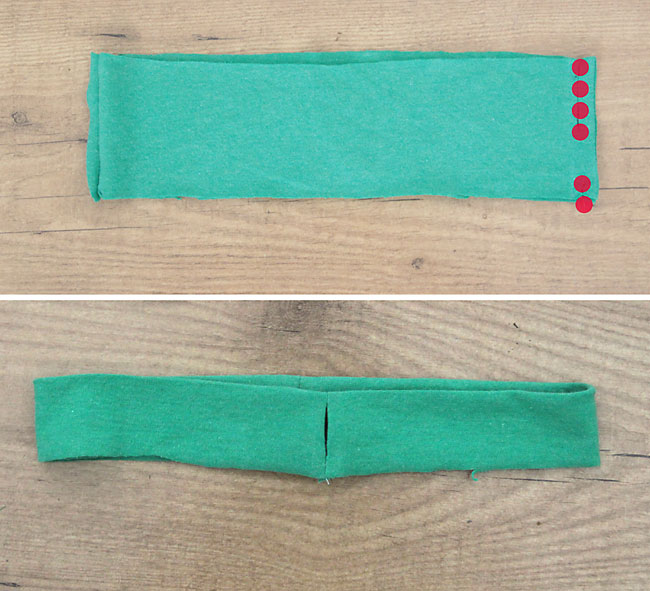
Finally, I cut a rectangle for the waistband – 3 inches tall and wide enough to go around my daughter’s waist. (I used material from the sleeves for this). Remember, the stretch needs to go along the length of this piece.
I started by sewing the shorts together along the dotted lines below – down the outside of each leg and then down the inside of each leg.
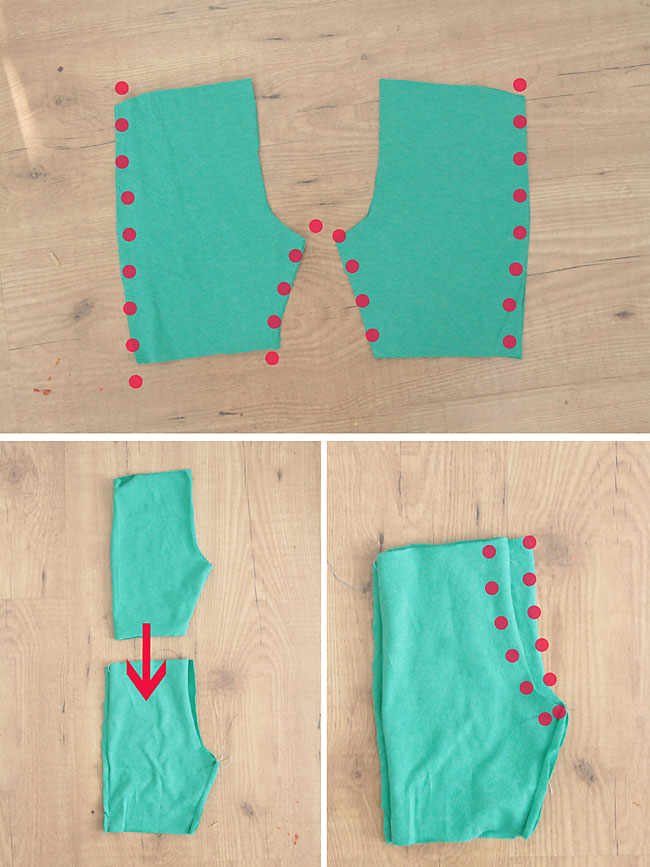
The I turned one leg right side out, and slid it into the other leg which was inside out. I sewed the two legs together along the rise (the crotch seam). Turn everything right side out, and you have shorts.
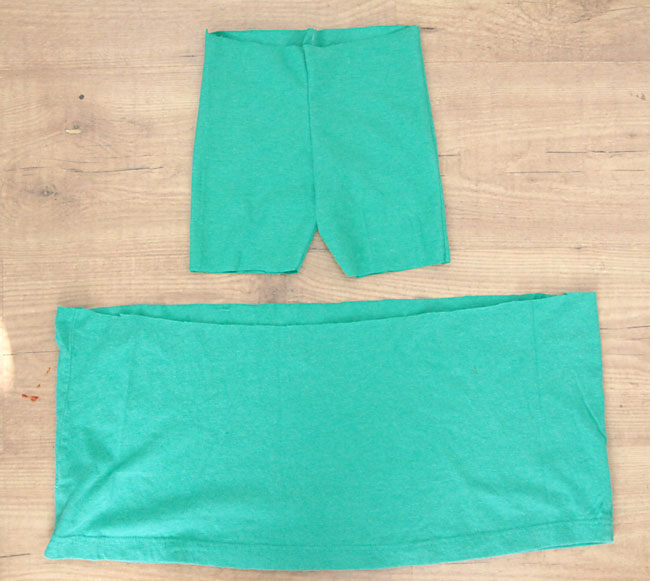
Next, I cut the waistline a little in the front of the shorts and the front of the skirt, as you can see below. This is important when sewing for toddlers since their little tummies stick out. If you don’t lower the front, the skirt will end up being longer in front than in back. If your toddler still wears diapers you’ll want to lower the front even more than what’s shown here.
I sewed a gathering stitch (long stitch length, lo tension) along the top of the skirt piece and gathered it until it was the same width as the top of the shorts (not shown).
The next step is to get the waistband ready. Sew the two short ends together as shown below, leaving a scant 1 inch opening on the lower half (1st photo below). Then fold the band in half and press. You’ll see that at the seam you have an opening where you’ll be able to thread elastic through (2nd photo below).
Now it’s time to put all the pieces together! First the shorts to inside the skirt (both right side out), and then the waistband goes on top of that, with raw edges together. The hold for the elastic should be on the outside at this point.
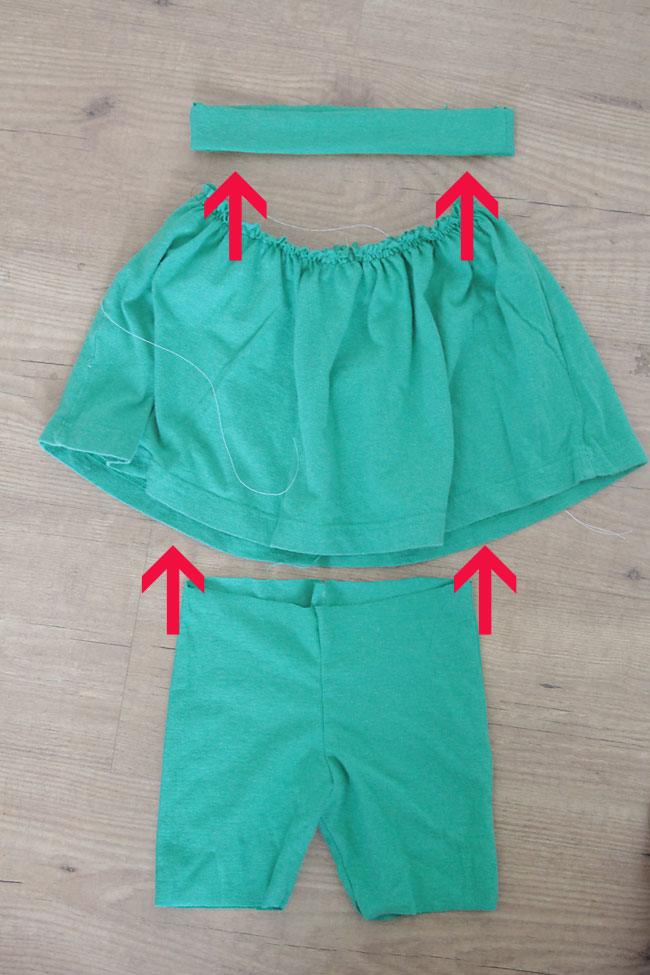
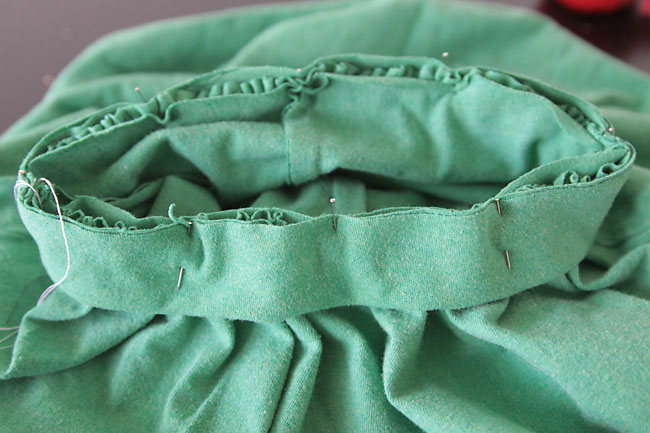
Pin all three pieces together – you can see what it looks like below. Shorts on the inside, gathered skirt next, waistband on the outside.
Sew around all the raw edges to connect everything. Then cut a piece of 1-inch elastic to 1 inch smaller than the waist measurement, and thread it through the waistband. Sew the ends of the elastic together, and your skirt with attached shorts (scooter skirt) is done!

Since knit doesn’t fray, I didn’t even worry about hemming the shorts. It probably took about an hour start to finish, including taking photos, so I bet it will go even faster next time.
Rebecca b says
My daughter is in 2nd grade. She spends all of her time on the monkey bars at home and at school. And she’s always in a skirt. Usually we just slap some leggings on her or a pair of shorts. This is a great alternative. We’ll probably be making a dozen for the start of school. Thanks.
Jenn says
Very cute! And your daughter is just adorable!!
autumn says
It’s a great idea – I teach primary at church and we are constantly telling the little girls to put their skirts back down – shorts underneath should be standard for little ones!
Nicole says
This is awesome! Just what I needed. Thanks.
CTY says
I would love to make these–but I am having a problem with the orientation of the shorts. The photo with the leggins shows the leggings right side up– but the traced pieces in the photo next to it looks like they are upside down. Are they? Slipping one leg into the other are all 4 of the crotch layers sewn together? The photo seems to sew two lines with 2 layers each line. Anyway, I think I’ll practice on a few stained tees that are ready for the rag bag.
autumn says
Yes, sewing shorts can be super confusing because they look very similar right side up or upside-down. They are actually right side (waist) up in all the photos in the tutorial. The part that has a slight curve is the rise, or center seam than goes from center back, under the crotch, and back up center front. And then when you slip one leg into the other you’re not sewing all 4 layers together – it’s hard to show in a photo, but you’re actually sewing a big “U” shape with just two layers together the whole time. I probably should have taken the photo from a different angle so you could see the sewing line better. I think it will make sense once you give it a try, or you can take a look at this tutorial: http://melissaesplin.com/2012/02/baby-leggings-tutorial-pattern/ It shows a slightly different way to do that step that might be easier to follow. Good luck!