
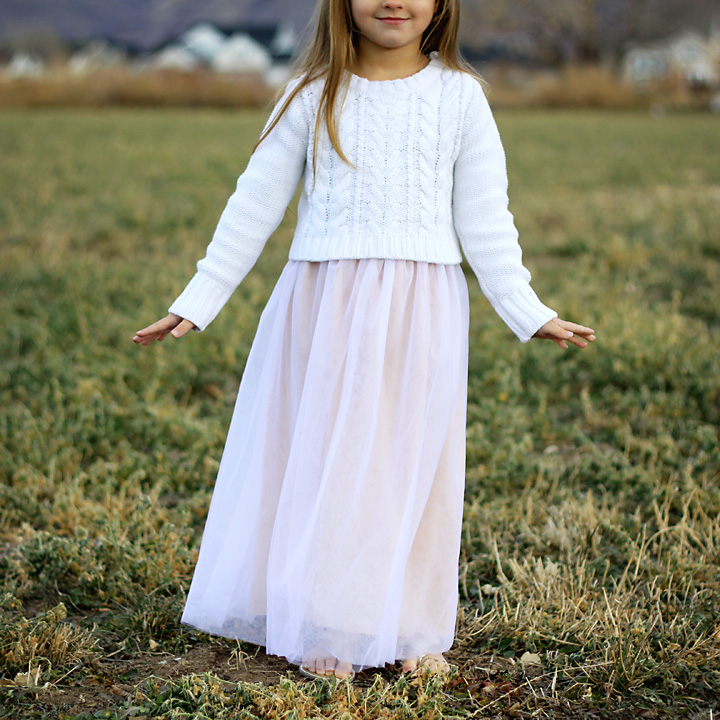
I love the look of the pretty tulle skirts I’ve seen in stores lately. They aren’t the big tutu-type skirts that were popular a few years ago; instead they are much softer and a little more sophisticated looking while still having a hint of “princess” about them. The good news is that a skirt like this is super easy to make!
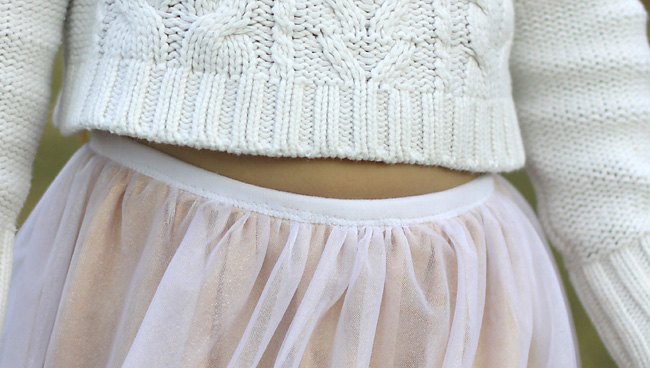
The key to a pretty tulle skirt is the type of tulle you use. If you buy normal tulle, the skirt will be a little scratchy, a little bunchy, and it won’t wash well. But if you get the right kind of tulle, it will be soft and pretty AND hold up in the wash.
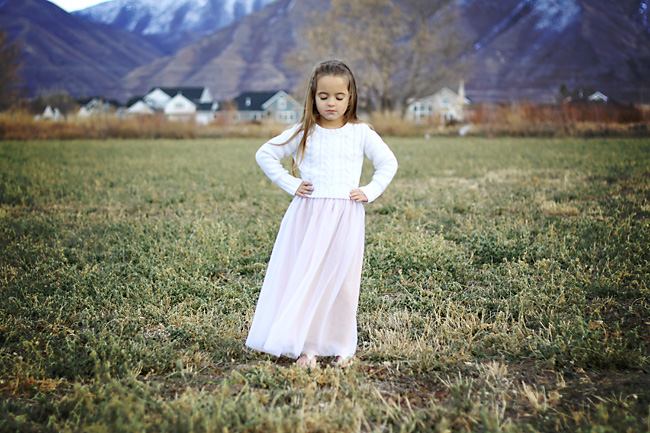
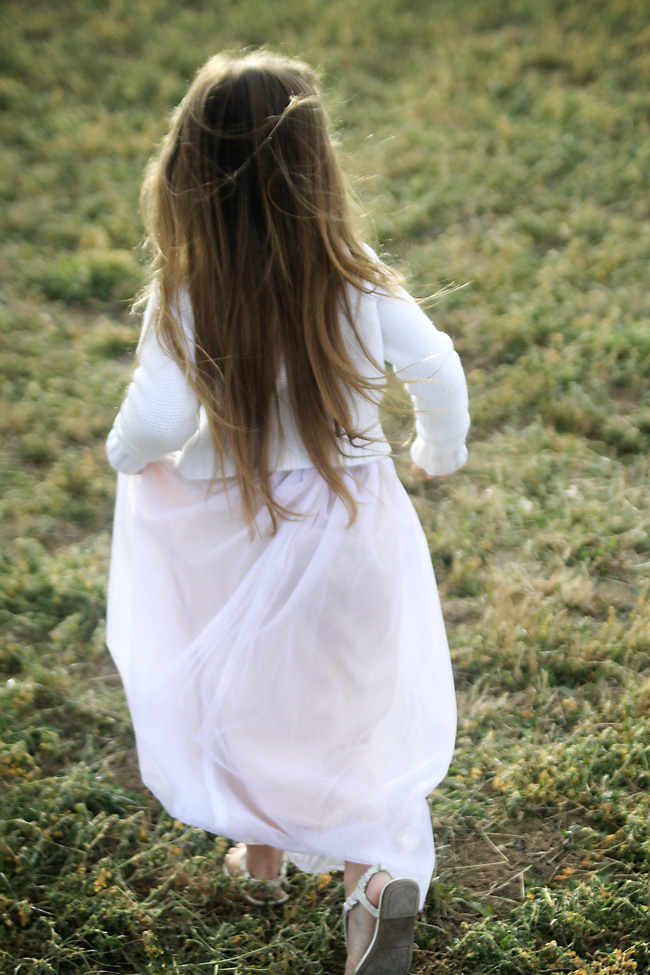
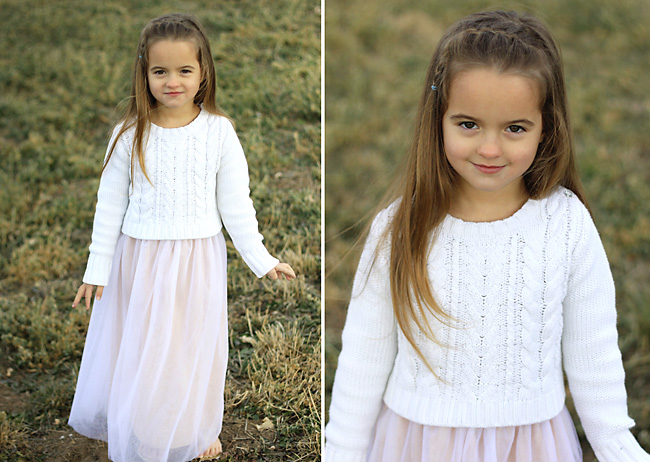
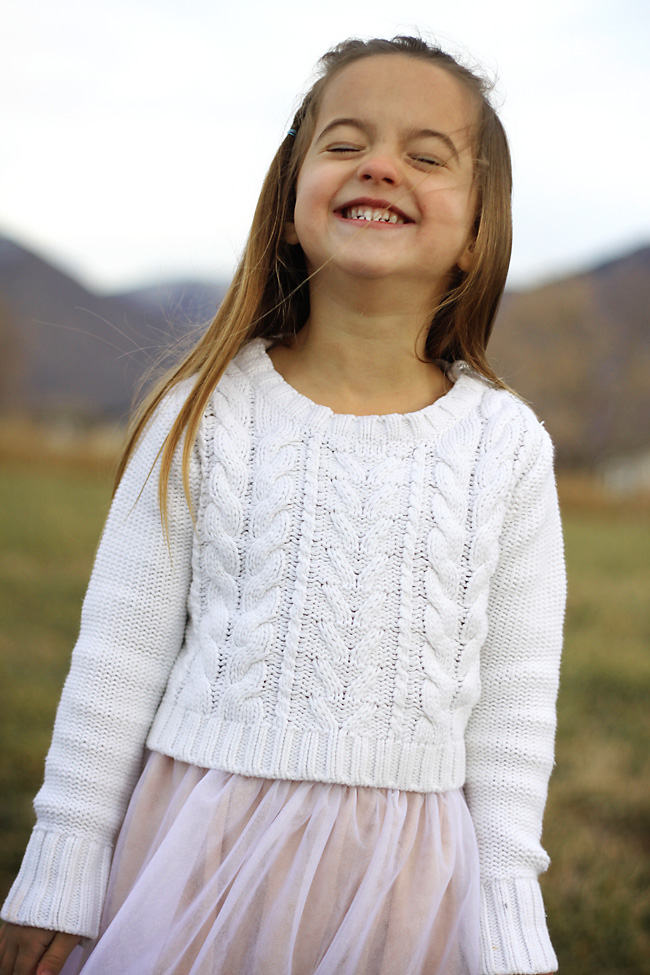
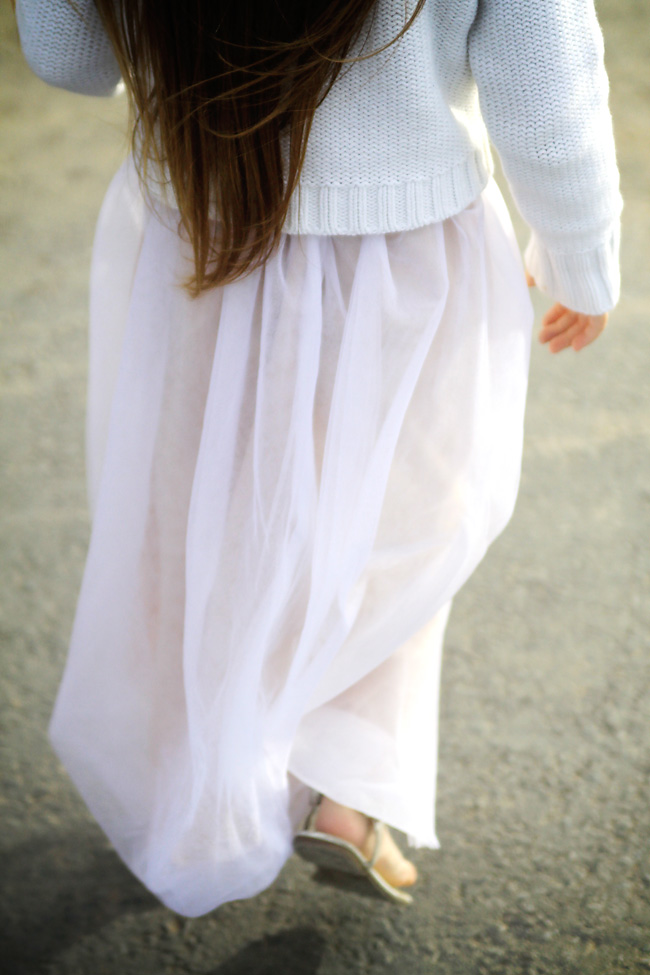
Paired with a sweater, it’s the perfect “fancy” outfit for a little girl that’s still comfortable enough to run around in.
My favorite fabric to use for skirts like this is foiled tulle. You can find it online here. It’s pricier than regular tulle, so plan to use a coupon, but it’s so worth it! It washes up so soft, doesn’t get messy on unfinished edges, and doesn’t stick to itself like normal tulle does. I first used it on this ballet dress and my daughter wore that thing every week for a year – we washed it so many times and the tulle held up beautifully. And it has a subtle sheen that catches the light and is very pretty.
Unfortunately, my local Jo-Ann Fabrics doesn’t stock foiled tulle anymore and I didn’t want to wait for an online order, so I found a close substitute: micronet (find it online here). It’s also much softer than regular tulle and looks a lot like foiled tulle. Unfortunately it doesn’t wash nearly as well as foiled tulle and comes out of the dryer pretty crumpled looking. If I make another, I’ll definitely order the foiled tulle.
Even so, my daughter is thrilled with her new skirt:
Should we finally get to the instructions?
How to make a long tulle skirt:
You’ll need foiled tulle or micronet for the outer skirt, something soft and a little slippery for the under skirt (I used an inexpensive “jetset” knit from Jo-Ann), and enough fold-over elastic to go around your little one’s waist.
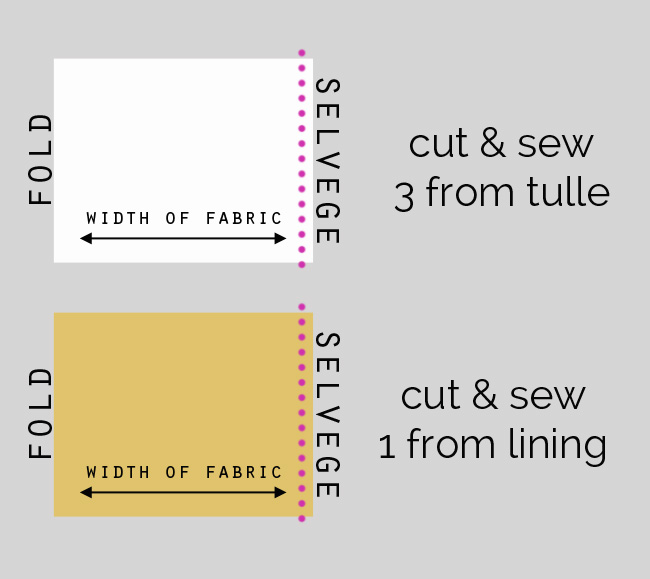
To figure out how much fabric you need, measure from your girl’s waist to the floor. For my daughter, this was 24 inches. That’s how many inches of lining fabric you’ll need. Multiply by 3 and that’s how many inches of tulle fabric you’ll need (for my skirt I needed about 2/3 yard lining and 2 yards of tulle, since 24 x 3 = 72).
Cut 3 pieces of tulle: each piece should be the length you just measured by the entire width of the fabric. Cut an identical sized piece of your lining fabric.
Take each piece of fabric separately and fold it in half with right sides together, matching selvedge edges. Sew down the selvedge edge. On the tulle, press the seam to one side, and topstitch it down using matching thread. You now have 4 different “skirt” pieces. (If your underskirt is made from fabric that frays, hem it now. If it won’t fray, you may want to trim about an inch from the bottom so it will be slightly shorter than the overskirts.)
You want to put all 4 skirt pieces together, one inside another, all of them with the right side facing out. You’ll also want to match up the seam in each piece. In the photo below you can see the 3 tulle skirts placed one inside another, all the seams matching up. You’ll place the lining skirt inside all three tulle layers.

At this point, go ahead and even out the bottom edges. The seams will go in the back, and as you can see in my photo above they often pull up a little since it’s hard to sew on such a delicate fabric. If so, you can trim the front and sides so they are even (I actually trim the front so it’s a little shorter than the back since the waist of skirts tends to sit a little lower in the front than the back).
Next, you want to sew a gathering stitch all the way around the top of the skirts. A gathering stitch has a low stitch tension and long stitch length. Divide the top of the skirt into fourths (with the seams being the center back) and mark with pins.
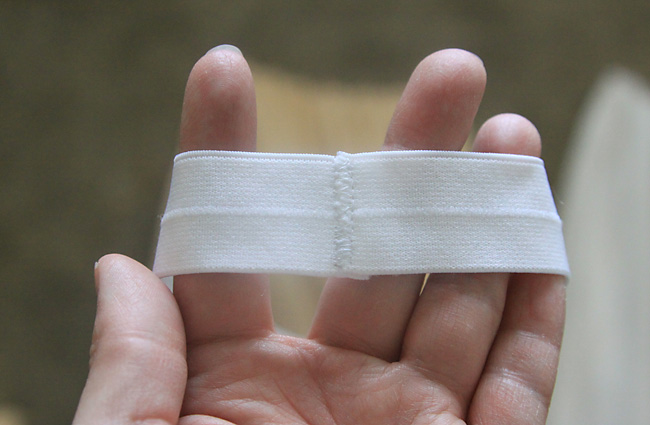
Measure the girl’s waist. Cut a length of white fold over elastic 2 inches shorter than the waist measurement. Barely overlap the cut edges of the fold over elastic and use a zigzag stitch to sew them together, as shown below.
You’ll also want to divide the elastic into fourths and mark with pins. Pull on the bobbin thread to gather up the skirt until it’s just larger than the elastic, as shown below. Make your gathers as even as possible.
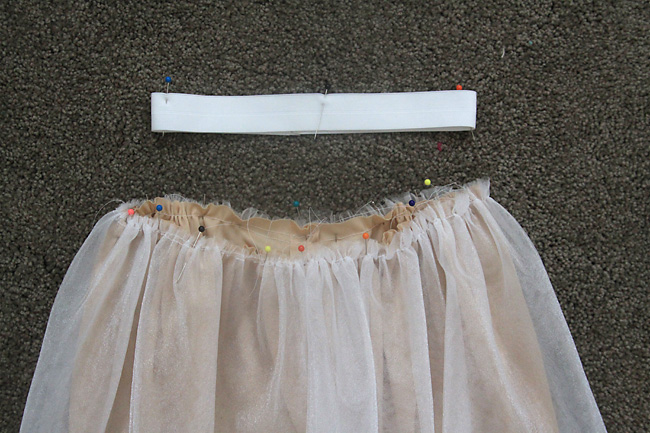
Then you’ll fold the elastic over the top of the skirt, sandwiching all the raw edges and matching the seam in the elastic to the seams in the skirts. Match the pins dividing the skirt and elastic into quarters as well. Then sew close to the edge of the elastic with a zig zag stitch, stretching slightly if needed to fit the skirt. The elastic will completely encase the top of the skirt, as you can see below:
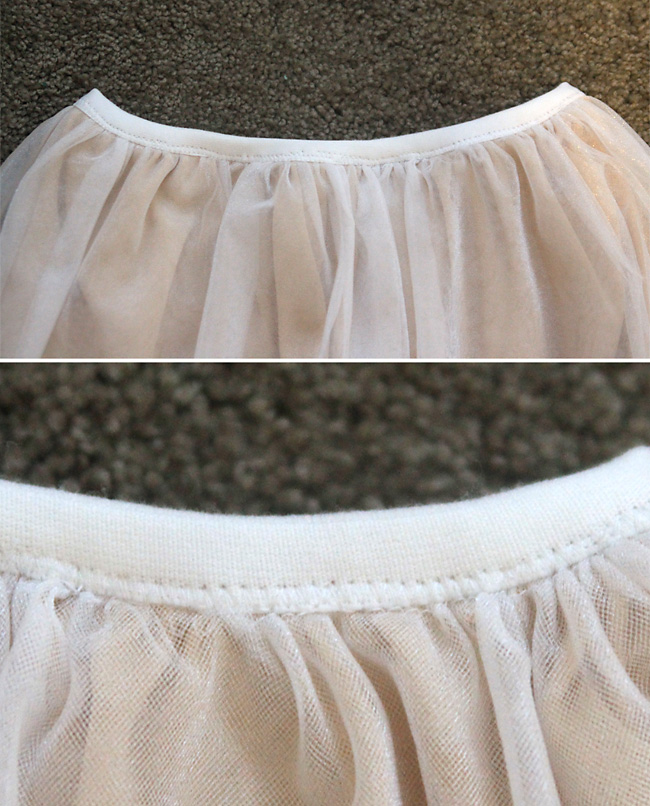
My zig zag is a little wonky because my sewing machine’s pretty old, but no one will notice once the skirt is on. As a last step, you’ll want to pull out any of the gathering stitches you can find.
At this point the skirt is finished and ready to give to a lucky little girl. Happy sewing!


Jeanie says
I just finished this for my grand daughter and it’s beautiful. Can’t wait to send it to her for her birthday! Great post!
Sara says
I can’t believe how grown up Lilly is!! She is adorable!!
nINA says
You are so right about the scratchy tulle problem, I have only tried making one once before and it was not a success. But they are so gorgeous…now I know I need foiled tulle…thanks!
Sarah Helene says
Truly CHIC! FABulous long tulle skirt sewn & worn by young daughter. Love the pale pink topped by a white thick cabled pullover creating more texture. Your tutorial is detailed & easy to follow with accompanying photos. Lucky girl — certainly she gets numerous compliments whenever she wears this outfit! BRAVO to mom, revealing lots of love sewn into this skirt! Sarah in Minneapolis