
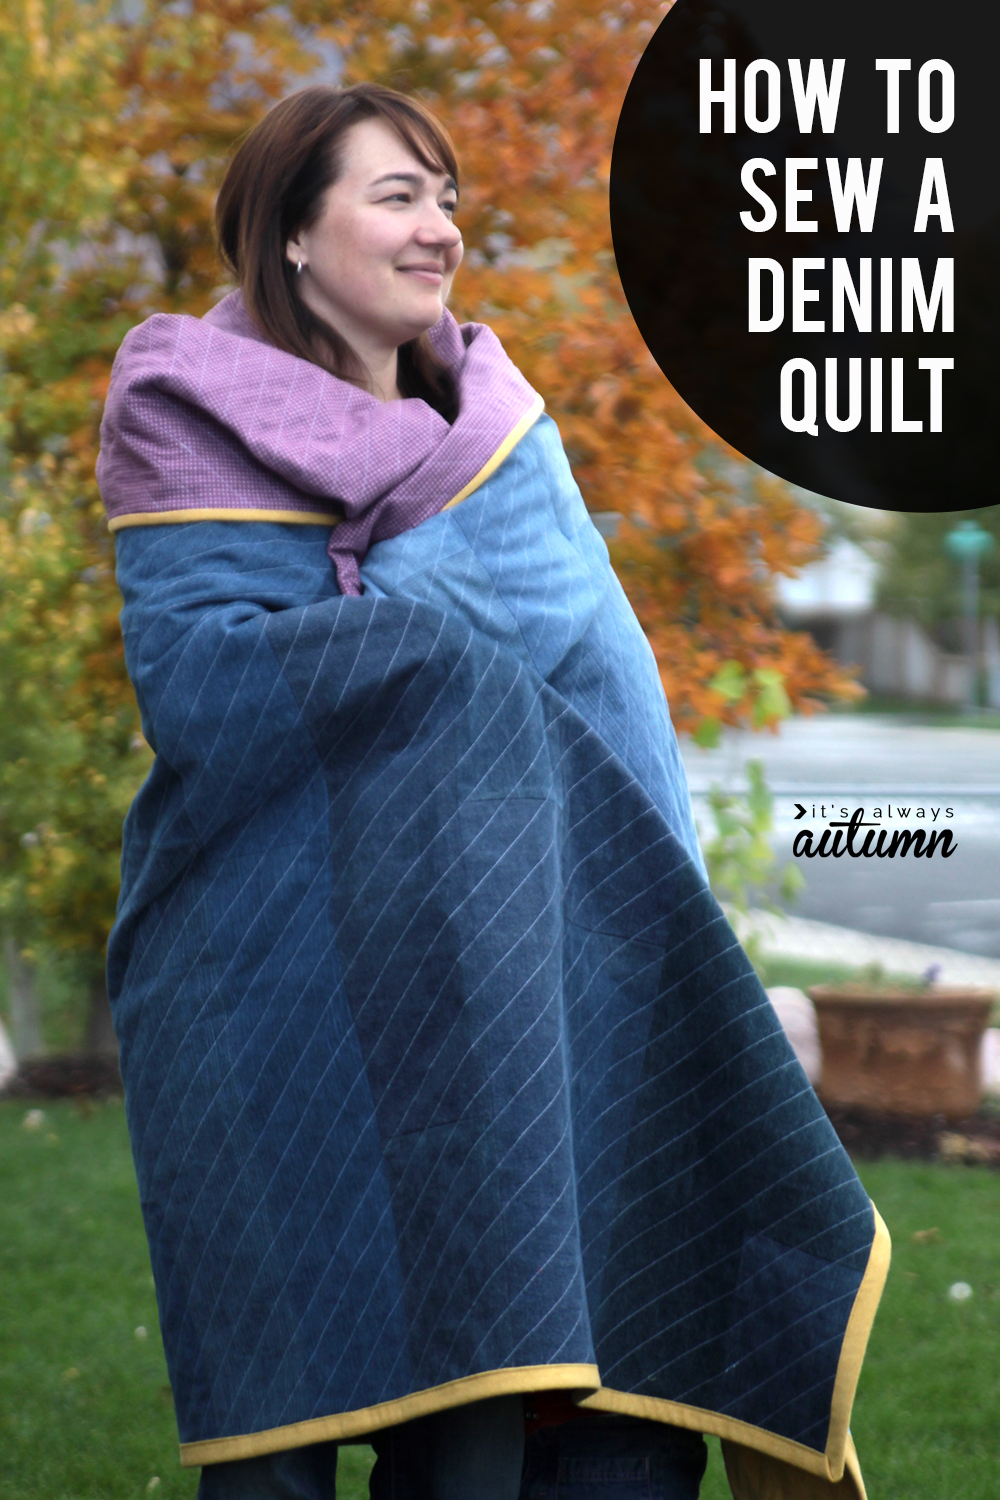
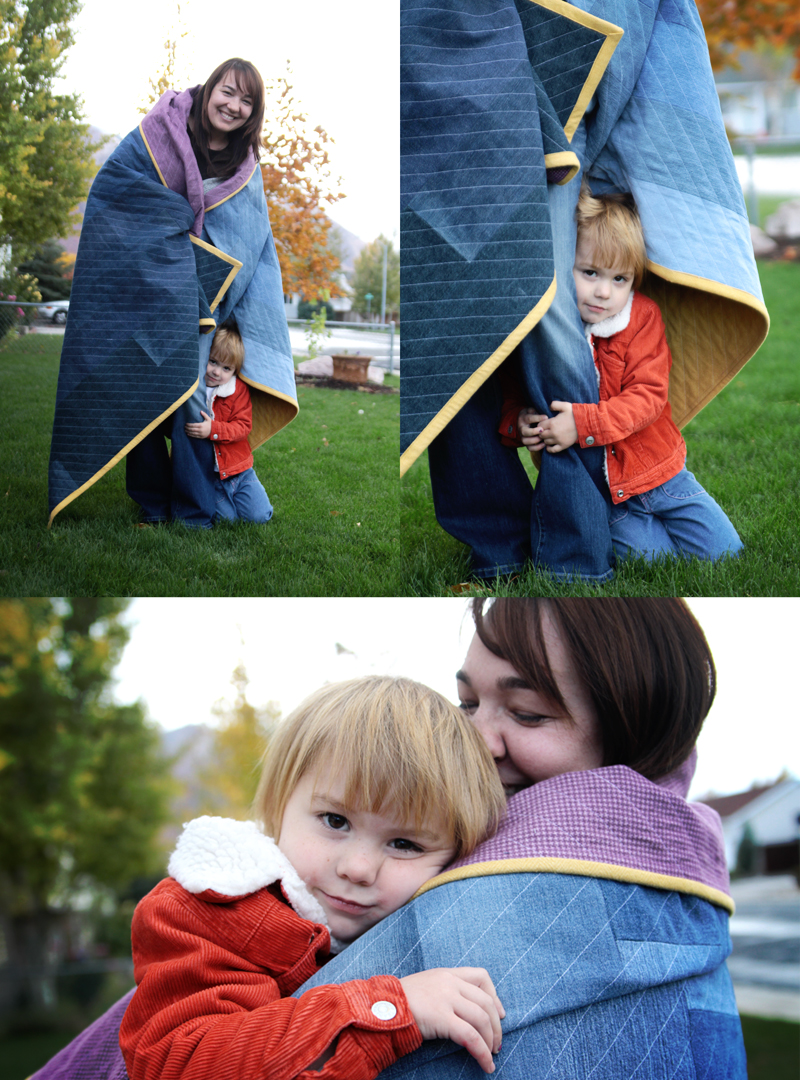
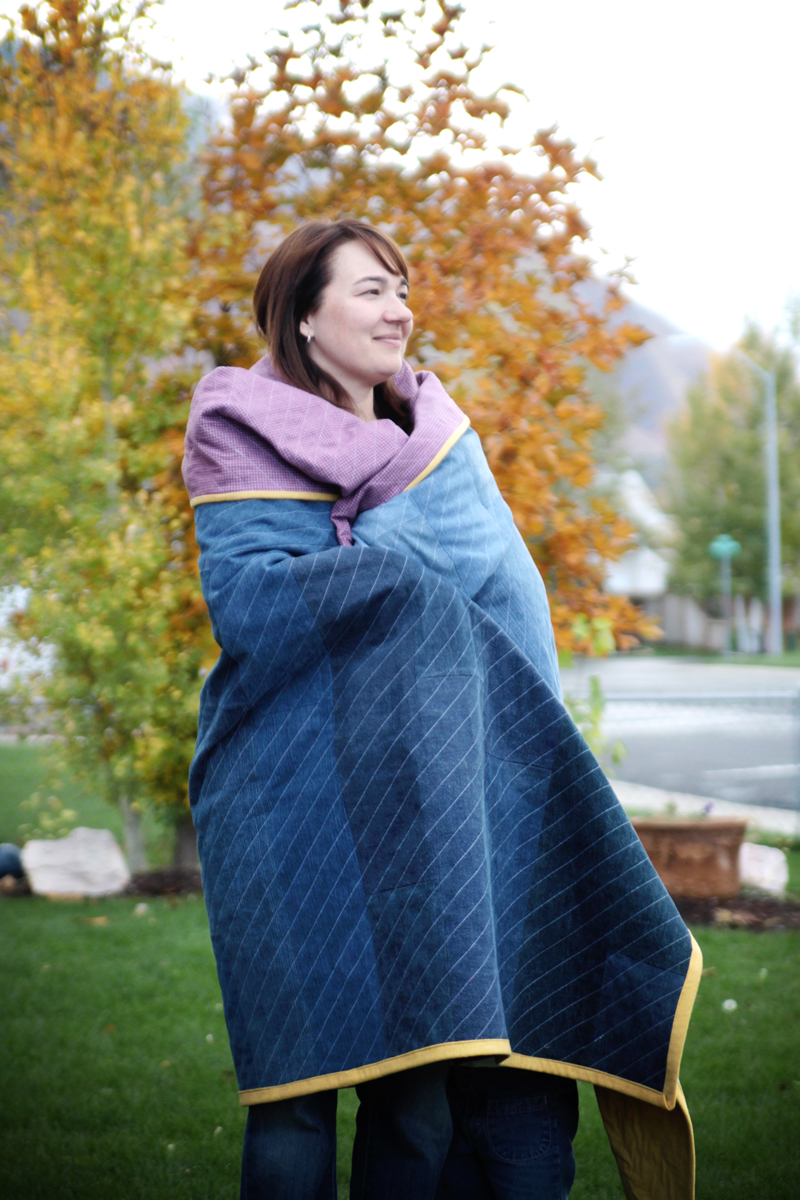
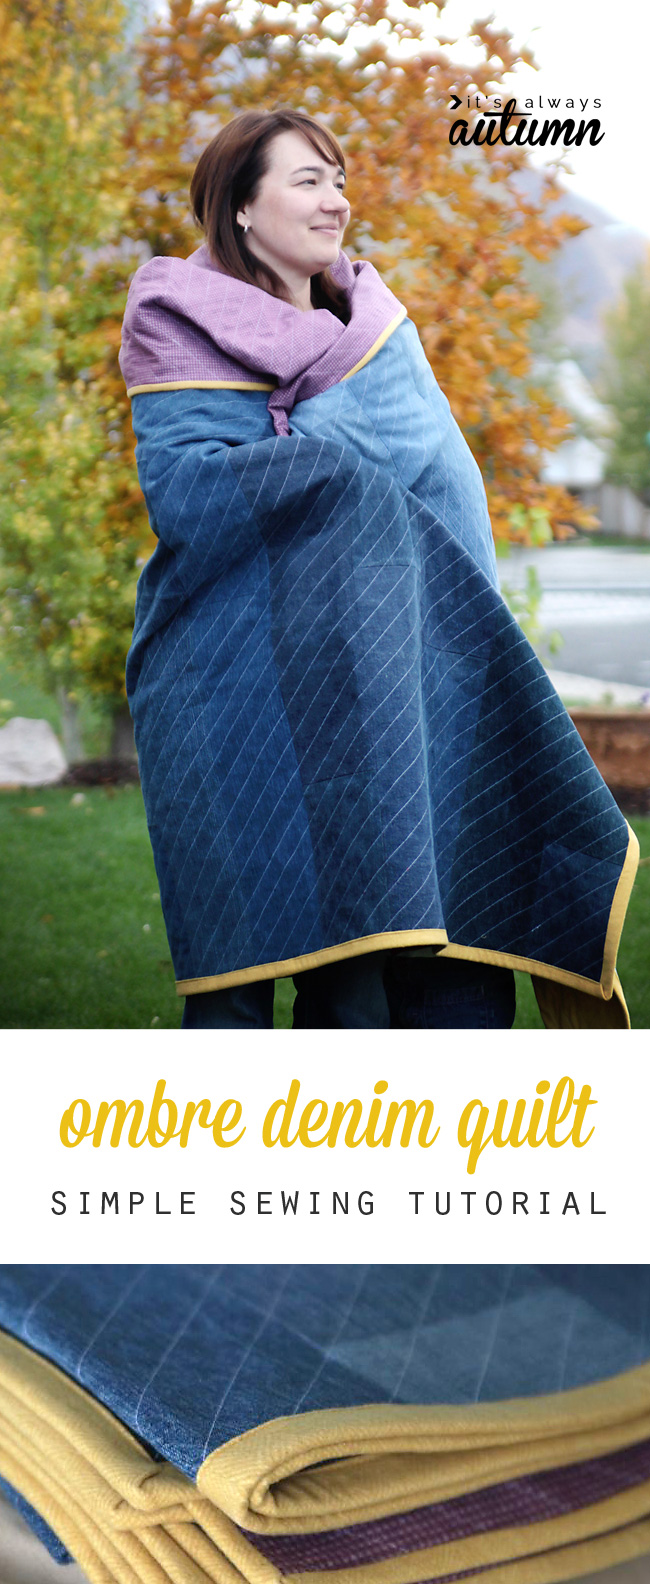
In today’s post: Learn the easy way to turn old jeans into a beautiful denim quilt, perfect for picnics!
Every one needs a denim quilt! They’re perfect for keeping in the back of the car so you always have a blanket handy for park playdates, picnics, soccer games, etc. A few years ago I decided I needed one. Today I’ll show you the easiest way to turn old jeans into a beautiful denim quilt.
Because you use recycle jeans to make a denim quilt, your squares have to be fairly small. I realized it would be much simpler to use longer strips of denim instead of squares.
Using strips instead of squares meant the quilt came together much more quickly!
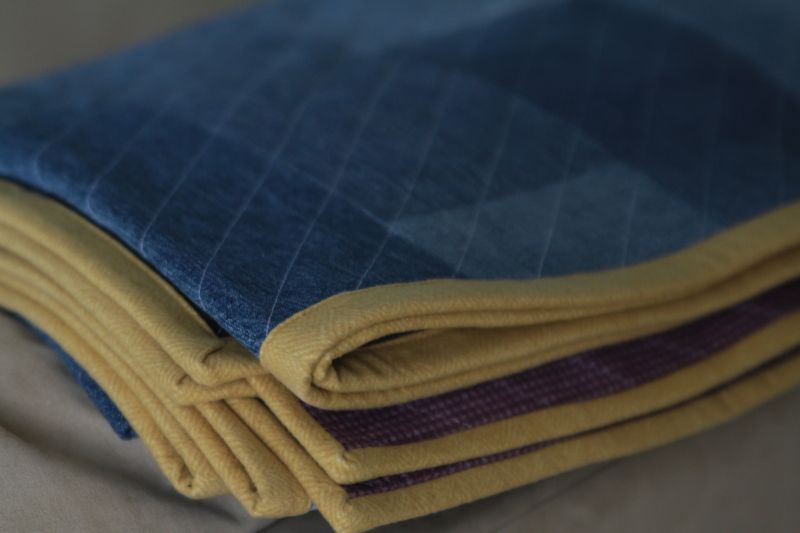
I used light, medium, and dark colored jeans and cut strips from each so I could get a pretty light-to-dark color effect.
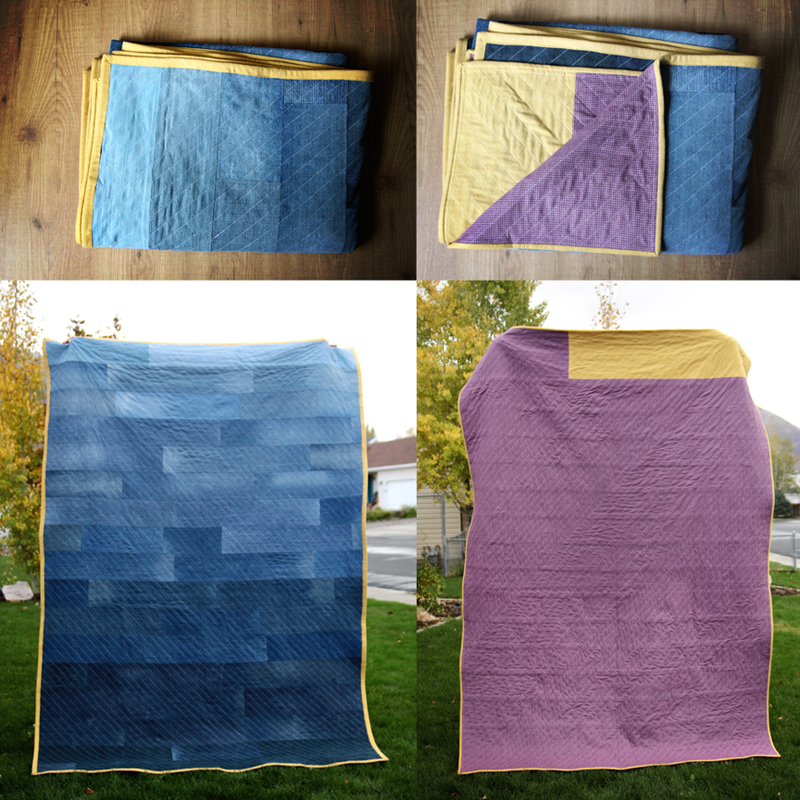
For the back of the quilt, I used a soft flannel. I didn’t use any batting in between layers because the denim and flannel together were already heavy and warm enough – I didn’t want the quilt so thick that we’d never use it. Leaving out the batting allowed me to straight stitch quilt the entire thing on my regular old sewing machine.
Now, you can certainly tie the quilt instead of sewing quilting, which will make this even easier! If you want to quilt it, you can simply sew straight lines about an inch apart like I did.
How to make a denim quilt
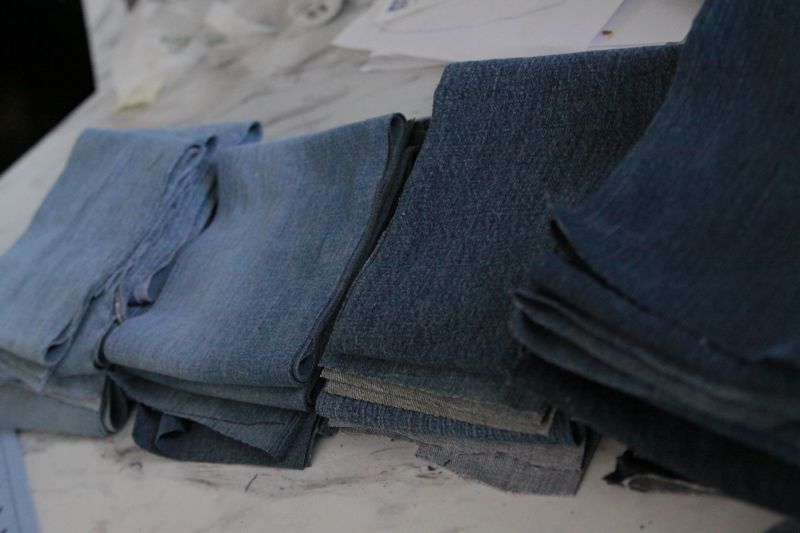
1. Gather denim. I purchased all my denim at three different garage sales the morning I wanted to start making the quilt. Garage sales are the best place to get denim cheap! If you want to make an ombre quilt you need to pay attention to the color of the jeans you are buying – be sure to get some that is quite dark, some that’s medium colored, and some that’s lighter. I kept all the denim I had bought in hand as I was looking for more, to make sure the colors all looked like they’d go well together. I only purchased adult jeans because I wanted strips the were a full 6 inches wide. Also, pay attention to how distressed the jeans are – if the dark jeans you buy all have really light areas in the bum/knees you’ll have to end up cutting some of those out. I think I purchased about 18 pairs of jeans and had at least three or four more than I needed. I got all my jeans for $1 or less per pair.
2. Wash and cut. I would not recommend trying this without a rotary cutter and large ruler, as you see below. You certainly could do it, but it would take lots longer! I just sliced the legs off the jeans right at the crotch then used my ruler and rotary cutter to cut them into 6 in wide strips. I discared the knees of many of my jeans because they were stretched out and light – but that’s ok, because you end up with strips of different lengths, which is what you’re looking for.

As I cut up jeans, I placed them into one of four piles based on color, and I tried to keep the piles fairly even.
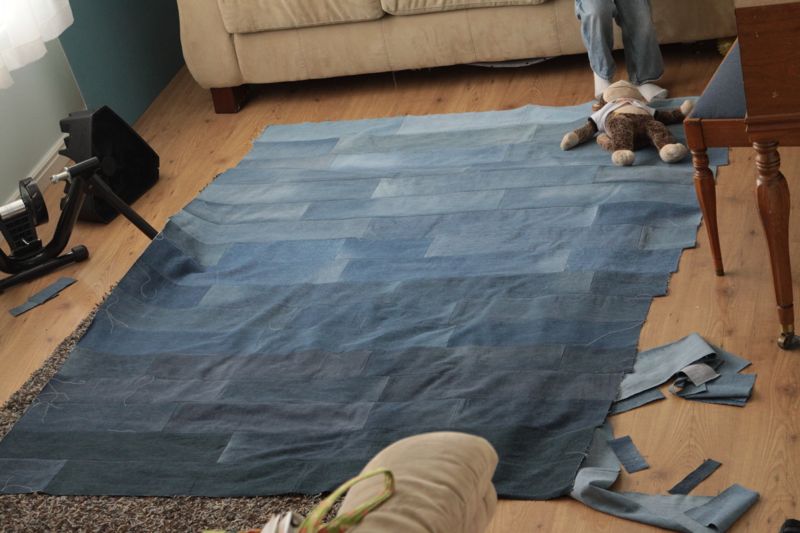
3. Lay out strips, then sew together. When I felt like I had lots of strips I laid them out on the ground and moved pieces around until I liked how they looked (making sure each row could be about 64 inches wide, and adding rows until I had nearly 88 inches in length – I ended up with 17 rows). I tried to make sure that the vertical seams connecting each strip WOULD NOT line up from row to row. When I liked how it looked, I went ahead and sewed the strips together into rows, using 1/2 seam allowance and pressing the seams open. Save yourself a headache and use a denim or heavyweight needle.
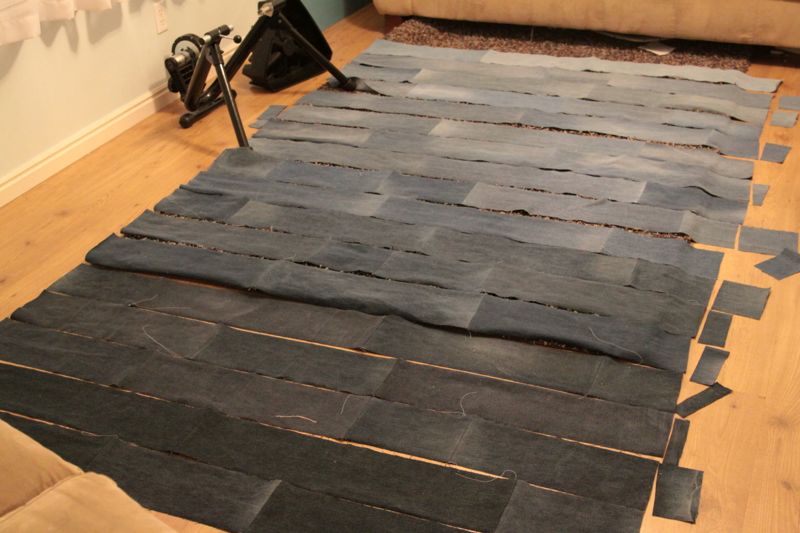
4. Sew each row together, then press all the seams open.
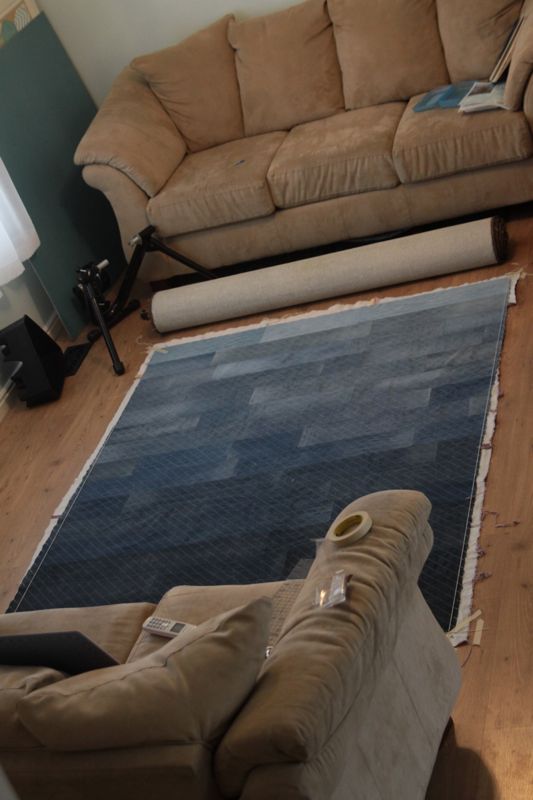
5. Place quilt top on backing fabric, wrong sides together, and baste securely. Sorry, I guess I didn’t take a picture of this step. I used 4.5 yards of nice flannel (washed first!) and sewed it together to get a rectangle just a little larger than my quilt top. I spread the backing down on the floor and smoothed it out as well as I could. I rolled the quilt top up into a log, then carefully unrolled it onto the backing, again smoothing as much as possible. Then I hand basted the two layers together (you could safety pin together if you’d like) so they wouldn’t move around once I started quilting. NOTE: I did not use batting between the two layers because I figured the quilt would be plenty heavy and warm as is. I was right.
6. Tie or machine quilt.this is a good tutorial If you’d like to tie the quilt, . I figured out where I wanted my first row of diagonal stitching to go and marked it with masking tape. Then I rolled up the portion of the quilt to the right of the masking tape into a log, moved it over to my sewing machine, and used a straight stitch with a fairly long stitch length, following the masking tape. (This is a great tutorial for straight stitch quilting – it recommends both a walking foot and grippy quilting gloves – I didn’t use either, but I think I may invest in both before I make another quilt!)
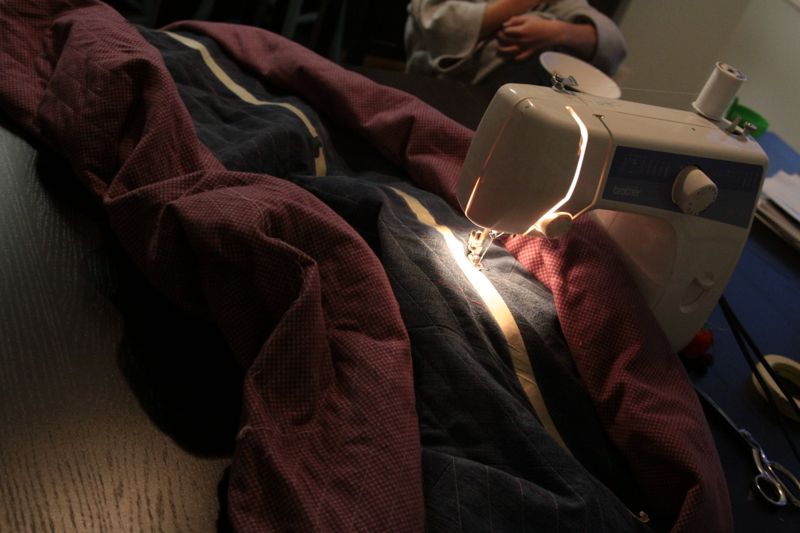
Here’s a closer view of the presser foot, right next to the masking tape. The masking tape really helped me keep my quilting rows nice and straight (or at least straight enough!)
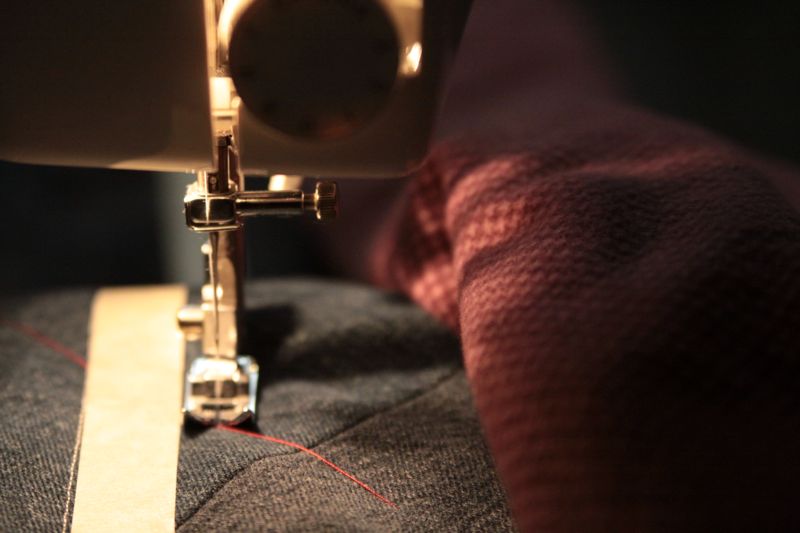
When I finished a row I’d move the masking tape over, lining it up with my row of stitching, then go back to the machine to quilt another row. I put my machine in the middle of my large dining room table, which made the quilting process much simpler because there was somewhere for the heavy quilt to rest as I sewed the rows. I was sewing like crazy trying to get this quilt done in time.
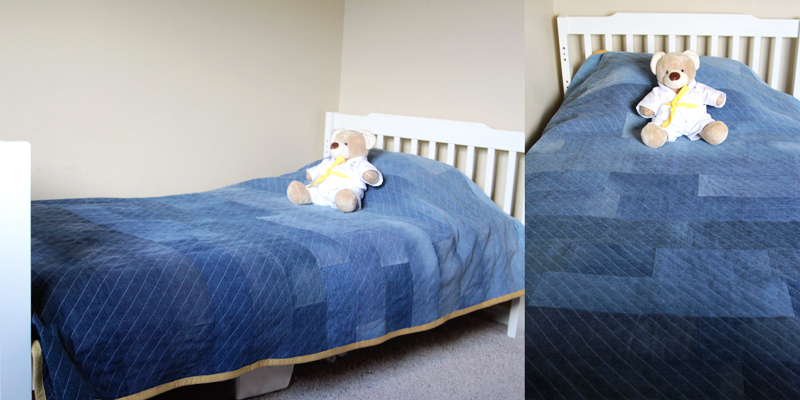
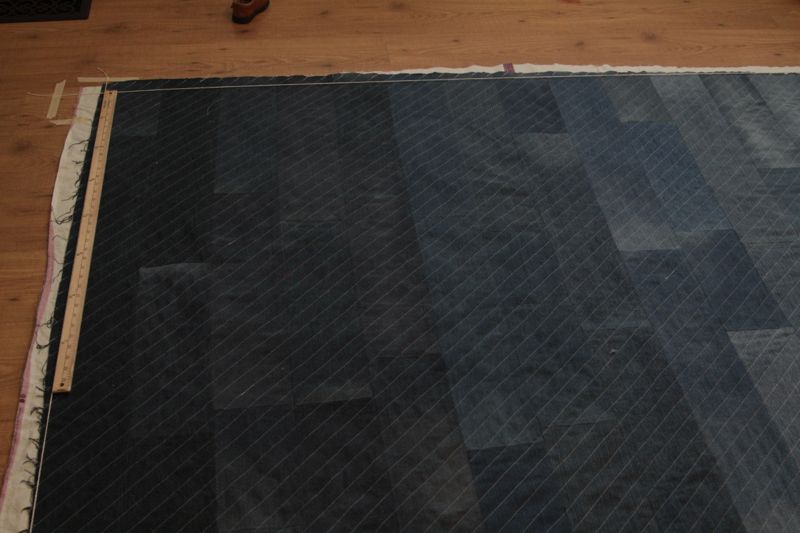
7. Square off the denim quilt. I spread out the quilt on the ground again, then measured and marked an even rectangle using string that I taped to the floor. I slid my cutting mat under the edge of the quilt and used my rotary cutter and ruler to trim the edges even with the string.
You can see the string a bit better here.
8. Bind the quilt. I used this tutorial for adding binding in a soft gold flannel (prewashed!). Make sure to use bobbin thread that matches the quilt backing so it will be less visible.I also had to lower my tension quite a bit so the binding didn’t bunch up as I sewed.
And there you have it: the easy way to make a denim quilt!
More sewing tutorials:
How to make a kids’ pillow bed
20 easy beginner sewing projects
How to make a gorgeous fleece blanket
Easy princess dress up aprons for girls


Cris says
I like the idea of strips instead of squares! For a beginner quilter this seems like a not so daunting large project I can tackle.
Could I use a lightweight fabric (such as muslin?) to line it, and then a different “stronger” fabric (be it flannel, cotton, or whatnot) to use as backing, leaving one side open, to use as a duvet cover? How do you think it would fair out?
Too heavy?
Would the tie on duvet “slide around” too much inside it?
Thanks!
Autumn says
I’m not sure how it would work as a duvet – it is pretty heavy with all the denim!
Linda says
I’m wanting to use denim and tee shirts. What do u This think. I’ve never seen one l
Autumn says
Hi Linda! I would not recommend that, because those two fabrics are very different weights and the t-shirt material will stretch, so I think it would be difficult to sew. Thx!