
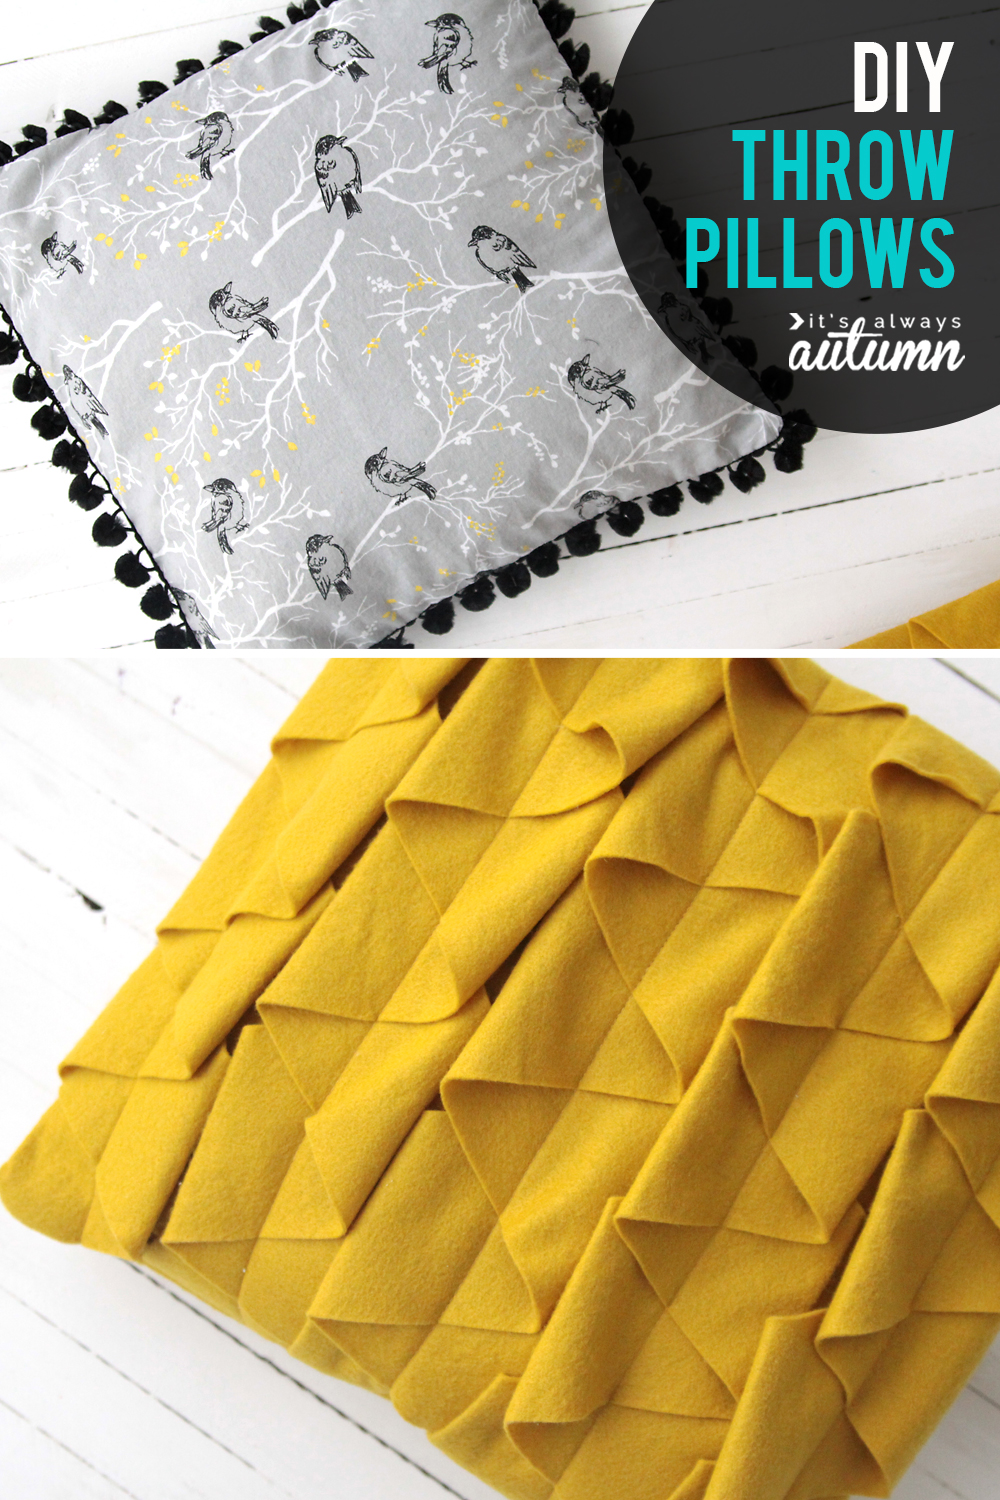
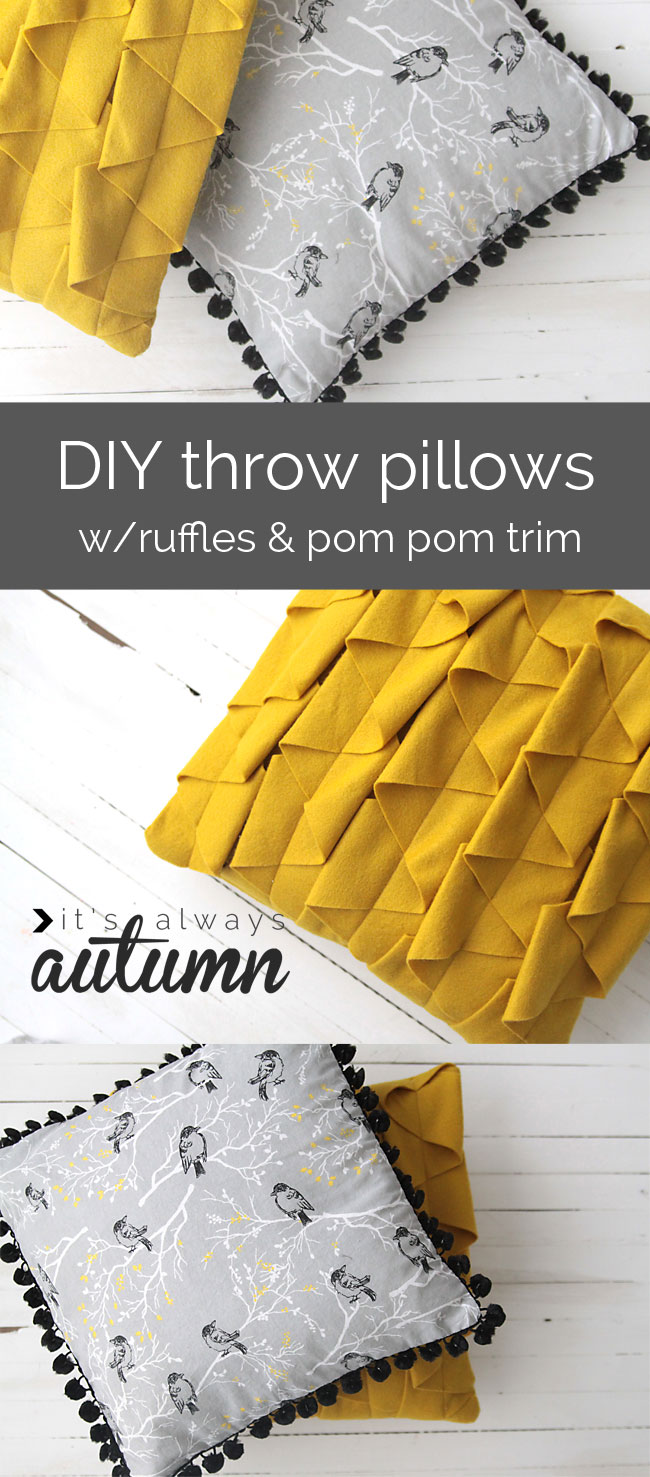
Today I have two easy throw pillow tutorials!
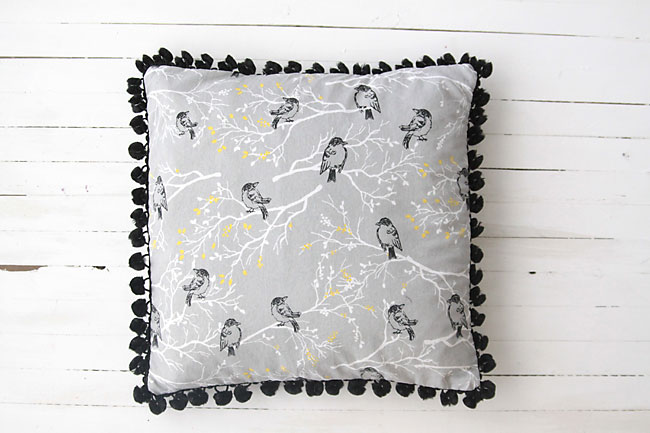
Cute fabric, right? My Joann Fabrics has been getting lots of nice quilting cottons in lately. To make a cover for a 14 inch pillow form you need 1/2 yard of fabric plus nearly 2 yards of trim. Wash and iron your fabric first. Here’s how to make it:
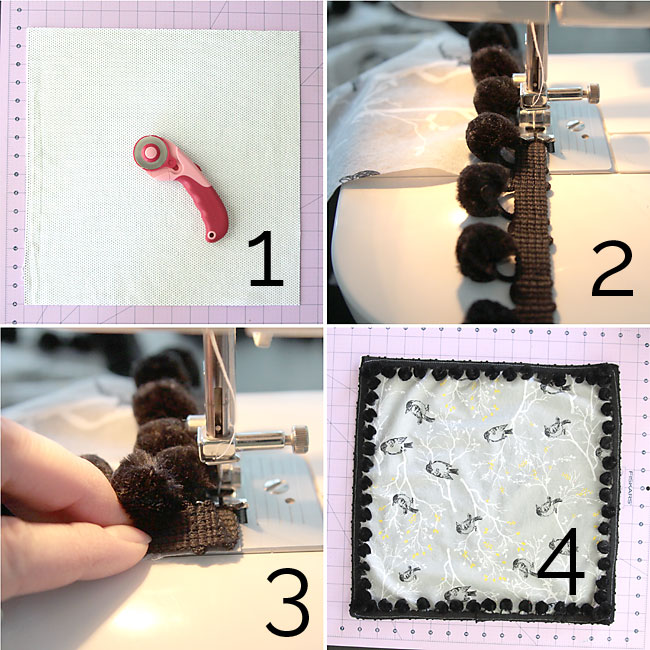
1 – Cut 3 15×15 inch squares of fabric (if your fabric has shrunk enough that you can’t quite fit 3 squares, cut one square at 15×15 and two rectangles at 15×13 or so). 2 – Take one of the 15×15 squares and sew the trim all the way around it. I found it was actually easiest to do this without pinning. Just place one end of the trim along one side of the fabric square, pom poms pointing in and right side of fabric up, and start sewing, about 1/4 inch from the edge. 3 – When you get to a corner, miter the trim. 4 – Continue sewing on trim until you get back to where you started. Slightly overlap trim, then cut off any excess.
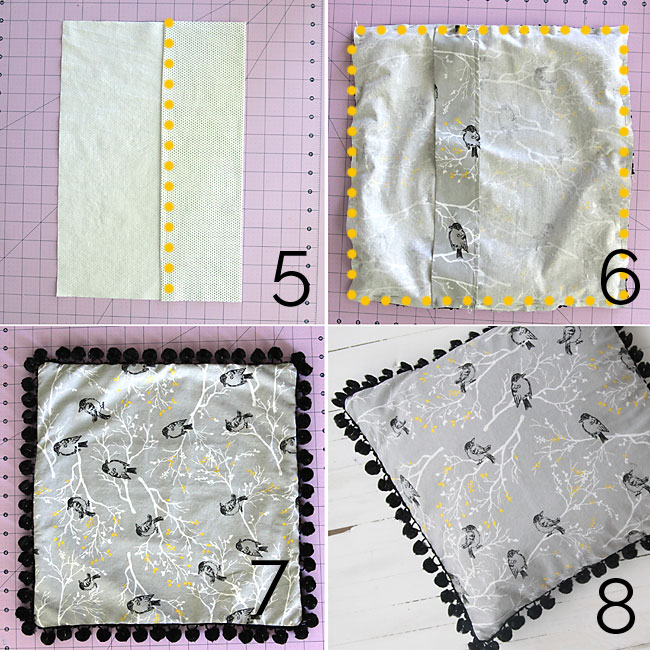
5 – To make the envelope opening on the back of the pillow cover, grab one of your other fabric pieces. Fold the right side in (wrong sides together) 5 inches, so you now have a 15×10 inch rectangle. Sew as shown w/yellow dots. Repeat with the other fabric piece, but this time folding in from the left. 6 – Place your trimmed square down on the table, right side up. Place rectangles on top of the square, right sides down, one matching up with the left side of the square and one matching up with the right, to form an “envelope”. Pin very well, then sew all the way around, as shown by yellow dots. Sew 1/2 inch from the edge this time. 7 – Turn right side out and press. 8 – Slide in pillow form.
Totally confusing? I hope not. It makes more sense when you’re actually doing it 🙂
Here’s a close-up of the zigzag ruffle pillow.
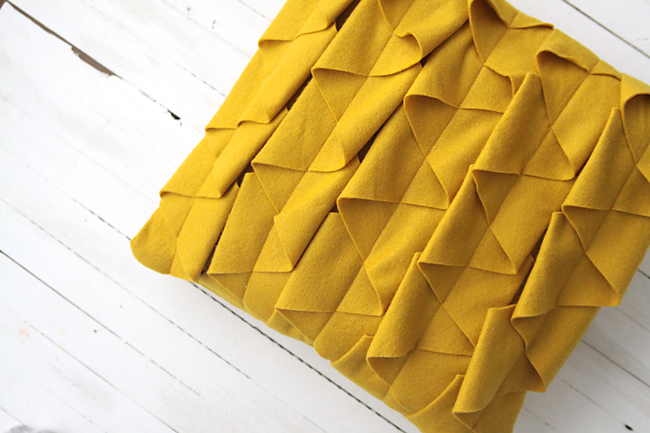
For this one you’ll need 1 yd of 36 inch wide wool felt and matching thread (you can find wool felt on the bolt at Joann Fabrics – it doesn’t need to be 100% wool, just have some wool in the blend).
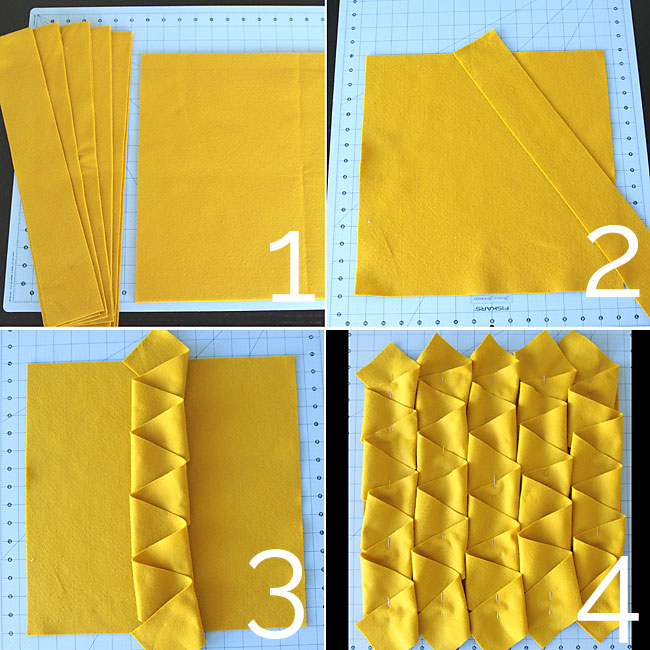
1 – Cut out 2 15×15 inch squares, and 5 strips that are 3 inches wide and 36 inches long. 2 – Lay out one square. Take your first strip and lay it diagonally out from the top center of the square, as shown. 3 – Zig zag the strip back and forth, making a ruffle, until it looks like the photo. Part of the strip should extend past the top and bottom of the square. 4 – Repeat with the four other strips as shown. NOT SHOWN: Scoot the ruffles in a little closer together, so you have 1/2 inch of open space on the left and right side of the square.
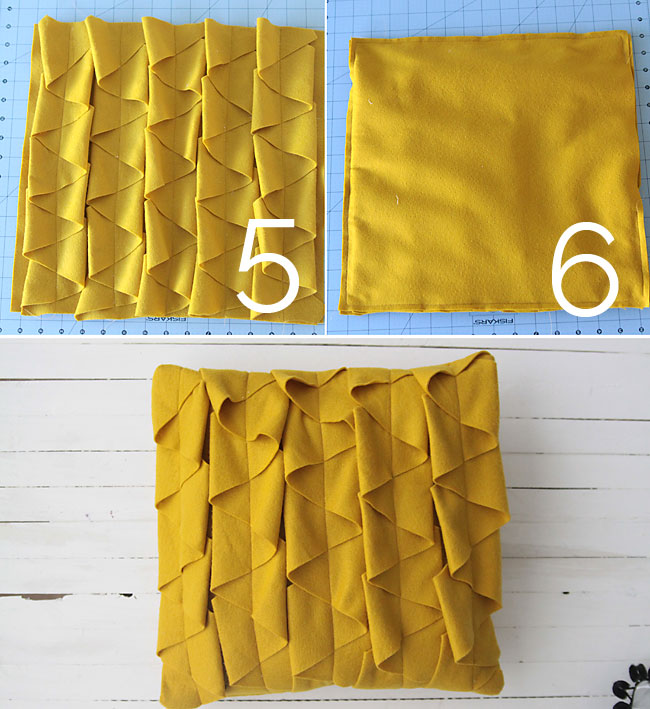
5 – Pin ruffles down, then sew a straight stitch down the center of each ruffle. Trim excess. 6 – Place other 15×15 inch square on top, then sew around edges, leaving about 6 inches open on the left or right side (not the top or bottom). To finish, turn right side out and stuff with polyfil or pillow form, then sew opening closed.
Two new throw pillows with a little personality. Don’t forget to click on over to Crazy Little Projects to see the other tutorials for this month and enter the giveaway.


Leave a Comment