
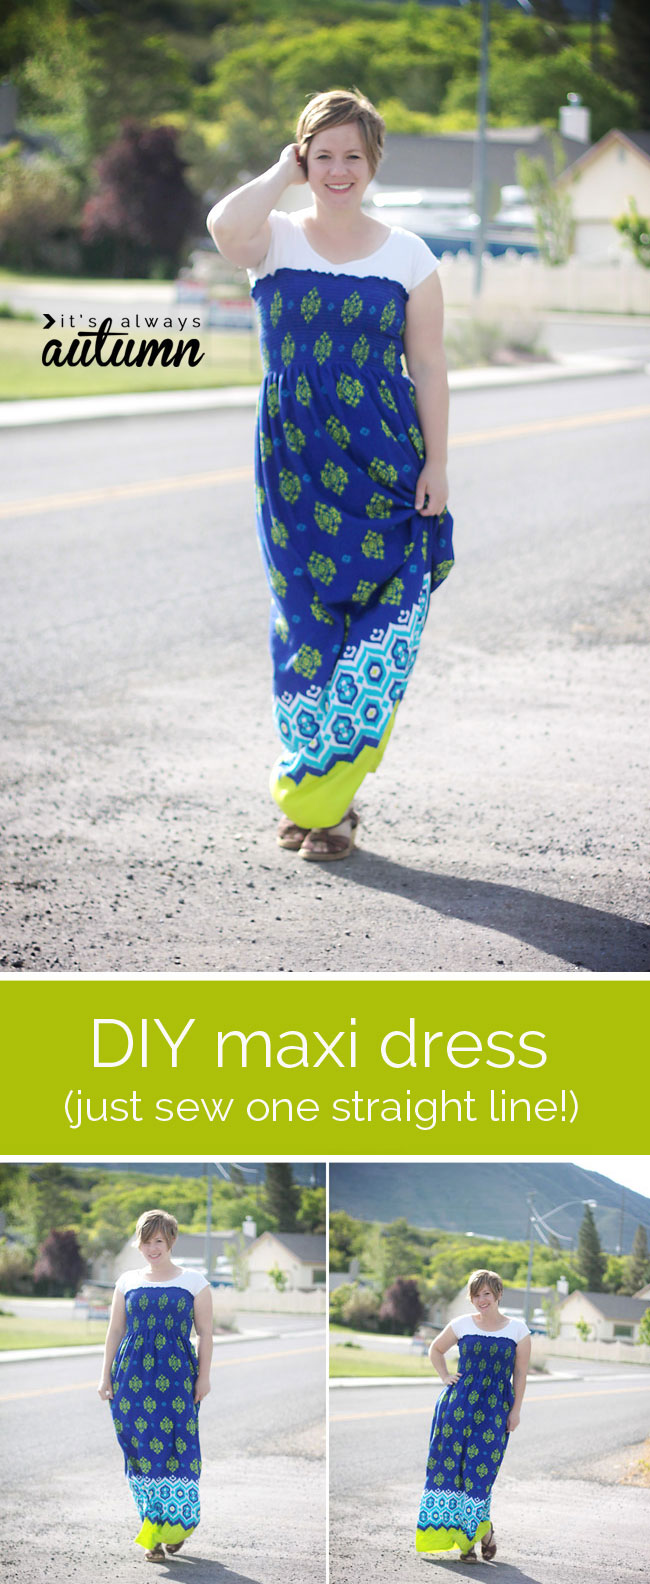
I love how cool and comfy maxi dresses are – I could wear them every day in the summer (anything not to have to put on jeans when it’s 90+ degrees out!) A few weeks ago I posted an easy to sew maxi dress tutorial, but today I have an even easier maxi dress how-to for you – would you believe this dress only takes one seam to make? If you can sew one line, you can make this dress!

It’s made using a pretty shirred Ikat print fabric from Joann (you can find it online here). I fell in love when I saw it in the store – it’s super soft, flows beautifully, and the print is gorgeous. The top of the fabric is already gathered up (shirred) with stretchy thread, making turning it into a dress ultra simple. I was put off at first by the price tag – 28 bucks a yard – youch! But then I thought about: I’d only need one yard and could use a half off coupon. When I realized I could sew a single seam and have a pretty new summer dress for $15 and 15 minutes of work, I was sold!
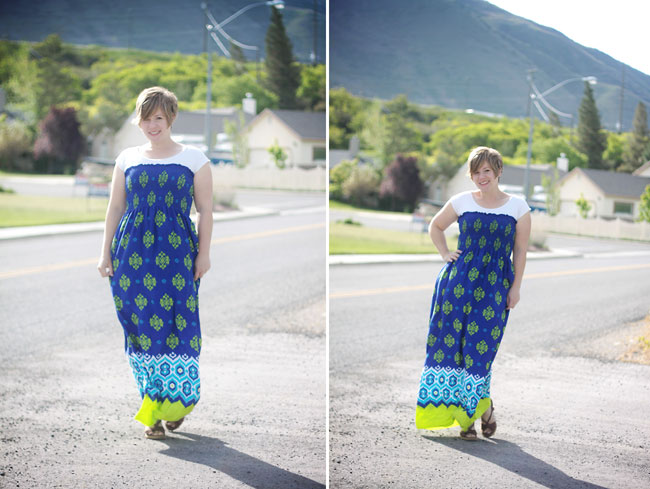
The material is a rayon challis, which is soft and drapey. It’s gathered like a tube top all through the chest&ribs, then is loose through the waist and hips, which, for me, is a good thing. The photos above were taken when it was quite windy out, so here’s an indoor one to show you how it falls.

You could certainly wear it without a shirt underneath if you aren’t worried one of your many children will yank on it and pull it right down 🙂 I like to use a safety pin or two to pin the dress to my shirt so I know it’s not going anywhere during the day.
Here’s what you need to know to make your own one seam maxi dress:
First, buy your fabric. If you usually wear a M or L tee, one yard will be just about right. Fold your fabric in half with right sides together as shown below. Sew a seam down the other side, matching raw edges together. Go back and either serge or zigzag the raw edges to make sure none of the elastic threads through the top come undone.
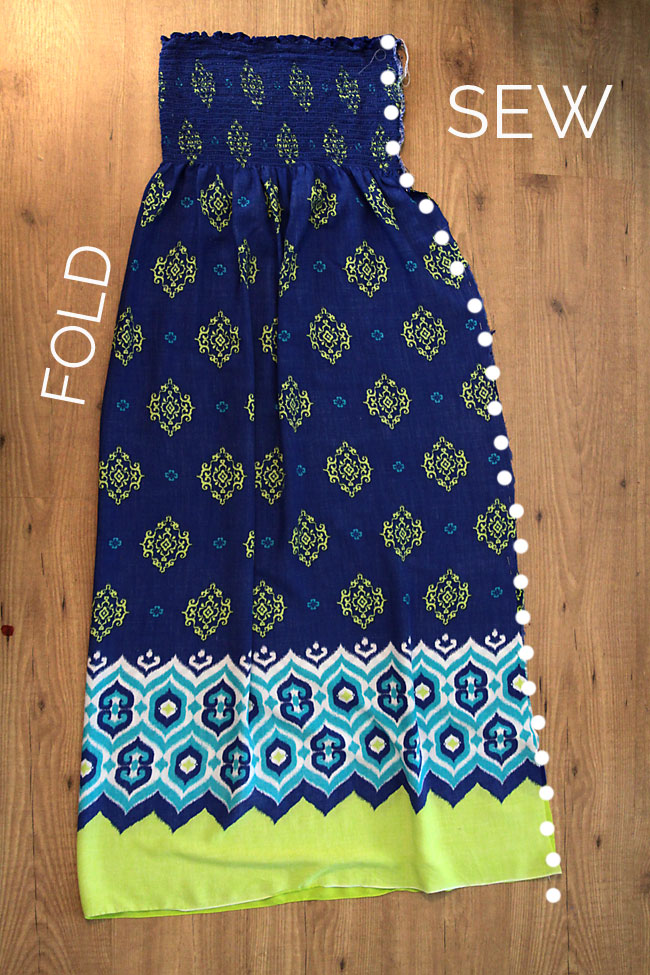
And that’s basically it! The bottom edge is already finished, so if the length is to your liking there’s no need to hem. If you like, you can tack the seam allowance down at the top and near the hem, like I did on this princess nightgown refashion, but you really don’t need to. Just press the seam and enjoy your new dress!
NOTE: the dress was quite long on me at first (I’m 5’3″). If you’re tall, make sure when washing your dress that you let it dress air dry so it doesn’t shrink. If you’re shorter, like me, just throw that puppy in the dryer! It shrank about 3 inches in length, making it the perfect length for me to wear with wedge sandals (it might shrink a little more after the second wash & dry). If you decide you need it shorten you could always turn it up and hem.
If you do wash it and put it in the dryer, the elastic threads will shrink up, too, making it a little bit narrower in width – but they stretch back out just fine once you put it on! If you sew up your seam and think it’s not tight enough across the chest, give it a wash before you take it in.


Sissy says
I love the ideal of this dress however I’m curious as to where to wear the one seam. Back or side?
Autumn says
Either one works actually! I would usually wear it in the back, but if you put it on one side no one is going to notice there’s not a seam on the other side.
Belle Sparks says
I wanted to say how beautiful the dress looks over the white top picking up on the bits of white at the bottom of the skirt. Also, so pretty and practical! I always stay away from these dresses because of the bare shoulders and arms. You solved that and look lovely:)!
Love your ideas:)!
Jessica says
I LOVE this, I just picked some shirred fabric for 60% off over at Joann’s today and HAD to have it. Now what to do with it?
I love this dress and I love that you put a T under it… could you sew the dress to the shirt so it’s all one piece? If so, could you explain what stitch/method I would I use as if I were 5 years old? (By the time I sit down to my machines my brain is mush.)