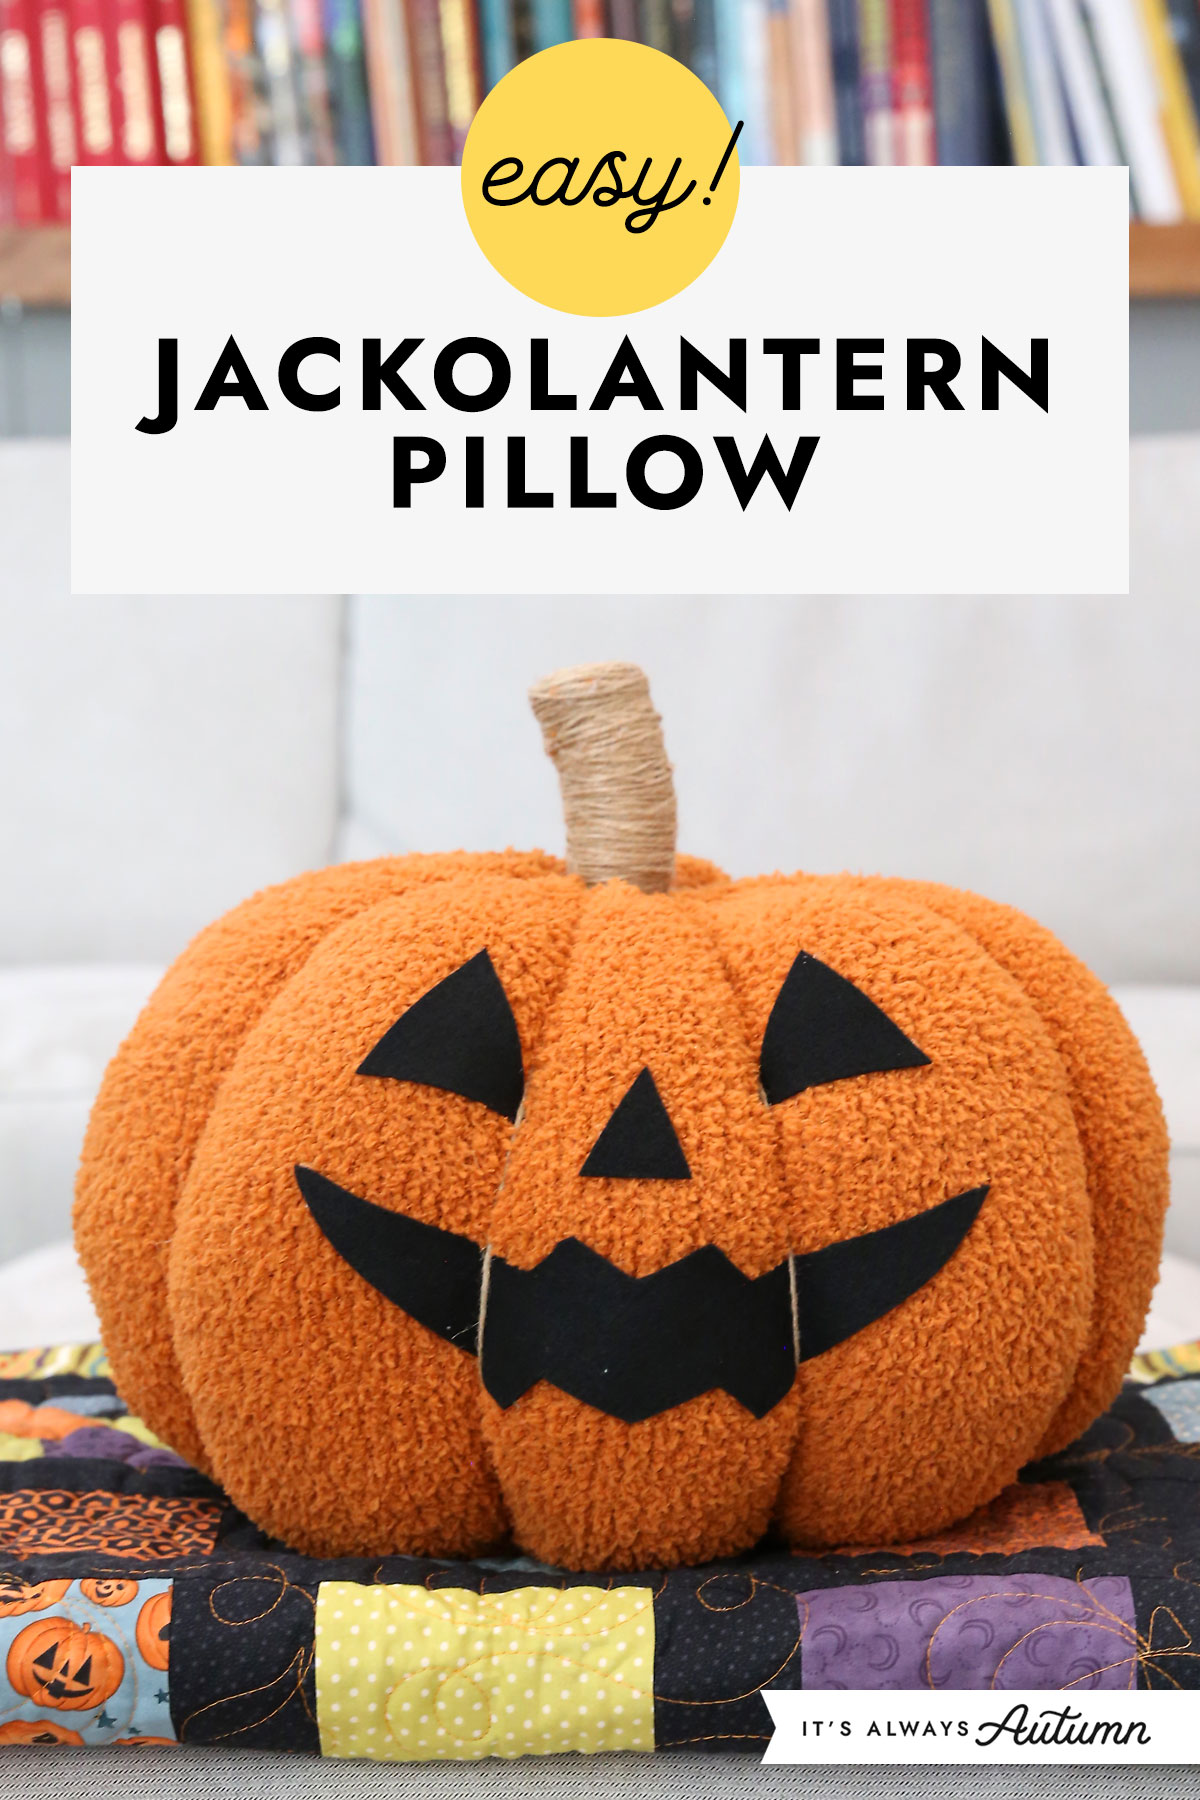
In today’s post: Make this adorable Jack-o-lantern pillow with just a few supplies for way less than the Pottery Barn inspiration! This is an easy Halloween craft for adults you can complete in about an hour.
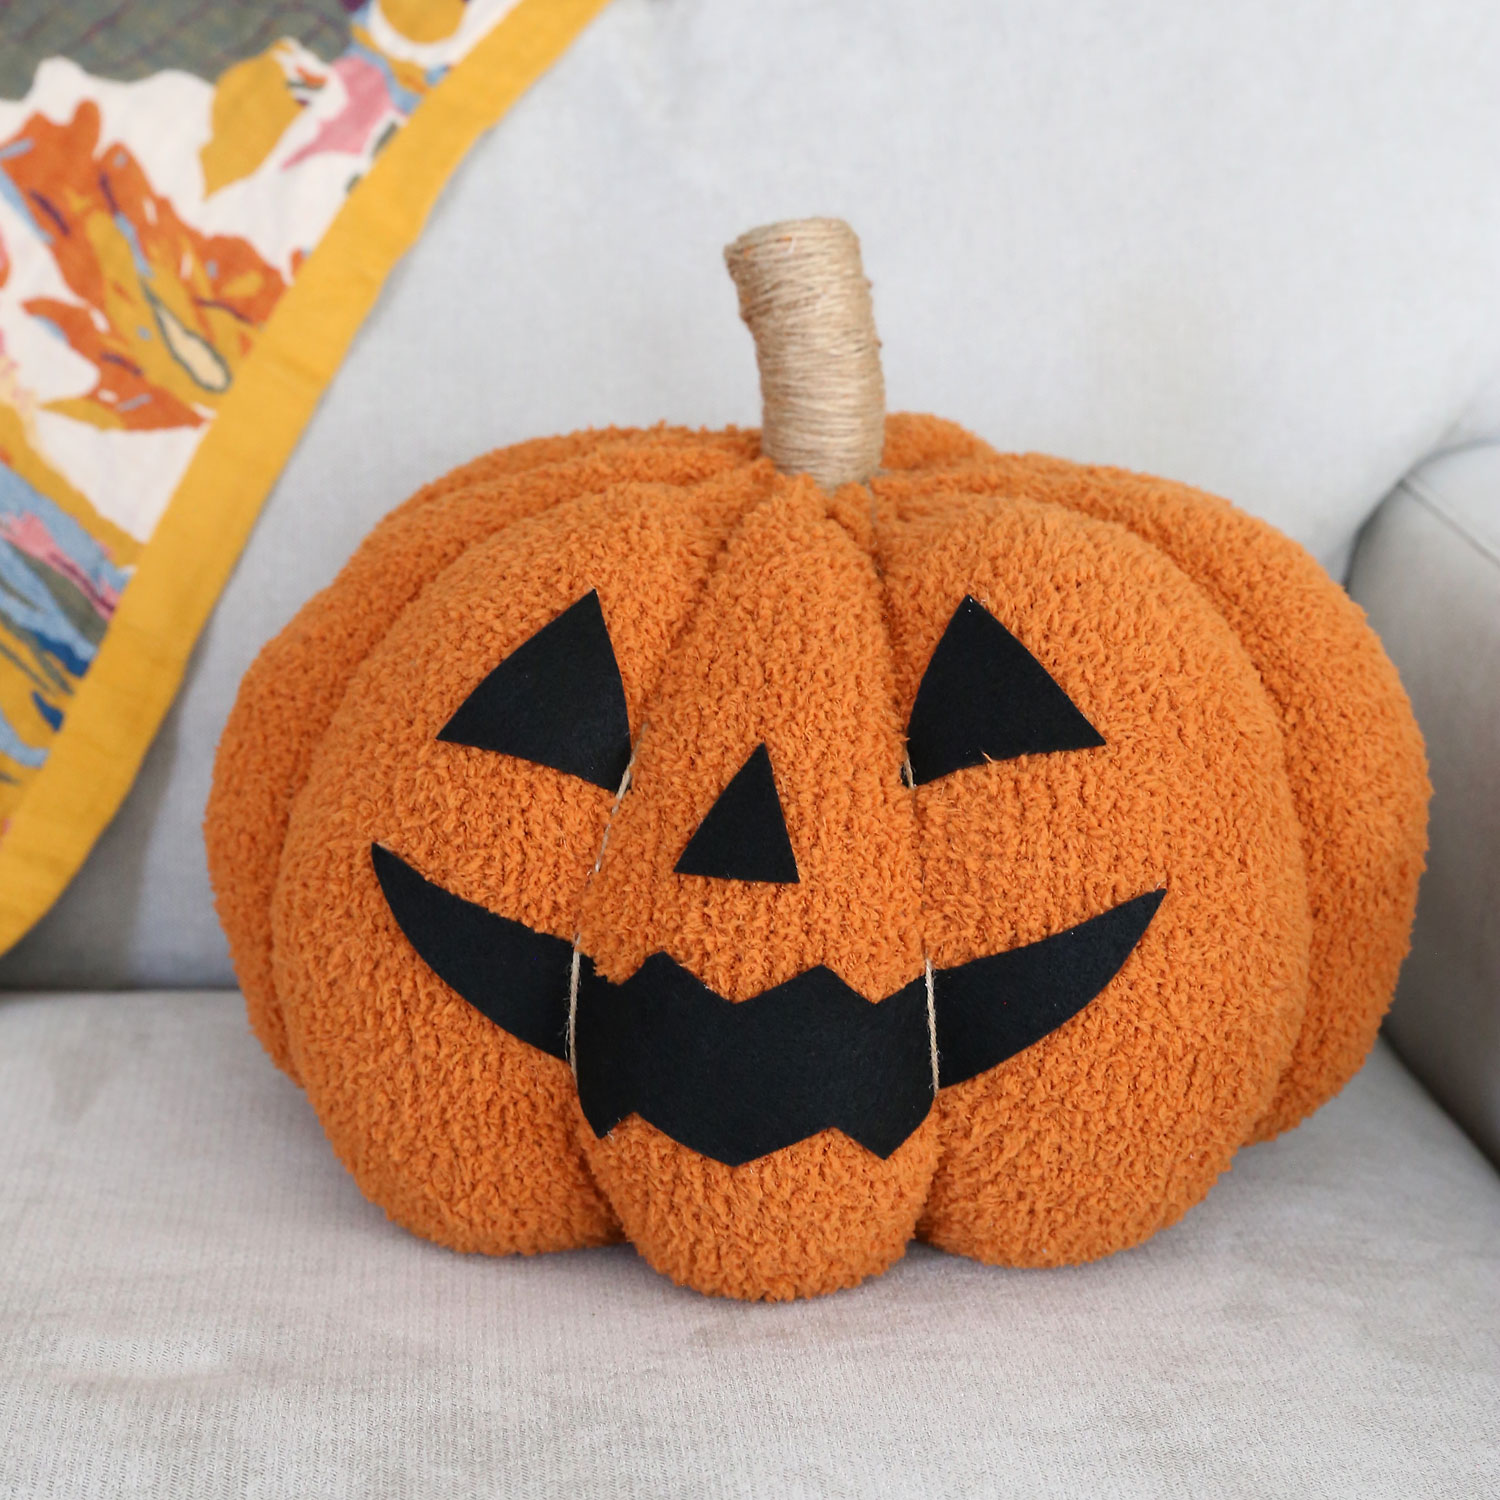
Pottery Barn Dupe Craft
Anyone up for an easy craft that turns out amazing…and saves you a bunch of money at the same time? This is one of my favorite Halloween crafts I’ve ever made. I love these fun Halloween pillows from Pottery Barn, but if I can make one at home for a fraction of the price, why not?
Supplies
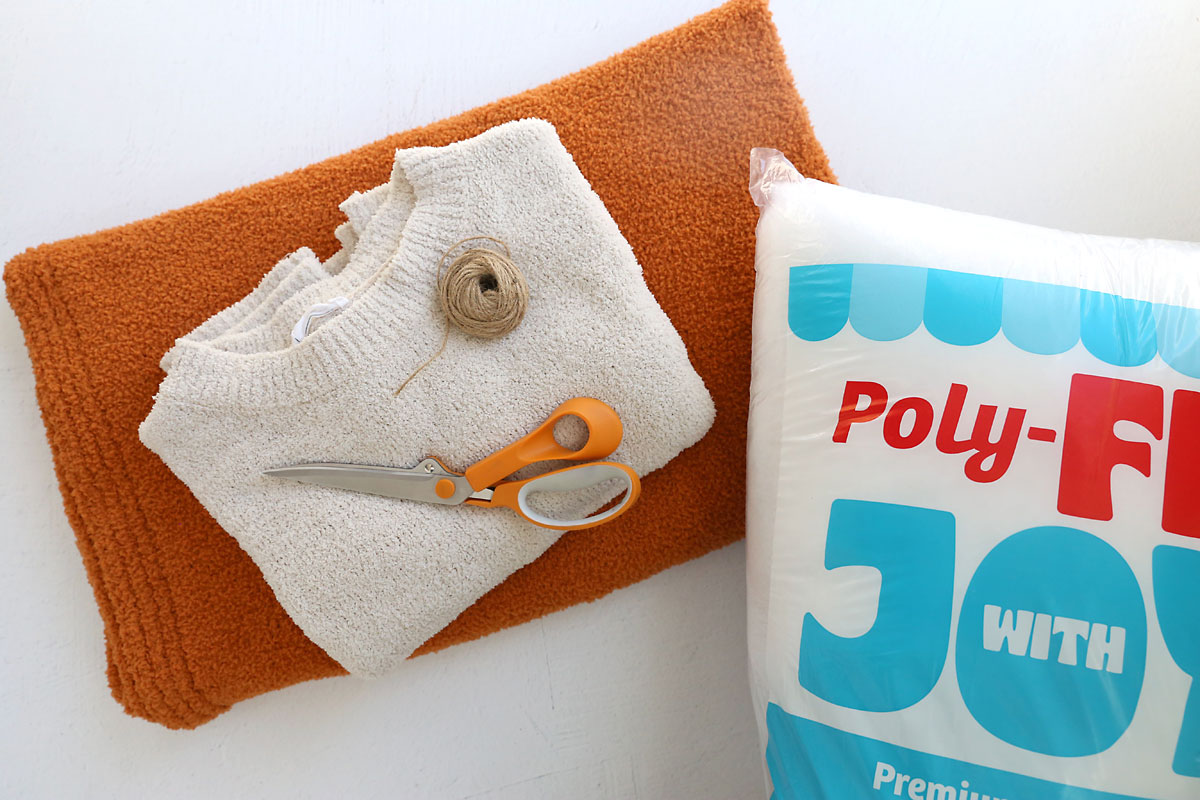
Here’s what you need to make your own Jack O’Lantern pillow:
- Fuzzy piece of fabric: you’ll want a soft or fuzzy fabric that has some stretch to it. Sweater type fabric works great! You’ll need a piece that is 24×34 inches, or two pieces that are 17×24 inches.
- Twine: I used jute twine from Walmart.
- Poly-Fil Stuffing: you’ll use this as the stuffing for your pumpkin pillow. I used approximately 16 oz of stuffing. You may want to purchase a larger package to make sure you have plenty for this project and others (like sock pumpkins). This 50 oz package on Amazon is a great price.
- One sheet of craft felt: If your craft store sells “premium” felt for a few cents more, get that! You’ll use this to make the Jack-o-lantern’s face. Find a template in the blue box under the photo.
You’ll also need good scissors and a hot glue gun (I recommend silicone finger protectors when using a hot glue gun).

Fabric Sourcing Options
It’s harder to source fabric these days and it can be expensive, so it can actually save you money to be a little creative. Look for sweaters at the thrift store; as long as the front and back are each 24×17 inches you can use just one to make a pillow! I actually purchased this pretty orange blanket from Amazon. The throw size was only $13 and it’s big enough to make two pillows.
How to Make a Jack-o-lantern Pillow
Prep the Fabric
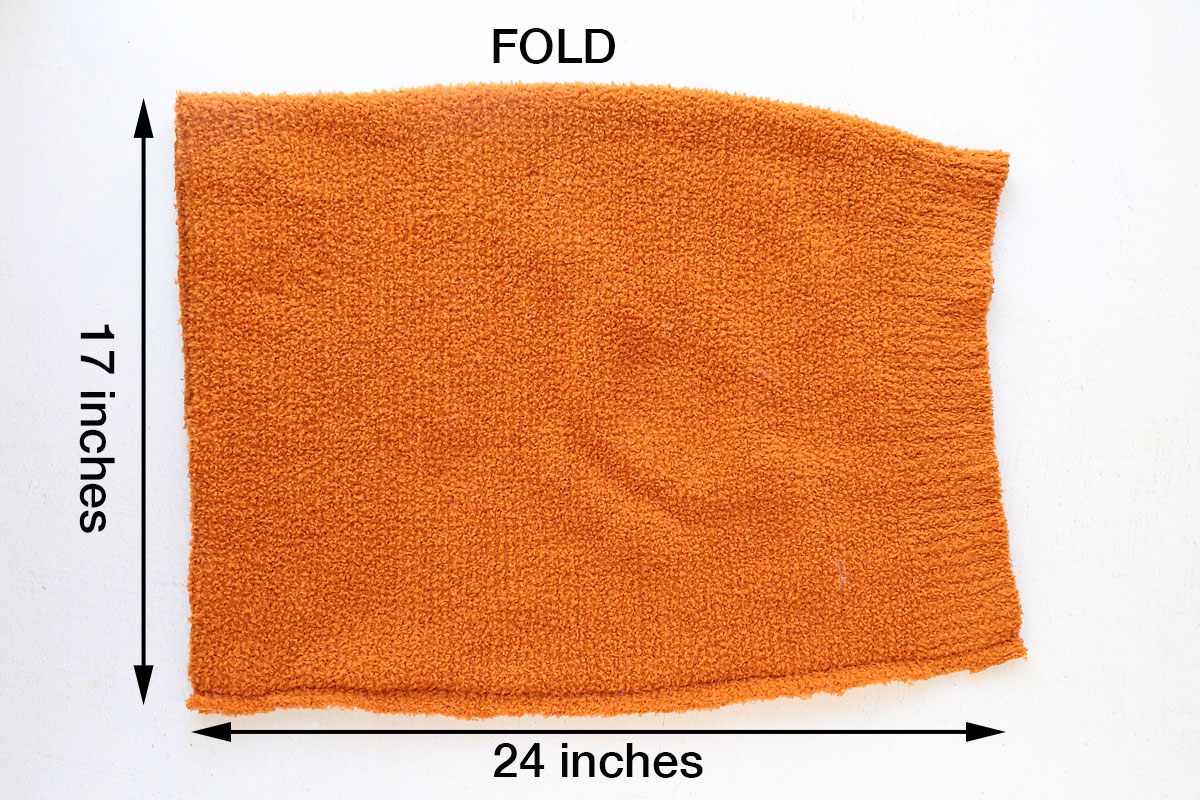
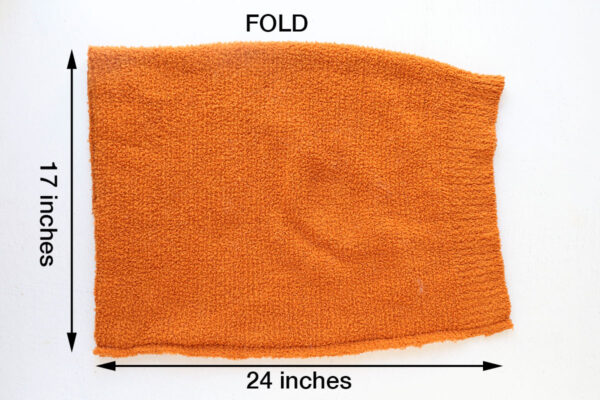
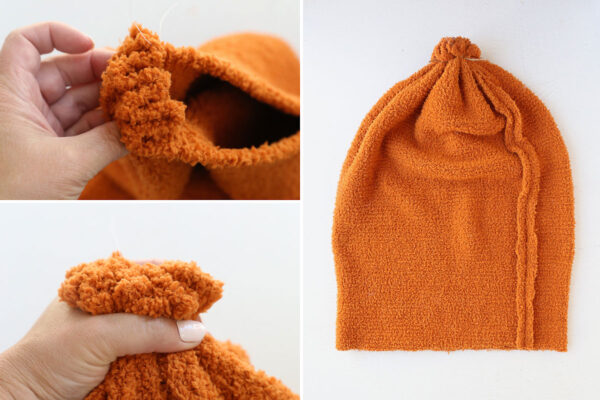
Start by cutting a rectangle of fabric that is 24 inches tall and 34 inches wide. If possible, the stretch should go along the width (it’s ok if your fabric stretches both ways). Fold the fabric in half with the right sides facing, and sew together along the side opposite the fold, as shown below. You’ll now have a tube that is 17 inches wide and 24 inches long. (If you start with two pieces that are 17×24 inches, just sew them together along both 24 inch sides).
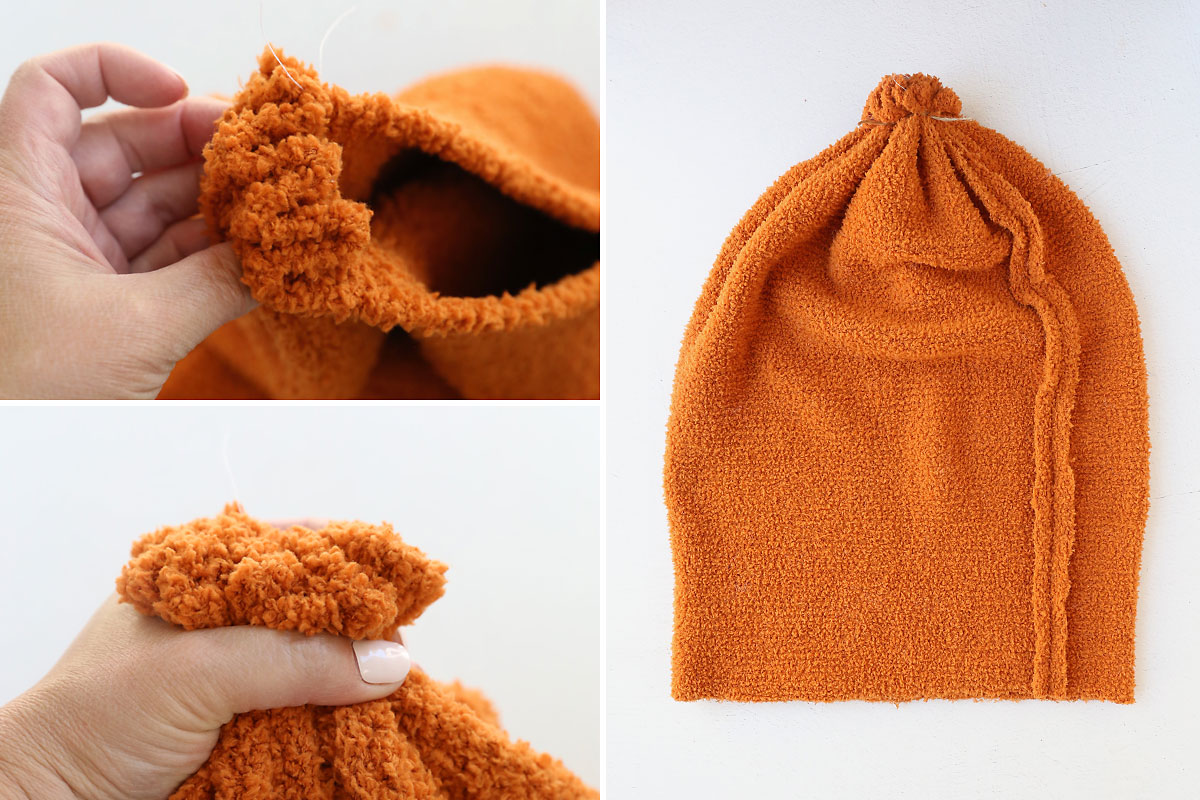
Now you will gather up one end of the tube. Fold the fabric back and forth as shown below to evenly gather up the end, then hold it tightly in one hand. With the other hand, wrap a piece of twine around the gathered end a few times and pull it tight, then knot the twine. Now you’ll have something that looks kind of like a beanie, or an upside down sack.
Stuff the Pillow
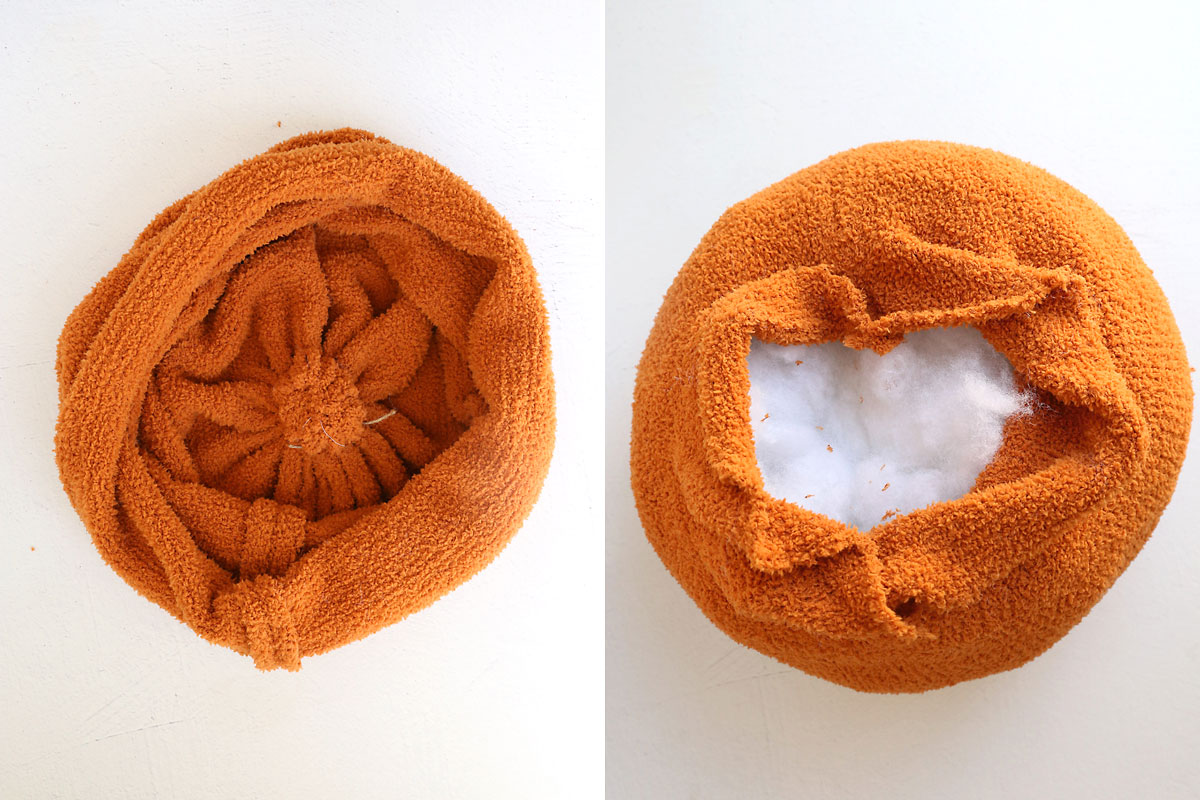
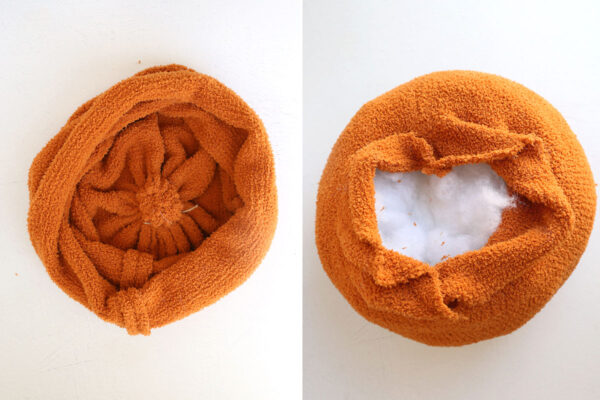
Turn the “sack” right side out, so the seam and twine are on the inside. Fill the sack with stuffing, using your hands to smooth the stuffing so the pillow looks fairly round, not lumpy. Your goal is to create a ball shape. Do not overfill; you will need to be able to gather up the top end of the sack and have three inches or so of fabric to create a stem with.
Create Pumpkin Shape with Twine
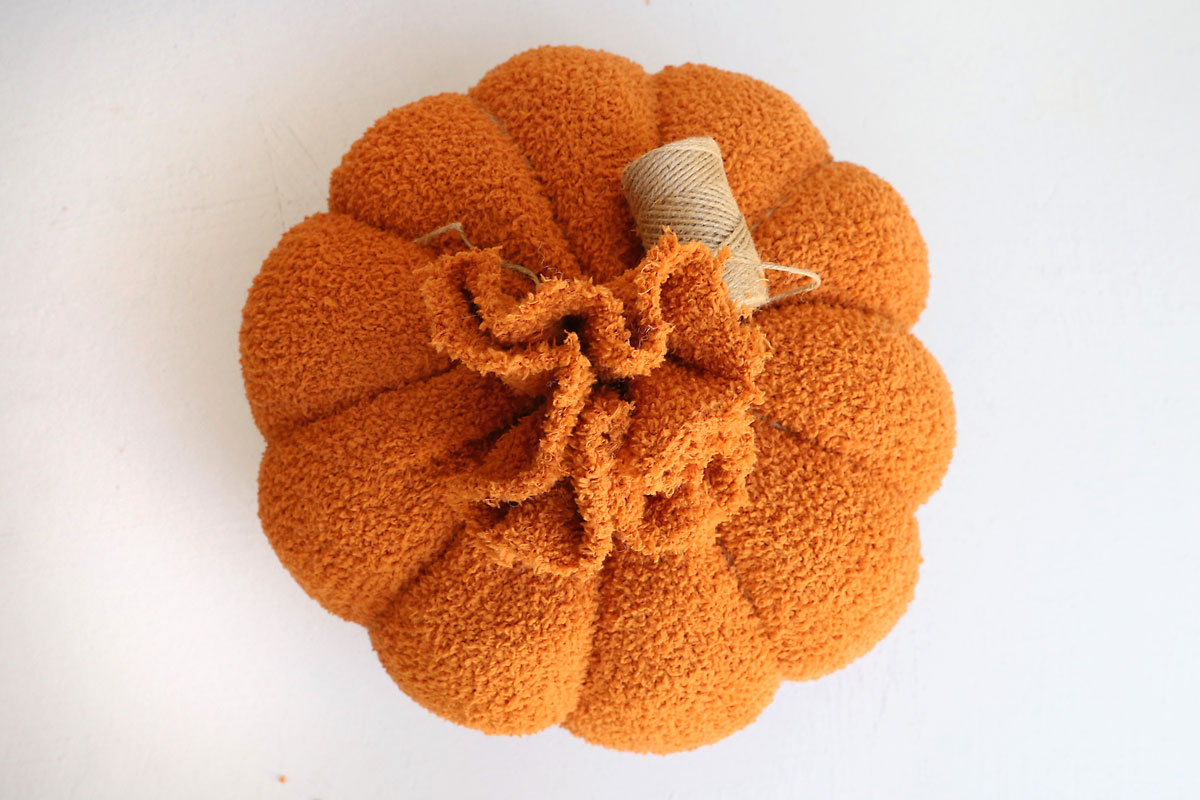
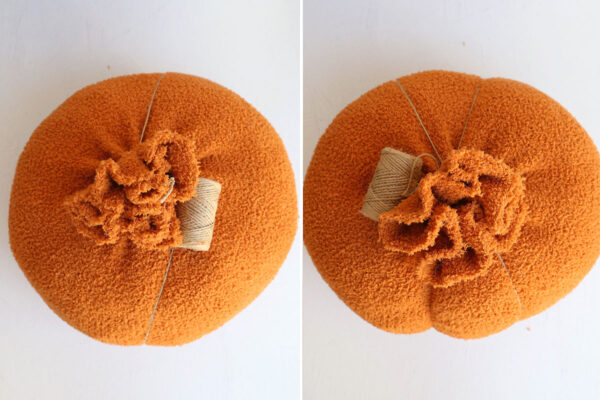
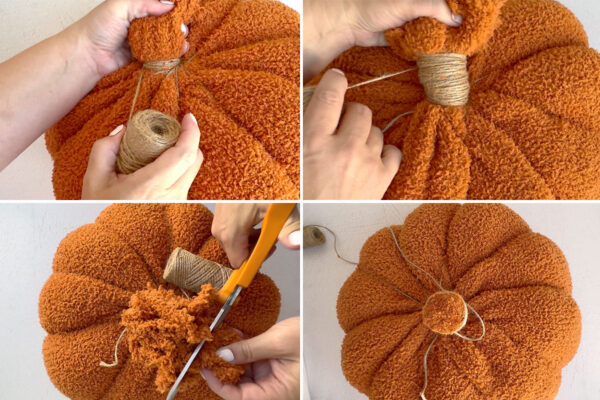
Now gather up the excess fabric at the top of the pillow and hold in one hand. With the other hand, wrap the end of your twine around the excess fabric a couple of times, pulling tight, then tie it to secure. DO NOT cut the twine. Wrap the twine down around the ball and back up the other side. Pull the twine tight enough to cinch the ball and create an indentation. Bring the twine around the right side of the excess fabric and then go down a little to the left of your first loop of twine, coming back up a little to the right, as shown below.
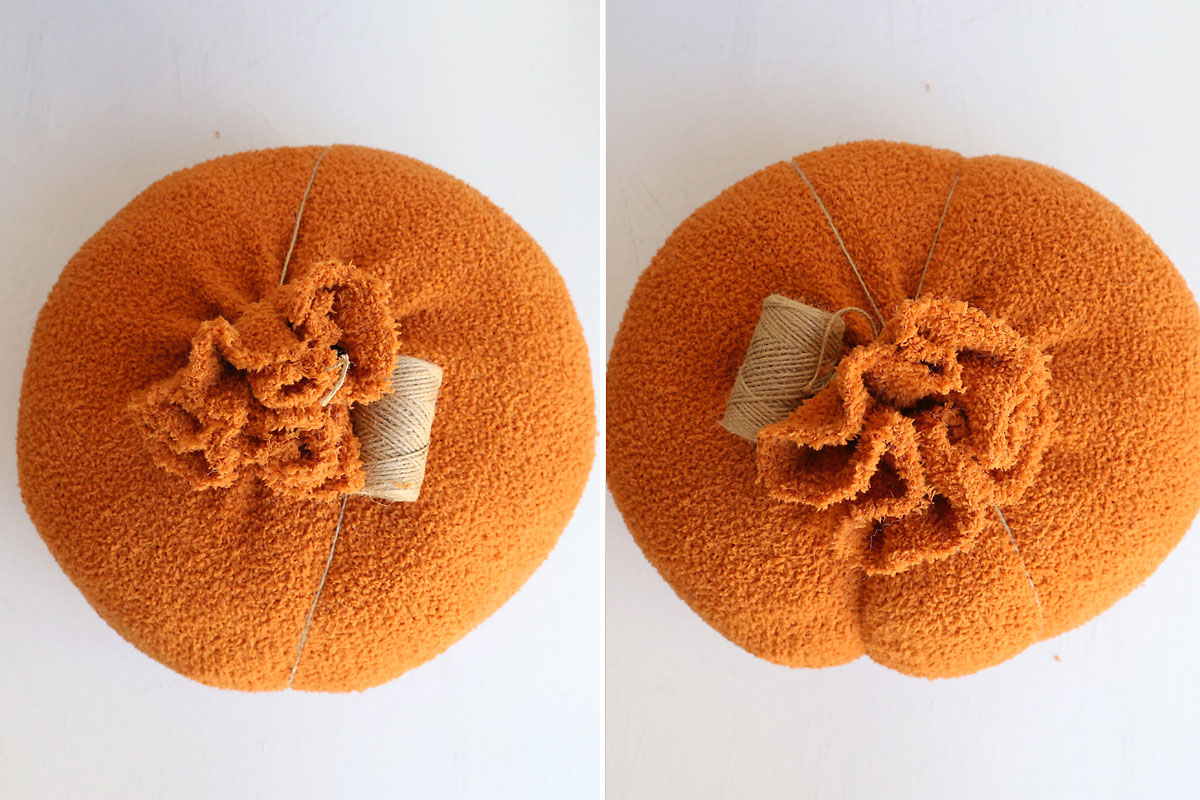
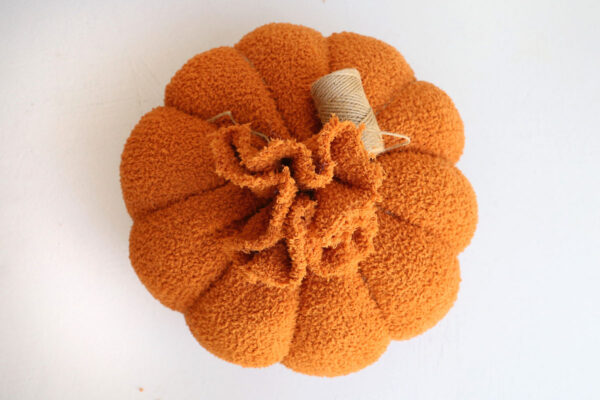
Repeat the process, wrapping the twine around the pillow five times total, to create a pumpkin shape as shown below. Remember to pull the twine tight enough to create an indent each time you wrap. It’s ok if the sections are not even, you can easily adjust the twine in a few minutes.
stem
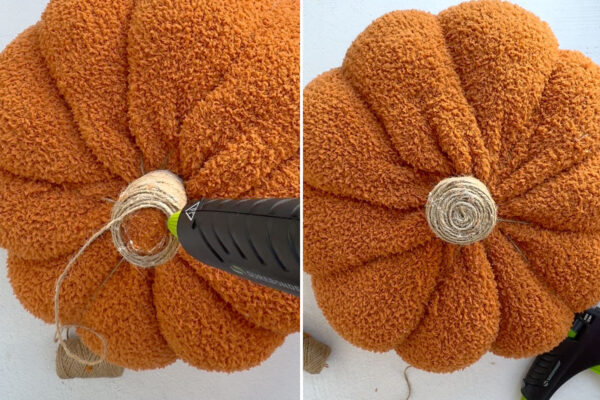
Remember you still have not cut the twine. At this point you will wrap the excess fabric in twine to create a stem. Wrap the twine tightly, around and around, completely covering the fabric. When the stem is as long as you’d like, trim away any excess fabric, leaving the top flat.
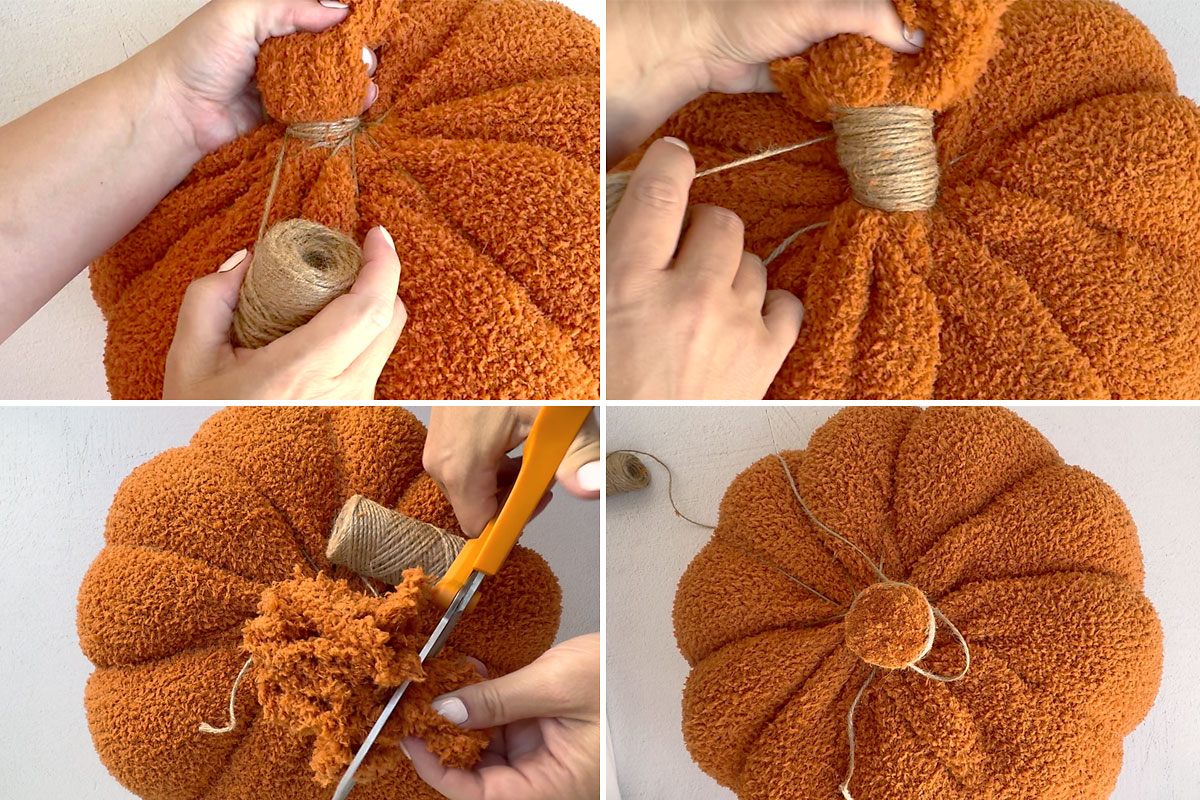
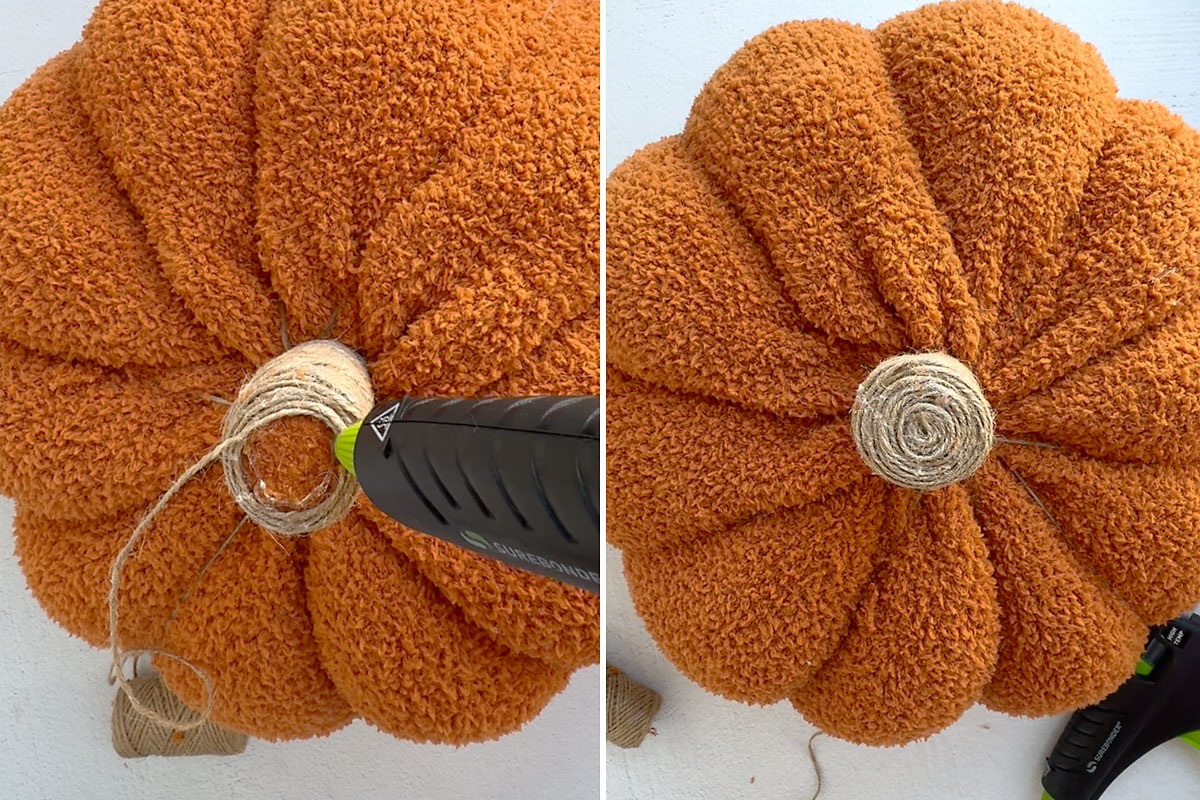
Now you’ll need a hot glue gun, and I highly recommend using silicone finger protectors as well. Use hot glue to secure the twine at the top edge of the stem. Continue to add a little bit of glue, then coil the twine, until you have filled in the top of the stem. Adjust any of the twine loops as needed so the pumpkin has fairly even sections.
Add The Face
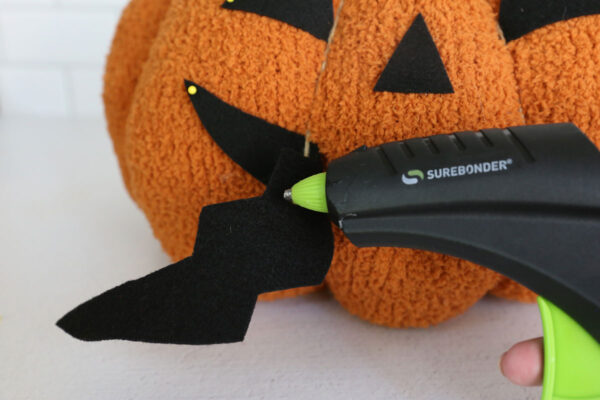
All that’s left now is to add a cute Jack-o-lantern face to your pillow! Cut out two eyes, a nose, and a mount from black felt. Pin or tape the felt pieces onto the pillow to figure out the placement of each piece.
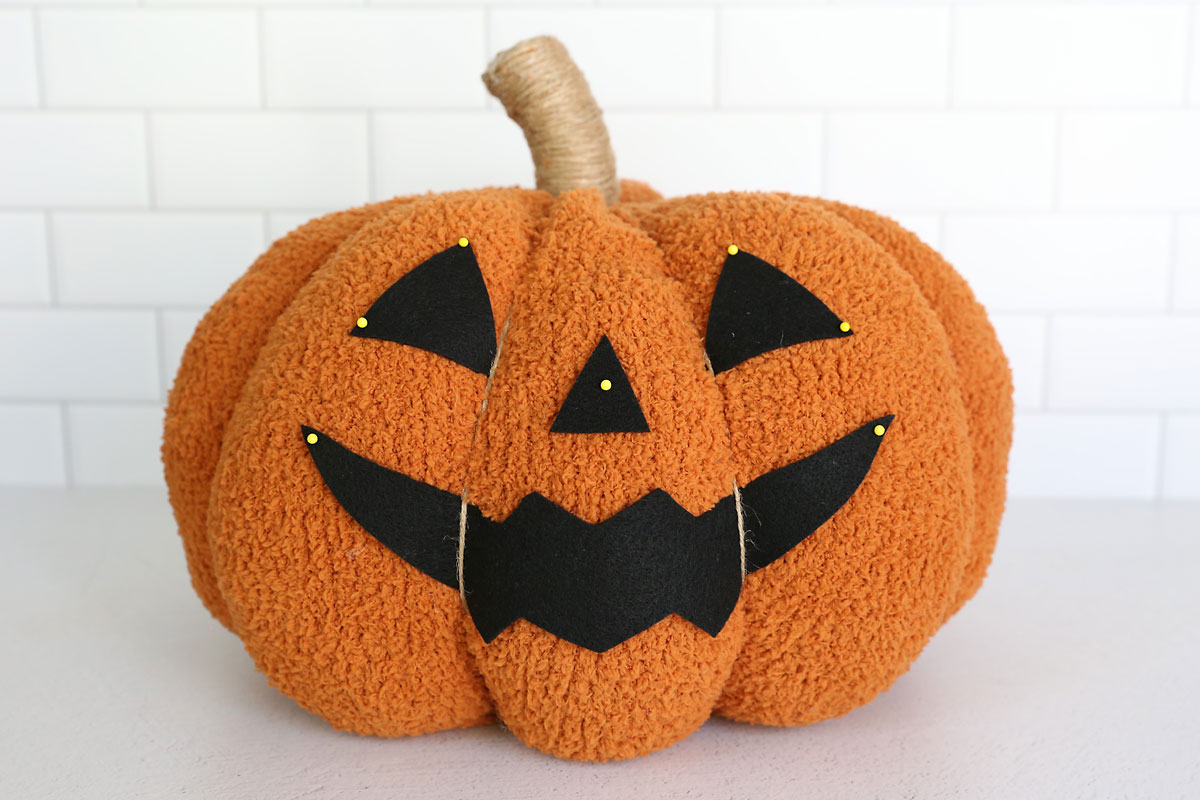
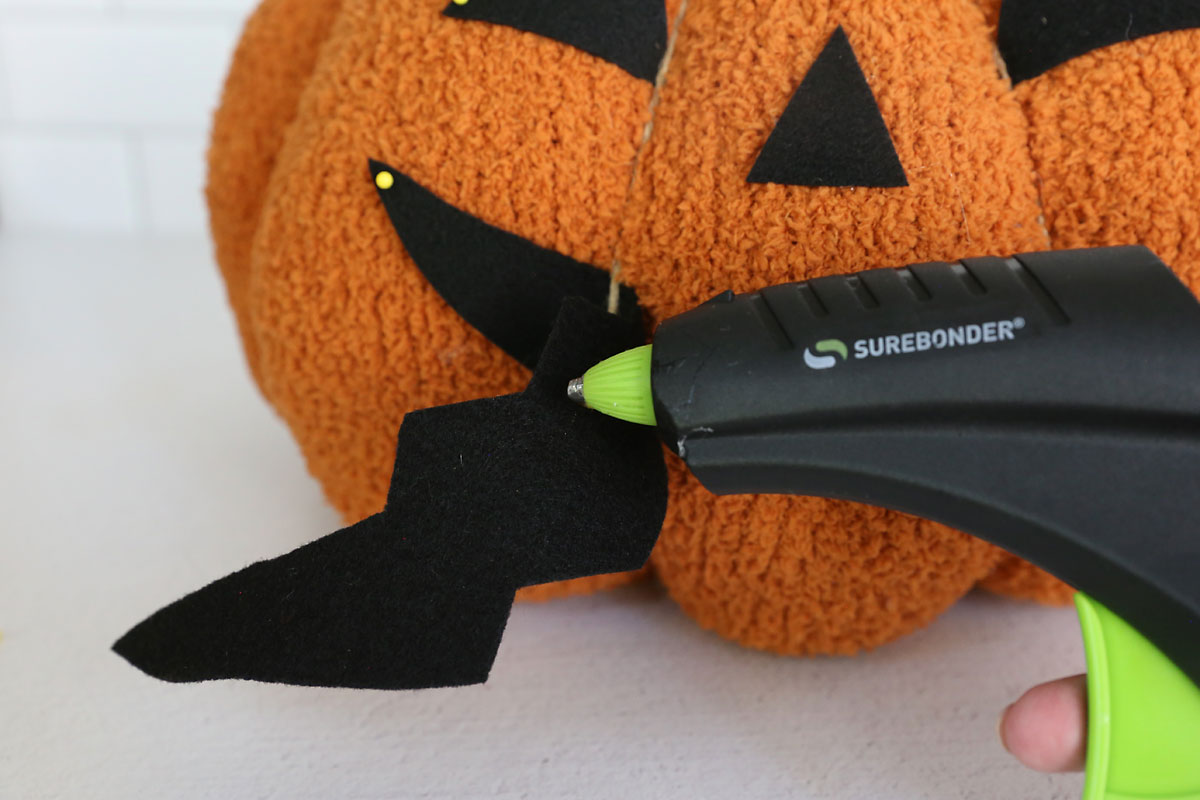
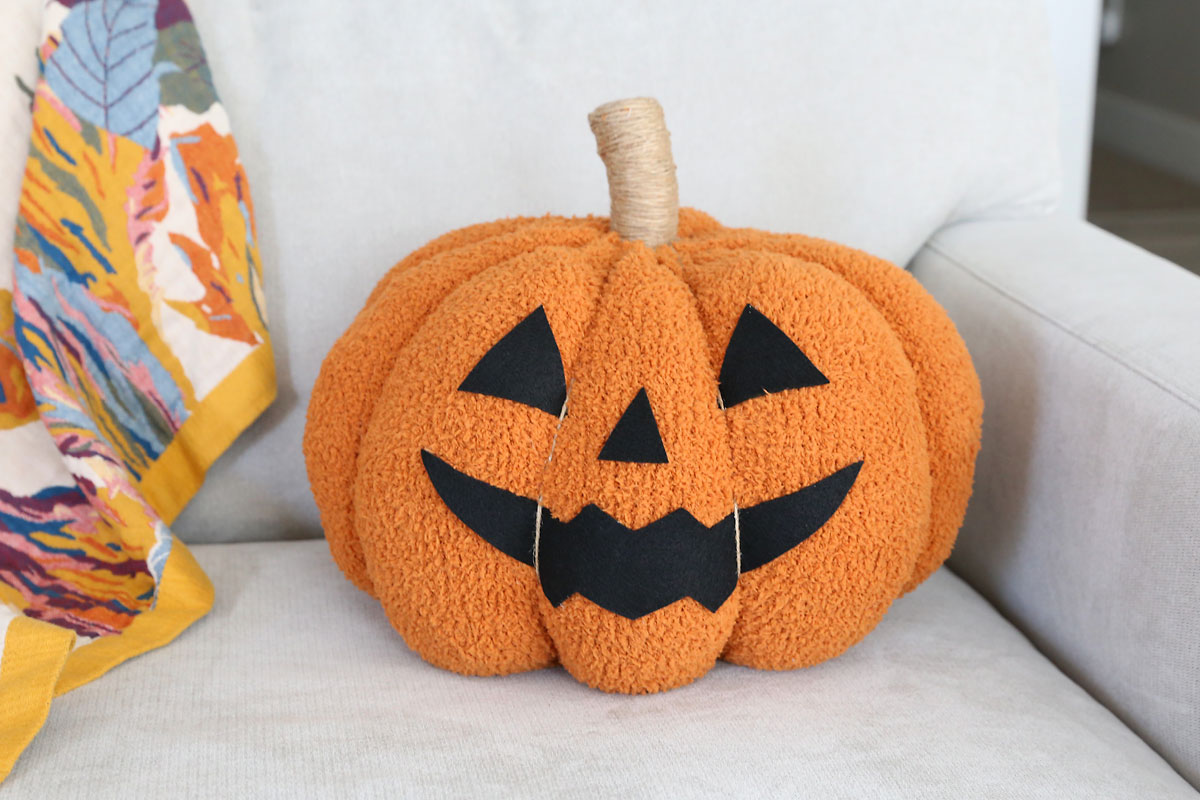
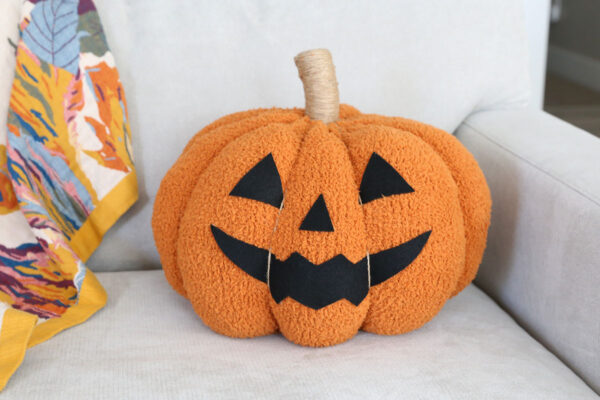
Once you are happy with the placement of the felt pieces, use hot glue to adhere them to the pillow. Note that I placed the mouth under two pieces of twine, and tucked the inner corner of each eye under the same pieces of twine, to make the face look like the inspiration.
Display
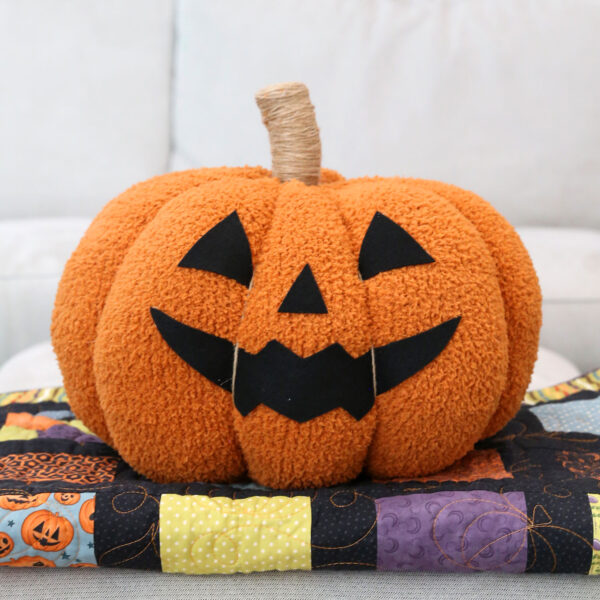
Your adorable DIY pumpkin pillow is now ready to display – happy crafting!
Jack-o-lantern Pillow
Supplies
- Fabric with some stretch 24×34 inches
- Twine
- Poly-fil Stuffing at least 16 oz
- Black Felt
Want more project ideas? Sign up to get my favorite easy crafts and recipes straight to your inbox!
Equipment
- Hot Glue Gun
Instructions
- Cut a rectangle of fabric that is 24 inches tall and 34 inches wide, with the stretch going along the width. Fold in half, right sides together, and sew down the 24 inch side. This creates a tube that is 17×24.

- Gather up one end of the tube and hold tightly. Wrap a piece of twine around it a few times, pull tight, and knot. This creates a sack.
- Turn the sack right side out. Fill with stuffing, using your hands to smooth out the stuffing so the pillow looks fairly round, not lumpy. Your goal is to create a ball shape.
- Gather up the extra fabric at the top of the ball. Wrap some twine around the excess fabric a few times, pulling it tight. DO NOT cut the twine. Wrap the twine around the ball, then pull it tight to create an indent.
- Wrap the twine around the ball a total of five times to create 10 sections and give the pillow a pumpkin shape. Do not cut the twine.
- Wrap the twine around the excess fabric at the top, pulling it tight. Continue wrapping twine to completely cover the fabric, creating a stem. When the stem is as long as you'd like, cut away any additional fabric, creating a flat top.
- Use hot glue to secure twine to top edge of stem. Add more hot glue, then wrap the twine around and around to completely cover the top edge of the stem.
- Cut eyes, nose, and a mouth from black felt. Pin or tape the felt pieces to the pillow to determine positioning. Once you like how it looks, hot glue the pieces to the pillow.
- Now your pillow is ready to display!

Amy Hunter says
What a darling pillow! And I love those silicone finger protectors for hot gluing!