
Once your kids hit a certain age, it gets a LOT harder to make gifts for them that they’ll actually like. This goes double for boys. I’ve been wracking my brains for some gifts I could sew for my tween and teen boys this year, and this is one of the things I’ve come up with: DIY leather deck holders for Pokemon or Magic the Gathering cards.
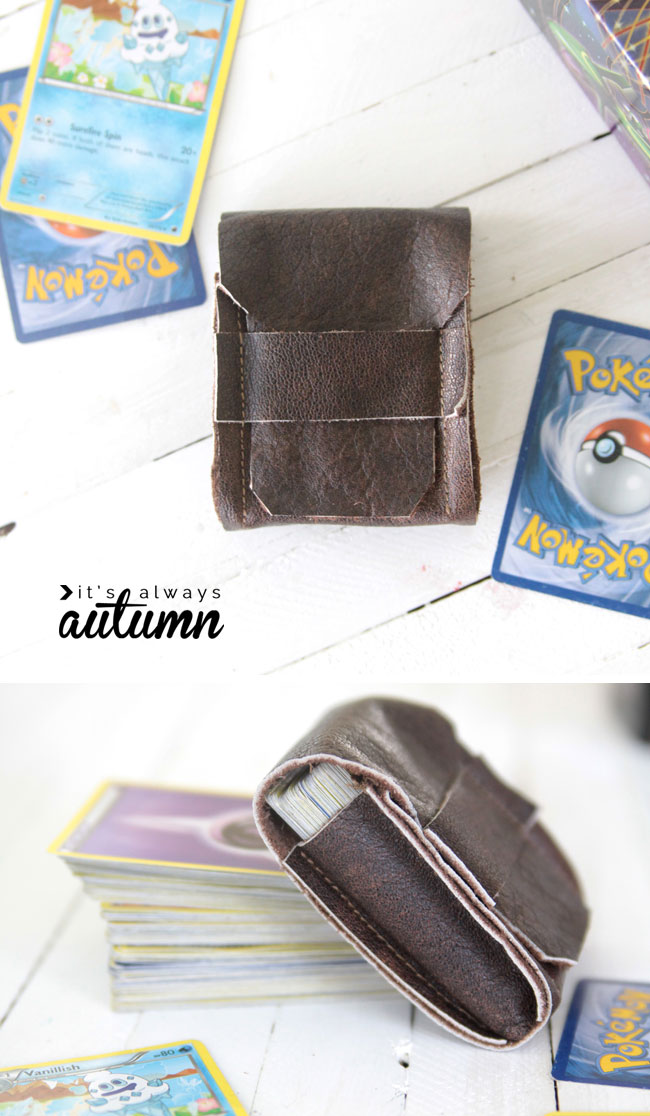
My boys spend almost as much time organizing their cards into “awesome” decks as they do actually playing Pokemon or Magic, and they always get frustrated when their carefully organized decks get knocked over and messed up. So I thought some cool leather cases that are just the right size to hold a 60 card deck would come in handy.

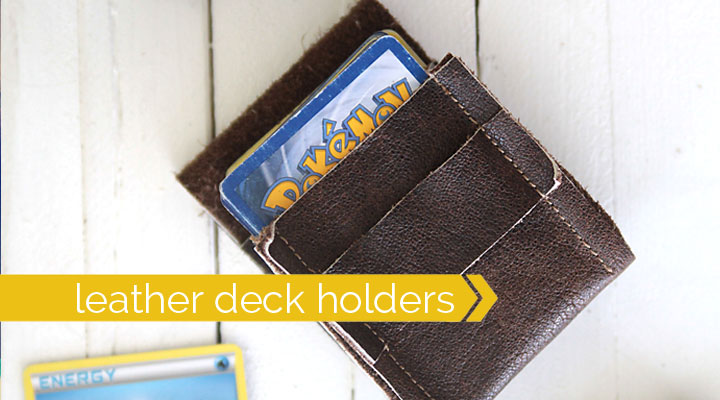
Once I figured out how to put them together, these leather deck holders turned out really cool! The best part is that there’s only four seams required, and you can make one from a pretty small piece of leather. I used leather from a thrifted jacket that I chopped up. My kids think these are pretty awesome.
A few tips before I get to the easy tutorial:
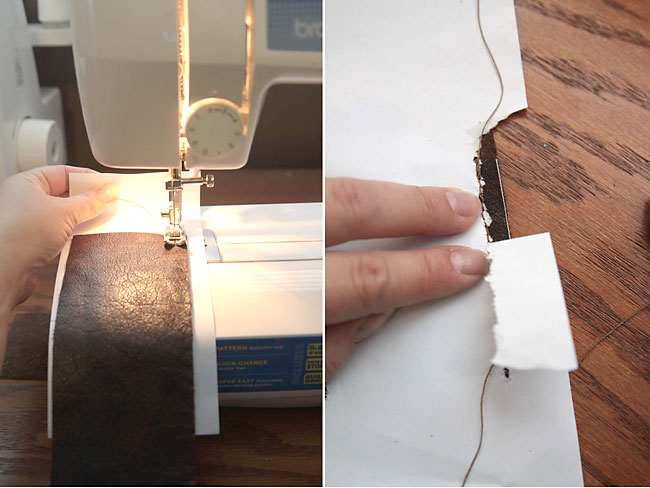
Unless your leather is extremely thin, you will want a leather needle. I also used heavy topstitching thread because I thought that would look best, but you can probably use whatever thread you want. Finally, I found the leather stuck to my machine and didn’t want to feed evenly, so I tucked a piece of paper under it as I sewed. That way I could gently pull on the paper to feed the leather through my machine. After sewing, gently tear away the paper from the seam. It’s a good idea to practice on some scraps just to get the feel of sewing on leather.
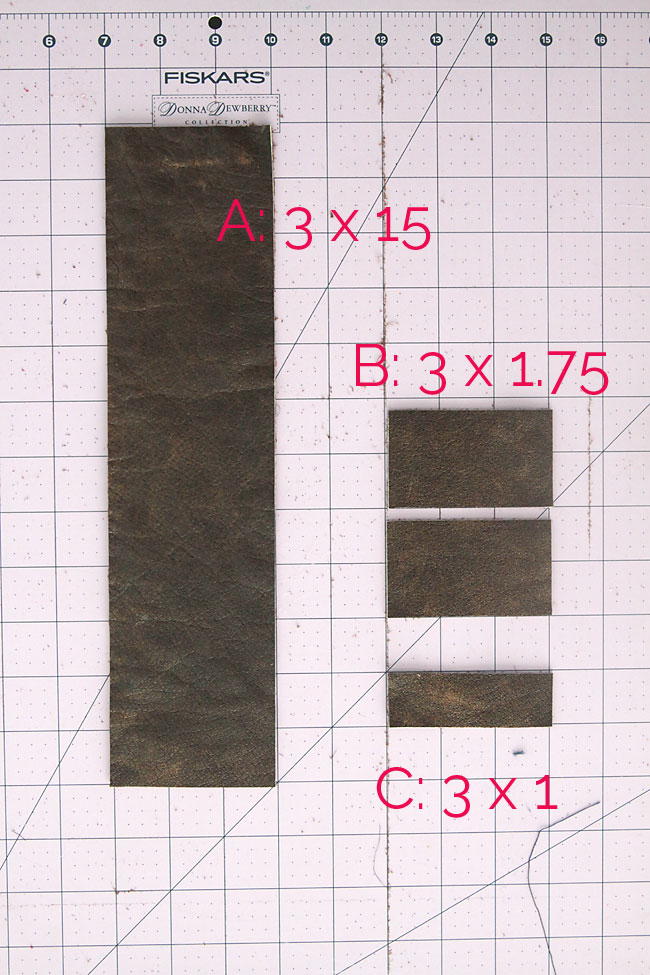
Ok, here’s how to make your very own leather deck box. Start with a piece of leather that is 3 inches wide by 18 inches long (OR a 3×12 piece and a 3×6 piece). Cut your leather into 4 pieces as shown: A is 3×12, B is 3×1.75, and C is 3×1. You need two Bs. A rotary cutter and ruler is definitely the way to go here. ***NOTE: the dimensions on the photo belong are WRONG for piece A – it is 3×12 inches, not 3×15***
Place piece C about an inch away from the top of piece A. Grab one of your B pieces and put it face down, then slide it under piece A. Match up the top and right edge, and sew them together 1/4 inch away from the edge as shown below.
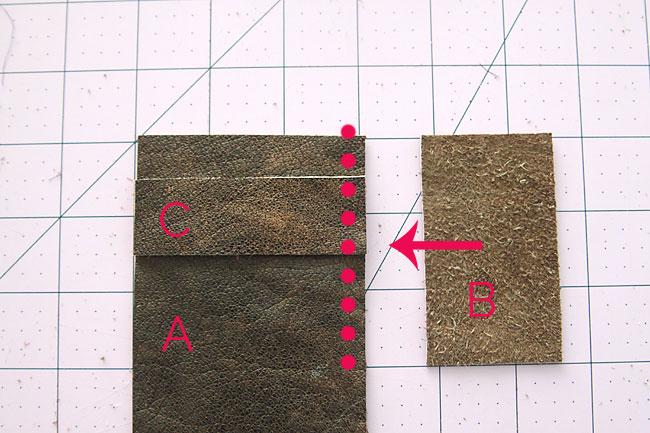
Repeat with the other piece B on the left side. Be sure to backstitch at the beginning and end of each seam. Your deck holder will now look like this:
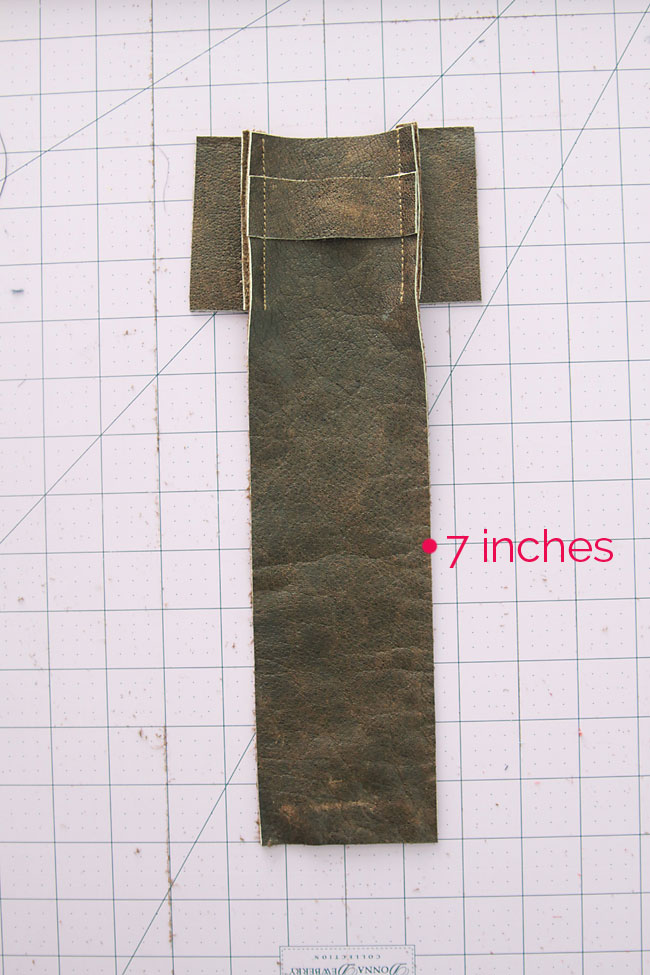
Measure 7 inches down from the top on each side of piece A and mark (if you use a pin try to push it into the side of the leather instead of going up and down from the top, since the pin holes may show).
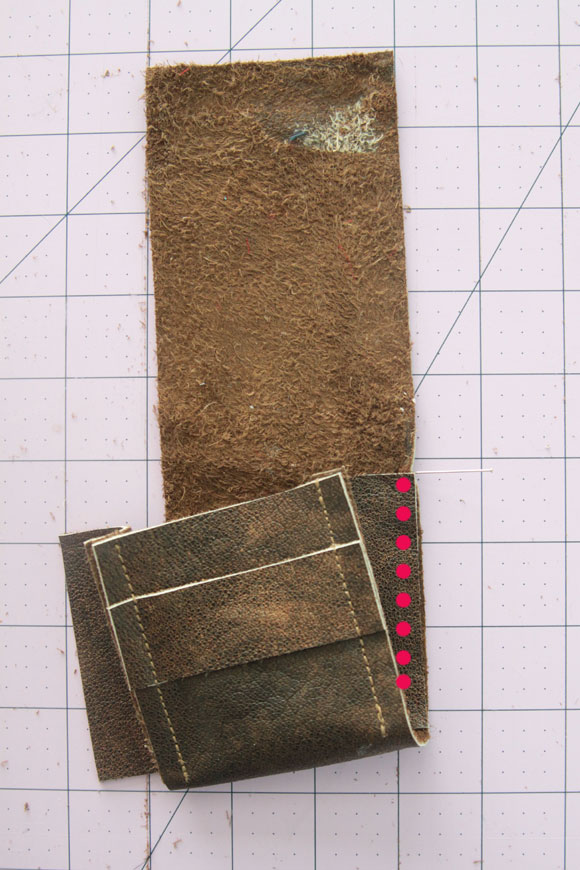
Fold piece A up and behind itself, matching the 7 inch mark with the top of piece B, as shown. Sew together 1/4 inch from the edge, as shown by the dots.
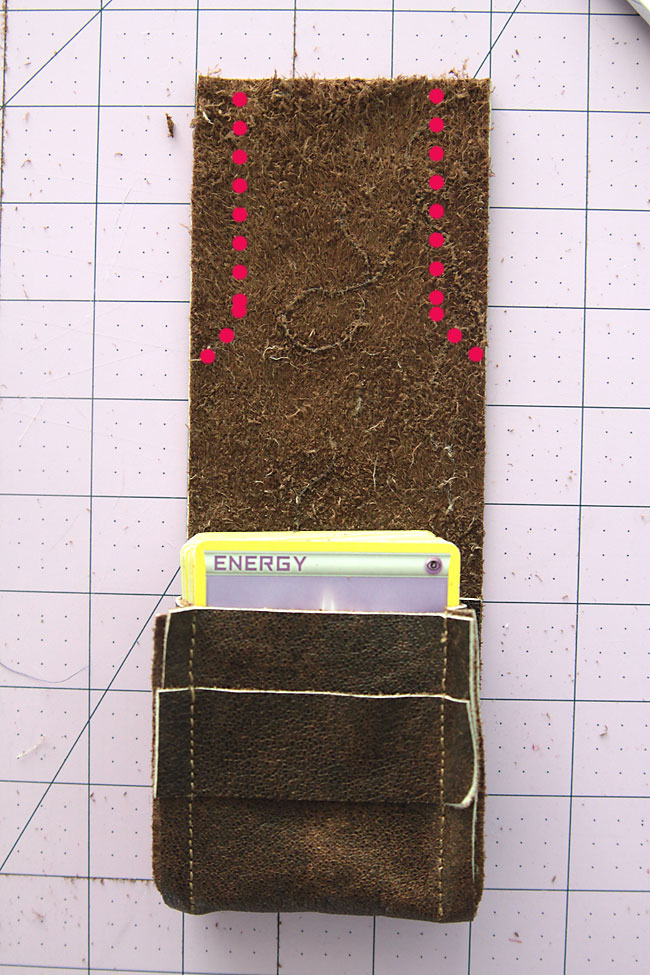
Repeat on the left side. Your deck holder is now assembled. Cut away the leather as shown by dots below, so the top flap can thread through piece C when the deck holder is closed.
Done!


tom says
I have been trying to find one of these
Mycraftymama says
Your numbers are all mixed up for the long piece. first it says 3×12 than pic says 3×15 then for larger amount of cards it says only 7.5. Help!
Autumn says
You are right, some of the numbers are wrong! The picture is incorrect, the long piece should be 3×12 and I will add a note about that in the post. It’s been a number of years since I wrote this post so I’m not sure of the dimensions for a larger deck. Sorry about that and thanks for letting me know!