
In today’s post: Learn how to put together this adorable exploding money box that looks like a graduation cap – any graduate will love this easy DIY gift!

Easy DIY Money Gift for Grads
Who doesn’t love receiving money for graduation? Today’s project is a FUN way to gift cash to your favorite graduate this year. It starts with a premade box from Amazon that we spruce up a little so that it looks like a graduation cap:
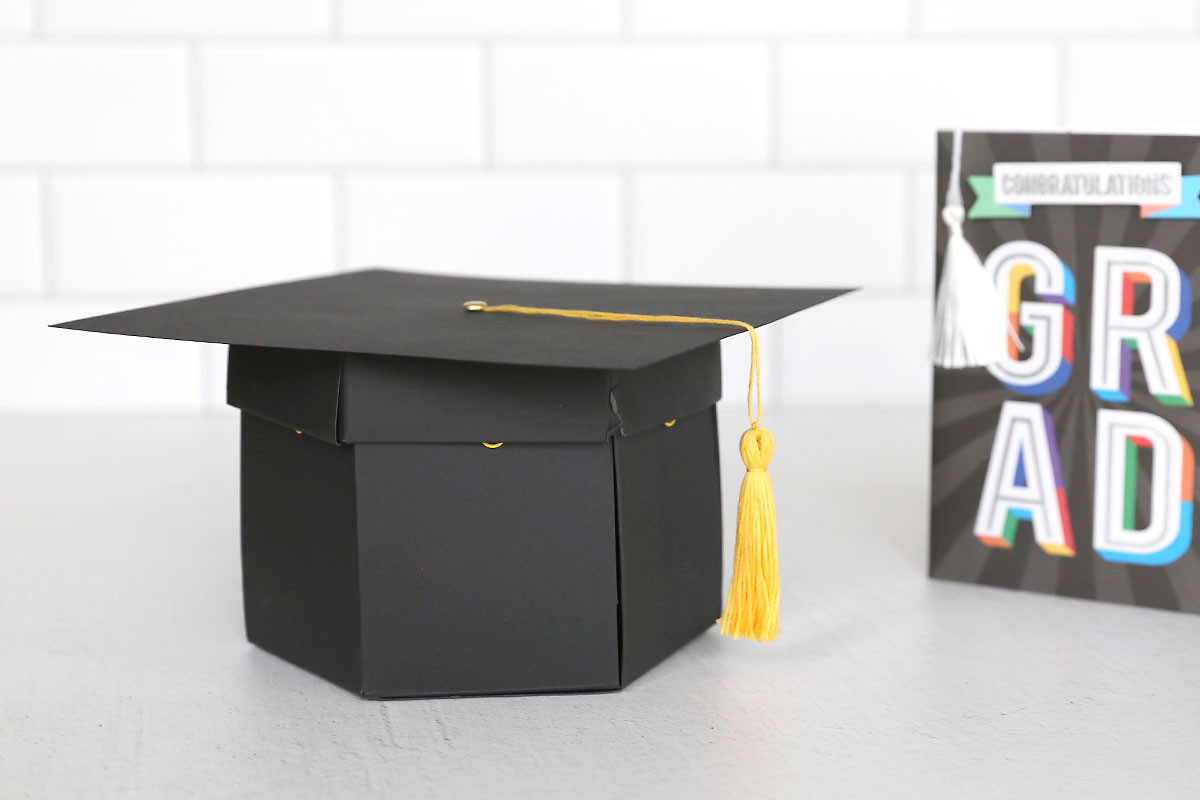
And then when the recipient opens it, the box explodes open showing all the cash inside! This is an easy DIY graduation gift you can put together in under an hour that packs a huge wow factor.
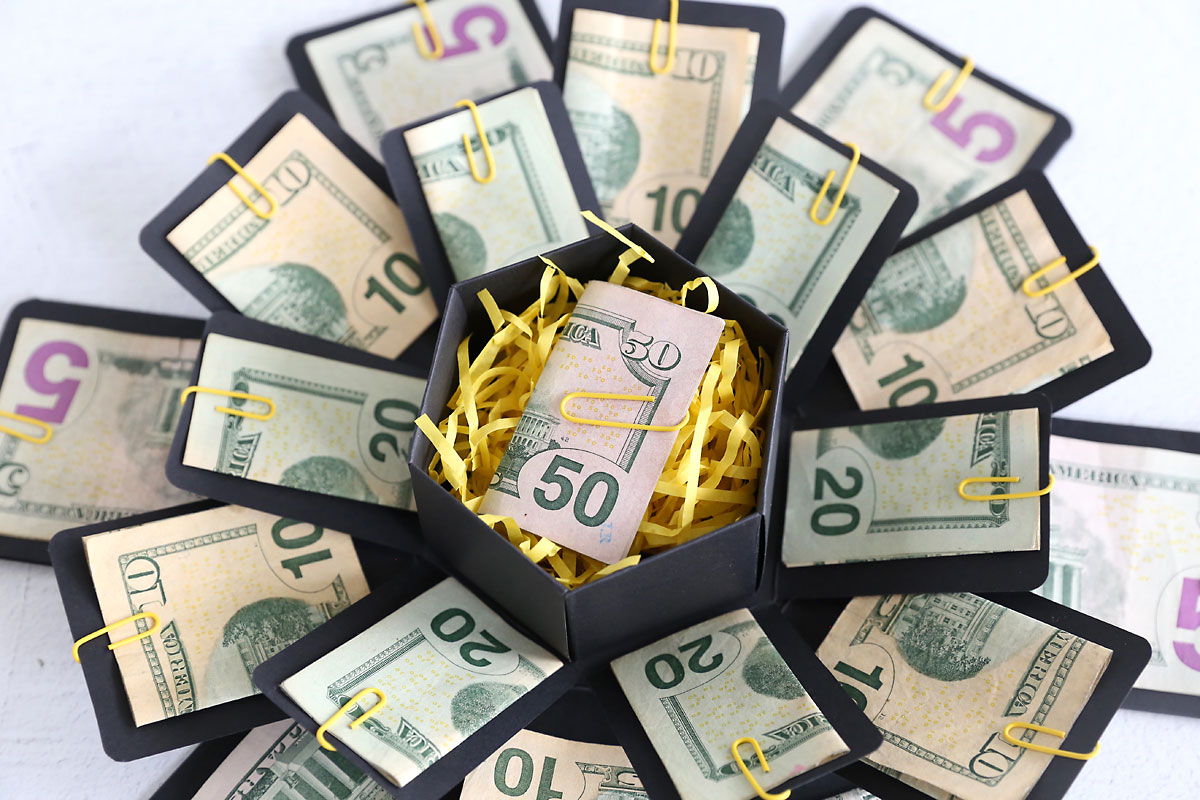
See How It Works
How Much Money?
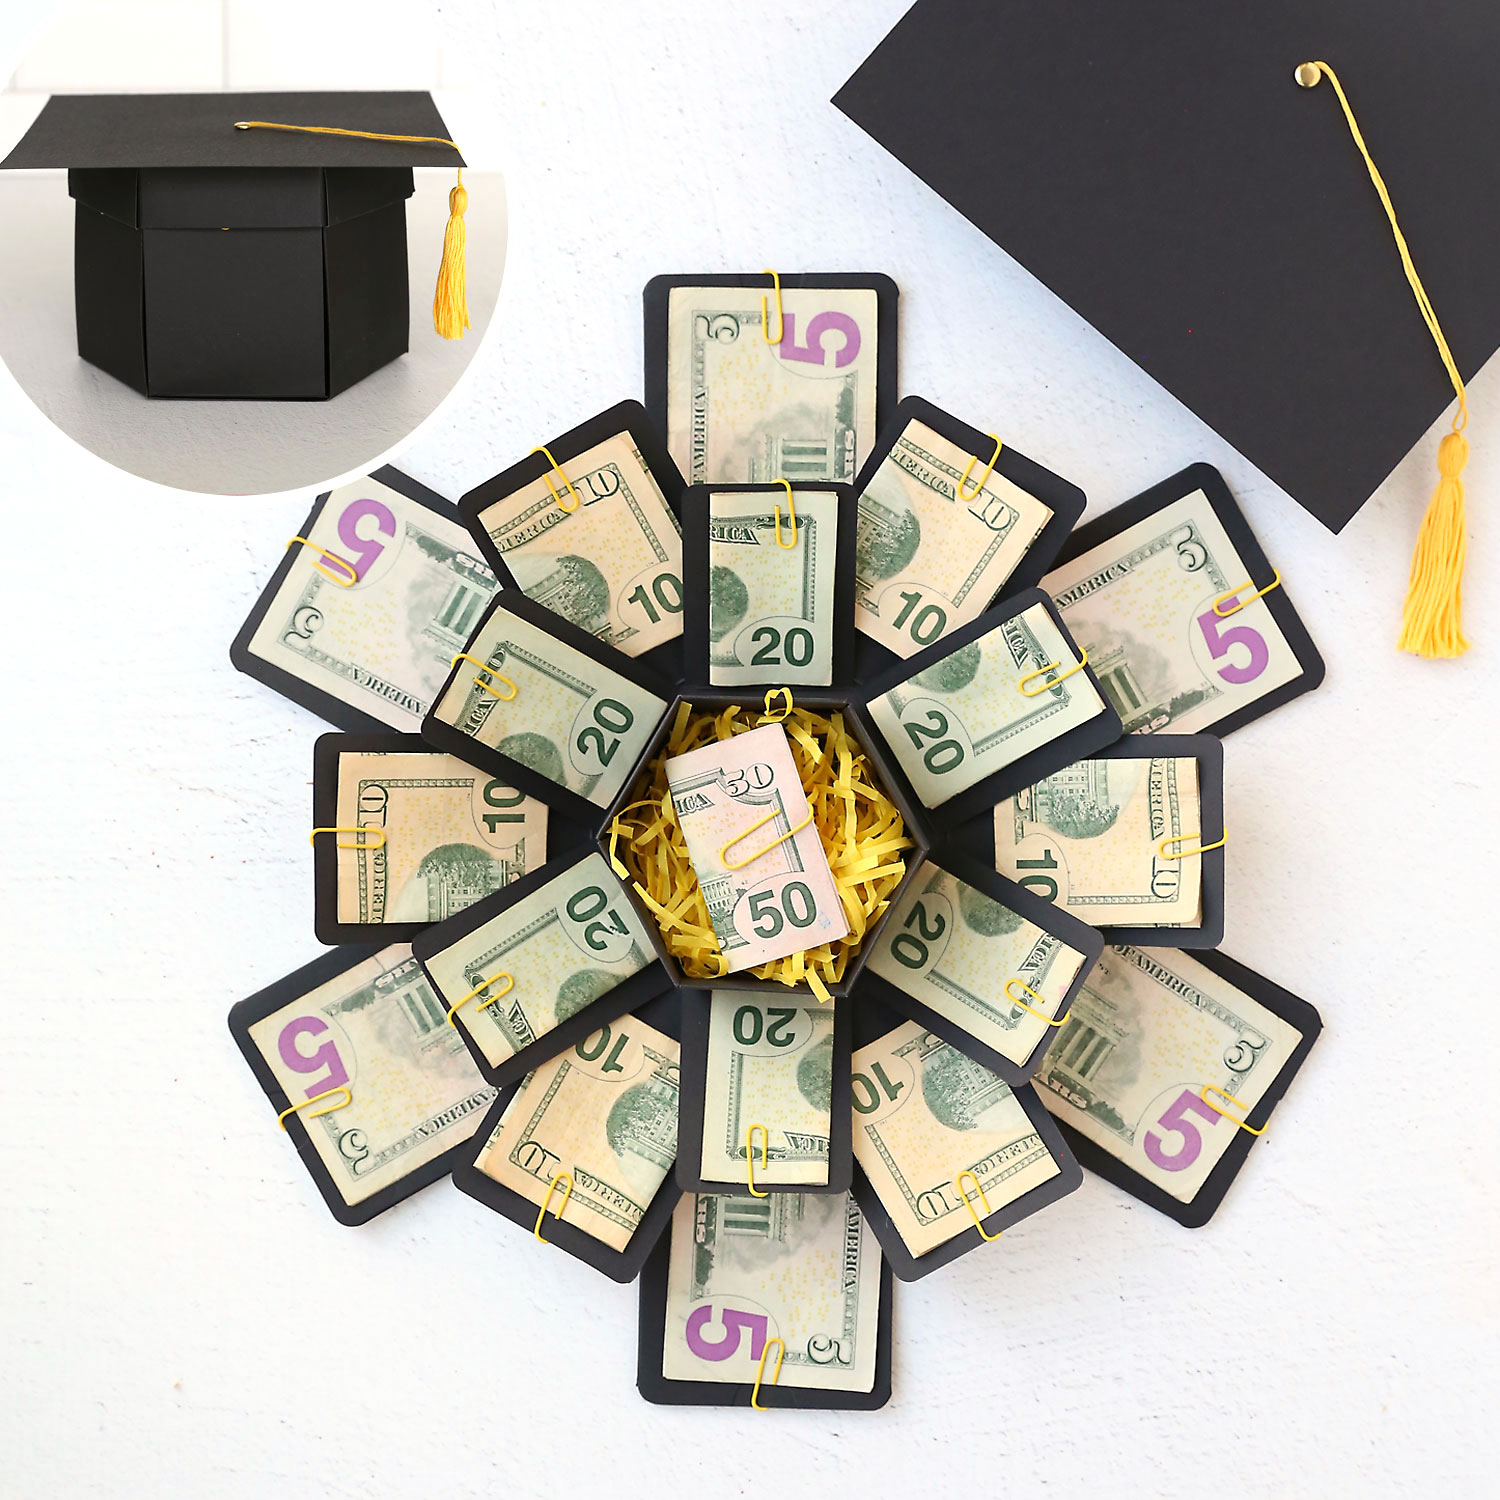
The great thing about this gift is you can decide how much money you’d like to give! The box comes with three separate layers of six flaps each, so there are 18 places to put dollar bills. Then there’s a smaller box in the center where you can put additional money or a different small gift, like jewelry or a gift card. Remember, use whatever bills make sense for you to get the total amount you’d like to give!
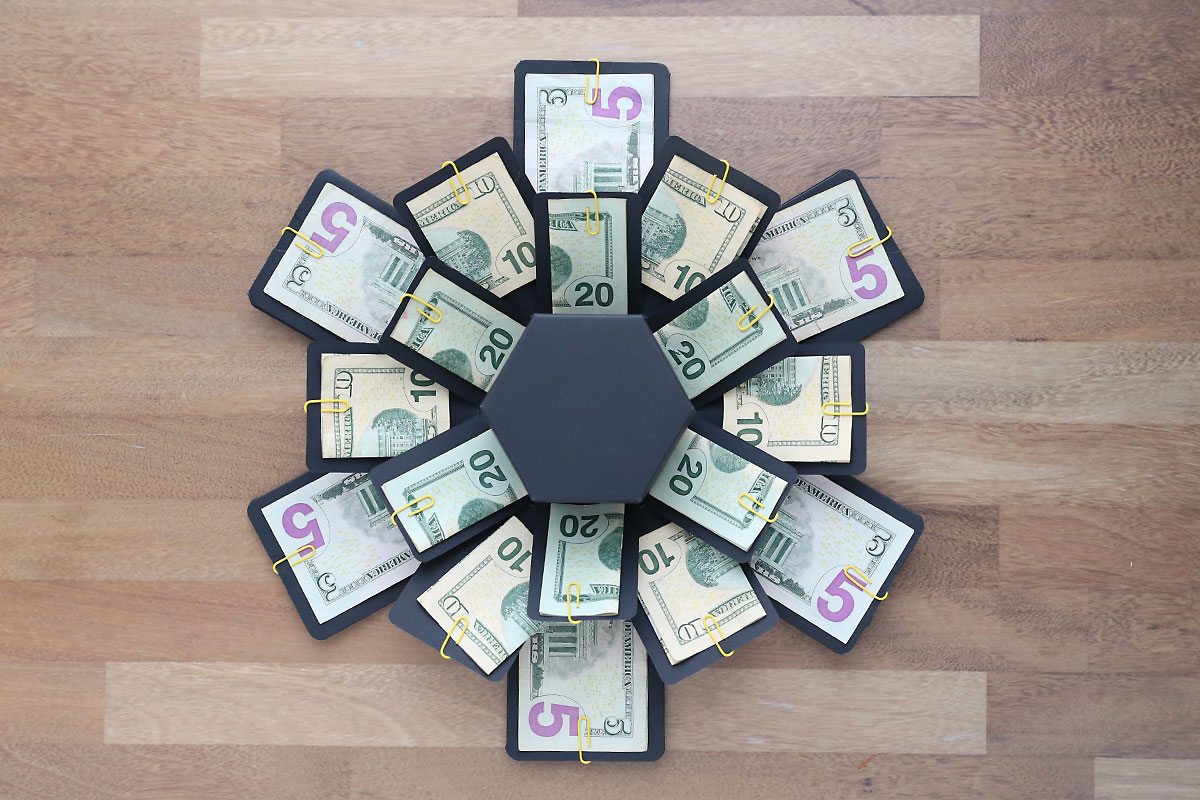
If you set the box up the way I did, you will use a total of $260:
- Six $5 bills ($30)
- Six $10 bills ($60)
- Six $10 bills $120)
- One $50 bill ($50)
Supplies
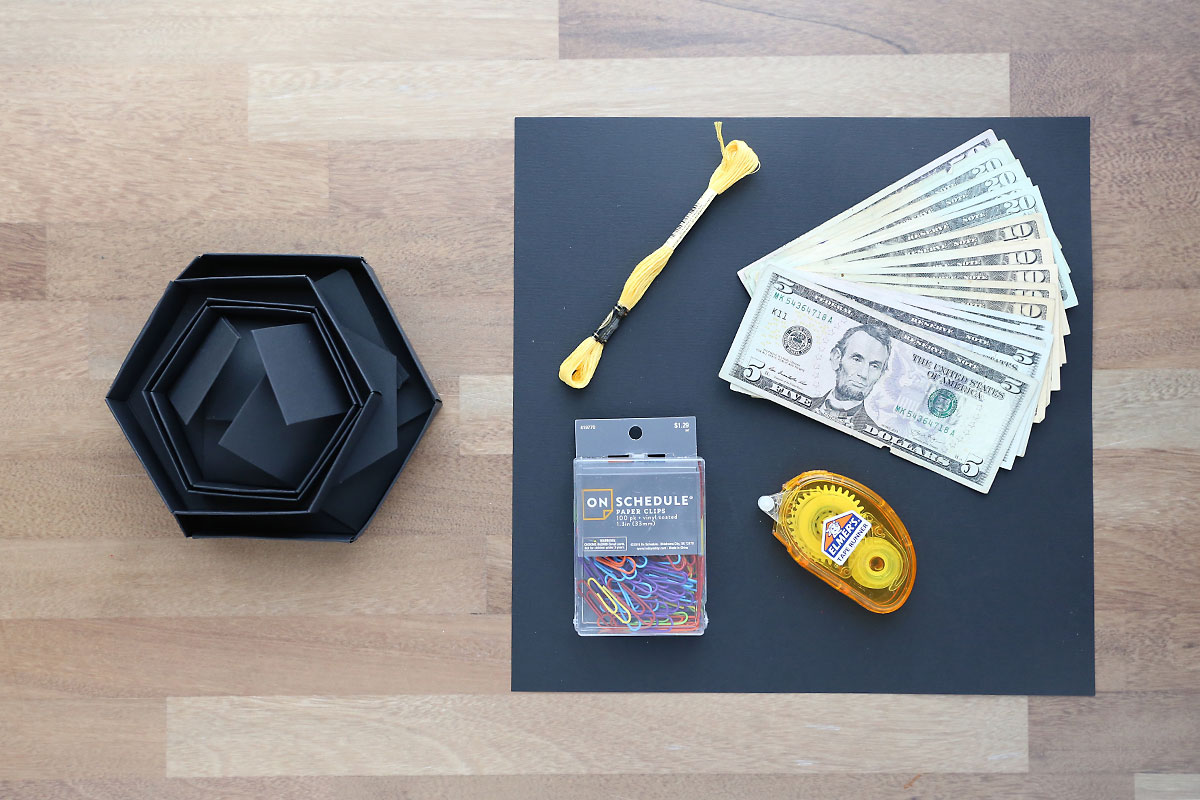
Here’s what you’ll need to make this graduation cap money explosion box:
- Six Sided Explosion Box: I used this premade explosion box from Amazon and I was super happy with it! I have a template to make your own explosion box from cardstock, but using this box from Amazon was well worth the low cost considering how much time it saved. It came almost completely assembled which makes this project so much easier, so I highly recommend it.
- One sheet of Black Cardstock: Either 8.5×11 or 12×12 cardstock works.
- Yellow Embroidery Floss: You’ll use this to make a tassel for the grad cap. You can find embroidery floss at most craft stores.
- One Brad: This is used to attach the tassel to the top of the grad cap; you can just use tape if you don’t have brads.
- Paper clips: You’ll use these to hold the money on each flap of the box. I grabbed colored paperclips at Hobby Lobby but normal ones work too.
- Dollar Bills: To make the box look like mine, you’ll need six 5’s, six 10’s, six 20’s, and one 50. But remember, you can use any bills you like. There is room for 19 dollar bills OR 18 dollar bills and another small gift.
- Adhesive
- Optional: You may want a little confetti or ribbon to go in the smallest box with the dollar bill or gift you are putting in there.
How to Make a Grad Cap Money Explosion Box
Open Box and Add Money
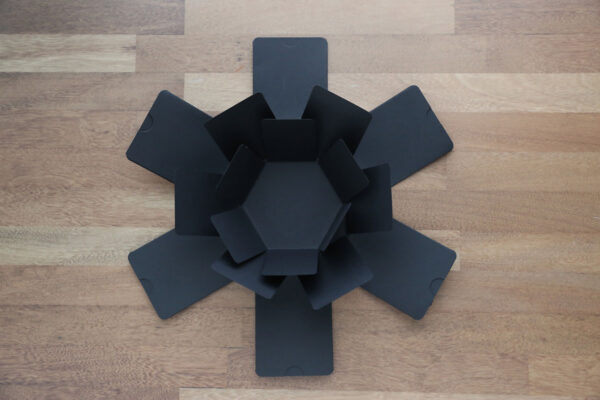
If you order the box I used from Amazon, it’s already assembled, which makes this super easy! Open the package and open up the main box. Set aside the lids for now, and also set aside the extras flaps, stickers, etc. This is what the main box will look like. You can see there are three different layers, each with six flaps:
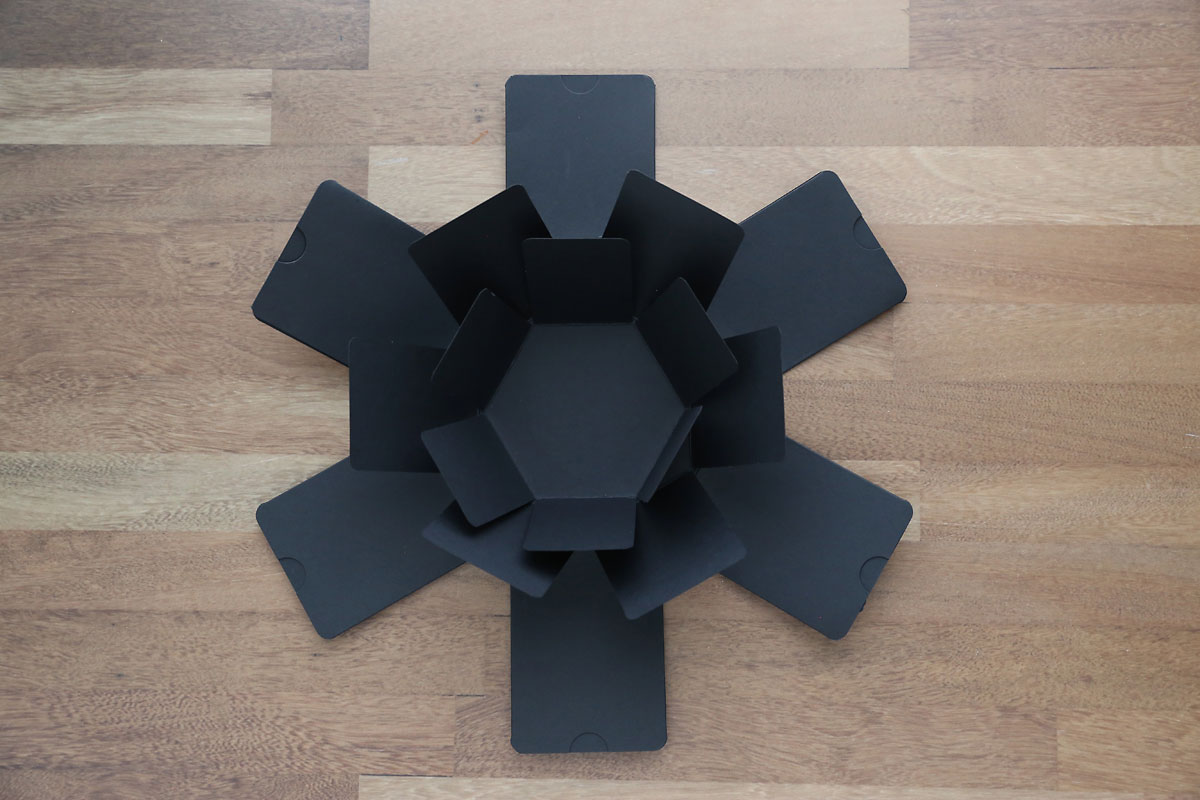
Fold your bills and use paper clips to attach them to each flap. For the largest flaps I folded the bills in half, for the middle flaps I folded them in thirds, and for the smallest flaps I folded them in quarters.
Add the Small Box
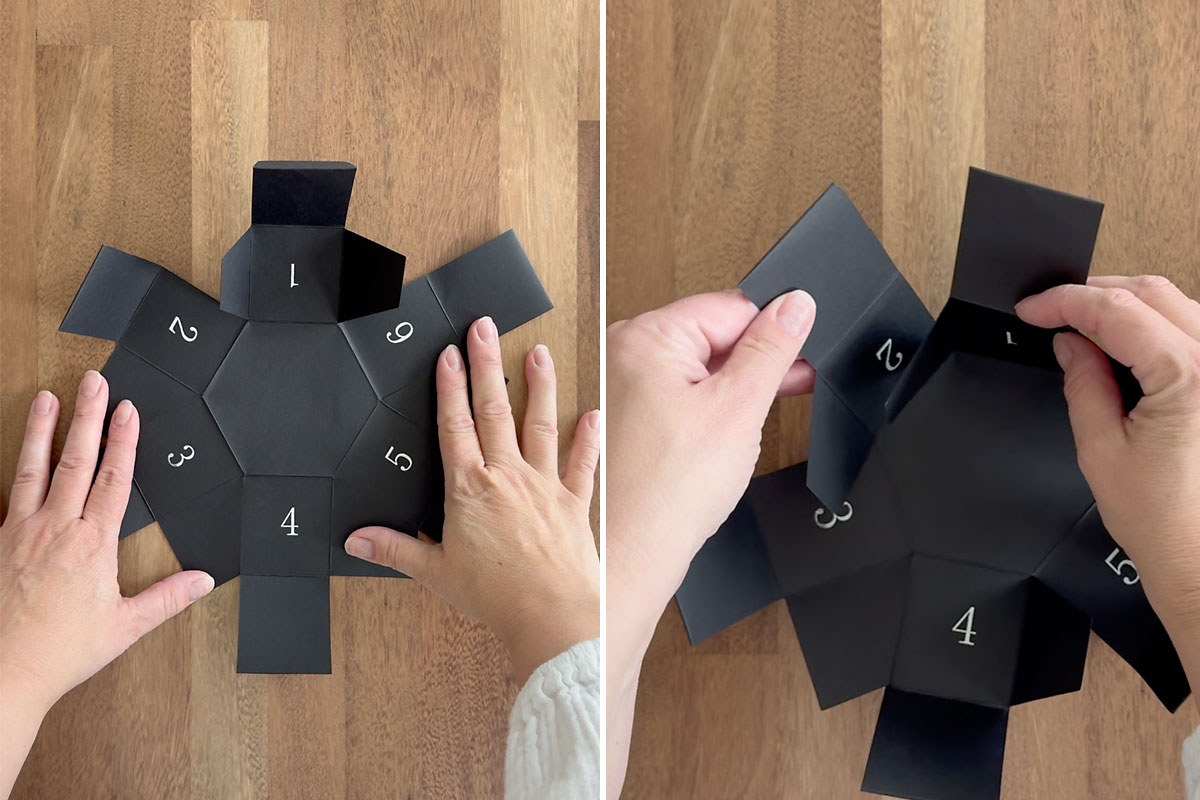
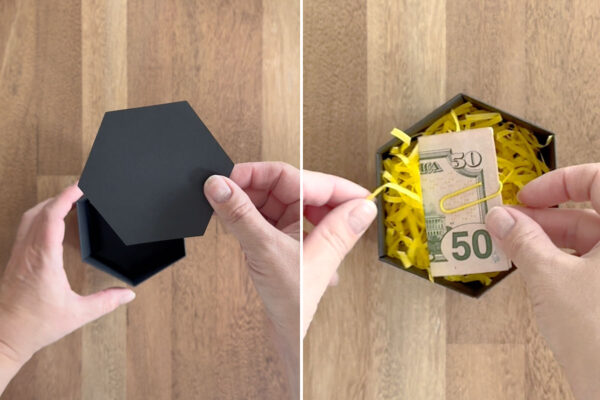
The kit includes a small box you can put in the very center, and this does need to be assembled. Find the piece that when unfolded looks like the first photo below. Pick up section 1. It has small flaps on either side. Pick up section 2 fold the top piece of it down over the left flap of section 1. Repeat with section 3, 4, and 5. You’ll see you are building a six sided box. When you get to section 6, make sure to fold the top down over flaps from section 5 and section 1. Then fold the top piece of section 1 down as well. (There is a video on the Amazon listing showing how to do this).
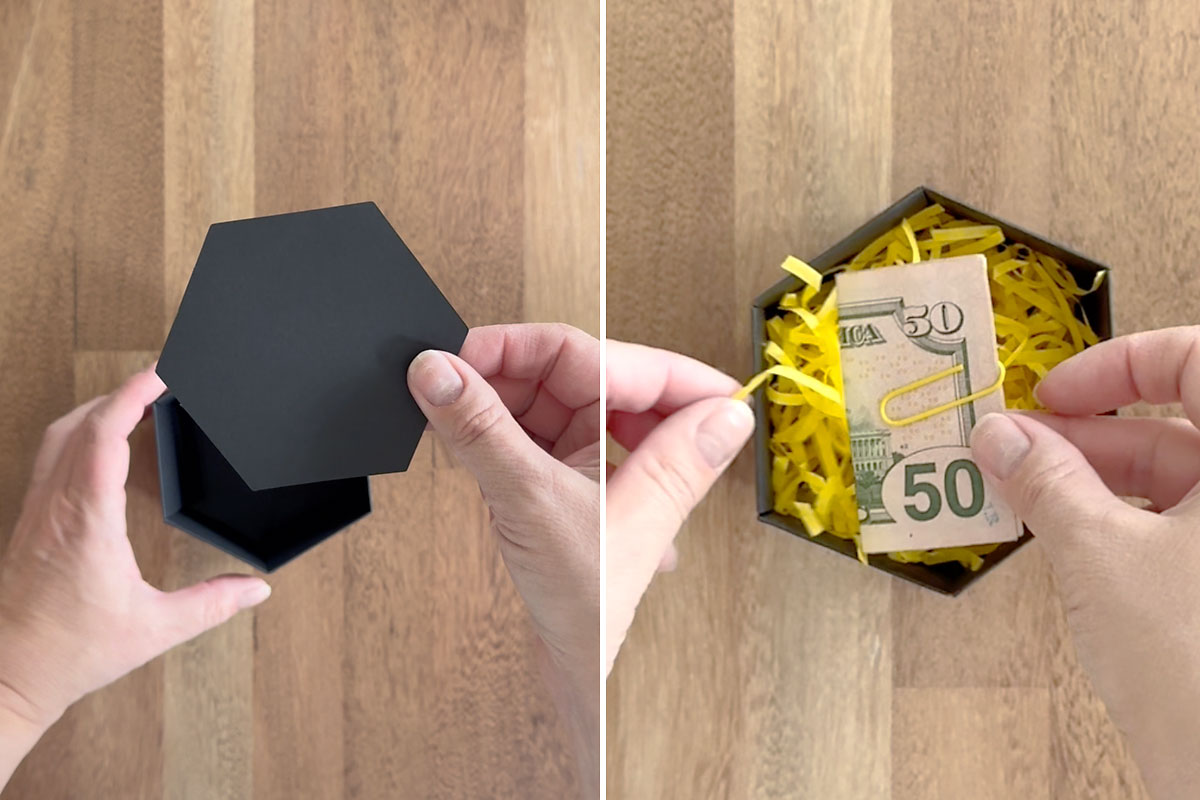
Find the small hexagon piece that fits inside this box and put it in to secure all the sides. Then you can fill the box with confetti and a dollar bill, or another small gift. Use adhesive on the bottom of the box to secure it to the center of the larger explosion box.
Make the Grad Cap
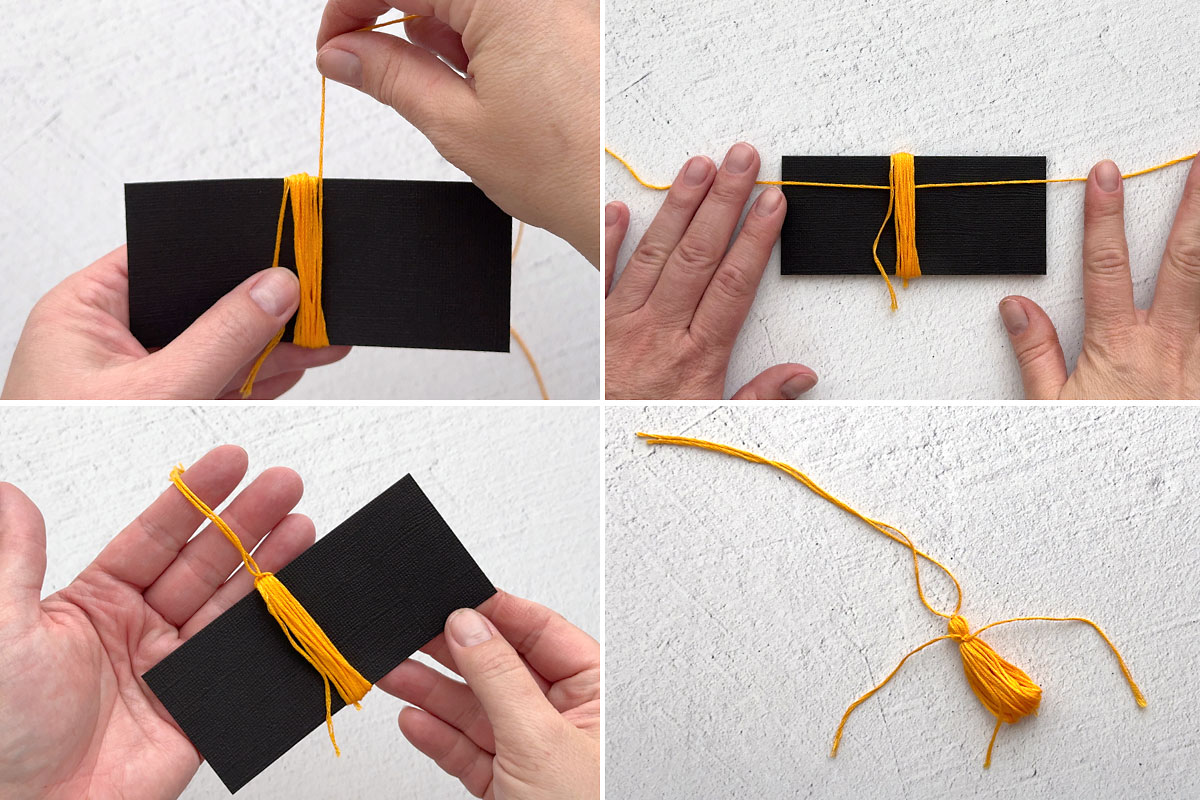
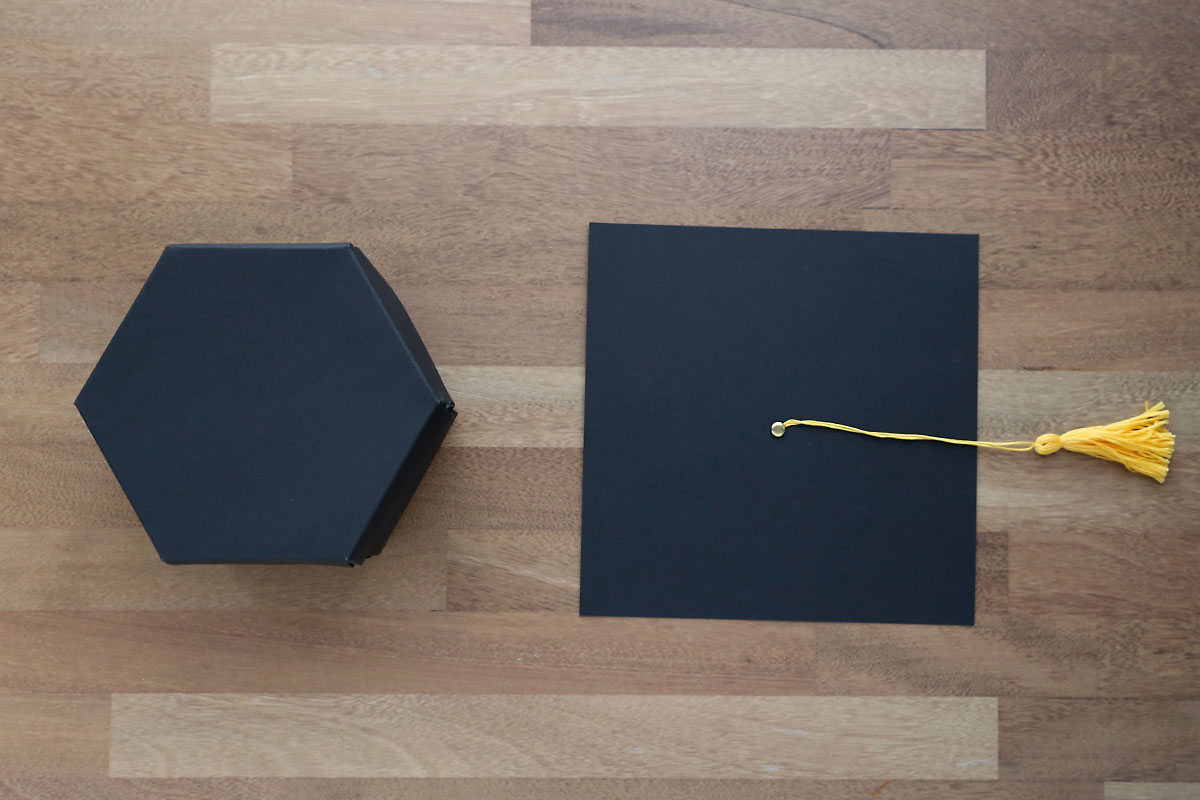
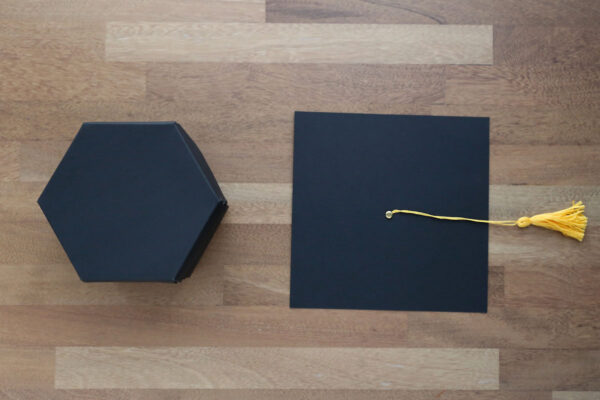
The last thing to do is turn the entire box into a graduation cap! Start by cutting an 8×8 inch piece of black cardstock, which will be the top of the hat. Then you’ll need to make a tassel from embroidery floss. Cut a piece of cardstock that is 3 inches tall.
- Wrap embroidery floss around the cardstock about 25 times.
- Cut a 12 inch piece of floss and slide it under the wrapped floss.
- Tie the 12 inch piece into a tight knot, then slide the floss off the cardstock.
- Cut a 6 inch piece of embroidery floss and tie it around the tassel just below where you tied the longer piece (see last photo below).
Trim the completed tassel and attach it to the cardstock square using a brad (if desired) or a piece of clear tape. Then adhere the cardstock square to the top of the largest lid on the box.
Ready to Gift
Here’s what the completed box looks like all closed up (note that you may need some help holding the flaps up to put the lids on, it’s a little easier with an extra hand):

When you take off the top lid the first layer of money – the 5’s – falls down. Then you take off the next lid to let the 10’s fall, then another lid to let the 20’s fall, then finally remove the lid from the small box in the center to reveal the 50 dollar bill (or other gift). Here’s what it looks like when all the lids have been removed:

What if the Flaps Don’t Fall?
Because the box comes packaged with the flaps folded all the way in, they may not fall the first time the box is opened. It’s a good idea to leave the box completely open overnight, with all the flaps pressed down. Then you can package it back up. This ensures that the box will work correctly when the recipient opens it!
Graduation Cap Money Explosion Box
Supplies
- 6 sided Explosion Box from Amazon, linked in notes
- 1 sheet Black Cardstock
- Yellow Embroidery Floss
- 1 Brad optional
- 19 Dollar Bills or 18 bills plus one small gift
- Paper Clips
- Adhesive
- A bit of confetti or ribbon optional, to fill smallest box
Want more project ideas? Sign up to get my favorite easy crafts and recipes straight to your inbox!
Instructions
- Open the explosion box package and remove the main box. Open all three layers of flaps and press them down flat.

- Add dollar bills to each flap using paperclips. Fold bills in half for the largest flaps, thirds for the middle flaps, and fourths for the top flap.
- Put together the small box that's included in the kit and place more money or another small gift inside (with confetti if desired). Adhere to the center of the main box and put on the lid.
- Cut an 8×8 square of black cardstock. Make a tassel from yellow embroidery floss and attach it to the square with a brad or tape.
- Fold up each layer of flaps and secure them with a lid. Then adhere the cardstock square to the top lid to make the box look like a grad cap.

- Remove each lid to watch the money "explode" outward.






Leave a Comment