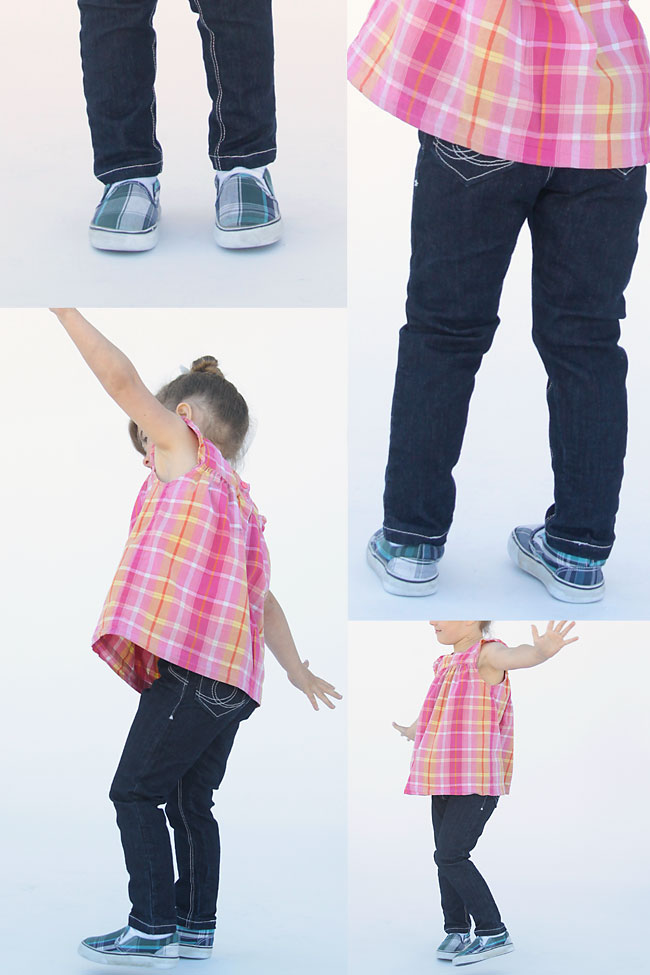
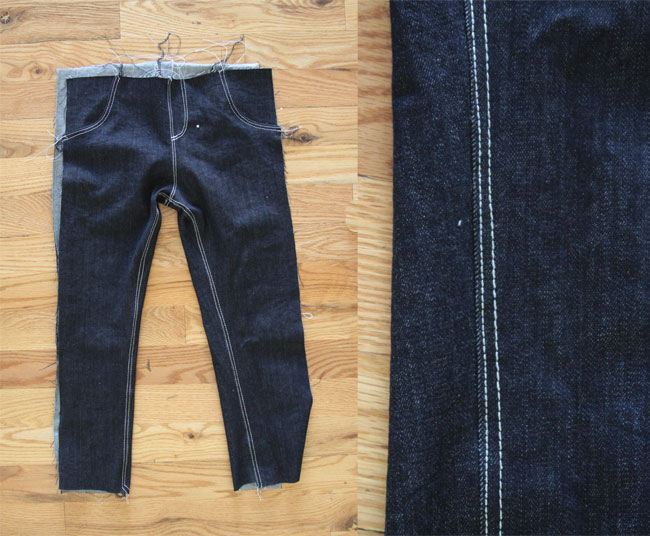
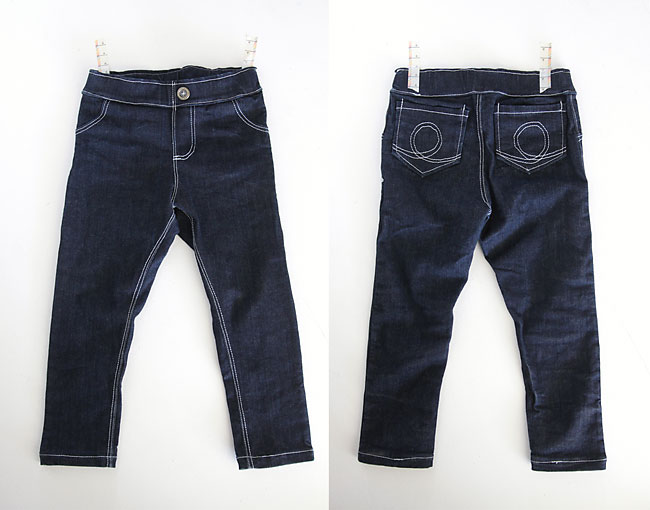
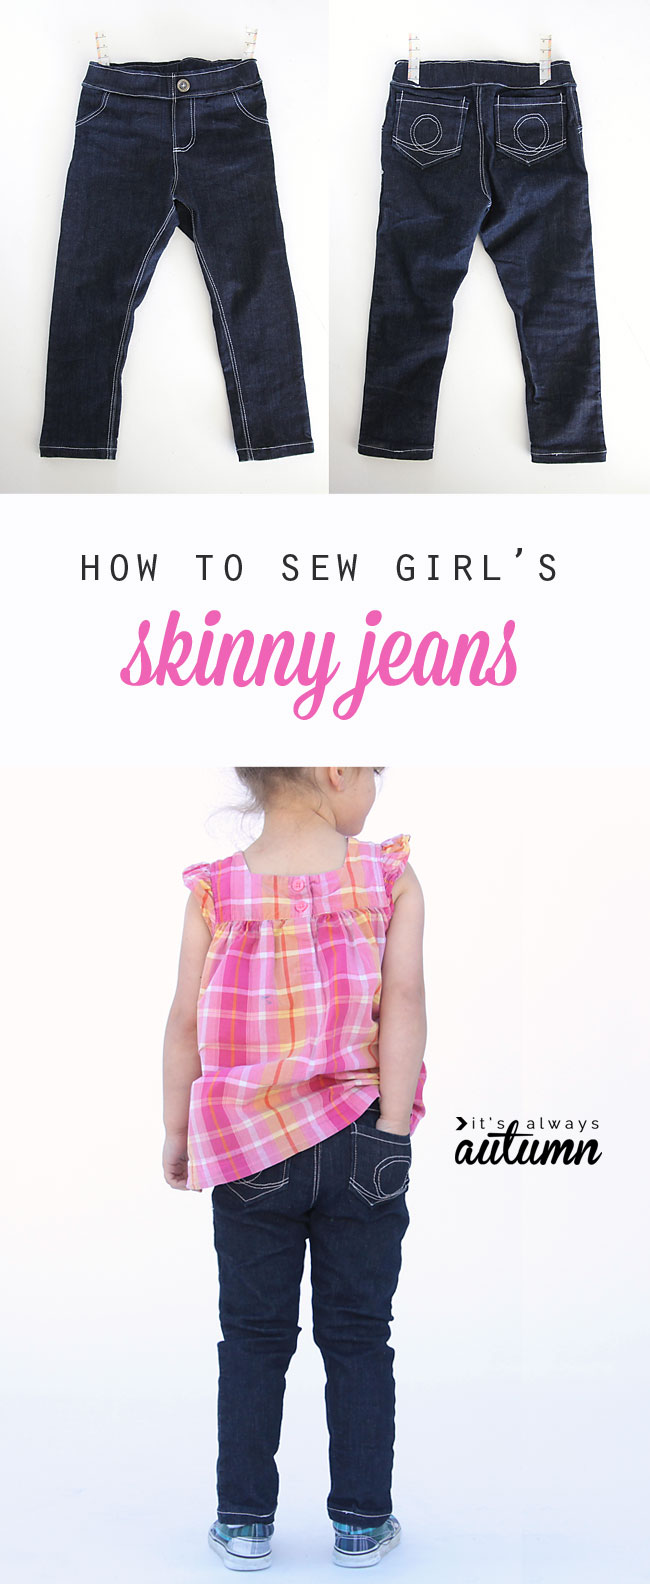
I gotta say, it’s pretty satisfying to make a pair of jeans. From scratch. All by yourself. Right now, I’m very satisfied with myself. Of course, I cheated. I don’t really have the patience to make an ACTUAL pair of jeans, so I basically made souped-up leggings instead. Souped-up leggings that LOOK like jeans, without all the work. See that front fly and those front pockets? Totally faux. As in fake. There’s no zipper in these puppies, just nice stretchy denim and some pretty topstitching. So I guess I didn’t actually make jeans. But I did make something that looks a whole lot like jeans, with a whole lot less work. So I’m calling that good for the day.
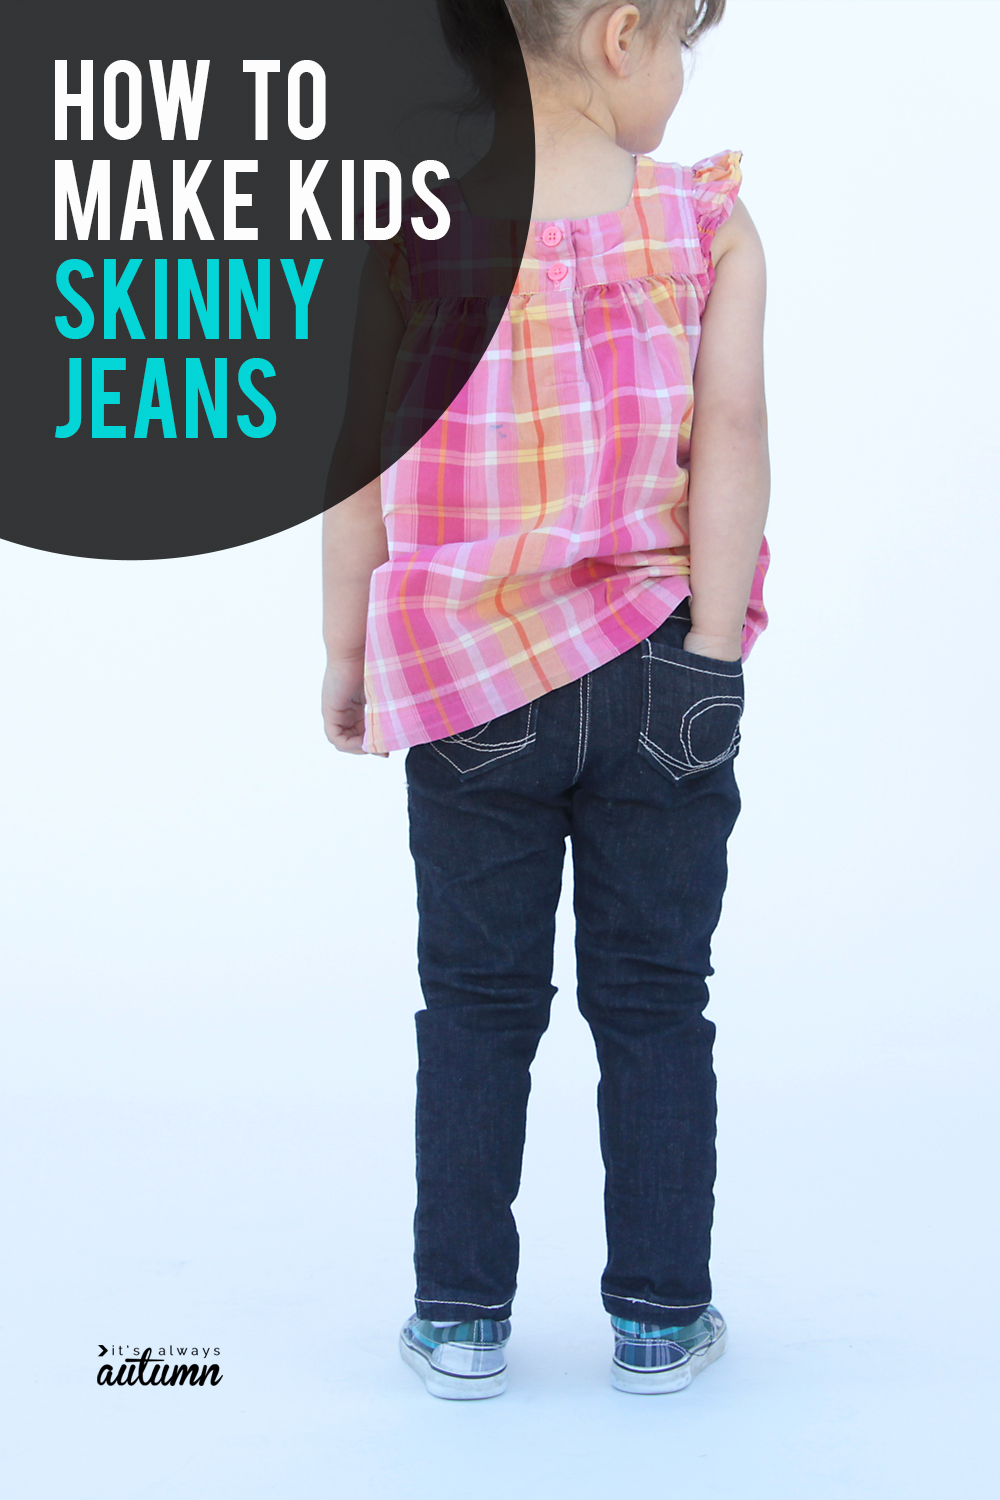
I got this very nice dark wash stretch denim from Girl Charlee which, unfortunately, is out of stock right now, but they’re hoping to get more in.
To make a cute pair of faux skinny jeans for a little girl, you’ll need a leggings pattern and some nice stretchy denim (denim from an old pair of jeans works great!). An adorable little girl might be nice to have as well.
A few denim sewing tips before we start: (1) read the “sewing with denim” post from Monday to make your life a whole lot easier, and (2) get topstitching thread. Jeans have lots of topstitching, so be sure you have a nice contrast topstitch thread – either yellow, orange, or white is most common on commercial jeans. I only use topstitching thread in the needle, with normal old all purpose thread in the bobbin.
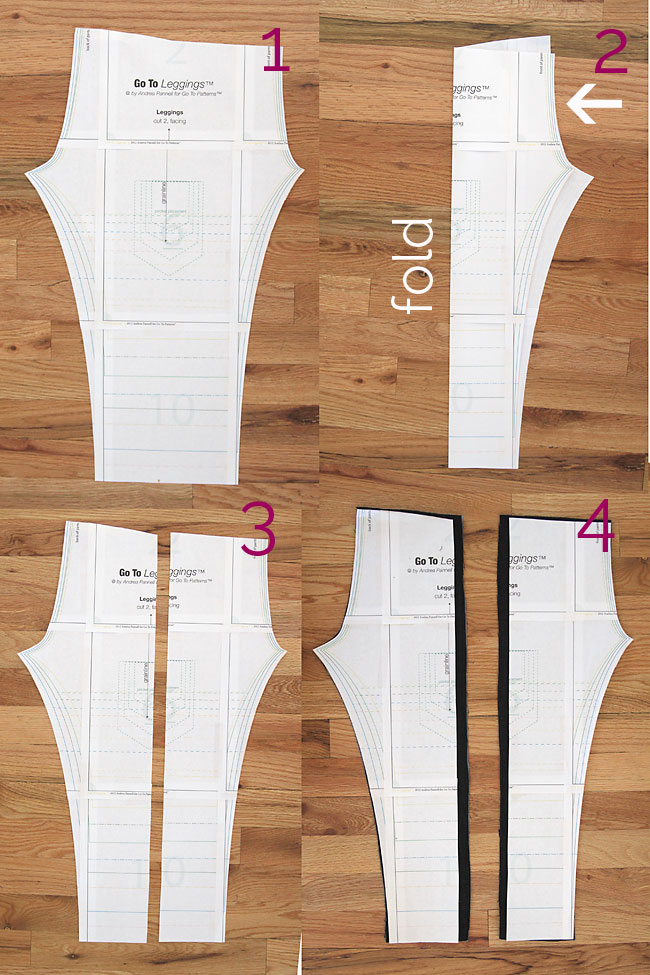
You can start with any leggings pattern – I used the Go To Leggings pattern. You may want to go up one size in width since stretch denim isn’t quite as stretchy as knit fabrics. We will use a separate waistband, so if you’re using the Go To leggings pattern you’ll need to cut about 1 and 5/8 inches off the top of the pattern (1). We also want a seam down the outer leg, just like on real jeans, so we’ll cut the Go To pattern piece in half. Fold it in half as shown, so the edges at the top line up as shown by the arrow (2), then cut down the fold line (3). Place both new pattern pieces on your fabric and cut out two of each, being sure to add seam allowance along the cut line (4). NOTE: if your leggings pattern already comes with two pieces and a separate waistband, you can skip those steps and just cut it out as normal!
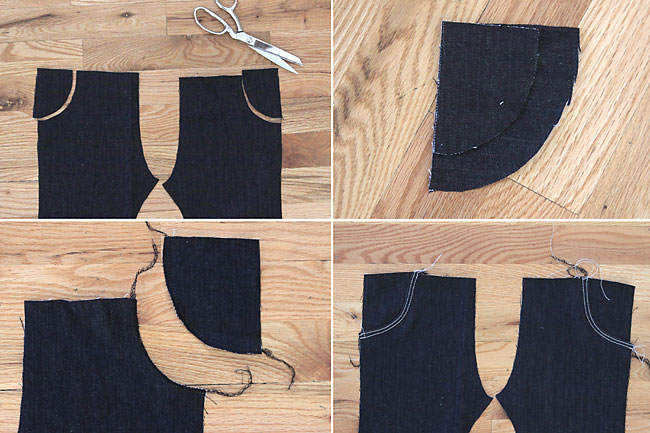
Now we’ll make faux front pockets, which are lots easier than adding actual pockets (and since there’s not really room to put much of anything in skinny jeans pockets, no one will miss them). Take your two front pieces – the front pieces are not quite as tall as the back pieces – it’s important that you’re using the right ones! Place them right side up as show below, then cut out a curved piece from the upper outside edges. Use the piece you cut out to cut two new pieces that are about an inch bigger along the curve, as shown below. This will be your faux pocket facing.
Finish the curved edges on the front jeans piece and the faux pocket piece. Turn under the curved edge on the jeans piece about 1/4 inch and press. Stack it on top of the faux pocket piece, and stitch in place. I used a double line of contrast stitching.
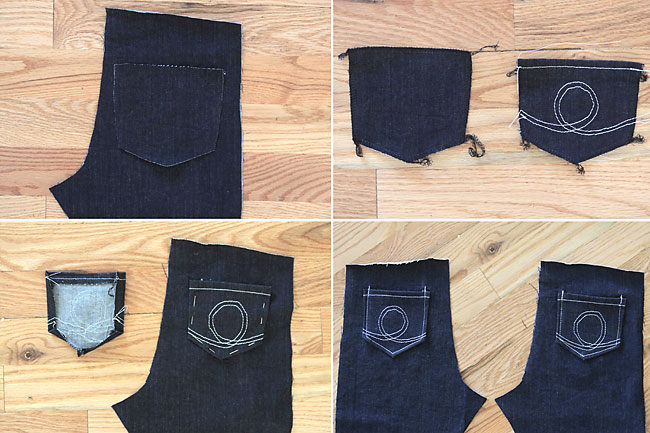
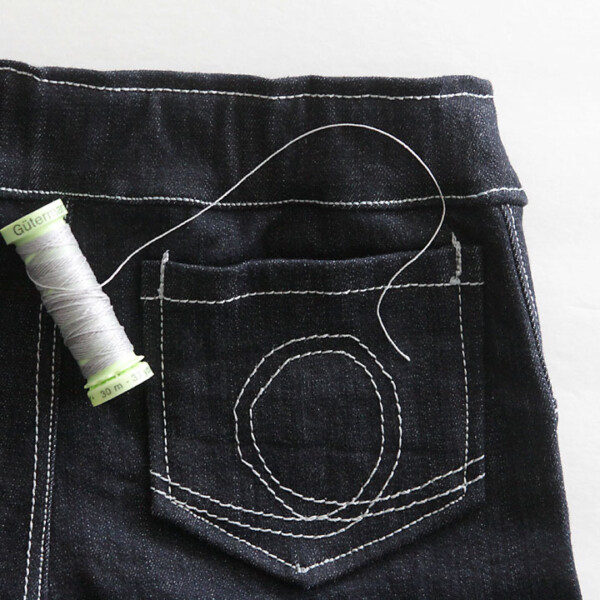
Next, we’ll make real pockets for the back of the jeans. Get the two back pieces and cut a pocket for each one. Use another pair of jeans as a guide for how big the pockets should be, and be sure to add about 1/2 on each edge for seam allowance. Finish the edges of the pockets, then turn down the top 1/2 inch and press. Stitch across it. Add any decorative stitching you’d like.
Then fold in each side about 1/2 inch and iron well. Pin the pockets onto the back jeans pieces and sew on, as you can see above. BTW, I wish I’d placed my pockets about an inch lower, but I didn’t realize that until later on, and I didn’t feel like unpicking them…
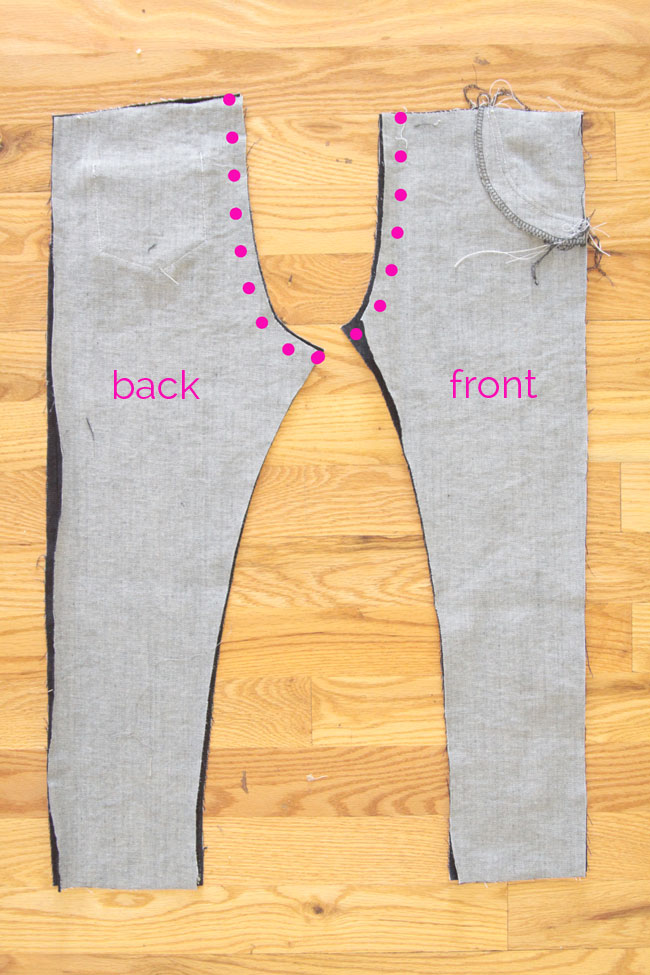
Now that the pockets are all taken care of, we can start putting the jeans together. Place the two front pieces RST, and the two back pieces RST. Sew along the upper curves, as shown below.
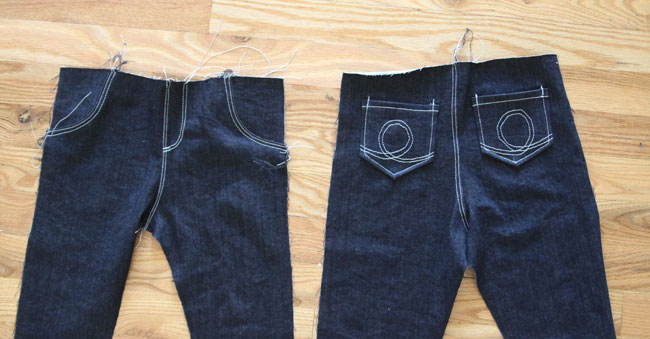
Open the legs up and press the seams (to the right on the front and to the left on the back). Then topstitch close to the seam to secure the seam allowance down. I did a double row of stitching. Also sew a “faux fly” on the front of the jeans – just two rows of stitching that mimics the look for a jeans fly. (After I took this photo I unpicked the faux fly and re-sewed it so it hit the center seam a little further down on the jeans.)
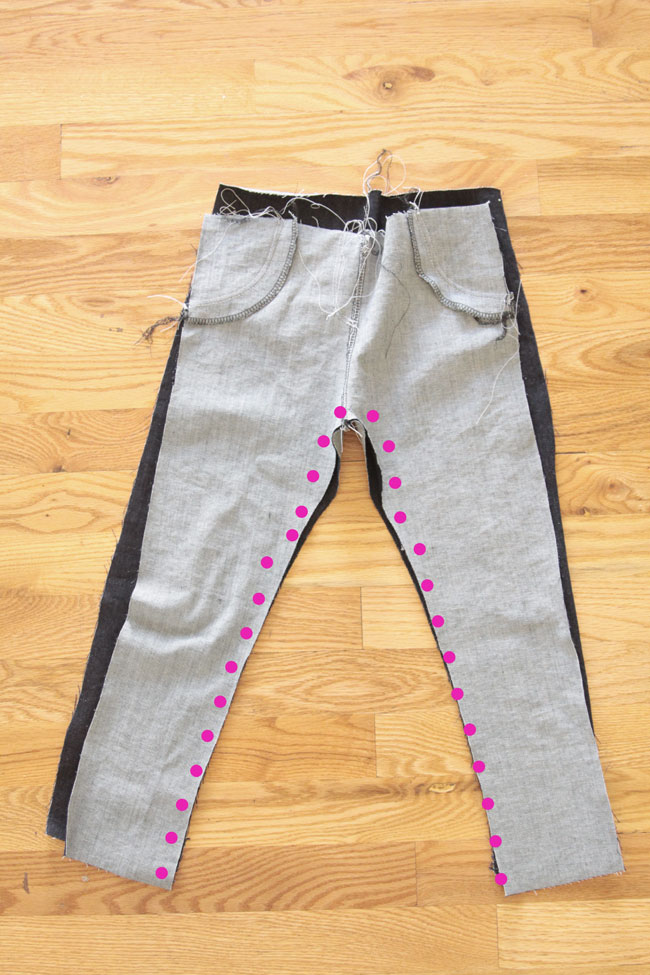
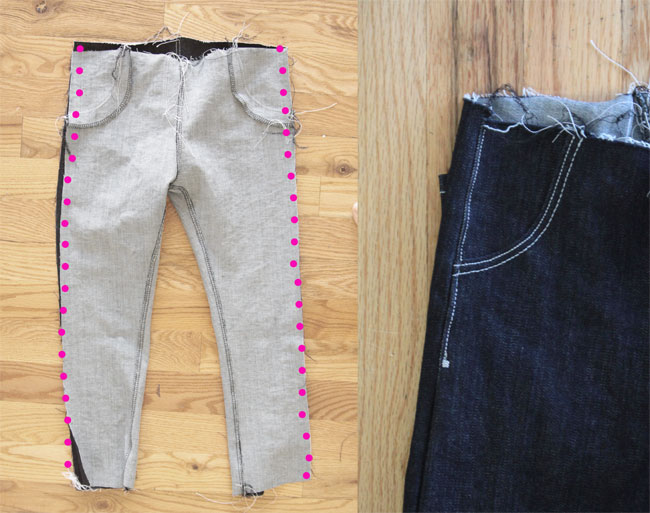
Now place the front of the jeans on top of the back of the jeans, RST. Pin and sew the inseam, shown by the dots below.
Once the inseam is sewn up, you’ll open up the pants and press the seam allowance to the front. Again, topstitch close to the seam, securing the seam allowance on the inside. Again, I did two rows of stitching.
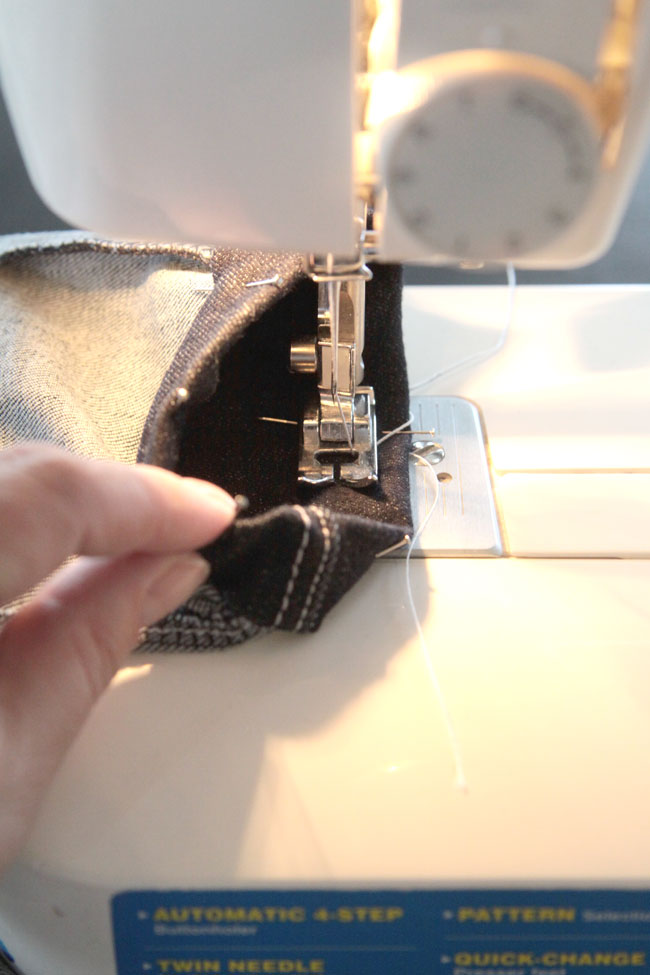
Alright, now you can turn the jeans back inside out and line up the outside edges. Pin and sew down the sides. Do your best to press the seam allowance toward the front. We can’t topstitch all the way down this seam now that the pants are all put together; you’ll notice on commercial jeans that the topstitching usually just goes down a few inches past the front pocket, and usually ends with a zigzag, so that’s what I did.
At this point you’ll want to press your jeans with a lot of steam, especially along the top. It’s likely that the denim will have stretched out a bit and you want to shrink it back up to size.
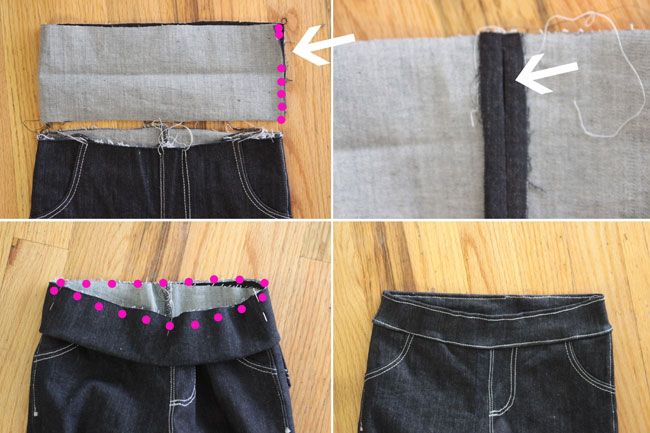
Now we’ll add a waistband. Cut a strip of denim 1 inch wider than your girl’s waist size and about 4 inches tall. Fold it in half and sew the short raw edges together as shown below, leaving an opening of 1 inch near the top. Press that seam open, and you’ll see the opening.
Fold the waistband in half lengthwise, with right sides out. With the opening in the seam facing OUT, slide the waistband over the top of the jeans, matching the raw edges. The waistband may be a little bit smaller than the top of the jeans, so pin it evenly. Sew the waistband on, stretching slightly to fit the jeans as you sew. Flip the waistband up and press the seam allowance up as well. Topstitch all the way around the waistband close to the seam at the bottom, and about 1/4 inch away from the folded edge at the top.
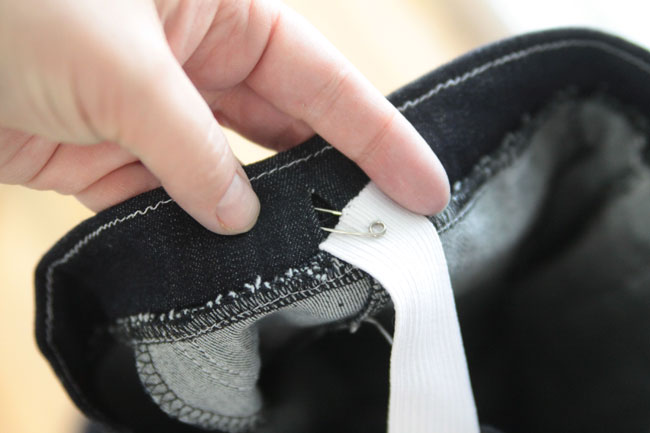
Cut a piece of 1 inch elastic that’s the same as your girl’s waist measurement. Use a safety pin to thread it through the waistband, using the opening we left in the waistband seam. Try the jeans on and pull elastic tighter if needed. Sew the short ends of the elastic together and trim any excess.
Then all that’s left is to hem the legs! Finish the bottom edge, turn up 1/4 inch, and turn up another 1/2 inch and sew. It’s easier to sew the hem with the pants inside out, as shown below.
As a last step I did sew a button on the front. I found a metal “sportswear” button that looks pretty close to the buttons used on commercial jeans.
Done! One pair of skinny jeans/jeggings that really weren’t that hard to make.


Marisa says
Love this tutorial! My daughter is so thin that we have a hard time finding jeans to fit her. We usually end up with leggings or jeggings, but even then finding ones with enough length can be an issue. Thank you!
Sarah Helene says
BRAVO! Fab tutorial on sewing a pair of jeans — denim leggings for a young girl that LOOK like jeans! Easy to follow instructions & accompanying
Photos. Certainly your sewing gave you satisfaction when you finished! Thanks for sharing! Sarah in Minneapolis
Deanna says
Great Job! I like the idea of using an old pair of stretchy jeans. Thanks for the tut.
Sharlyn says
Absolutely darling!!