
In today’s post: Learn how to make beautiful fabric hair bows using less than a quarter yard of fabric. This is an easy sewing project that will take about thirty minutes.
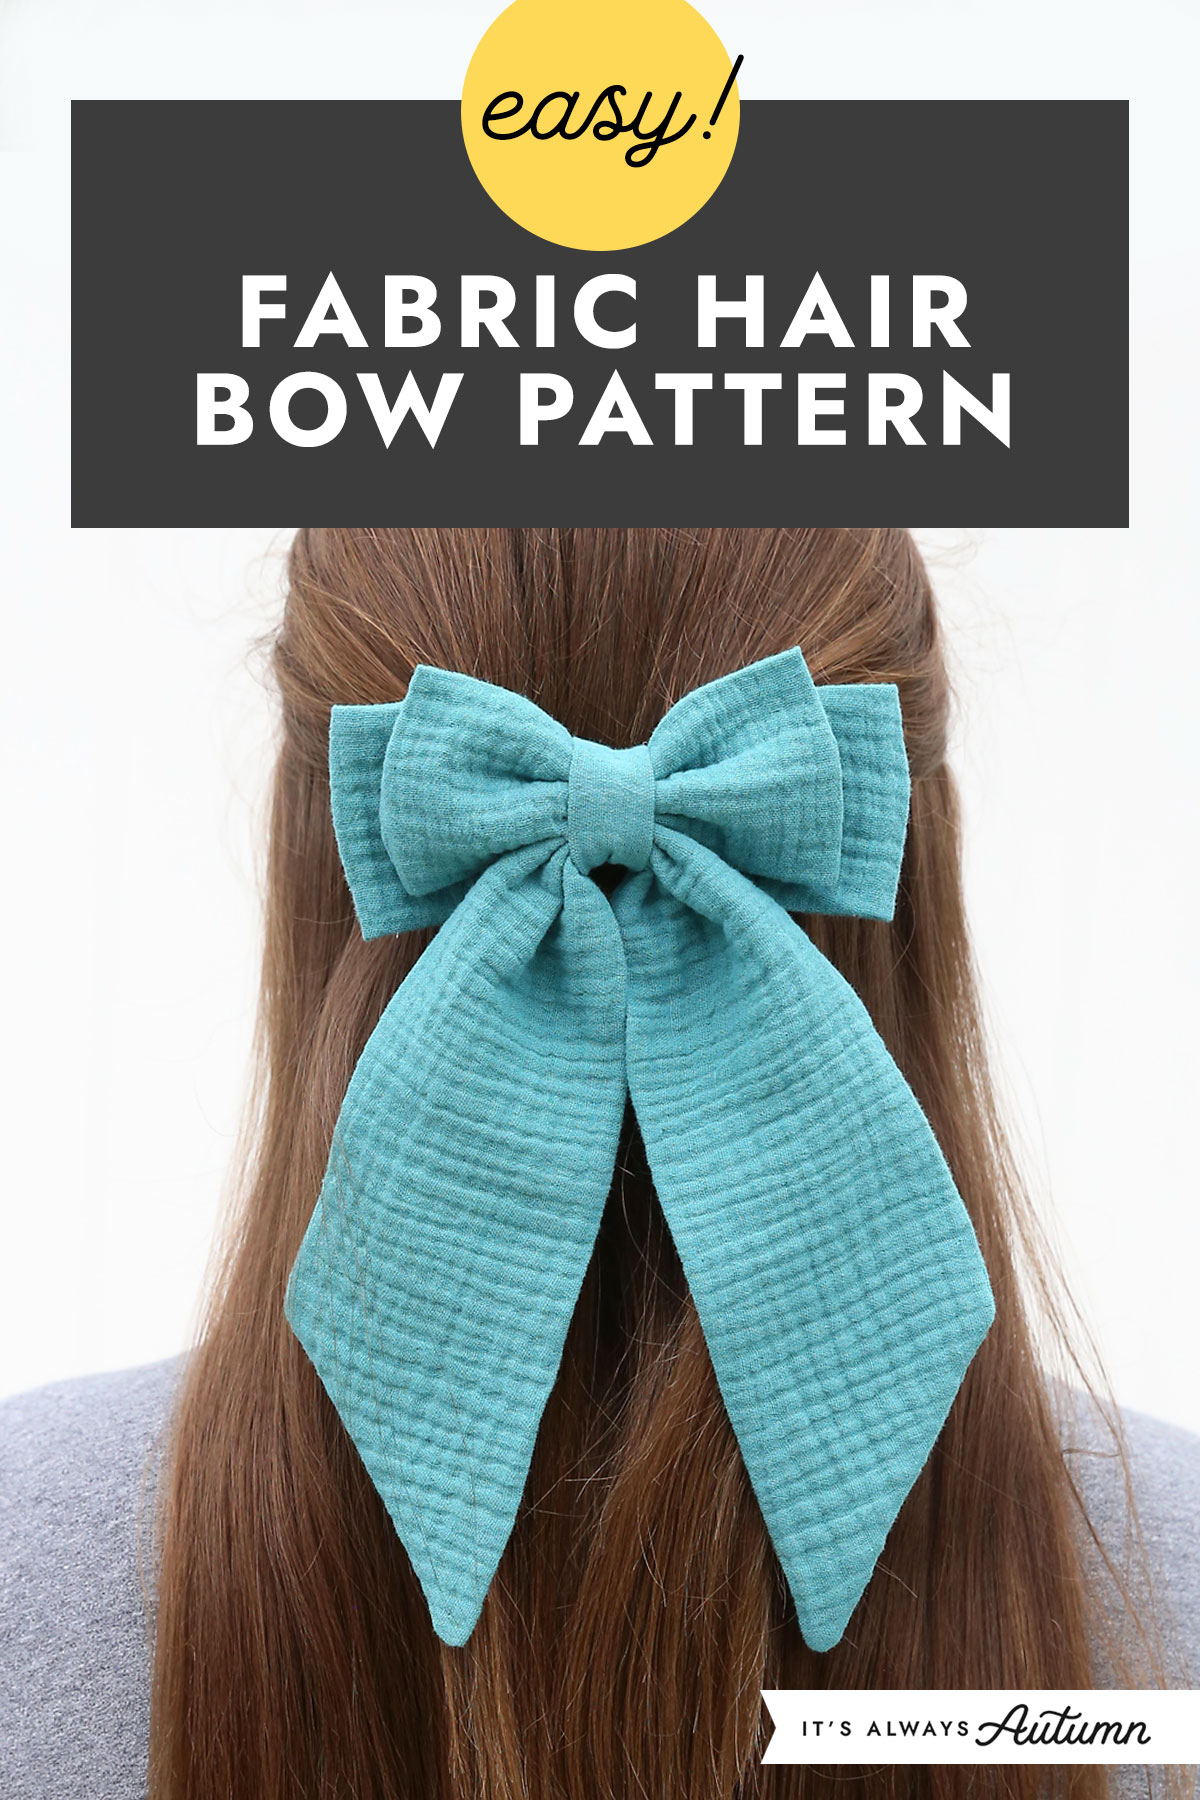
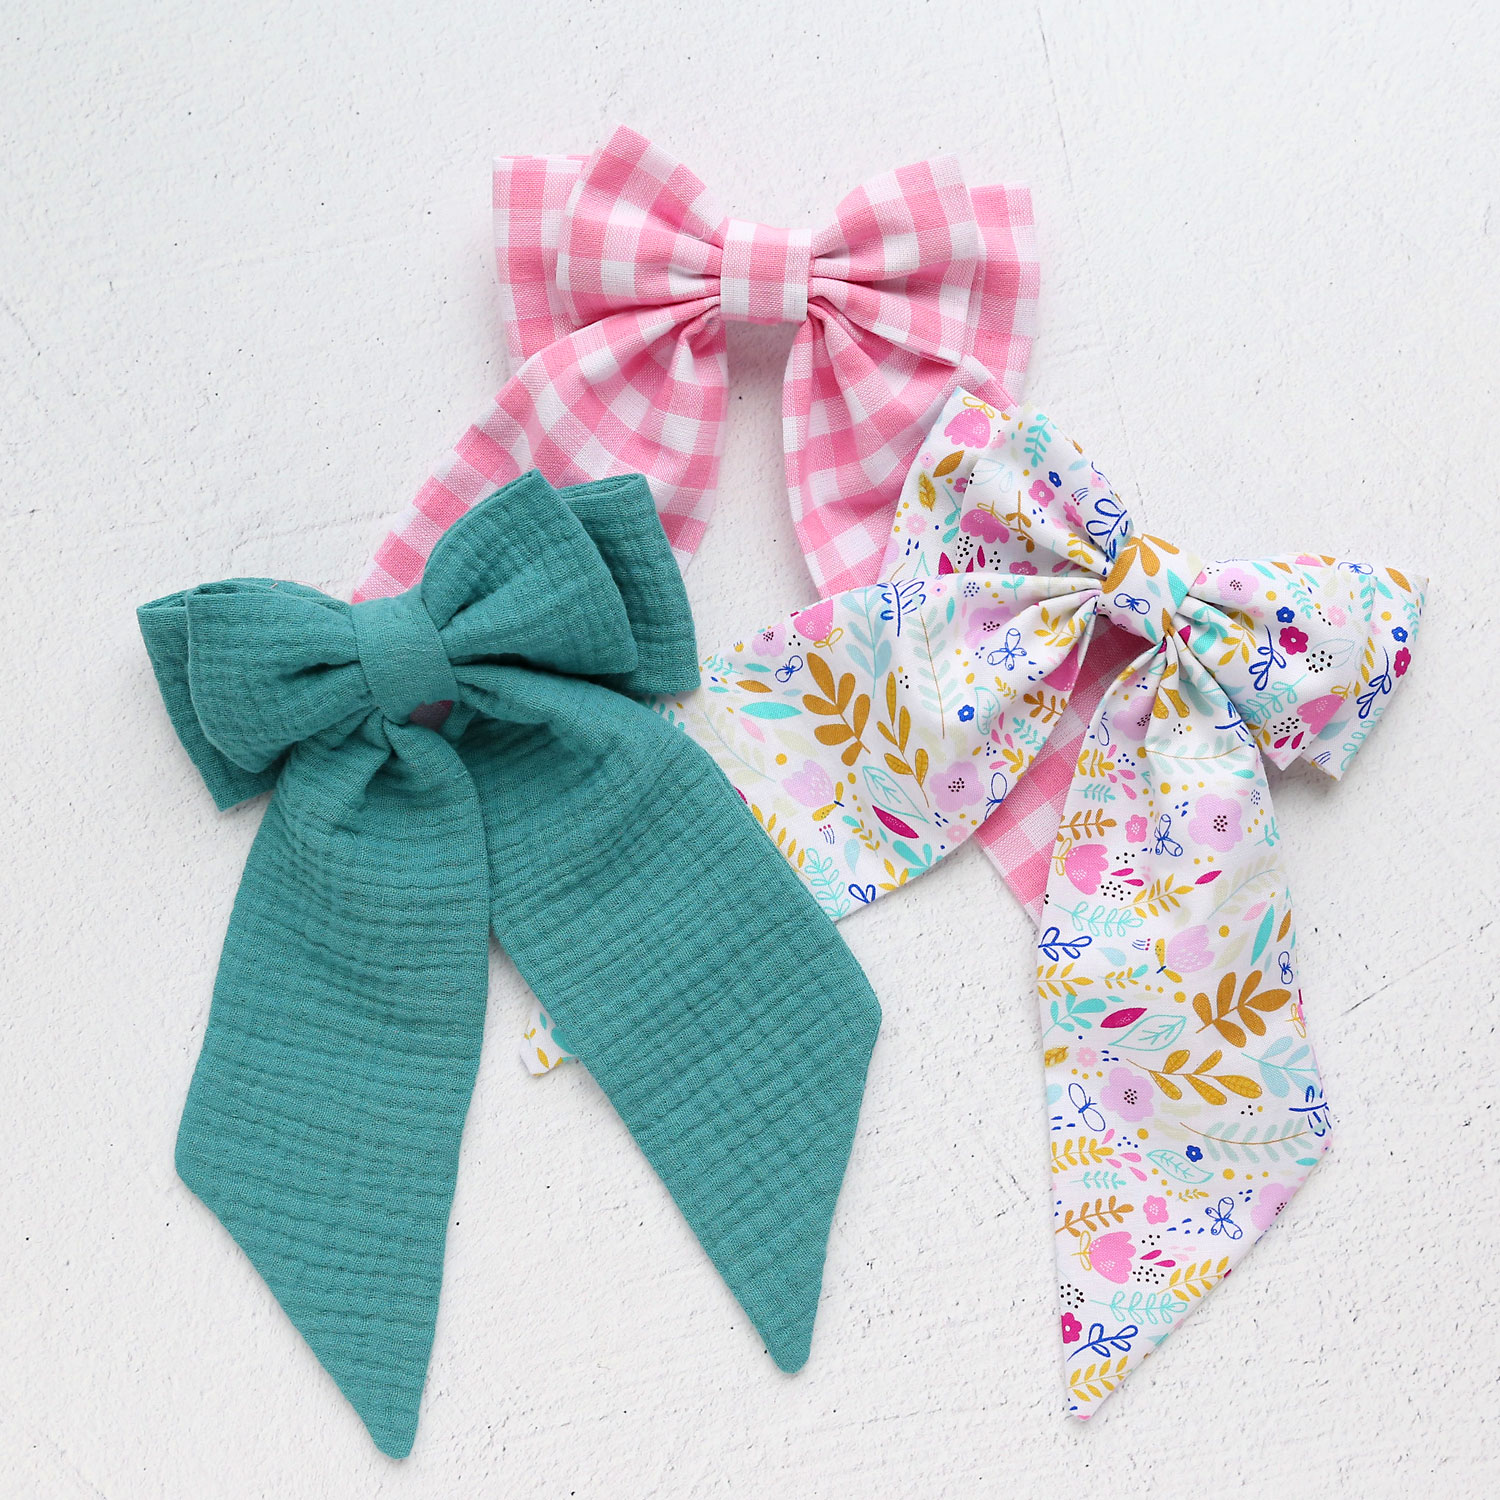
Pretty fabric hair bows are super trendy right now with teen and tween girls! You’ll find them in boutiques for $10+ per bow, but now you can make your own for a fraction of that price using our free fabric hair bow pattern.
Fabric Hair Bow Pattern
This is an easy sewing project that only requires a few straight lines of sewing, so it’s a great project for a beginner. Each bow takes less than a quarter yard of fabric and you can get snap hair clips on Amazon for less than fifty centers per clip. That means the bows in this post each cost about two bucks to make.
Supplies
Here’s what you’ll need to make an adorable fabric hair bow:
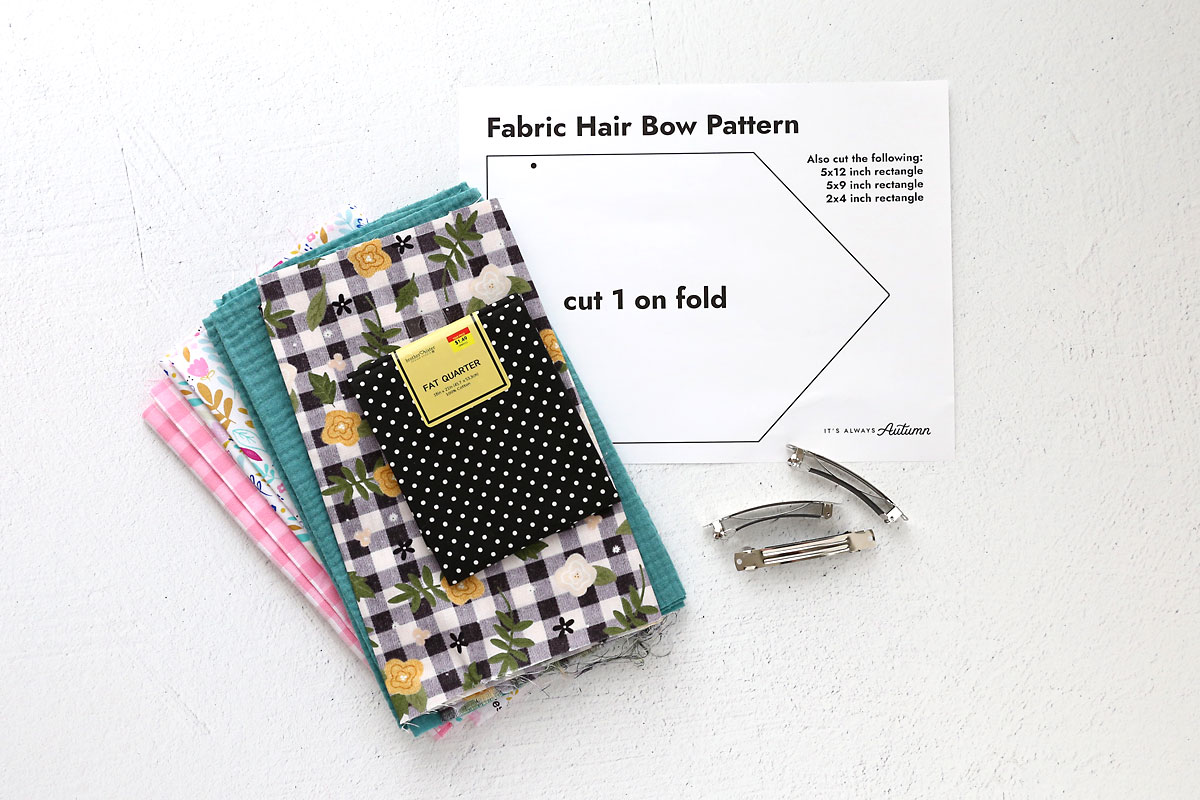
- Fabric Hair Bow Sewing Pattern: you can get the pattern by clicking the underlined text in the blue box directly above.
- A quarter yard of fabric: This pattern is meant for lightweight woven (not stretchy) fabrics. Quilting cottons works great here and are very easy to sew on so that’s what I’d recommend using if you are a beginner. If you have some sewing experience, you can use just about any lightweight fabric. The blue bow featured in this post is made with gauze fabric – it’s super pretty but it is a smidge harder to sew with than a quilting cotton. You can use a quarter yard cut from a bolt OR a fat quarter.
- Hair Clip: I used these snap hair clips from Amazon.
- Hot Glue Gun
- Sewing Machine and thread (it doesn’t matter if the thread matches the fabric)
How to make a Fabric Hair bow
This is an easy sewing project that will take about half an hour to complete. If you’d like, you can wash and dry your fabric before starting although that is not necessary. If you do wash and dry the fabric you may need to iron it before you begin.
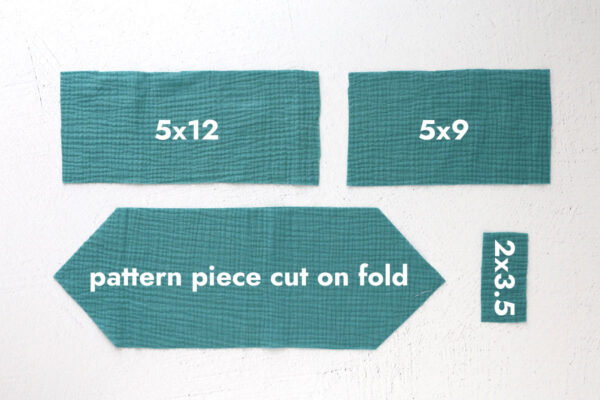
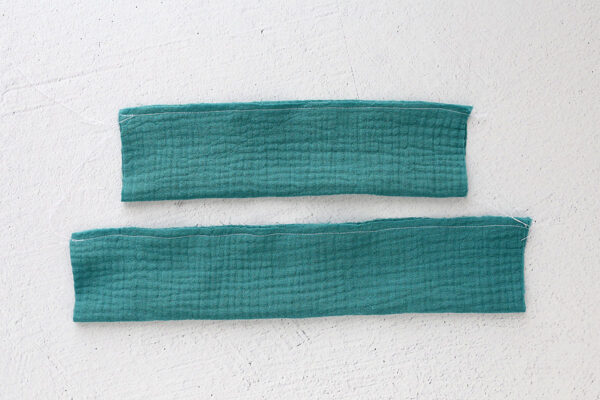
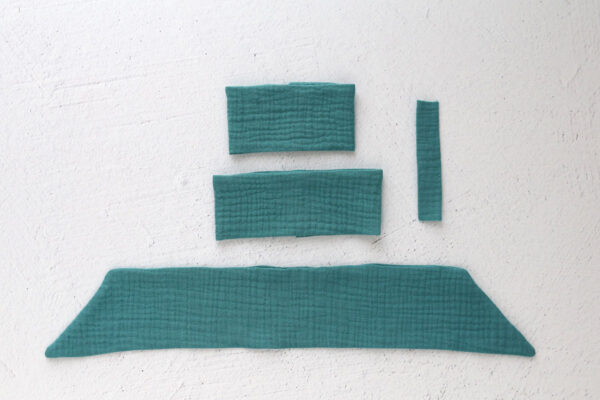
Cut the pattern pieces
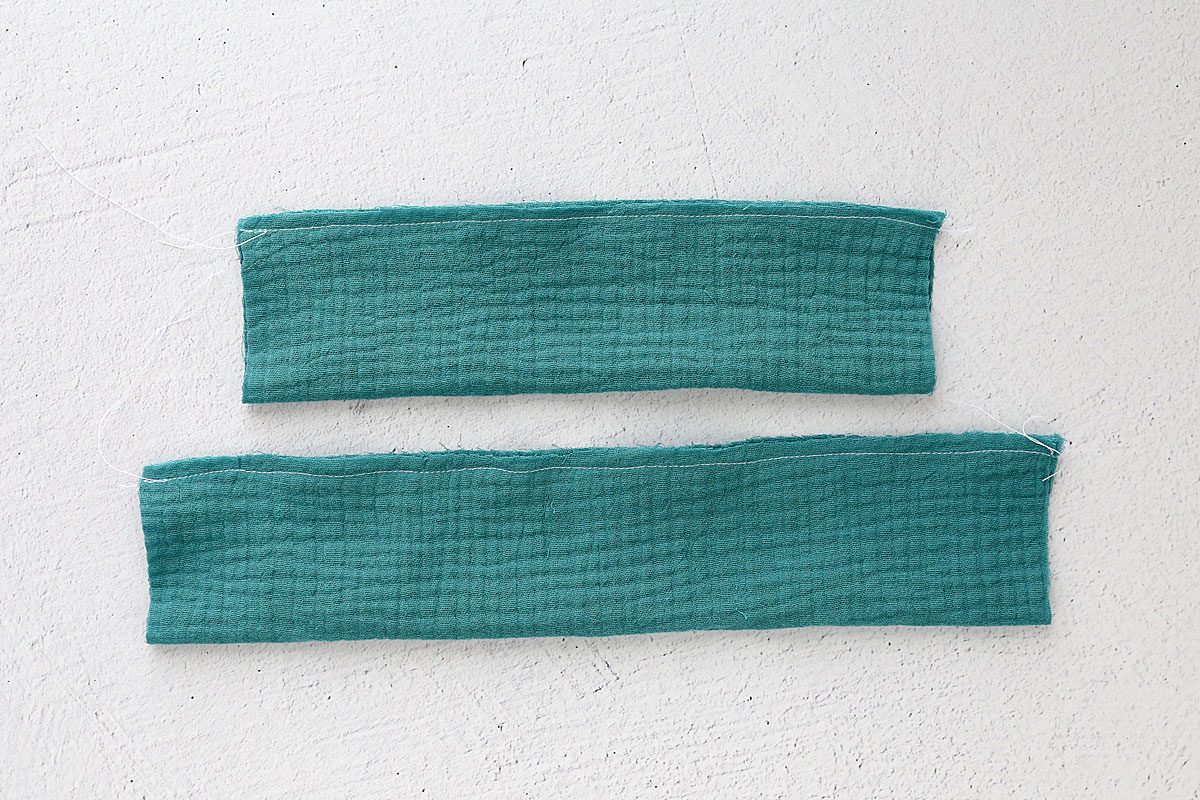
For each bow you will cut out four pieces. There is the piece that will print on the paper pattern, which you should cut on the fold as directed. This is the tie for the bow. You’ll also cut three rectangles to the dimensions listed on the pattern sheet. The largest one is the larger bow, the middle one is the smaller bow, and the smallest rectangle is the tie for the bow. This is what the four pieces look like once cut out:

Sew and Turn Bow Pieces
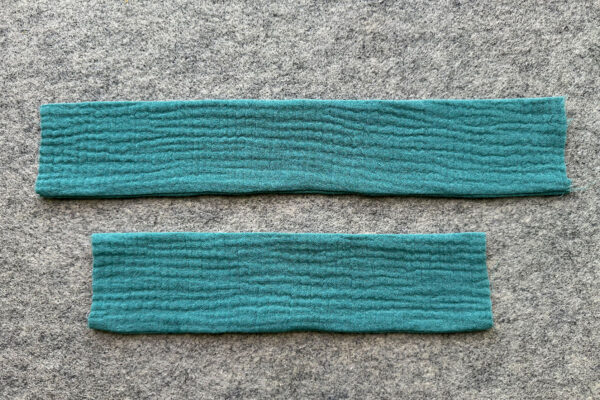
You’ll start with the 5×12 rectangle and the 5×9 rectangle. Fold them both in half lengthwise with the right sides together. Sew along the long raw edges using a 1/4 to 3/8 inch seam allowance. Backstitch at the beginning and end of each seam.
Turn each rectangle right side out, pushing the seam to the bottom. Iron the pieces flat.
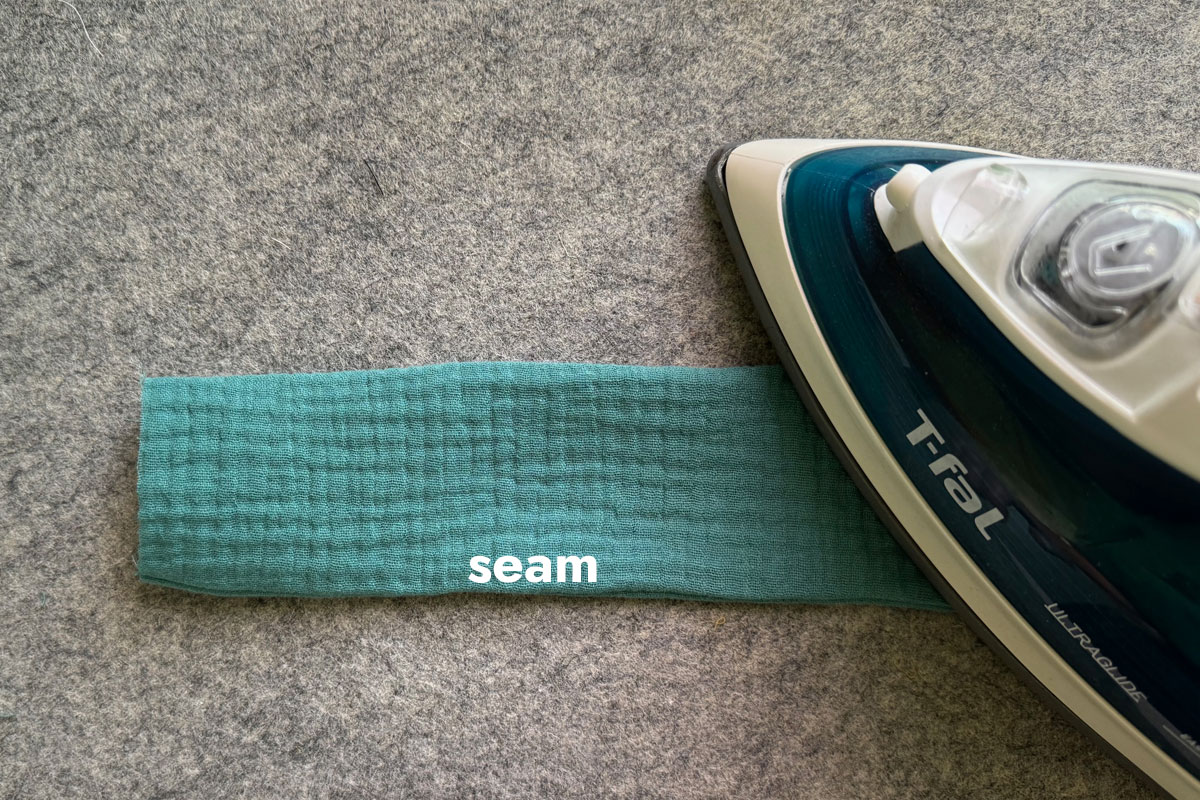
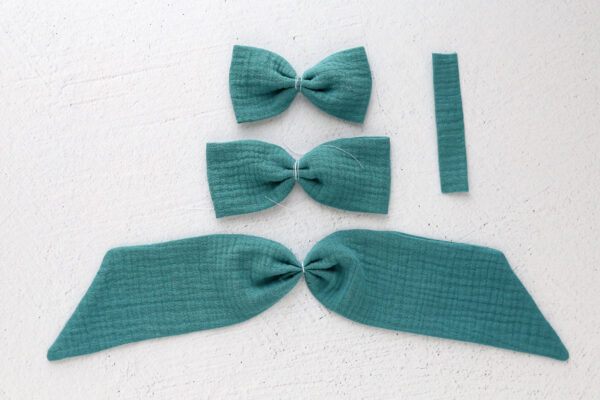
Here are both of the bow pieces sewn together, turned right side out, and ironed:

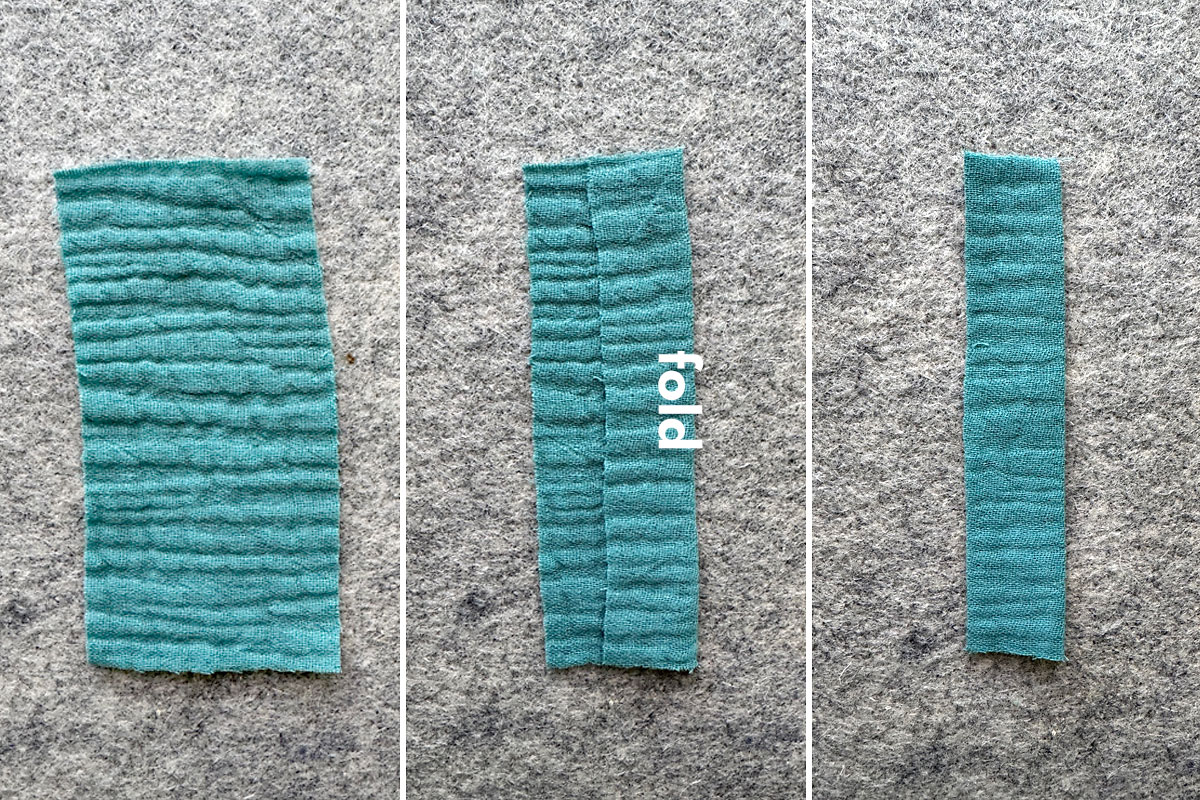
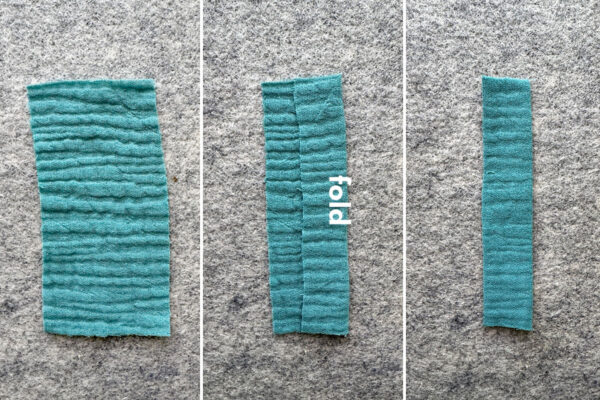
Take the smaller bow and fold each of the sides in to the center, overlapping them about half an inch. Press. Repeat with the larger bow and set aside.

Prep the Tie Piece
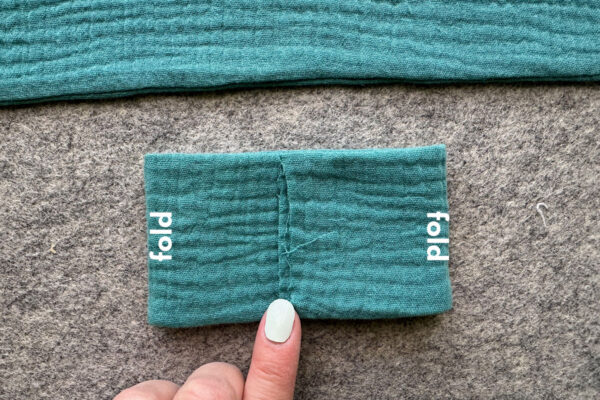
Grab the small rectangle, which will be the “tie” for the bow. Lay it with the right side down. Fold one long side in about a third of the way and iron. Then fold it over again and iron. This gives you a narrow rectangle with folds on either side. (Alternately you can fold this piece in half lengthwise and sew it, then turn it right side out the same way you did with the bow pieces. It’s just a little hard to get turned right side out because it’s narrow so I do it this way instead.)
Sew and Turn the Tail Piece
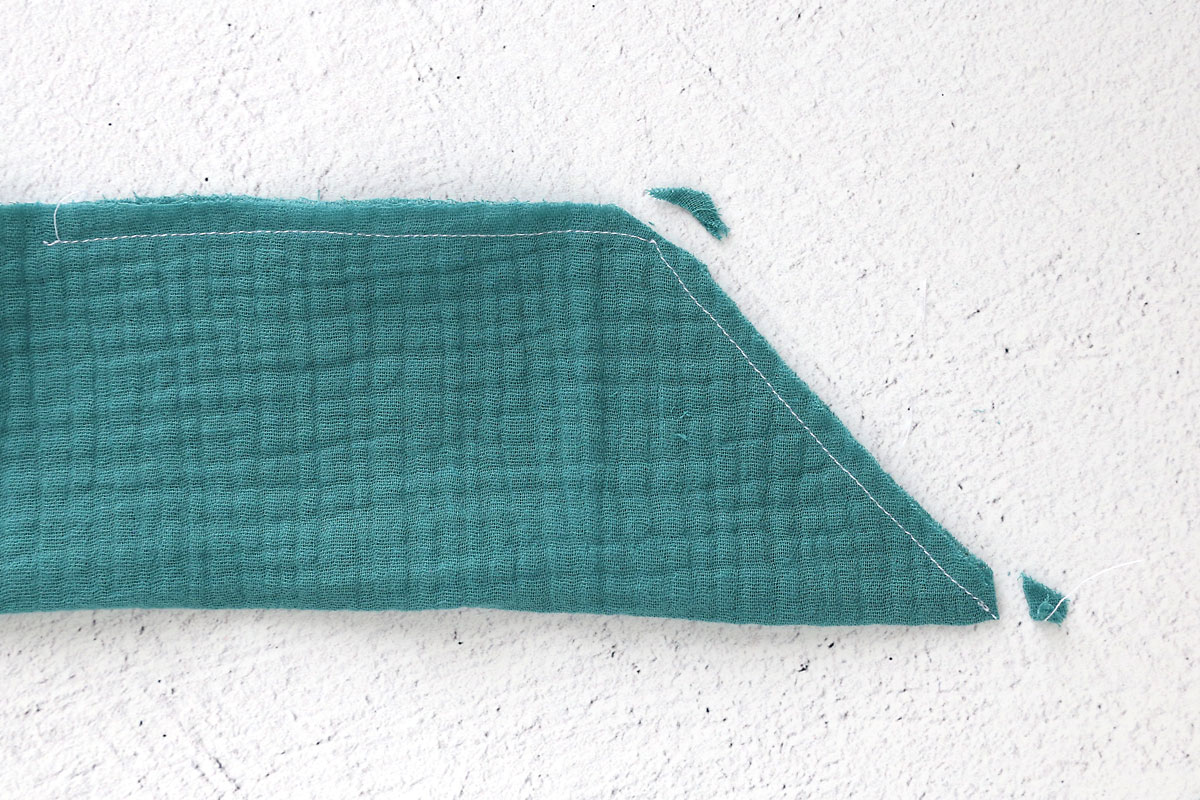
Next, fold the tail piece in half lengthwise with right sides together. You are going to sew the raw edges together using the same seam allowance you used before. However, you will leave a two inch opening in the middle, as you can see marked by dots below. (There is a dot on the pattern piece that corresponds to the dots on the photo below – you can use pins to mark that dot so you know where to stop sewing and then where to start again.) Remember to backstitch when you start or finish a seam.
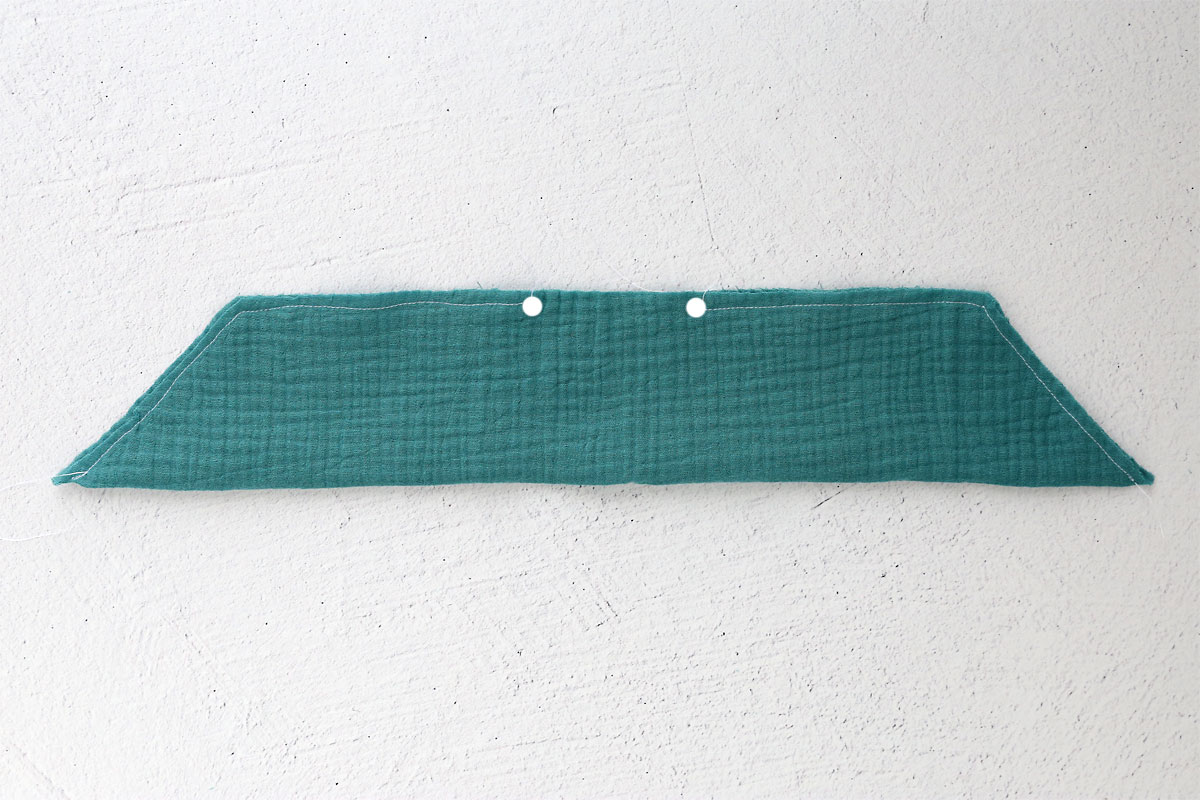
Clip the seam allowance at the corners, as shown below:
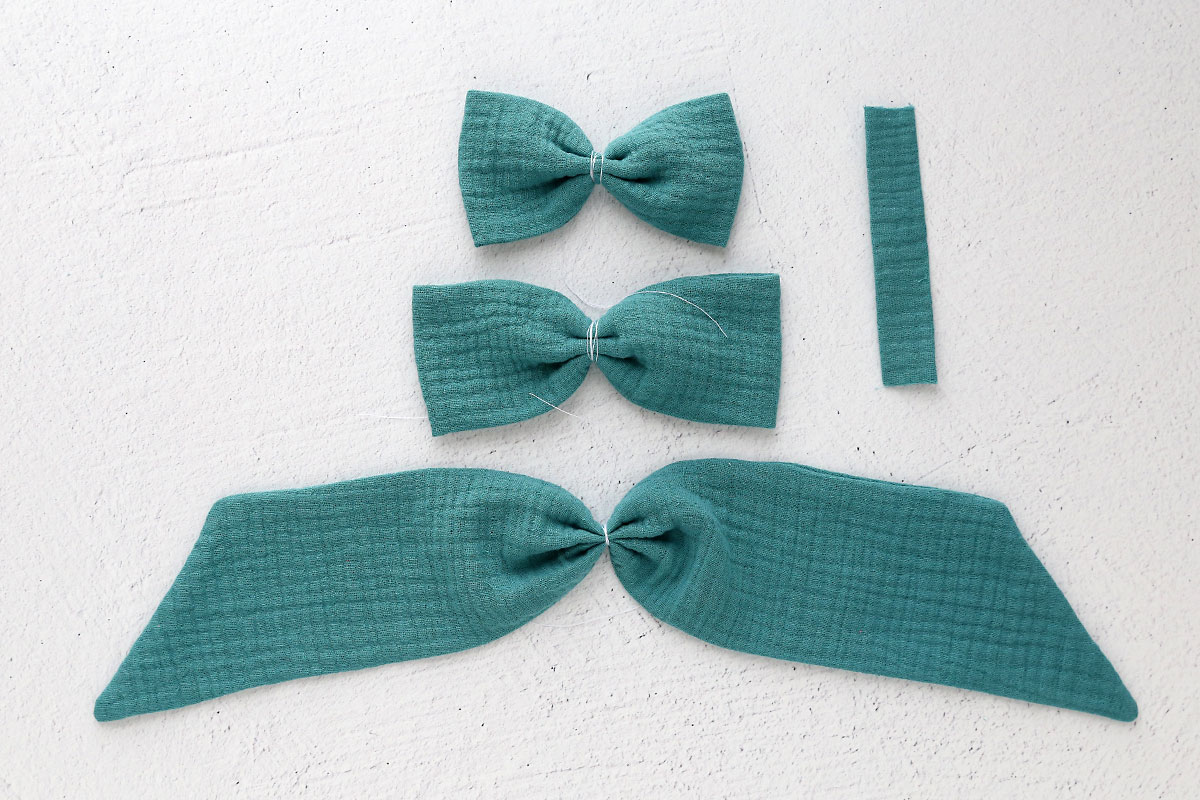
Turn this piece right side out as well and iron it flat. Now you have all four pieces prepped and ready to turn into a bow:

Fold the Pieces
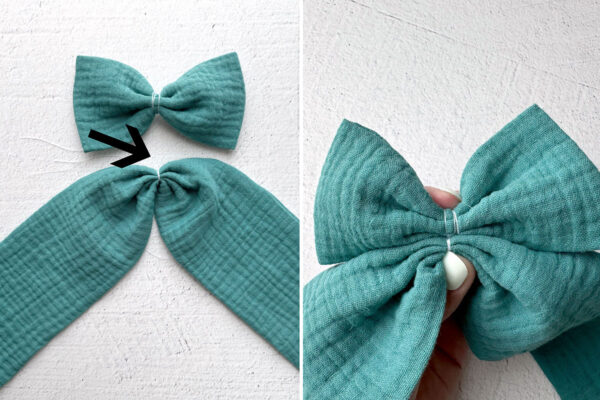
Cut a couple pieces of thread that are each about twelve inches long. Grab the smaller bow piece. From the center, accordian fold it a few times and hold it between your fingers to create a bow shape, as you see below. The overlapped edges should be to the back, caught in the folds. Using your other hand, wrap thread around the center a couple of times, then tie the thread to secure the bow shape.

Repeat with the larger bow piece. Repeat with the tail piece. This is what all the pieces look like now (note that the seam on the tail piece is at the top):
Glue the Hair Bow Together
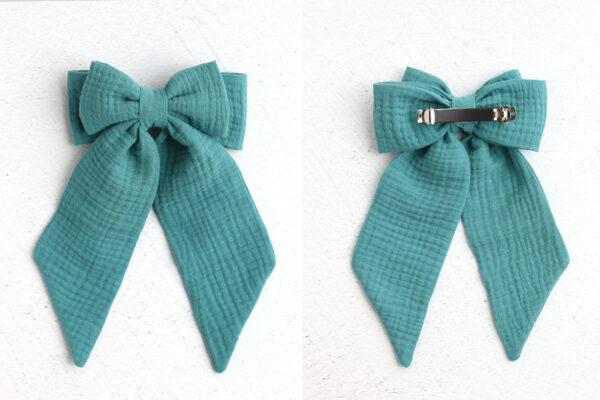
You’ll start by gluing the top edge of the tail piece to the bottom edge of the small bow. Place a dot of hot glue on top of the tail piece, as shown by the arrow below. Immediately place the small bow piece right above it and squeeze the two pieces together until adhered.
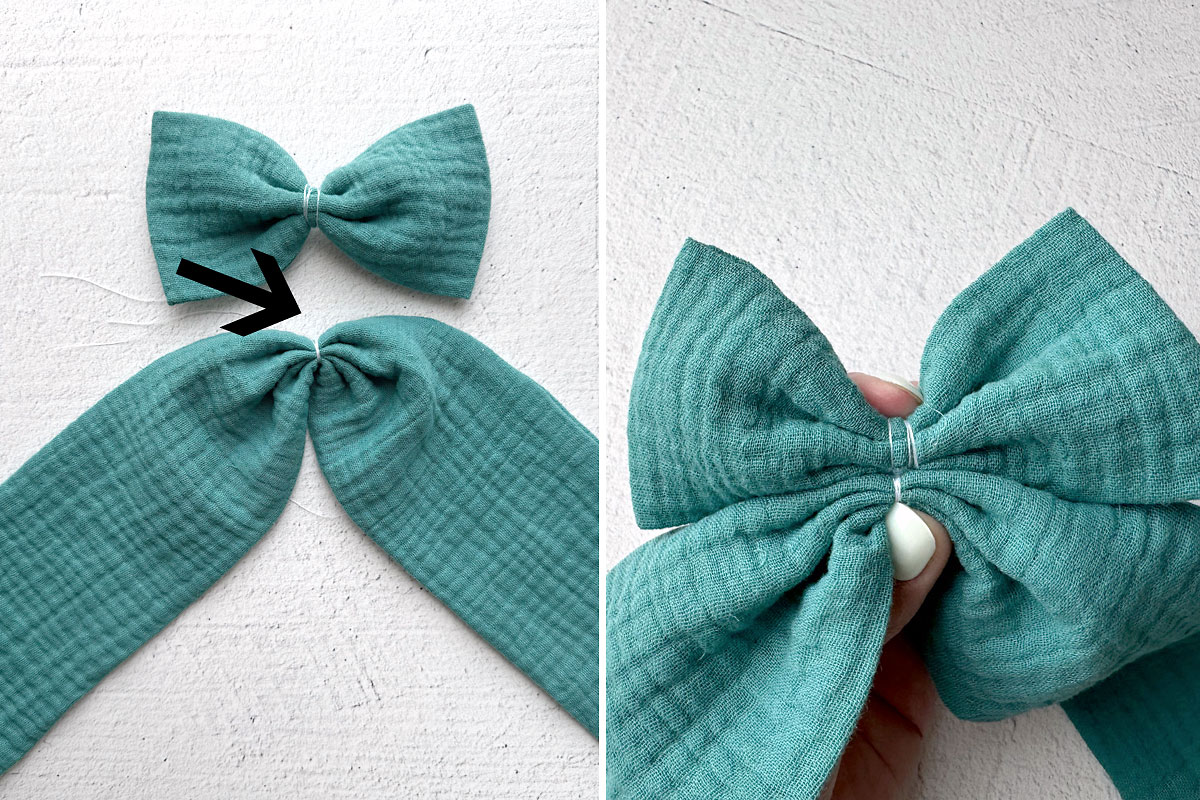
Next, flip the bow and tail over and place some hot glue on the back of both pieces. Then place them on top of the larger bow piece and press down until adhered.

Now you will add the tie piece. Put some hot glue on one end of the tie piece and press it down on the back of the bow. Then flip the bow to the front and run hot glue all the way down the tie piece. Pull the tie up over the front of the bow, over the top, and down to the back again. If the tie piece is too long trim any excess. Add additional glue on the back if needed to make sure everything is securely glued together.
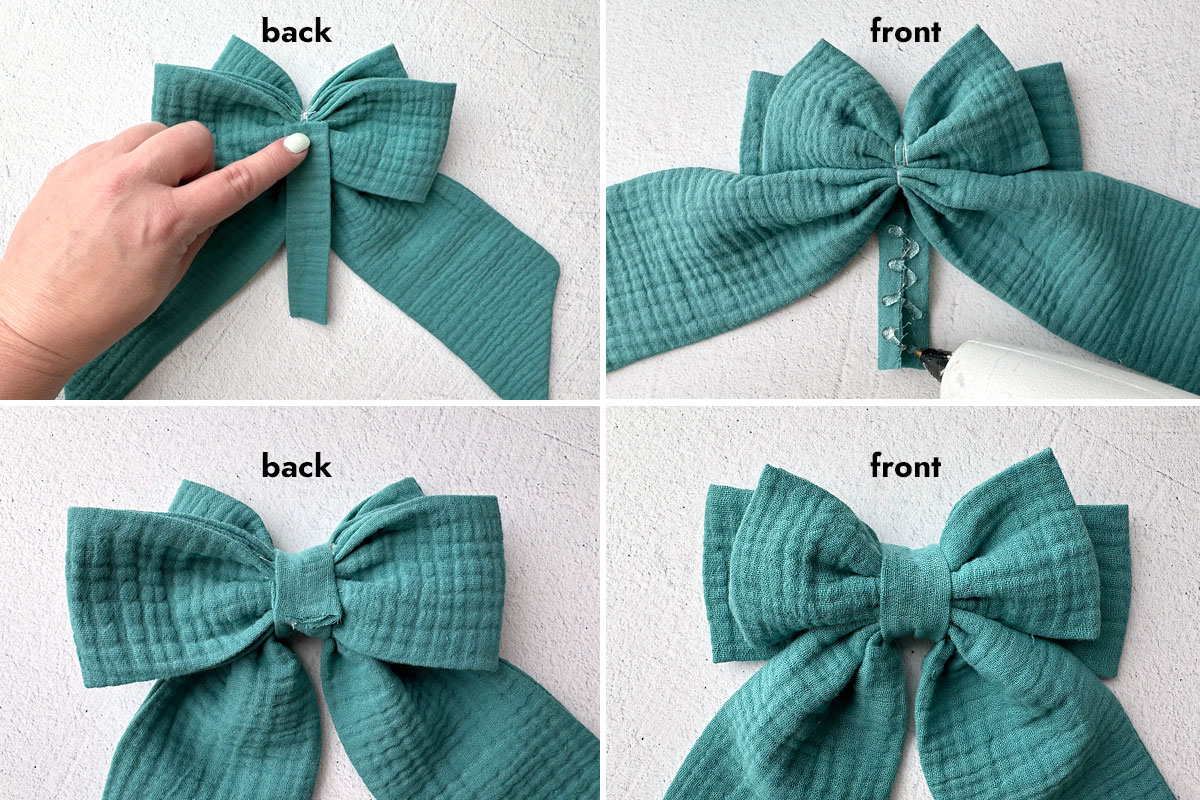
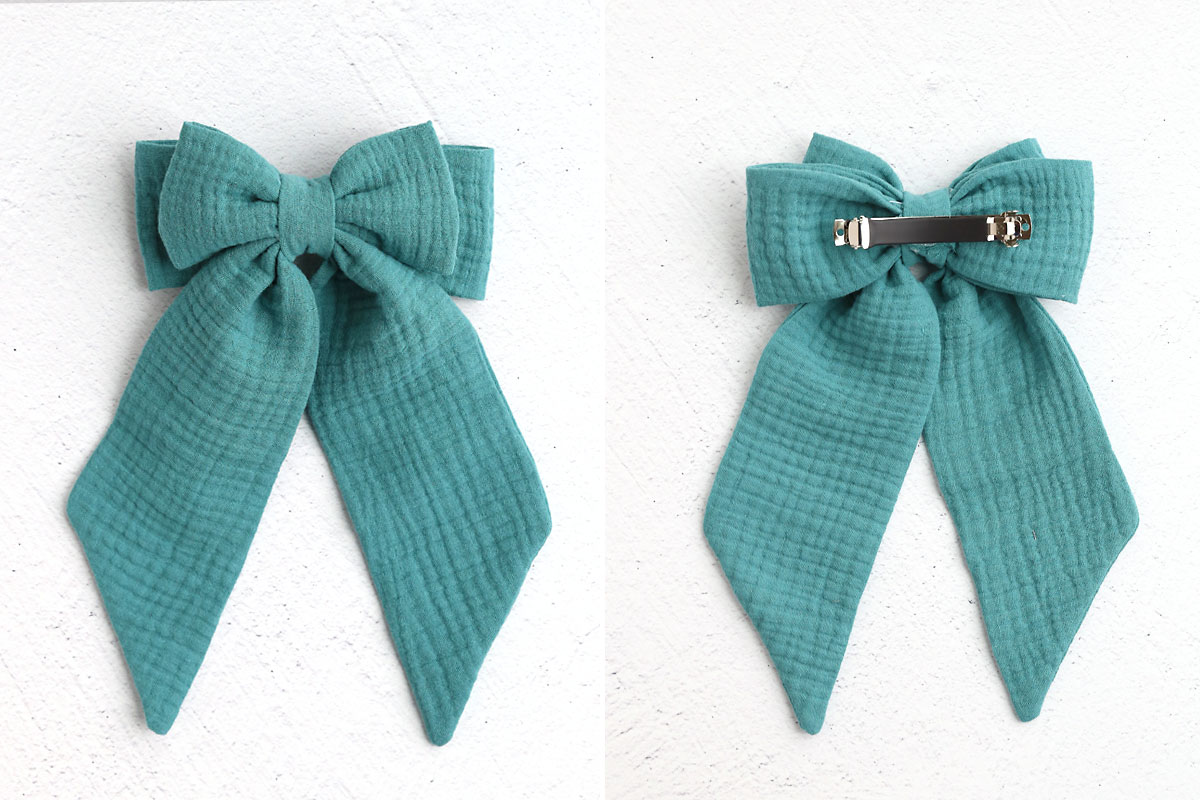
The bow is finished! All that’s left to do is hot glue a clip onto the back. Place a good amount of hot glue in between the two lines you see on the clip (do not add glue all the way to the right and left edges as this will cause the bow to curve back at the sides). Then flip the clip over and press it down on the back of the bow. Hold for a few seconds until it’s secure.
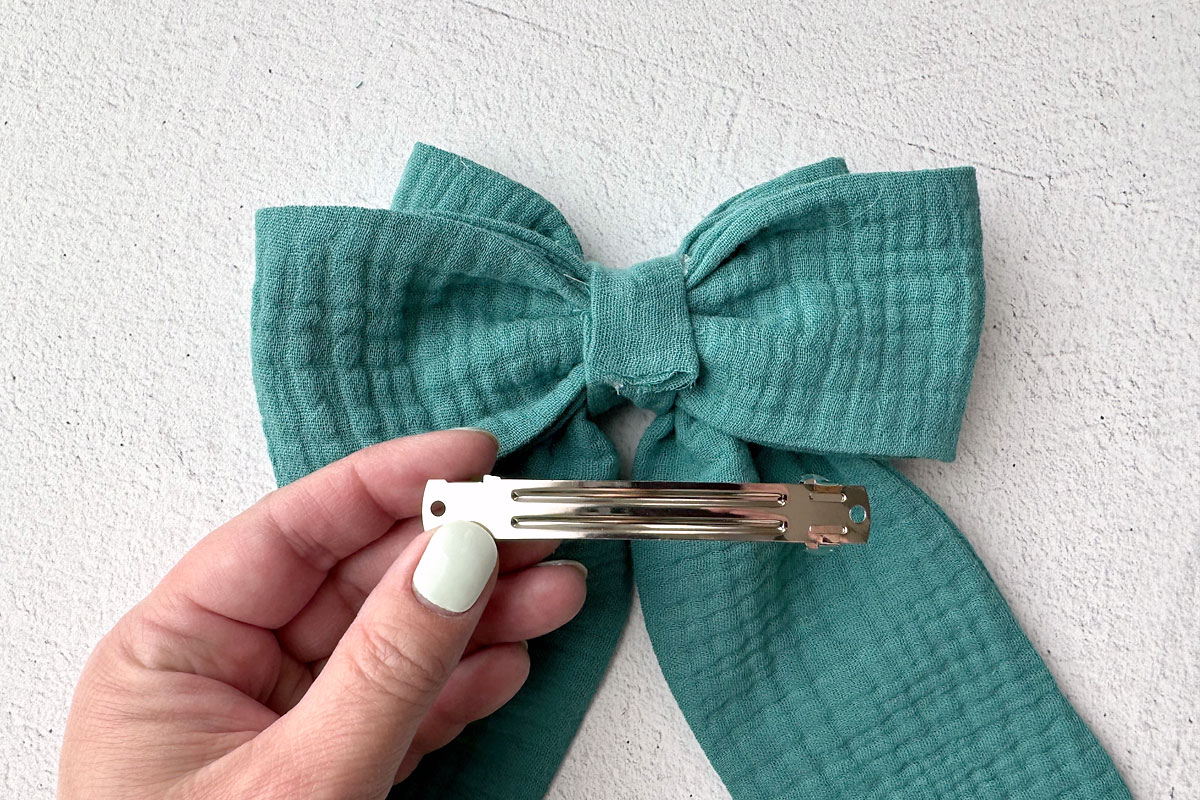
Which way does the clip go?
If the wearer of the clip is right handed, you want the snap that opens the clip to be on the right side when the bow is facing down. That means it will open to the left side when you put the bow in your hair.
Fabric Hair Bows
Supplies
- 1/4 yard Fabric lightweight woven fabrics work best, like quilting cotton
- Hair Clips
Want more project ideas? Sign up to get my favorite easy crafts and recipes straight to your inbox!
Equipment
- Hot Glue Gun
- Sewing Machine
Instructions
- Cut out the four pieces as directed on the pattern.

- Fold each of the two large rectangles in half lengthwise. Sew along the long raw edge using a 1/4 to 3/8 inch seam allowance.
- Turn both pieces right side out and press.
- Fold in each short side and overlap about half an inch in the center. Press.
- Fold the small rectangle in thirds lengthwise and press.
- Fold the tail piece in half lengthwise. Sew along the raw edges, leaving a two inch opening in the middle.
- Clip the seam allowance in the corners of the tail piece. Turn right side out and press.
- Hold one of the bow pieces with the overlap to the back. Accordian fold it in the middle to create a bow shape. Wrap thread around the middle a couple of times and then tie the thread to secure.
- Repeat with the other bow piece and the tail piece.
- Glue the tail piece below the small bow piece.
- Glue the tail/small bow on top of the large bow.
- Glue one end of the tie piece to the back of the bow, then put glue all the way down the tie piece and wrap it all the way around the bow, securing on the back.
- Glue a hair clip to the back of the finished bow.


Leave a Comment