
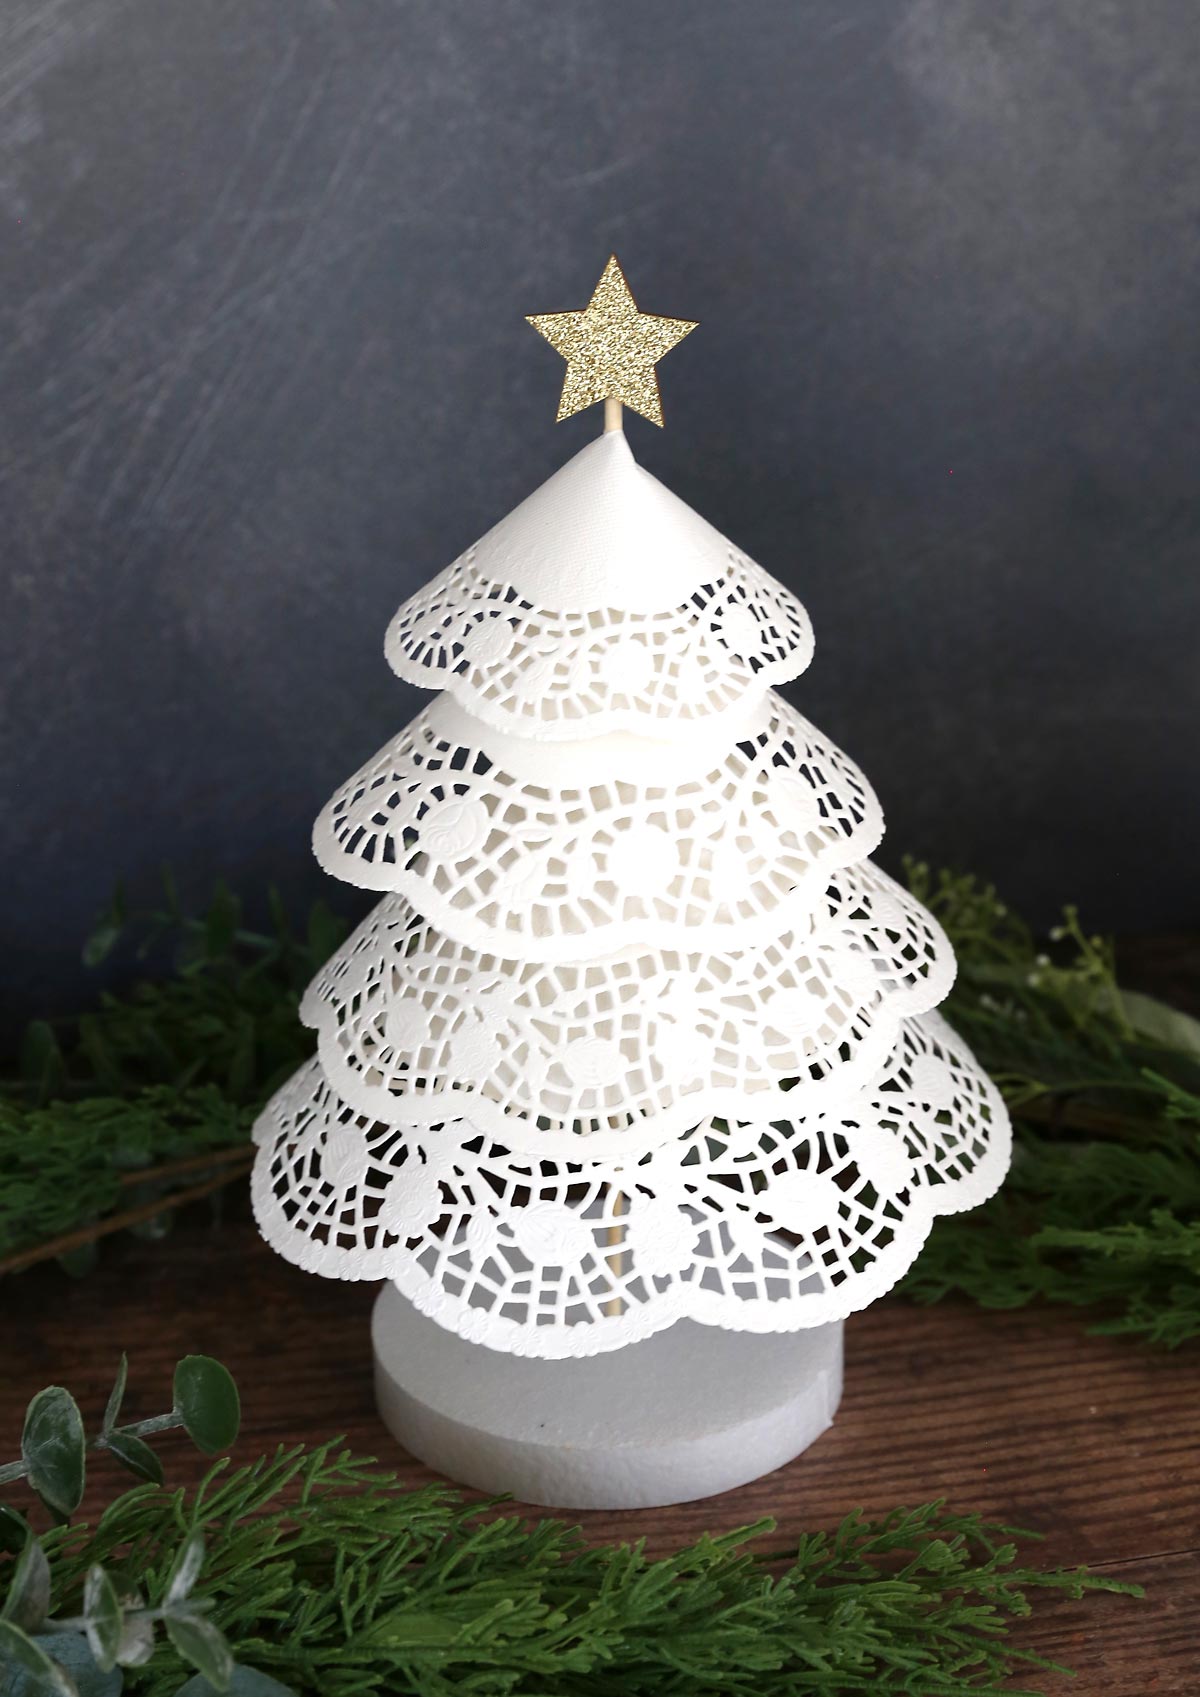
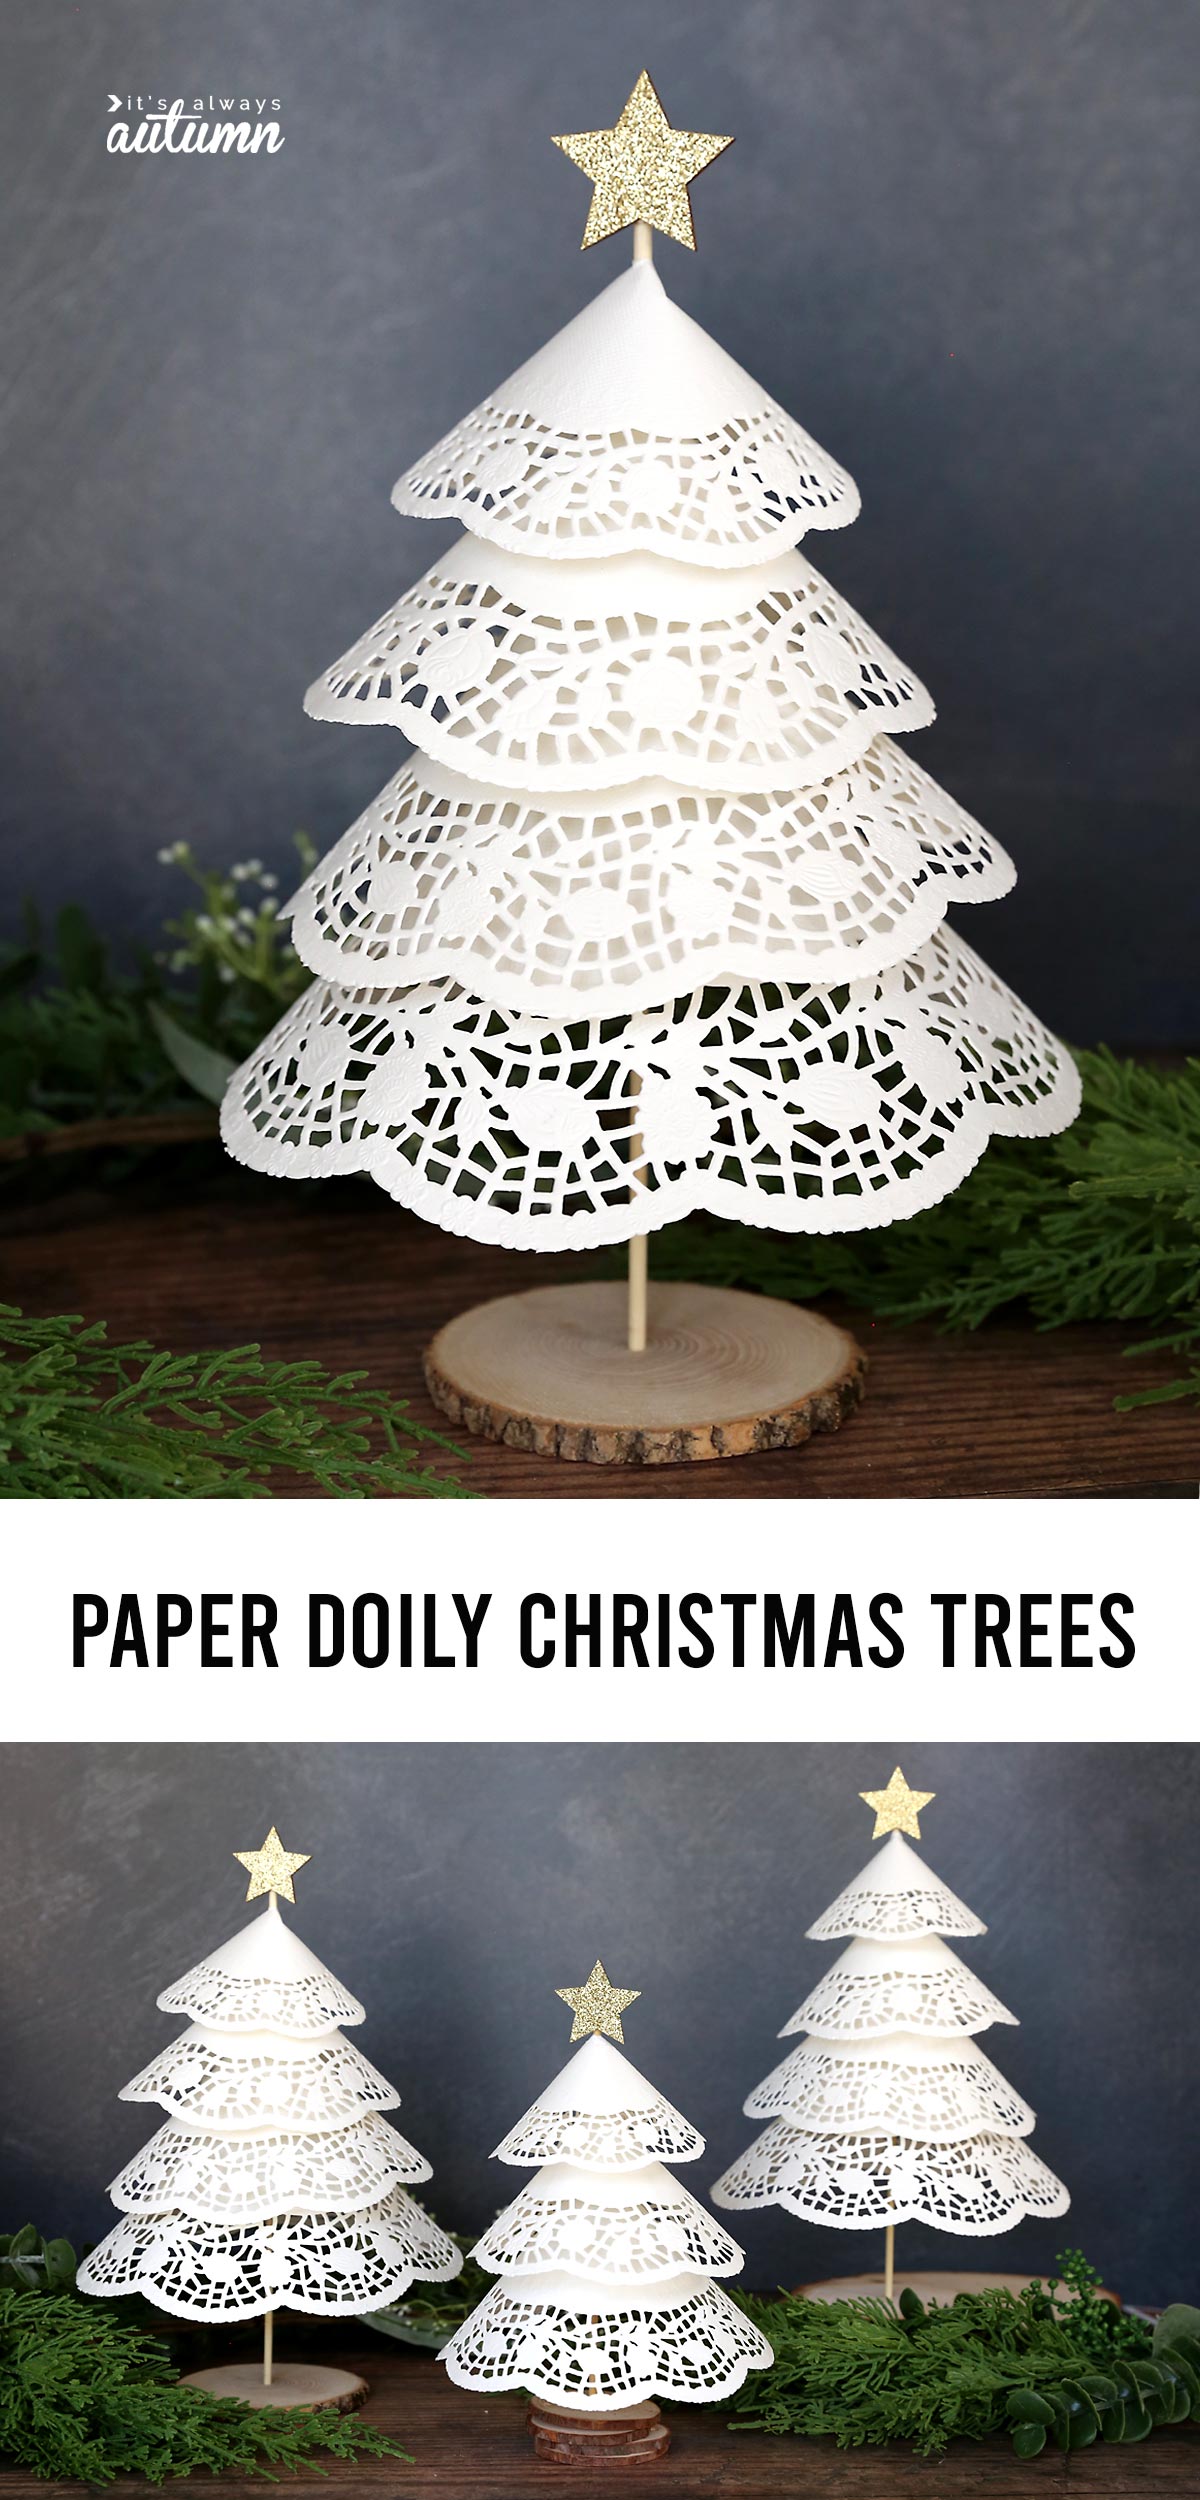
In today’s post: These pretty paper doily Christmas trees are made with inexpensive supplies you can find at the dollar store!
Don’t hate me because it’s not quite Halloween and I’m already posting Christmas stuff. I promise I’m not trying to annoy you. It’s just that this time of year always goes by SO QUICKLY and if you like to make things for Christmas you have to start early! So here’s a fun little Christmas craft to get you started on your holiday cheer: Paper Doily Christmas Trees.
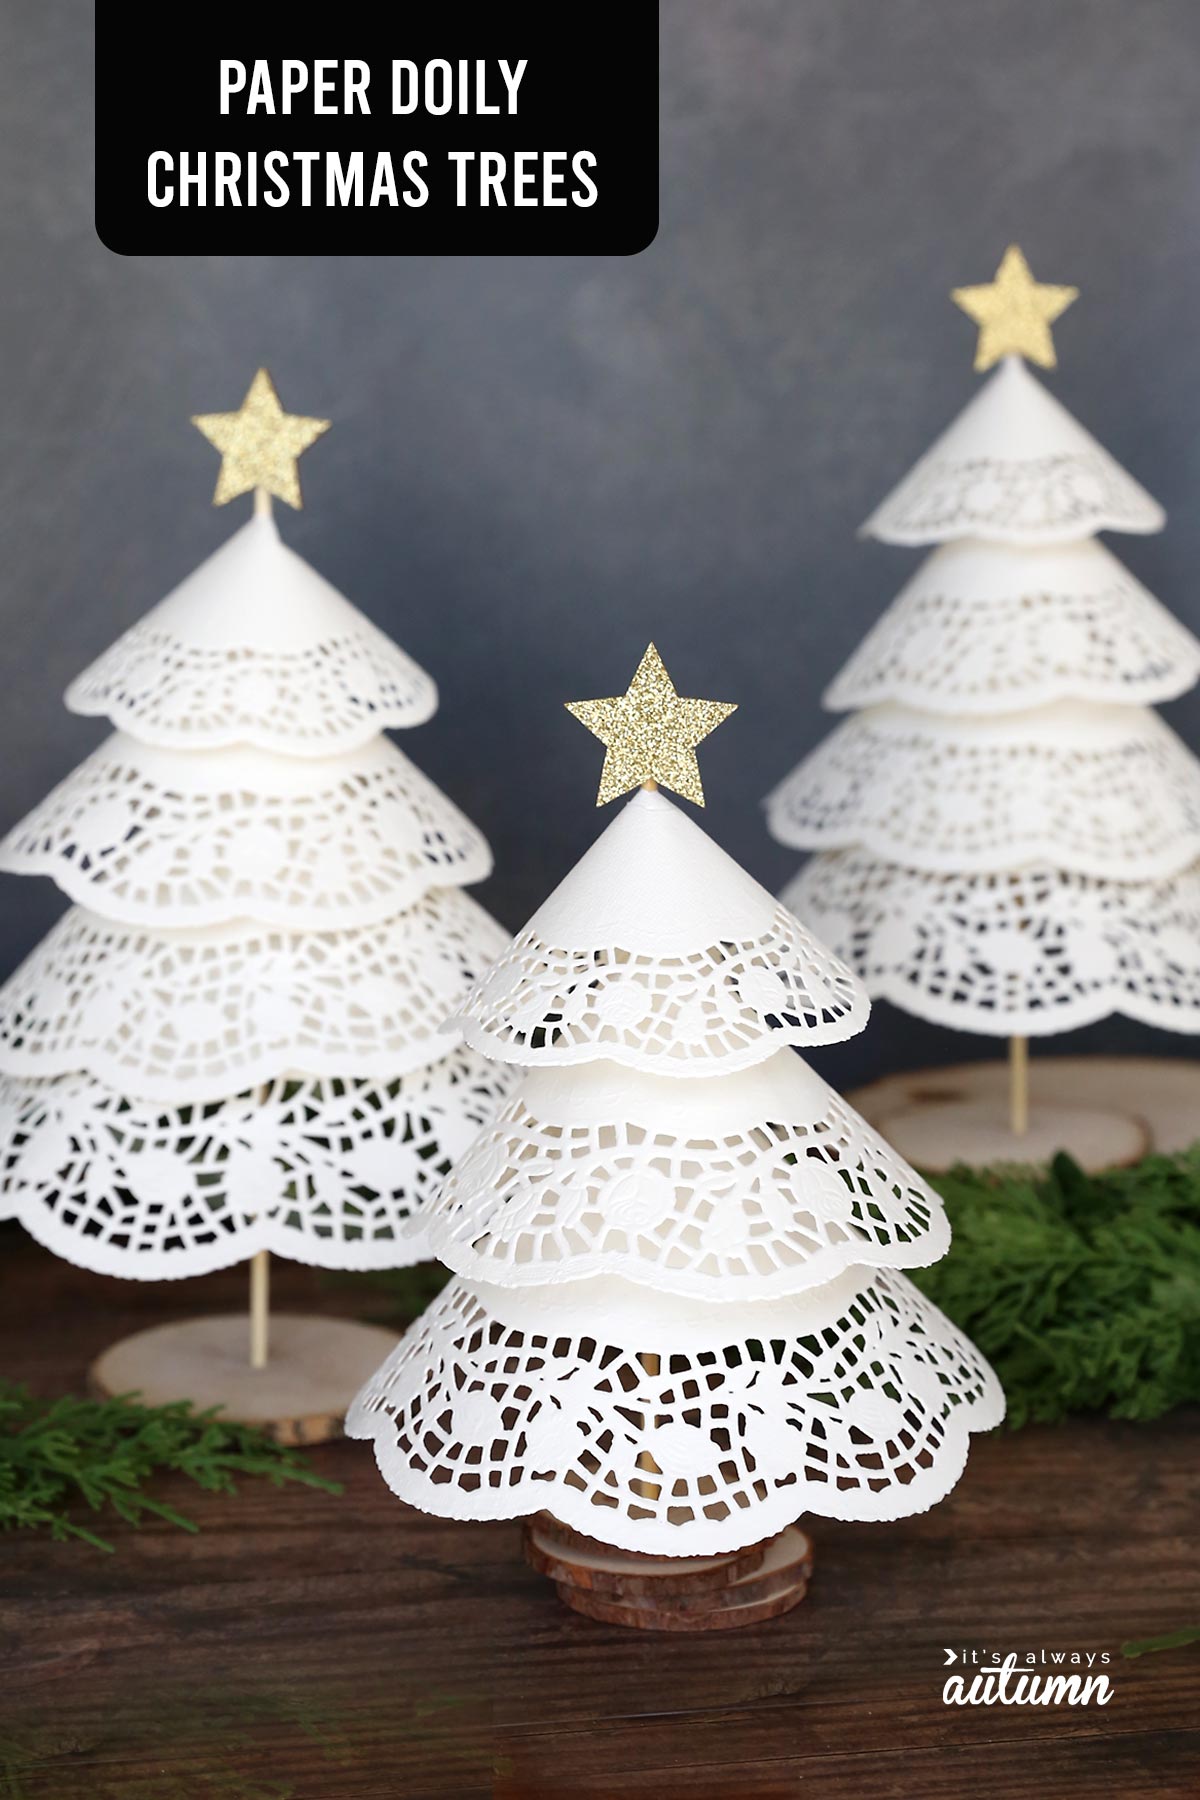
I first saw the idea for these doily trees at Oui Oui Oui Studio. Her trees are very pretty and she made a whole forest of them in varying heights on a large styrofoam sheet (click through to check them out). When I found a paper doily set with 4 different size doilies at the Dollar Store I decided to make my own version using inexpensive supplies. I also gave them each their own base so they can be displayed anywhere you like!
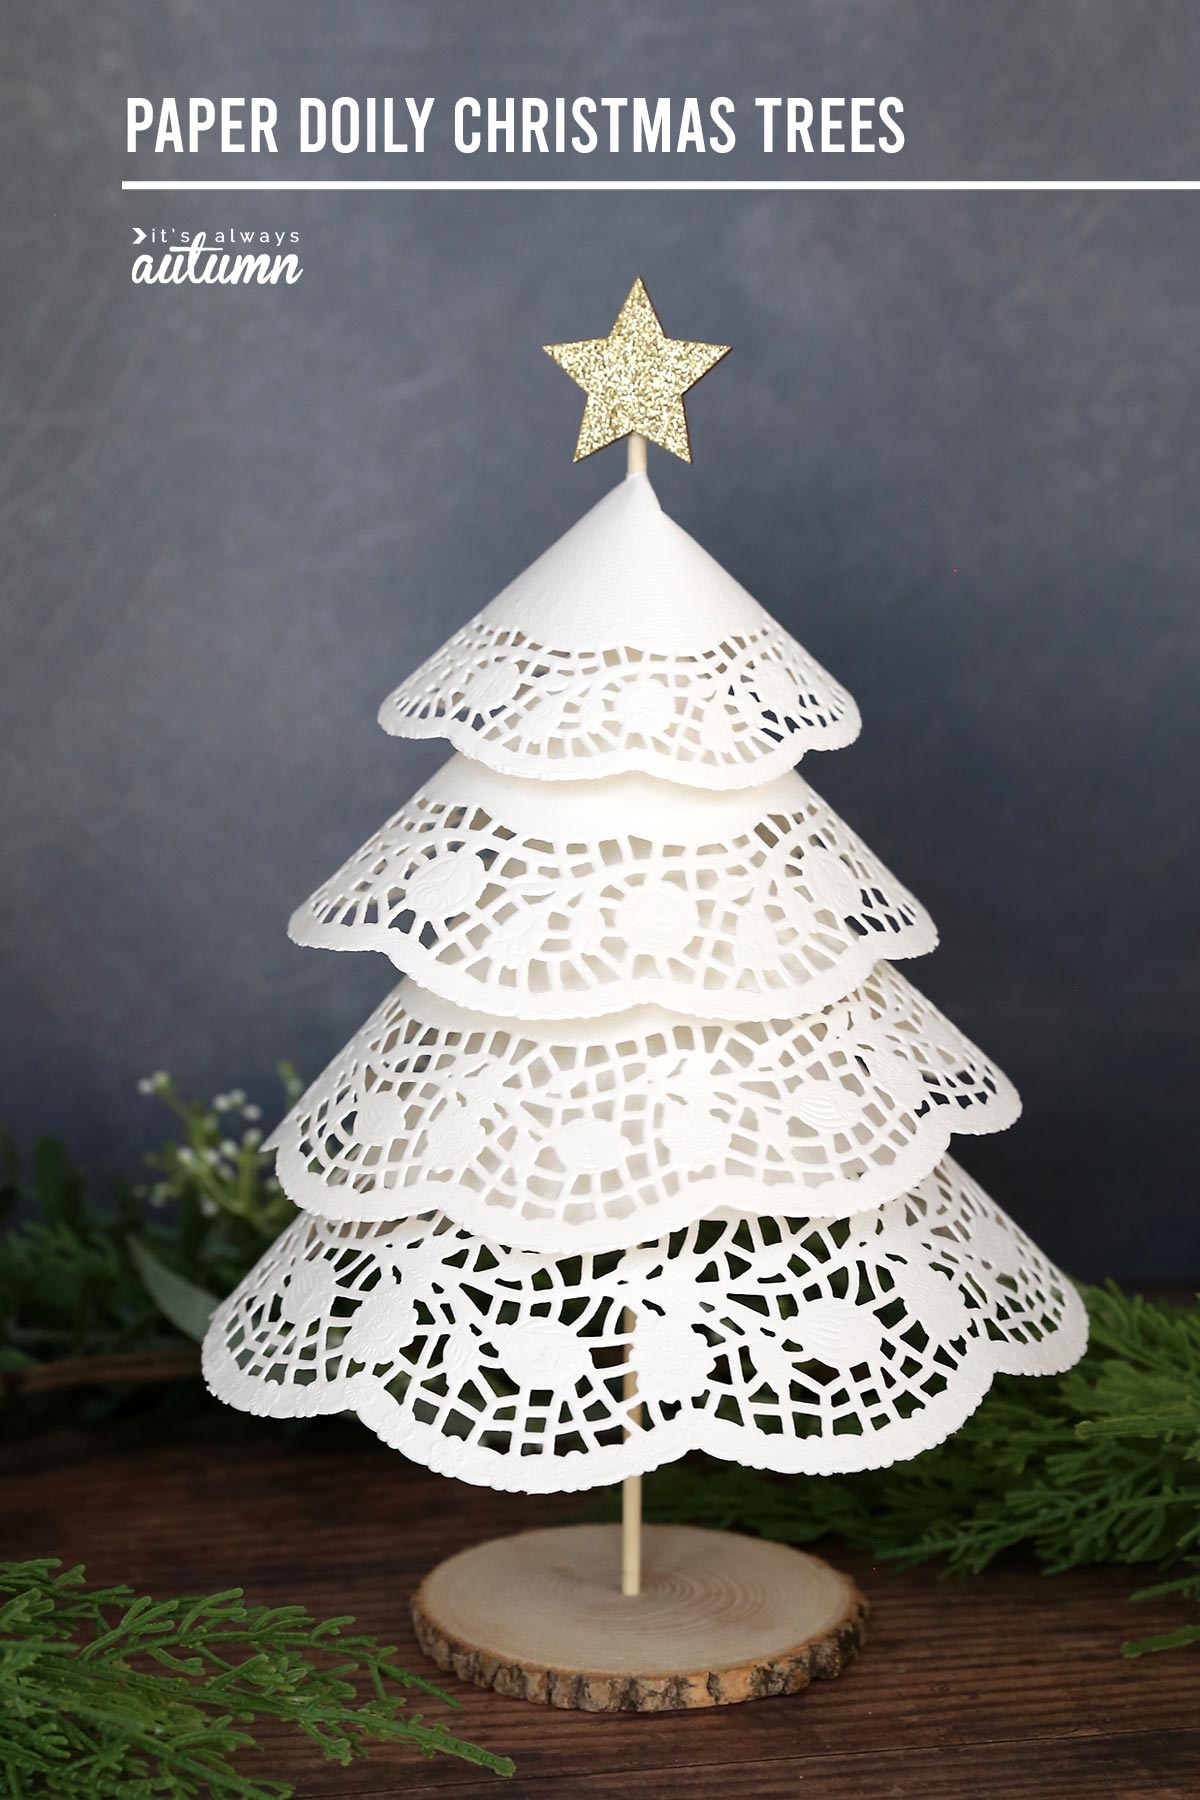
I’ll walk you through the supplies you’ll need AND I’ve made a video so you can see each step of this cute craft. You can make smaller trees with 3 layers of doilies:

Or you can make larger trees with 4 layers, or a mix of both!
Paper Doily Christmas trees VIDEO
Watch this video to see exactly how I made the doily trees. After the video you’ll find the details on where to get your supplies, as well as step by step instructions with photos.
Doily Christmas Trees: Supplies
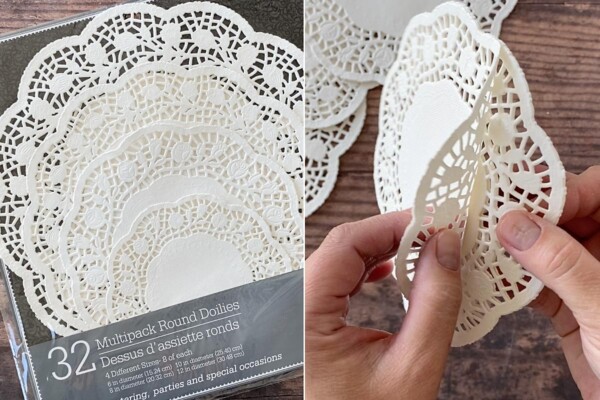
Most of the supplies that you need for to make Paper Doily Christmas trees can be found at the Dollar Store (or around the house), so this is a very inexpensive craft! To make the tree itself, you will need doilies in 3 or 4 graduated sizes as well as wooden skewers. I found the package of doilies you see below at my local dollar store; if your dollar store doesn’t carry them you could order this package of doilies from Amazon. Your dollar store may also carry wooden skewers, but if not you can find them for about a buck at Walmart or the grocery store.
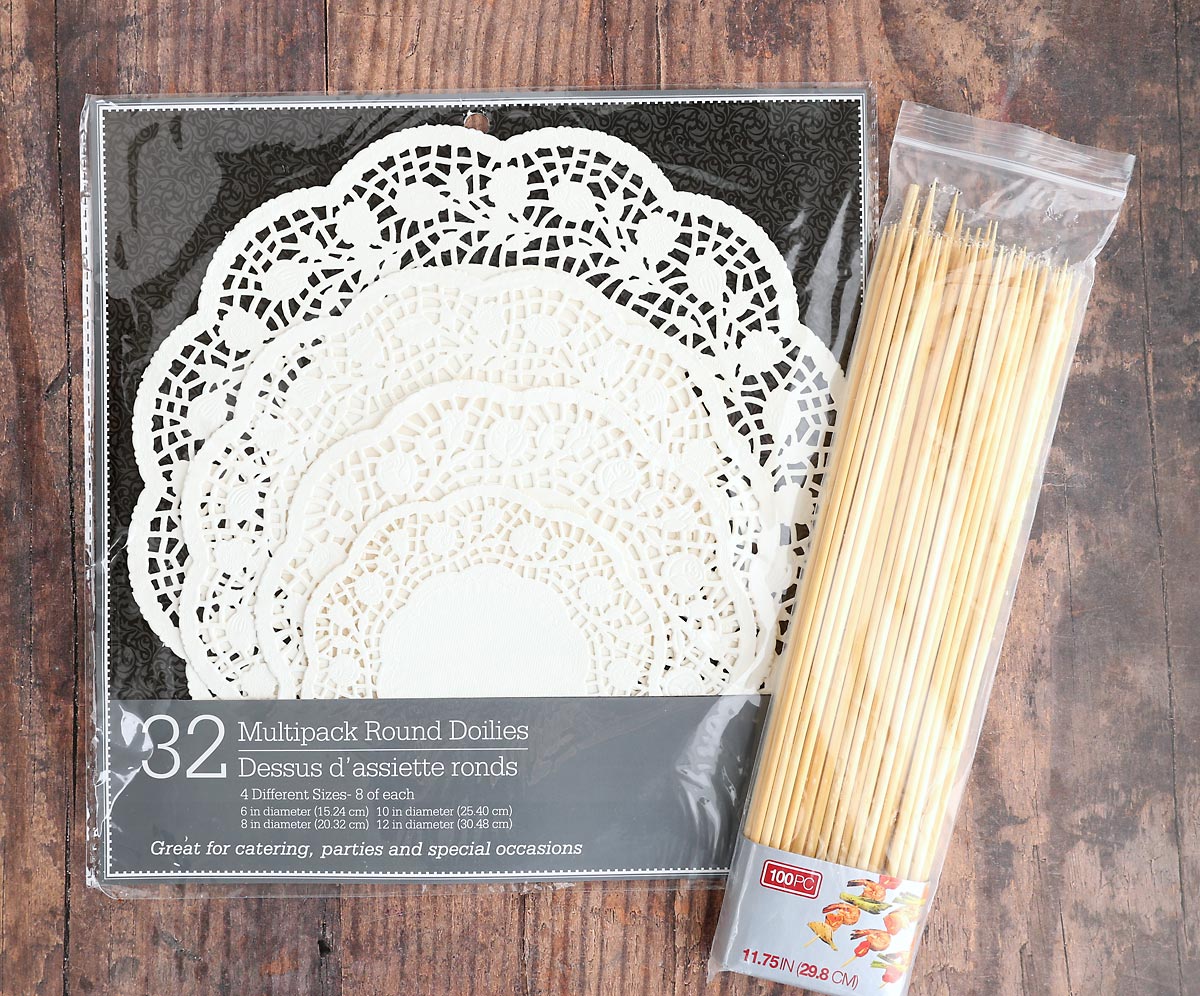
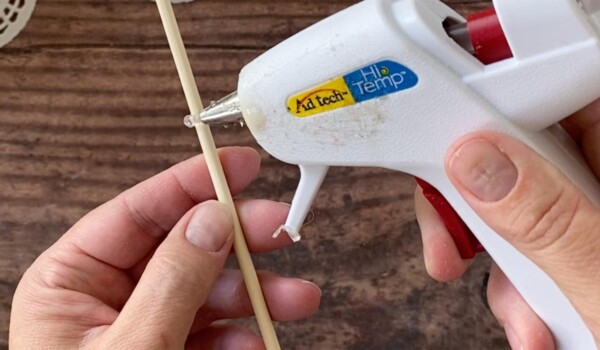
You will also need adhesive. First, you’ll need something you can use to glue the doilies to themselves to create a cone shape. I used an adhesive tape runner, but a glue stick would also work – of even a glue gun. Second, you will need a glue gun to attach the doilies to the skewers.
Doily Christmas Tree Base Options
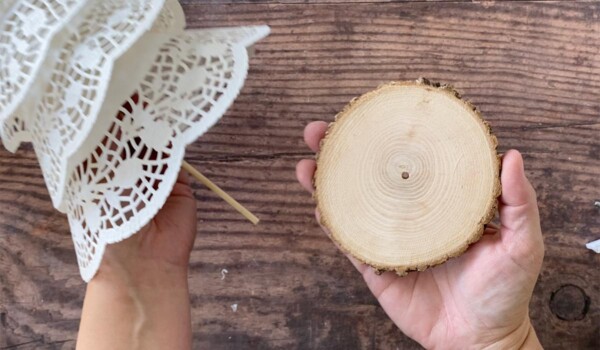
If you want your Christmas trees to stand up, you will need to create a base for them. There are two options you can use for this. First, you can use small wood slices, which I have occasionally seen at the dollar store. The larger wood slices you see in the photo below can be found at many Walmarts in the craft section in packages of 4 for about 4 bucks.
I like the look of wood slices, but if you want to use those you will need to drill a hole in the middle of them. Use a drill bit that is the same size as your wood skewers.
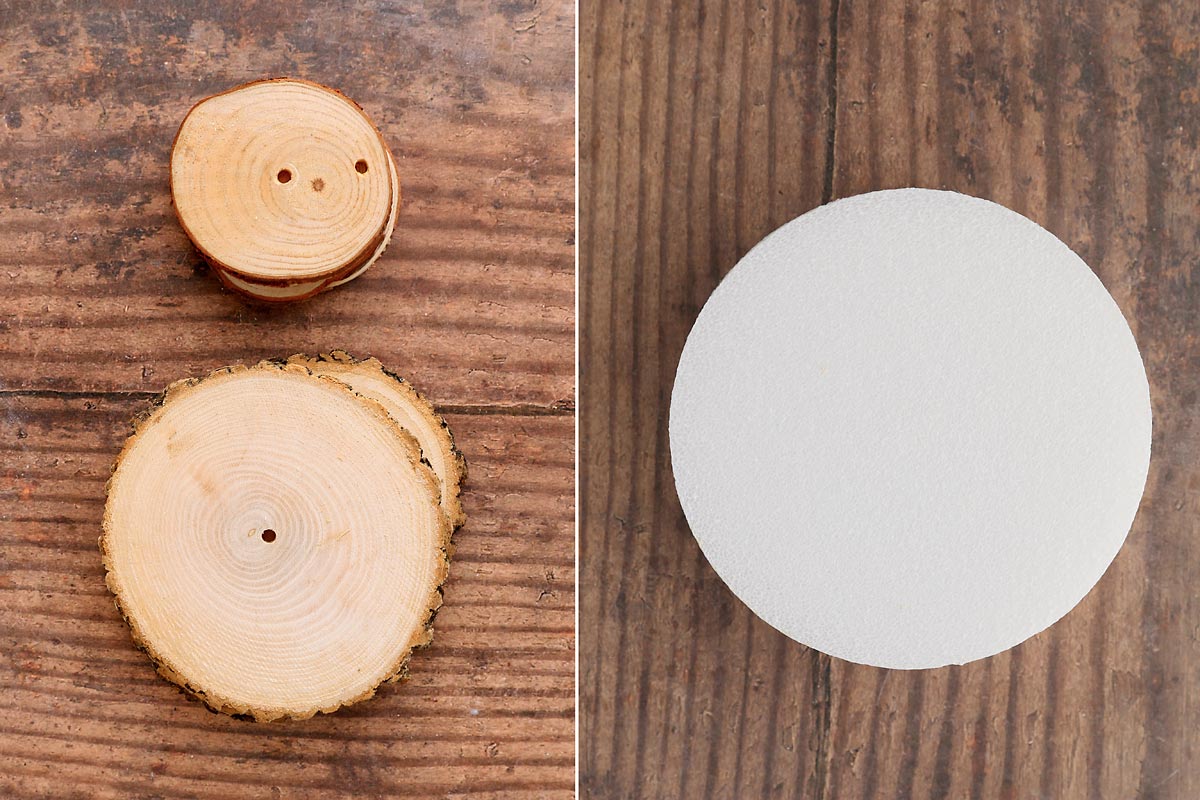
For an easier alternative, I found styrofoam discs in the floral section of the dollar store (2 for a dollar). Because they are white, they make a great base for the doily Christmas trees. No need to drill a hole; just stick the skewer in the middle of the disc and secure with some hot glue. Here’s what the trees look like with the foam disc for a base:
How to Make Doily Christmas Trees
Paper Doily Christmas Tree
Supplies
- Paper Doilies in 3-4 graduated sizes
- Wood Skewers
- Glue stick or Tape Runner Adhesive
- Hot Glue Gun
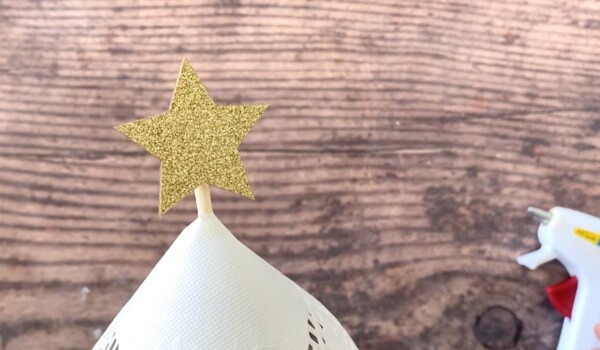
- Chipboard Star Sticker or Wood Star Cutout
- Styrofoam Discs (found in the floral section)
- Wood Slices + a way to drill holes in them (as an alternative to styrofoam discs)
Want more project ideas? Sign up to get my favorite easy crafts and recipes straight to your inbox!
Instructions
- For each tree, you will need paper doilies in 3 or 4 different sizes. Because doilies are so thin, you will want to use 2 paper doilies in each size. Try to peel 2 doilies off each stack without separating them.

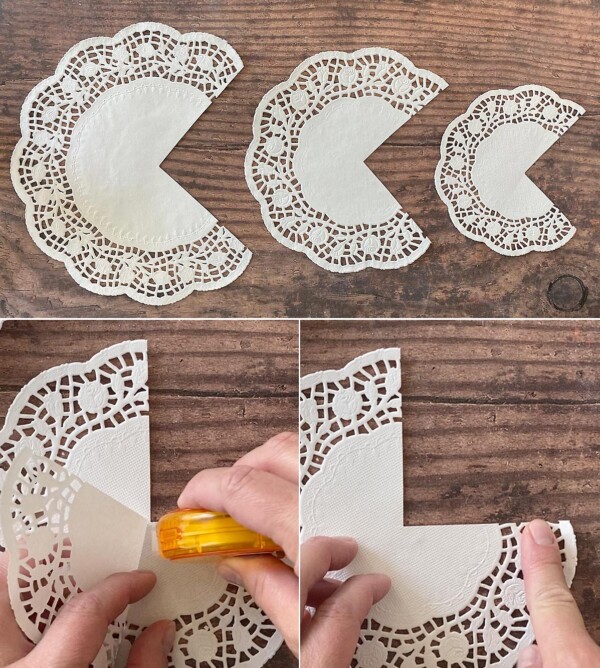
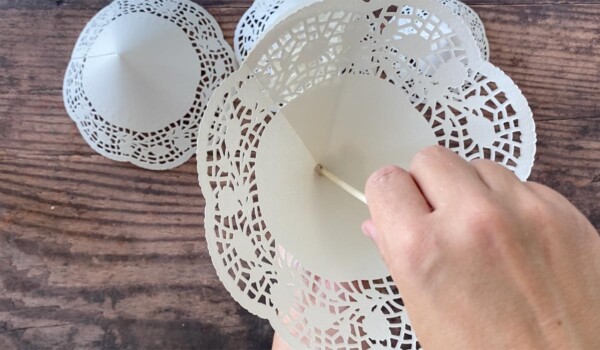
- Cut one quarter out of each size doily. Use adhesive to glue the two layers of each doily together. Be careful when adding adhesive because doilies are delicate. I like to use a tape runner; a glue stick would also work.

- Flip over the smallest doily and place adhesive along one cut edge. Overlap that cut edge with the other cut edge to create a cone shape. Adhere. Repeat with the other size doilies.

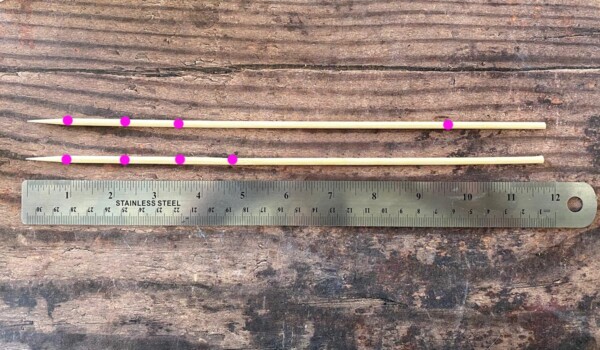
- Place a wooden skewer next to a ruler. Starting from the pointed end, make small marks with a pencil at 1 inch, 2.25 inches, 3.5 inches, and 4.75 inches (for a 4 layer tree). For a 3 layer tree, make small marks at 1 inch, 2.25 inches, 3.5 inches, and 9.5 inches. Use kitchen shears to cut off the skewer at the 9.5 inch mark.

- Pick up the skewer with the pointed side up. Put hot glue all the way around the skewer at the lowest mark.
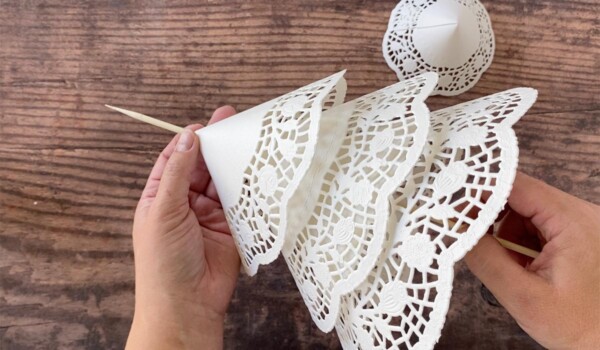
- Poke the skewer through the pointed end of the largest doily and bring the doily up until it touches the hot glue. Hold the doily there for a moment to allow the glue to cool and harden. Try to keep the skewer centered inside the doily while you wait for the glue to harden.
- Repeat with two or three more doilies, working from largest to smallest.
- Glue a chipboard star sticker or wood star cutout on top of the tree.
- Make a stand for the tree: drill a hole into a small wood slice that is the same size as the skewer OR stick the skewer into a floral foam disc. Secure with more hot glue.


MARIA DULANEY says
Beautiful Work!
Andrea says
Hi there, these doilie trees are so cute. Just wondering what size of the wood slices did you use? I was thinking maybe a 3in?
Billie says
Hello there! Looked thru many tutorials, yours are EXACTLY what I was looking for. I’m going to try an extra “layer” on 1 just to experiment I’ve had some paper ones pretty big..
Thanks for your time with the tutorial .
Pam says
Beautiful!
Kristie says
Super cute idea! Thanks for sharing. I will be getting all the stuff for this project to do with my kids. I’ll probably give them some glitter and glue to sparkle them up before we make them into trees.