
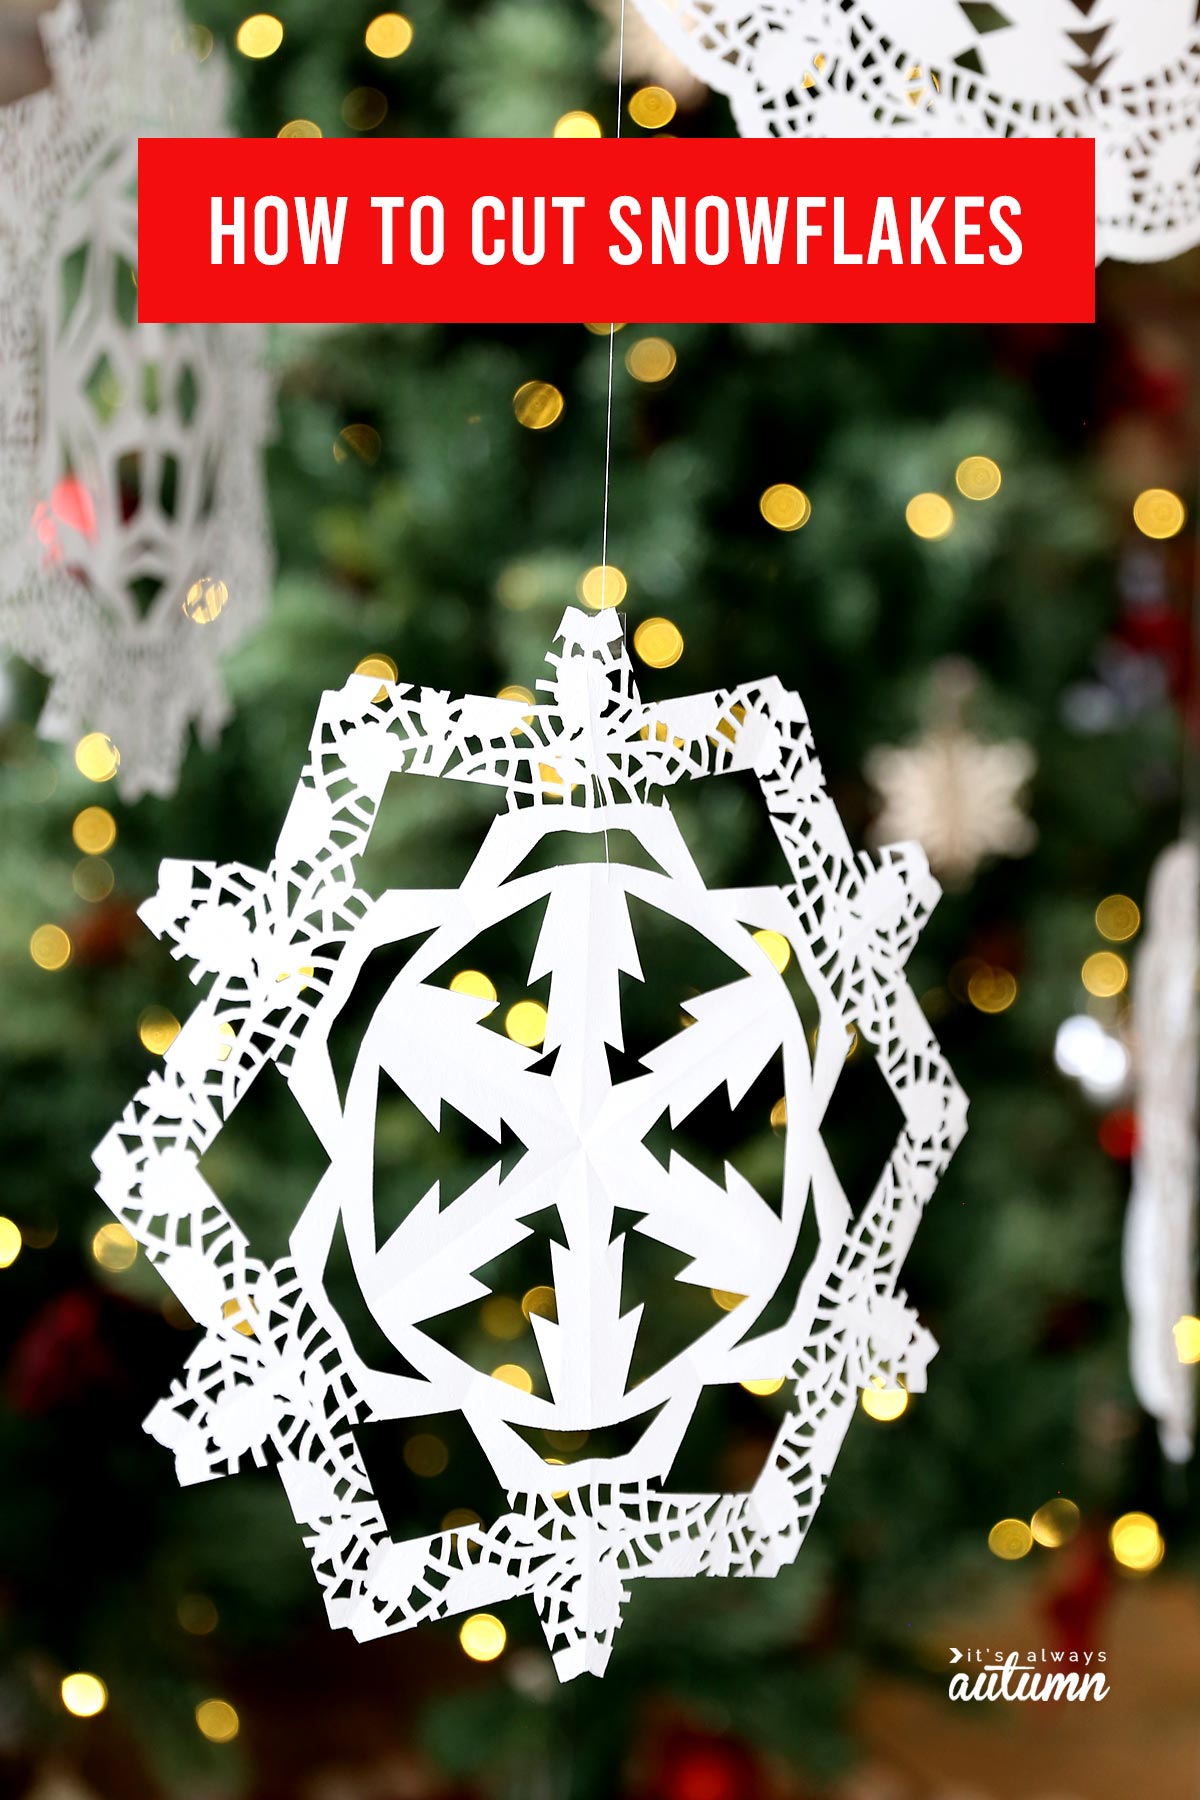
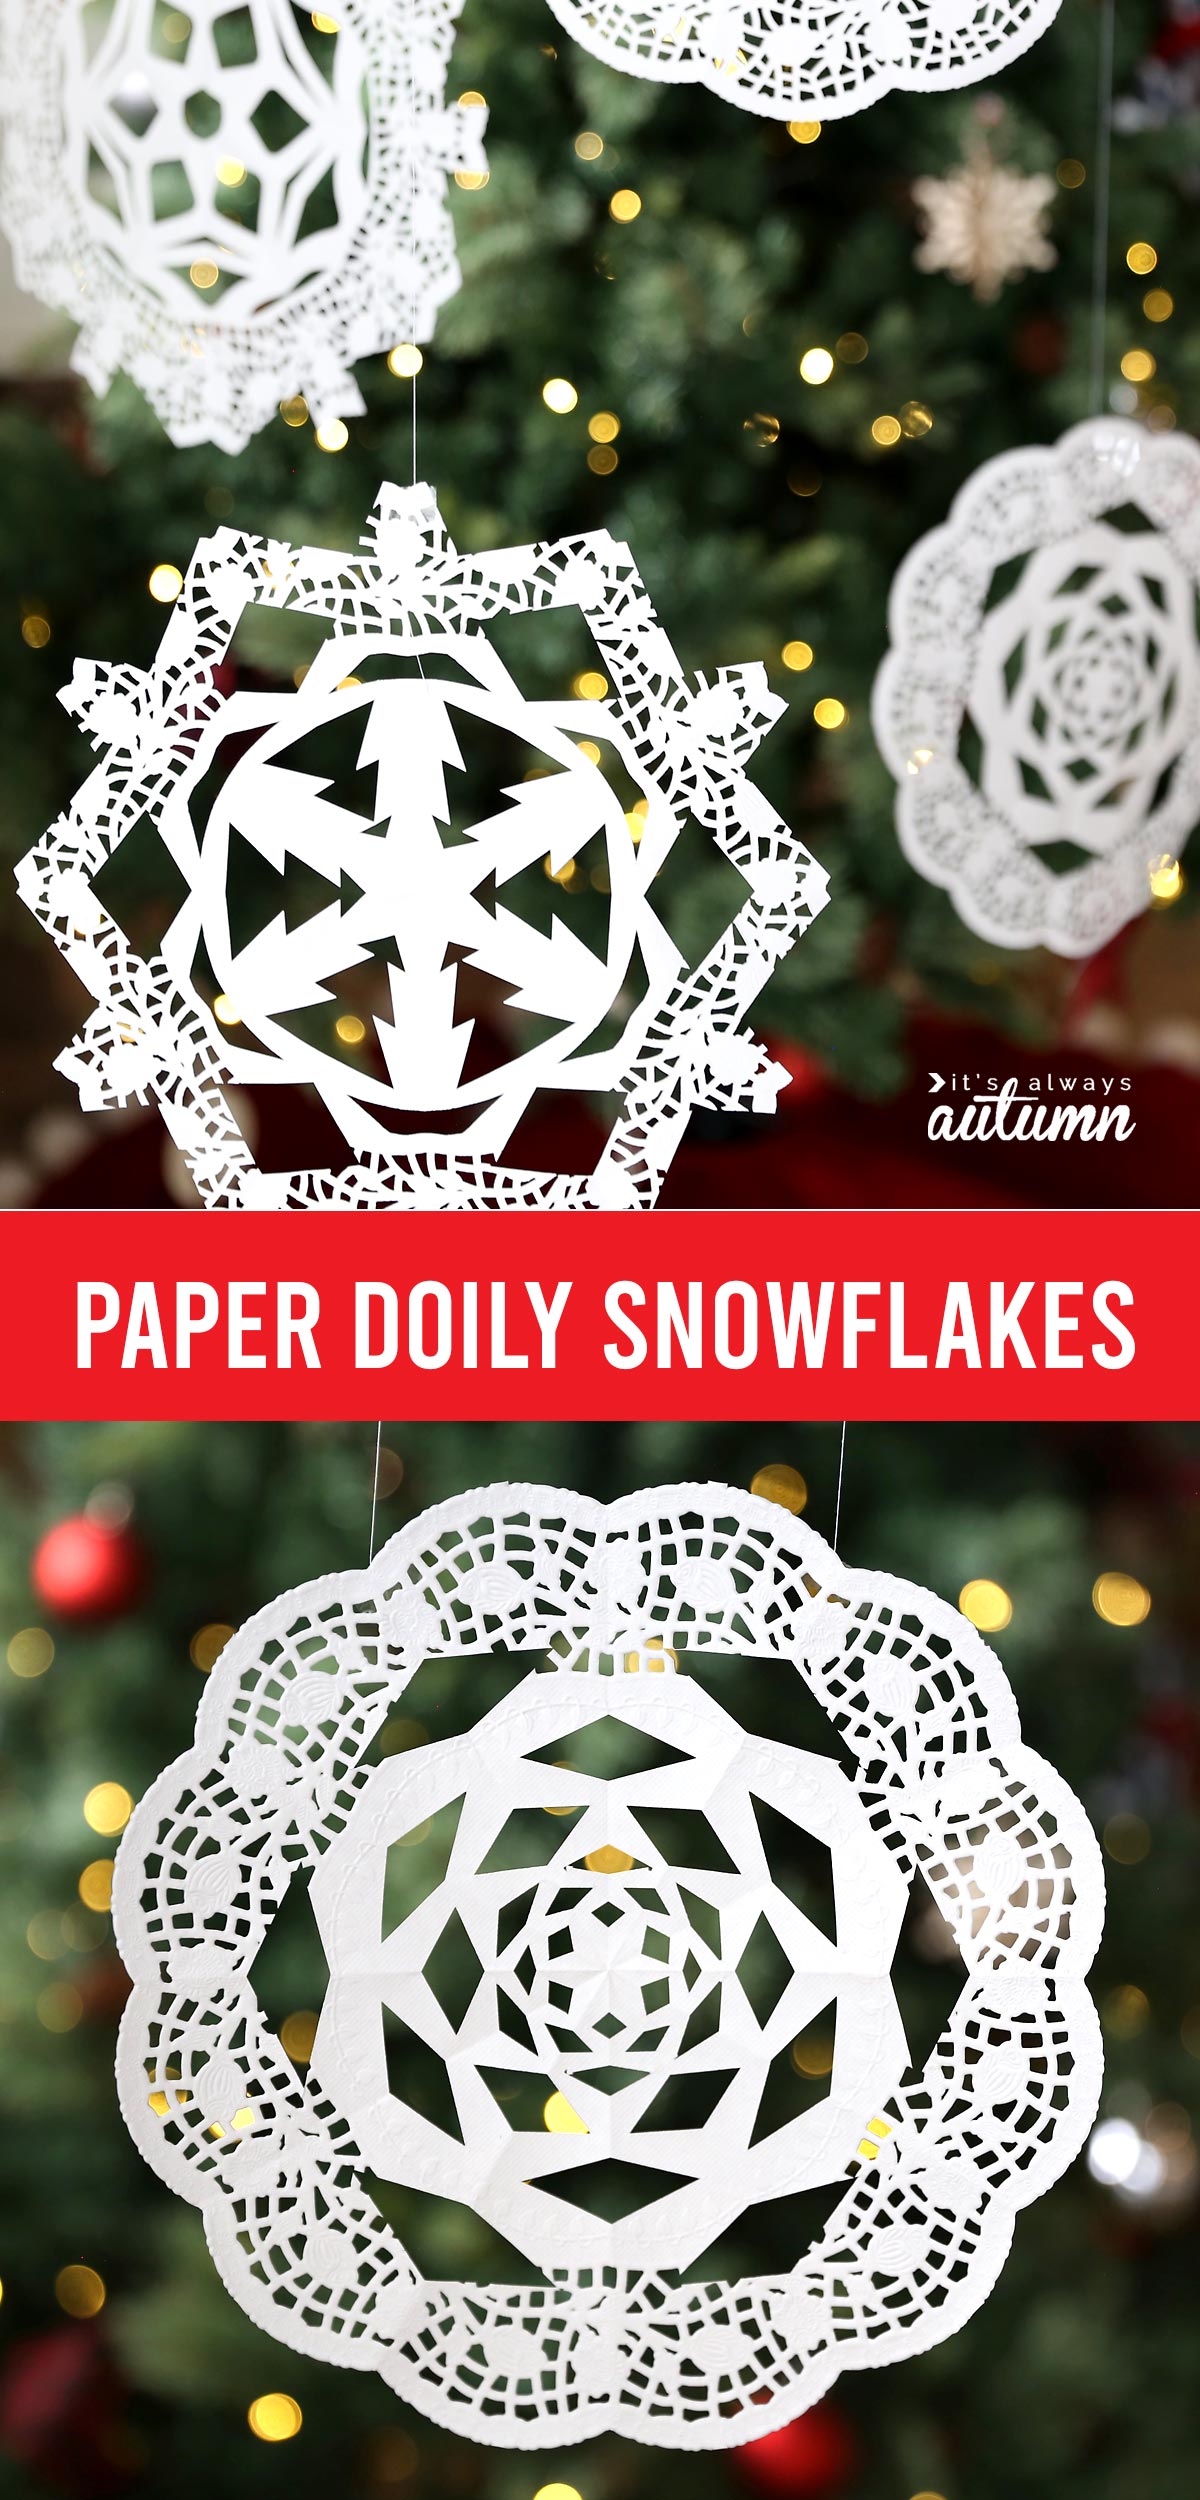
In today’s post: Learn how to cut snowflakes from paper doilies from the dollar store. They’re easy enough for kids to make and they turn out beautiful!
Cutting paper snowflakes has been one of my favorite Christmas traditions since I was a kid. I grew up near Seattle, where it doesn’t snow much – winter is often a near constant drizzle. So my mom taught us how to cut snowflakes and then we’d tape them all over our windows to make it feel a little more Christmas like.
I’ve already shared a post that teaches you how to cut snowflakes from paper and includes some printable snowflake templates. But this year we’ve put a new twist on our paper snowflakes: we are using paper doilies from the dollar store.
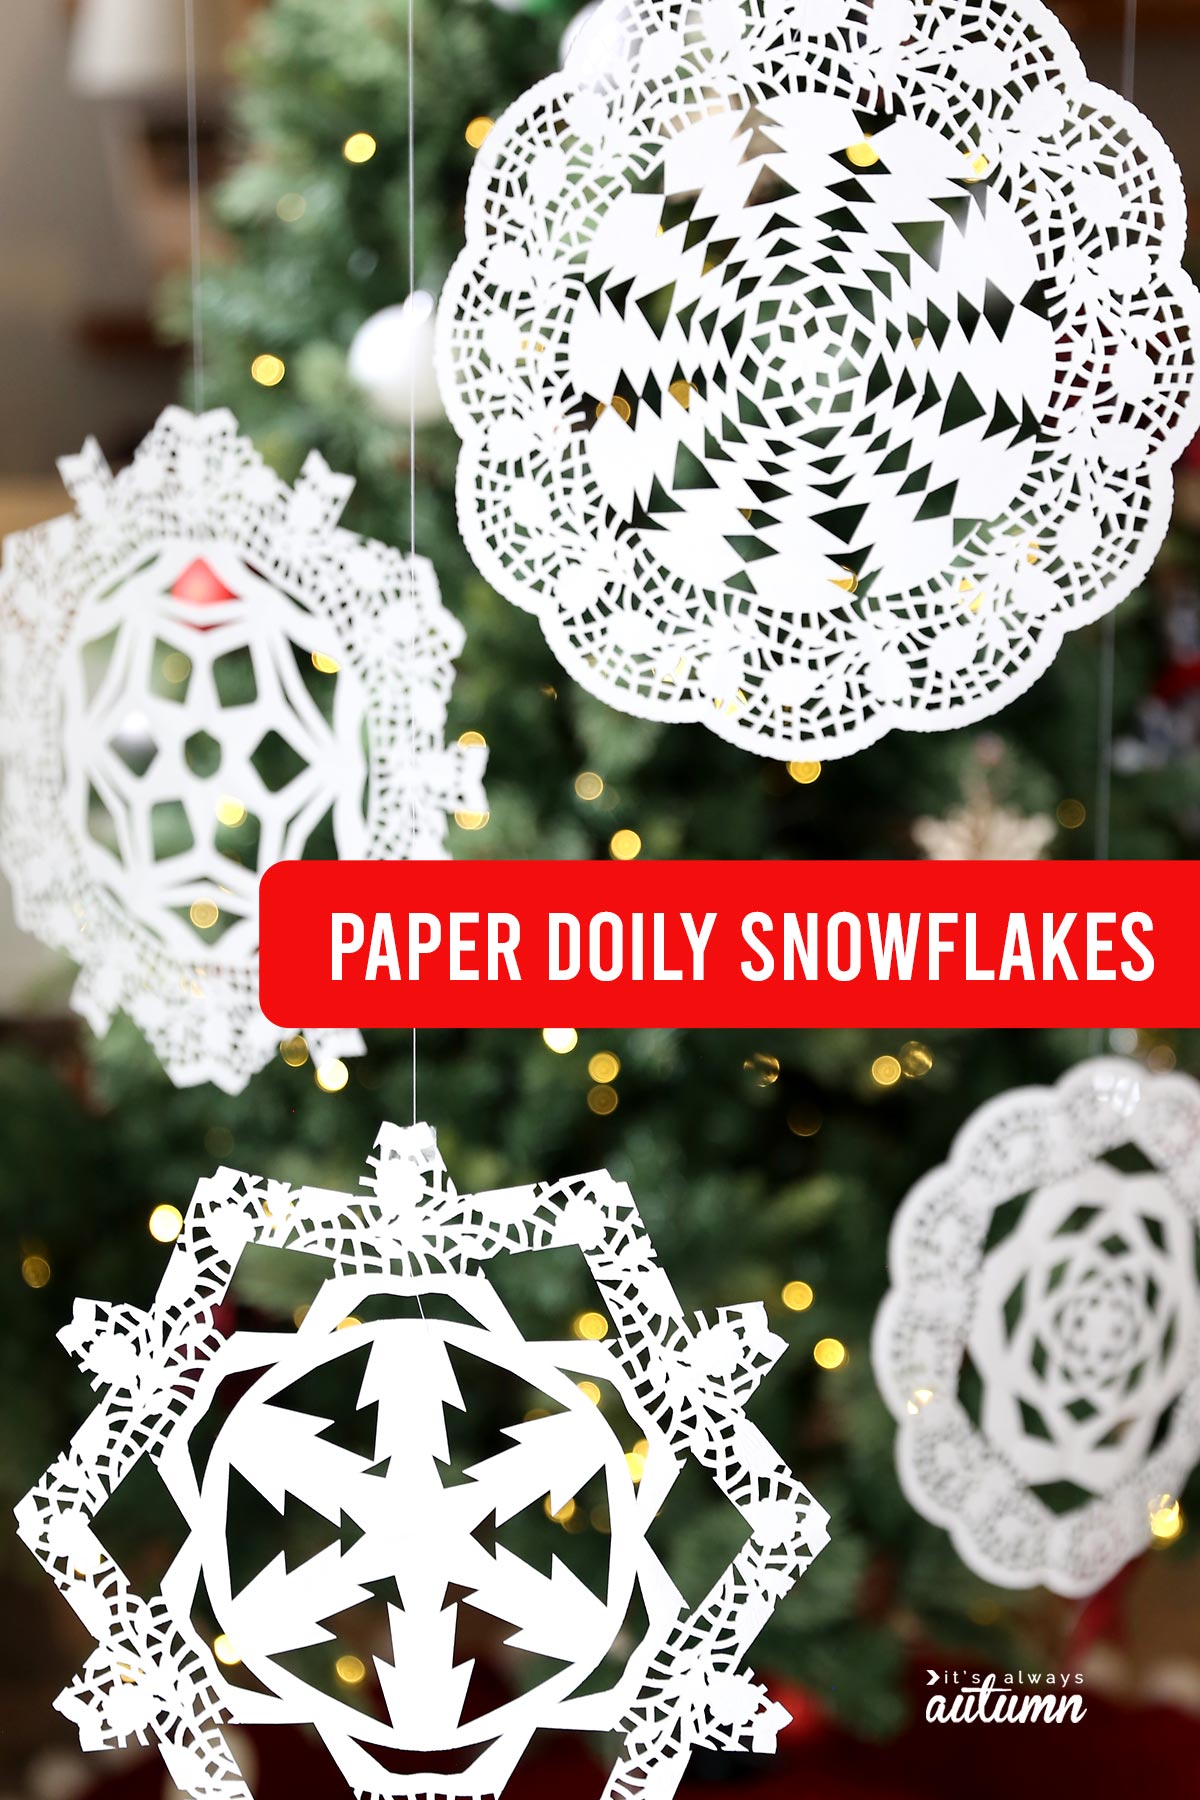
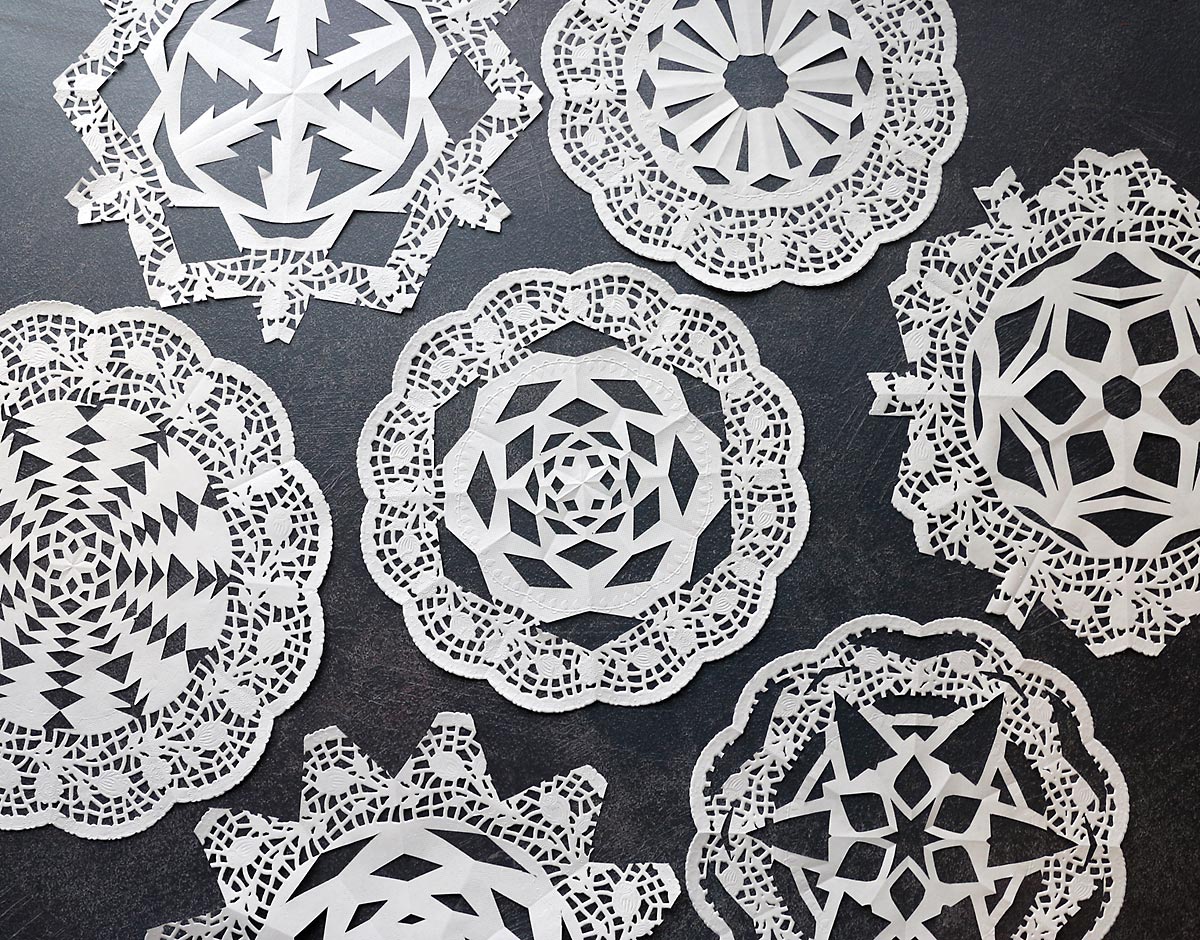
Paper doilies work great for making snowflakes!
- They’re the perfect weight for folding and cutting because they are lighter than normal printer paper, which makes them even easier to use.
- The scalloped edge makes it super easy to fold in 12ths to make a six (or 12) sided snowflake.
- And the laser cut design around the outside makes the snowflakes look extra fancy.
Paper Doily Snowflake Supplies
All you need to make doily snowflakes are some paper doilies and a pair of scissors. I found these multipacks of doilies at my local dollar store:
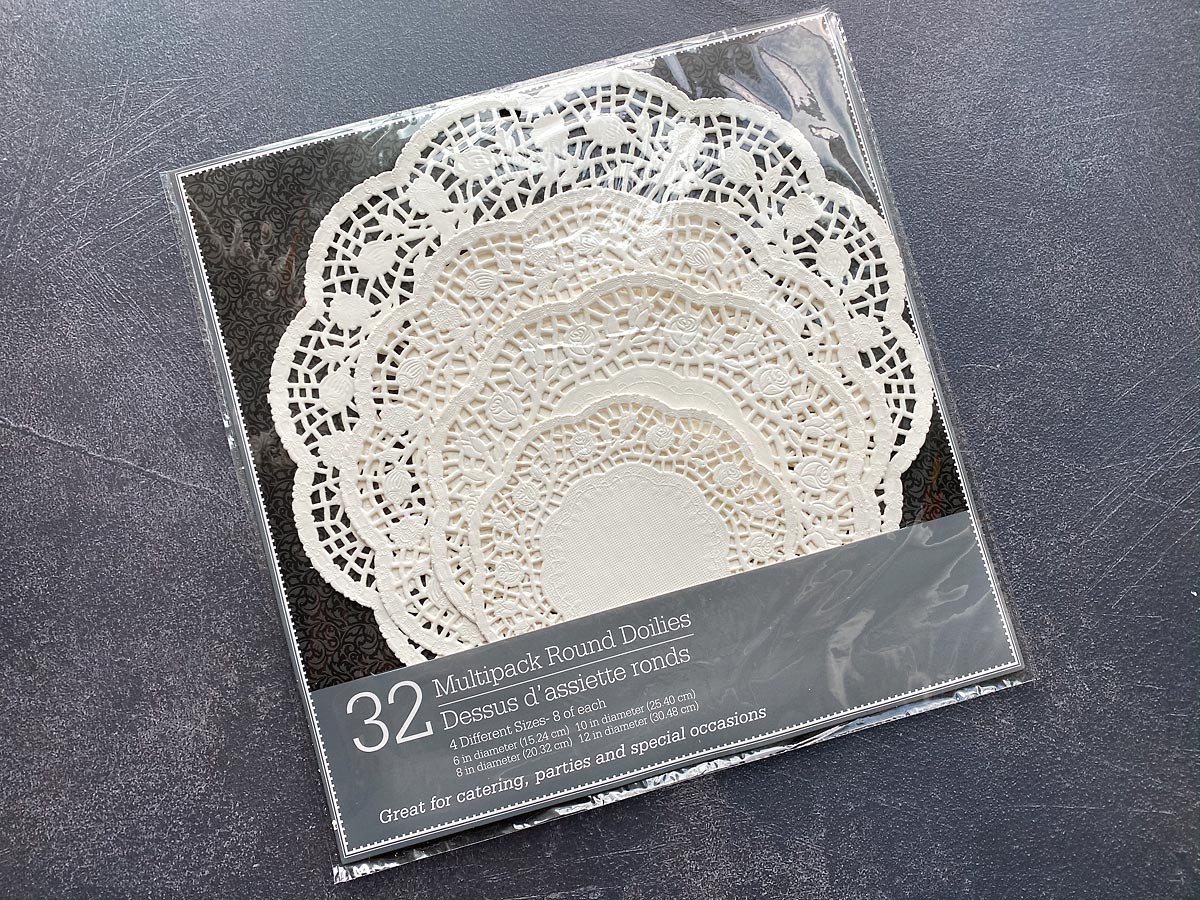
The largest and second largest size doilies have 12 arches or “scallops” around the outside, which makes them perfect for folding into snowflakes. The two smaller sizes only have 10 arches, so they won’t work. That means you’ll be able to fold and cut 16 snowflakes from one pack of dollar store doilies.
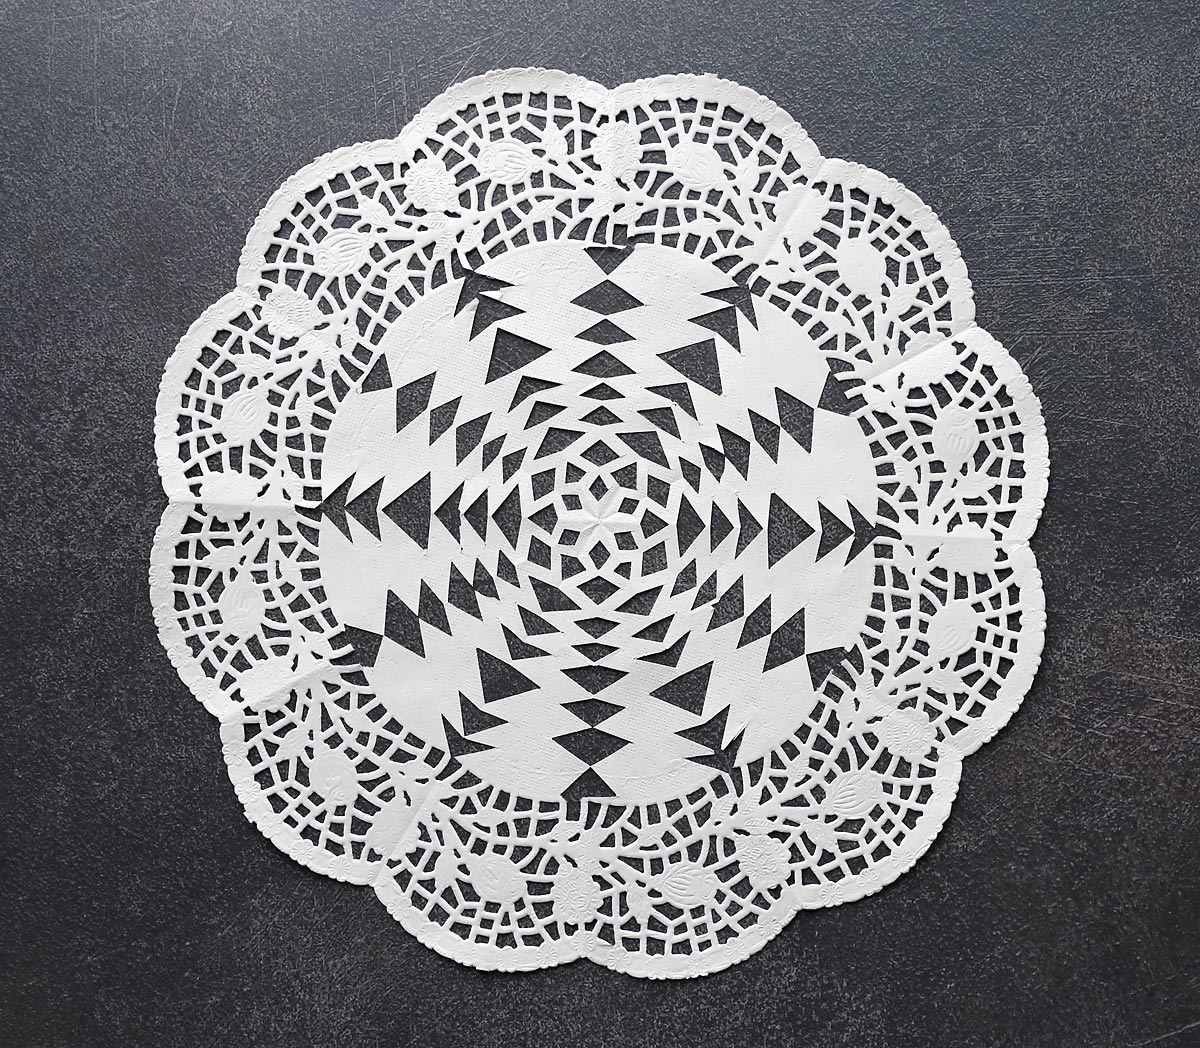
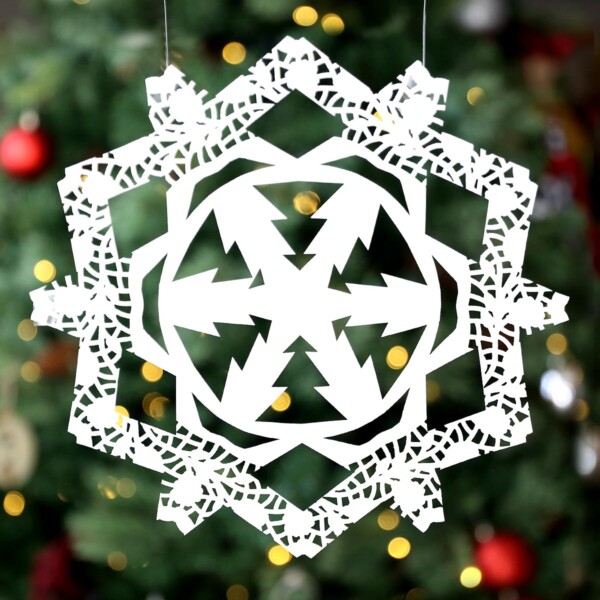
You can leave the outer edge of the doily alone, like this one:
I think that looks really pretty, but my teenagers think that doesn’t look enough like a snowflake. They prefer to cut along the edge so you end up with six points or sides, like this one:
FUNNY SIDE NOTE: In my original paper snowflakes post, the method I show creates an 8-sided snowflake, simply because it’s much easier for kids to learn how to fold paper in 8ths instead of 6ths. But BOY DID THAT MAKE PEOPLE MAD! I can’t tell you how many comments and messages I got telling me that I had no right to call those snowflakes! and that I apparently don’t know how to count. It appears that paper snowflakes are a serious business, so it’s a good thing the doily version will give you six sides instead of eight 😉
How to Cut Paper Doily Snowflakes
You can watch this quick video to see how to fold and cut a doily snowflake. Written instructions follow.
Paper Doily Snowflakes
Supplies
- Paper Doilies with 12 scallops around the edge
Want more project ideas? Sign up to get my favorite easy crafts and recipes straight to your inbox!
Instructions
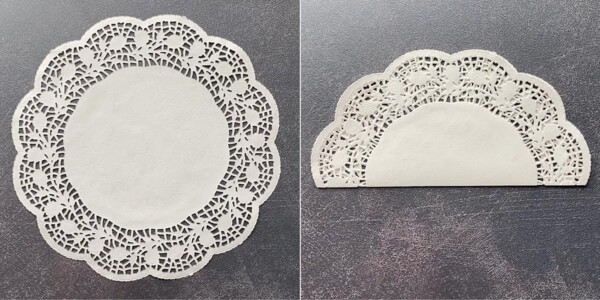
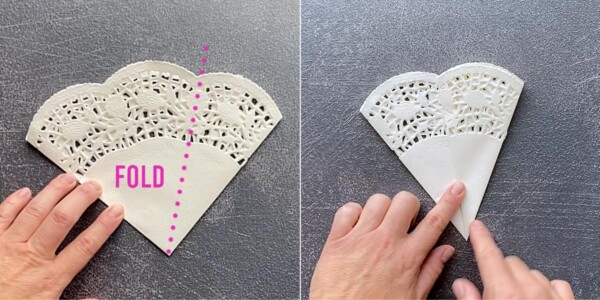
- Separate a single paper doily from the bunch. (They are thin, so be sure you just have one.) Fold it in half, matching the scalloped edges, and crease. None of the "arches" on the scalloped edge should be folded in half.

- Fold the doily in half again and crease.
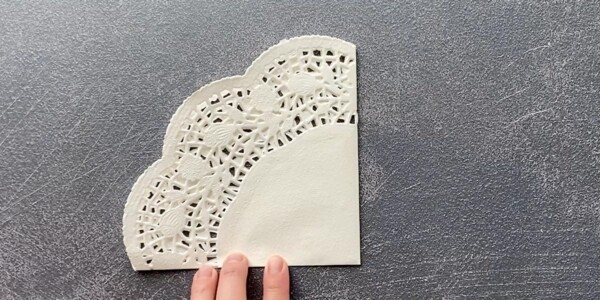
- You now have a triangle of paper that has 3 arches (or scallops) along the edge. Fold over the right third of the triangle, matching the arches on the edge.
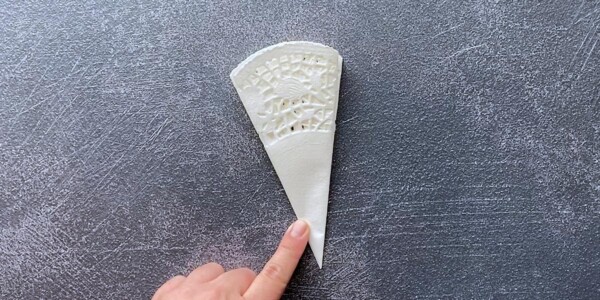
- Then flip the doily over and fold over the right third again, creating a narrow triangle with an arched edge. (The doily has been folded in 12ths at this point.)
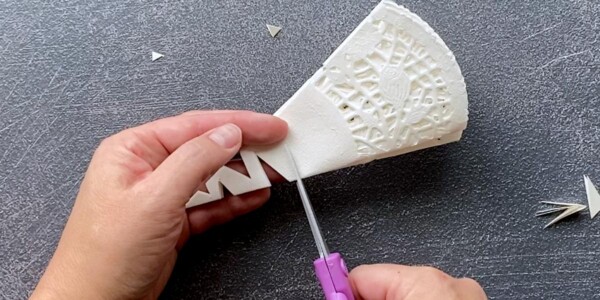
- Begin cutting your snowflake. Cut out shapes or designs from one straight side OR the other straight side of the snowflake. DO NOT cut all the way across from one side to the other, unless you are cutting very close to the point to create a circle or star shape in the center of the snowflake. You can leave the arched outside alone to keep the scalloped doily shape, or you may cut along the outside edge to change the shape.
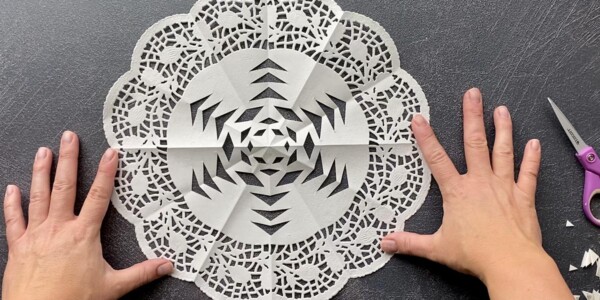
- Unfold the doily to see your finished snowflake. Carefully iron the snowflake on medium heat to flatten out the creases.

Kristi Andres says
This is a great idea! 🙂 I am north of Seattle (closer to the Canadian border) so I totally know what you mean about not a lot of snow! I like putting my snowflakes on the window with a little tape and then spraying the white “snow” over/around them and then taking it off and you have the shape of the snowflake on your window with the snow around it.