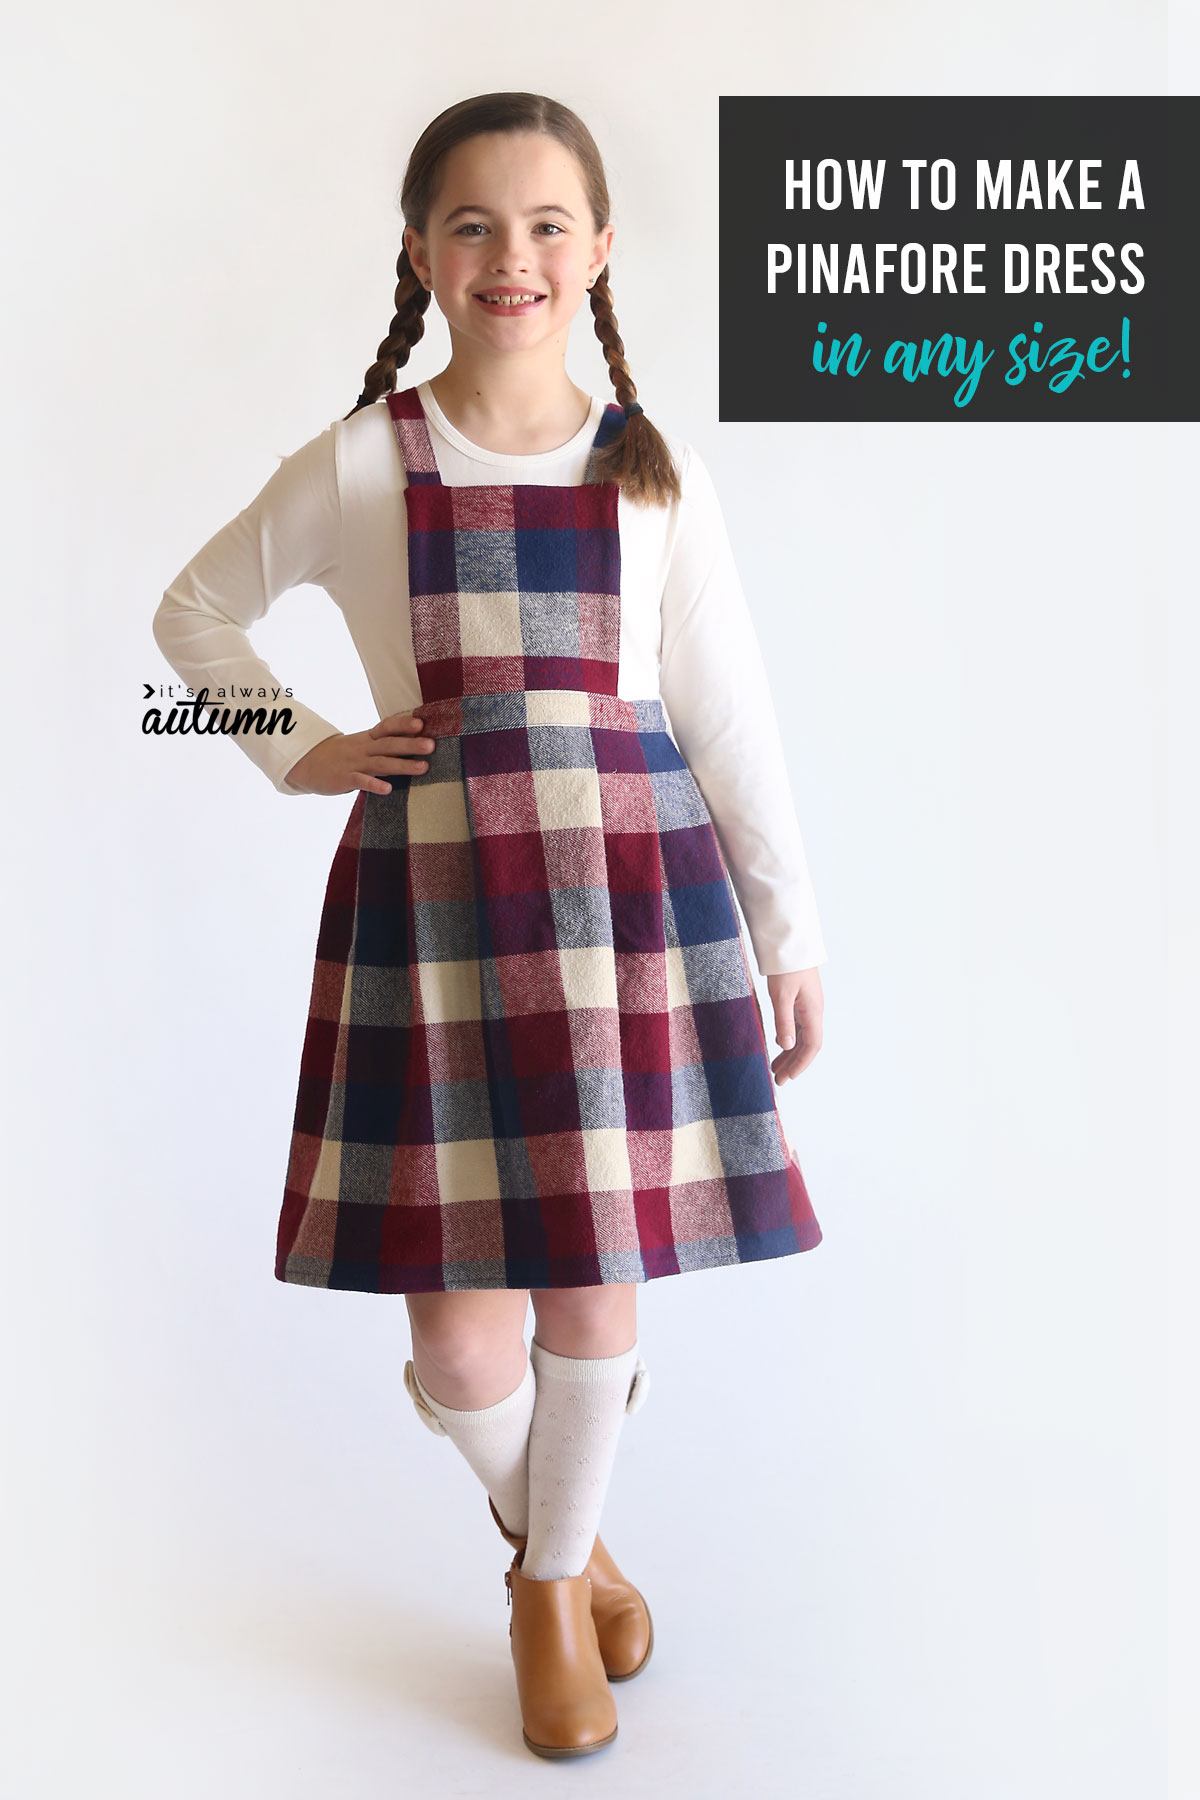
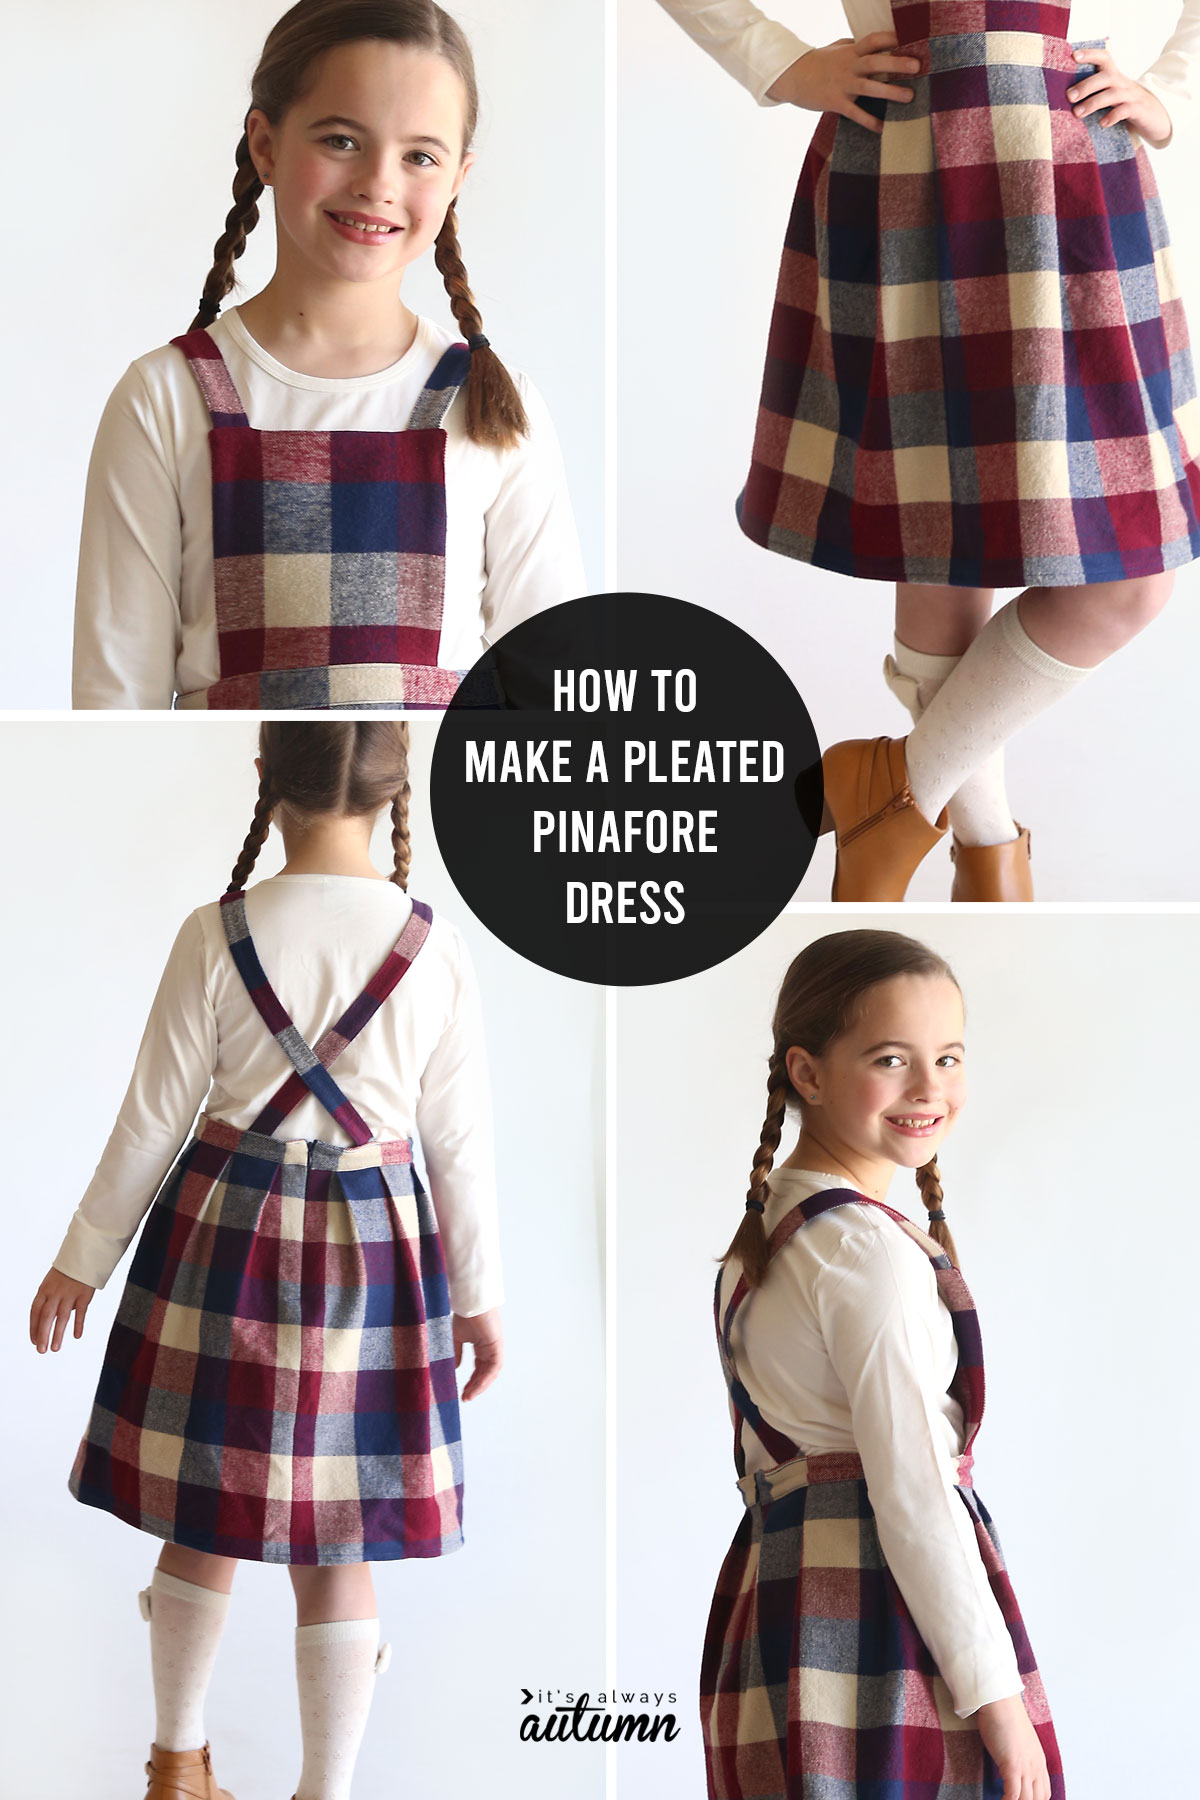
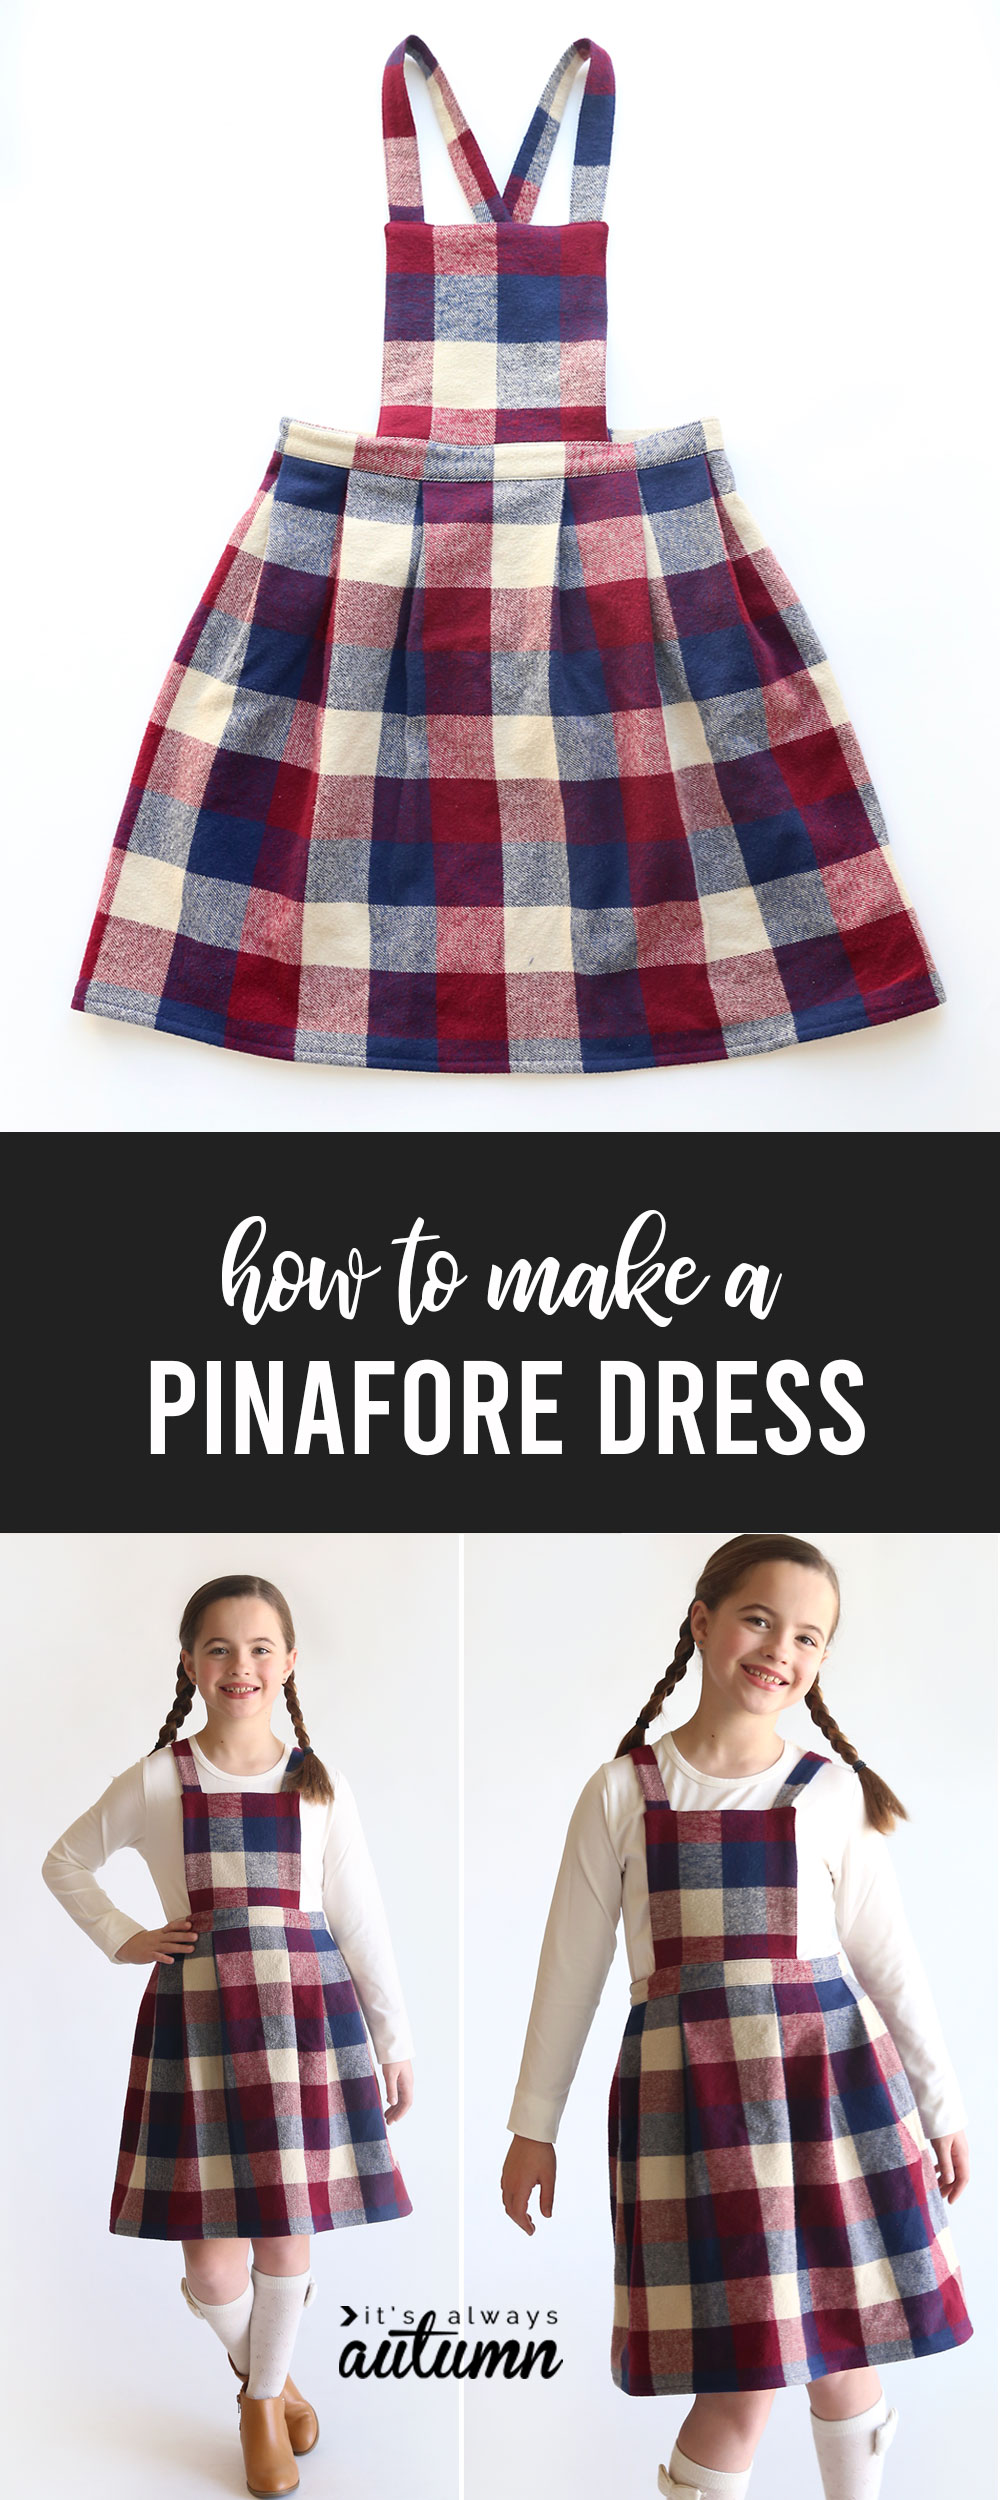
In today’s post: Learn how to make a pleated pinafore dress in any size by creating your own pinafore dress pattern.
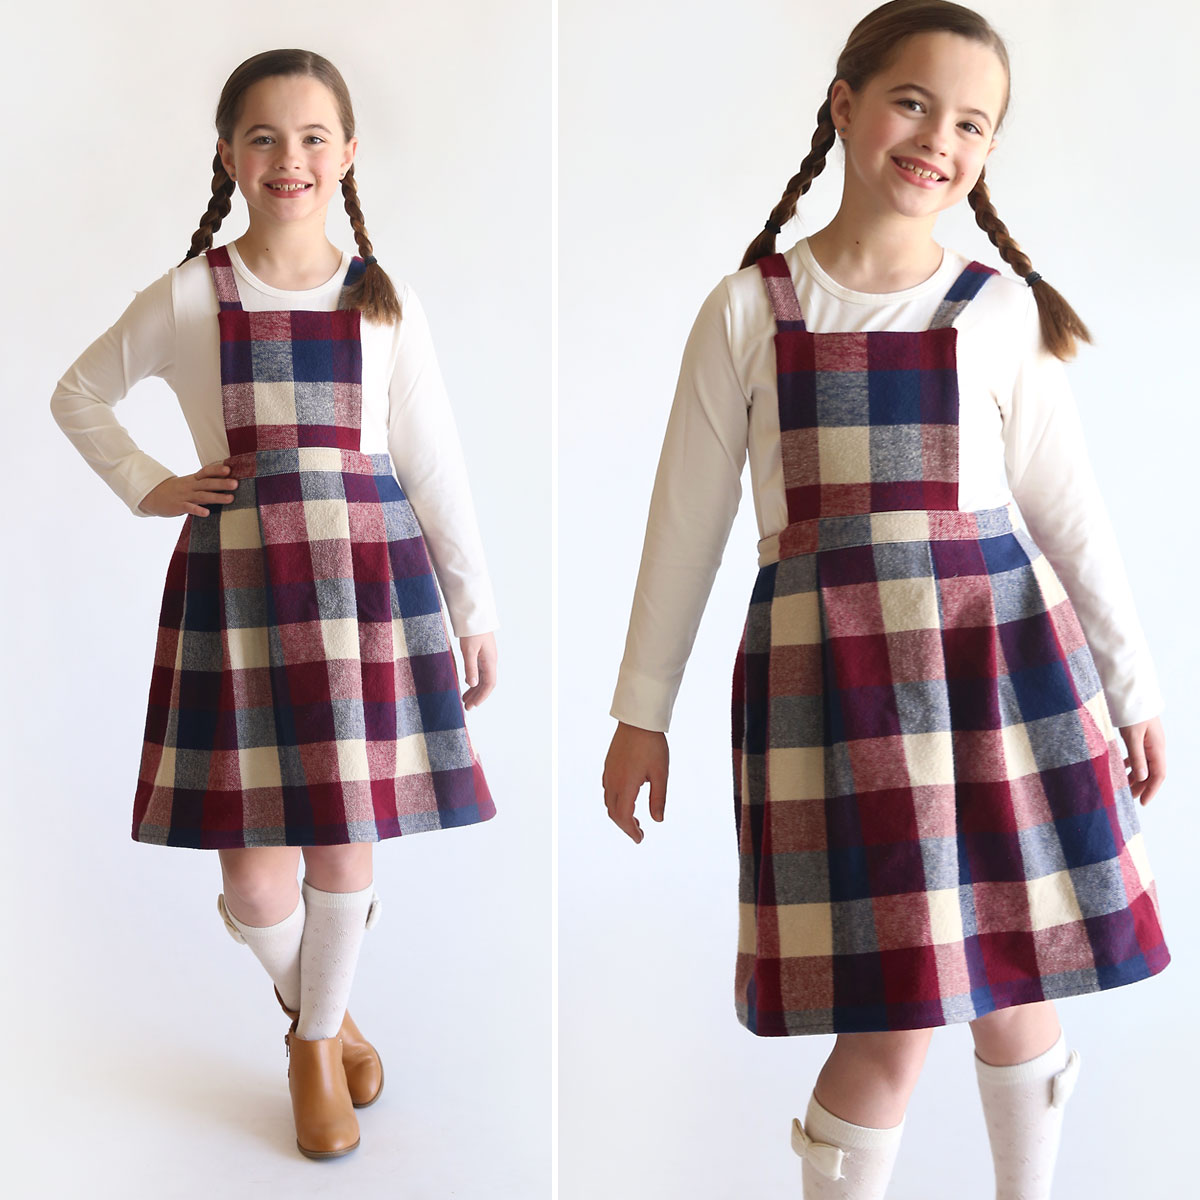
My daughter has been asking for more warm dresses for winter. I’ve actually been surprised how many dresses (even during the holiday season) are short sleeved, which makes for a pretty cold church service during January. I LOVE the look of pinafore dresses, so I decided to make her a nice pleated pinafore from a warm flannel. Paired with a long sleeve tee and knee highs or tights and she’ll be plenty warm until spring!
Now, I should warn you that this post is long. That’s because first, I’ll show you how to create your own pattern pieces so you can make this pinafore dress in any size!
I’ve also included dimensions for a girls’ size 10 dress (25 inch waist), so the process will be simpler if you’re making that size.
Next, I’ll walk you through each step to sew the pinafore together. There’s nothing very hard about making this dress, but it does have more steps than my normal sewing tutorials. That’s because we’re going to sew it up the right way, including all the professional looking finishes.
But don’t worry if you’re more of a slapdash sewist (which I am most of the time!). I love pinafores so much that I’m already scheming up a cheater version that will use shortcuts. Check back for that next month!
Create your Pinafore Dress Pattern
The directions for making your own pinafore dress pattern look complicated because I’ve tried to be very thorough, but honestly it’s not that difficult. You’re only need to create 4 different pattern pieces, and they are all rectangles! So follow each step and you’ll be good to go.
To make this dress in any size you’d like, you’ll need to take some measurements first. You need four different pattern pieces, so you’ll need four measurements.
1. TO MAKE THE WAISTBAND PATTERN PIECES, measure the girl’s waist. Measure over a shirt like the one she would wear under a pinafore, and keep the measuring tape comfortable, not pulled tight. The waistband pattern piece will be two inches high, plus two inches longer than the WAIST MEASUREMENT. (NOTE: this creates a waistline with about an inch of “give” so it’s not too tight.) You will need 2 waistband pattern pieces.
So if the waist measurement was 25 inches, the waistband pieces will be 2 inches tall by 27 inches wide.
2. TO MAKE THE SKIRT PATTERN PIECE, measure from the girl’s waist to the knee, or wherever you would like the skirt to hit. Add two inches to that number to get the length for the skirt piece. The width of the skirt piece is going to be double the waistband piece. You will need 1 skirt piece.
In my example, the waist to knee measurement is 18 inches. So the skirt piece will be 20 inches tall by 54 inches wide (that’s double 27 from the waistband above).
3. TO MAKE THE PINAFORE SQUARE PATTERN PIECE, measure the size of the square that will sit against the girl’s chest. I find it’s easiest to hold up a sheet of paper and cut it to a size that looks good. Measure that, and then add one inch to the height and width for seam allowance. You will need 2 pinafore squares.
In my example, the square ended up at 7×7 inches, so the pinafore piece will be cut 8 inches wide and 8 inches tall. Please note this piece doesn’t have to be exactly square – I actually wish I had made mine an inch wider than it is tall.
4. TO MAKE THE STRAP PATTERN PIECES, measure from the top of where the square will sit over the shoulder and back down to the waistband, criss crossed. Add about 4 inches to that number to get the strap length (that will make the straps plenty long and we can shorten as needed later on). The width for each strap piece is 3 inches. You will need 2 strap pieces.
In my example, from the top of the square over the shoulder back to the waist is 21 inches. So my strap pieces will each be 25 inches long by 3 inches wide.
You may create paper pattern pieces for your pinafore dress if you’d like, but since all four pieces are rectangles that’s not necessary. You can cut out the pieces using the measurements you’ve just created.
What Fabric should I use and how much will I need?
You want to use a woven (non-stretchy) fabric for this pinafore. I used a flannel, which is nice because it’s sturdy but not too thick to pleat. A medium weight fabric is best. If you choose to use a lighter weight fabric, you may want to iron interfacing onto the strap and waistband pieces (and maybe the pinafore square as well).
Be sure to wash and dry your fabric before you begin.
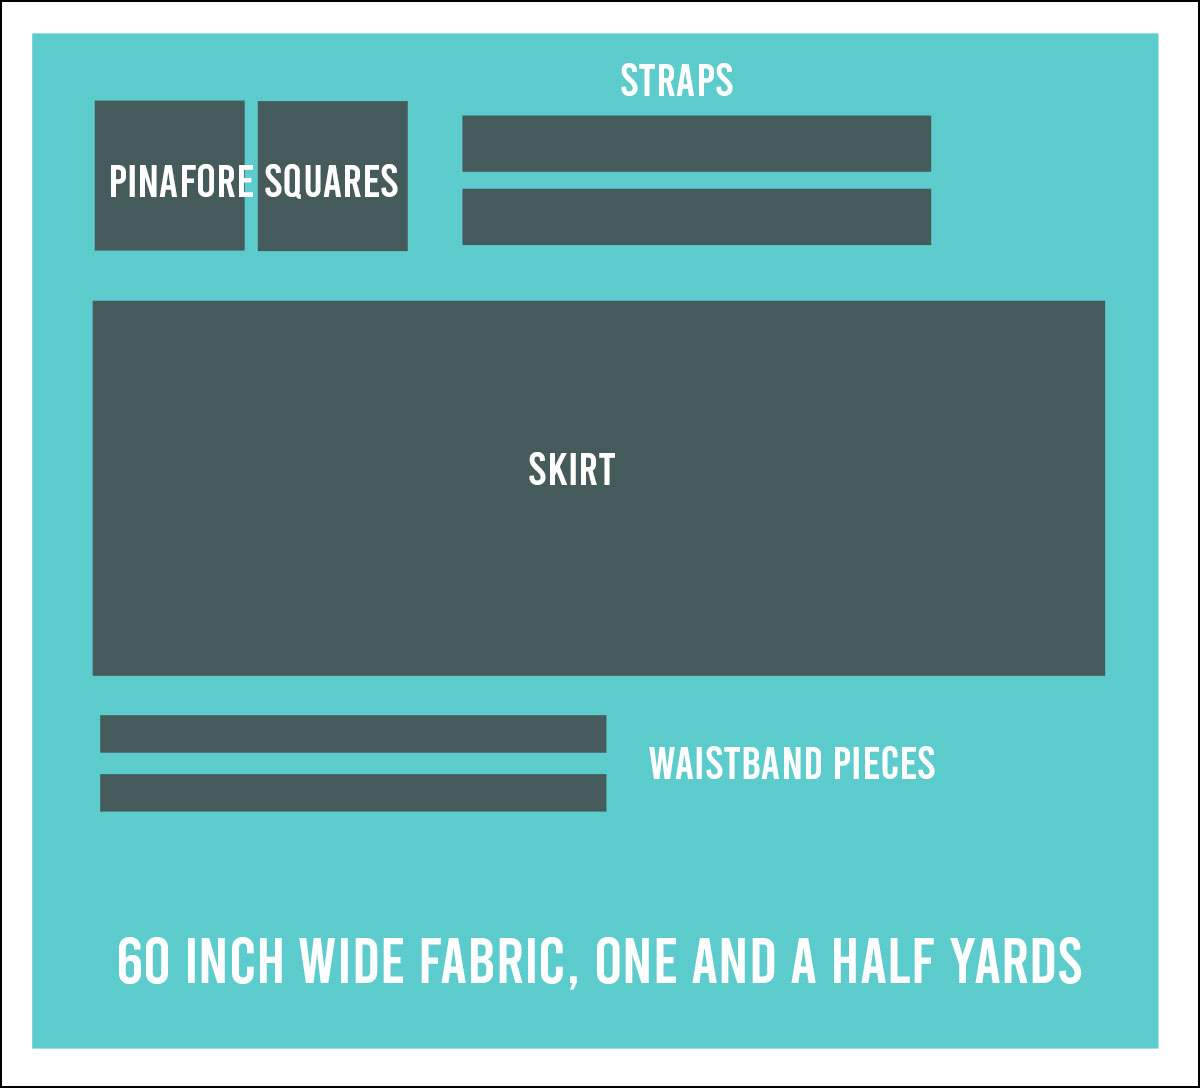
How much fabric you need will depend on the size of dress you are making, as well as how long you want the dress. Once you have the measurements for your pieces you can figure out how they will fit on your fabric. I recommend using 60 inch wide fabric if possible because it will be much easier to fit the skirt piece.
You can see from my diagram above how the pattern pieces I needed for a size 10 dress fit on one and a half yards of 60 inch wide fabric. I could have gotten away with one and a quarter yards, but it’s always good to get a little extra, especially because most woven fabrics will shrink when washed and dried.
Please note that you will also need a 7 inch invisible zipper.
NOTE for creating patterns for larger sizes
Please note, if you use 60 inch wide fabric, you’ll be able to cut your pieces as directed for up to a 28 inch waist, which will cover most girls’ sizes and small adult sizes. If your want to make this skirt for someone with a larger waist (like me!) you have two options:
First, you can simply cut your skirt piece the entire width of the fabric (60 inches), no matter what your waistband length is. This will require you to make some adjustments when you pleat the skirt; i.e. you won’t be able to put as many pleats in or the pleats will need to be smaller. You can just play with the pleating to make it work. This option is simplest, but the skirt won’t end up as full.
Second, if you really want your skirt to be full, you’ll need to create a skirt piece that is twice the width of your waistband piece. Do this by cutting two skirt pieces that are each the width of your waistband + 1 inch. Cut one piece in half width-wise, then sew one half piece to each side of the full piece. That will give you a skirt piece that’s twice the width of your waistband with a seam down each side. This will require more fabric (additional yardage that matches the length of your skirt piece).
NOTE for using Plaid Fabrics
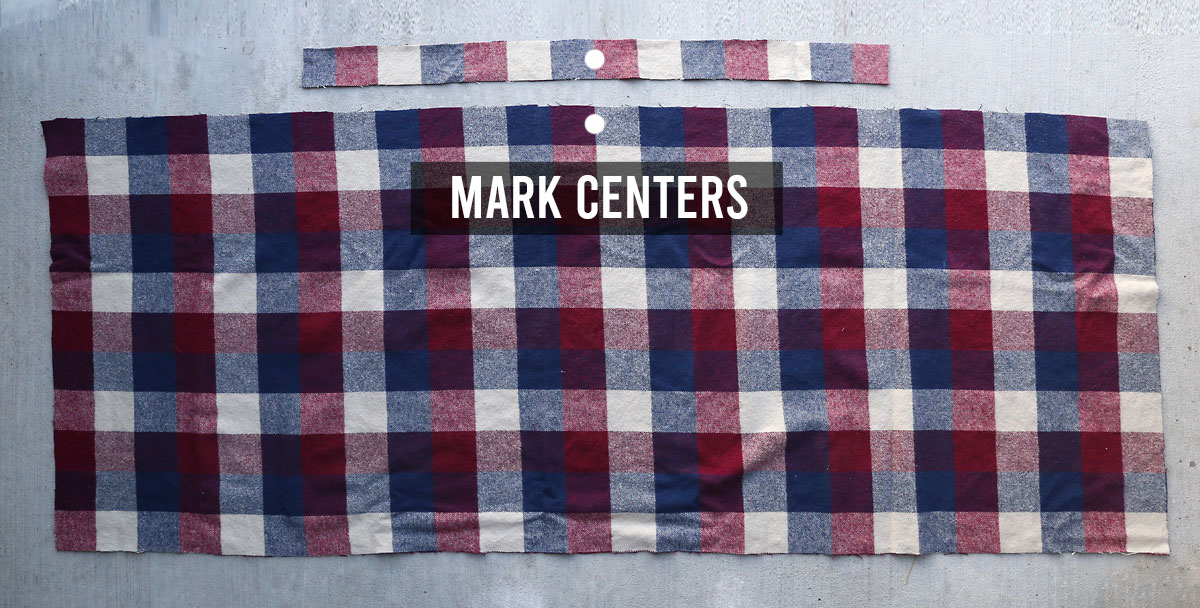
When you cut out your fabric pieces, PLEASE TAKE NOTE if you are using a plaid fabric. Be sure that the vertical center of your pinafore squares, waistband, and skirt pieces are on the line where two colors meet, NOT the center of a square. This will make matching up centers and pleating much simpler.
Ok, the hard part is done and now it’s time to sew up this dress!
How to Make a Pinafore Dress: Sew the straps
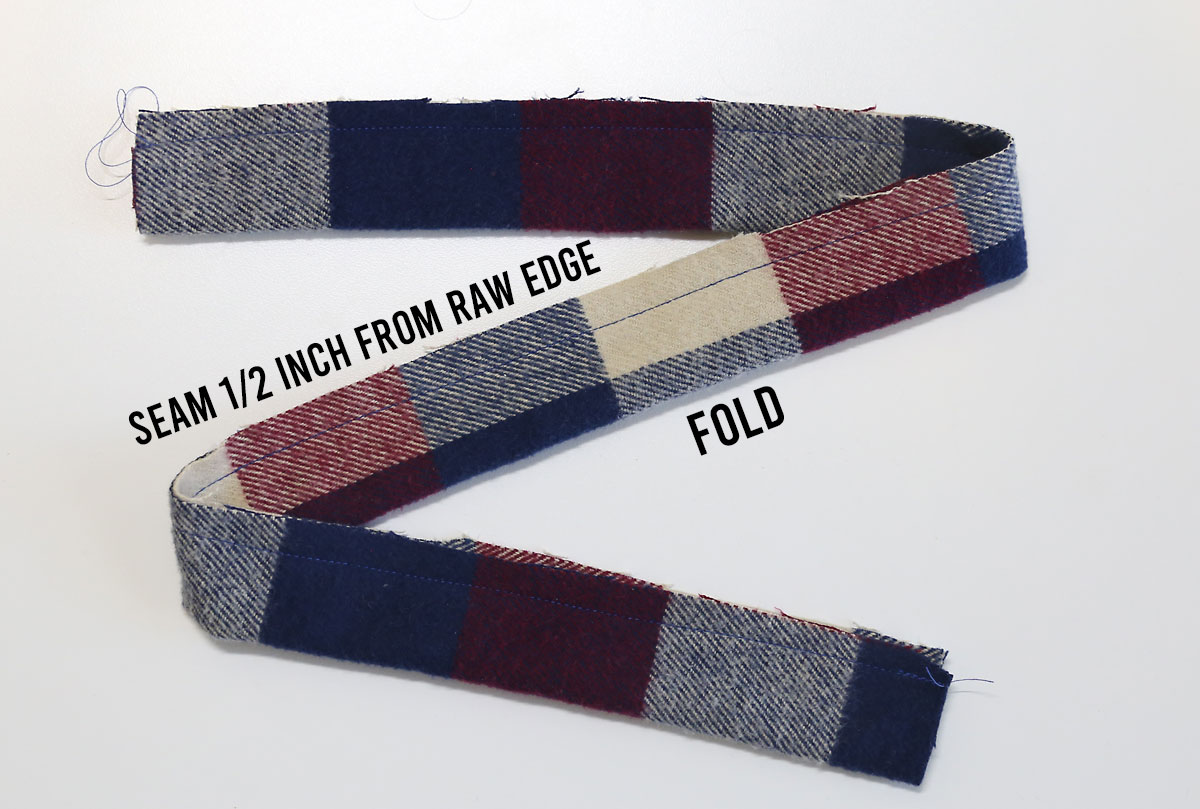
Fold each strap piece in half lengthwise and sew down the long edge, using a scant 1/2 inch seam allowance.
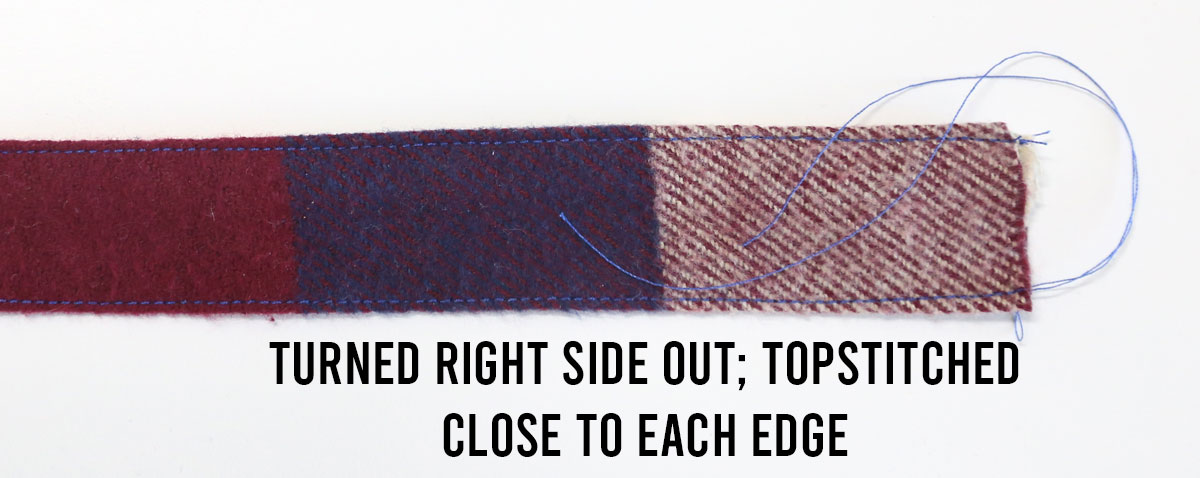
Turn the straps right side out. Iron.
Topstitch along both long edges if desired. This isn’t necessary, but it does give a professional look.
How to Make a Pinafore Dress: Sew the Pinafore Square
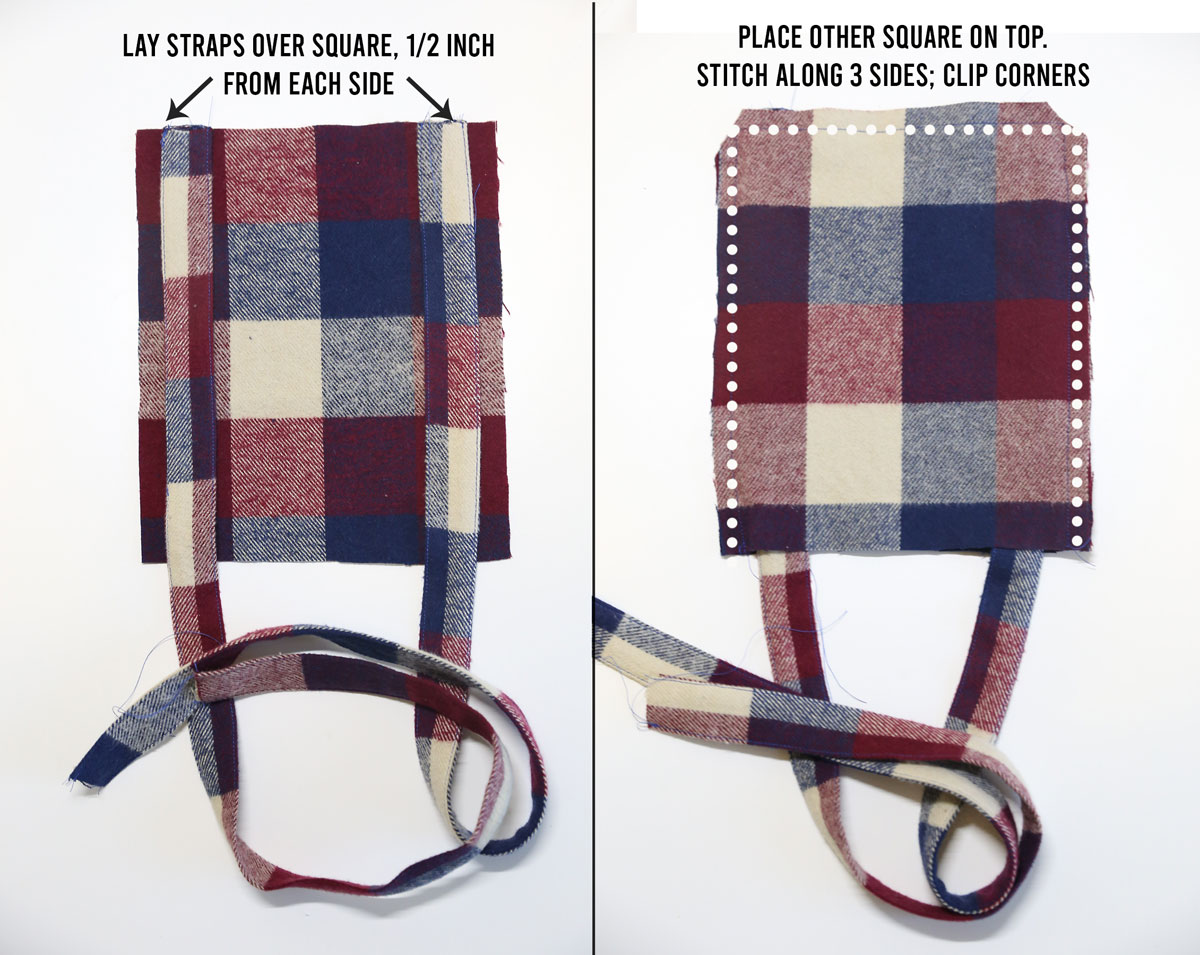
Lay one pinafore square down on a table, right side facing up. Place a strap just barely over half an inch from each side and pin, as shown below.
Lay the other pinafore square on top of the first, right sides facing. Pin up one side, across the top, and down the other side. Sew, using a half inch seam allowance. BE SURE NOT TO CATCH THE STRAPS IN THE SIDE SEAMS.
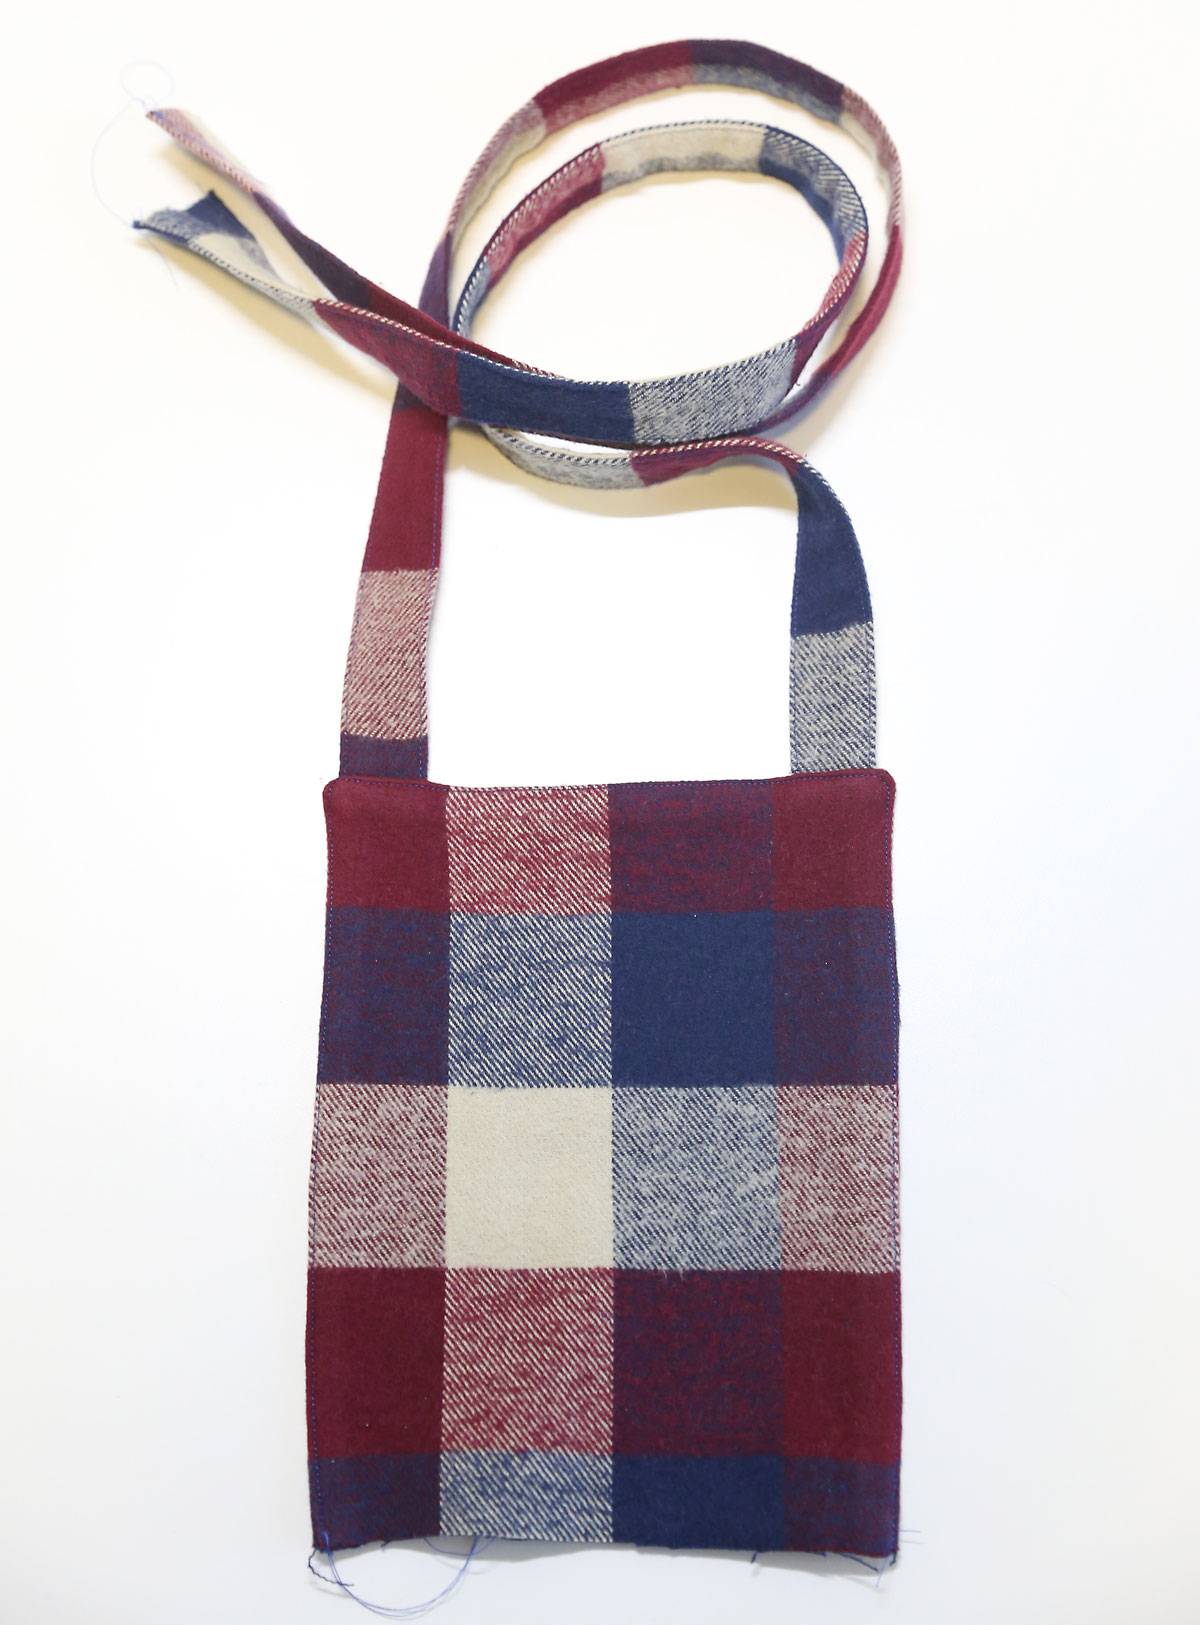
Clip across the top corners and turn the pinafore square right side out. Press well and topstitch along the 3 sewn edges if desired.
How to Make a Pinafore Dress: Pleat the skirt
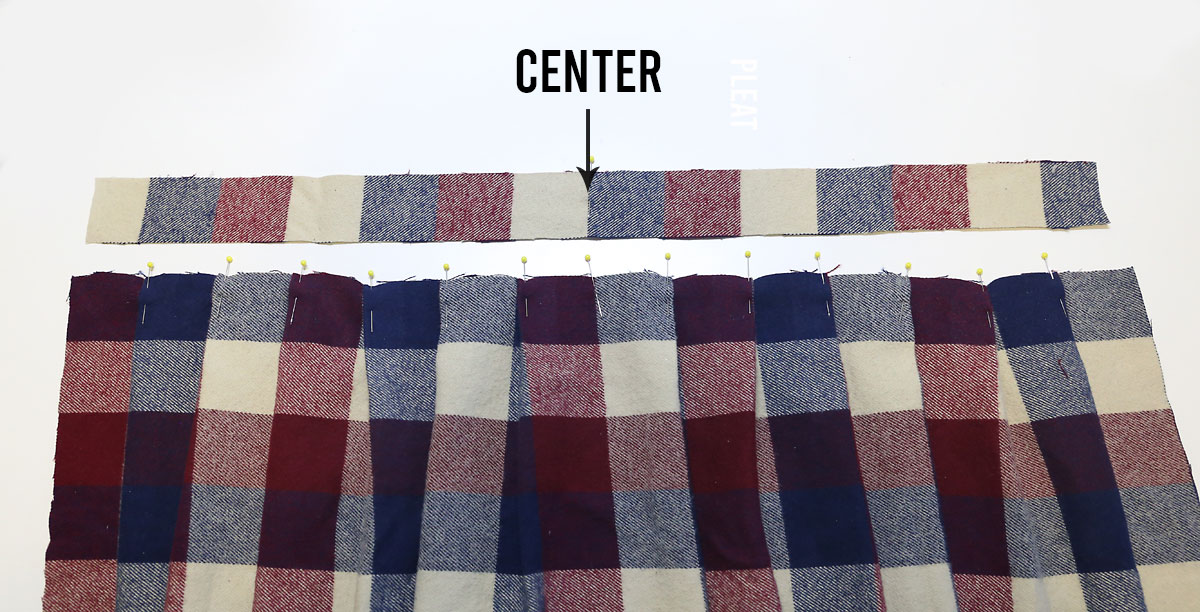
Place on waistband piece down on a table. Mark the center. Place the skirt piece below it. Mark the center.
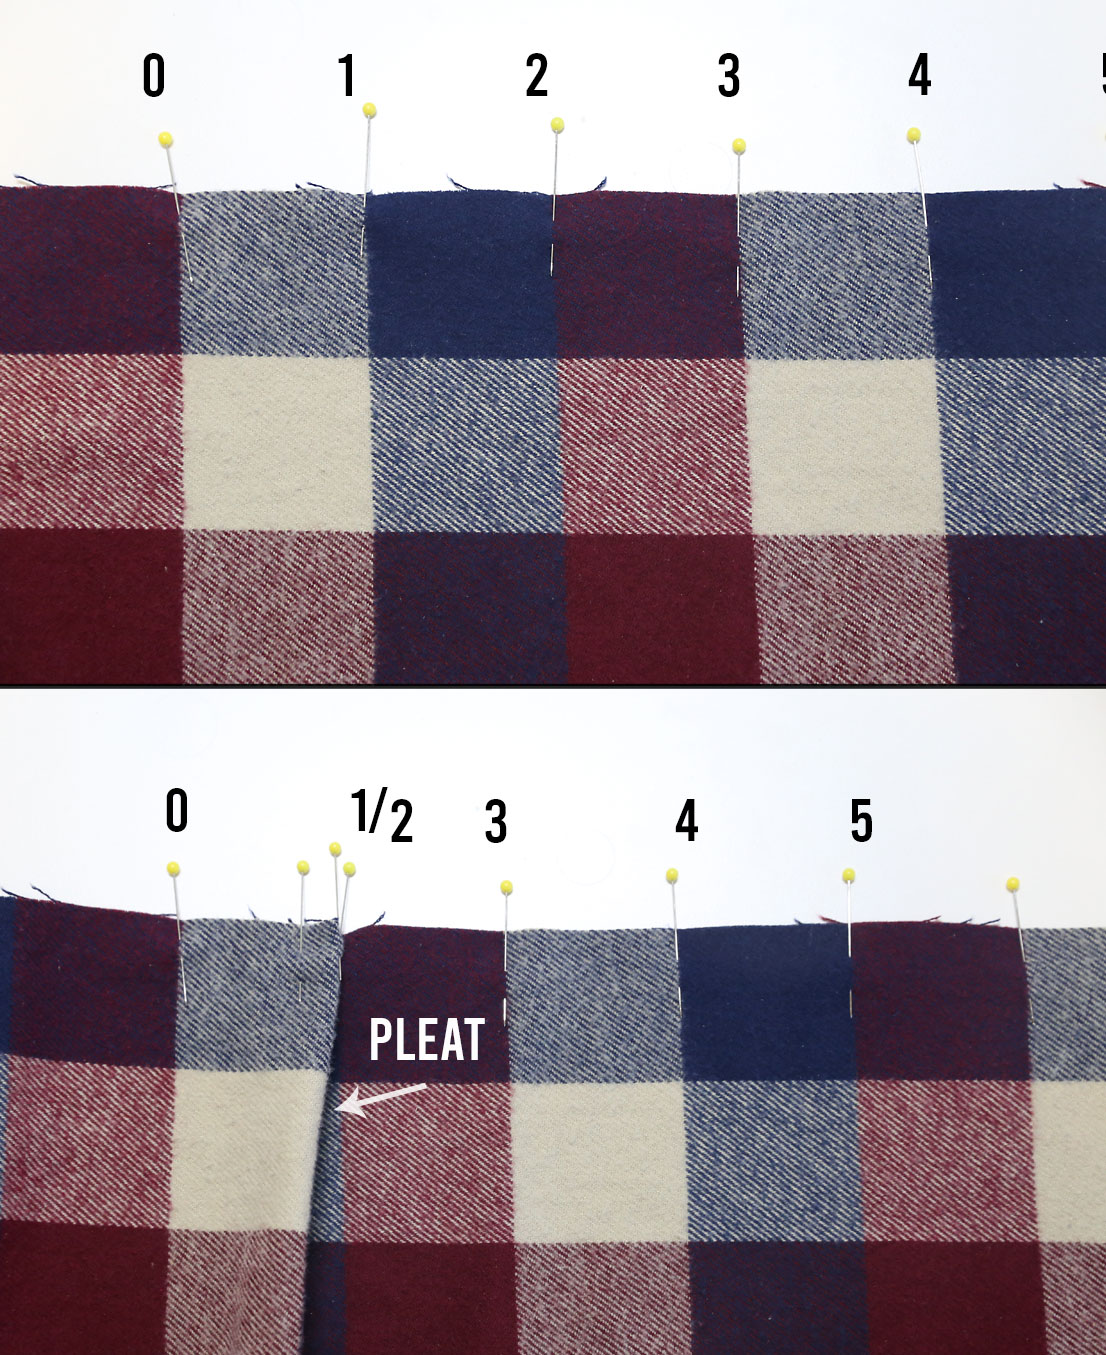
Starting from the center of the skirt piece, measure out and pin at two inch intervals, both to the right side and to the left. In the photo below I’ve number the pins, 0 being the center, then 1, 2, 3 etc.
Grab pin 2 and match it up with pin 1, folding the excess fabric underneath toward the center. This creates your first pleat. Pin the pleat to secure.
Then take pin 4 and match it to pin 3, creating another pleat. Continue pleating from the center outward on each side until your skirt piece is roughly the same width as your waistband piece (the skirt may end up slightly wider on each side than the waistband, that’s ok).
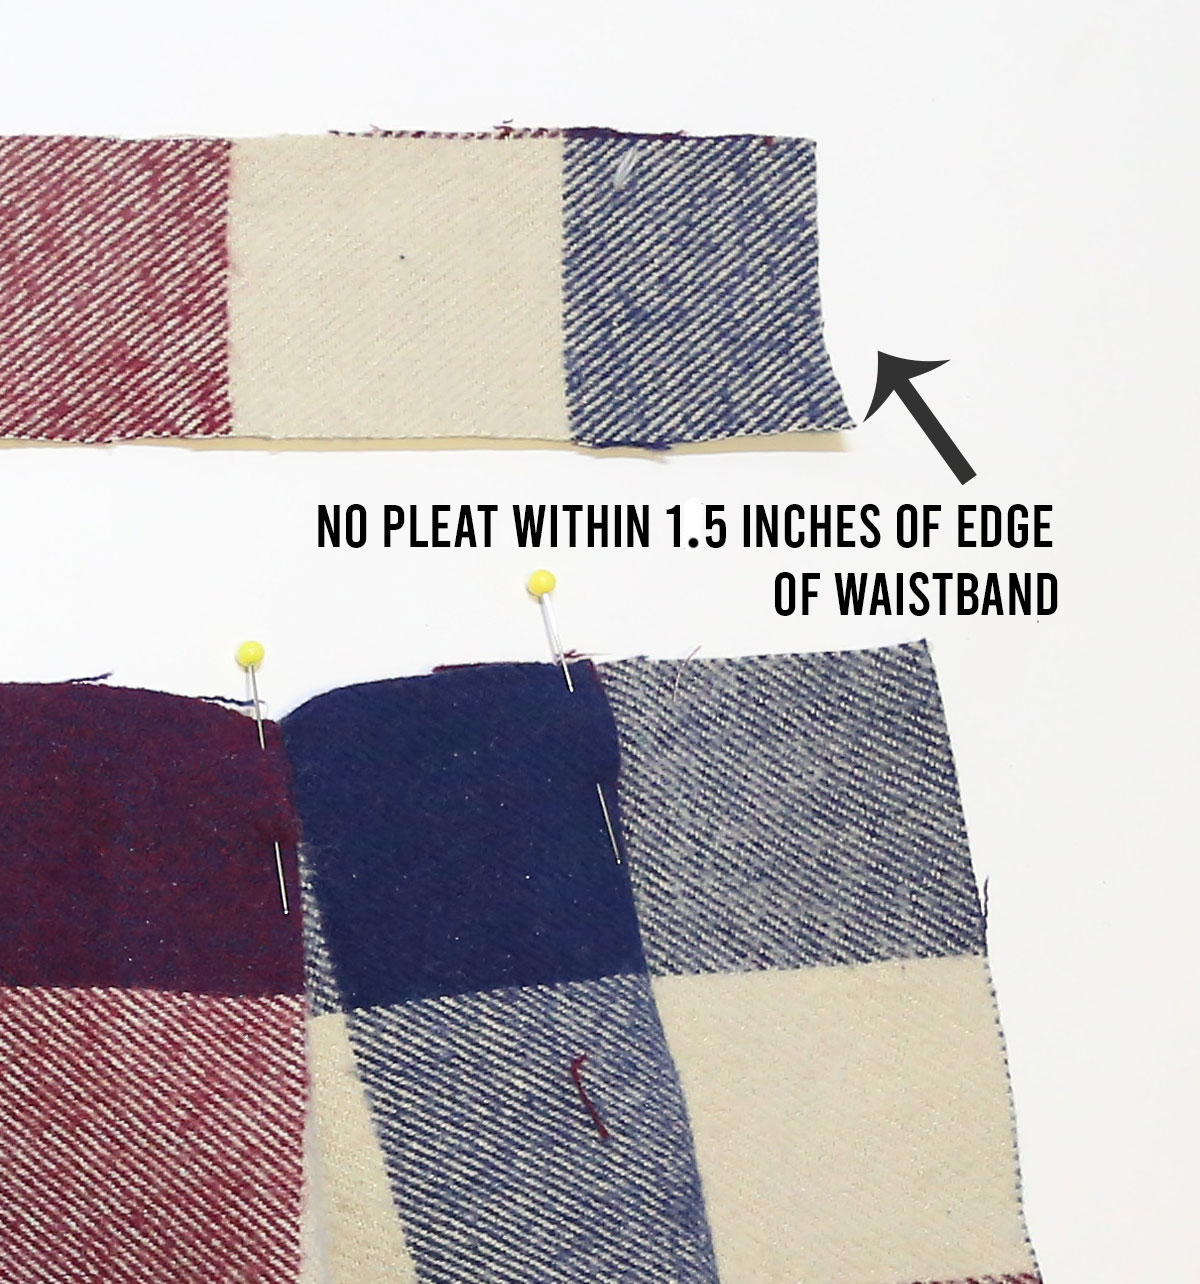
NOTE: You do not want to have pleats right at the edges of the waistband because you will be installing a zipper there. Make sure your last pleat is 1.5 inches away from the edge of the waistband. If you end up having a pleat very close to the end, just remove that pleat.
NOTE: Your pleats don’t have to be 2 inches apart! That’s just what I did because it’s easy. But if you prefer to have fewer pleats, feel free to space them further apart, or to make your pleats more shallow. If your skirt piece isn’t twice the width of your waistband piece, you’ll need to add fewer pleats or space them farther apart. Just play with the spacing until your skirt piece is roughly the same width as your waistband.
As you create your pleats, press them down about 2 inches from the top.
Sew across the top of the pleats, 1/4 inch from the edge, to keep them in place.
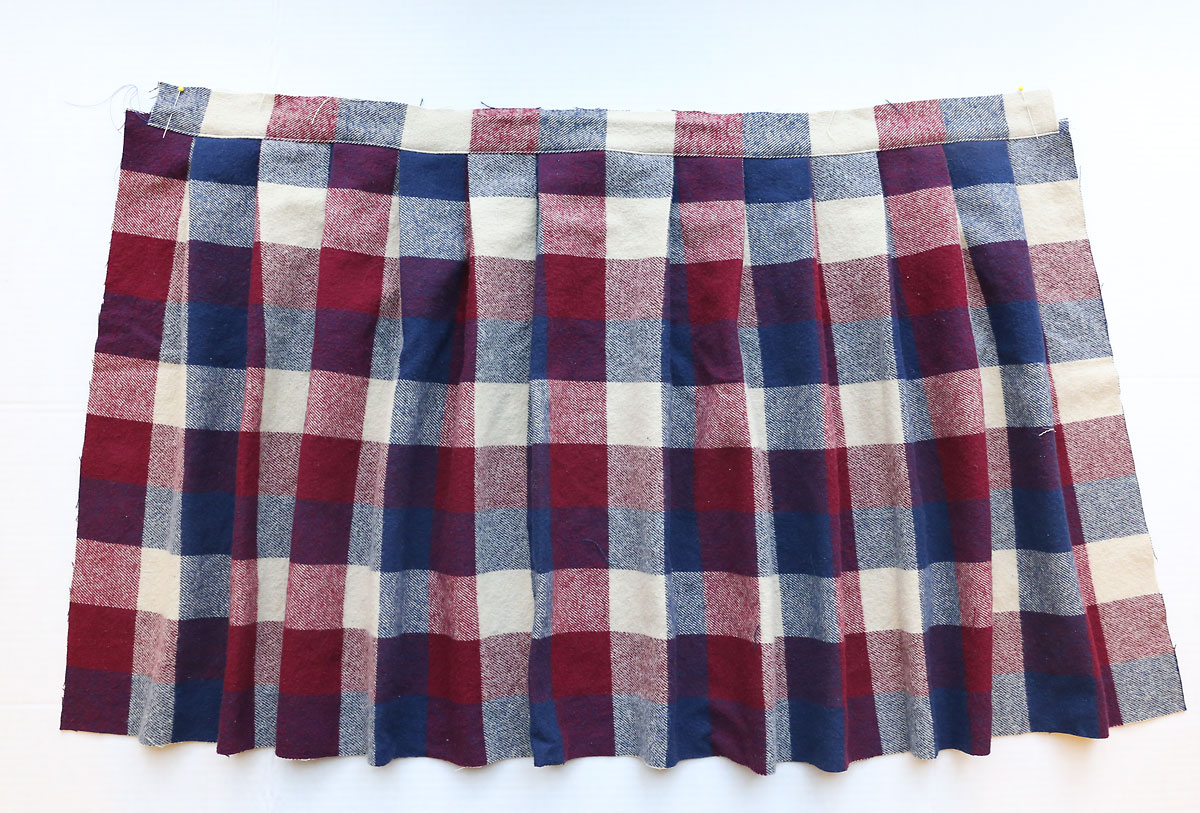
Then place one waistband piece along the top edge of the pleated skirt, matching up centers and right sides facing. Sew the waistband piece to the skirt using 1/2 inch seam allowance and press.
Flip the waistband piece up and press the seam allowance up. Topstitch (if desired) over the seam allowance. This has been done in the photo above.
How to Make a Pinafore Dress: Install the zipper
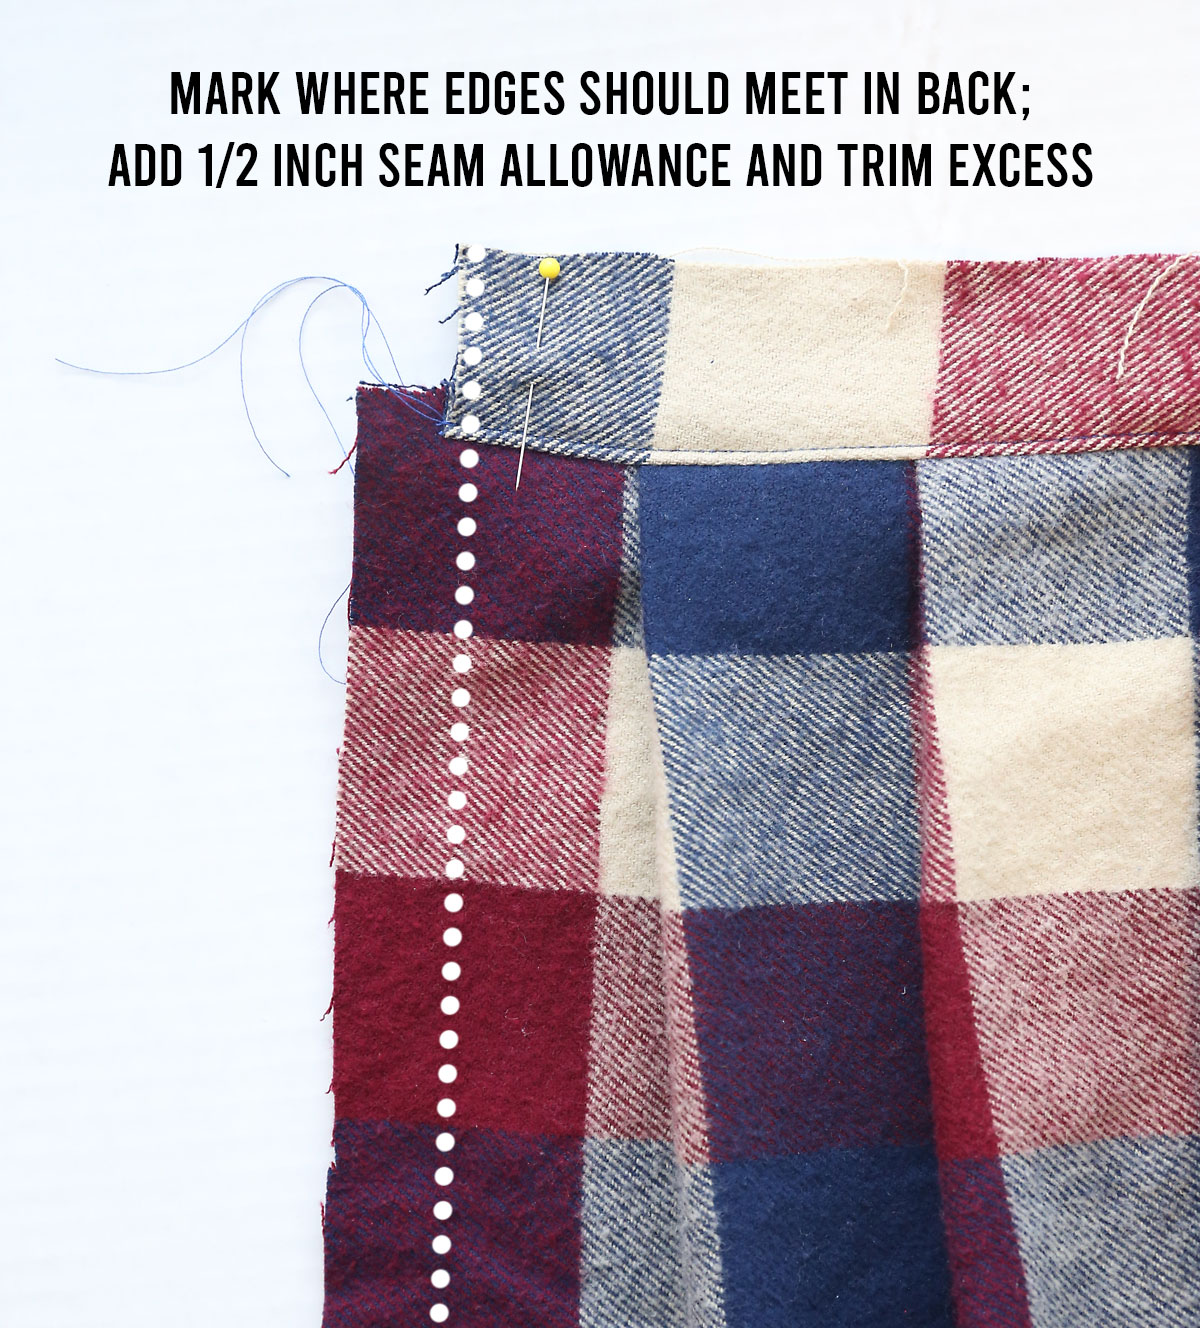
At this point, you’ll want to wrap the skirt around the girl and pin the sides together in the back where it feels most comfortable. Be sure the girl is wearing whatever shirt she’ll usually wear under the pinafore when you do this.
Mark where the two pieces should meet. Add 1/2 an inch to each side for seam allowance and trim any excess fabric at this point.
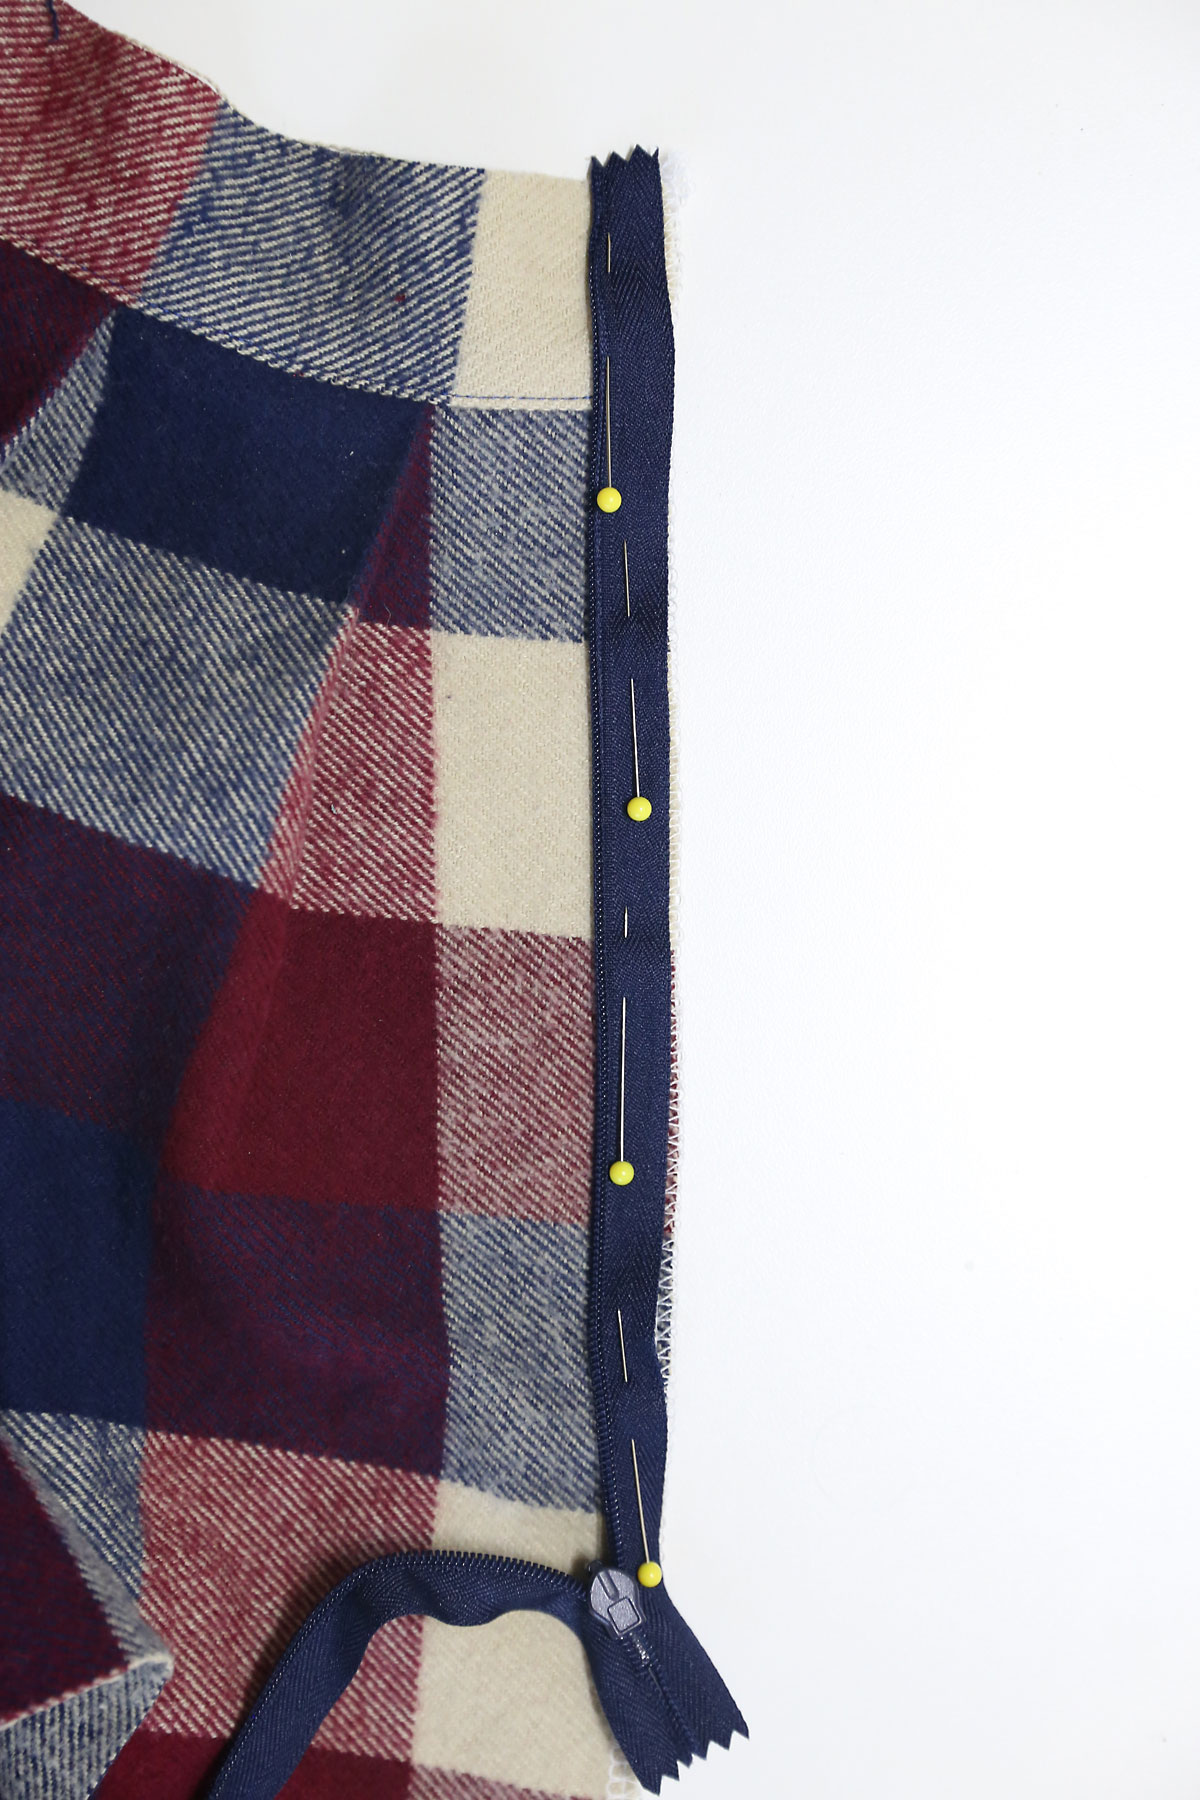
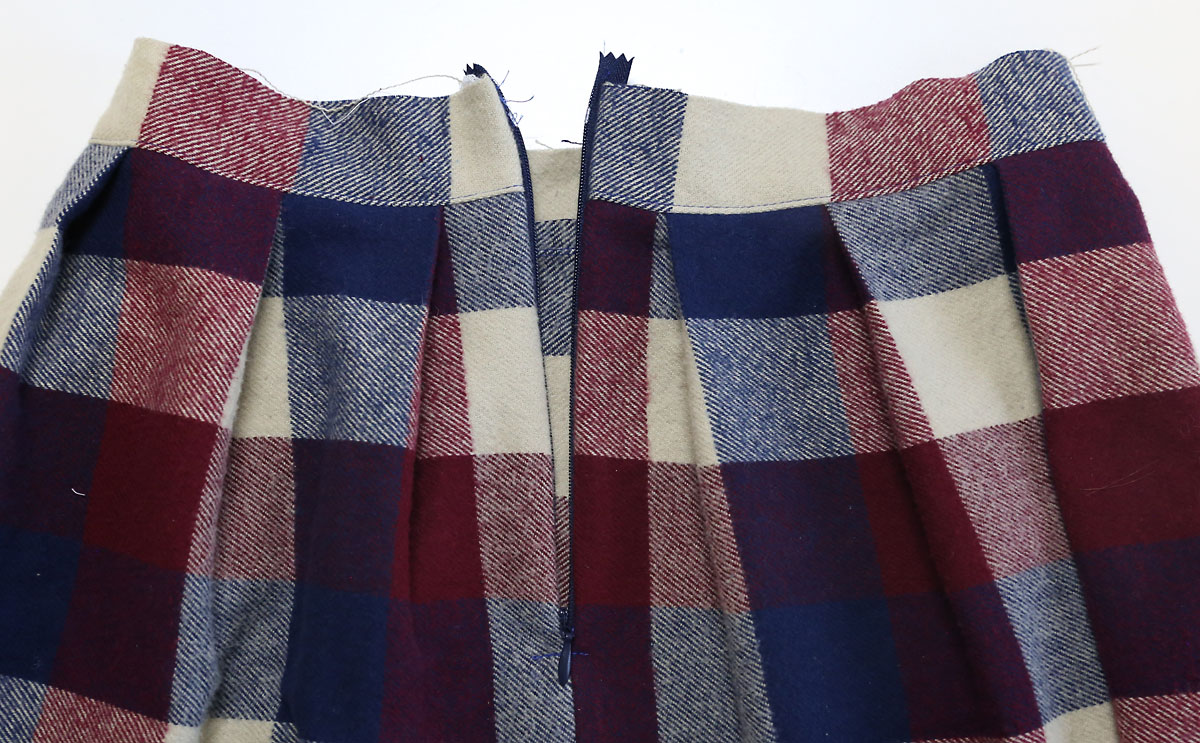
Now you’ll install an invisible zipper. The zipper teeth should start 1/2 inch below the top of the waistband. That probably means that the zipper tape will be just above the top of the waistband, as seen below.
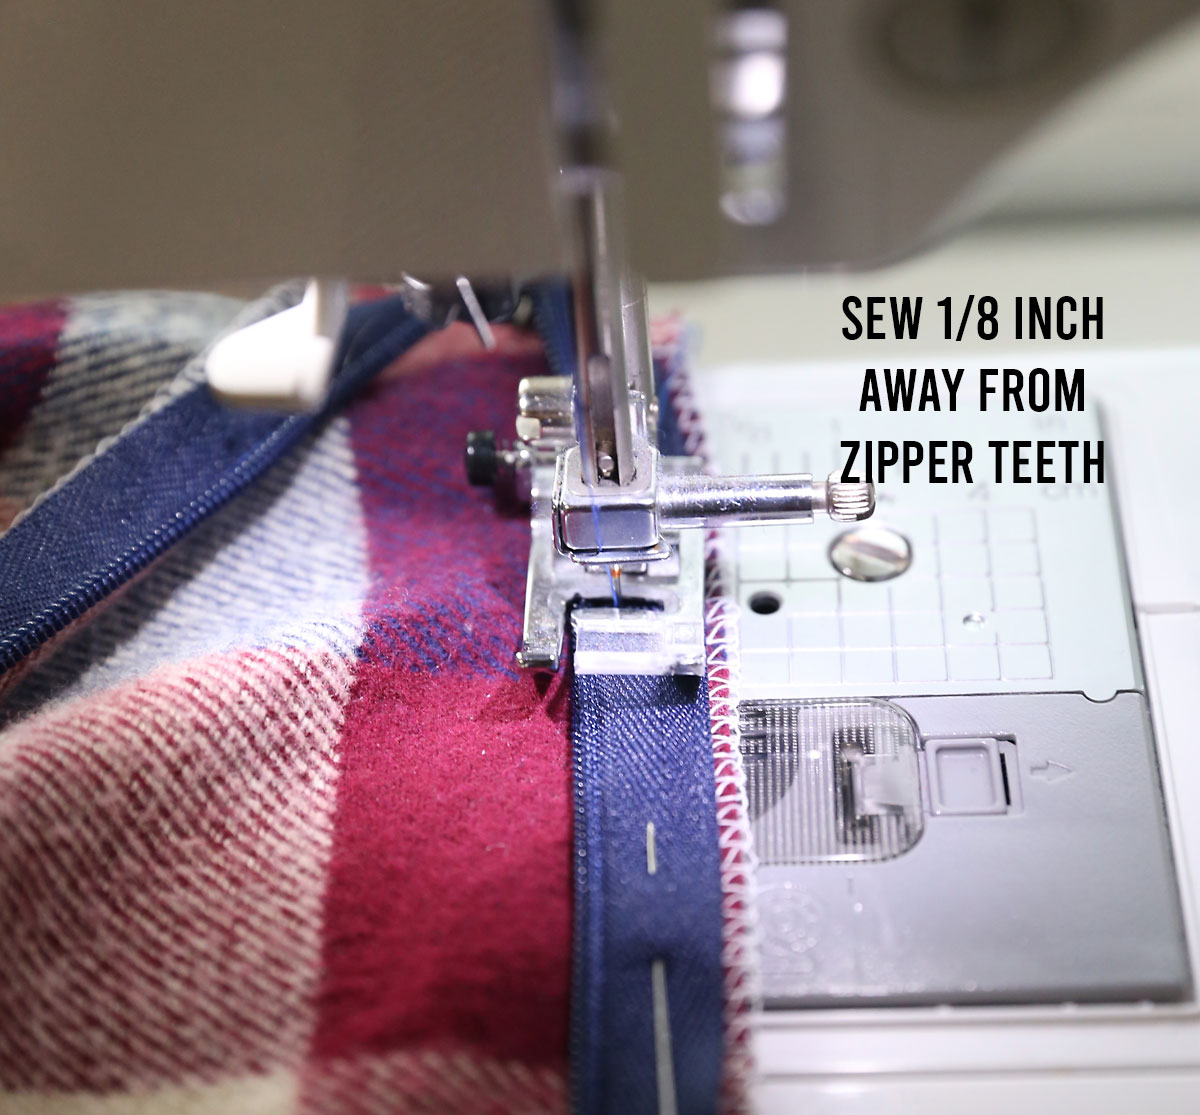
If you need help installing an invisible zipper, this is a great tutorial. The tutorial uses an invisible zipper foot, but you don’t actually need one. You can use your normal presser foot; but be sure you press the zipper tape open first, and then sew an even 1/8 inch away from the zipper feet.
Sew up the rest of the back seam and press open.
Zipper installed:
How to Make a Pinafore Dress: Attach the Pinafore
Ok, now the skirt is sewn and the pinafore is sewn and it’s time to connect them together.
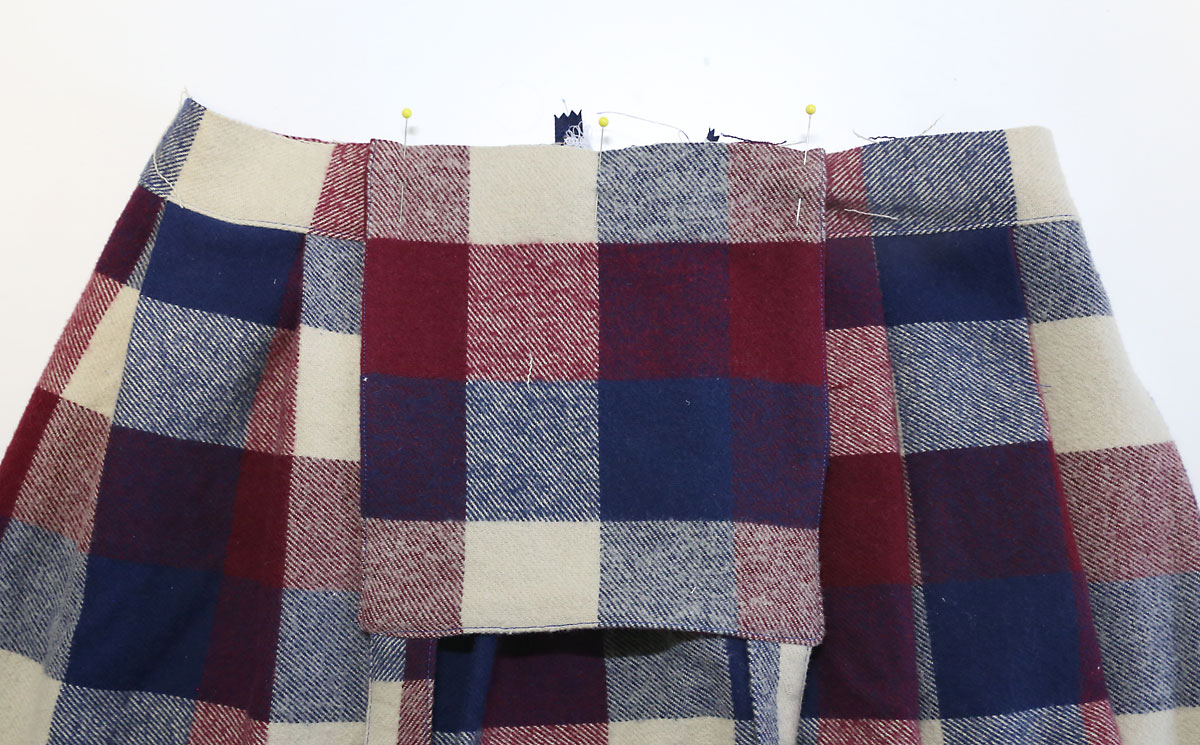
Find the front center of the skirt waistband and mark it. Place the pinafore square on top of the skirt, matching raw edges and center points. Pin. (You can sew the pinafore to the skirt now if you want, just use a 1/4 inch seam allowance.)
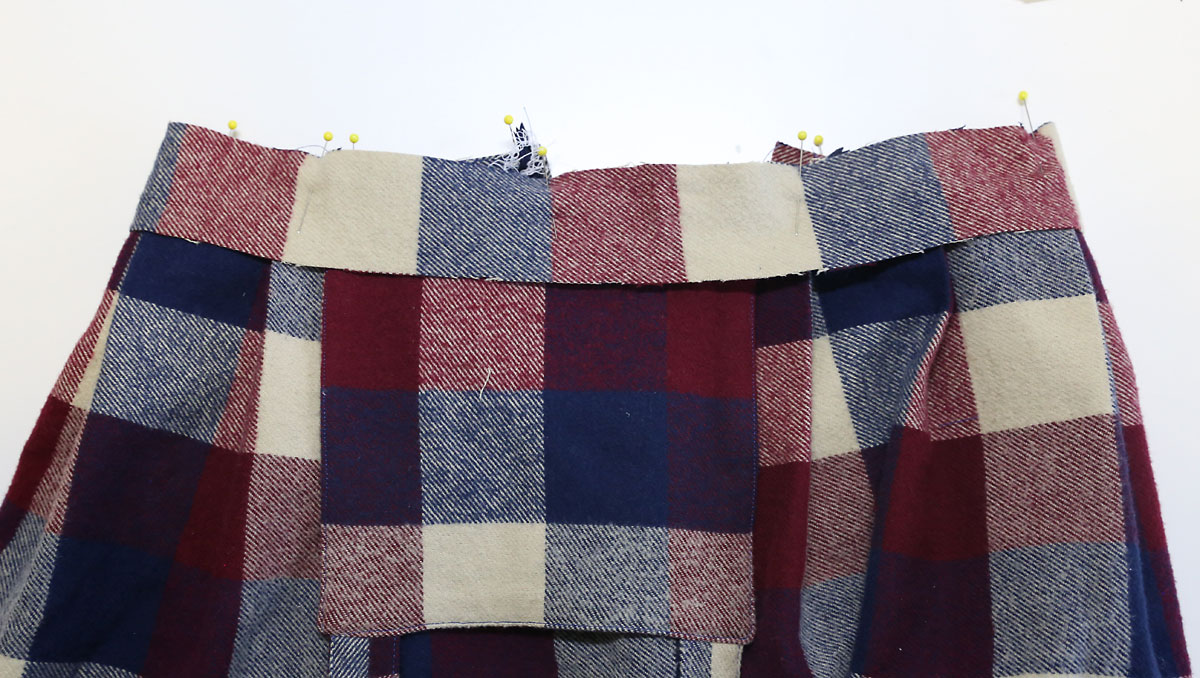
THEN match and pin the other waistband piece (which is now called the waistband facing) to the skirt waist, sandwiching the pinafore square in between.
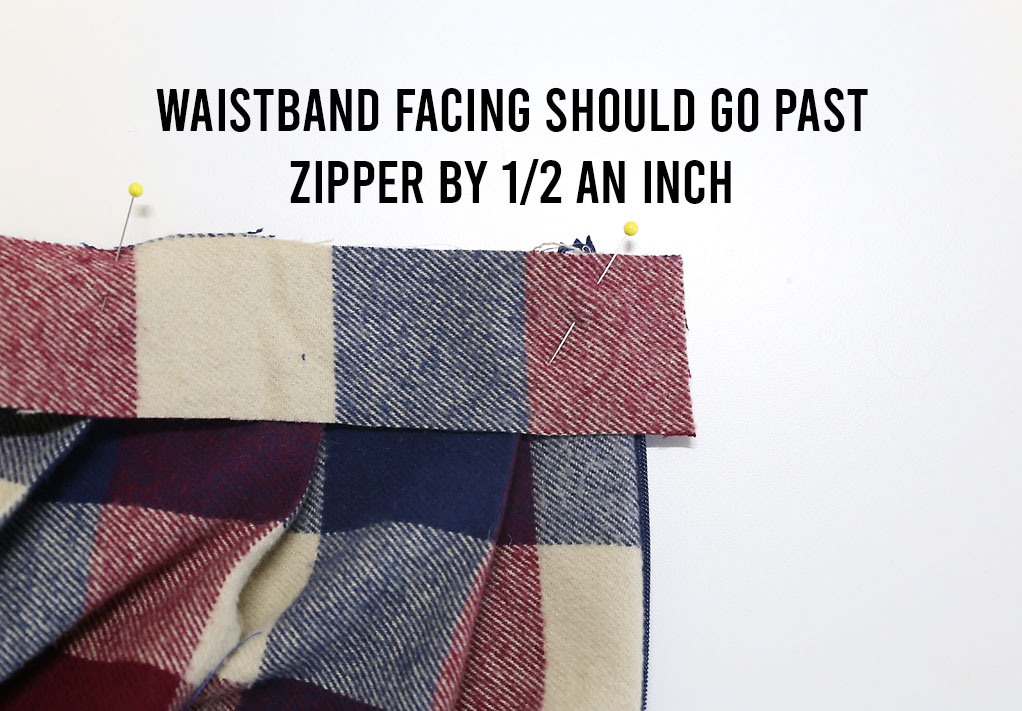
The edges of the waistband facing should extend 1/2 inch beyond the zipper, as shown below:
Sew all the way around the top, sewing the waistband facing to the waistband (with the pinafore sandwiched in between).
Now we’re going to finish off the facing so the dress looks tidy and very professional on the inside.
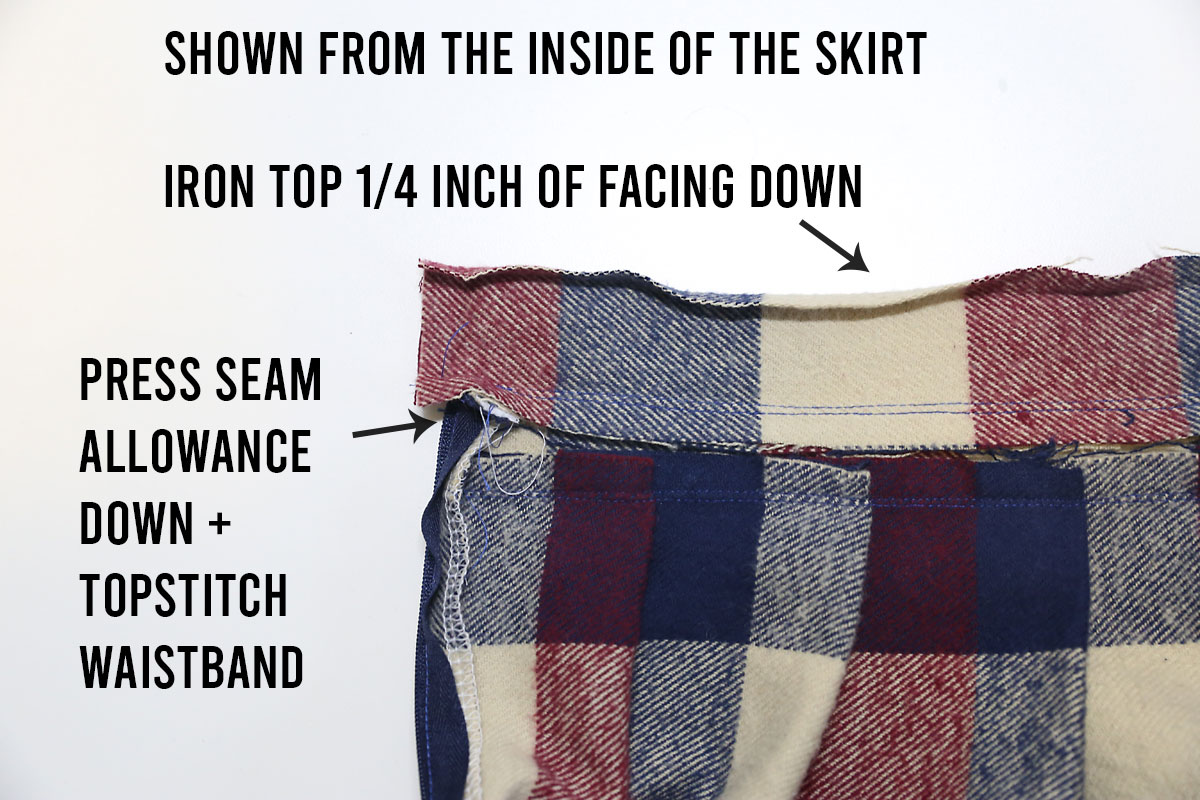
Press the waistband up, and the seam allowance down. Go ahead and topstitch over the seam allowance if desired, starting and ending 1/2 an inch away from the zipper.
You also need to turn down the top 1/4 inch of the facing and press:
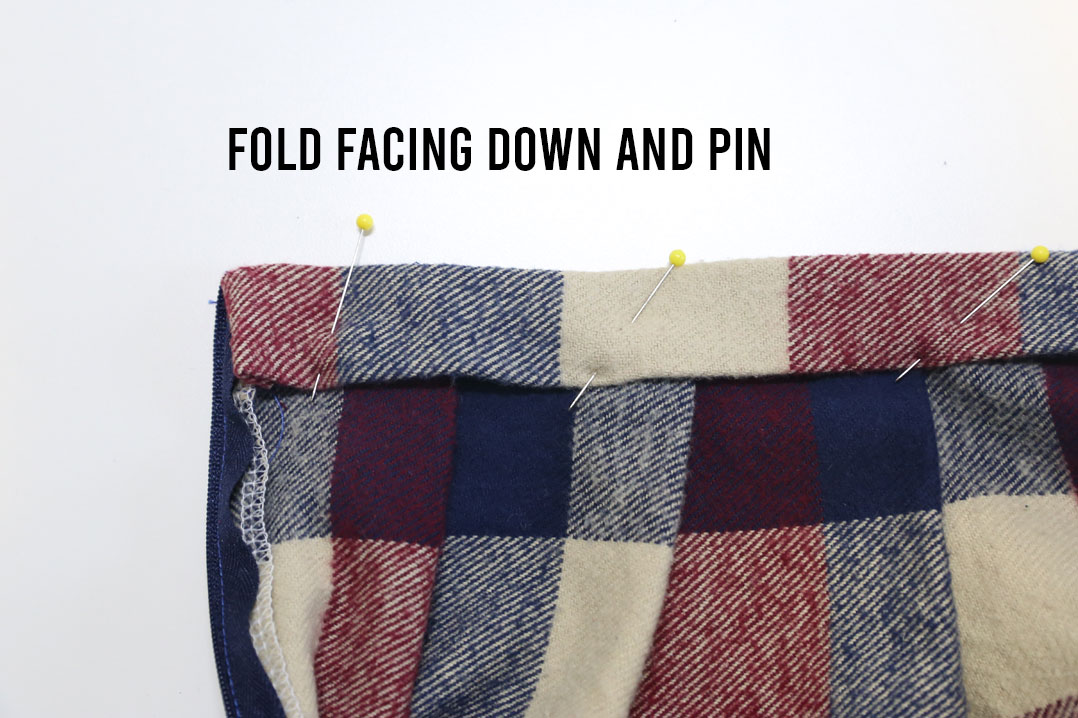
Now you can fold the waistband facing to the inside, and it will completely cover the seam allowances at the top and bottom of the waistband. Tuck in the short edge that’s closest to the zipper as well.
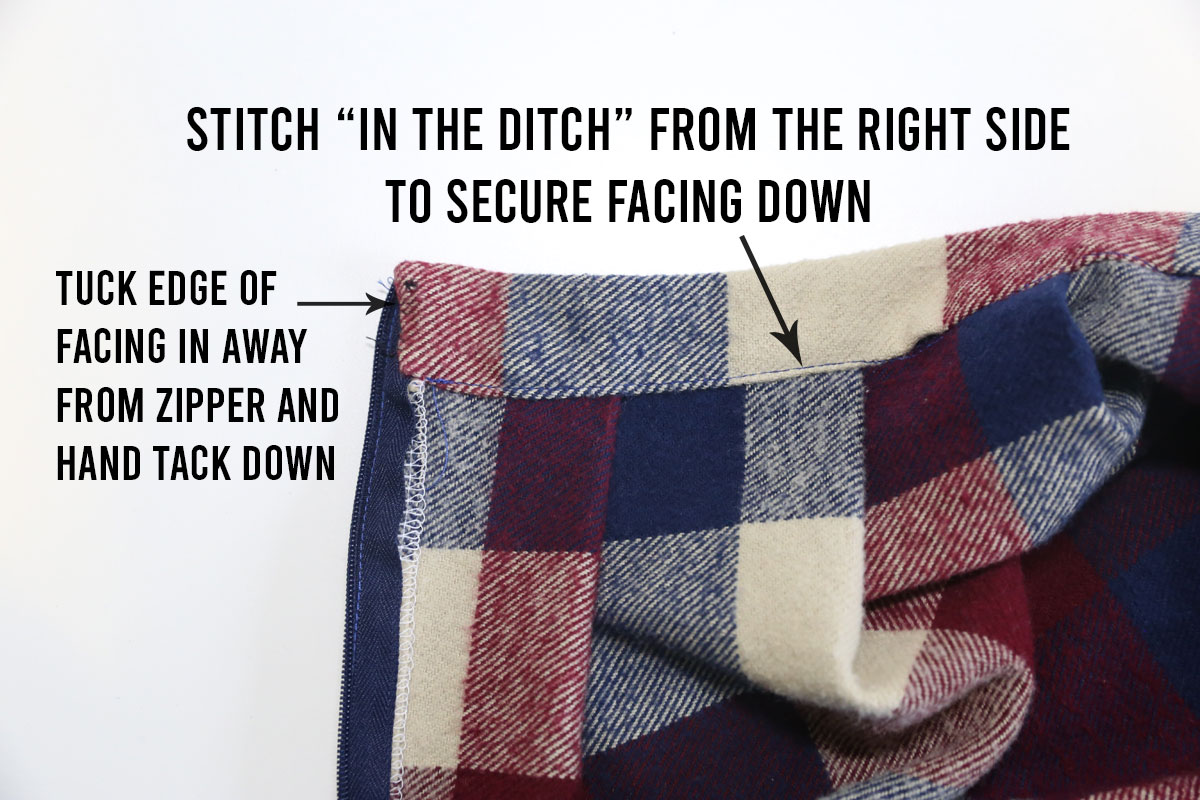
Pin it down, and from the outside sew in the seam between the skirt and waistband. This is called “stitching in the ditch”.
You also want to tuck in the edge of the facing that’s close to the zipper and handtack it down so it’s out of the way of the zipper.
How to Make a Pinafore Dress: Finishing
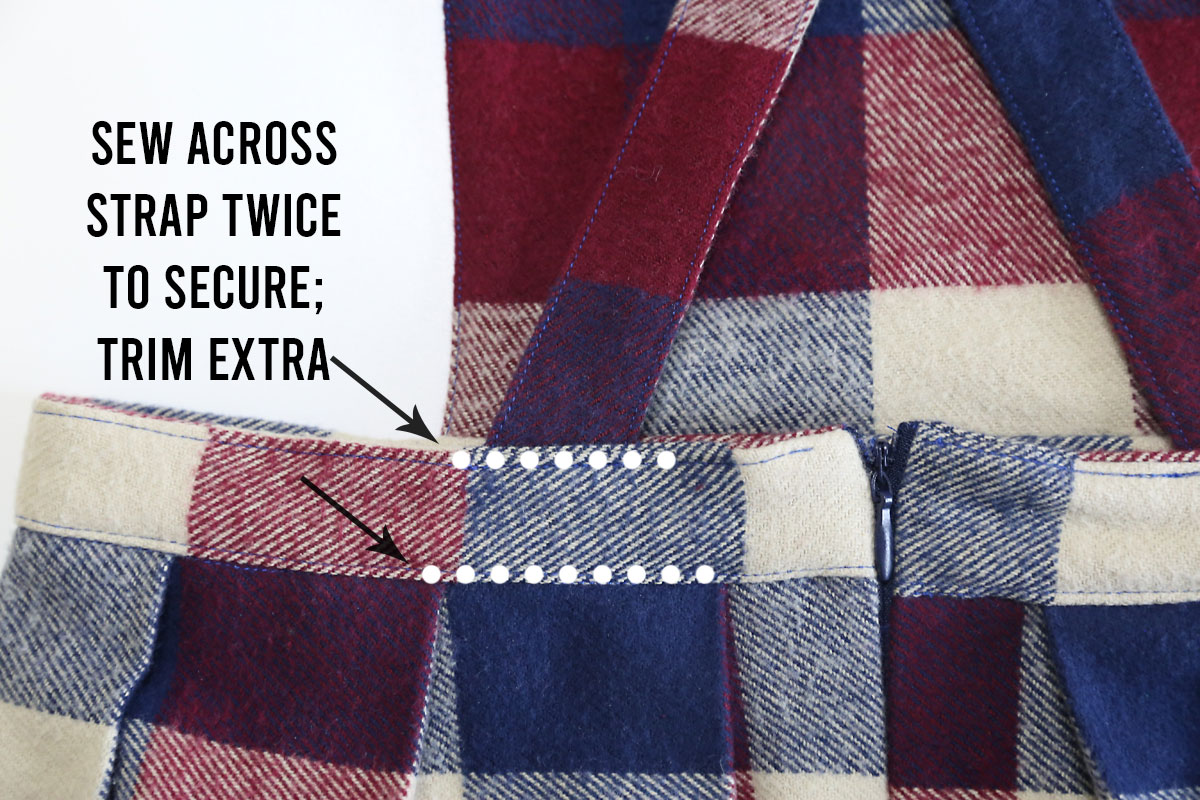
Ok, nearly there! Now you can try the dress on your girl and decide where you want the straps to attach in back. You can sew the straps in place OR add buttons inside (or outside) the waistband. If you add buttons, you’ll need to finish off the ends of your straps and add a buttonhole.
I found that with the zipper open, my daughter can put the dress on and take it off without the straps needing to come undone. So I just sewed the straps to the back of the dress. I sewed along both lines of topstitching on the waistband.
The last step is to fold up the hem 1/2 inch, then another 1/2 inch and sew around the bottom. Pleated pinafore done!
Click here for more sewing for girls tutorials


Grace Achord says
Thanks for the detailed tutorial! I just finished one for me and have two more cut out for a couple of my daughters. Very helpful 🙂
Helen says
thank you SO much for this wonderful pinafore dress! it is exactly what I have been looking for!!!