
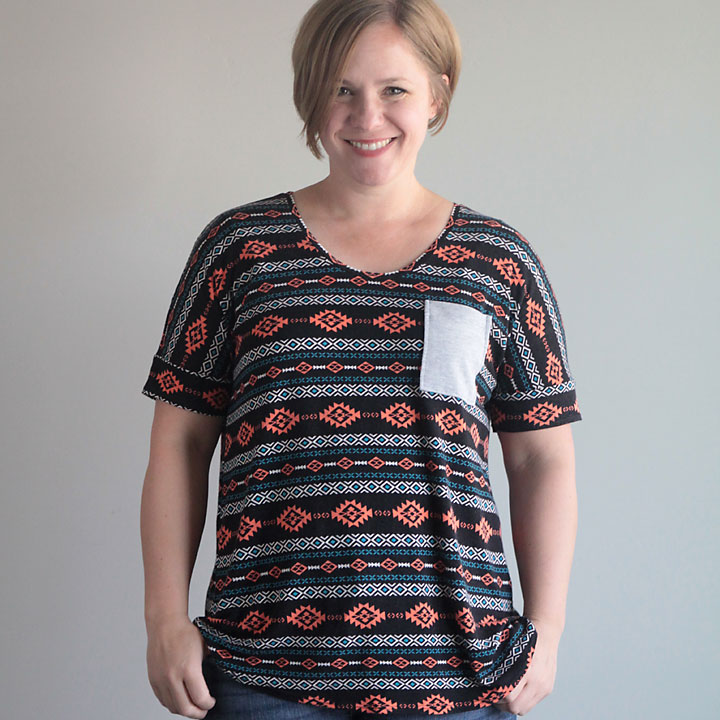
Last week I shared a new free pattern for the breezy tee in size L. Today I wanted to show another breezy tee to show the difference fabric choice makes in how it fits. Also, I’ll walk through the steps for adding the pocket that’s included in the pattern. I love this pattern because it’s loose and comfortable AND it has sleeves, AND it’s super easy to sew up (think an hour or less!).
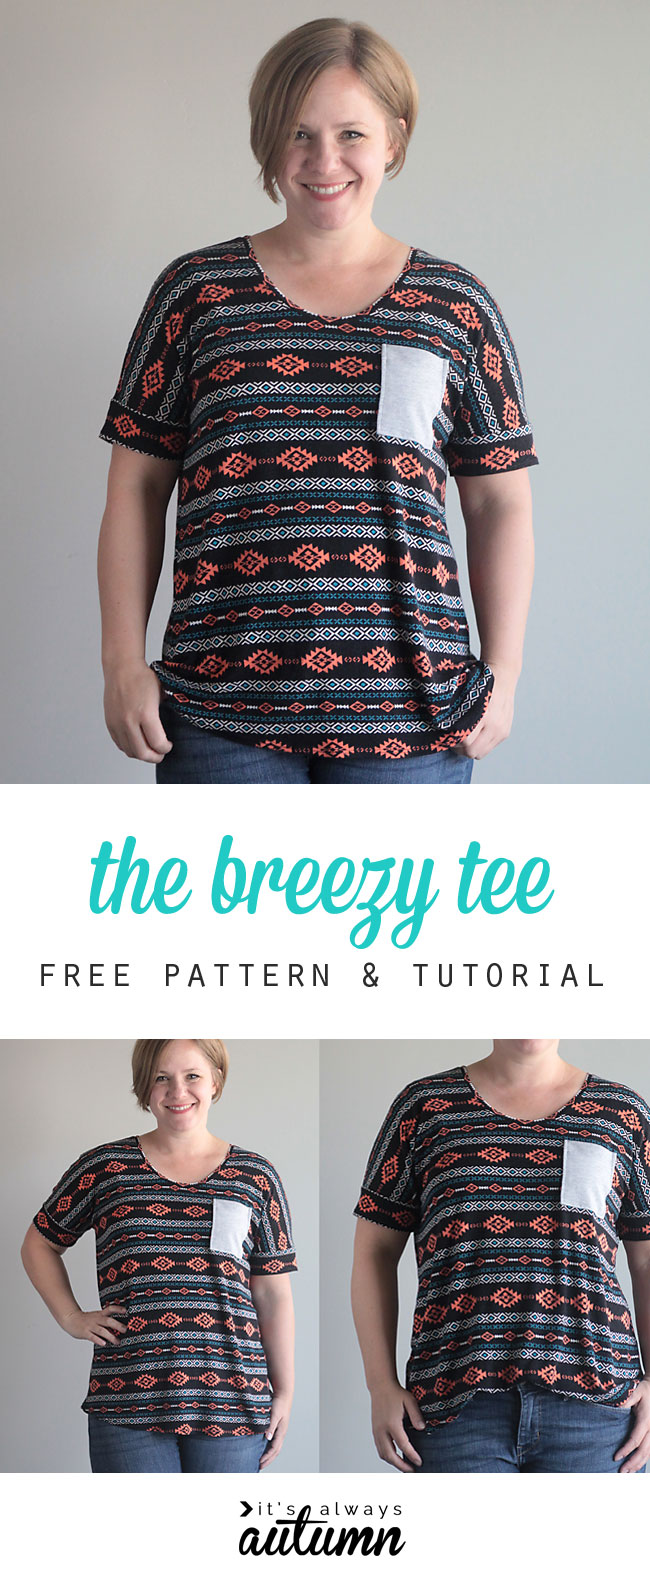
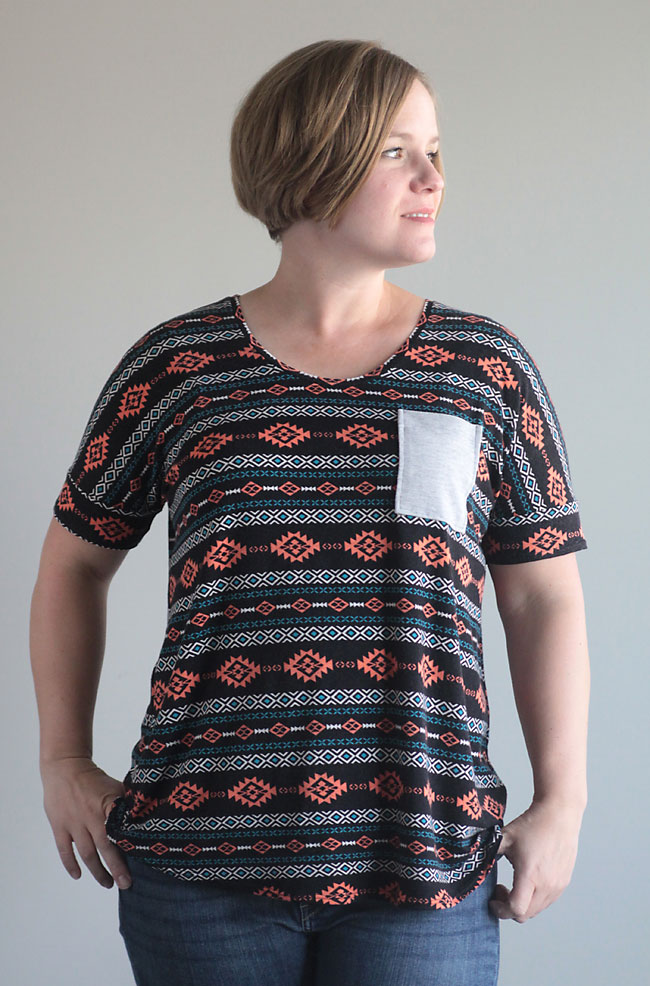
The fabric I used for today’s shirt is a cotton rayon spandex knit from Girl Charlee (no longer in stock, this print is similar in fabric content and it’s just plain gorgeous). It’s super soft and quite stretchy. As a result, the fit on this top is a little looser and drapier than on the first breezy tee I made, even though the pieces were cut to exactly the same size.
So that’s something to keep in mind when sewing up any patterns using knit materials.
Adding a pocket is very easy and using a contrast fabric is fun. I used a light grey because it’s what I had on hand – I wanted a coral pocket that would coordinate with the navajo print but I couldn’t find any matching knit, so grey it was.
On the free pattern which you can download here, you’ll see there’s a pocket pattern piece and a dotted line that shows the pocket placement on the shirt.
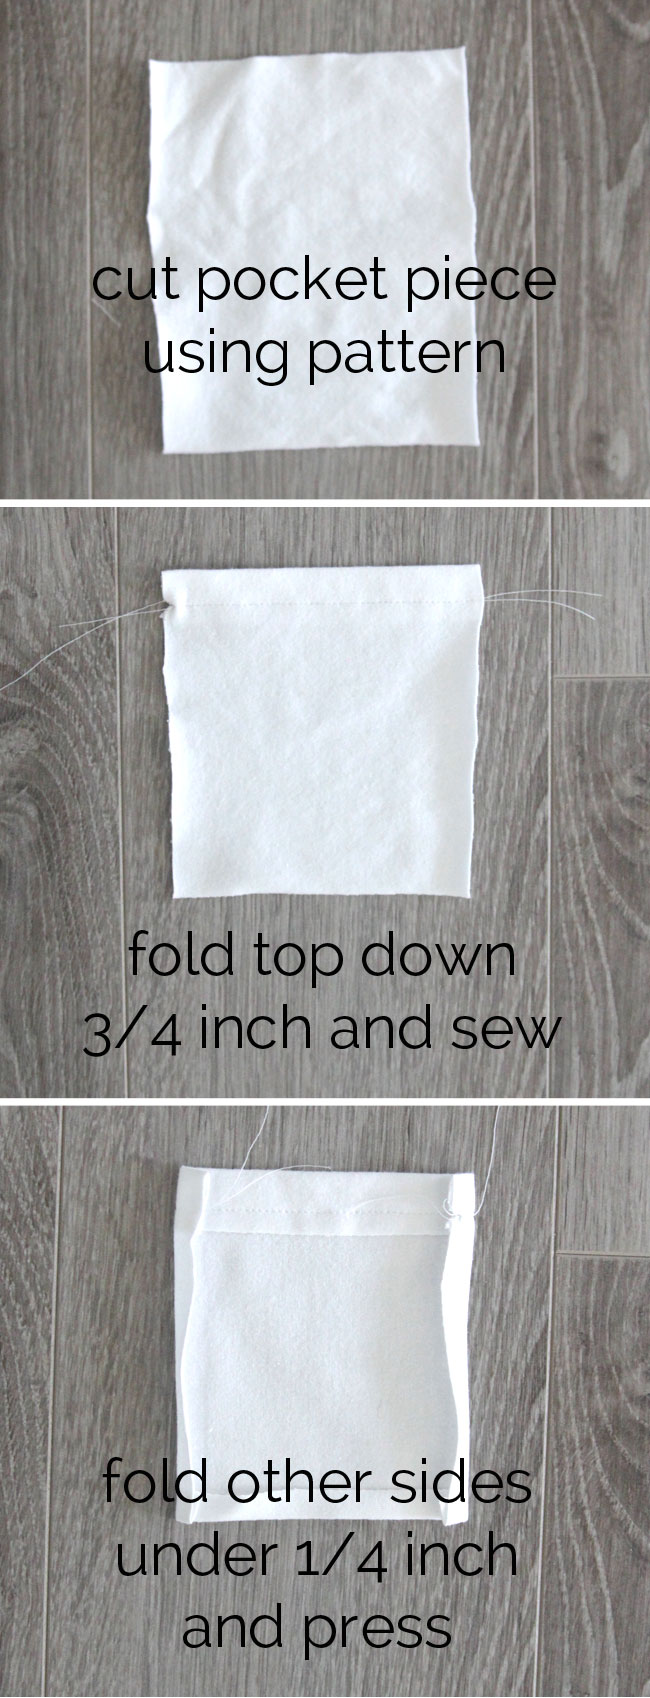
Cut out all the shirt pieces, including one pocket piece. Prep the pocket as shown below:
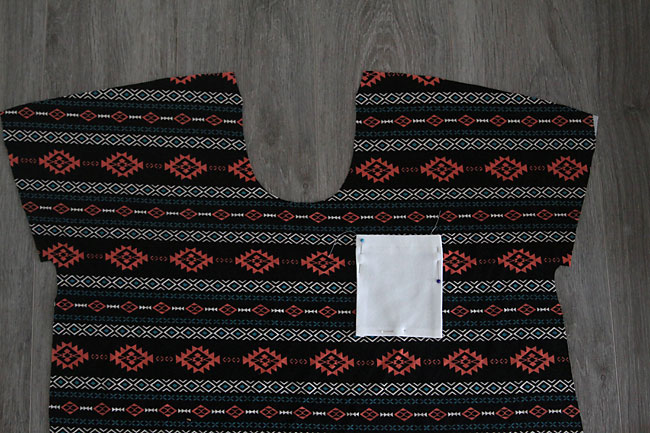
Then use the dotted placement guide on the pattern to figure out where to put the pocket on the front shirt piece. I place the pocket on the right side when you’re looking down at the shirt piece, which will make it sit over the left breast.

Pin the pocket on very well. Because both the pocket and the shirt piece will stretch, sewing on the pocket can be a little tricky and it helps to have lots of pins. I like to put the pins in sideways, as you can see below, so that as you sew around the pocket you can use the pins to help guide the material under the presser foot.
Sew the pocket on using a straight stitch, backstitching at the beginning and end. It might look a little wonky right after you sew. Press it out using lots of steam and it will look much better.
Then sew up the rest of the shirt as directed in the original tutorial.


Donna Rice says
I was wondering if there is a way to alter the pattern for different sizes. I would love to make matching shirts for me, my mom and my grandaughter.
Marcelena Melton says
I have used an existing shirt or skirt that I like the fit of to try and change the size where needed. I lengthened this shirt by laying out my favorite t-shirt and drew the length on the pattern I printed out. I know this insn’t detailed, but I hope it helps a little!
Cheryl says
I love these tee shirt patterns. I don’t mind the size large. I used to wear a size 3XXX and now I wear a size 10, so these will feel wonderful. Thank you for sharing your brainstorms. I know they don’t usually come easy.
Cheryl
jANET says
LOVE YOUR DESIGNS
SusaNne says
That’s gorgeous
Linda says
I love love love your patterns. I’ve made almost all of them, your instructions and patterns make it so easy. Thank you for the patterns and the valuable information, especially the one on material. I never knew to look for material by weight. Thank you sooooooo much!