
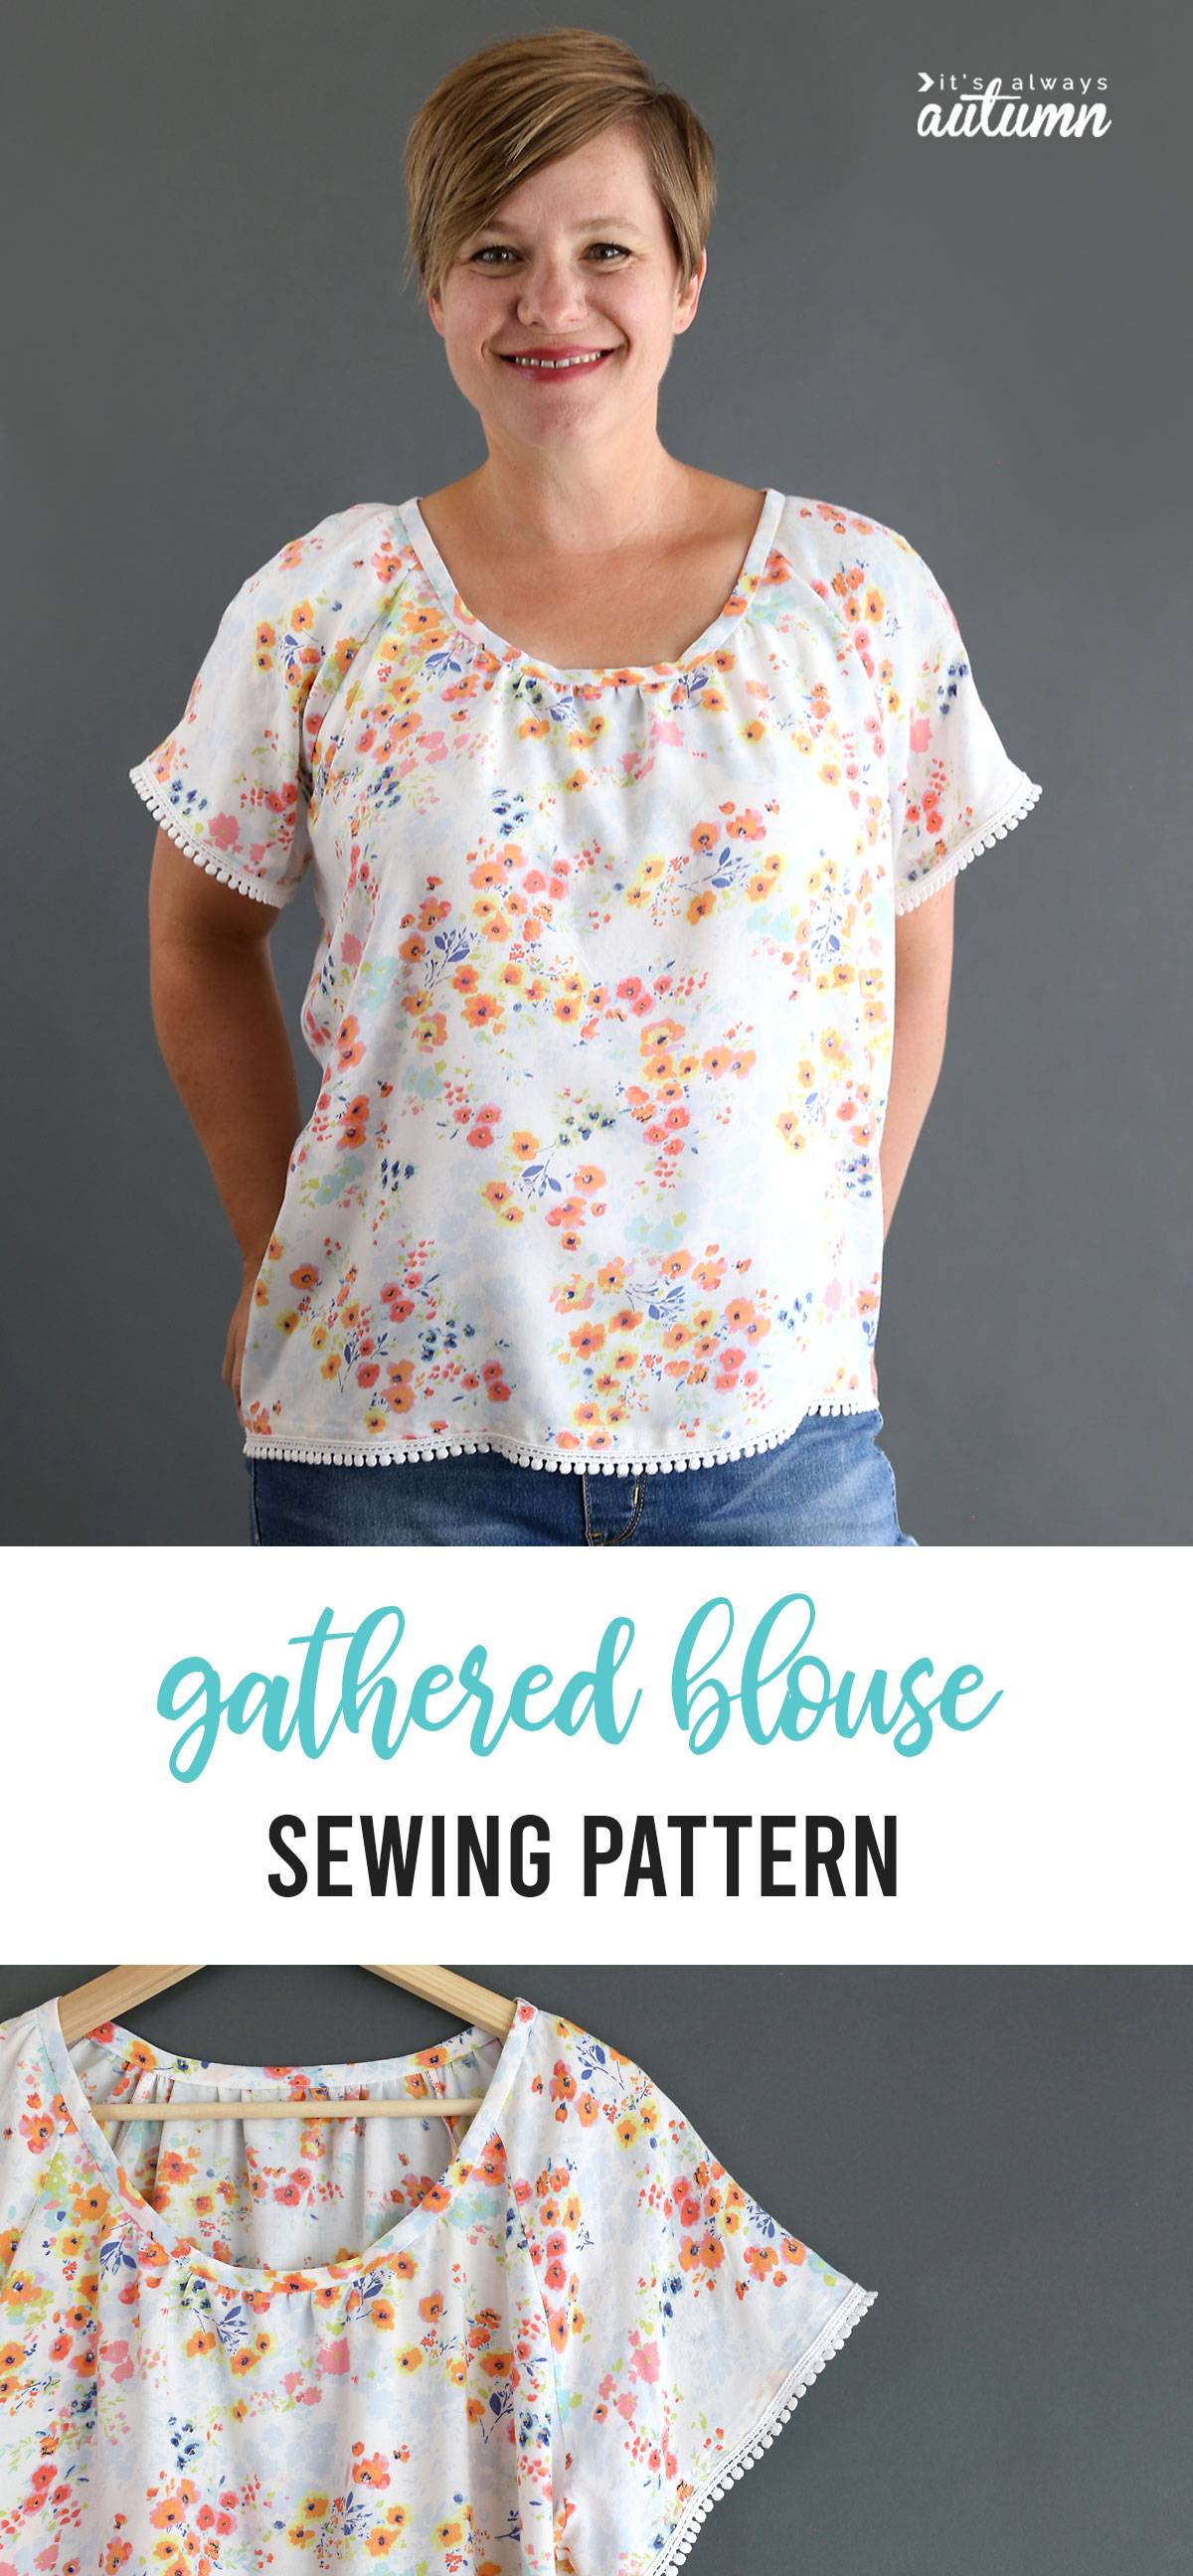
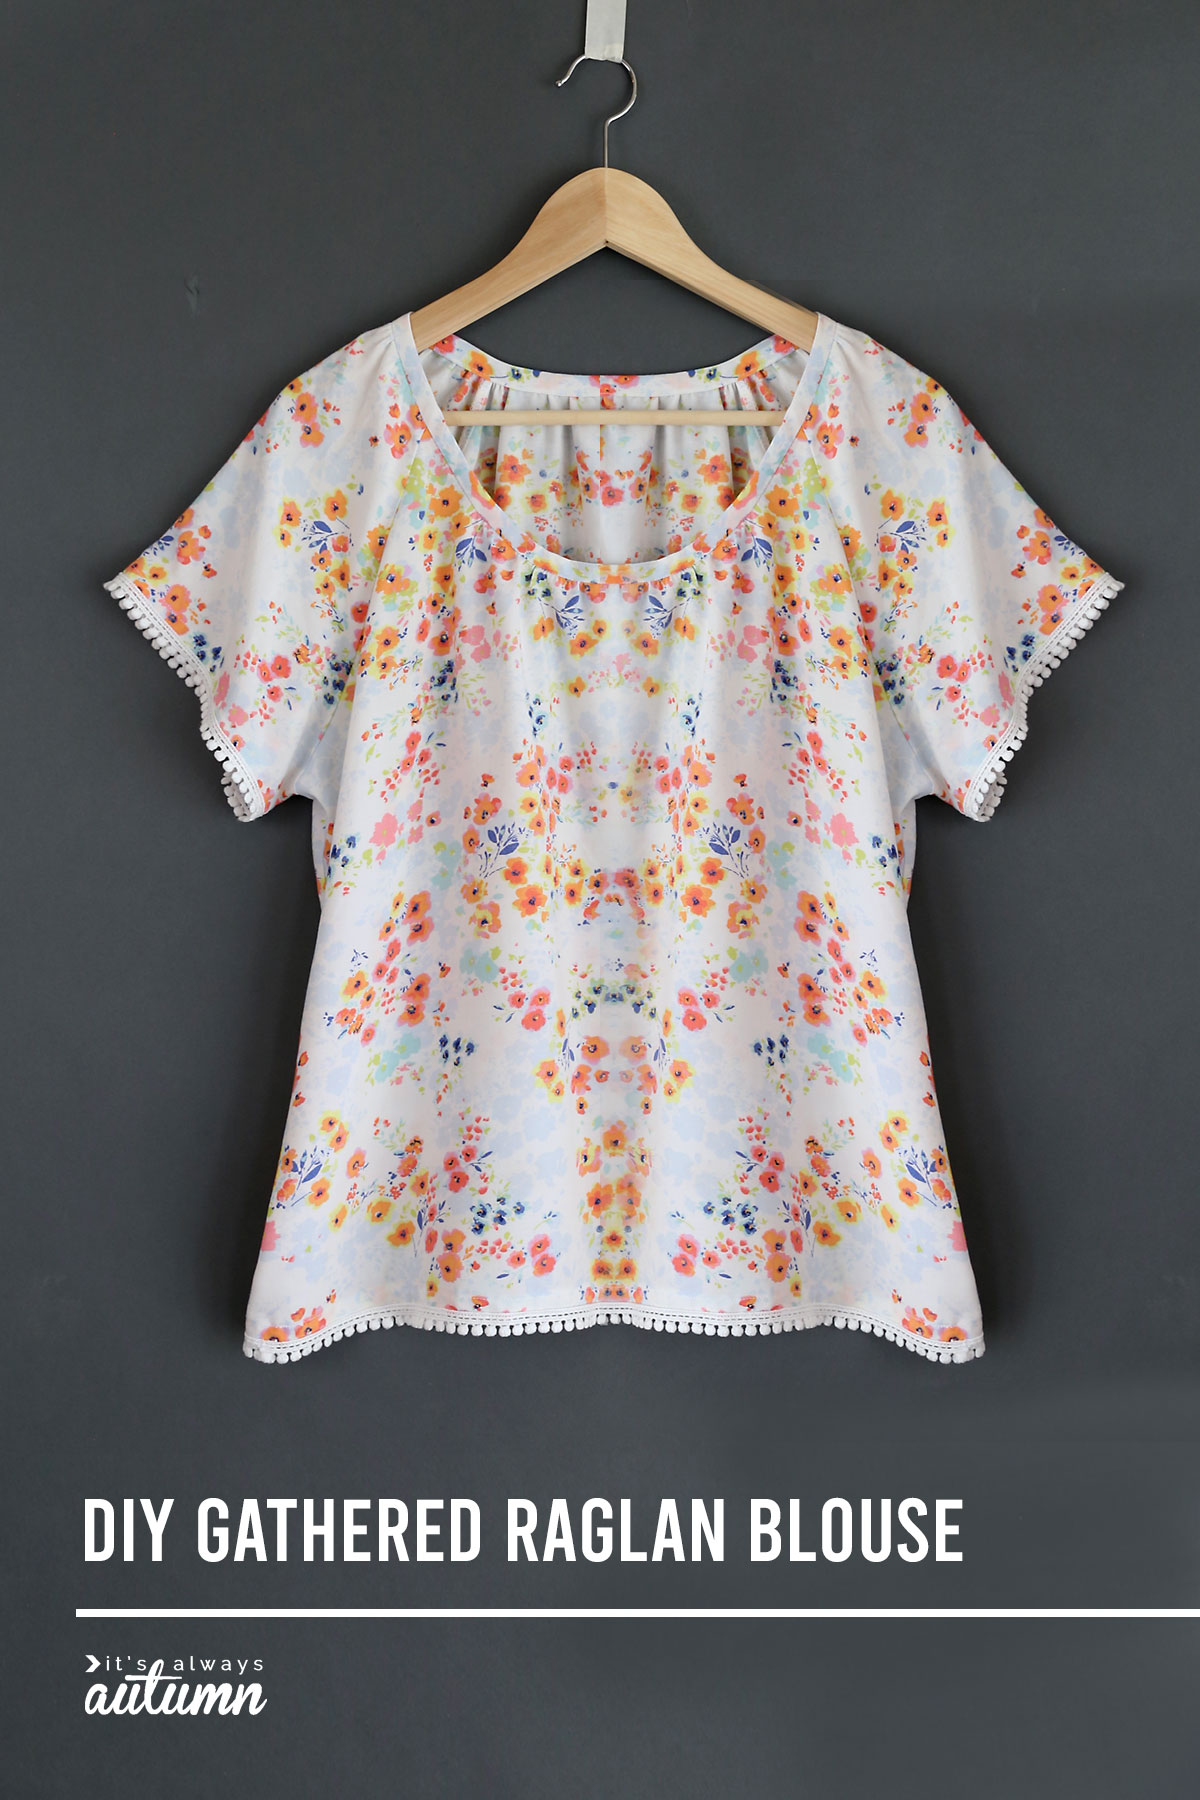
In today’s post: Learn how to sew a loose, flowing gathered raglan blouse based on one of my free sewing patterns.
Guys, it’s HOT! I know that those of you in Arizona probably think I’m a wimp, but it’s hit 103 every day for the past five days and I am melting. Ok, thanks to my air conditioning I’m not actually melting, but goodness it’s warm out there.
That makes it the perfect time of year for a super light weight, breezy blouse.
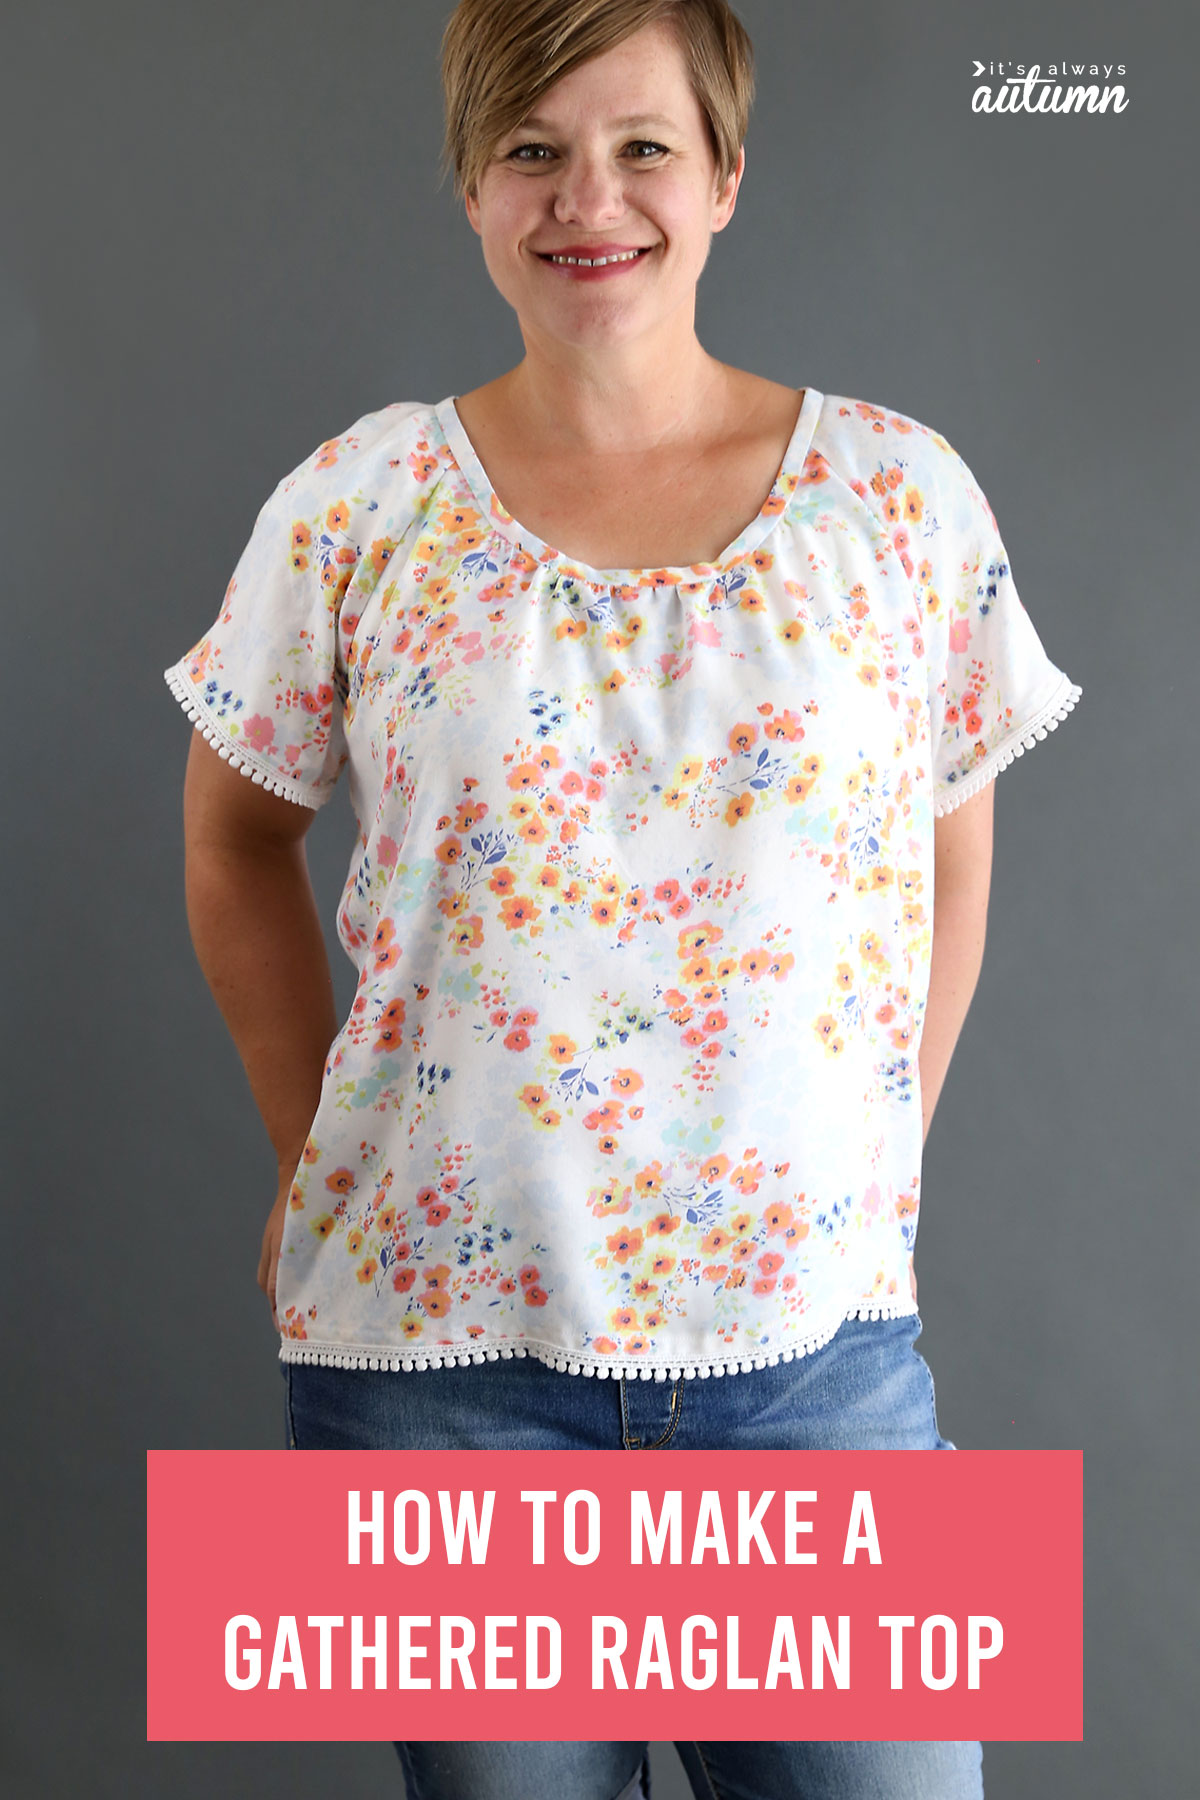
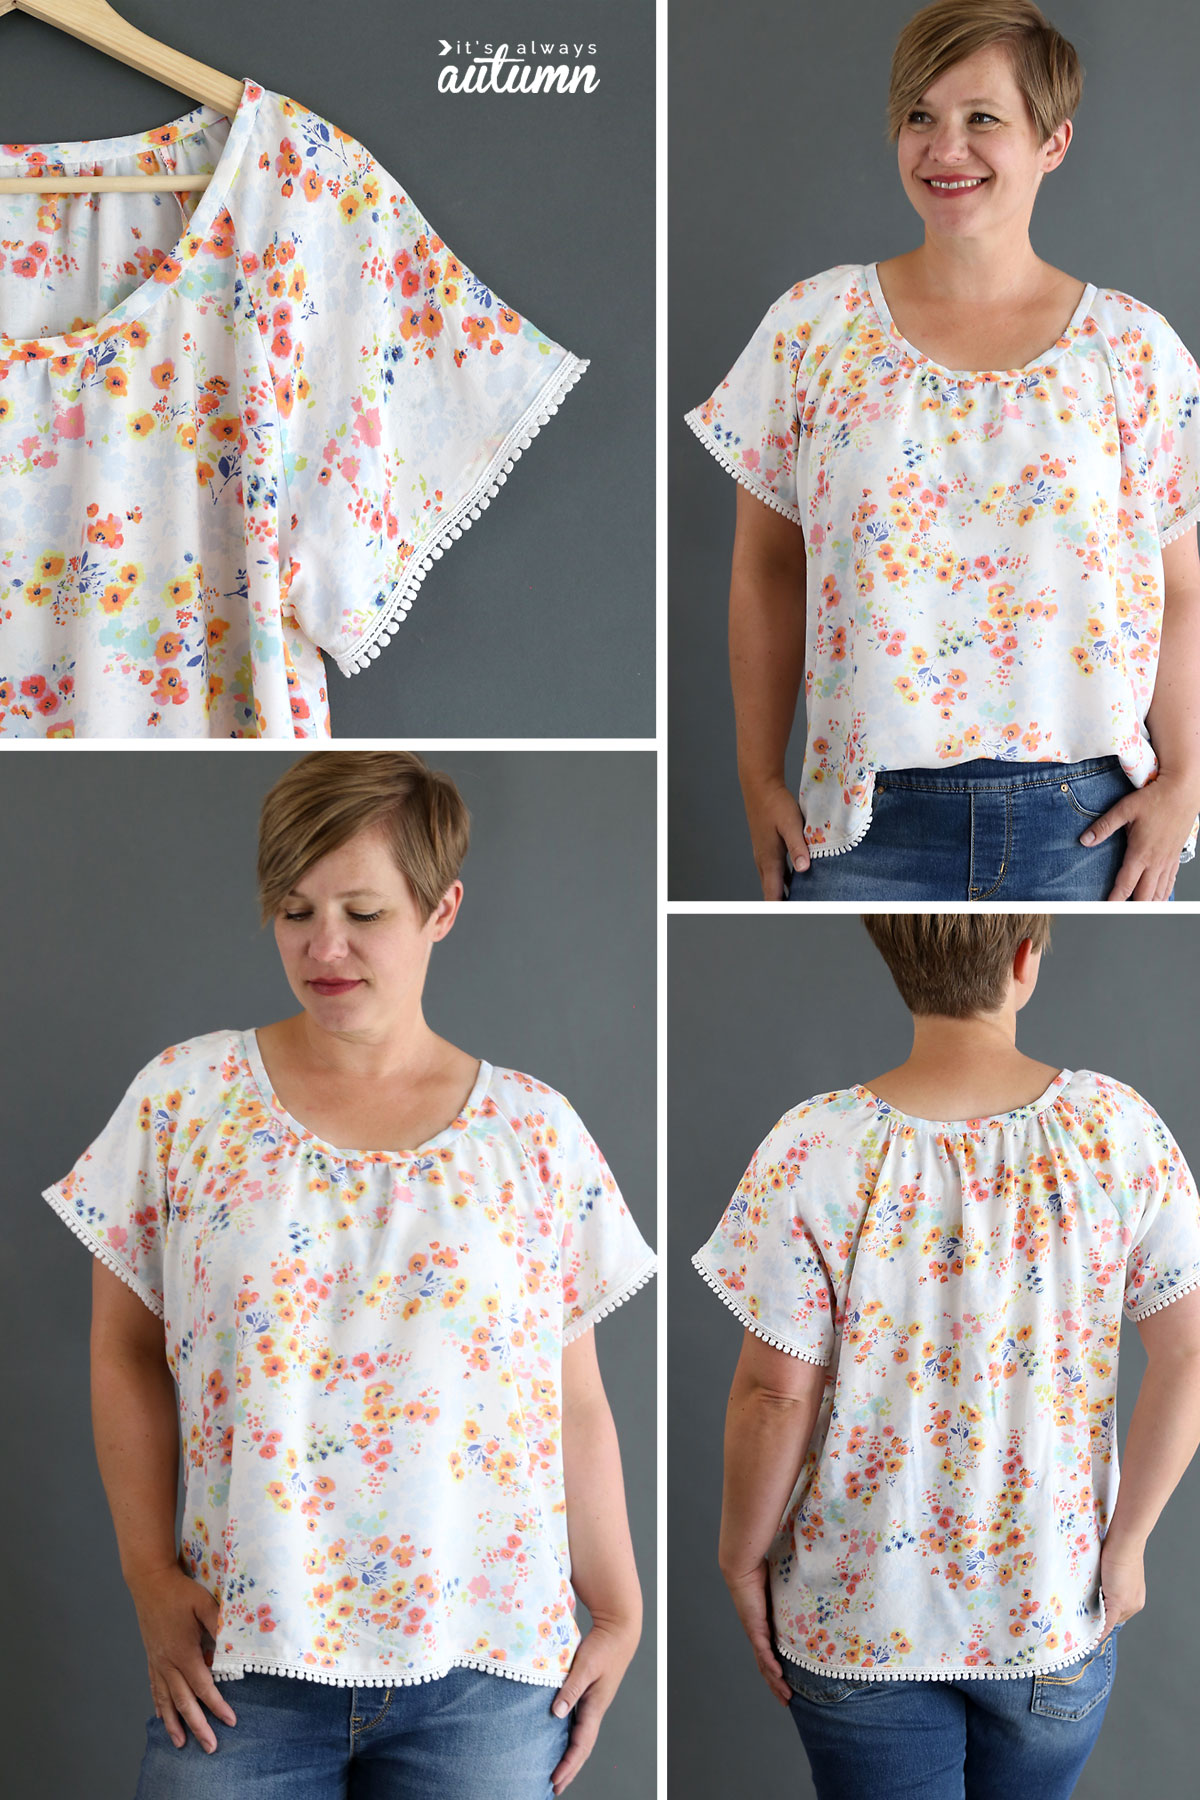
Since I’m a lazy sewist (yep, that’s what we’re calling people who sew now), my blouse doesn’t have buttons or darts or set in sleeves or anything else remotely hard to sew. Instead it has easy raglan sleeves and some extra gathers so it’s loose and cool.
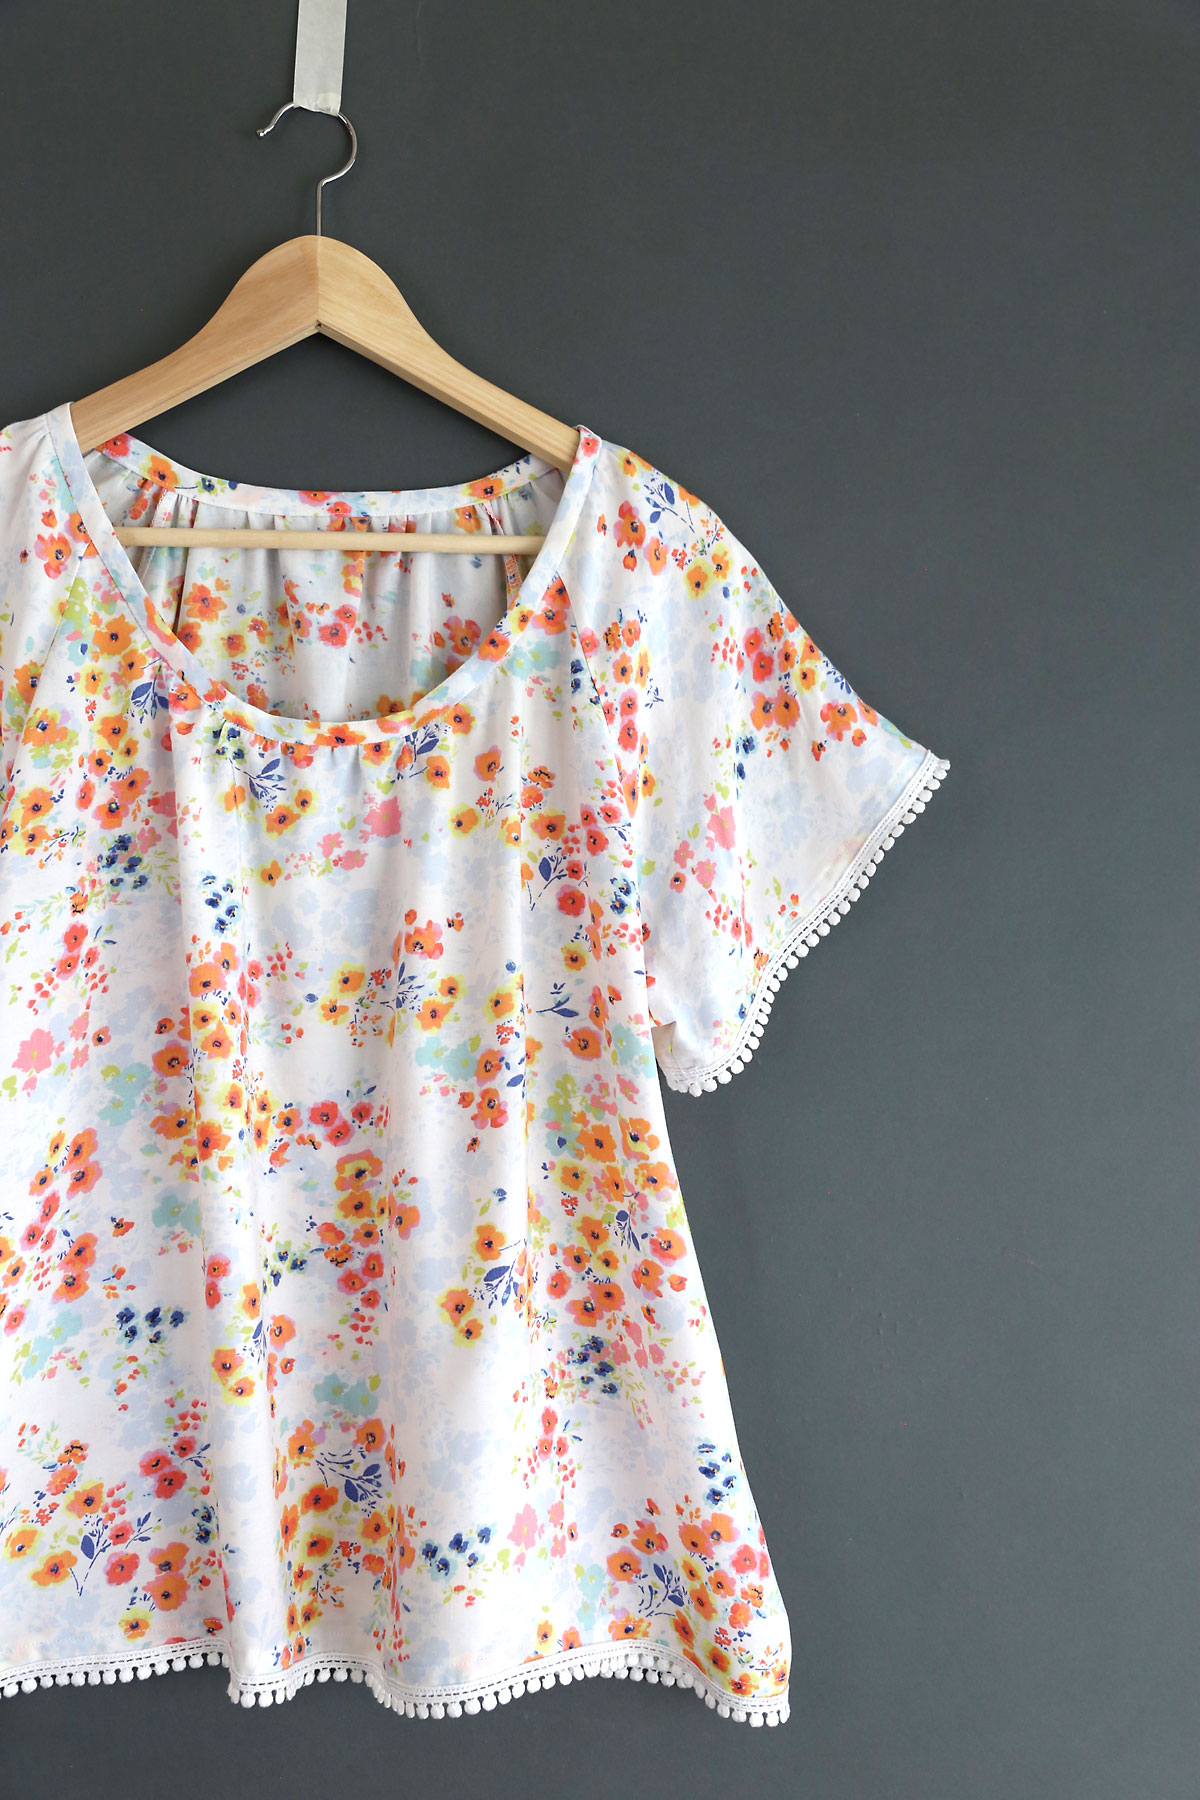
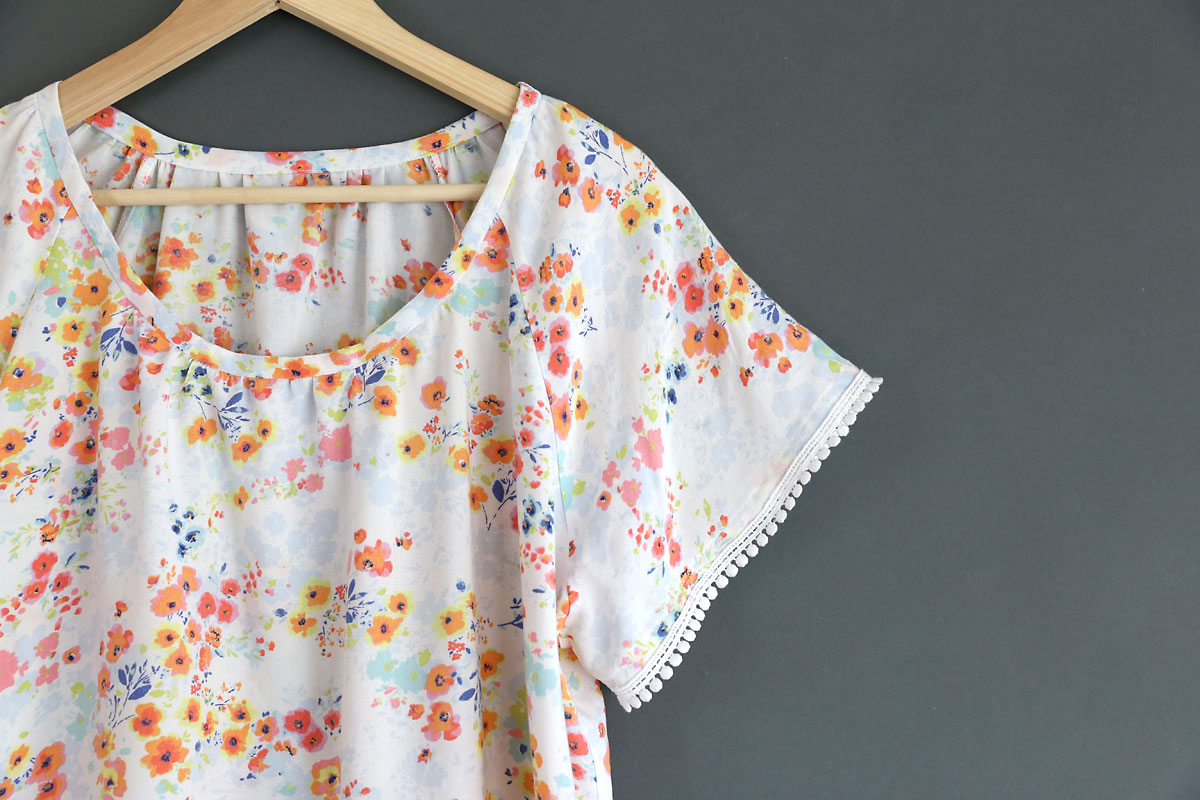
And it’s got cute tiny pom trim because the fabric was free! I cleaned out my closet a few weeks ago, and among the piles of stuff to donate was an old maxi dress I never wear – but I hated to get rid of it because I loved the fabric and print. So I used it to sew up this blouse…and since I didn’t have to spend any money on the fabric I was willing to drop ten bucks on adorable trim.
This gathered raglan top is very easy to make and I’ll walk you through the steps below. Please note, you will need to know how to make your own bias binding and bias bind a neckline. Let’s go!
Cut your Pattern Pieces
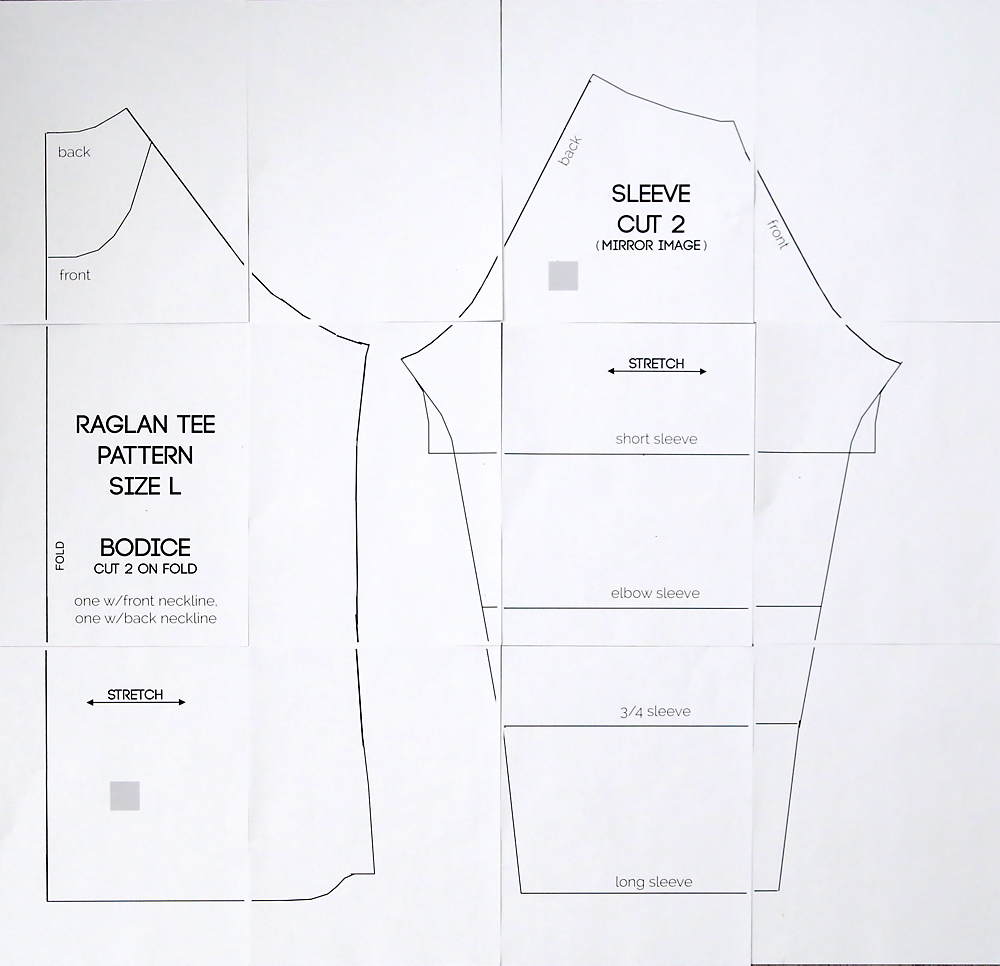
This blouse is based on my free raglan t-shirt pattern, which is available is a size L (roomy fit for a 38 inch bust). You will need to go to this post to download and print the pattern: Raglan T-shirt Pattern
Print the pattern at 100% or full size on 8.5×11 paper. The test box on page 9 should measure exactly 1 inch. Butt the pages together without overlapping and tape. The pattern looks like this:
To make a gathered raglan blouse, we are going to add more room into both the shirt pieces and the sleeves. How much room you add is up to you and how blousy you want the finished top to be. I’ll tell you how much I added and you can decide what you’d like to do.
You will need about a yard and a half of 56-60 inch wide fabric – many of the fabrics in the “silky” section of Jo-Ann come in 57 inches wide. If you are using something that’s only 45 inches wide you’ll probably need 2.5 yards. Because this is a roomy gathered blouse, you need to choose a lightweight fabric with plenty of drape, like a rayon challis or similar. DO NOT use a quilting cotton or any other stiff fabric. You could use a lightweight knit if you want to. Be sure to wash and dry your fabric before you cut out the pieces.
PLEASE NOTE: many lightweight woven fabrics fray a LOT. That means you are going to have to finish your seam allowances in some way. You can trim your seam allowance with pinking shears to keep it from fraying, or sew a zigzag along the edge of the seam allowance. Or you can sew the seams on a serger.
Here is a cutting diagram:
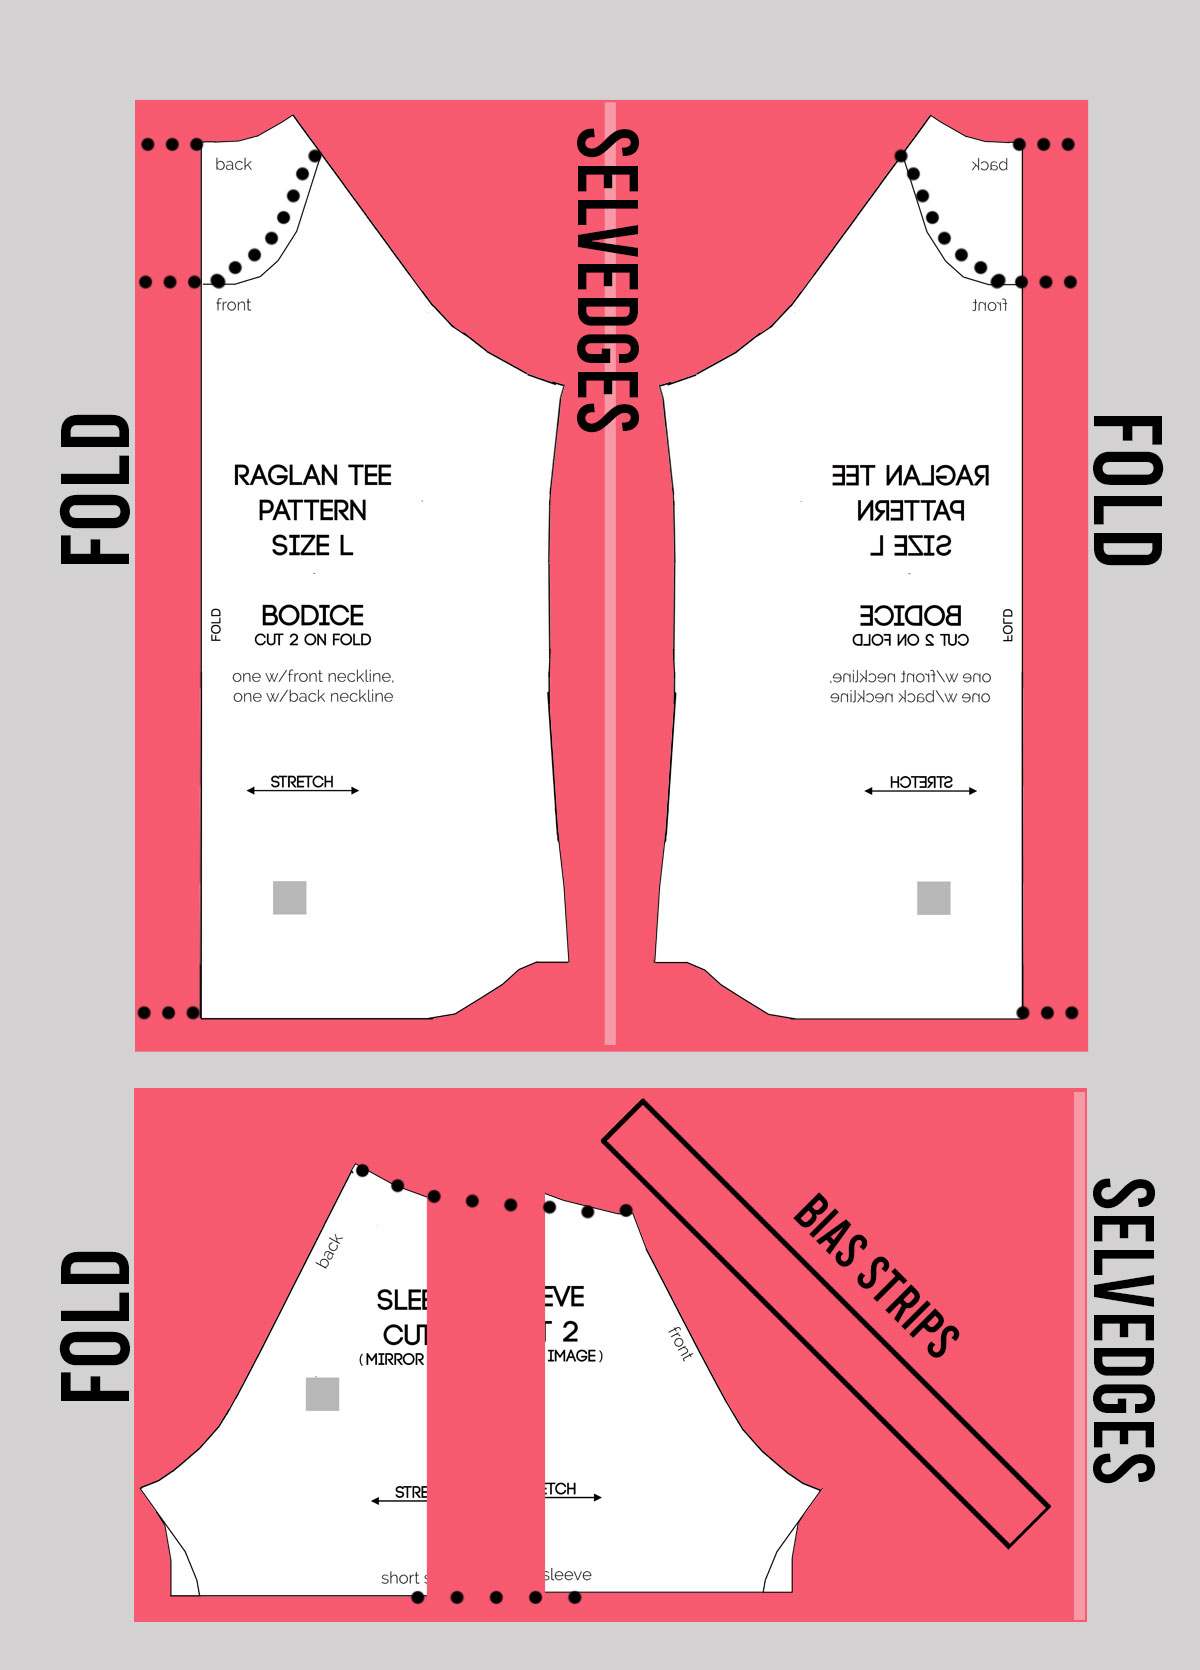
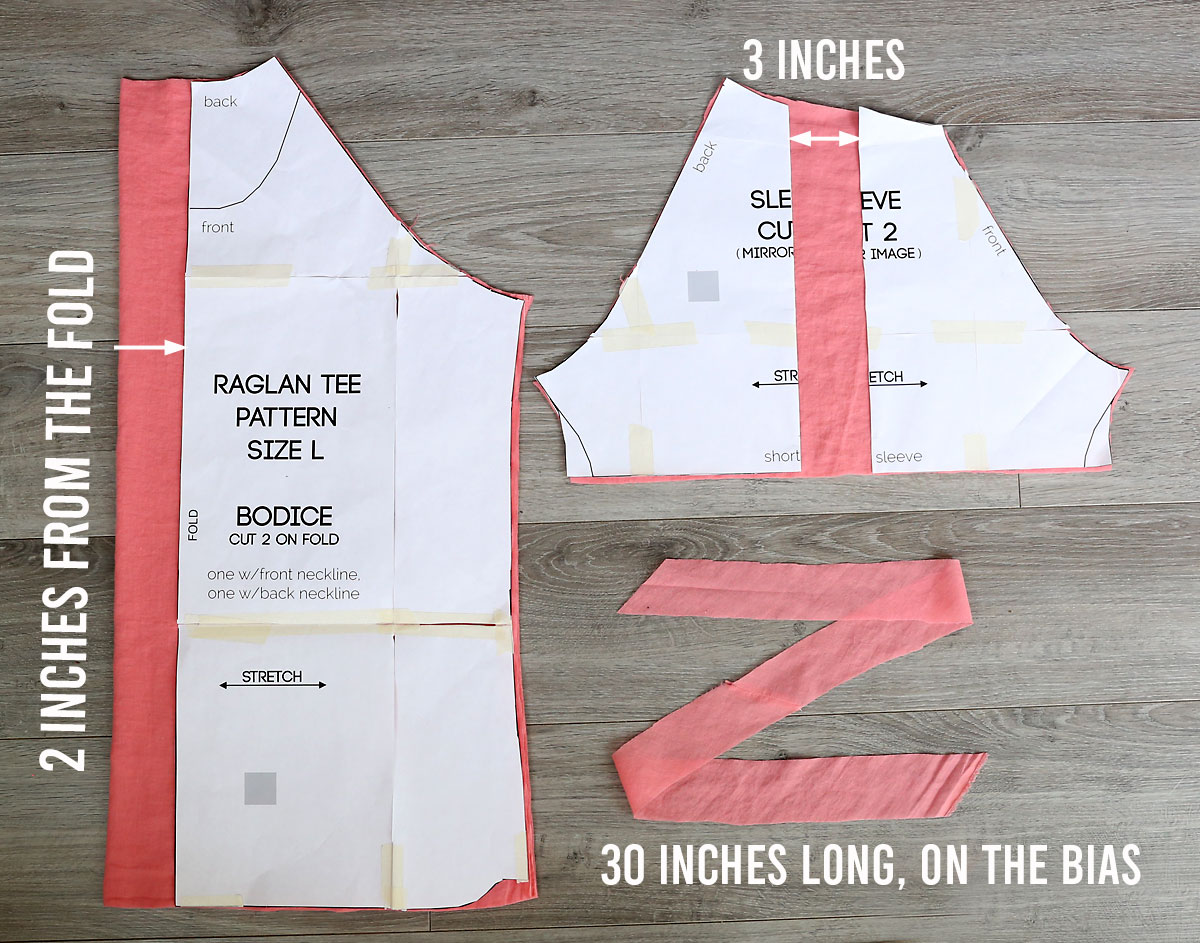
The pattern tells you to cut out a bodice front and a bodice back, both with the pattern piece lined up on the fold. For this blouse, I moved the bodice pattern piece 2 inches away from the fold before cutting (which gave me 4 inches of extra room in the front piece and 4 inches in the back piece). If I make it again I might only move it over 1 to 1.5 inches.
For the sleeves, you’ll need to slice the pattern piece in half vertically. Spread the two halves a couple inches apart to give extra room in the sleeve. I cut my sleeves with 3 inches in between the pattern halves at the top and 4 inches between the pattern halves at the bottom.
You are also going to need about 30 inches of 2 inch wide bias strip. You can cut two 16 inch long bias strips and join them together. You’ll be creating 1/2 inch bias tape to bind the neckline with this strip.
How to Sew a Gathered Raglan Blouse: Basic Construction
The basic construction for this blouse is the same as the method used for the Raglan t-shirt.
You should have a bodice front which is cut with a lower neckline and a bodice back that has a higher neckline. You should also have two sleeve pieces.

Start by laying the front bodice right side up. Match up one of the sleeve pieces with the bodice piece as shown below. Note that the sleeve pattern shows which side of each sleeve should match up to the front bodice (it’s shorter than the side that matches up to the back bodice). Pin and sew, using 1/2 an inch seam allowance.

Repeat with the other sleeve on the other side of the front bodice. Press the seam allowance up toward the sleeves.
Now you’re going to match the “back” side of each sleeve with the same sections on the bodice back. Pin and sew with a half inch seam allowance, then press the seam allowance toward the sleeves. Make sure you are sewing with right sides together.
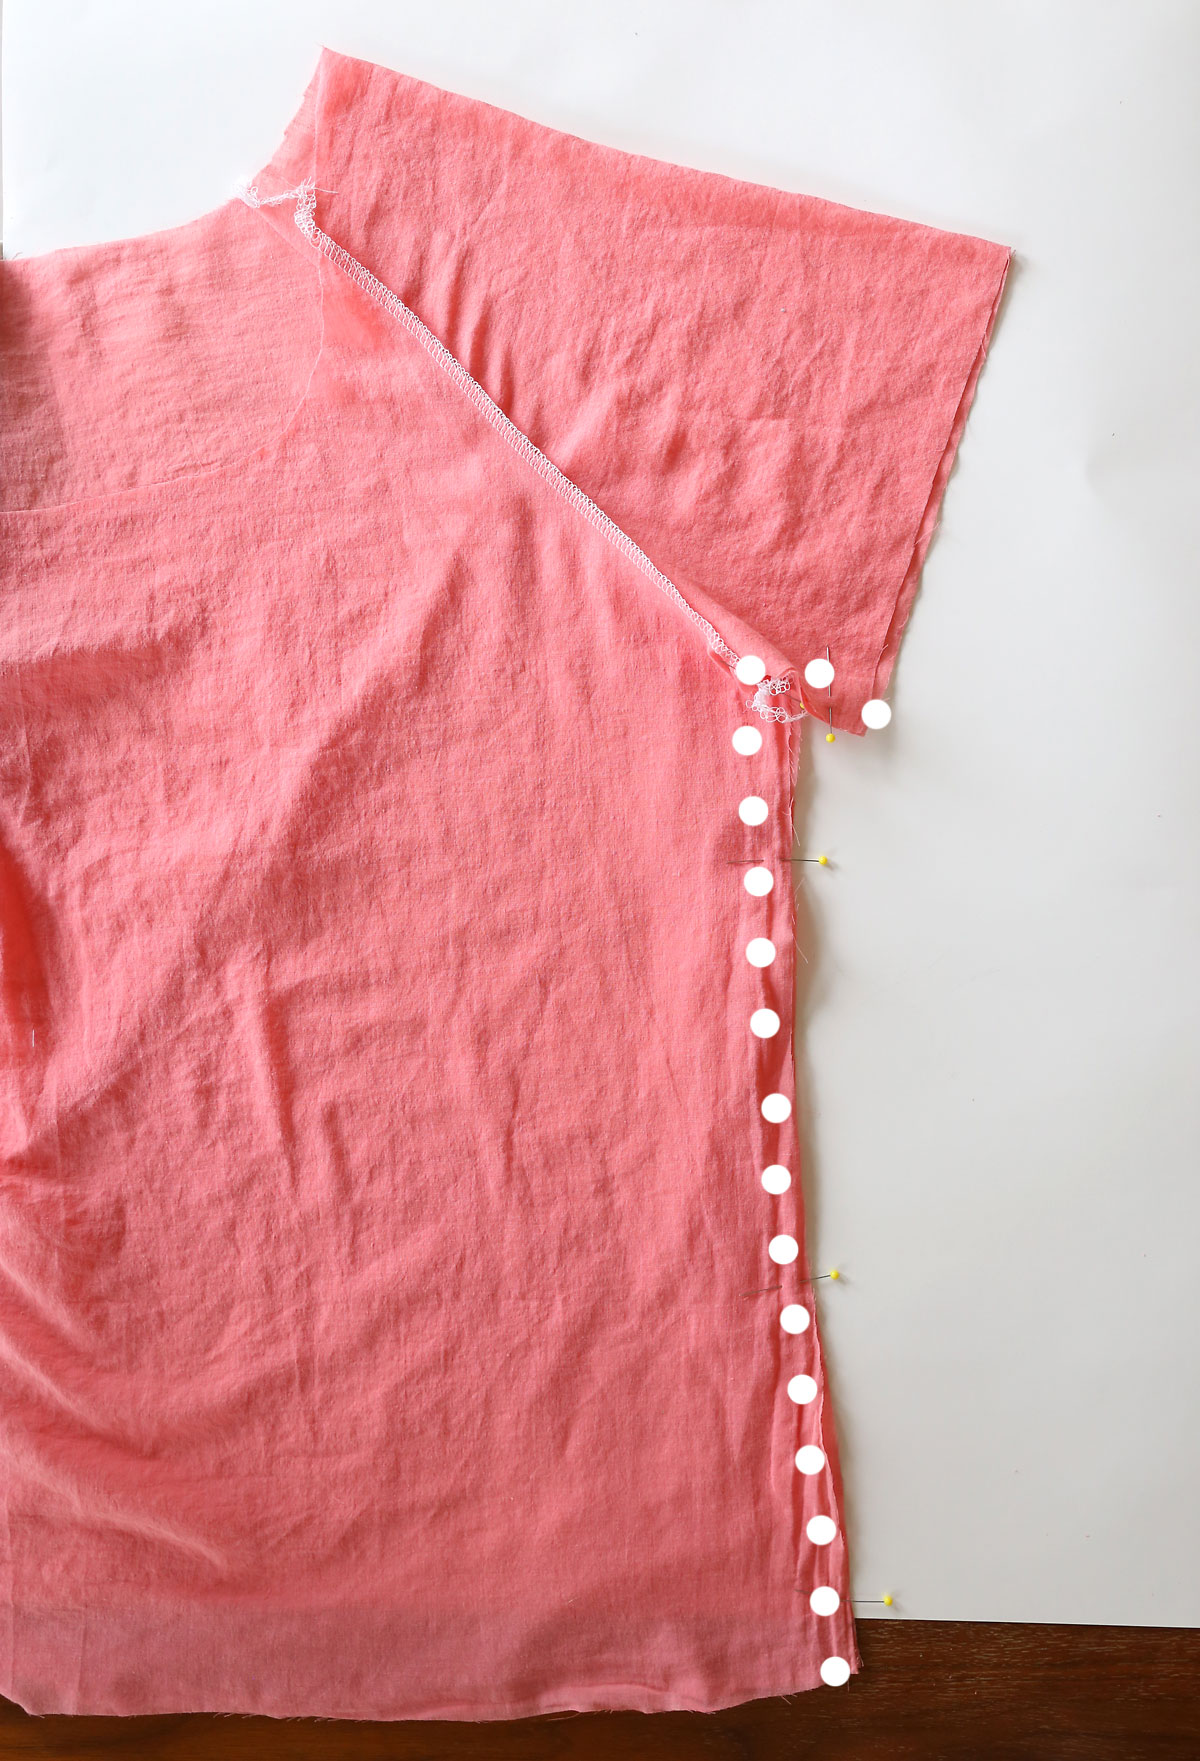
Now you can lay the shirt down flat with the front and back bodice right sides together. Sew the side seams: start under the arm and sew up under the armpit and then back down the side to the hem.
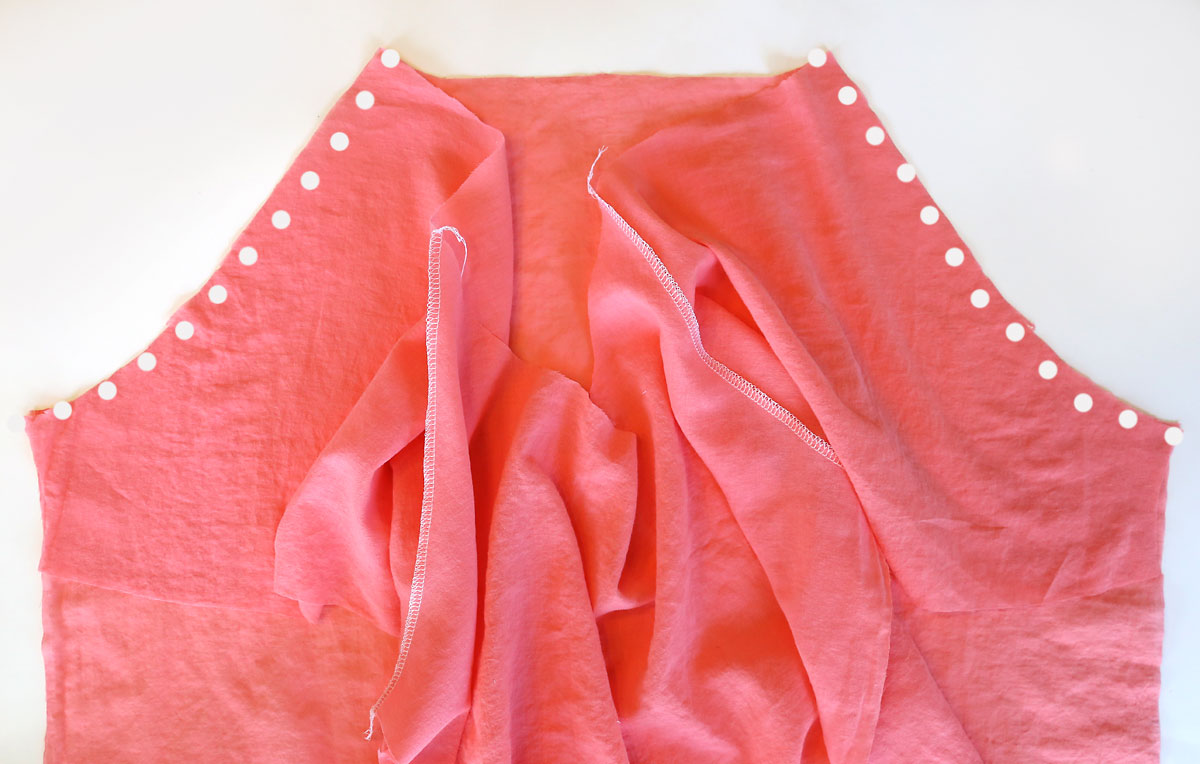
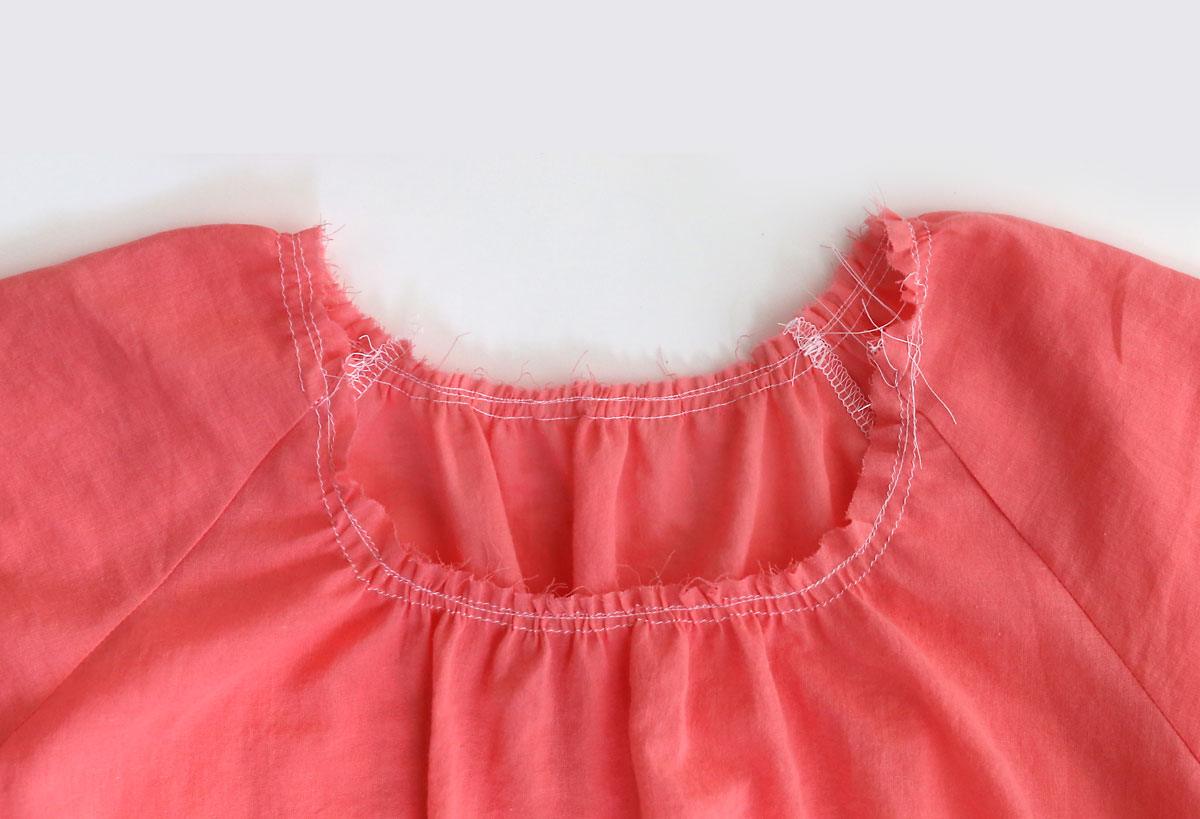
Turn the blouse right side out and you’ll see that you have your main piece sewn together. However, at this point the shirt is very wide and the neckline is huge. It’s time to do some gathering.
How to Sew a Gathered Raglan Blouse: Gather the Neckline
The next step is to sew gathering stitches all the way around the neckline. A gathering stitch is a straight stitch with a low stitch tension and a long stitch length. For tidy gathers, it’s best to sew two rows of gathering stitches: one that’s 1/2 inch away from the raw edge of the neckline and one that’s 1/4 inch away.
I sewed two rows of gathering stitches across the front of the neckline, from the left shoulder seam to the right. Then I sewed another two rows of gathering stitches from that right shoulder seam over the right sleeve, across the back bodice, and over the left sleeve.
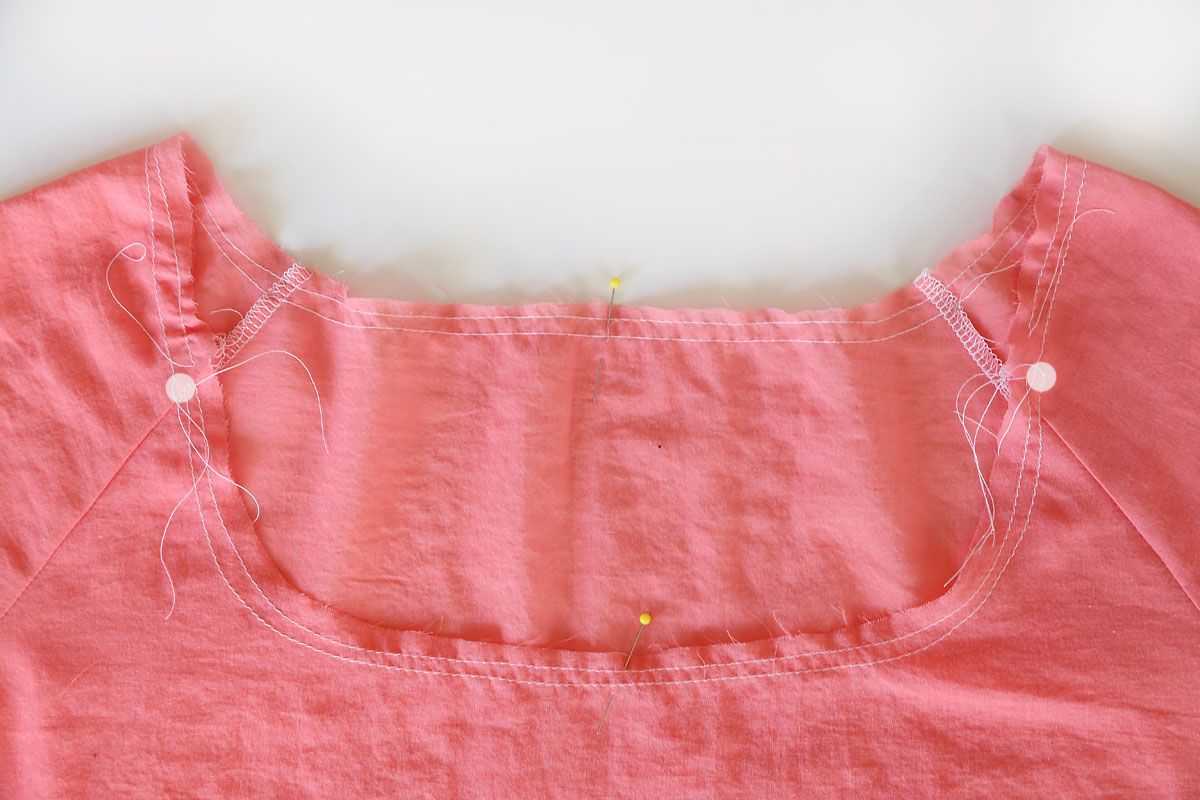
Now you can pull on the bobbin threads to gather up your neckline until it’s as large or small as you’d like. For reference, I gathered my neckline to about 25 inches all the way around. You’ll need to gather the threads then try on the shirt and adjust them as needed. Once you get the neckline to the size you want, you can take the shirt off and make sure the gathers are evenly distributed.
Once the gathers look right, I like to sew over them with a normal straight stitch to make sure they don’t move. Sew this stitch 3/8 inch from the raw edge.
How to Make a Gathered Raglan Blouse: Finish the Neckline
Ok, now it’s time to finish the neckline with bias tape! Grab your 2 inch wide strip that was cut on the bias and use to to bind the neckline. I used the double fold bias tape method + stitch in the ditch to finish this neckline. It’s the third method described at this link.

You may need to unpick/pull out any gathering stitches that are visible once the neckline is bias bound.
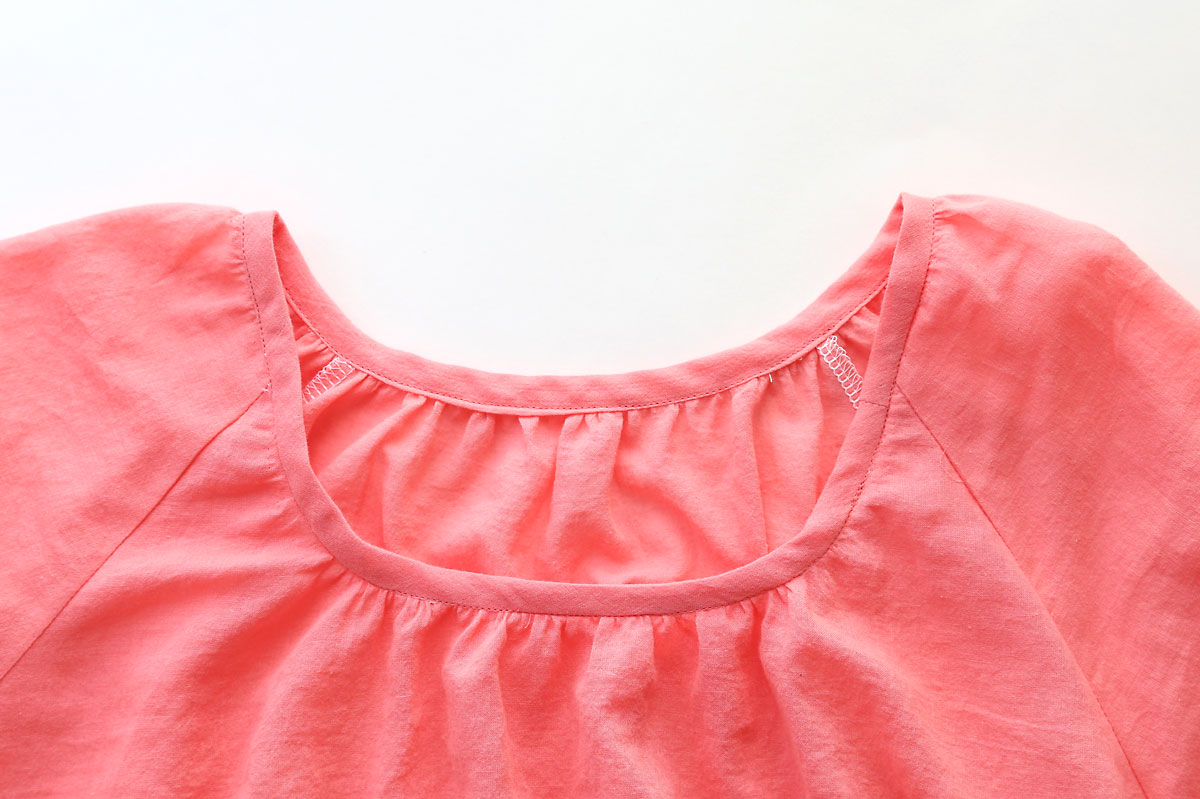
How to Make a Gathered Raglan Blouse: Hems
Your final step is to hem the bodice and sleeves. I trimmed the bodice and sleeves to 1 inch longer than the finished length that I wanted. This involved cutting at least 3 inches off the bodice piece. Then I turned the cut edges up 1/2 an inch twice and pressed. Finally I sewed with a straight stitch to complete the hems.
I also decided to add some trim to the sleeves. I just slid the trim under the hemmed sleeve and sewed it on with a straight stitch.
Happy sewing! You may also enjoy these posts:
How to draft a raglan shirt pattern in any size
The BEST free maxi dress patterns
LaDonna Manson says
Hello Autumn, I have recently made the raglan top. I was wondering if I could modify this pattern to make an open cardigan. I was thinking of making the back piece on the fold then 2 pieces separately to make the 2 front panels. I would use the longer length for the sleeves. I was thinking of a light jersey fabric. Do you have any suggestions as I am a beginner at sewing. Thank you for your easy to follow patterns that I can easily adjust to my size.
Brenda Shaw says
Can I omit the sleeves for a flowy summer blouse?
Autumn says
This pattern won’t work without the sleeves because the sleeve create the shoulder portion of the shirt. You could try cutting the sleeves quite a bit shorter however!
Kimberly Hashagen says
Do I have to add to sleeves and neckline or can I just add to neckline for a less gathered look ?
Autumn says
I would add a little to the sleeves if you are using a woven fabric. This pattern was developed for a knit (stretchy) fabric, and so I’d worry that if you use a fabric without stretch and don’t add some room the sleeves will feel too tight. Good luck!
Kate says
Can I use bias instead of having to make my own?
EmSue says
Of course you can. Matching, coordinating, or contrasting. Make it the way you want it.