
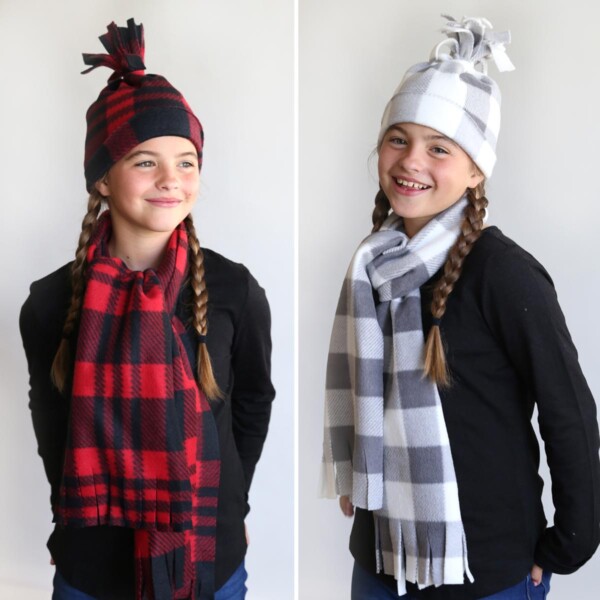
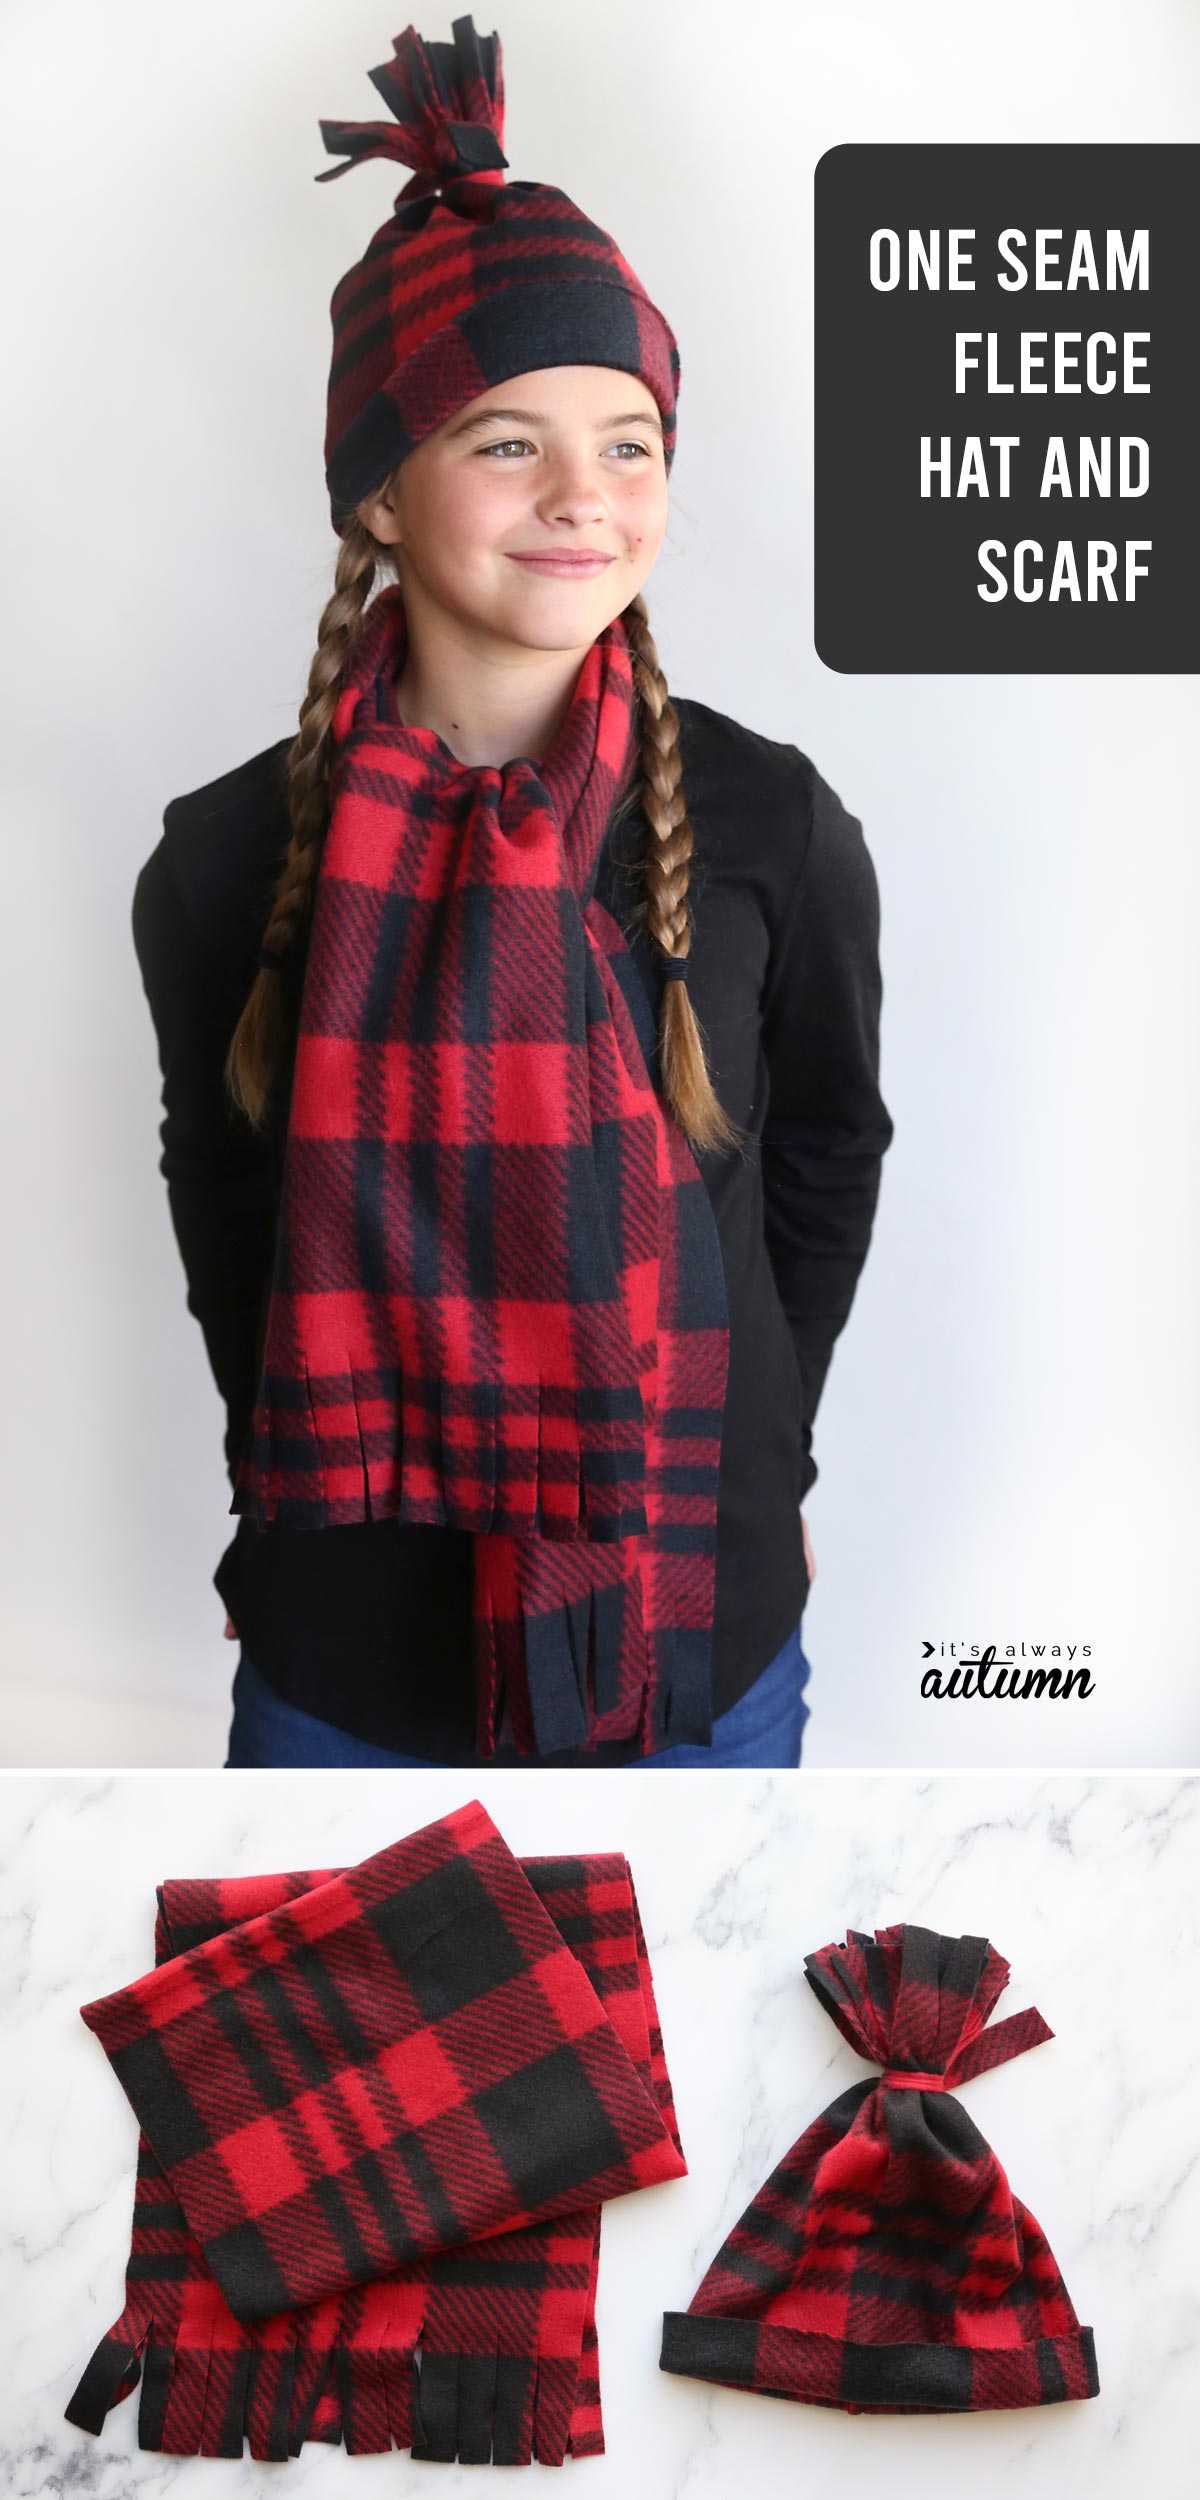
In today’s post: You can make this adorable fleece hat and scarf set in under 20 minutes – you don’t need a pattern and only have to sew one seam!
Hey there! Today’s project is one of my favorites: a super simple sewing idea that doesn’t take long to make and turns out adorable. You can whip up a fleece hat and scarf set in under 20 minutes. Seriously! Even if you barely know how to sew you’ll have this done in no time – as long as you can sew one straight seam you are good to go.
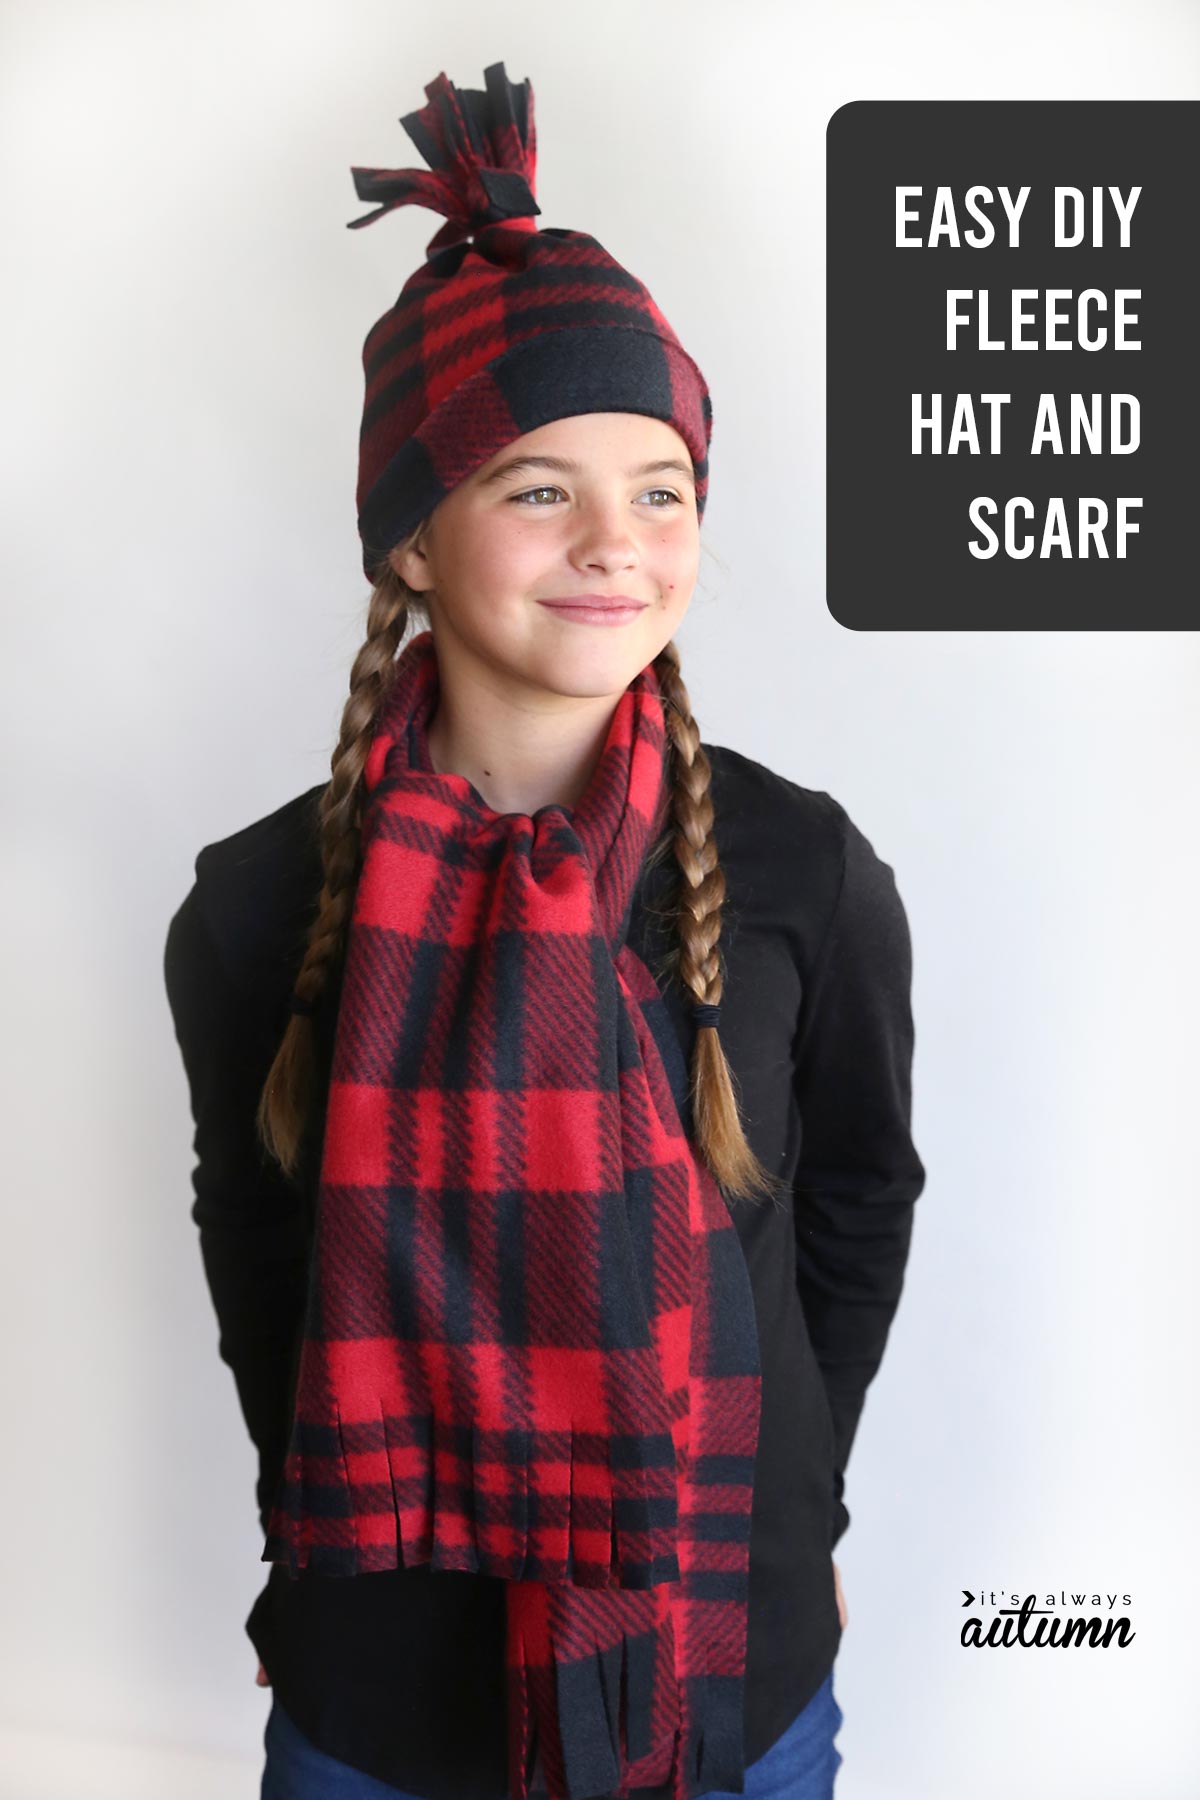
In fact, my 9 year old daughter watched me make her new hat and scarf and immediately grabbed some scraps and made a set for one of her stuffed animals with no help from me. If she can do it, you can too! Keep reading and I’ll walk you through the process.
Let’s talk Fleece
Fleece is an easy fabric to use if you’re a beginner to sewing. Here’s why:
- Fleece doesn’t fray, which means you can leave the edges unfinished.
- Fleece has some stretch, which makes it forgiving fit wise, but it’s also stable enough that it doesn’t move around when you sew.
Fleece also comes in tons of pretty colors and cute prints, so you get to enjoy a nice long browse in the fabric store deciding which one you want to use!
Types of Fleece
It is worth noting that as with most fabrics, it’s worth paying a little more for quality. I generally buy fleece at Jo-Ann, which carries three kinds:
- Blizzard Fleece – least expensive and often goes on sale for about $3/yard in the fall/winter
- Anti Pill Plush Fleece – much softer and cozier than blizzard fleece, but also more expensive. Usually on sale you can get this for about $7 or $8/yard
- Luxe Fleece – this is the KING of fleece and it’s absolutely gorgeous. It’s heavier and softer than either of the other options and is my go-to for making fleece blankets
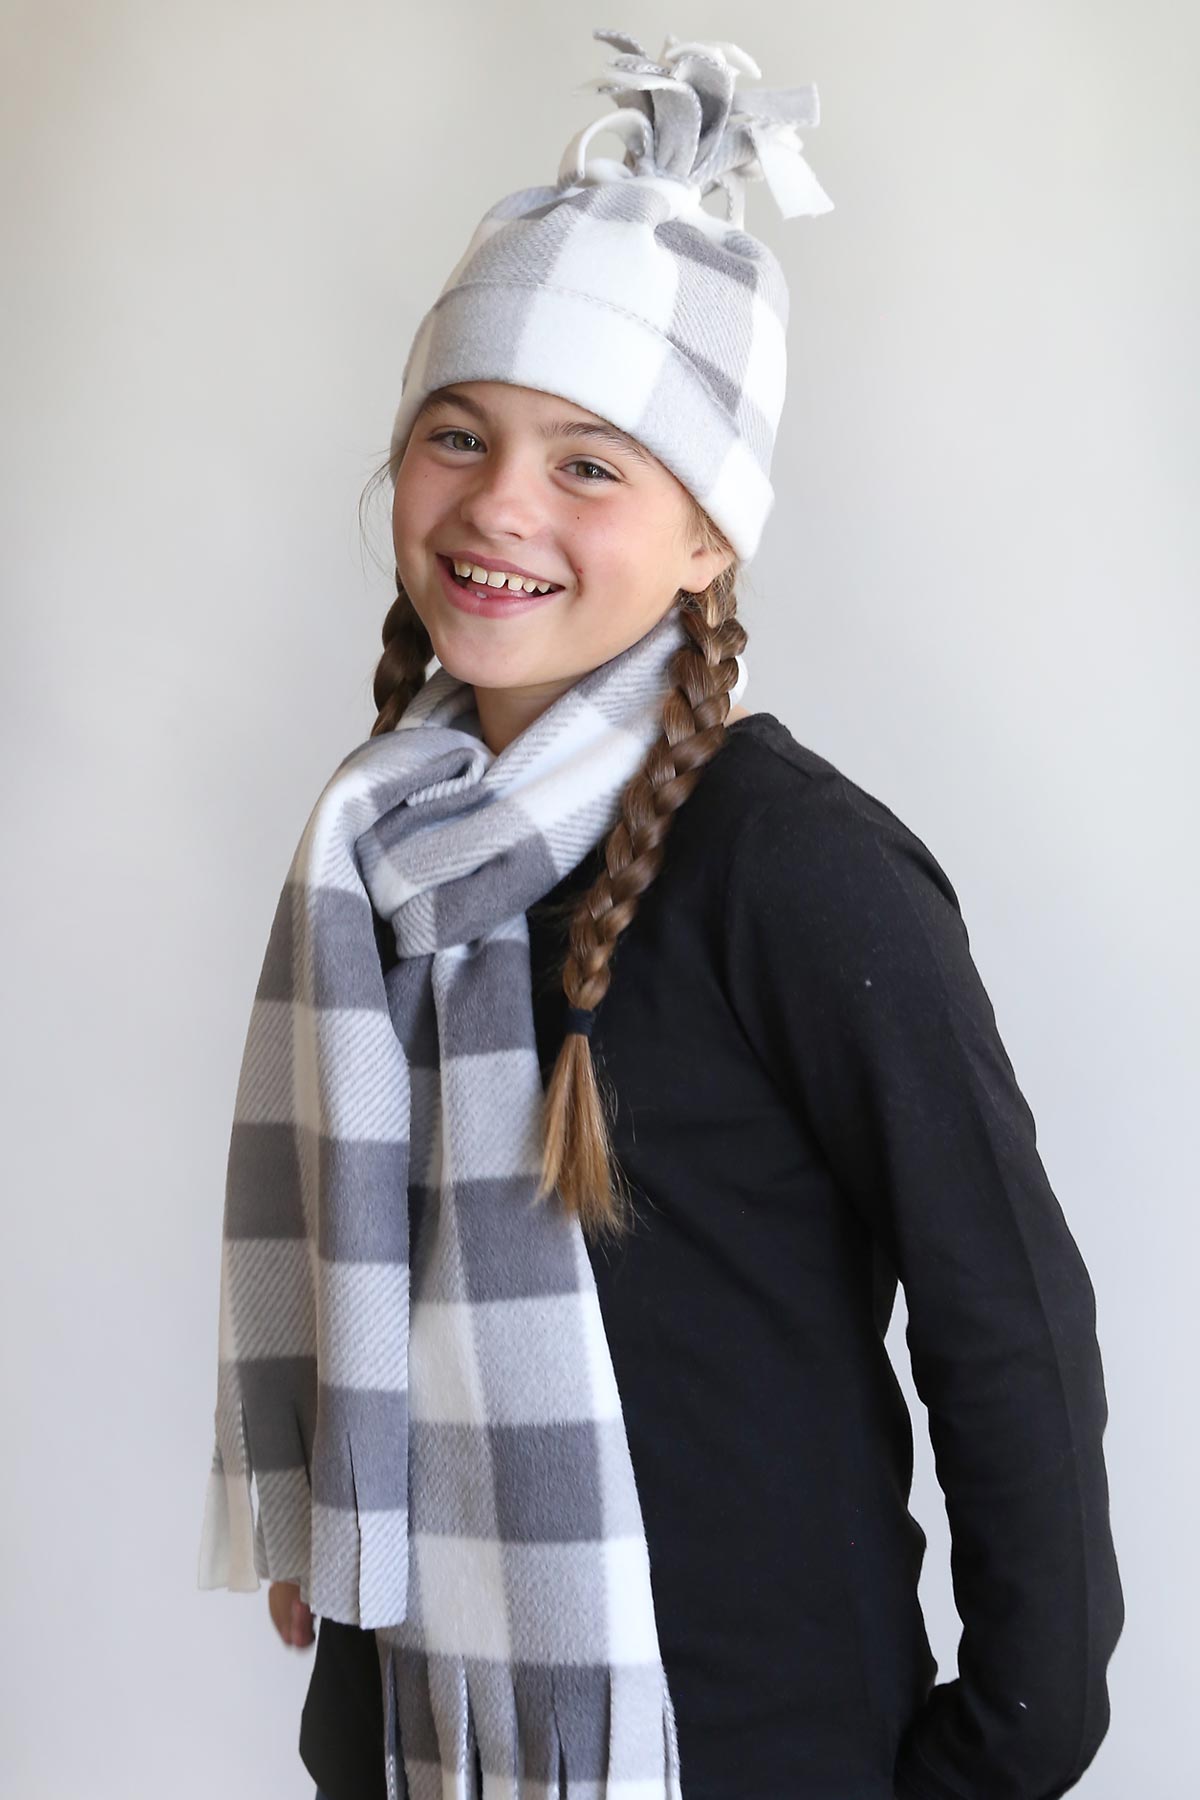
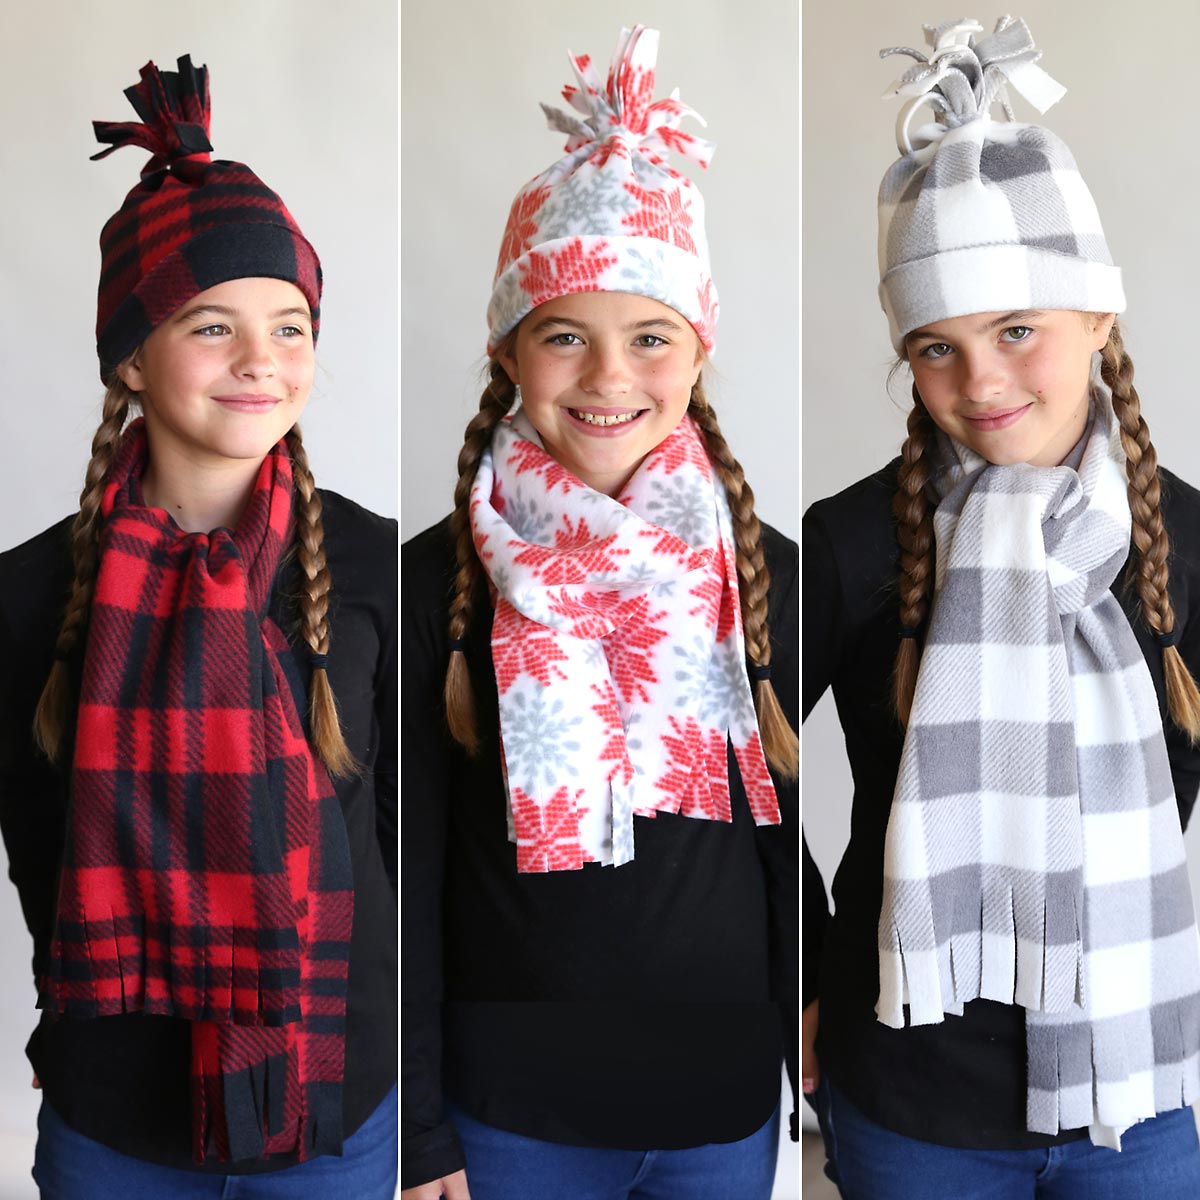
For this fleece hat and scarf set, I would recommend using Anti Pill Plush Fleece. I made three different sets of hats and scarves for my daughter for this post. The one on the left and in the middle below are made from Blizzard fleece, while the one of the right is made from Anti Pill fleece. She immediately told me the one made from Anti Pill fleece was her favorite, as it’s much softer. Additionally, Anti Pill fleece holds up much better to repeated wear.
Fleece Hat + Scarf Video
Watch this video for an overview of the process. Full instructions follow.
Fabric Cutting Guide
You will need 2/3 of a yard of fleece to make one kid-size hat and scarf set, but you can get two sets out of one yard of fabric.
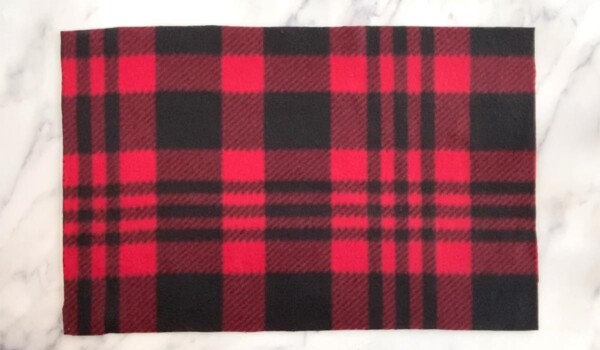
For a scarf, cut an 11 inch tall piece of fleece from one side (selvedge) all the way across to the other side. That will give you a piece that is 11 inches by about 60 inches wide. Trim off the selvedges.
For a hat, you need a rectangle of fabric. Measure the child’s head circumference; that is the width of your rectangle. Find the height for the rectangle that corresponds in the chart below.
If you cannot measure the child’s head, here are approximate cutting guidelines:
- Ages 2-5: Cut a rectangle 18 inches wide by 12 inches high
- Ages 6-8: Cut a rectangle 20 inches wide by 13 inches high
- Ages 9-teen: Cut a rectangle 22 inches wide by 14 inches high
Remember, these sizes are approximate; head sizes vary quite a bit so measuring when possible is a good idea.
For a hat, you will also need a strip of fabric that is one inch wide and 12 inches long.
DIY Fleece Hat + Scarf Set
Supplies
- 2/3 yard Fleece Fabric
Want more project ideas? Sign up to get my favorite easy crafts and recipes straight to your inbox!
Instructions
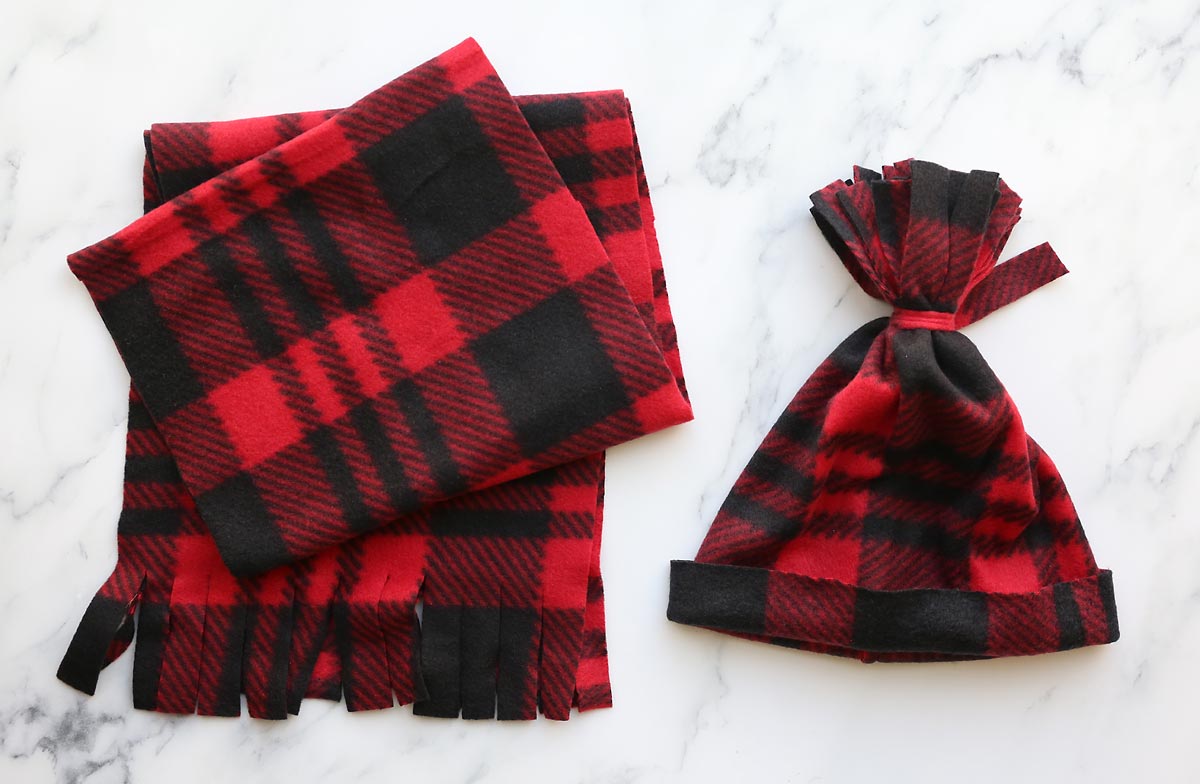
- Cut a fleece rectangle for the hat according to the cutting chart. Also cut another strip of fleece 1 inch wide and approximately 12 inches long.

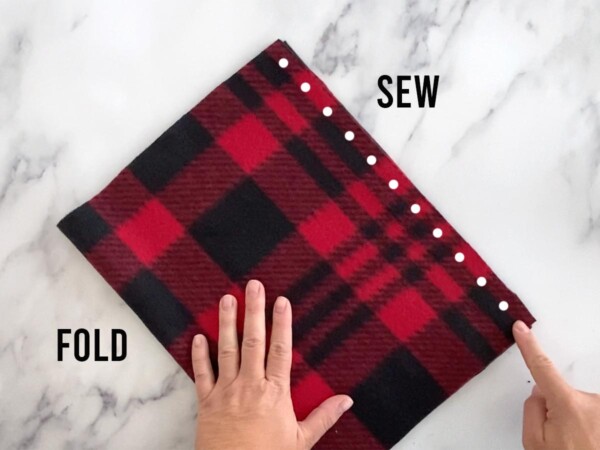
- Fold the rectangle in half, matching two short ends, with right sides together. Sew together along the matched short ends using a 1/2 inch seam allowance. You MUST backstitch at the beginning and end of this seam to secure it.

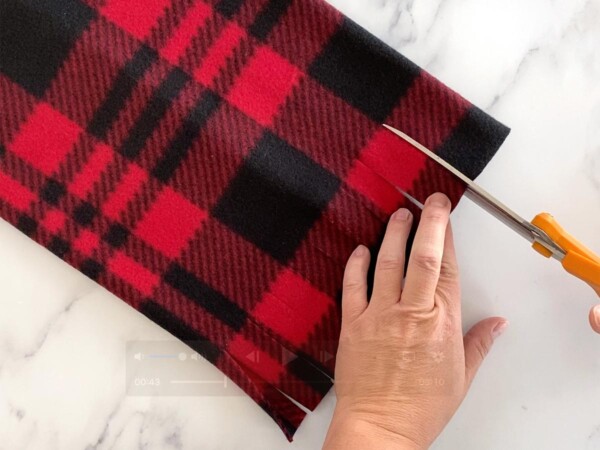
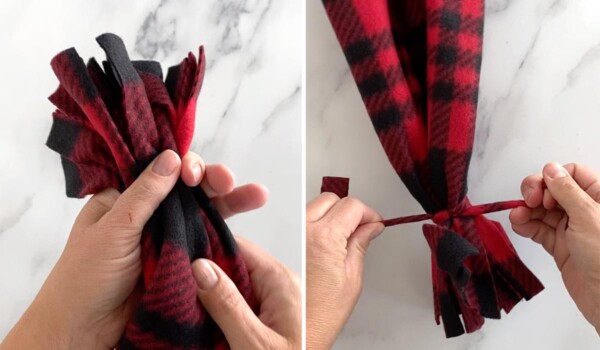
- Turn the hat right side out. Cut a fringe on one end, making cuts about 3 inches long and approximately 1 inch apart. (For the smaller size hat, make the cuts about 2.5 inches long. For the larger size hat, cut about 4 inches.)
- Gather up the hat at the bottom of the fringe. Use the 1 inch strip to tie the fringe together. This will create a "pom pom" at the top of the hat. Trim any of the 1 inch strip that is longer than the rest of the pom pom.
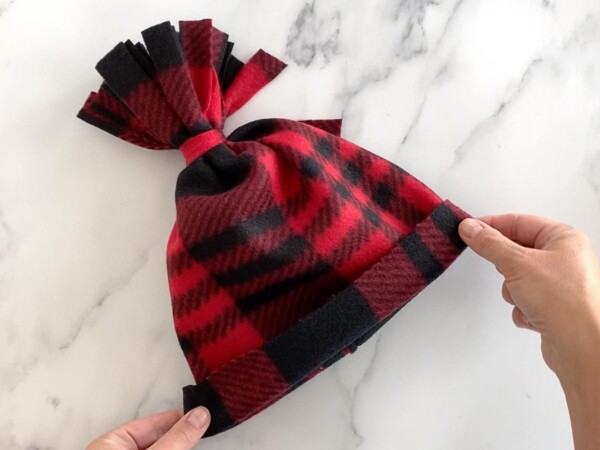
- Fold up the bottom brim of hat. The hat is now finished.
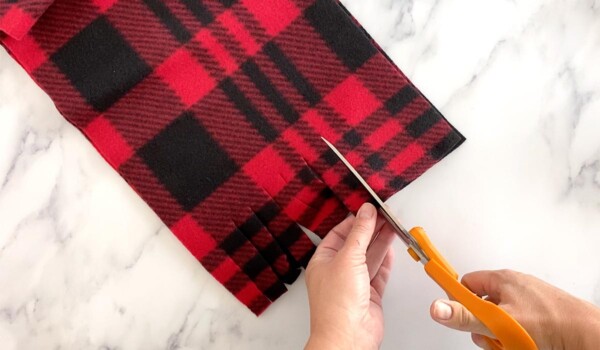
- Cut a long rectangle for the scarf, using the full width of fleece. It should be 11 inches tall and approximate 60 inches long. Trim off the selvedges on each short end of the scarf. Cut fringe into each short end, making cuts 3 inches long and approximately 1 inch apart.
Tips


Kelly Campton says
My daughter would like me to make these for her girls. She wants elastic in the top where the fringe for their ponytails. Thoughts?
Lorena says
Love these!! Would it work to make a slit at the top of each fringe pc on the scarf & flip them over the same way you did on your fleece blanket edge?
Morgan Kshlerin says
I appreciate you sharing such terrific information since the post you supplied includes some very great information that I find to be really helpful. I will be happy if you play game electron dash with me.
Nancy says
Cute idea. Note which direction fleece stretches and plan hat accordingly.