
In today’s post: Learn how to make these adorable bunny “Easter baskets” from plastic bowls and bunny ear headbands.
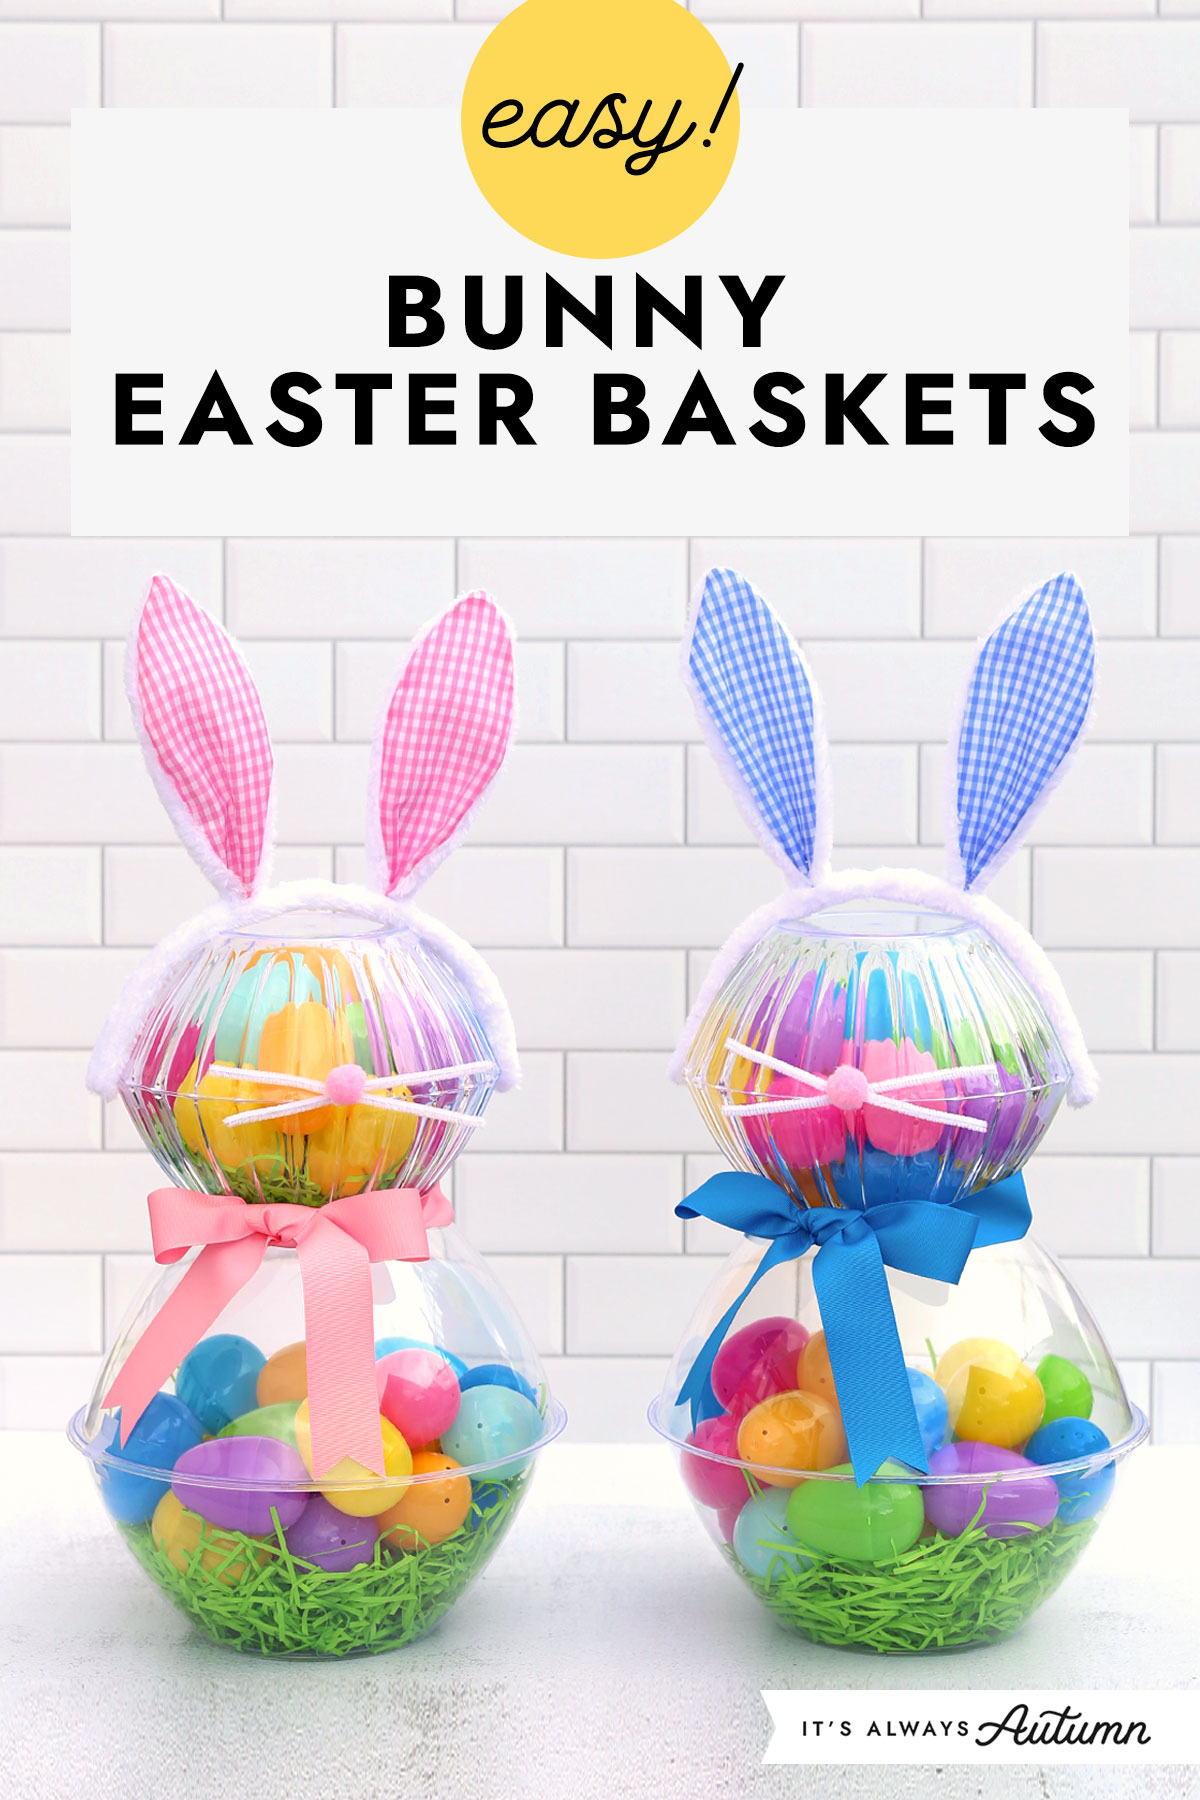
If you want to do something fun for Easter baskets this year, try making Easter bunnies from plastic bowls and filling them with Easter eggs and other small treats! These will be so much fun for kids to open on Easter morning, and they are cute enough to set out a few weeks in advance as Easter decorations.
Supplies
Here’s what you’ll need to make bunny Easter Baskets:
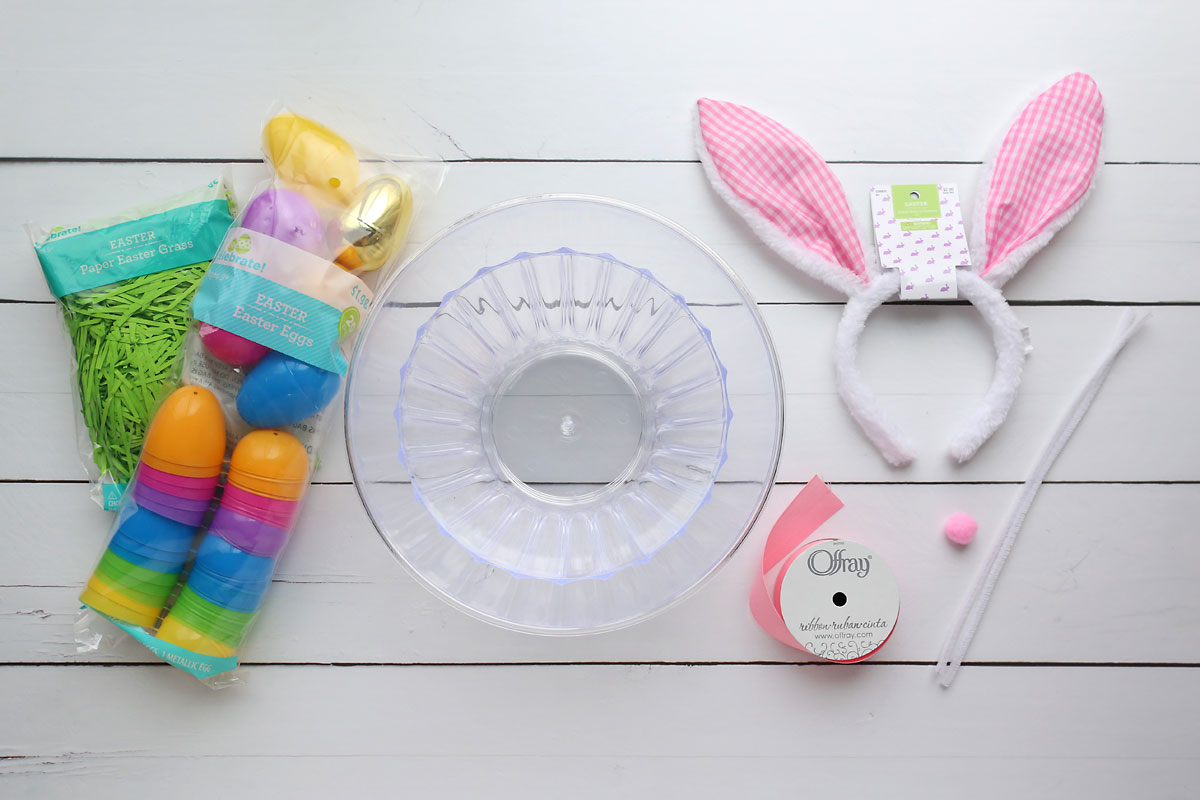
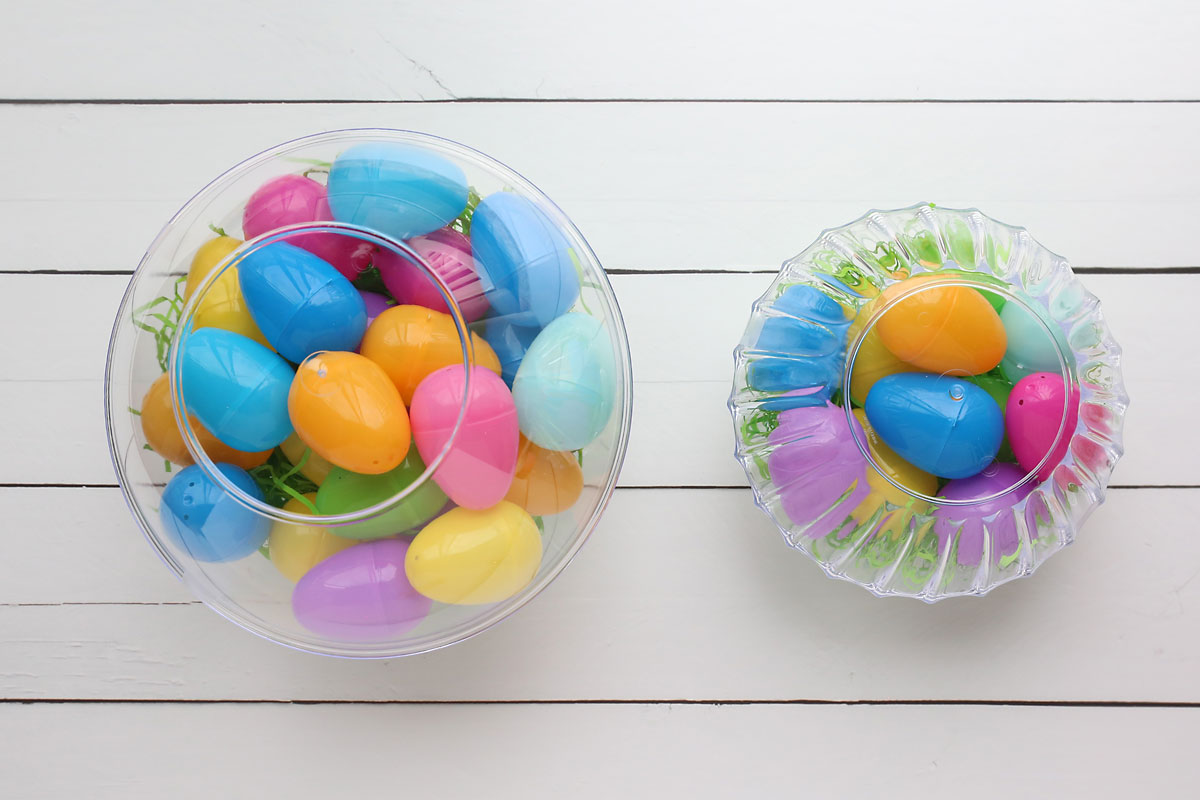
- Plastic Bowls from Dollar Tree: for each bunny you’ll need two large plastic bowls that are 11.25 inches in diameter and two clear plastic fluted bowls that are 8 inches in diameter. I used clear bowls but these same bowls are also sold in different colors if you’d like to make a colored bunny.
- Bunny Ear Headbands: You can find bunny headbands like these at Dollar Tree, Hobby Lobby, or Walmart
- Ribbon: You’ll need about four feet of ribbon
- White Pipe Cleaner and Pink Pom Pom (optional, to add whiskers and a nose)
- Fillers for the Bunny: I used one package of paper Easter grass and about 40 large Easter eggs for each bunny. You could also add candy, books, toys, or anything else you’d like to include in the Easter basket.
You will also need scotch tape and a hot glue gun (if you add a nose and whiskers).
How to make a Bunny “easter Basket”
This is an easy Easter craft that you can complete in about twenty minutes. Please note I recommend putting these bunnies together with tape instead of hot glue. That makes them easier for kids to open and allows you to reuse most of the bowls for another purpose. However, that means they aren’t super sturdy so you’ll need to be careful if you have to transport them. If you want to use these bunnies for display as part of your Easter decor instead of as an “Easter basket”, feel free to glue everything together to make them more sturdy.
Fill The Bowls
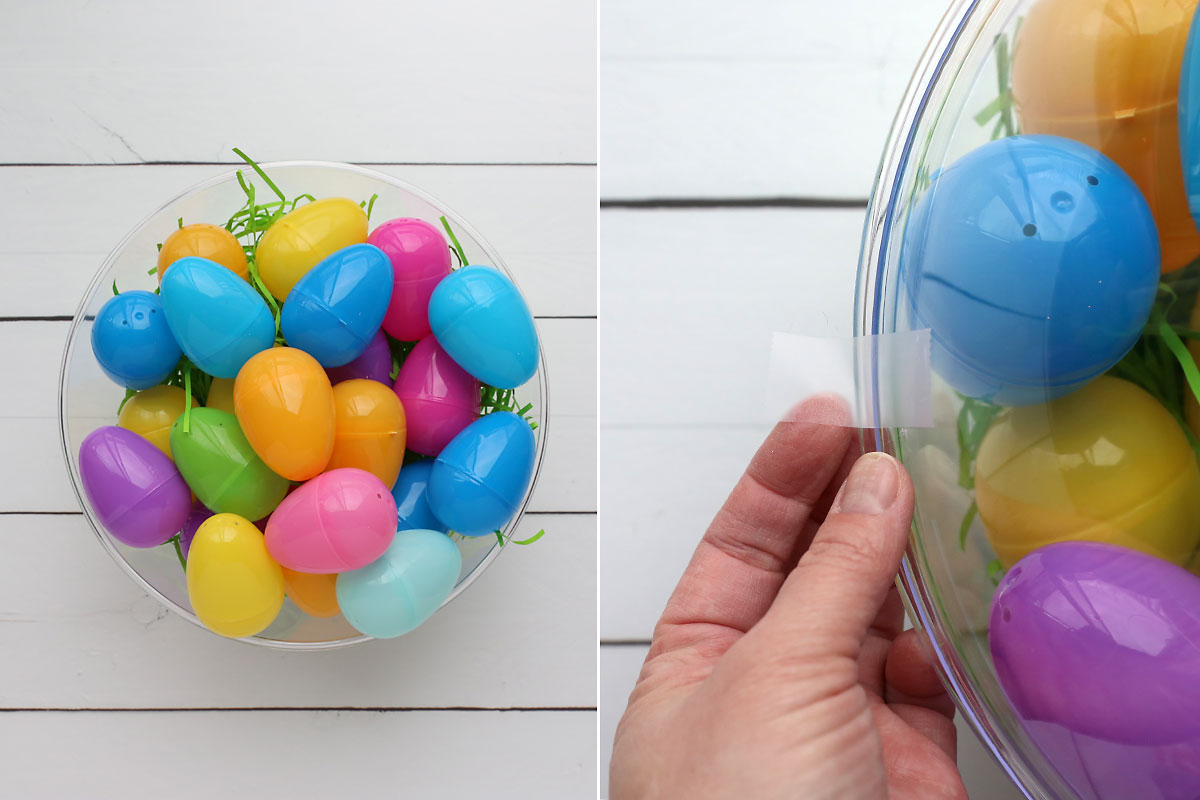
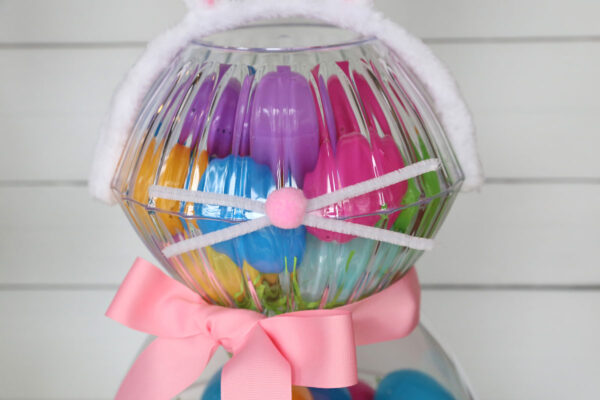
First remove the stickers from the bowls. If they are hard to get off, you can use a hair dryer to blow hot air on them for about fifteen seconds and the stickers will peel off easily. Then place some Easter grass in the bottom of one large bowl, then fill it with filled Easter eggs and other treats if desired. Place a second large bowl on top and tape the bowls together with clear tape in 2-3 places.
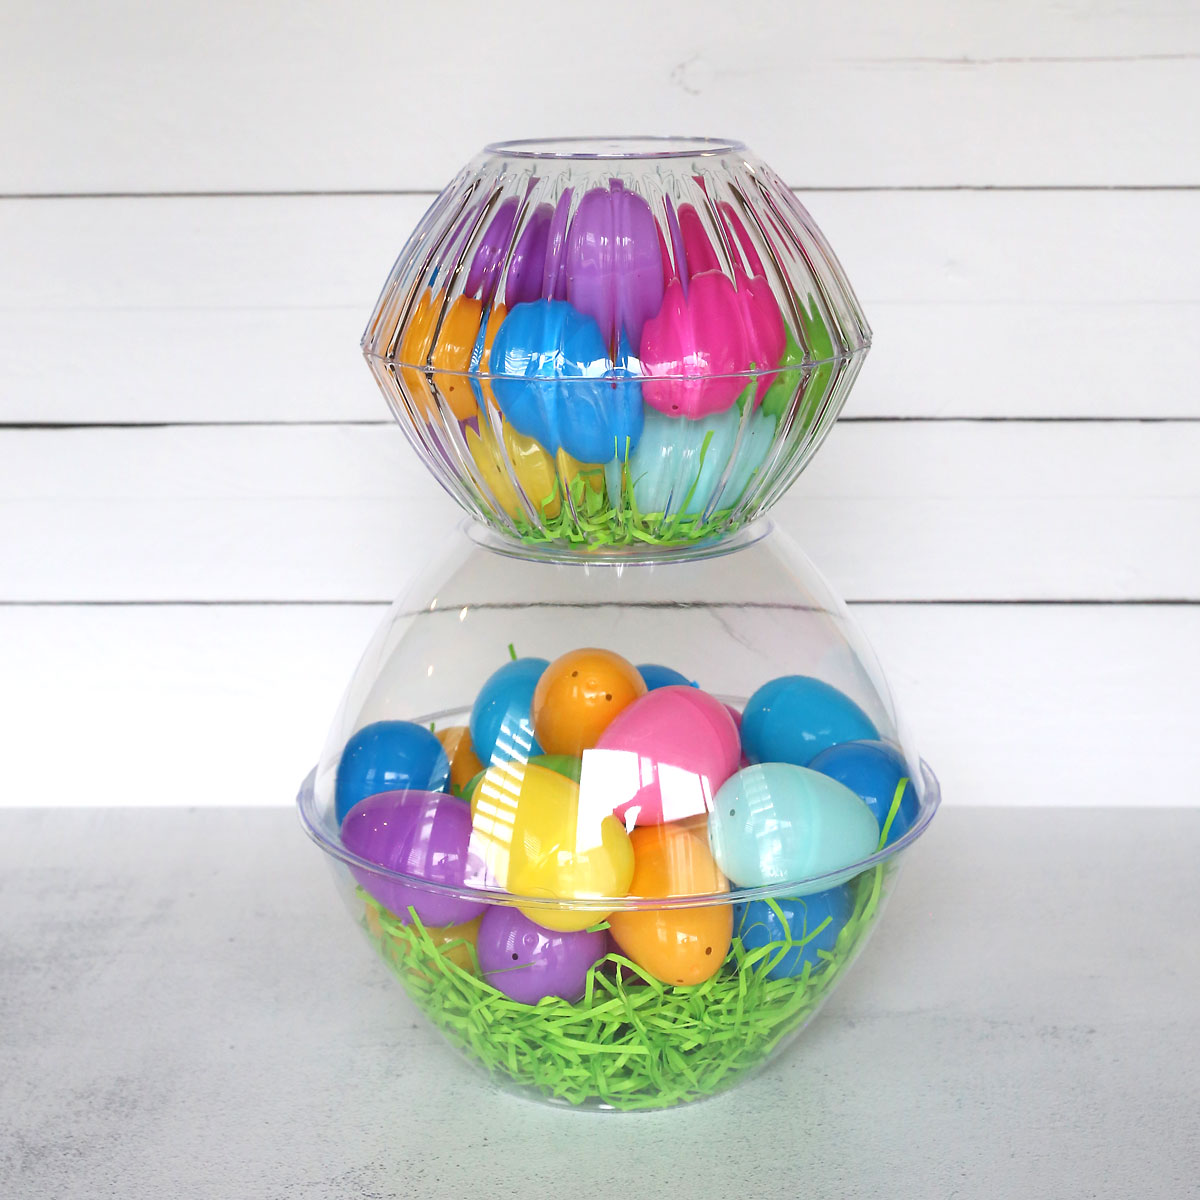
Repeat with the smaller bowls. I found the bunnies look best if you only use a small amount of grass in the smaller bowls (or none at all). Now you have the bunny’s head and body put together.
Assemble the Bunny
Stack the smaller bowls on top of the larger bowls, using tape in between them to secure. (Again, you can use glue if you want it to be sturdier but then you won’t be able to reuse the bowls.)
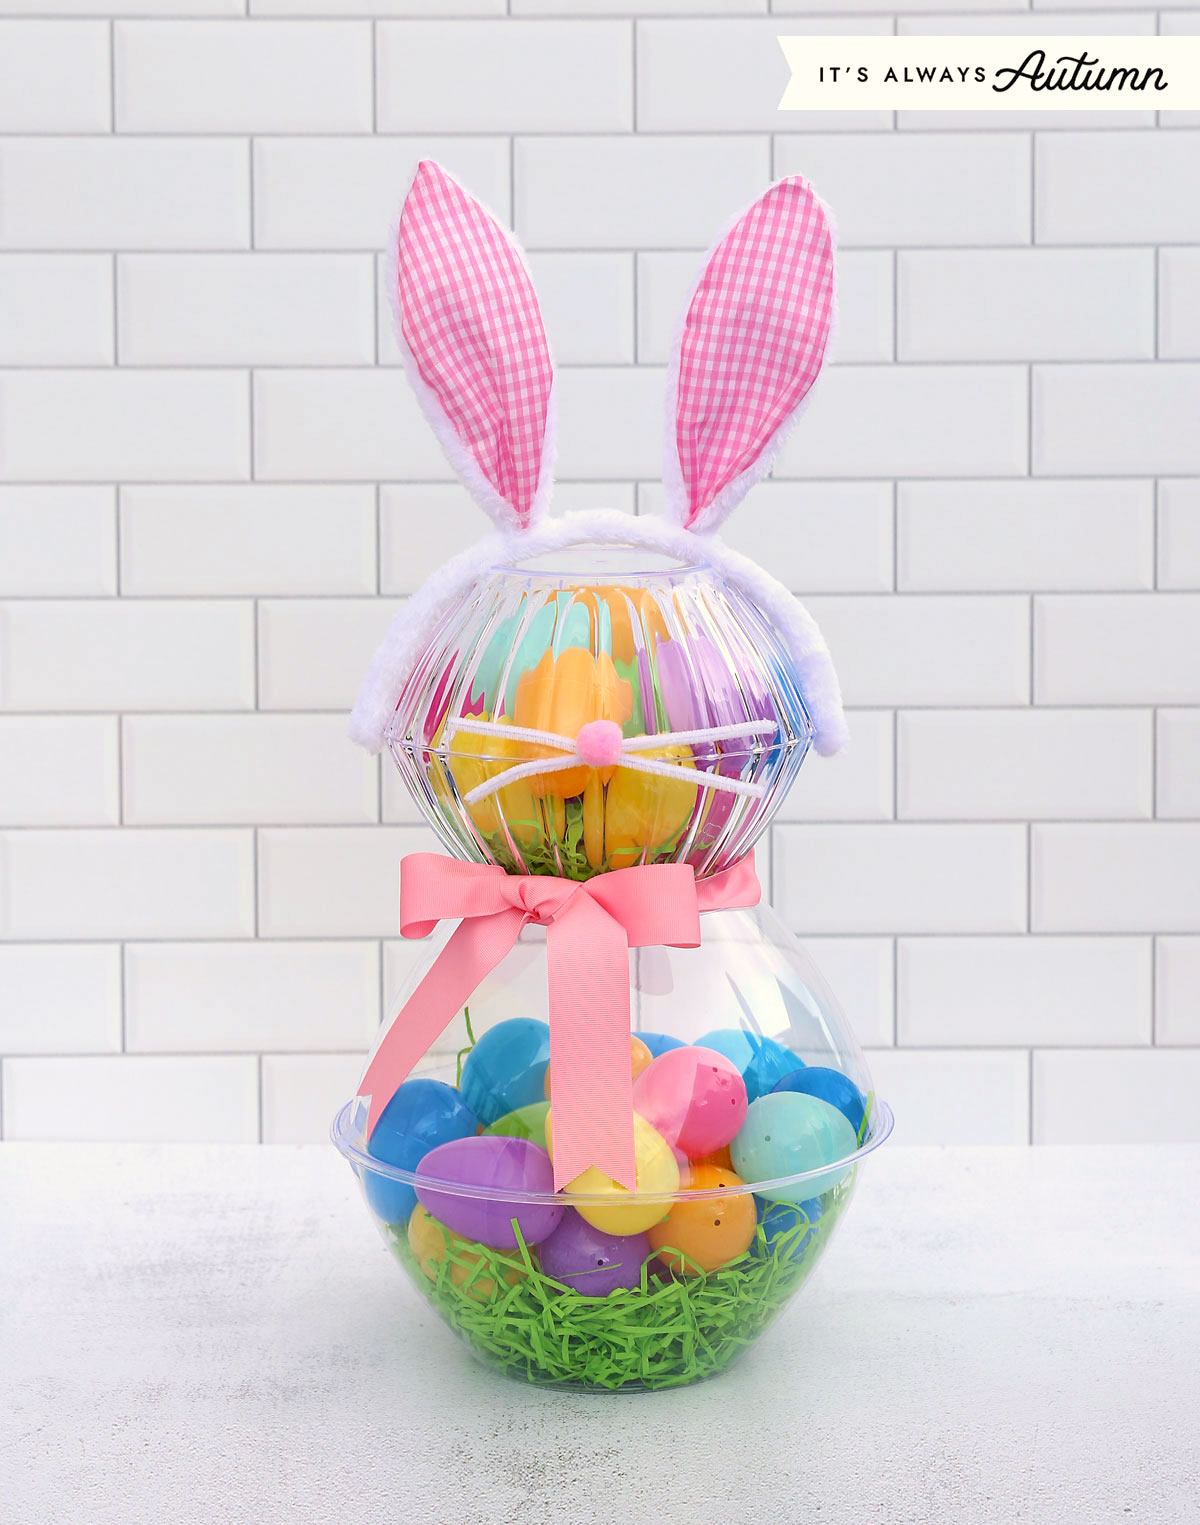
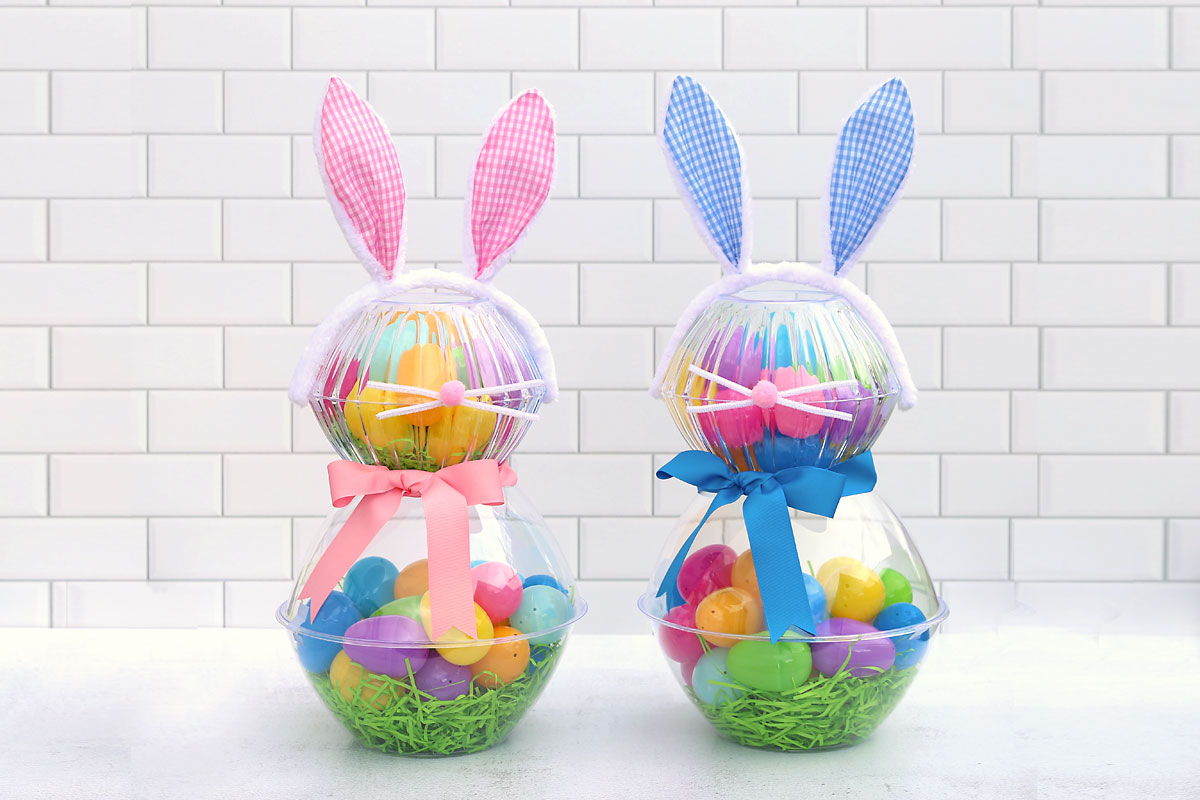
Finish assembling the bunnies by placing the bunny ears headband on top of the small bowl. If the headband doesn’t stay in place on it’s own, use some clear tape to secure it. Cut about four feet of ribbon and tie it in a bow around the bunny’s neck. Then cut a white pipe cleaner in half and hot glue it to the front to act as whiskers. Finally, glue on the pink pom pom for a nose. (Tape doesn’t work here, so if you want to be able to reuse the top bowl you can skip the nose and whiskers.)

That’s it! Your bunny Easter basket is ready to display or give as a gift on Easter morning.
DIY Bunny “Easter Baskets”
Supplies
- 2 Large Plastic Bowls from Dollar Tree, 11.25 inches
- 2 Clear Fluted Plastic Bowls from Dollar Tree, 8 inches
- 1 Bunny Ears Headband
- 4 ft Ribbon
- 1 White Pipe Cleaner
- 1 Pink Pom Pom
- Easter grass, Easter eggs, any other treats/fillers I used 40 large Easter eggs per bunny
Want more project ideas? Sign up to get my favorite easy crafts and recipes straight to your inbox!
Instructions
- Place Easter grass at the bottom of one of the large bowls. Fill it with Easter eggs and any other treats you'd like to include. Place a second large bowl on top and tape the bowls together in 2-3 places. This creates the bunny's body. Repeat with the smaller bowls to create the head.

- Stack the head on top of the body and secure with tape.

- Tie the ribbon in a bow around the bunny's neck. Place the headband on it's head. Cut the pipe cleaner in half and use hot glue to glue it on as whiskers, then glue on the pom pom for a nose.
- Note: the bunnies are assembled with tape so they are easy to get into and most of the supplies can be reused for another purpose. If you'd like them to be very sturdy you can use hot glue to glue everything together instead.


Leave a Comment