
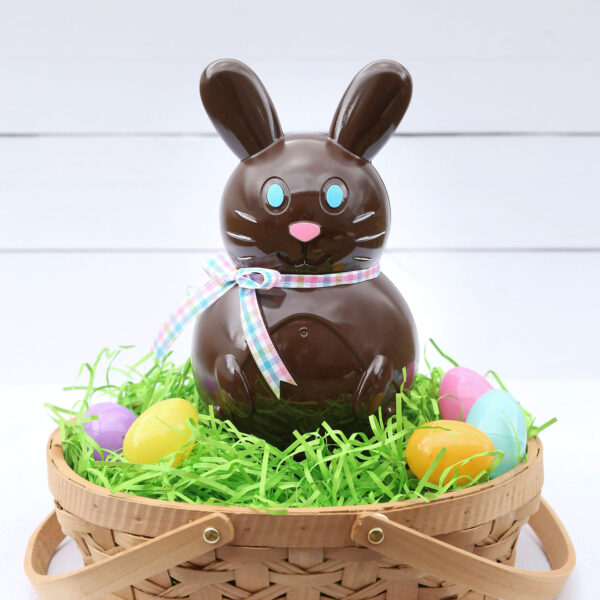
In today’s post: Turn a plastic bunny into a faux chocolate bunny that looks adorable as part of an Easter centerpiece.
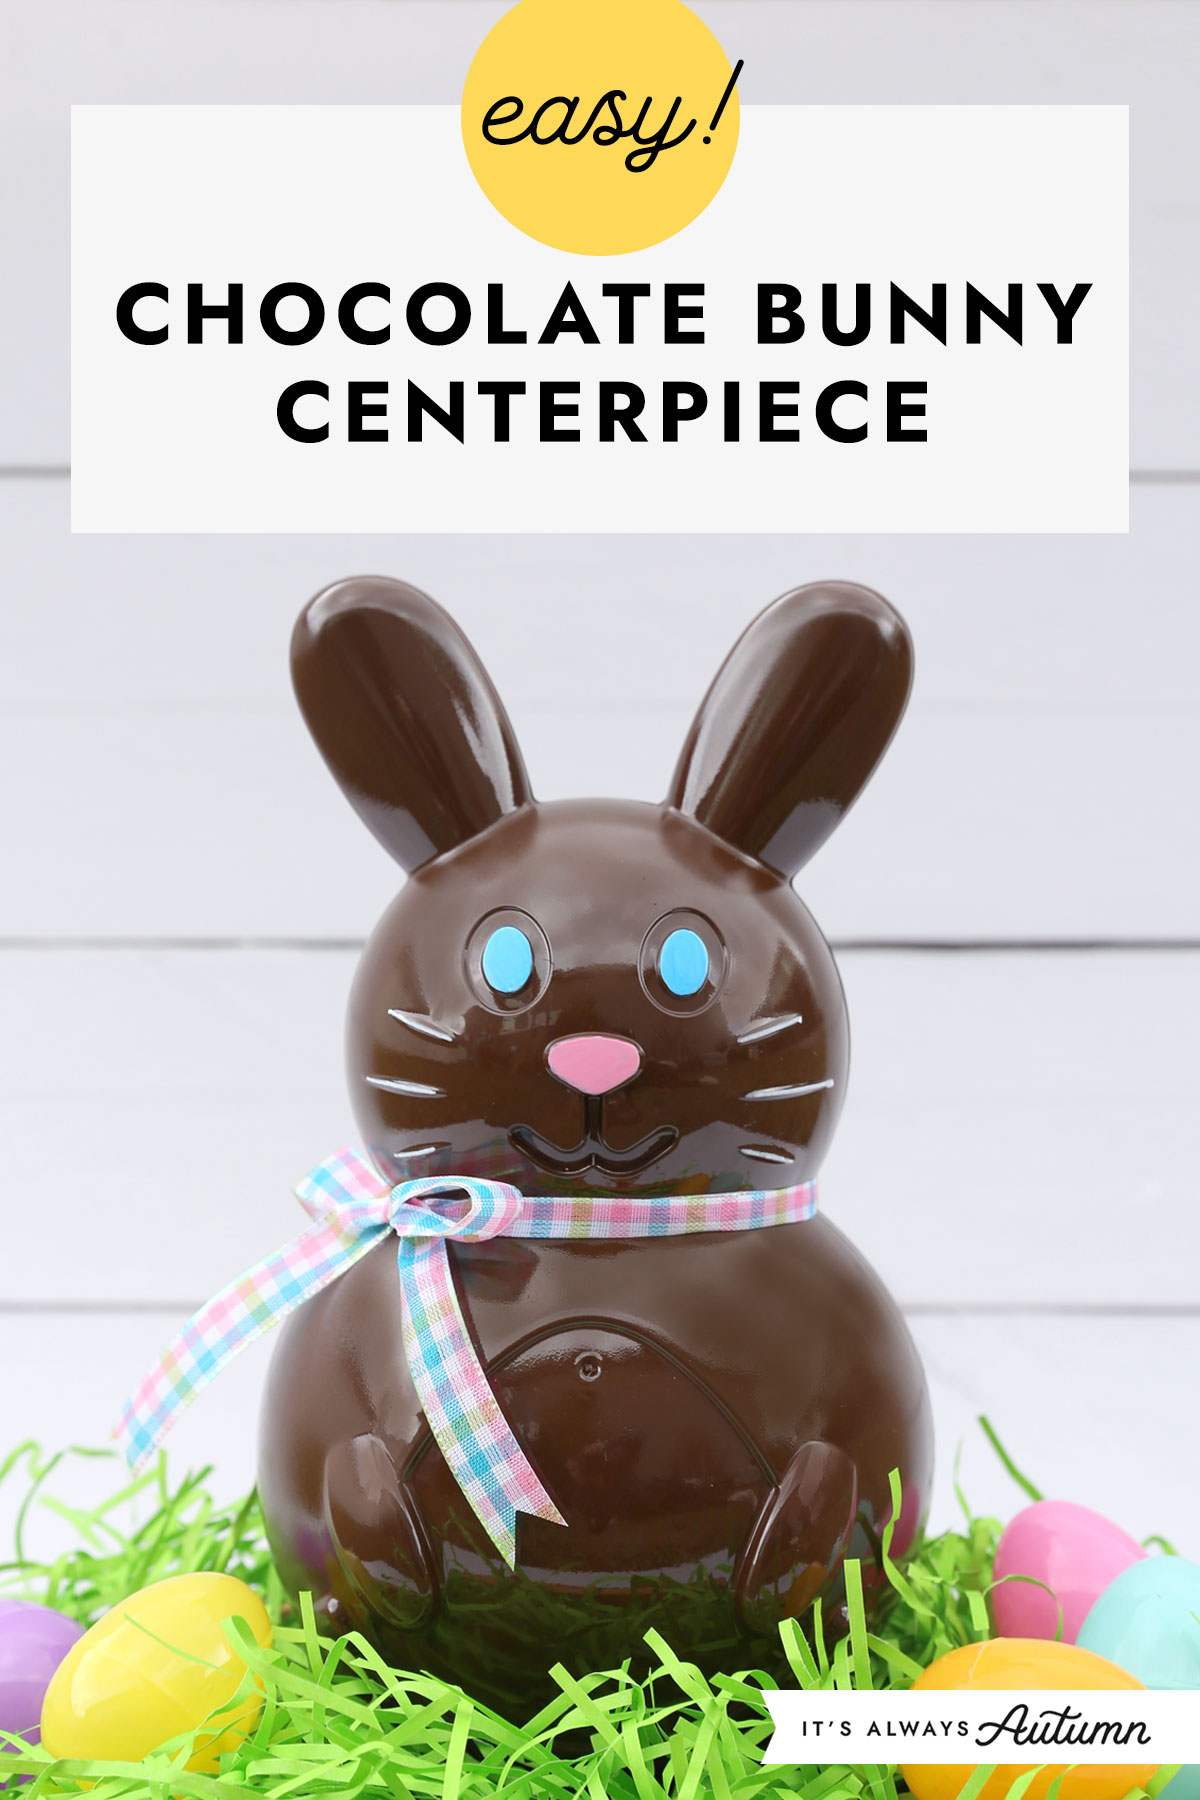
This is an easy Easter craft for adults that will look cute on your mantel or Easter table. This project doesn’t take much hands on time – probably 30-45 minutes. However, because paint is involved you will need to factor in drying time, which means you may want to paint the bunny one day and then assemble the centerpiece the next day.

Fun For Kids
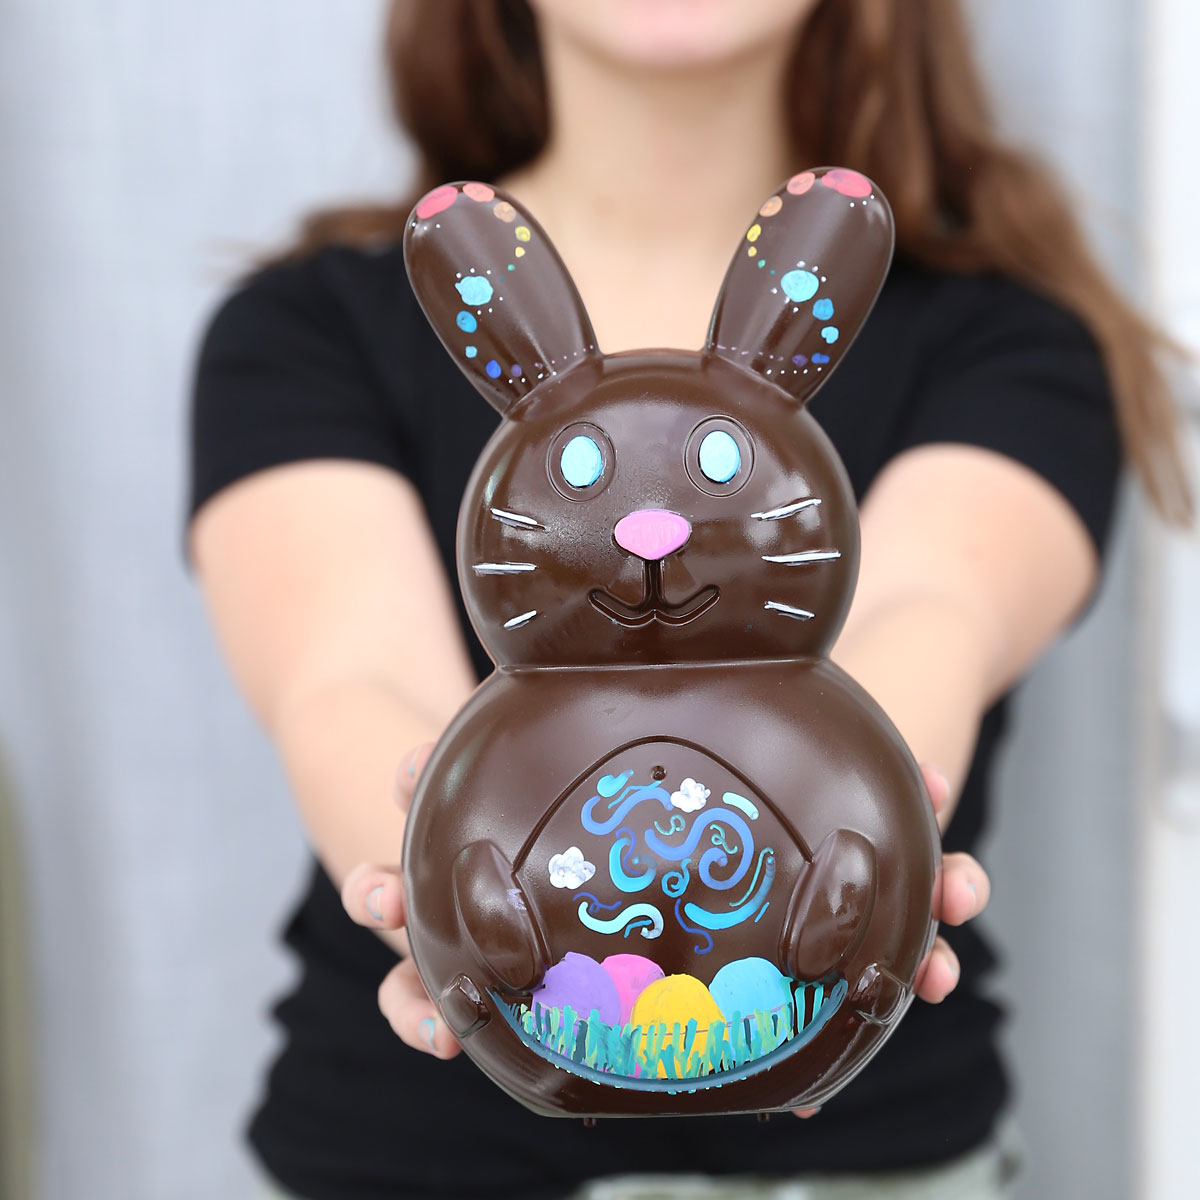
This can be a fun project for kids to help with! These plastic bunnies only cost $1.25, so you can paint a few extras and then let your children decorate them. Paint pens make it easy!
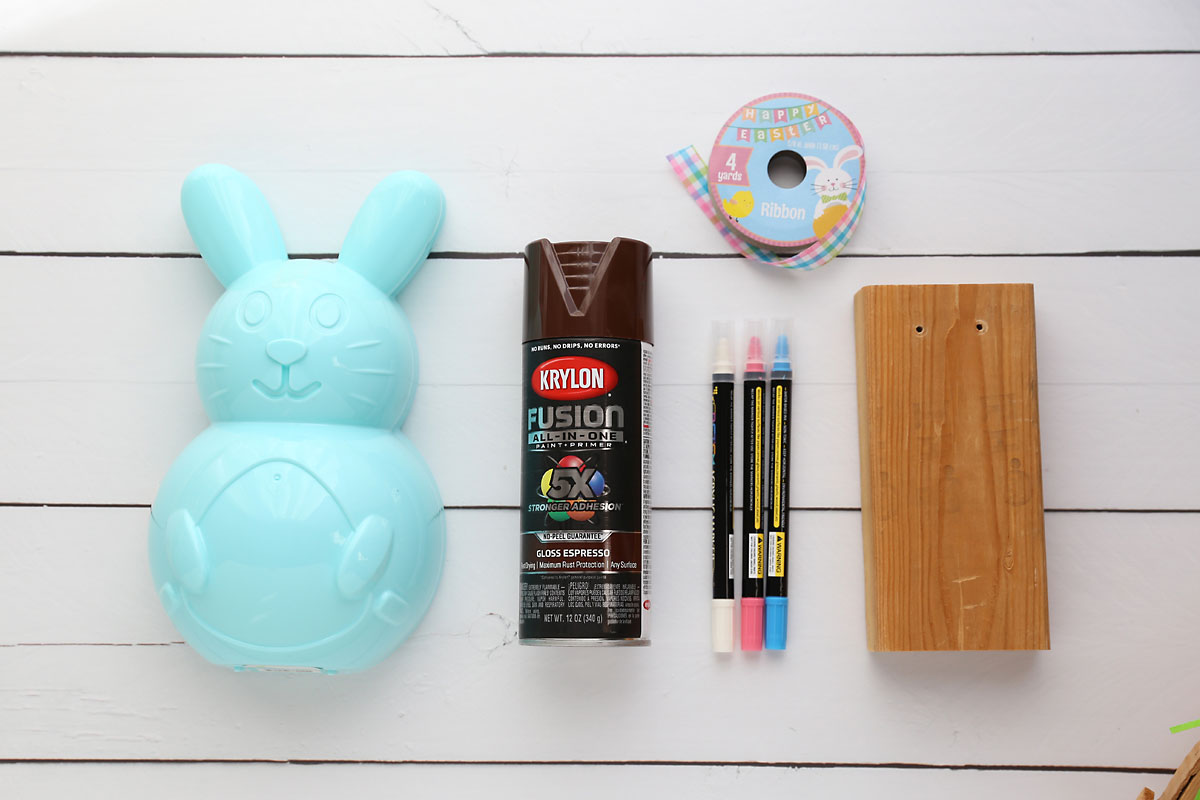
Supplies
Here’s what you need to make a faux chocolate bunny centerpiece:
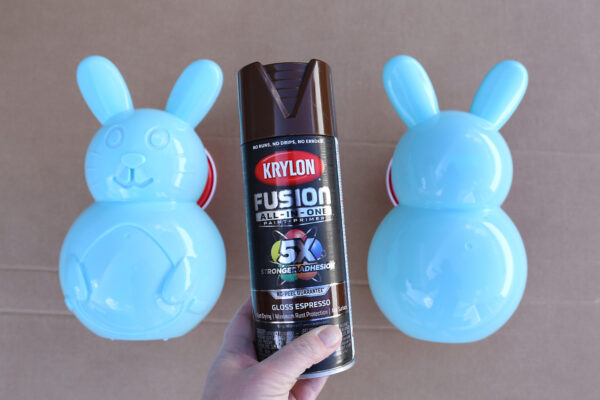
- Plastic bunny: I’m using fillable plastic bunny containers that I found at Walmart (these are also sold at Dollar Tree).
- Brown gloss spray paint: I used Krylon brand spray paint (it’s made to work on plastic) in Espresso, also found at Walmart.
- Paint pens (optional): If you’d like to add some color to the bunny’s eyes and nose, paint pens work great! They are so much easier to use than a paintbrush. These are the paint pens I used from Amazon.
- Ribbon: I used about a yard of half inch ribbon to tie around the bunny’s neck.
- Scrap piece of wood: I used a small piece of a 2×4 I had in the garage. This will act as a base for the bunny to keep it standing up. If you plan to put the bunny in a basket, like I did, it doesn’t matter what this wood piece looks like because you won’t see it. If you want to display the bunny without a basket, you’ll probably want to use a small wood plaque instead of scrap wood.
- Basket, optional, not pictured: I used a shallow basket I found at the thrift store.
- Easter grass + Easter eggs
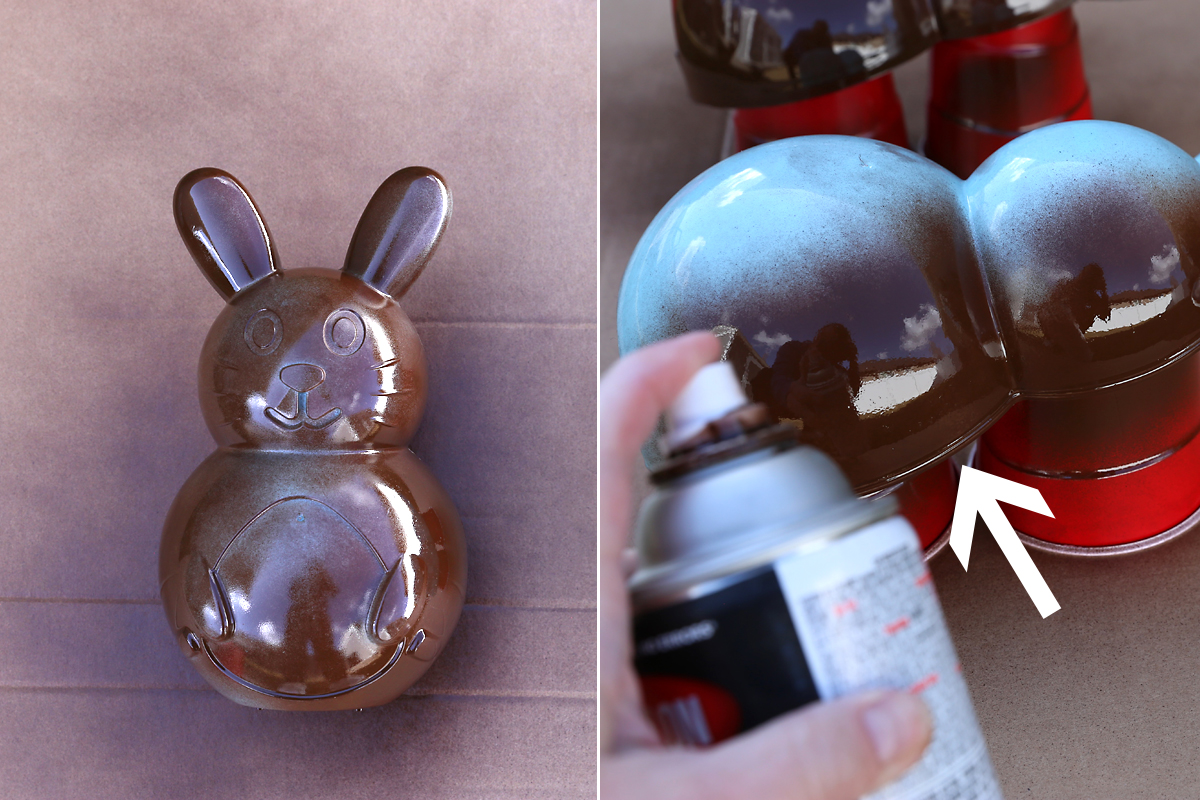
Spray Paint the Bunny
The first step for this project is to spray paint the bunny brown. I used a gloss brown paint so the bunny would be shiny like real chocolate. I set each half of the plastic bunny on two plastic cups on top of a piece of cardboard.
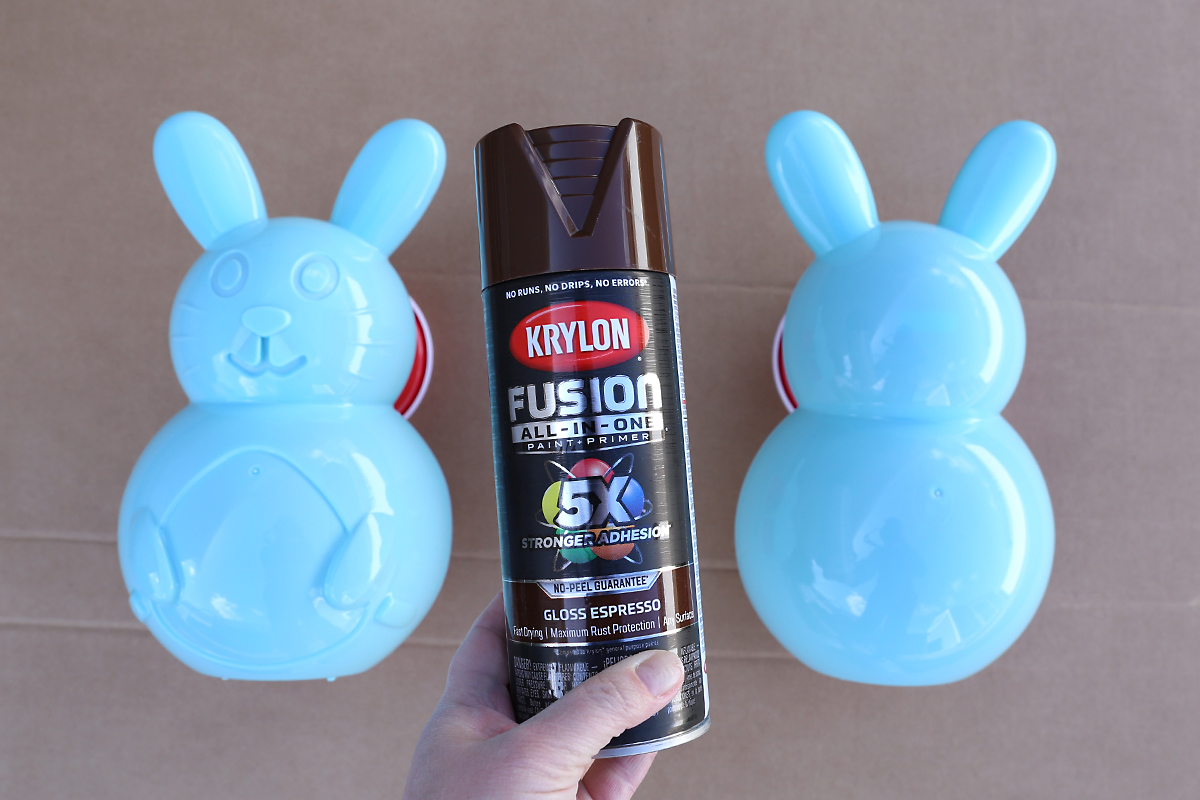
When using spray paint, you always want to do a couple of light coats of paint, allowing the item to dry in between coats (15 minutes is usually sufficient). Make sure that you get the lip on the edge of each side painted, where you see the arrow in the photo below. NOTE: I painted the piece of scrap wood as well.
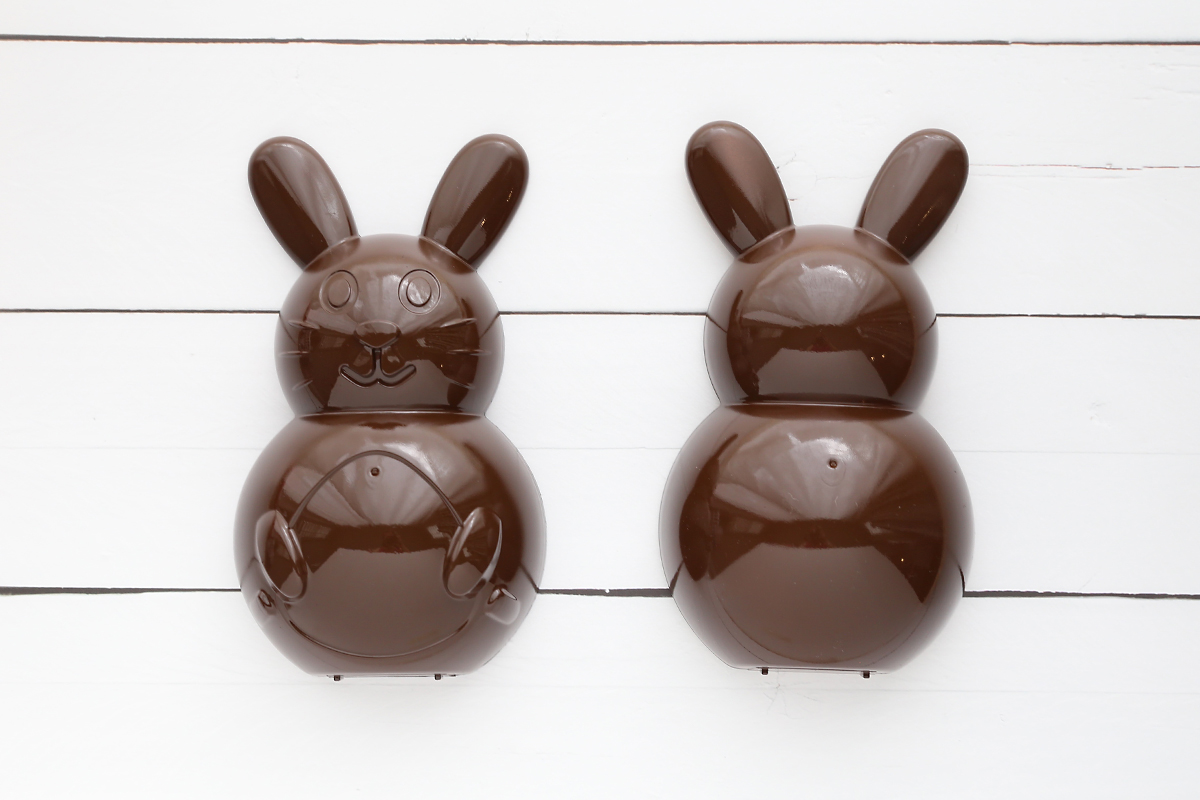
Here’s what it looks like when both pieces are painted and dry – nice and shiny, just like chocolate! I recommend waiting until the next day for the paint to dry and cure completely before proceeding. When it’s completely dry, you can pop the two halves together.
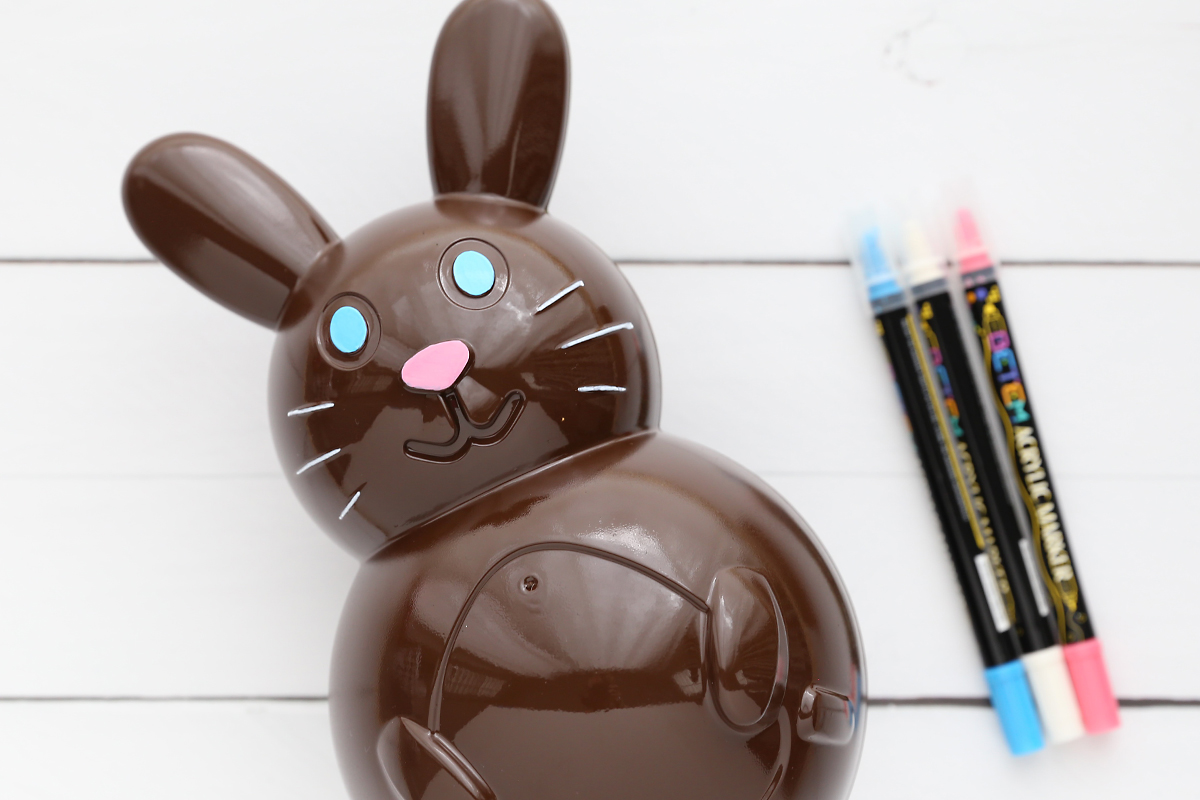
Decorate the Bunny
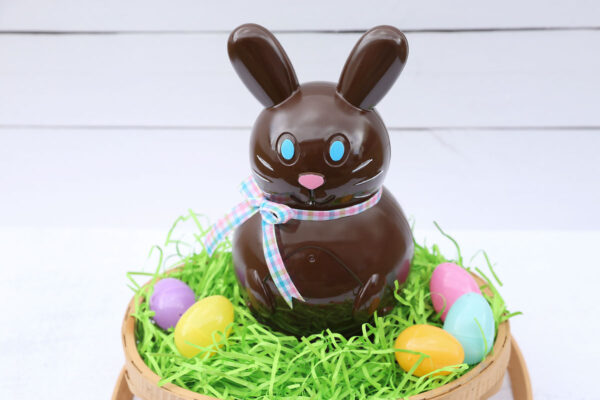
This step is optional. You may prefer to leave the bunny brown, as this will make it look the most like an actual chocolate bunny. However, I think it looks really cute to use paint pens to color the eyes blue, the nose pink, and draw the whiskers on in white. I did 3-4 coats of paint pen for the eyes and nose. The paint dries almost immediately so it’s easy to do multiple coats.
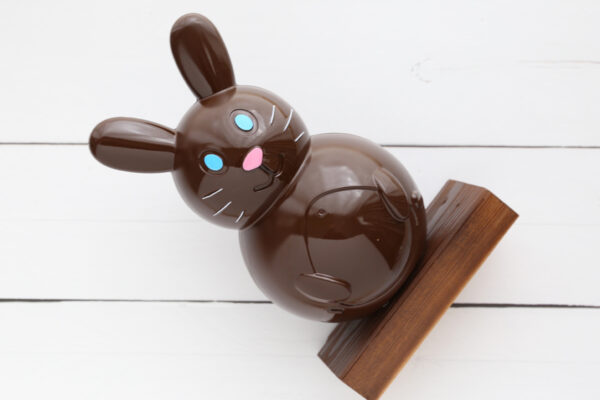
Glue the Bunny to the Base
Next you’ll hot glue the bunny to the piece of scrap wood. The wood acts as a base so the bunny doesn’t tip over and also raises the bunny up so it’s more even with the top of the basket. Place a generous amount of hot glue along the seam at the bottom of the bunny and on the slightly raised lines shown by arrows.
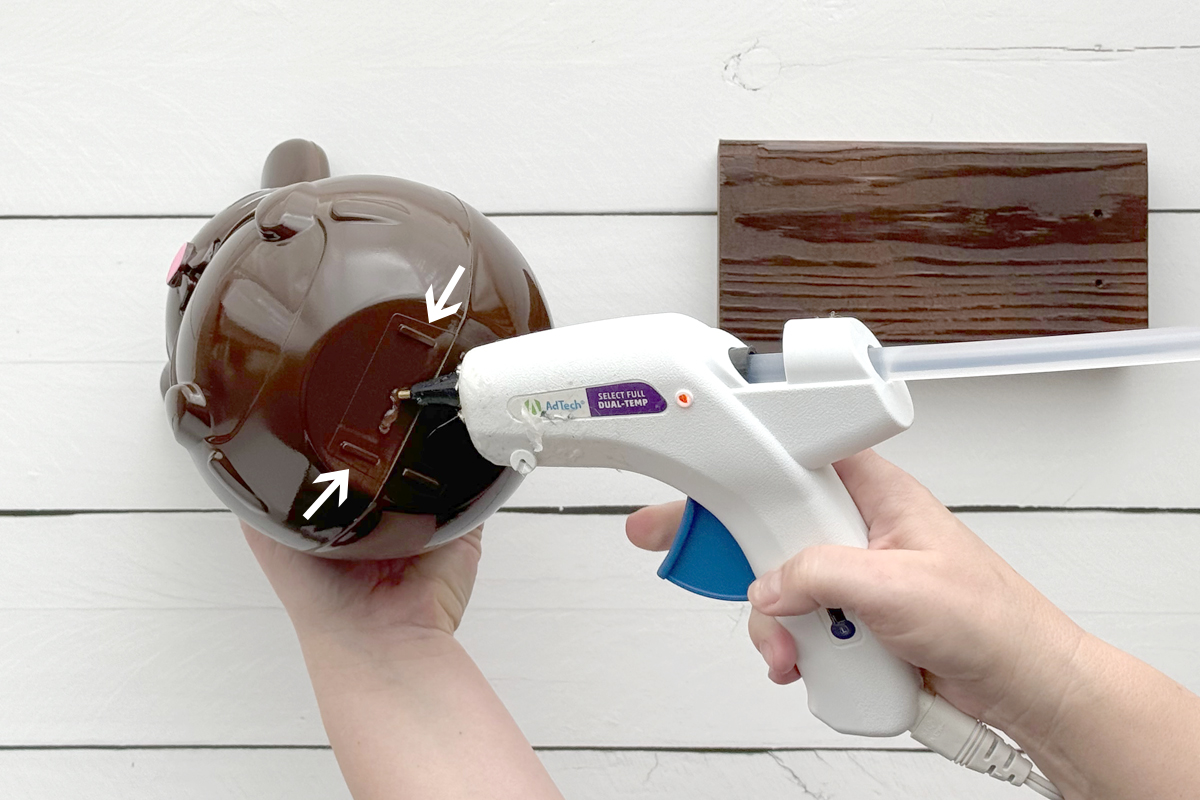
Immediately place the bunny down on the wood base and hold until it’s secure.

Assemble the Centerpiece
Now your plastic bunny looks like a chocolate bunny and you can assemble your centerpiece! I placed the wood base of the bunny inside my basket and covered the base with Easter grass. If you are using a taller basket than the one I used you may need to add another piece of wood or even a small cardboard box under the bunny to raise it up so the bottom of the bunny is level with the top of the basket. Then I tied a ribbon around the bunny’s neck. Because the neck is short, a narrow ribbon works best. The ribbon I used is about half an inch wide and I actually folded it in half lengthwise where it wraps around the bunny. Finish off the basket with a few Easter eggs and any other decorations and your centerpiece is ready to display.
Faux Chocolate Bunny Centerpiece
Supplies
- Plastic Bunny Container
- Brown Gloss Spray Paint
- Paint Pens blue, pink, white, optional
- 1 yard Narrow Ribbon
- Small Piece of Scrap Wood
- Easter basket, grass, eggs
Want more project ideas? Sign up to get my favorite easy crafts and recipes straight to your inbox!
Instructions
- Prop halves of plastic bunny up on plastic cups on a large piece of cardboard. Using 2-3 light coats, spray paint both halves brown, making sure to paint the "lip" around the edges as well. Also paint the piece of scrap wood.

- Allow bunny to dry thoroughly.
- Push the halves of the bunny together. Use paint pens to draw on eyes, nose, and whiskers if desired.
- Use plenty of hot glue to glue the bunny to the piece of scrap wood to act as a base.
- Place the bunny inside the basket. If the basket is tall, you may want to set it on another piece of scrap wood or another item to raise it up so the bottom of the bunny is level with the top of the basket. Fill the basket with Easter grass to cover the base. Tie a ribbon around the bunny's neck. Add Easter eggs if desired.


Shelby Walther says
Cute
Dottie says
Brilliant. Thank you