
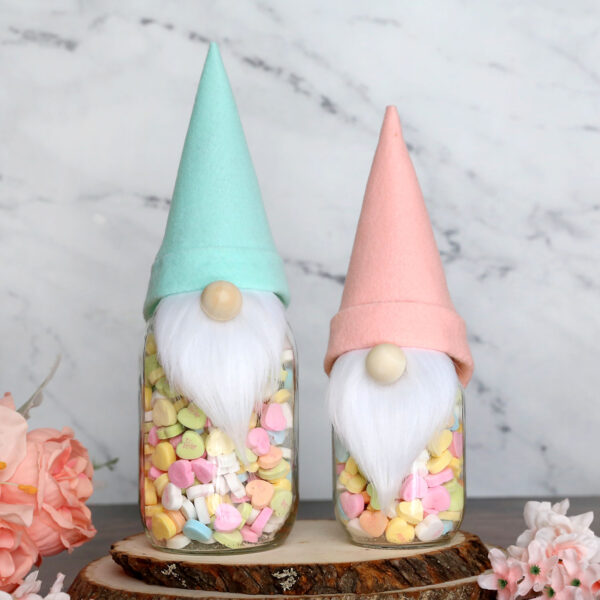
In today’s post: Turn mason jars into gnomes in just a few steps, then fill them with candy for an adorable gift!
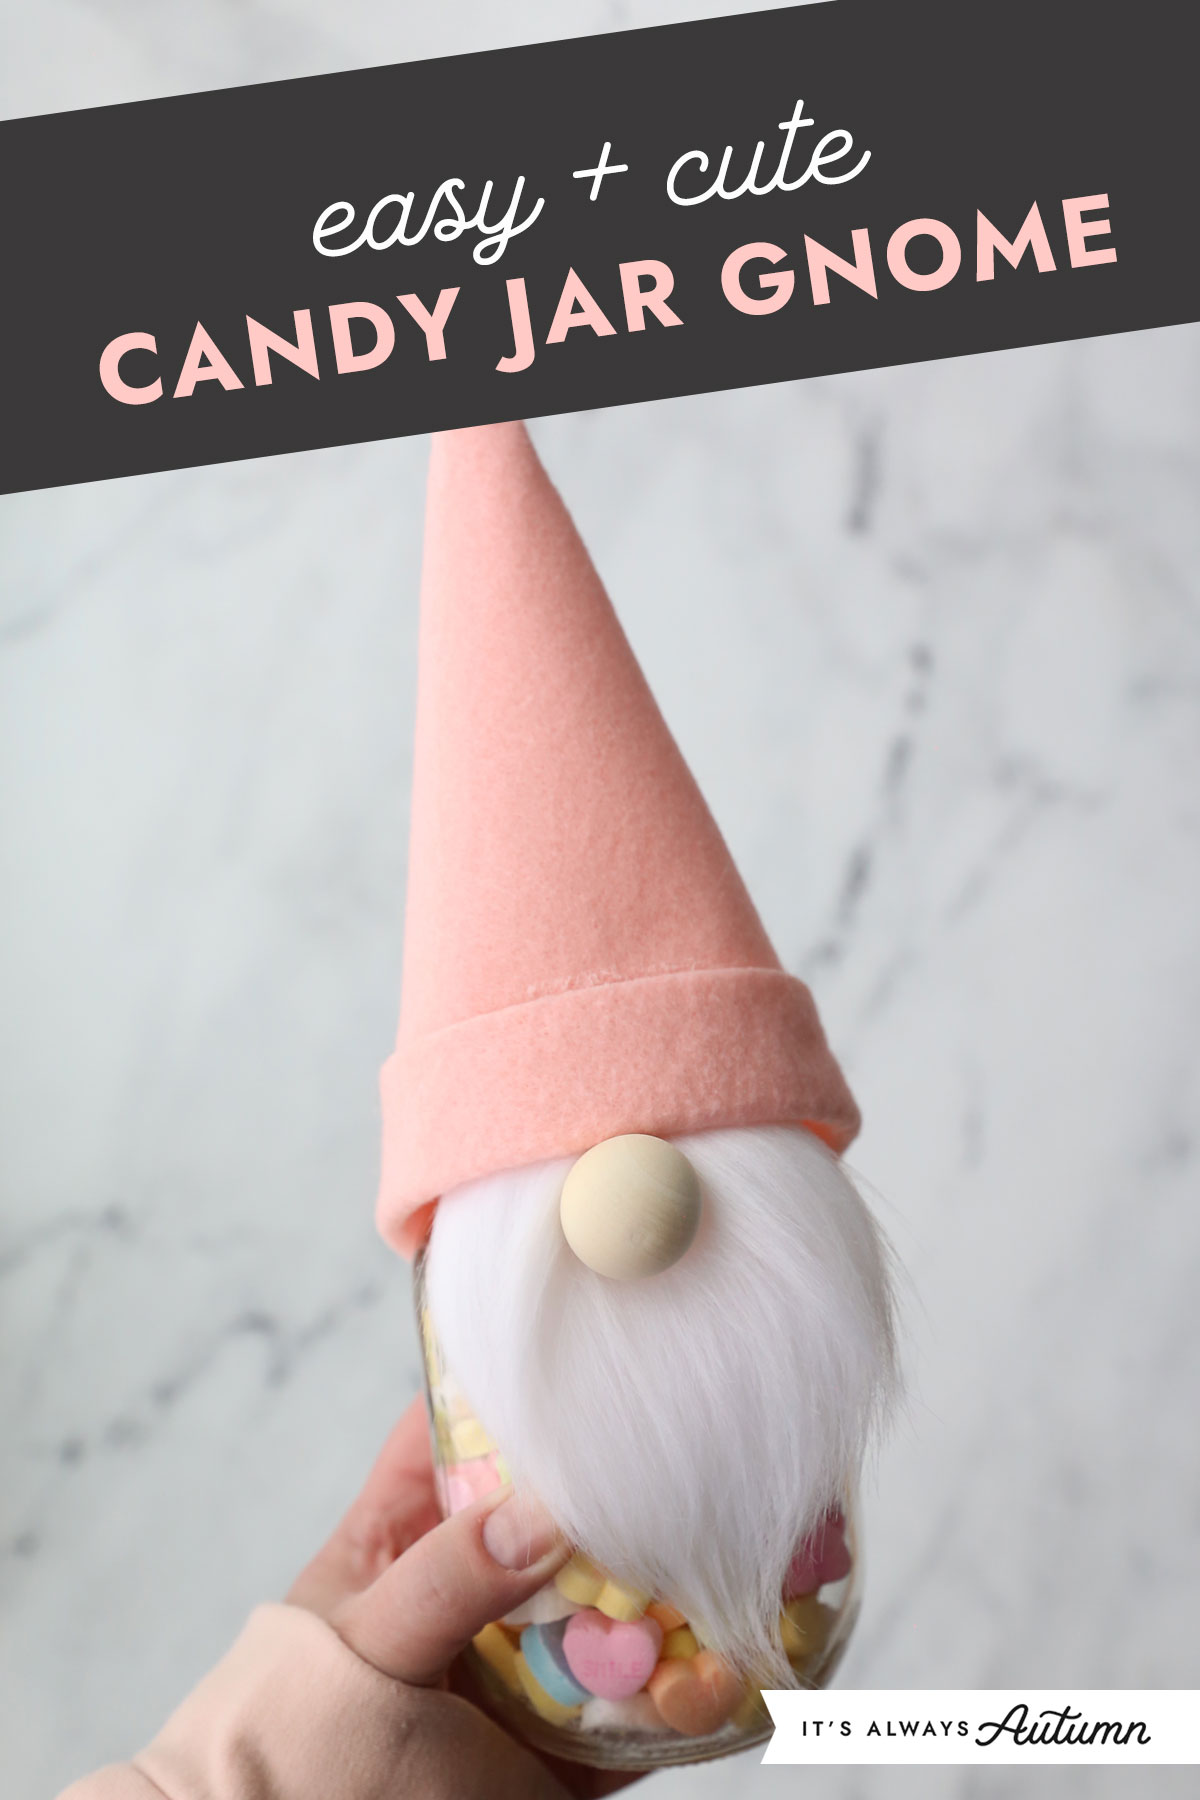
Today I’m showing you how to glue together a cute gnome hat that fits over a standard size mason jar lid. Fill the jar with candy, screw on the lid, top it with the gnome hat, and you have an adorable gnome candy jar! This makes a fun decoration for Valentine’s Day when filled with conversation hearts, but you could easily make these gnomes hats in any color for different holidays.
DIY Valentine’s Day Craft
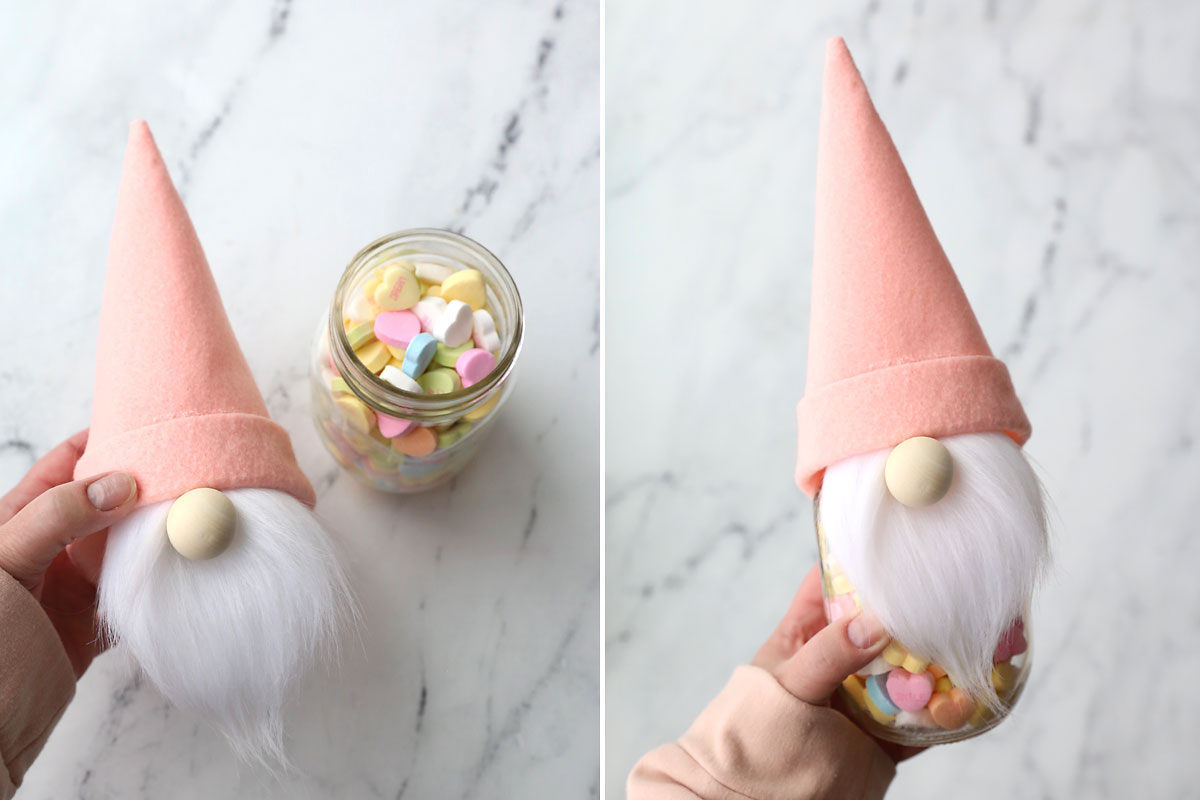
Wouldn’t this be a cute gift? It’s easy to put together in about 15 minutes using hot glue (no sewing!). I’m including a printable pattern that will make cutting out the hat and beard super simple. This pattern will fit standard size mason jar lids (not wide mouth lids) on either pint or quart jars, although you may want to make the beard longer if you plan to use a quart jar.

Supplies
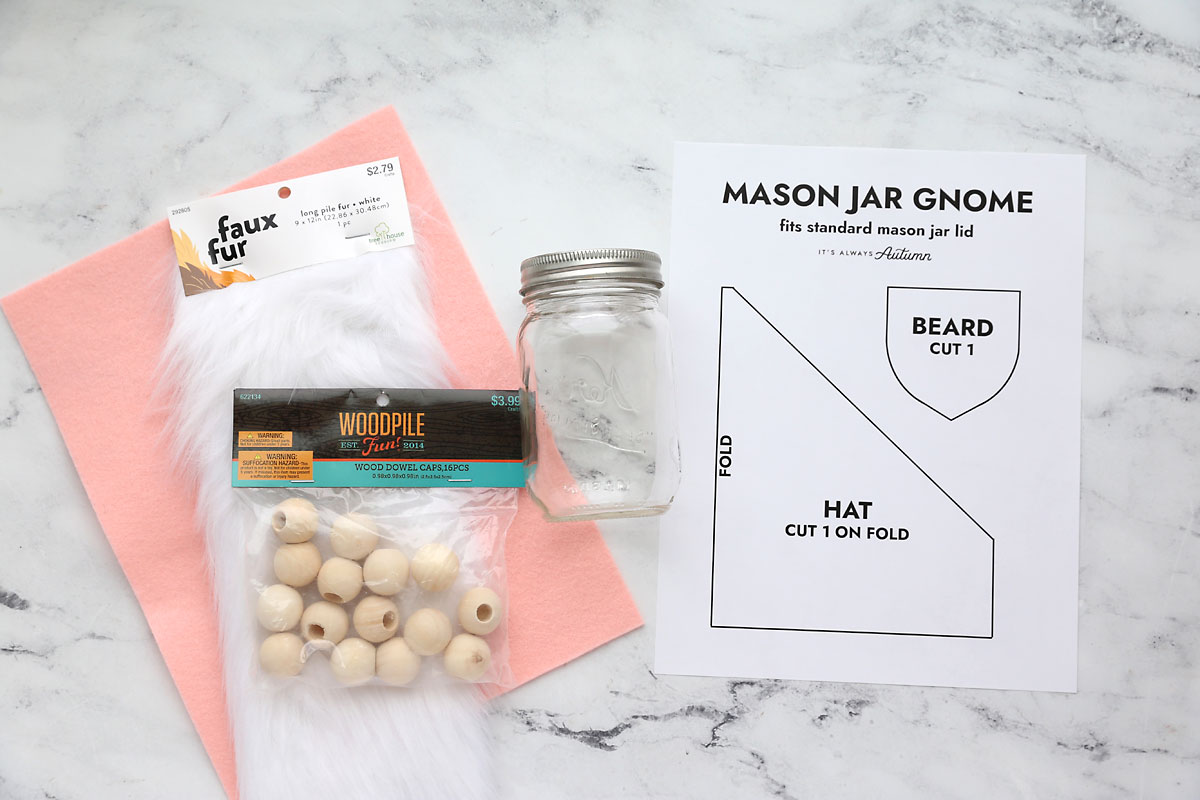
Here’s what you’ll need to make a candy jar gnome:
- Sheet of 9×12 craft felt: I prefer using the “premium” sheets of felt that are a little bit thicker, but normal craft felt works too. In the photo above the pink is a “premium” felt and the blue is standard. I purchased these at Hobby Lobby for $.25 and $.39 each.
- Faux Fur: You need just a small piece of faux fur for each gnome, only about 3 inches square. I purchased a piece of fur from Hobby Lobby in the craft section near the felt for $2.99. You can also buy a narrow strip of fur off the bolt at a sewing store like Jo-Anns (if you think you’ll use a lot of it) or order sheets of fur from Amazon.
- 1 inch Wood Dowel Caps or Wood Ball Knobs: I purchased wood dowel caps at Hobby Lobby. You should be able to find them (or the ball knobs) at any craft store. Just be sure not to get wood beads, which have a hole running all the way through them.
- Mason Jar and Lid: You want a mason jar with a standard size lid, not a wide mouth lid. I think these look cutest with pint size jars, but they will work with quart size jars too.
How to Make a Candy Jar Gnome
This easy Valentine’s Day craft will take about twenty minutes to make. You will need a hot glue gun. Once you’ve gathered your supplies and printed the pattern, here’s what you’ll do:
Cut out the pieces
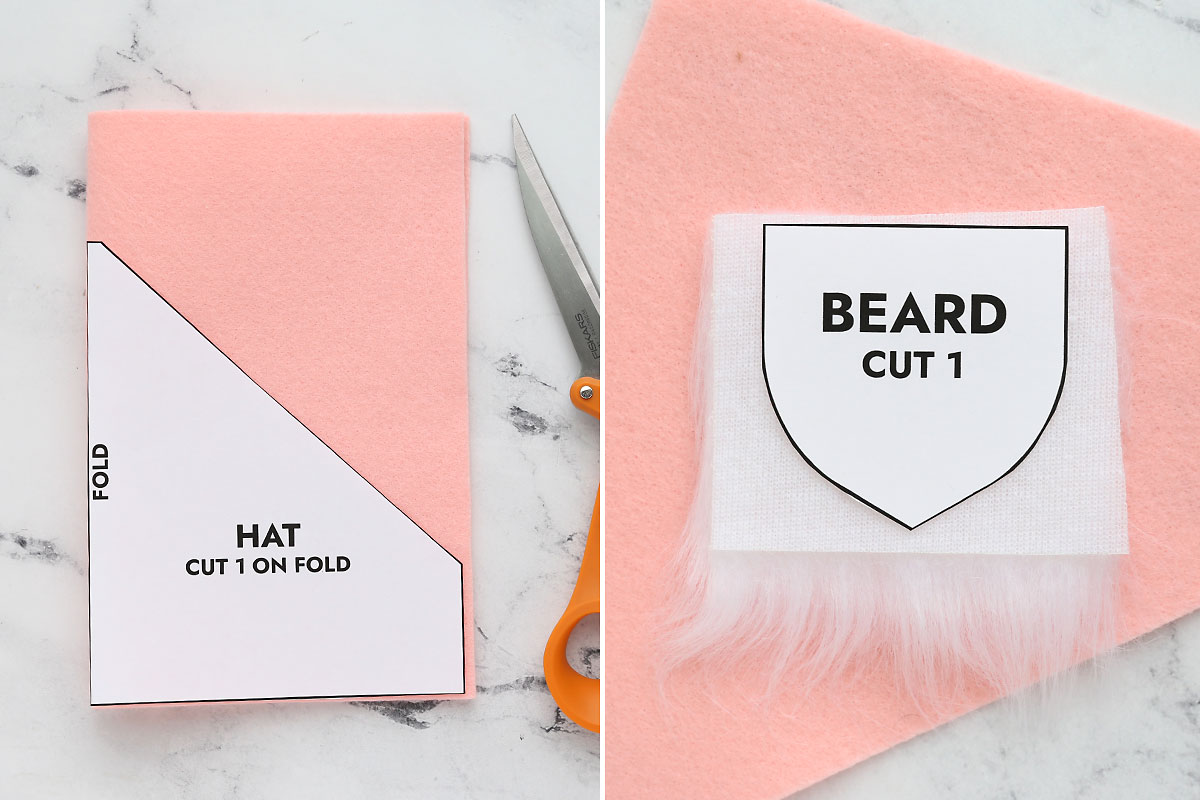
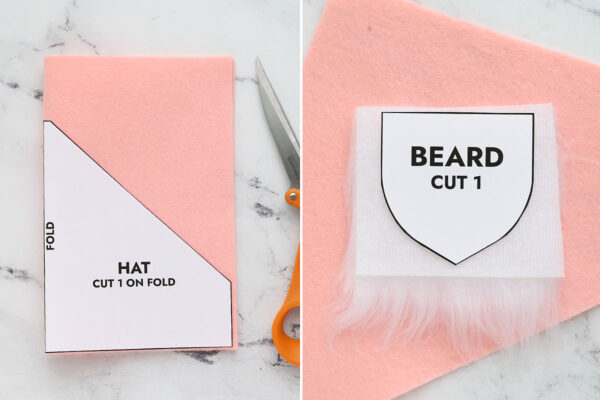
Cut out the hat pattern. Fold a sheet of craft felt in half and line up the side that says “fold” on the pattern with the fold on the felt. Cut out the pattern. Then trace the beard pattern on the back of faux fur and cut it out.
NOTE: When cutting fur, you DO NOT want to just use scissors and cut it out like you would any other fabric because then the fur along the edges of the beard will be very short. To make sure you get the long “beard” effect on the fur, you have two options. First, you can use a razor blade or exacto knife and cut from the back of the fur, cutting through the backing only. Second, you can use sharp scissors, but you’ll want to cut with the back of the fur facing you, and slide the bottom of your scissor through the fur very close to the backing. Your goal is to just cut the backing, not any of the fur itself.
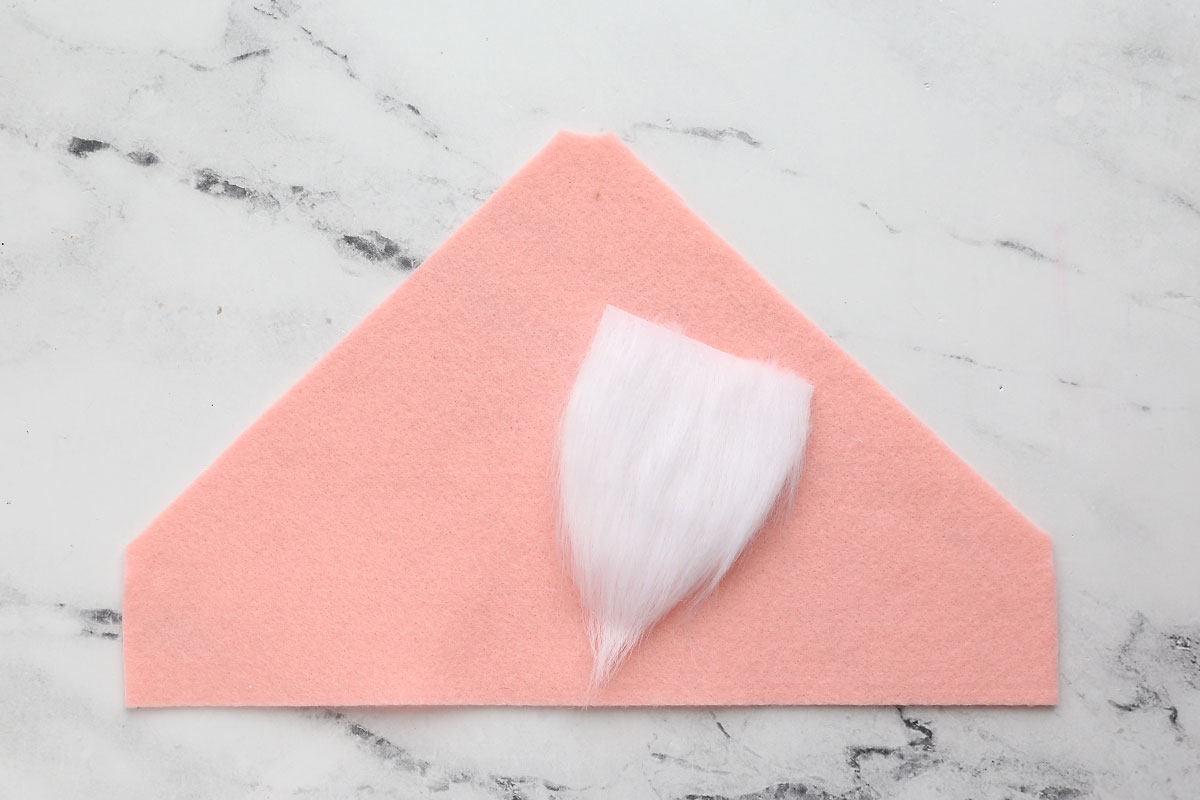
This is what the pieces will look like once cut:
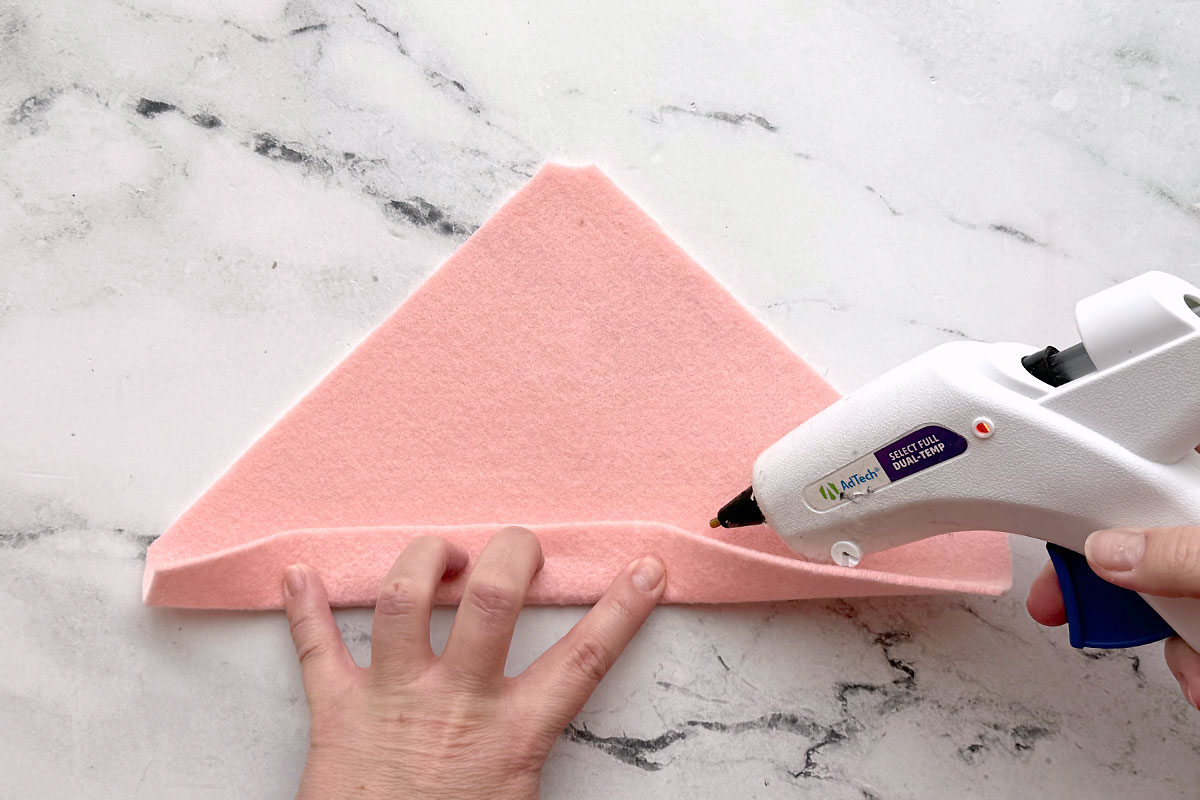
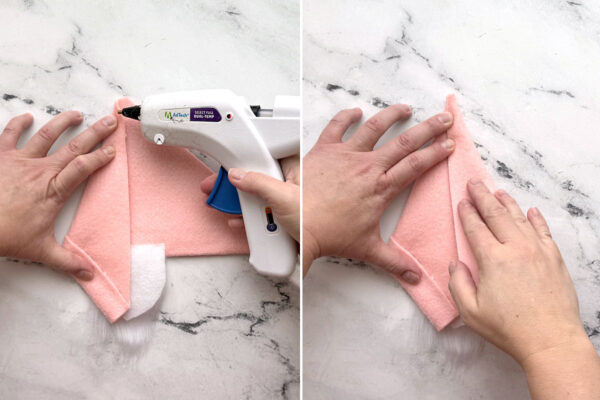
Glue the Hat Together
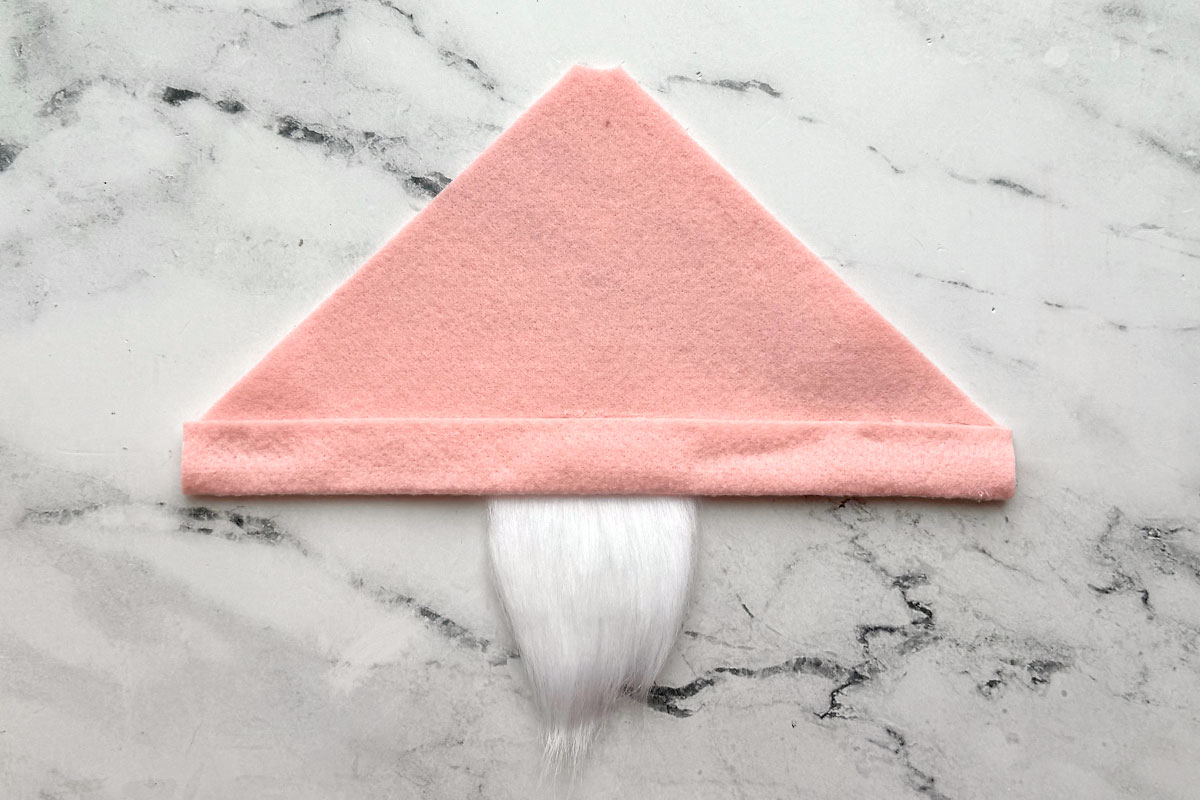
Fold the bottom edge of the hat up one inch and use hot glue to secure. When using hot glue on felt, you’ll need to work a few inches at a time and hold the felt in place for 15-20 seconds until it’s secure.
Next, run a line of hot glue along the very top edge of the beard. Center the beard below the hat.
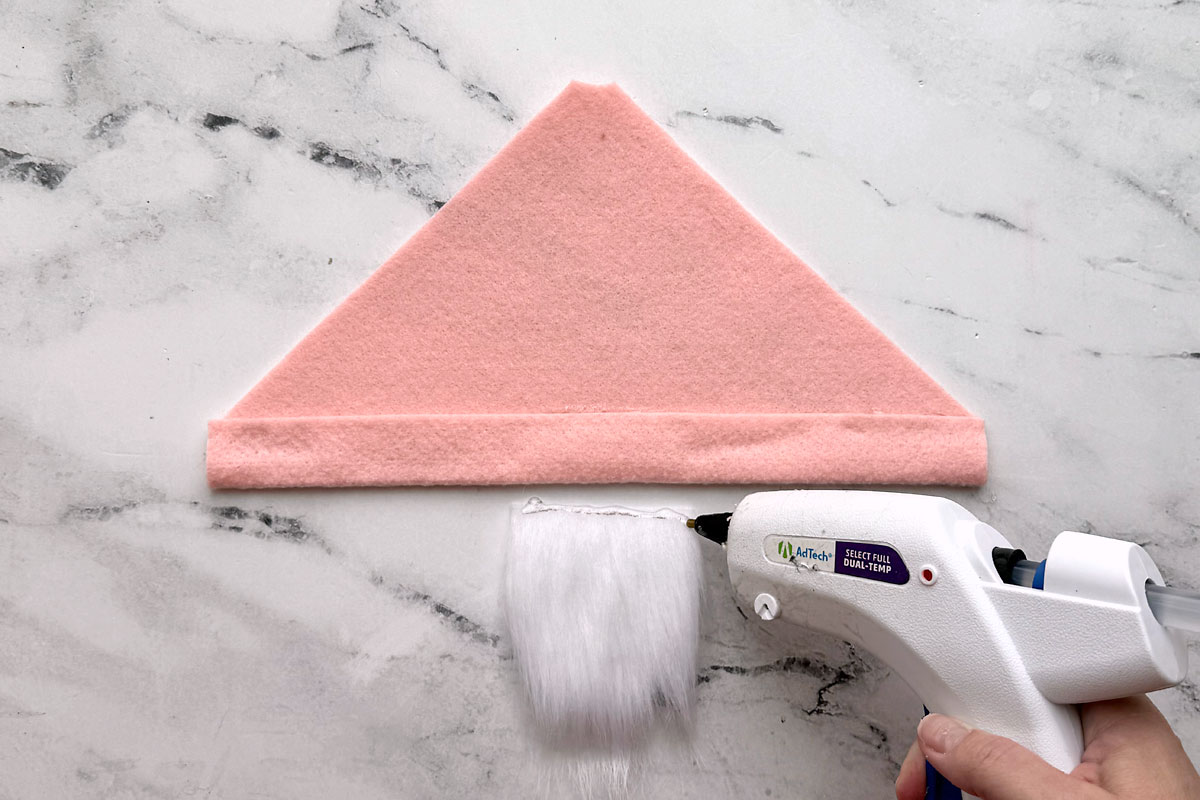
Slide the beard up under the hat and press down to secure.
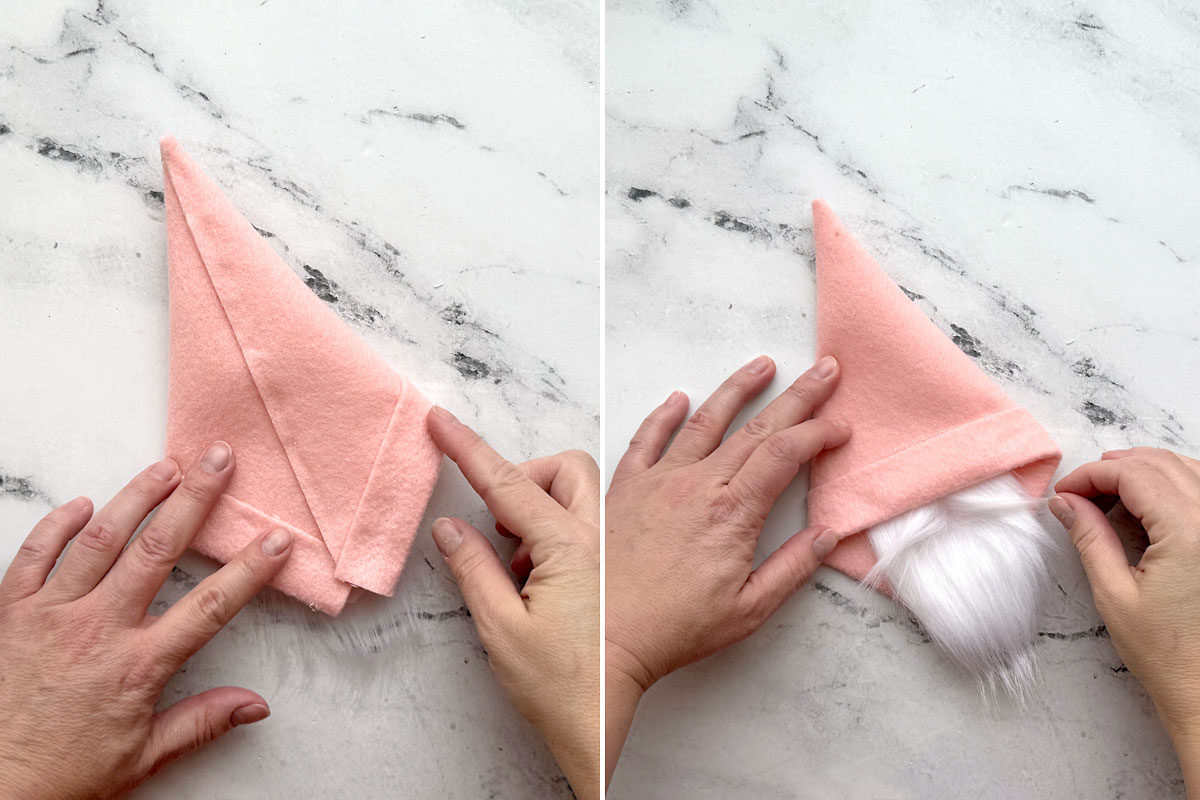
Next, flip the hat over. Fold one side of the hat down so the diagonal edge is straight up and down. Place hot glue along the edge for the top couple of inches. Fold the other side of the hat over so it overlaps by about a quarter of an inch.

Continue adding hot glue, a few inches at a time, to glue the sides of the hat together. Here’s what it will look like from the back, and then the front, when finished:
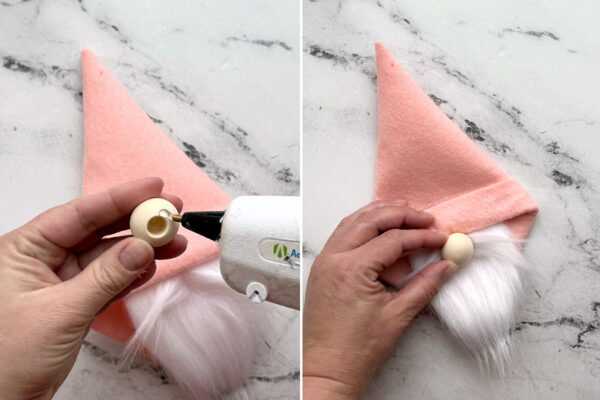
Glue on the Nose
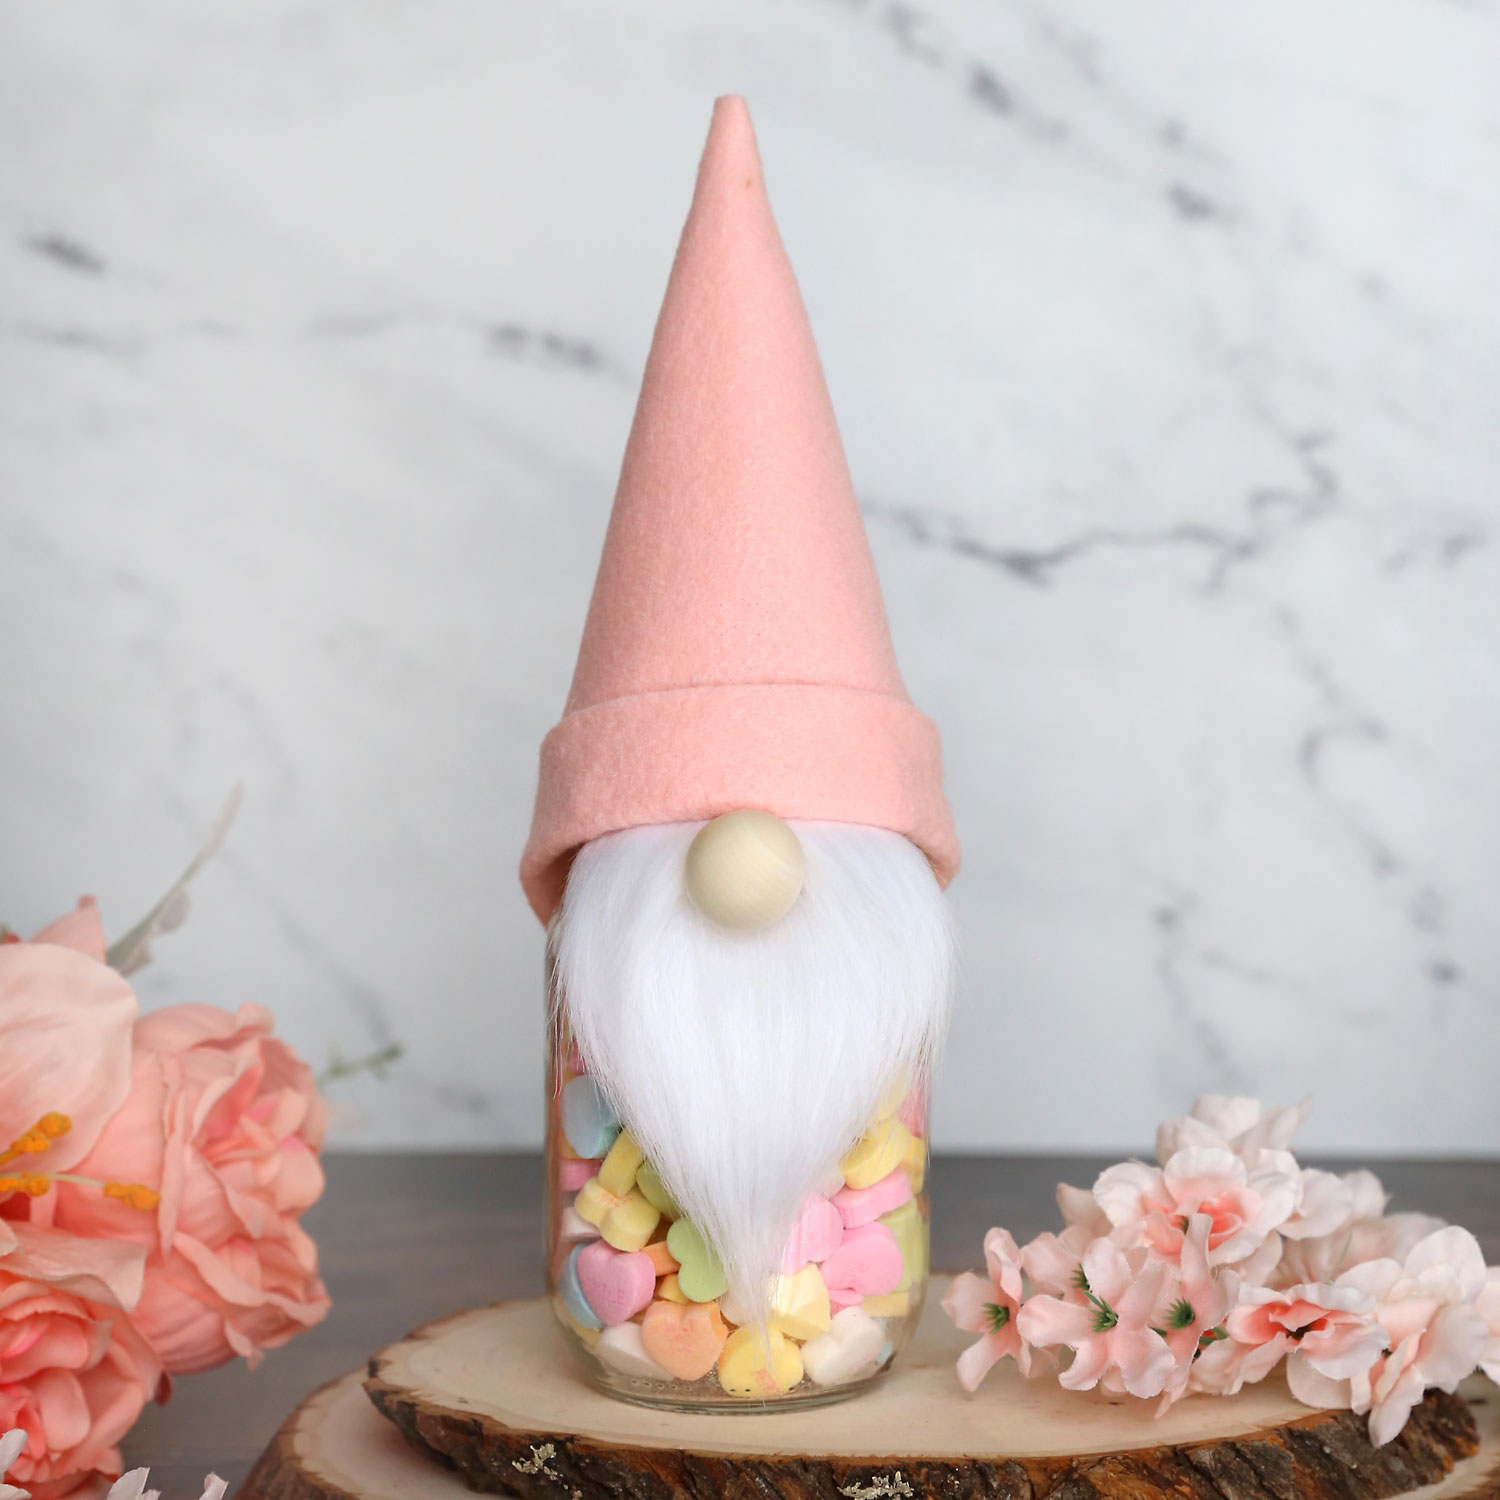
The last step is to glue on the wood dowel cap or ball knob for a nose. At the top center of the beard, pull the fur apart, like you can see in the photo above. This creates a mustache effect and ensures the nose is secured to the fur backing. Add hot glue to the back of the wood ball and press it down, holding for a few seconds until secure.

Now the gnome hat for your candy jar is complete! You have a couple options at this point: you can fill the jar with candy, screw on the lid, and just place the hat on top of it. Or if you’d like, you can glue the hat to the lid – just run a line of hot glue around the outside of the lid before placing the hat on it.
Candy Jar Gnomes
Supplies
- 1 piece Craft Felt 9×12 inches, premium is preferred
- 1 piece Faux Fur 3×3 inches
- 1 inch Wood Dowel Cap or wood ball knob
- Mason Jar w/standard size lid
Want more project ideas? Sign up to get my favorite easy crafts and recipes straight to your inbox!
Equipment
- Hot Glue Gun
Instructions
- Print out the pattern for the hat and beard. Cut the hat out of felt (on the fold) and the beard out of faux fur.

- Fold the bottom edge of the hat up 1 inch and secure with hot glue.
- Place a line of glue along the top edge of the beard, then tuck it under the hat (centered) to secure.
- Turn the hat over and fold one side down so the diagonal edge is straight up and down. Add some hot glue, then overlap the other side about 1/4 inch. Continue gluing to secure the second side over the first side.
- On the front, split the fur in the middle and pull it apart. Glue on the nose.
- Place the hat on top of a mason jar. Glue it to the lid if desired.


Tempie Adams says
I loved the pattern for the candy jar Gnome.