
In today’s post: You can make this cute DIY Valentine’s sweatshirt in under half an hour without a cutting machine! Easy craft idea for adults and teens.
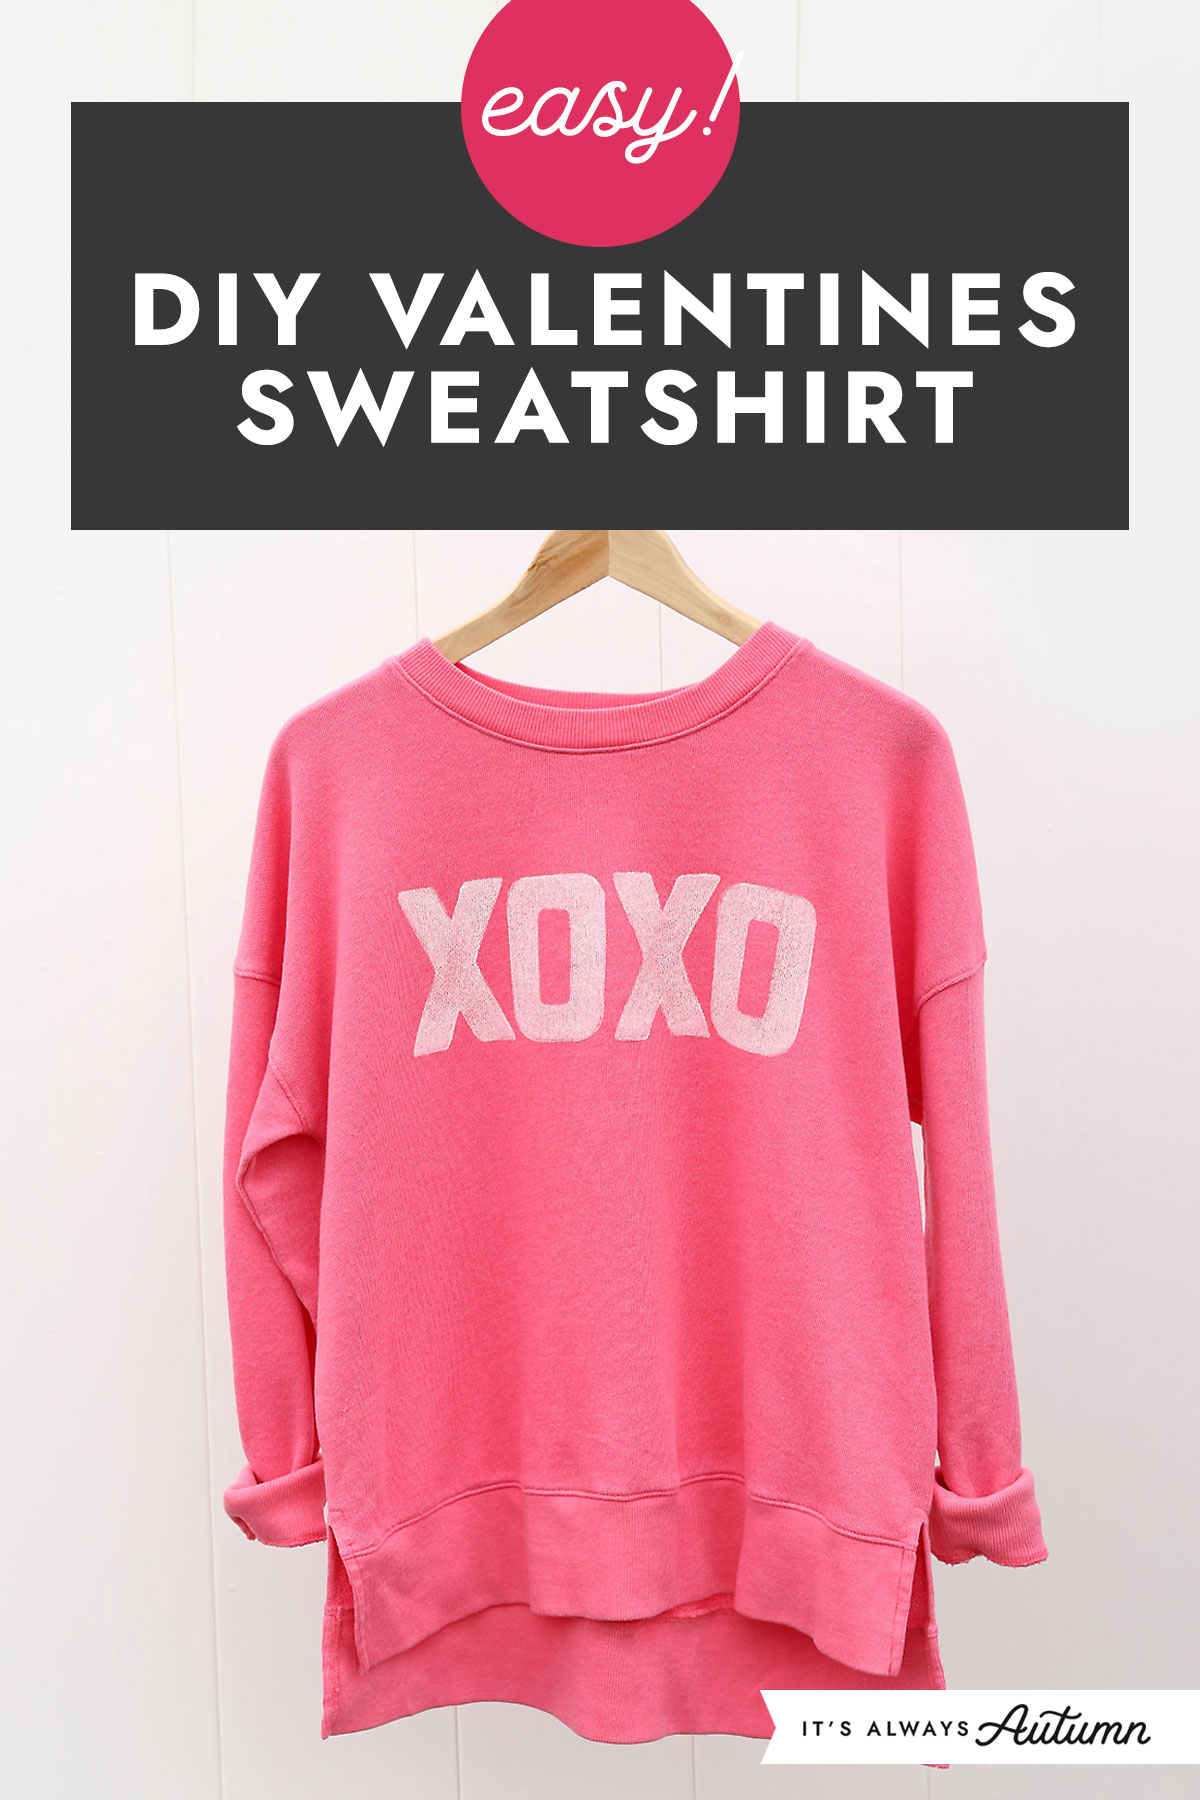
Easy DIY Valentine’s Sweatshirt
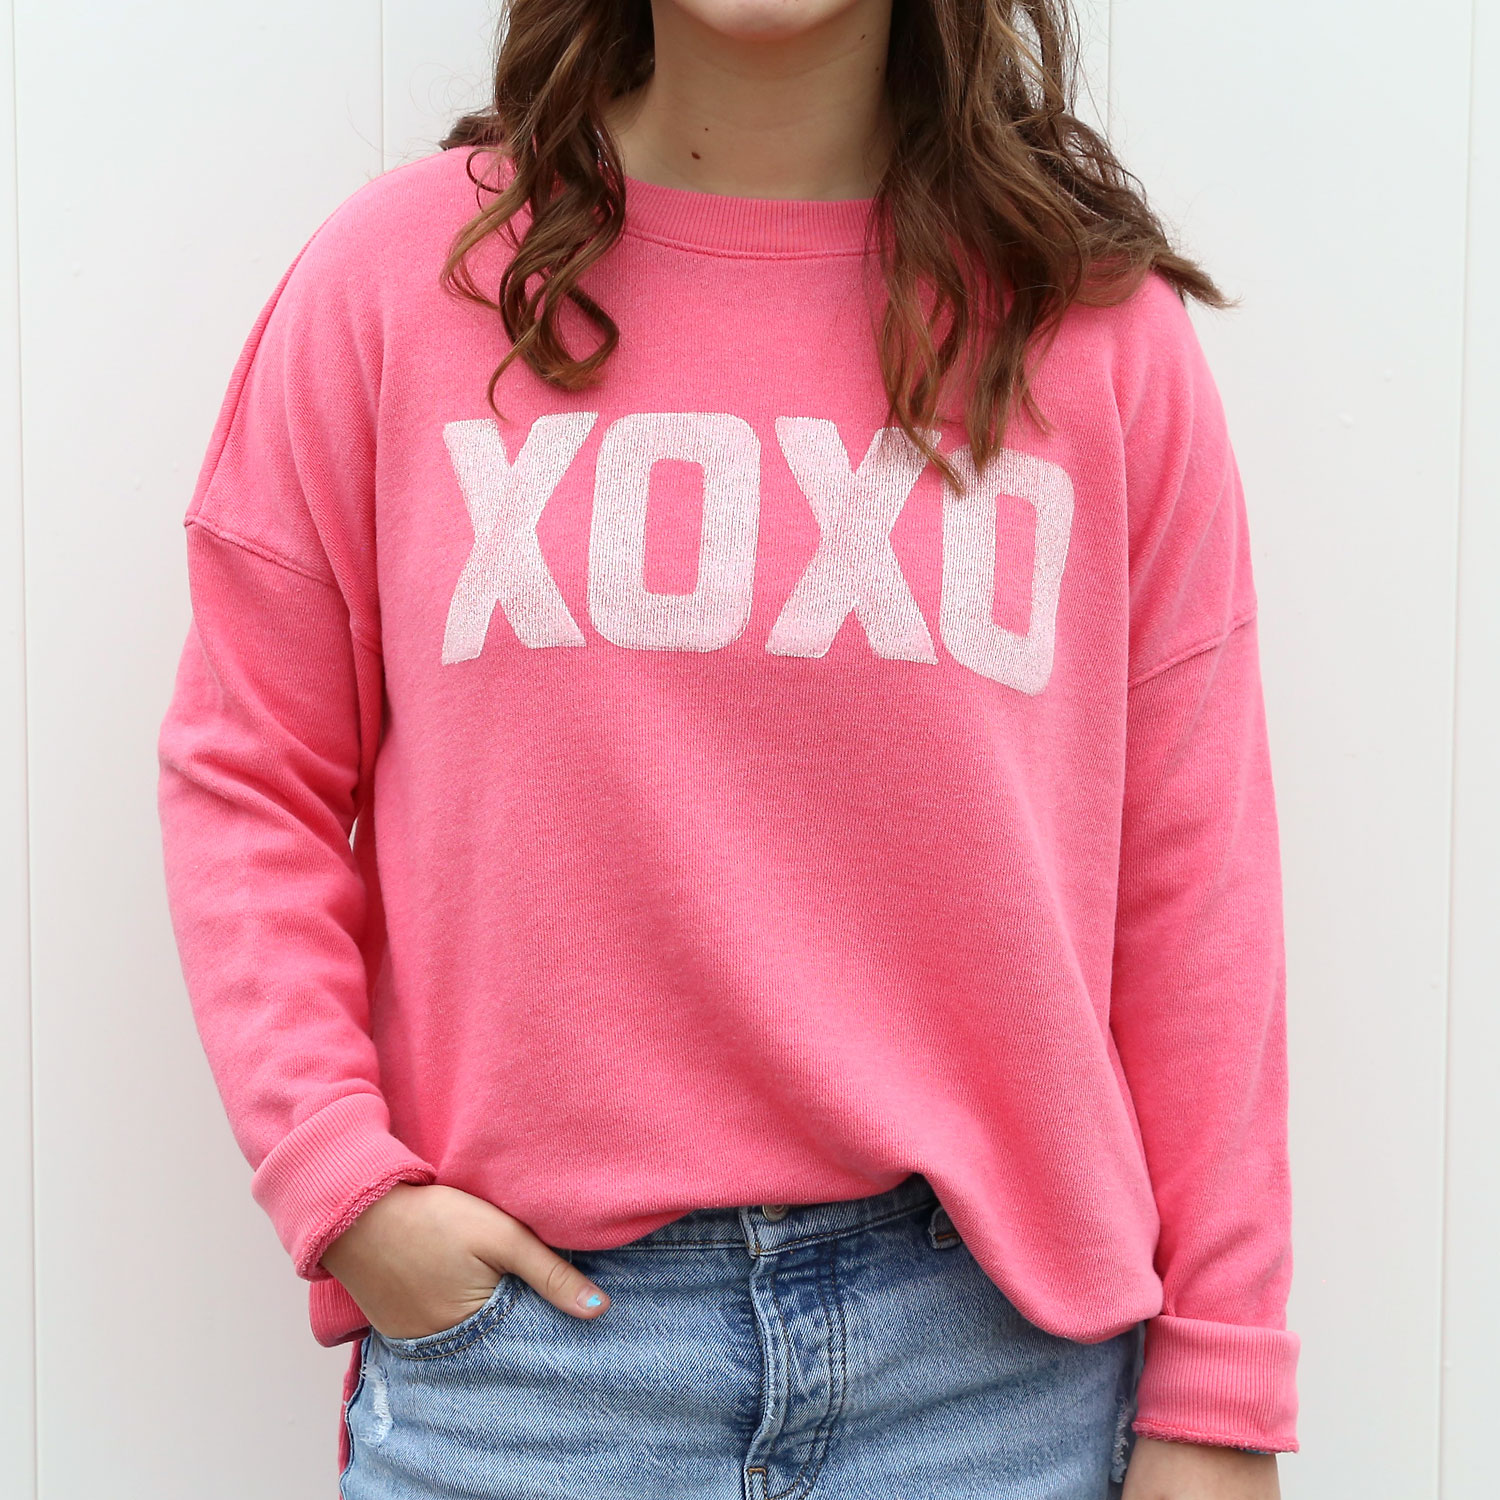
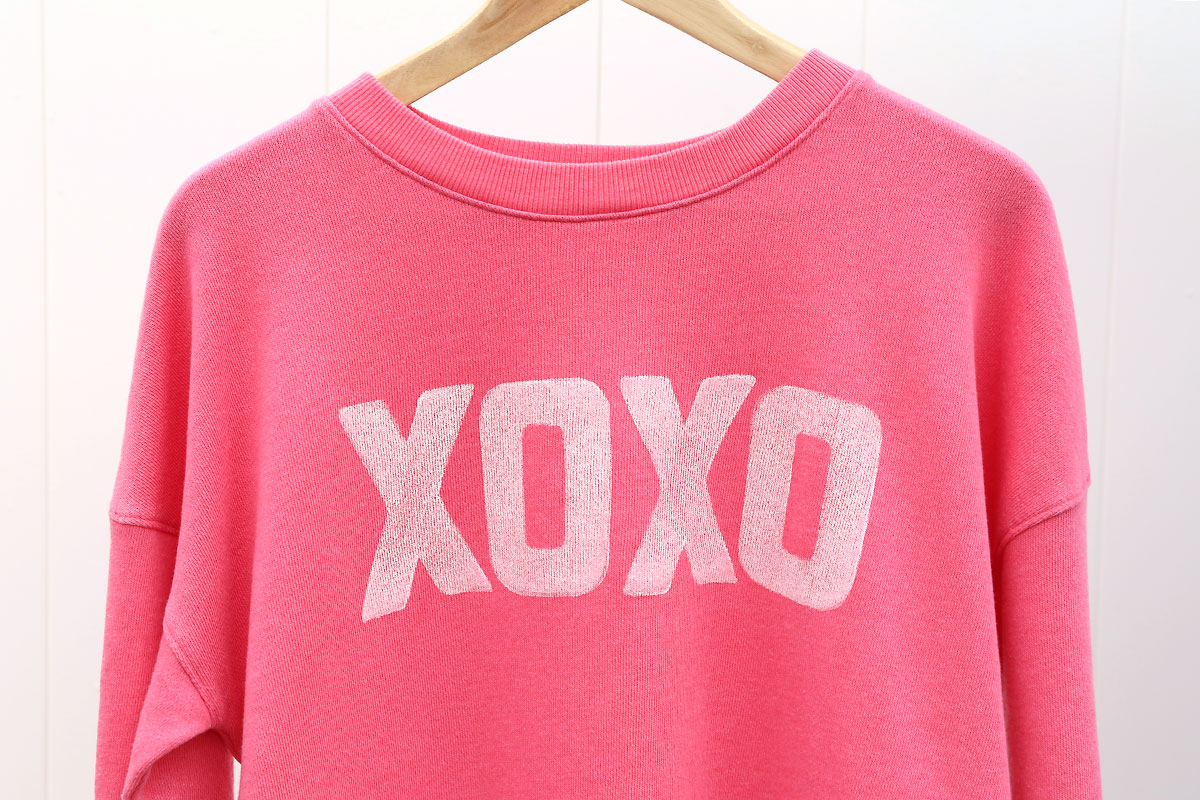
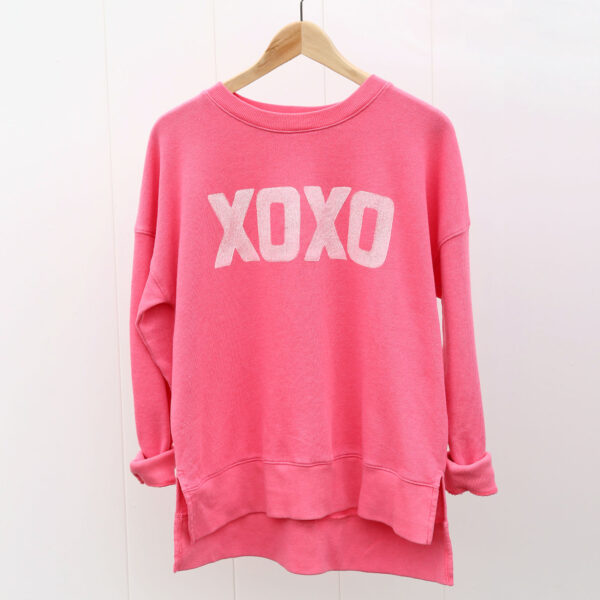
This cute Valentine’s sweatshirt is very easy to make! Most tutorials for adding text to shirts require a cutting machine to make a stencil, but today’s project is way easier than that: we used paper mache letters to “stamp” the XOXO on the front of this top. It’s perfect for Valentine’s Day, but the design isn’t so holiday specific that you can’t wear it after February as well.
Supplies
Here’s what you need to make this top:
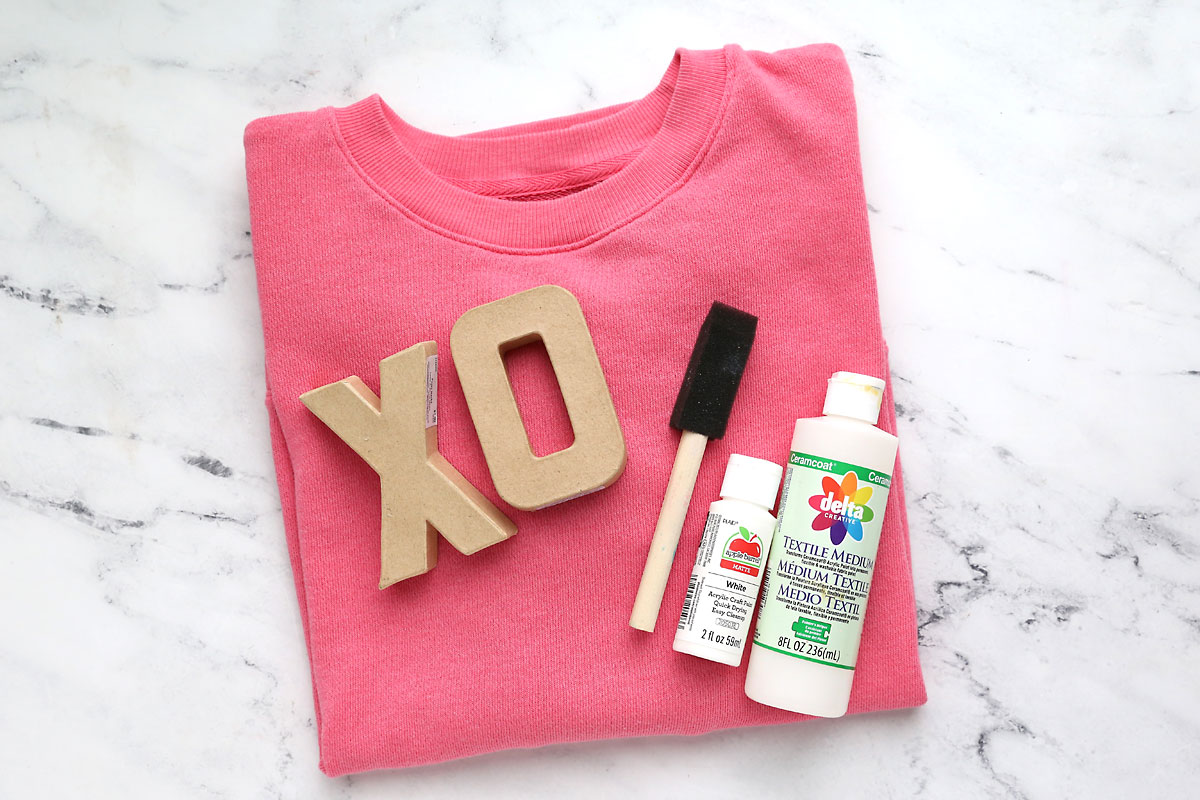
- A sweatshirt: I found this cute pink sweatshirt at Walmart, but you could use a sweatshirt you already own or find one at the thrift store. A dark or bright color will work better if you’d like to use white paint.
- Paper Mache letters: I used 4 inch paper mache letters from Hobby Lobby.
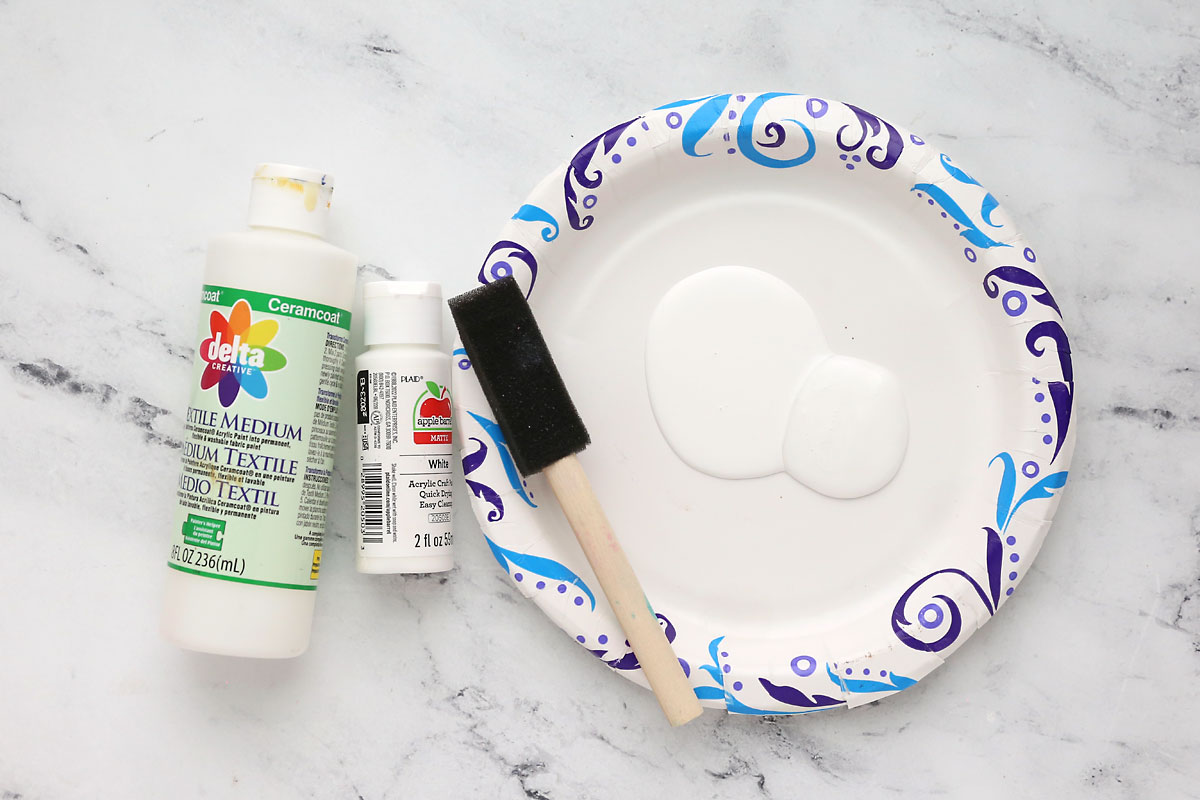
- White Acrylic Paint: this is just the cheap craft paint you can get at any craft store.
- Textile Medium: You will mix textile medium with your paint. It helps keep the paint soft and flexible after drying on the shirt – without it the paint will be stiff and will crack easily. The textile medium also helps ensure the paint doesn’t come off when you wash the shirt. I used this Delta brand textile medium.
- Foam Paintbrush + Masking Tape + Paper Towels
Prep the Sweatshirt
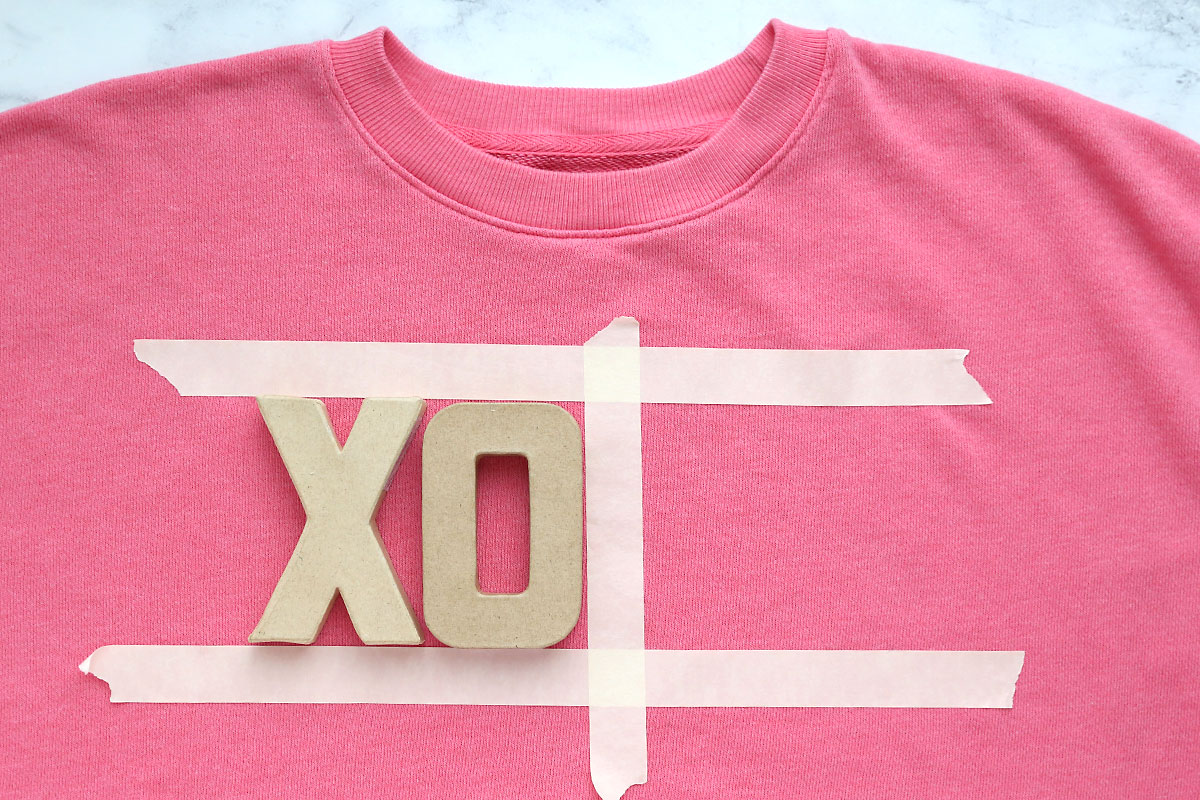
Wash and dry your sweatshirt before you begin. Also, grab some paper towels and tear them into four pieces each. You will need about 12 small pieces of paper towel to wipe the letters as you stamp. Also, keep a few more pieces of paper towel handy in case you get paint on your fingers. Be careful during the process – check to make sure you don’t have paint on your hands before touching the sweatshirt.
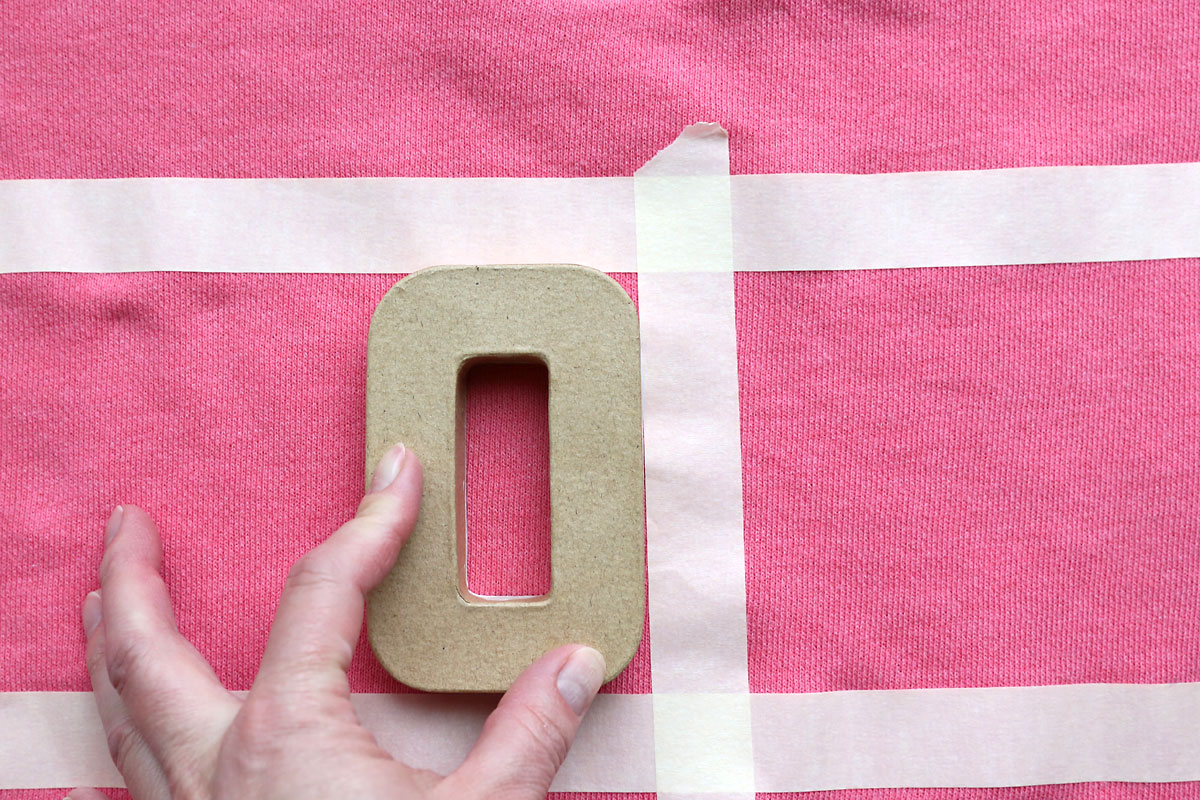
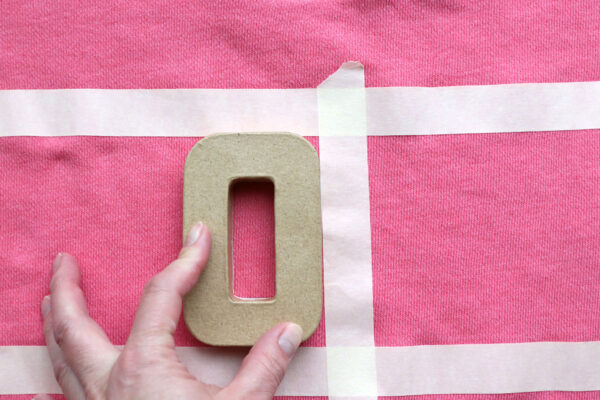
Decide where you want the letters positioned on your sweatshirt. Place strips of masking tape to mark where the top and bottom of the letters will be. Then use another strip of masking tape to mark the center of the sweatshirt. In the photo below, the left edge of the vertical tape marks the exact center of the sweatshirt.
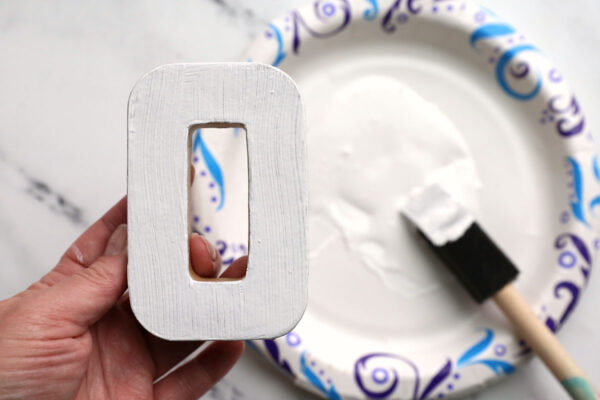
Apply Paint to the Letter
Squeeze some white acrylic paint out onto a paper plate. Add about half as much textile medium (2 parts paint to 1 part textile medium). You can just estimate this, it doesn’t need to be exact. Mix the paint and textile medium together thoroughly.
Paint one side of the “O” with white paint to completely cover it. Then use one of the pieces of paper towel to wipe excess paint off the sides of the letter. This is important! If you don’t wipe excess paint off it will bleed onto the shirt when you stamp and look messy.

Stamp the Letters
Place the “O” paint side down on the sweatshirt directly left of the masking tape marking the middle of the shirt. Press down firmly to transfer paint.
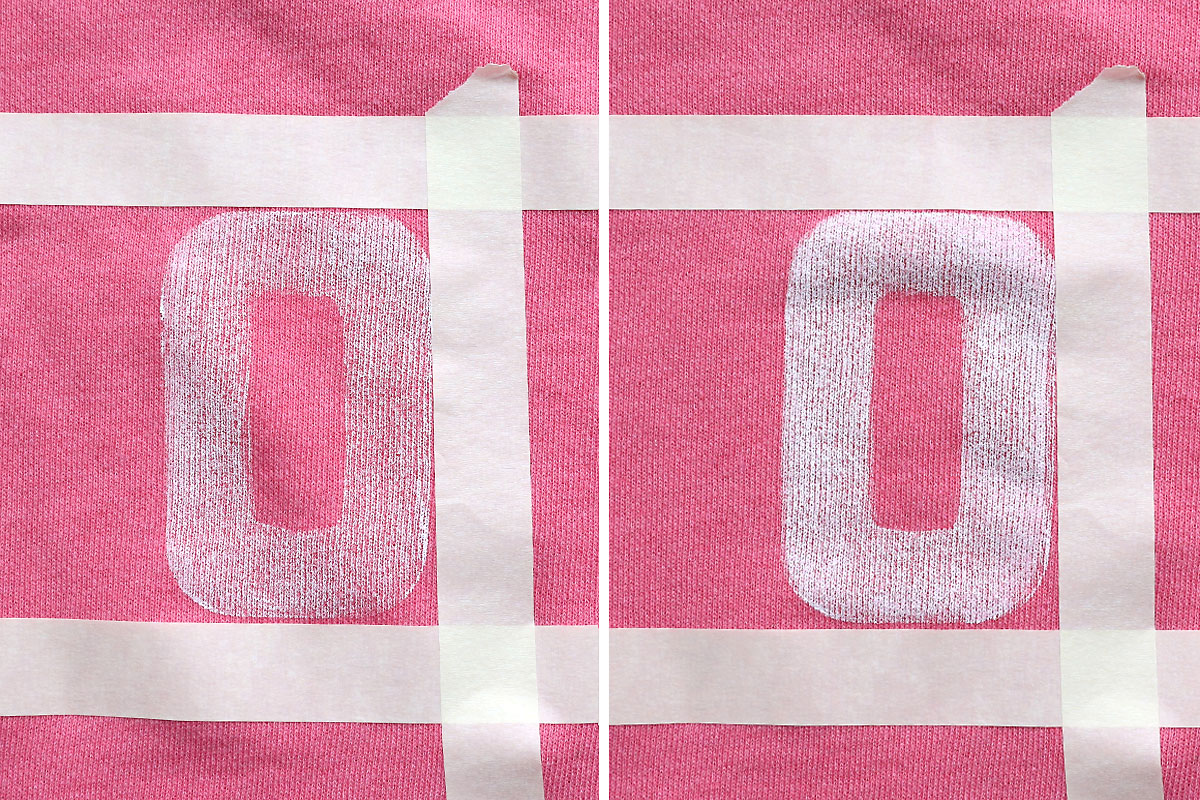
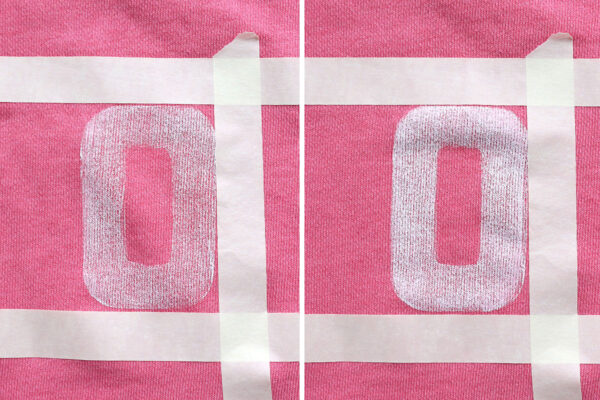
Pull the letter off. The paint will be quite faint, that’s ok. Just paint the letter again and repeat the process, stamping the letter down in the same place. (It’s easiest to stamp in the same place if you are looking down at it from directly above.) The photo below shows how it looks after one stamp and then after a second stamp. I ended up doing 3 stamps for each letter. Remember to wipe off the sides of the letter every time you add more paint.
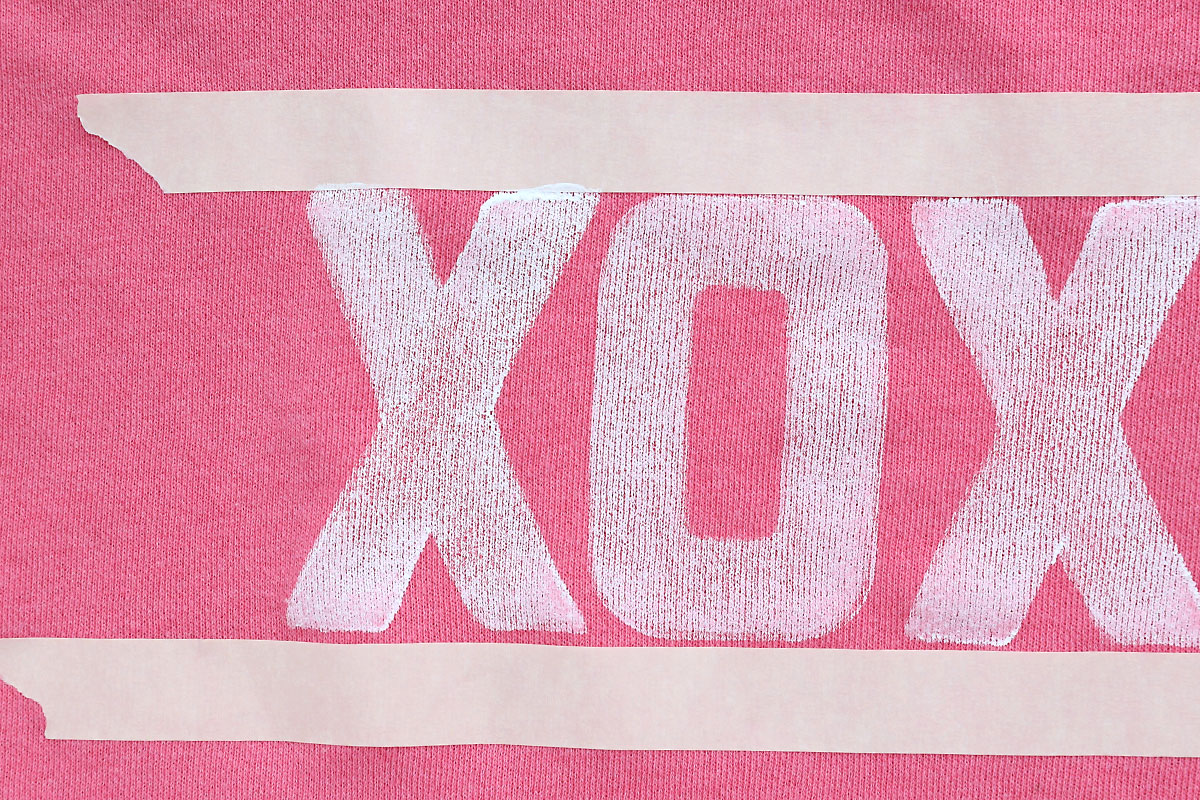
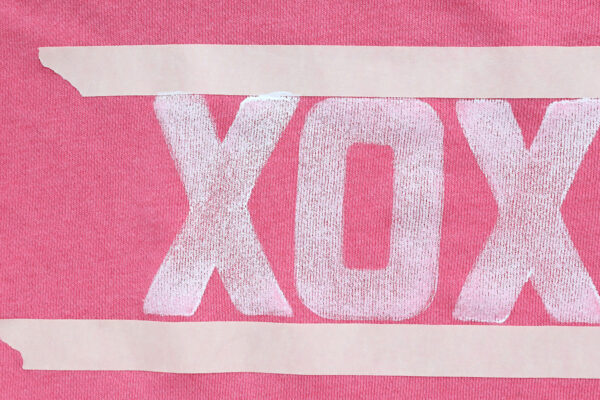
After you like the look of the “O”, repeat the process with the “X” to the left of the “O”. Then remove the tape marking the middle of the sweatshirt and add another “XO” to the right of the first ones. If you end up with a little extra paint, like you can see at the top of the “X” below, just dab it gently with a paper towel. Once all of your letters are stamped, you can remove the rest of the masking tape.
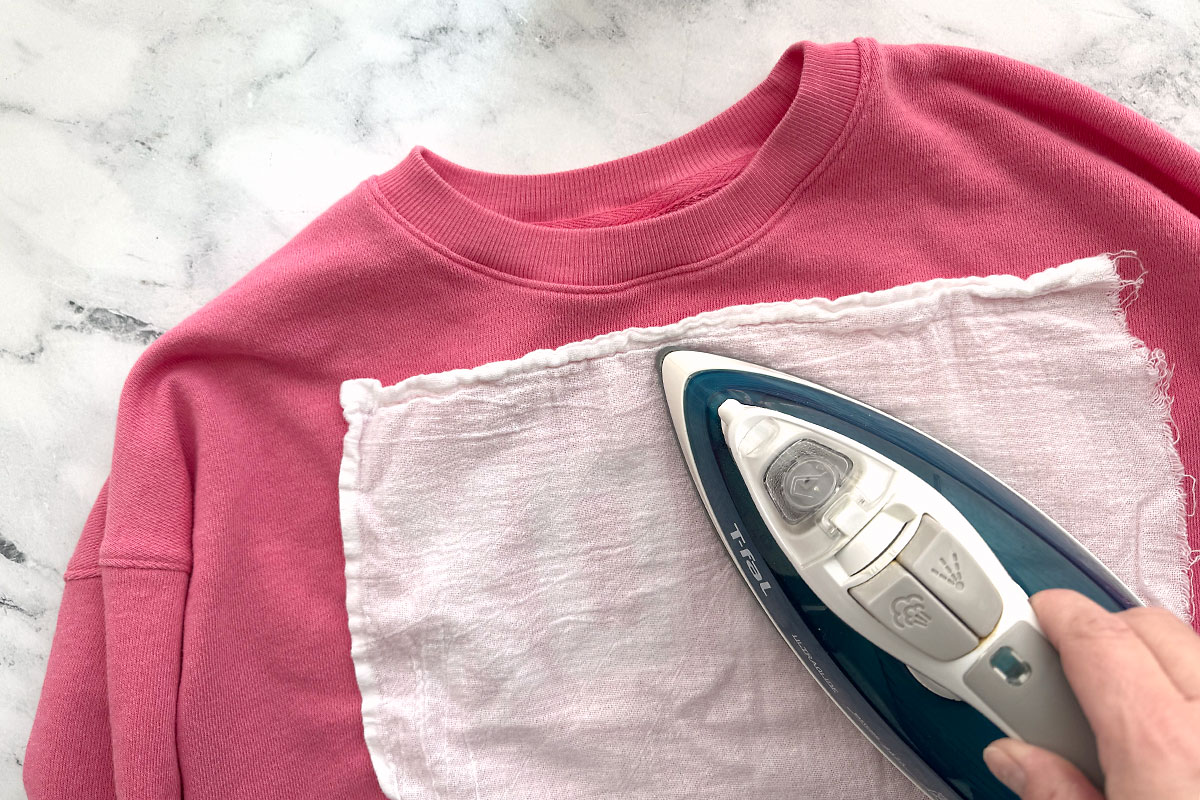
Iron to Set the Paint
Allow the paint to dry completely, about an hour. Then you’ll want to iron over the painted areas to set them. Place a thin piece of fabric like a tea towel over the painted area and use a hot dry iron on each letter for about 20 seconds.
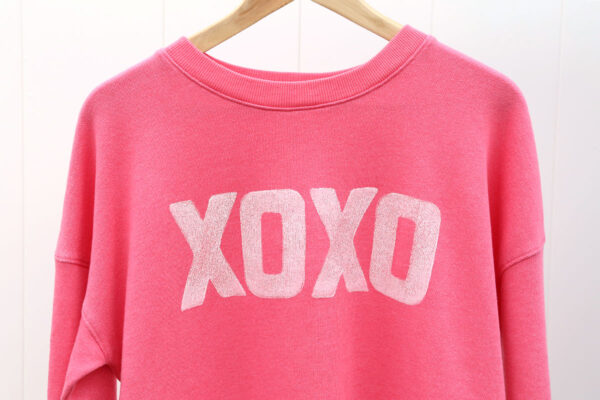
Then your sweatshirt is done and ready to wear! The paint will get a bit softer after it is washed. Follow these instructions for washing:
- Wait at least 24 hours to wash the sweatshirt
- Turn it inside out before washing
- Dry as you normally would (in a dryer is fine)
DIY Valentine’s Sweatshirt
Supplies
- Sweatshirt
- Paper Mache letters X and O
- White Acrylic Paint
- Textile Medium
Want more project ideas? Sign up to get my favorite easy crafts and recipes straight to your inbox!
Equipment
- Foam Paintbrush
- Masking Tape
Instructions
- Wash and dry the sweatshirt before beginning. Also, tear a few paper towels into four pieces each. You will need these to wipe paint off the sides of the paper mache letters.
- Use masking tape to mark where you will stamp the letters.

- Mix 2 parts paint with 1 part textile medium. Paint one side of the letter "O". Use a piece of paper towel to wipe excess paint off the sides of the letter, even the inside.
- Place the "O" down on the sweatshirt, using it like a stamp. Press firmly for a few seconds, then remove the letter.
- Stamp again in the same place to darken the letter until you are happy with how it looks. Remember to wipe excess paint from the sides of the letter each time.
- Continue until you have stamped the entire design. Use a paper towel to blot any extra paint.
- Allow paint to dry completely, about one hour. Then heat set the paint by covering the shirt with a thin cloth and ironing each letter for 20 seconds with a hot dry iron.
- Wait 24 hours before washing and turn the shirt inside out before washing. Drying in a dryer is just fine.


Tanya says
This is ADORABLE! You should sell them! Do you by chance have the link for that sweatshirt?
Toni says
I love your craft tutorials. While painting a sweatshirt sounds like a simple idea, I appreciate all the specific tips you give. I wouldn’t have ever known about textile medium! And the warning to wipe the sides of the letters. Thanks for sharing.