
In today’s post: Log Santas are easy to make and add a cute rustic touch to your porch, near your fireplace, or on a shelf. This is a fun Christmas craft for adults you can complete in under an hour.

Easy Christmas Craft
This Santa log craft is easy to make with just a few supplies. You will need access to a miter saw or other saw that can make an angled cut – if you don’t own a saw, check with neighbors! Once the logs are cut at an angle, painting on the Santa faces is super simple. You can make just one or two Santas or a whole family in various heights, and they’ll be an adorable addition to your Christmas decor.
Project inspiration: Collin Garrity

Supplies
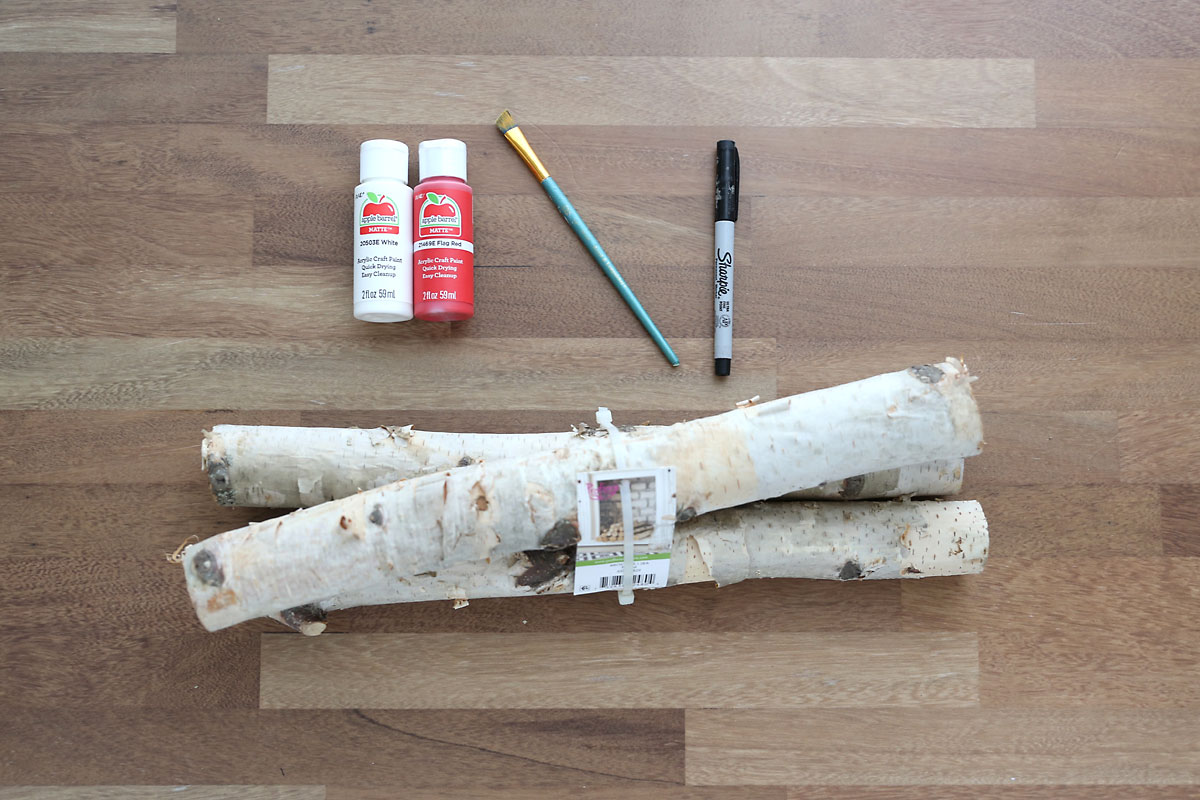
Here’s what you need to make log Santas:
- Logs or branches: You can use small logs or thick branches that you find in your own yard for this project OR you can purchase decorative logs to use. I tried this project with these decorative birch logs from Walmart ($15) and these mini birch logs from Hobby Lobby ($10). Both options worked well. The Walmart logs are longer so I made two Santas from each log. Some of the Hobby Lobby logs were too short for me to cut safely, so I only used a few from the package of six (but I got it on sale for $5 so I didn’t mind). My Santas are about 2 inches across and range from 5-10 inches tall, making them a good decoration for sitting on a shelf. You can use the same process to make larger Santas from thicker logs.
- Miter Saw or other saw you can make an angled cut with: To complete this project you will need to cut the top of each log at a 45 degree angle. I used a miter saw; you can use a different type of saw if desired.
- White and Red acrylic paint: This is the cheap craft paint you can find at Walmart or any craft store.
- Small Paintbrush
- Black Sharpie
Cut Safely
Please ensure you follow all safety recommendations when using any power saw, including wearing eye protection and using clamps for smaller pieces instead of holding them with your hands.
How to Make Log Santas
Cut the Logs
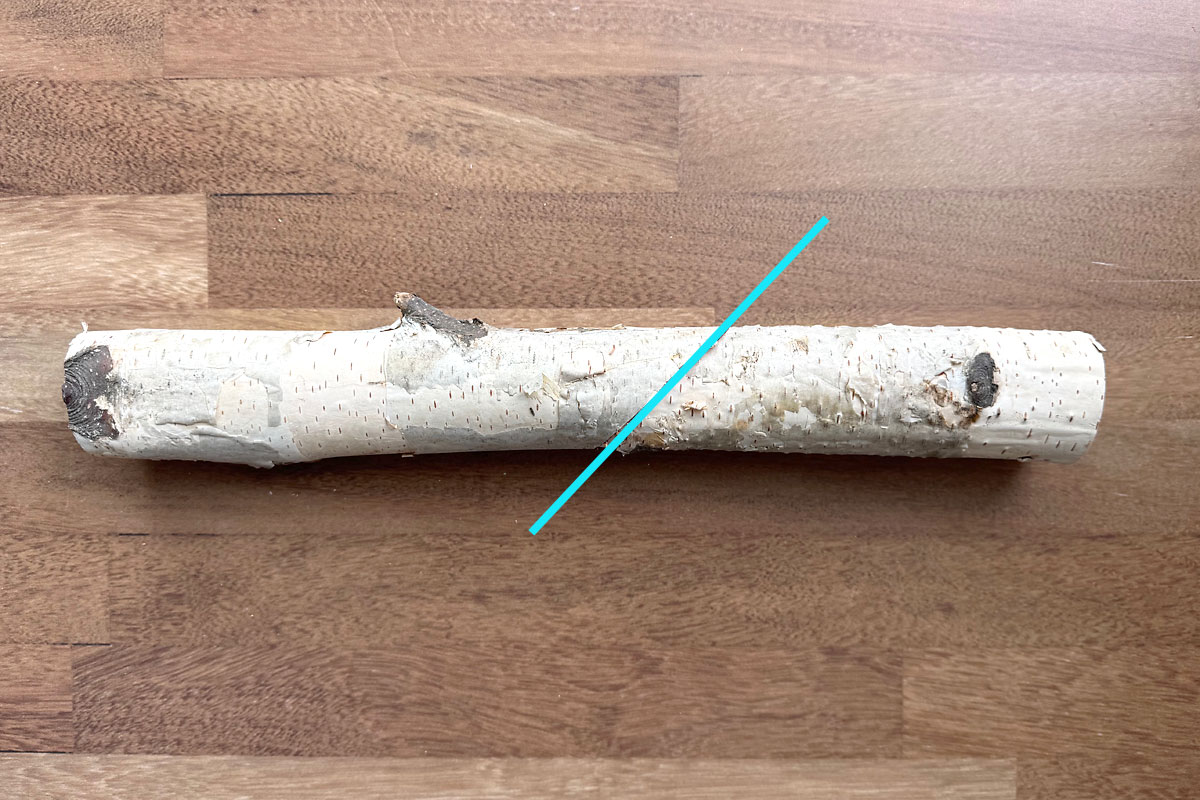
The first step is to cut each of your logs. You want the bottom of the log to be cut straight across and the top of the log to be cut at a 45 degree angle. If you are cutting a log in half to make two Santas with it, you can make one angled cut as shown below. If you’re making multiple Santas, vary the height of each one.
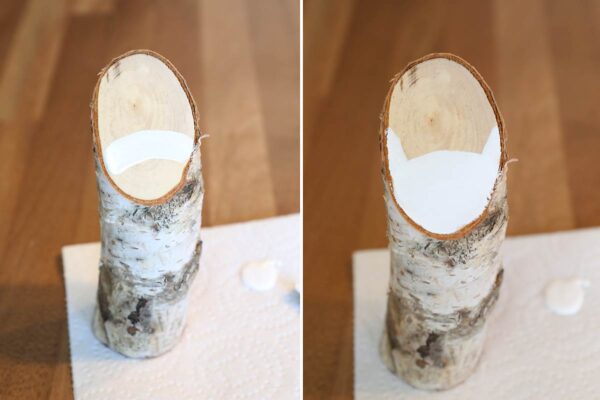
Paint the Beards
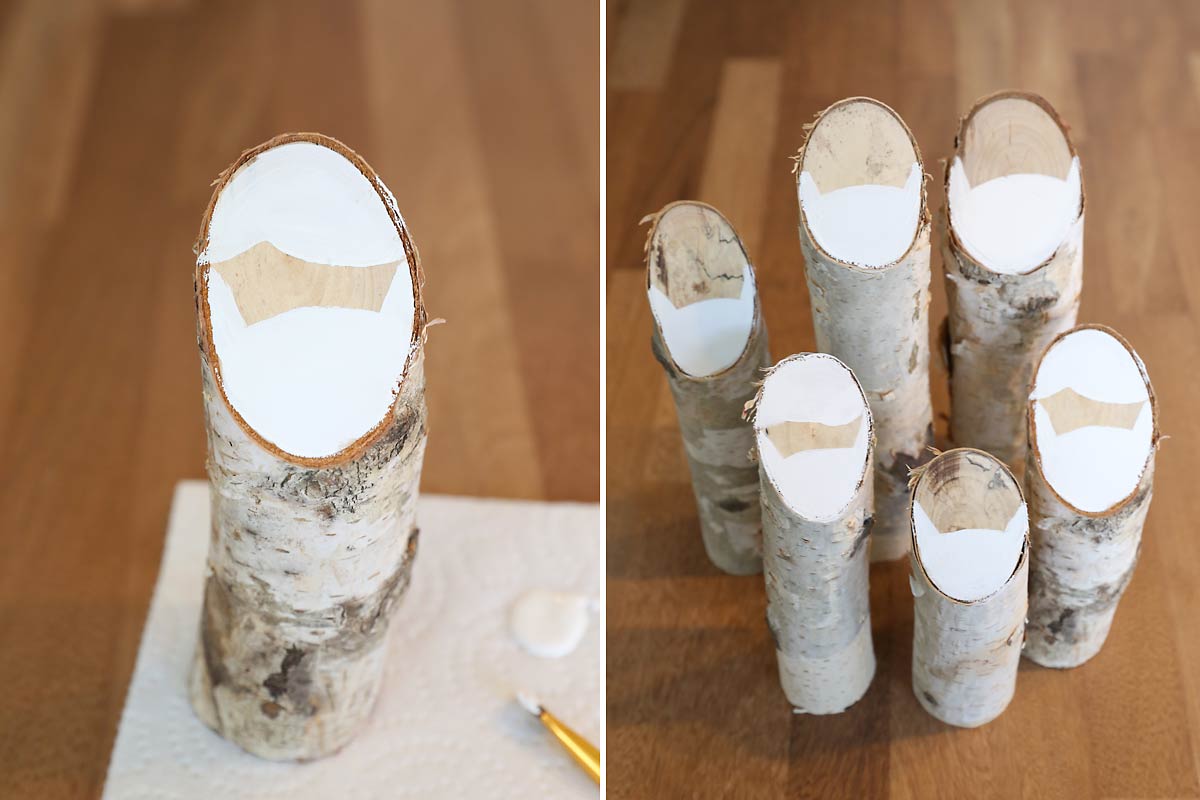
Once the logs are cut, you can begin painting the faces on the cut edge. Start by painting the beards in white. Paint a slightly curved line about a third of the way up from the bottom. Fill in the rest of the area under that curved line, then add a bit more white paint on each side to look like sideburns.

You can also add a little swoop of hair on the top third of the face that will show below the red hat. Allow the white paint to dry thoroughly and add a second coat of white paint if desired; you can use a hair dryer to speed the drying time in between coats.
Add the Hat and Eyes
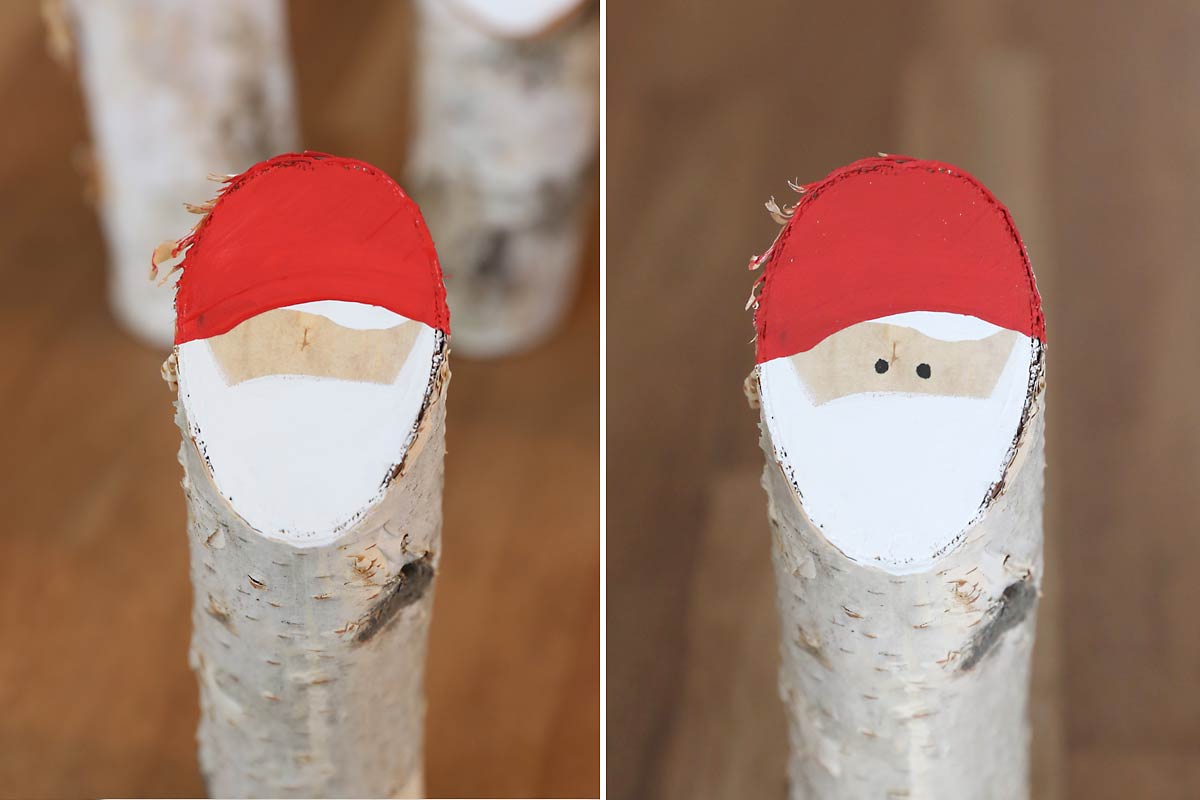
Once the white paint is dry, you can paint over the top third of the face with red paint to create a hat. You will likely need 3 coats of red paint to cover completely. Once the red paint is dry, dot on eyes using a black Sharpie, then your Santa is finished. (You can add a small pom pom or tiny wood bead for a nose if you wish.)
Display
These wooden Santas look cute displayed together in a group with Christmas ribbon tied around them. If you plan to display them outside, consider sealing them with a matte spray sealant.


Log Santa Craft
Supplies
- Birch Logs or other thin logs or thick branches
- Acrylic Paint red and white
- Small Paintbrush
- Black Sharpie
Want more project ideas? Sign up to get my favorite easy crafts and recipes straight to your inbox!
Equipment
- Miter Saw
Instructions
- Cut logs to various heights. Cut the top edge of each log at a 45 degree angle.

- The angled cut edge will be the face. Using white paint, paint a beard in the lower third.
- Add hair in the upper third of the face if desired. Allow the white paint to dry thoroughly, using a hair dryer to speed dry time if desired. Add a second coat if needed.
- Use the red paint to create a hat in the upper third of the log face. You will likely need three coats of red paint for good coverage. Use a Sharpie to dot on eyes.
- Display the Santas in a group, tying them together with Christmas ribbon if desired.


Amy Hunter says
Sooooo cute! I love this