
In today’s post: Learn how to turn cheap canvas sneakers into a pair of gorgeous custom designed shoes with simple embroidery stitches. No embroidery experience needed!
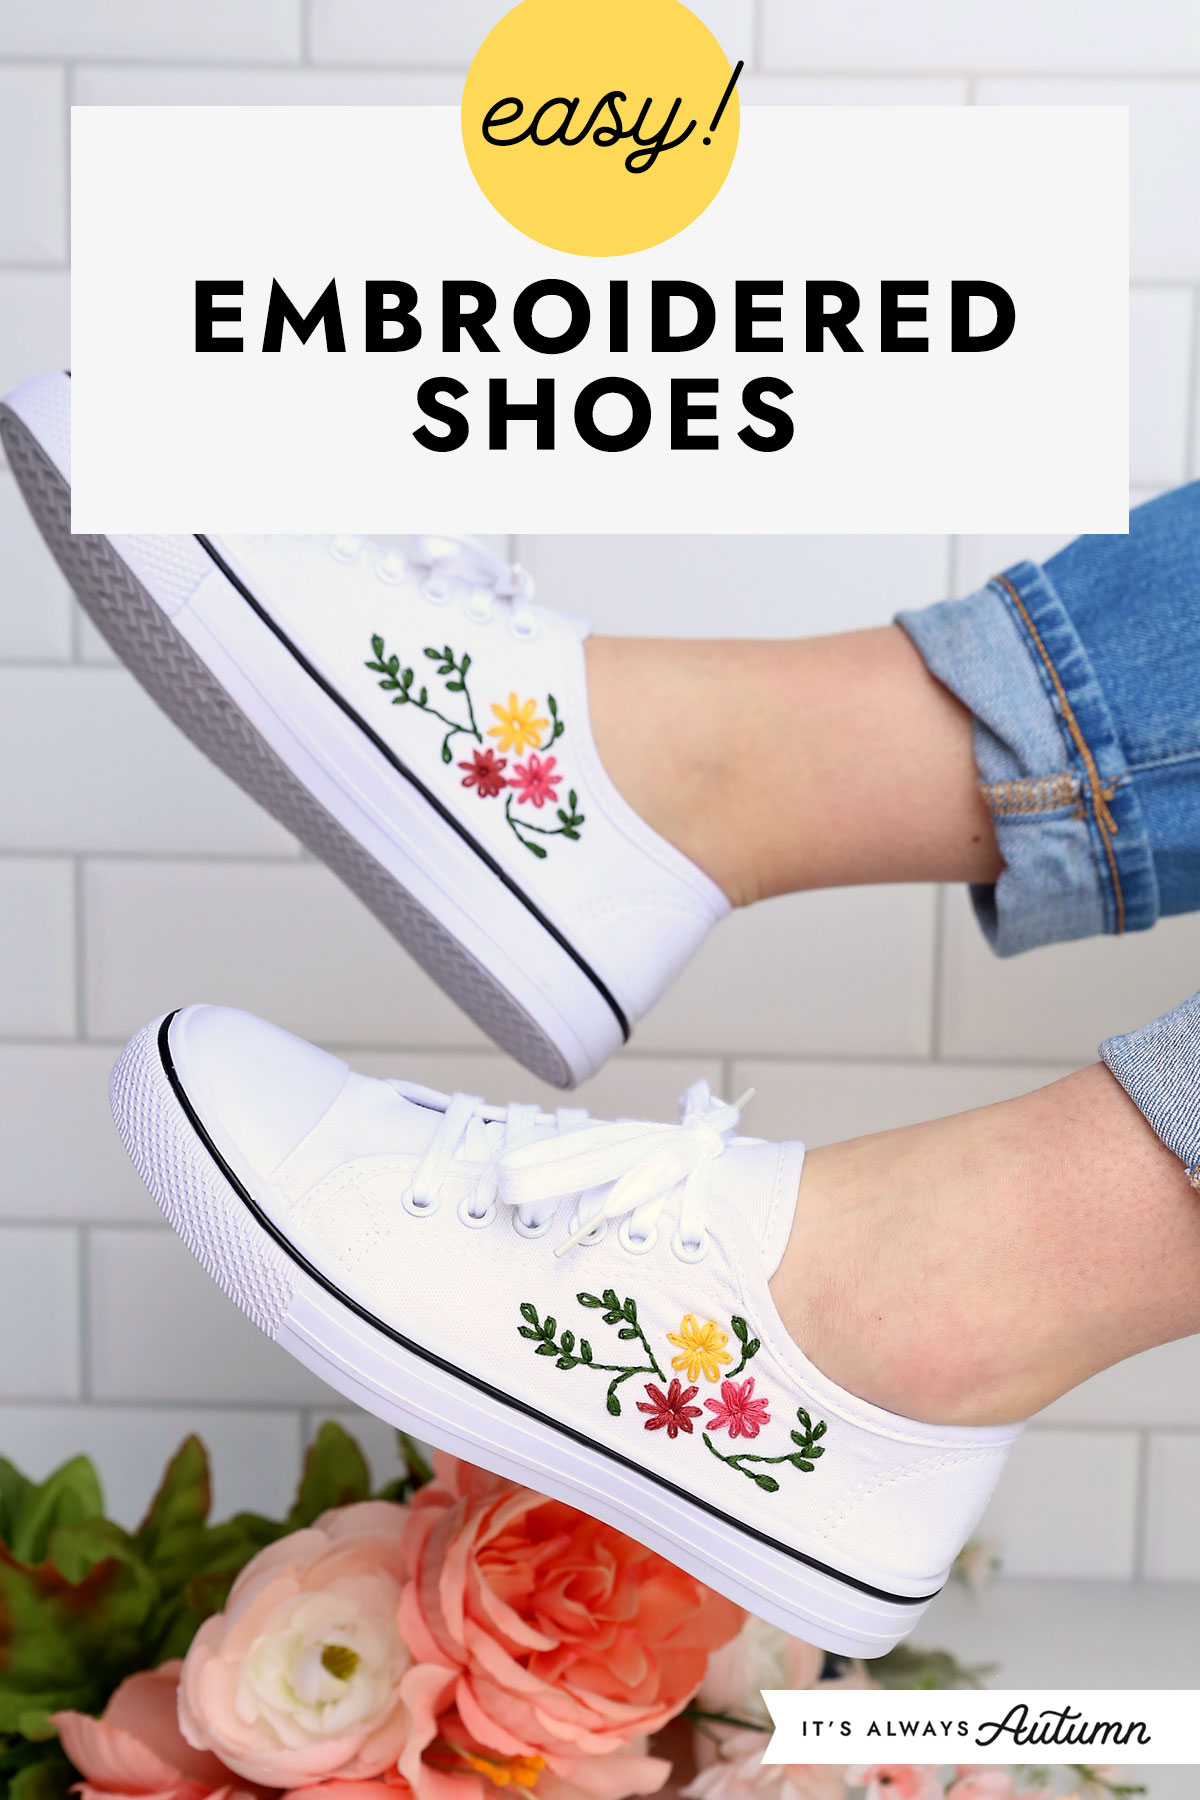
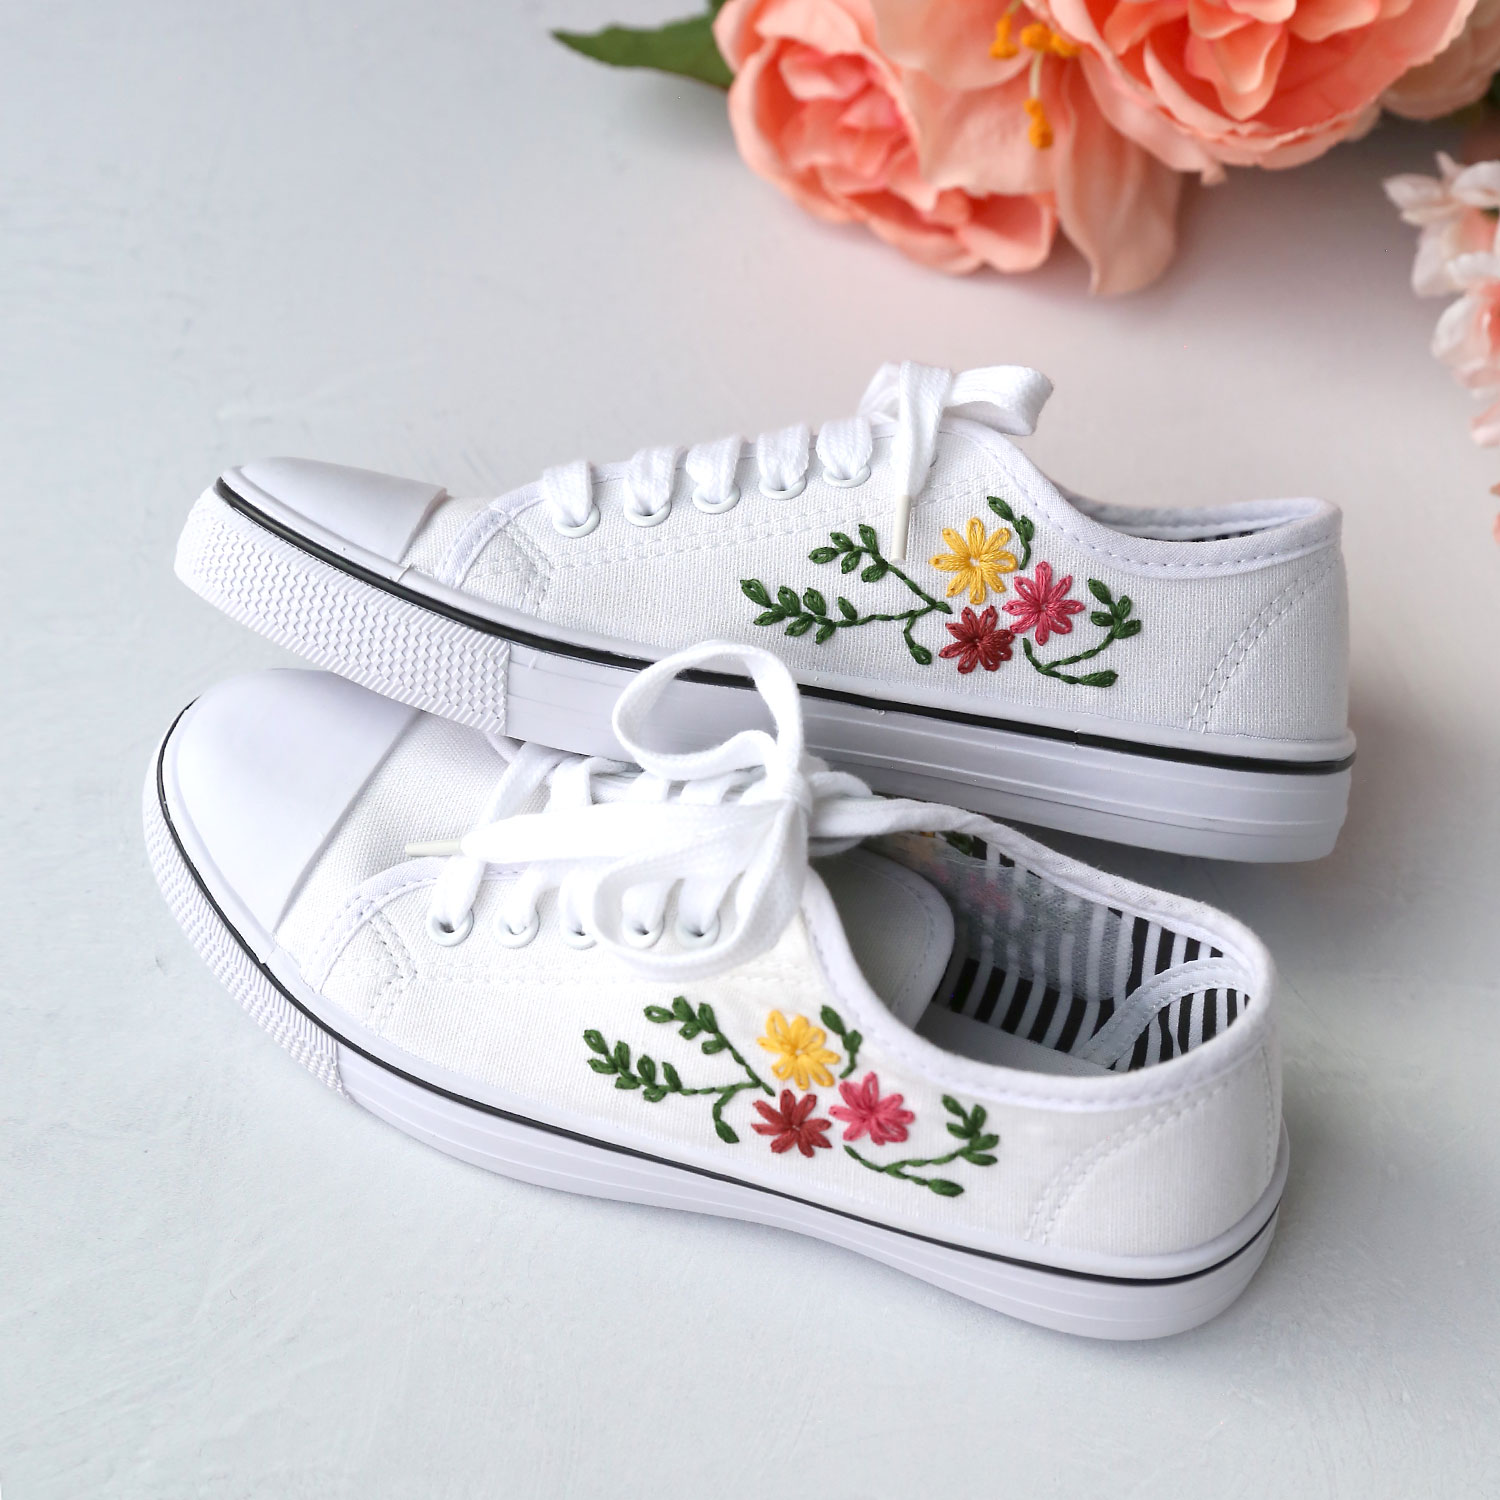
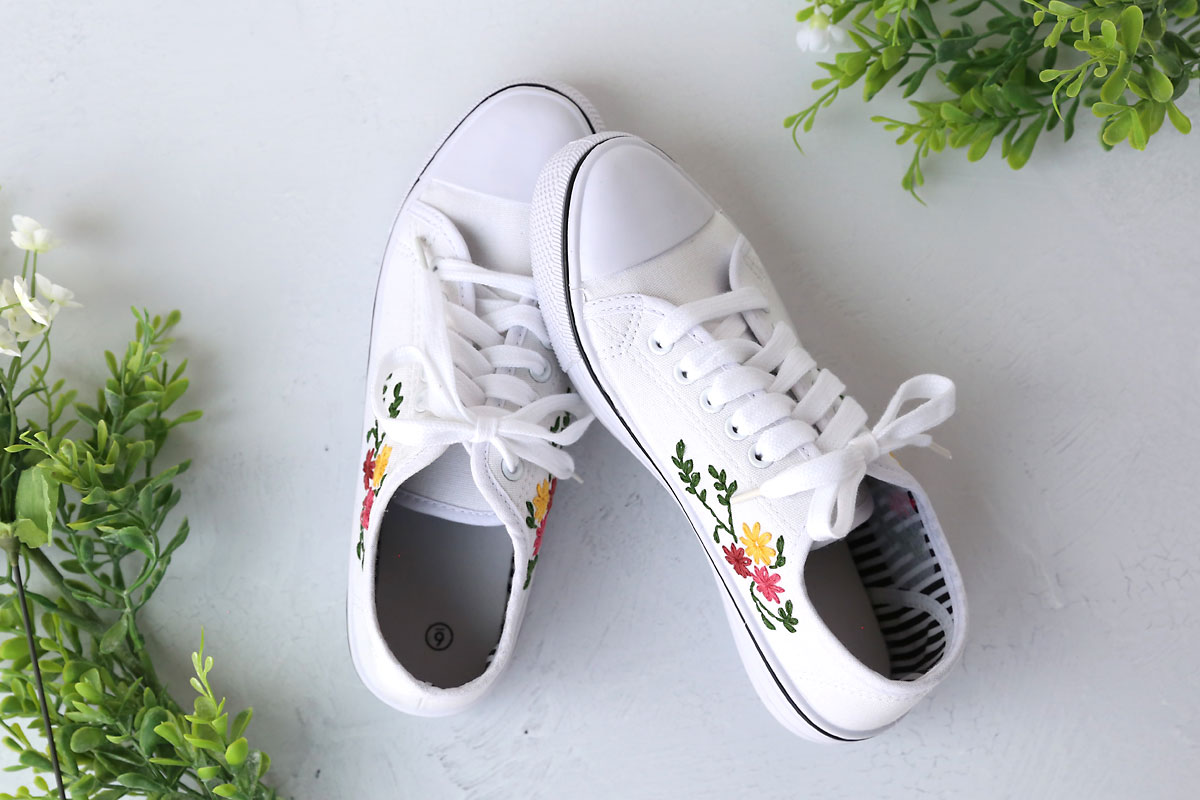
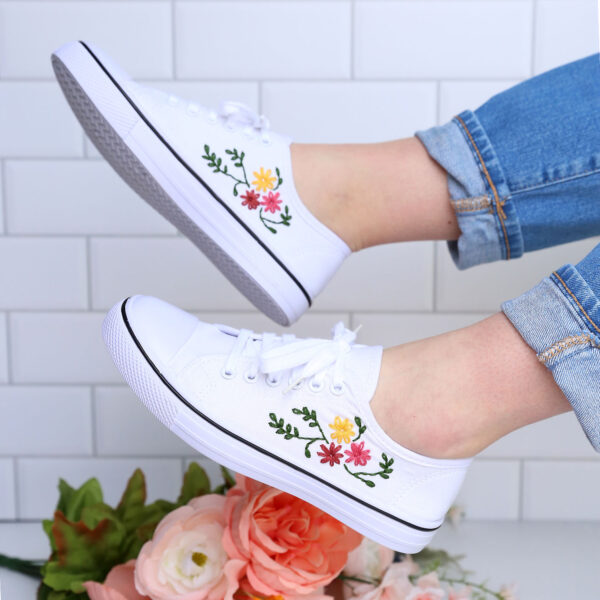
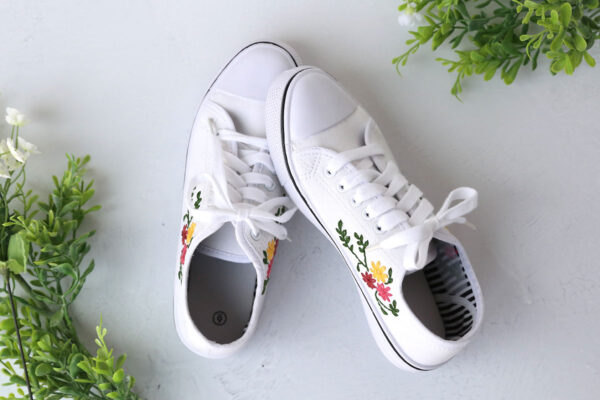
Today’s project is so much fun! I turned a pair of seven dollar sneakers into these gorgeous embroidered shoes – without any previous embroidery experience. You can embroider flowers, vines and leaves on your shoes with just two basic embroidery stitches – no previous experience necessary. In fact, these shoes are the first thing I’ve embroidered and I love how they turned out. And I will show you EXACTLY how I made them.
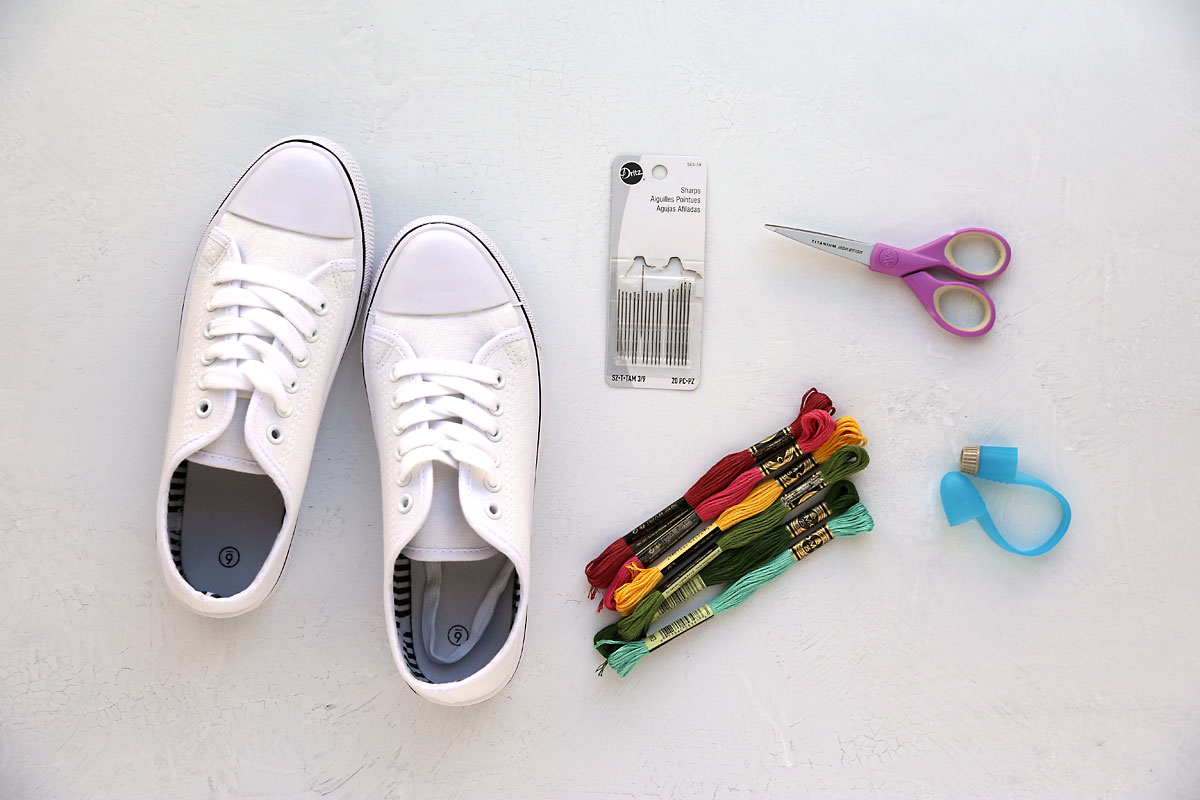
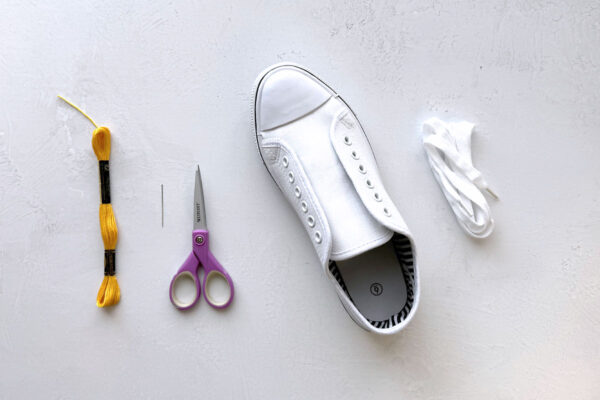
Supplies
Here’s what you’ll need to make your own pair of custom DIY embroidered shoes:
- Pair of white canvas sneakers: This type of embroidery looks very cute on white Converse, but if you don’t want to invest that much money you can find inexpensive converse knockoffss at both Hobby Lobby and Jo-Ann for under ten bucks – the pair I used were from Hobby Lobby. You can also find them on Amazon.
- Embroidery floss in various colors: You can find this at any craft store or Walmart. I used yellow, pink and red for flowers and green for vines. You can use any color you like!
- Embroidery needles (or sharps needles with a long eye). I recommend getting a package that has a few different sizes of eyes – you’ll want the smallest eye that you are able to thread the embroidery floss through.
- Small scissors
- Thimble + threadpullers or this Wonder Grip combo: This is optional; you may be able to embroider your shoes without any of these tools. However, I found my fingers got pretty tired pushing and pulling the needle through the canvas without any help, so I used the wonder grip at times to make it easier.
How to Embroider Shoes
The embroidery stitches we are using for these shoes are very simple and easy to learn, but embroidery does take some time. Each side of my shoes took about an hour, although I got faster as I went along. All in all I spent close to four hours embroidering both sides of both shoes. However, you don’t see the inside of the shoes very often so you could easily get away with only embroidering the outsides. Additionally, you could do a simpler design than I did if desired. It’s a great project to work on while watching a show or listening to a podcast.
Video
I find that it’s easiest to learn things like embroidery by watching, so I’ve created a video that walks you through the entire design for my shoes. After the video there are also photos and written instructions, followed by a printable instruction card. Here’s the video:
Prep the Shoes
First, you’ll want to remove the shoelaces from the shoes and set them aside.
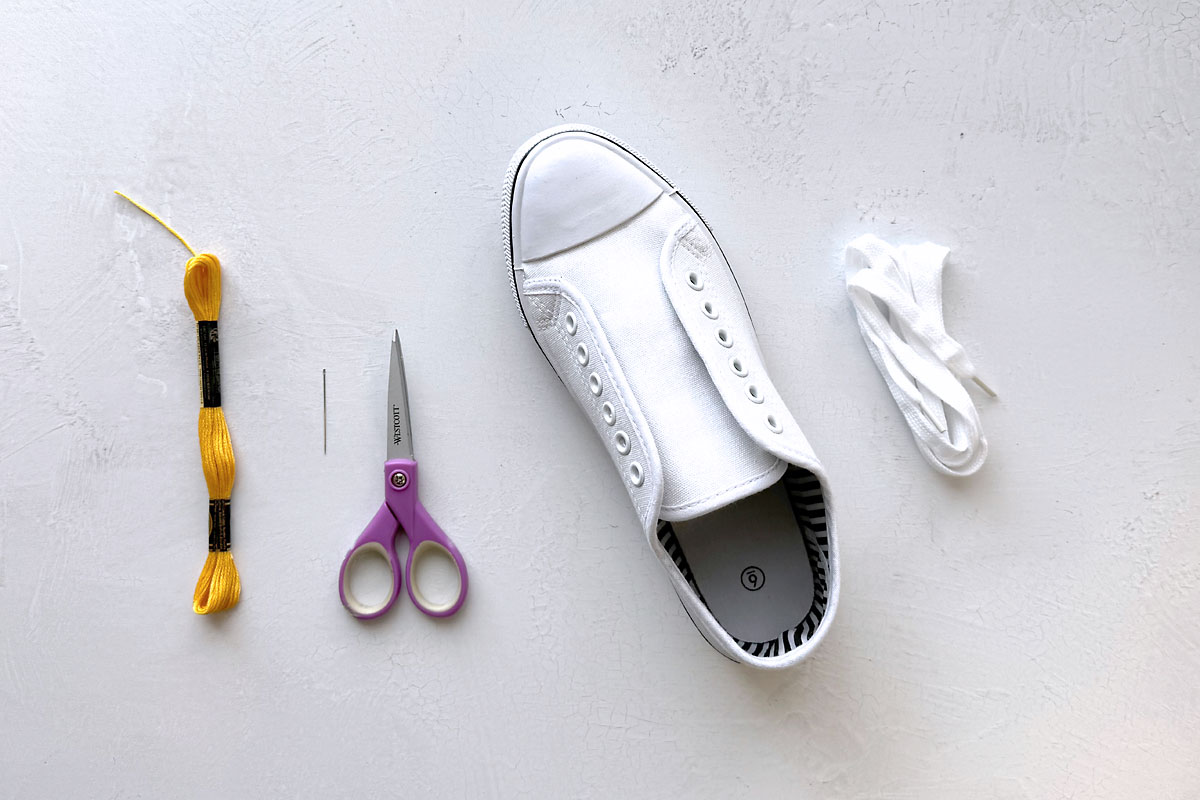
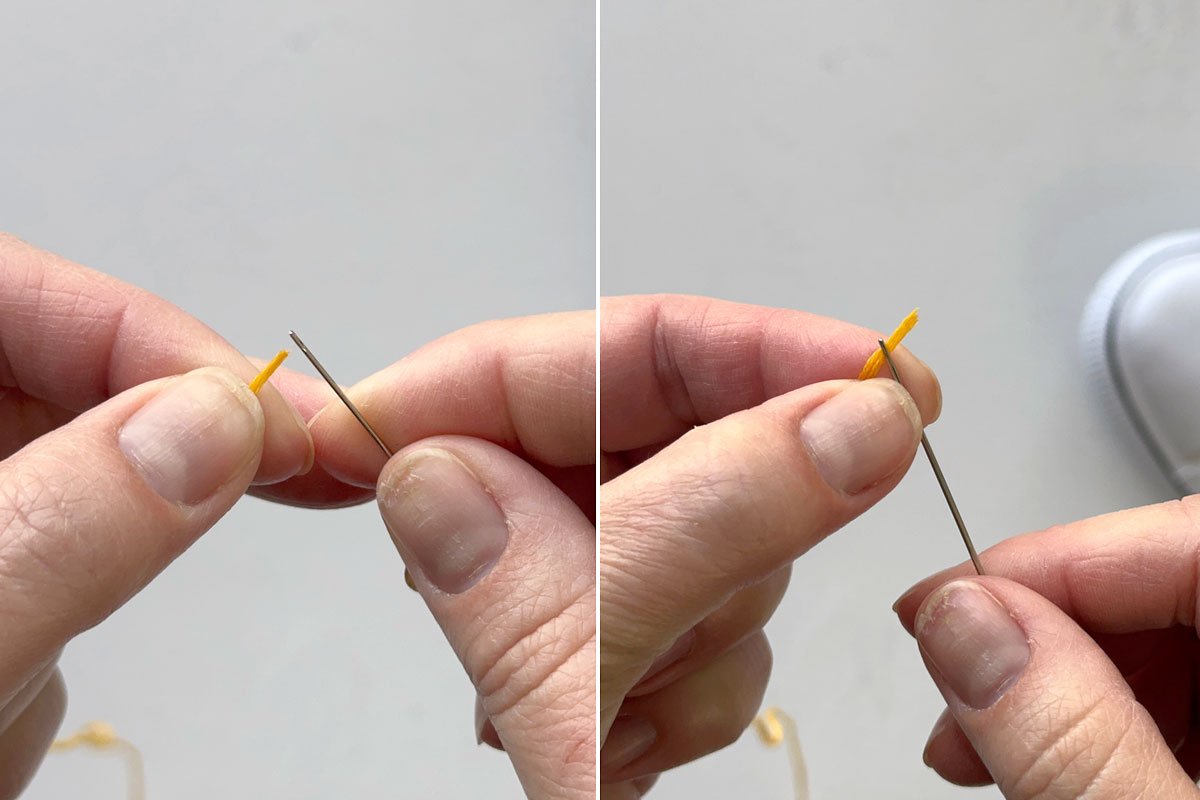
Next, thread a needle with about eighteen inches of embroidery floss. I use all six strands of the embroidery floss to make a fuller looking flower; however you may split the floss and use fewer strands if you like. Threading a needle with all six strands can be difficult – you will need to ensure that you cut the floss straight across, then get it wet and roll it between your fingers to make sure all the strands are close together. Flatten it down and carefully thread the needle, then tie one knot at the end of the floss.
Note: If you are finding threading the needle impossible, you’ll need to switch to an embroidery needle with a slightly longer eye. Use the smallest eye you are able to thread.
Next, you can make a plan for your design if you wish, and lightly mark it on the shoe in pencil. If you want to use the same design I did, you can make marks like the ones below. The larger dots shoe the center of the three flowers, while the smaller dots show where the vines go. Or you can just start embroidering flowers and add more as you go along.

Embroider Flowers
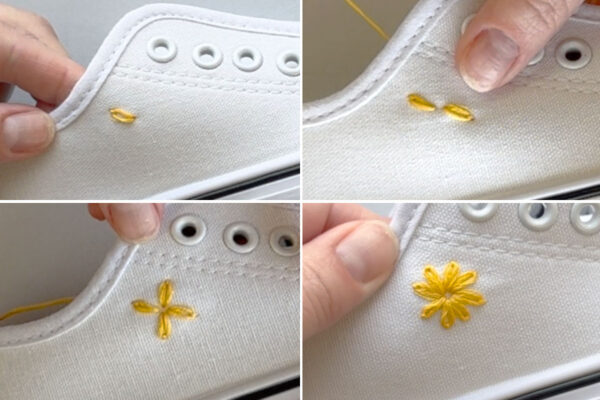
Now it’s time to start embroidering. Remember, there is a video above that shows all these steps in greater detail. You will make flowers using a lazy daisy stitch. Start by coming up from the inside of the shoe where you’d like the center of the flower to be and pull the thread to the knot. Then you’ll place the needle back down in the same spot you came up, but do not push the needle all the way through. Instead, bring the needle back up about a quarter of an inch away. Take the thread and place it under the needle, then pull the needle all the way through.
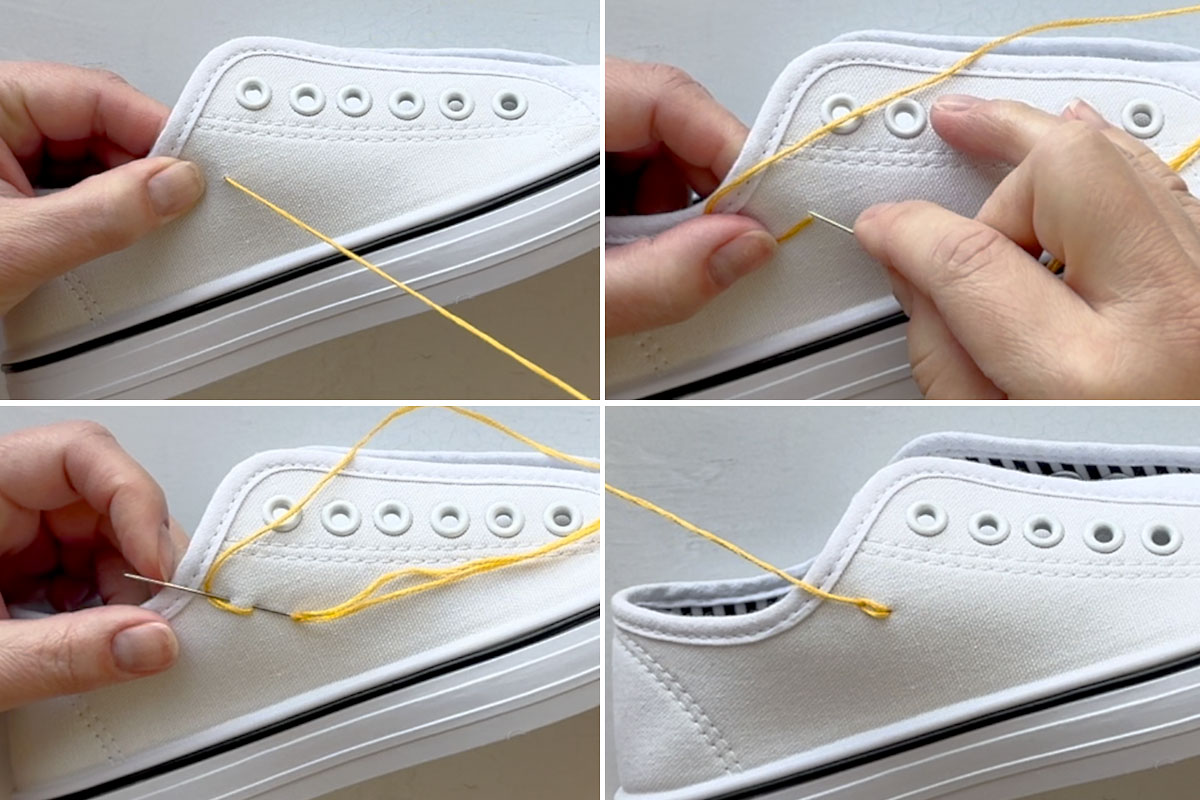
This traps a loop of thread to make a petal shape. Go back down with your needle on the other side of the loop to secure it, and your first petal is complete. Now come back up a little bit away from where you first came up and make a petal going the other way. Make two more petals, this time up and down. Remember that every time you are coming up in the middle of the flower. Finally, you can add four more petals, one in between each of the ones you’ve made already, to complete your first flower. ***If you are having a hard time following these instructions, there is a video above under a heading that says “Video”***

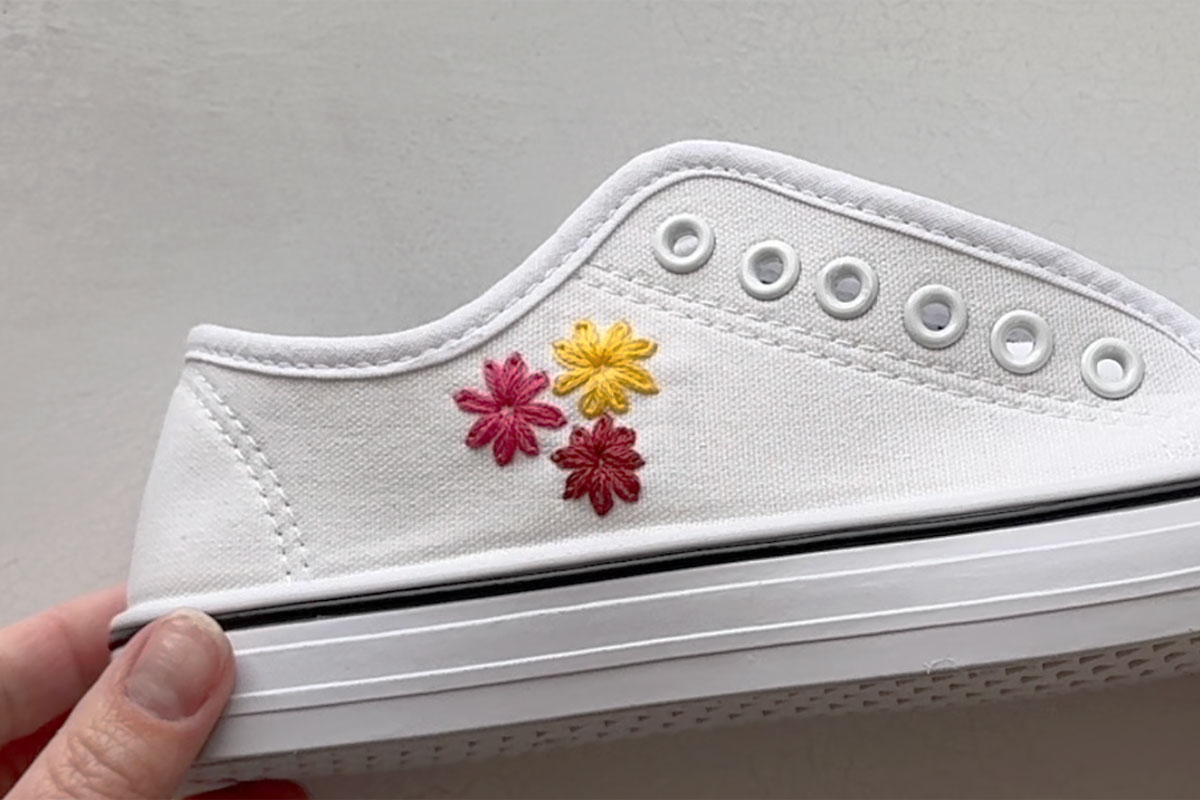
I repeated the flower design two more times with different colors. Each time you finish a flower, tie off your thread on the inside of the shoe and snip off the excess. Don’t worry if your petals are different sizes or not perfectly aligned – no one will notice once the design is finished!
Embroider Vines + Leaves
Now you can switch to green thread to make some vines with leaves. The base of the vine is made with a backstitch, which is an easy way to embroider a straight or curved line. You’ll start by coming up from the inside of the shoe at the start of the line and going back down about a quarter of an inch later. Then you’ll come up about a quarter inch past where you went down, and go backwards this time, meeting the end of the line and going down there. Continue coming up a stitch length past the end of the line, and stitching back to meet the line.
When you have the line of the vine stitched, you can add some leaves using the exact same lazy daisy stitch we used to make the flower petals.
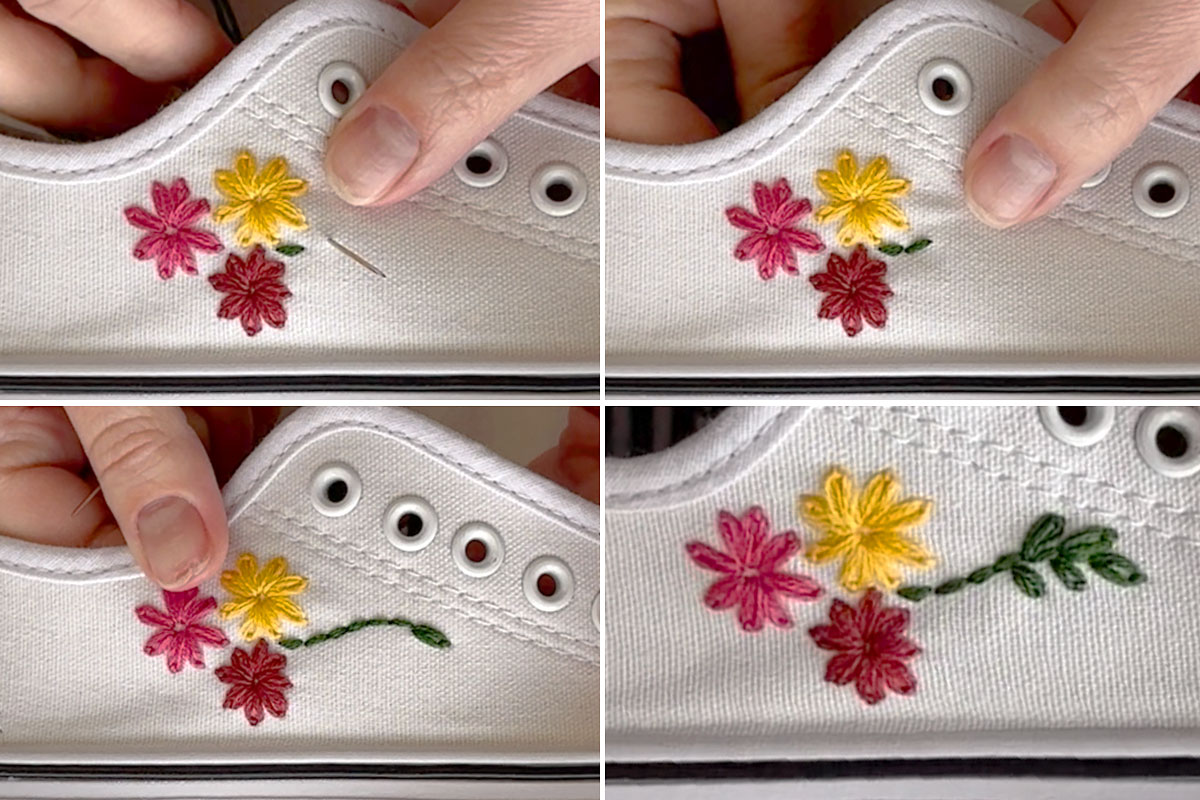
Tie off on the inside of the shoe and start new thread as needed. Continue embroidering vines and leaves until you like how the space is filled. And that’s it! Replace the laces and your pretty custom embroidered sneakers are finished.
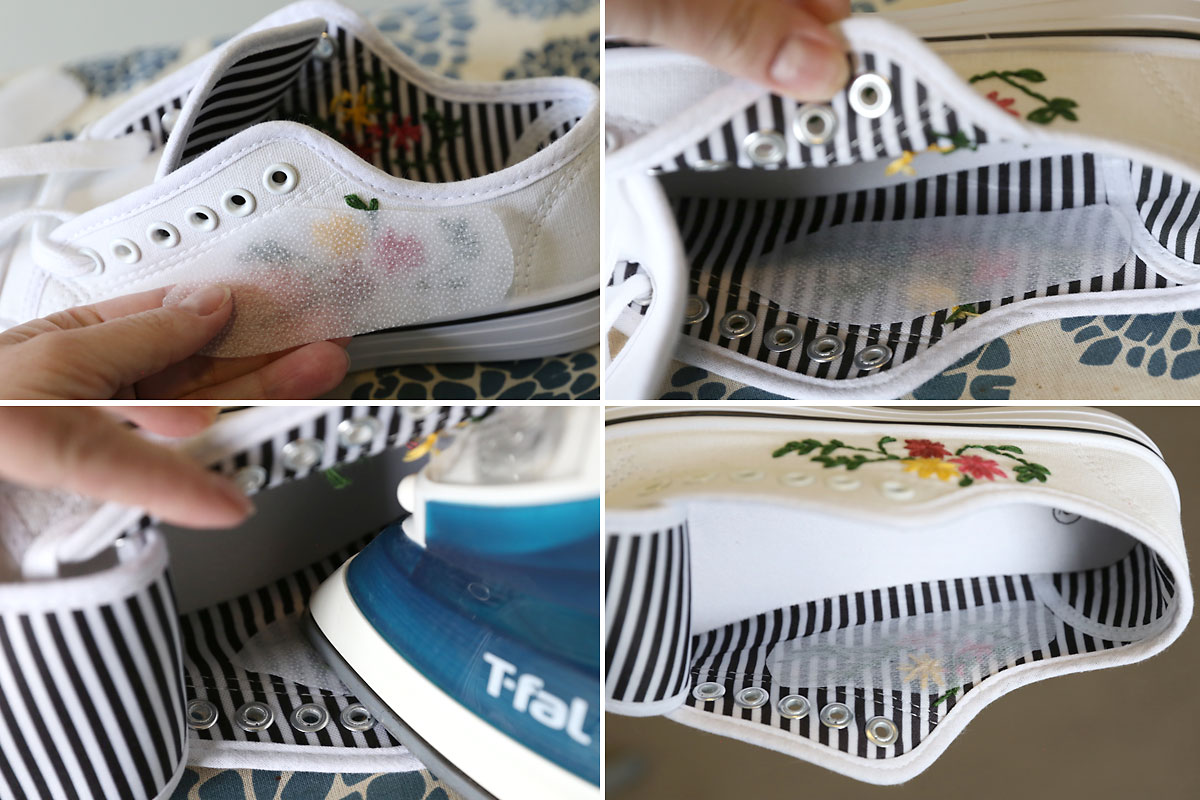
Optional: Add a Lining
If the knots on the inside of the shoes bother you, you can purchase a small amount of lightweight fusible interfacing at a fabric store. It has a side with bumps on it that can be fused with an iron. Cut a small amount of the interfacing to fit inside the shoe, then follow the instruction it comes with to iron it over the threads inside the shoe. ***I cannot guarantee how well the interfacing will hold up to repeated wearing; this is optional if you’d like to give it a try.***
DIY Embroidered Shoes
Supplies
- 1 pair White Canvas sneakers with laces
- Embroidery Floss in desired colors
- Embroidery Needle
Want more project ideas? Sign up to get my favorite easy crafts and recipes straight to your inbox!
Equipment
- Small scissors
- Thimble/thread puller or Wondergrip optional
Instructions
- Remove laces from shoes and thread needle with all six strands of embroidery floss.

- Create a flower using eight lazy daisy stitches. Each lazy daisy stitch starts in the center of the flower. Come up from the inside of the shoe, then poke the needle back down in the same spot you came up, but do not push the needle all the way through. Instead, bring the needle back up about a quarter of an inch away. Take the thread and place it under the needle, then pull the needle all the way through.
- This traps a loop of thread to make a petal shape. Go back down with your needle on the other side of the loop to secure it, and your first petal is complete. Repeat seven more times to make a flower.
- When your flowers are complete, add vines using a backstitch. Come from the inside of the shoe at the start of the vine and go back down about a quarter of an inch later. Then come up about a quarter inch past where you went down, and go backwards this time, meeting the end of the line and going down there. Continue coming up a stitch length past the end of the line, and stitching back to meet the line. Add leaves using a lazy daisy stitch.
- Tie off on the inside of the shoe and start new thread as needed. Continue embroidering vines and leaves until you like how the space is filled. Replace the laces and your pretty custom embroidered sneakers are finished.


Kristie says
So cute. Thanks for the info on how to do it. And now to find some shoes. 🙂
Amy Hunter says
I LOVE this idea! SOOOO cute! Thank you for the tutorial!