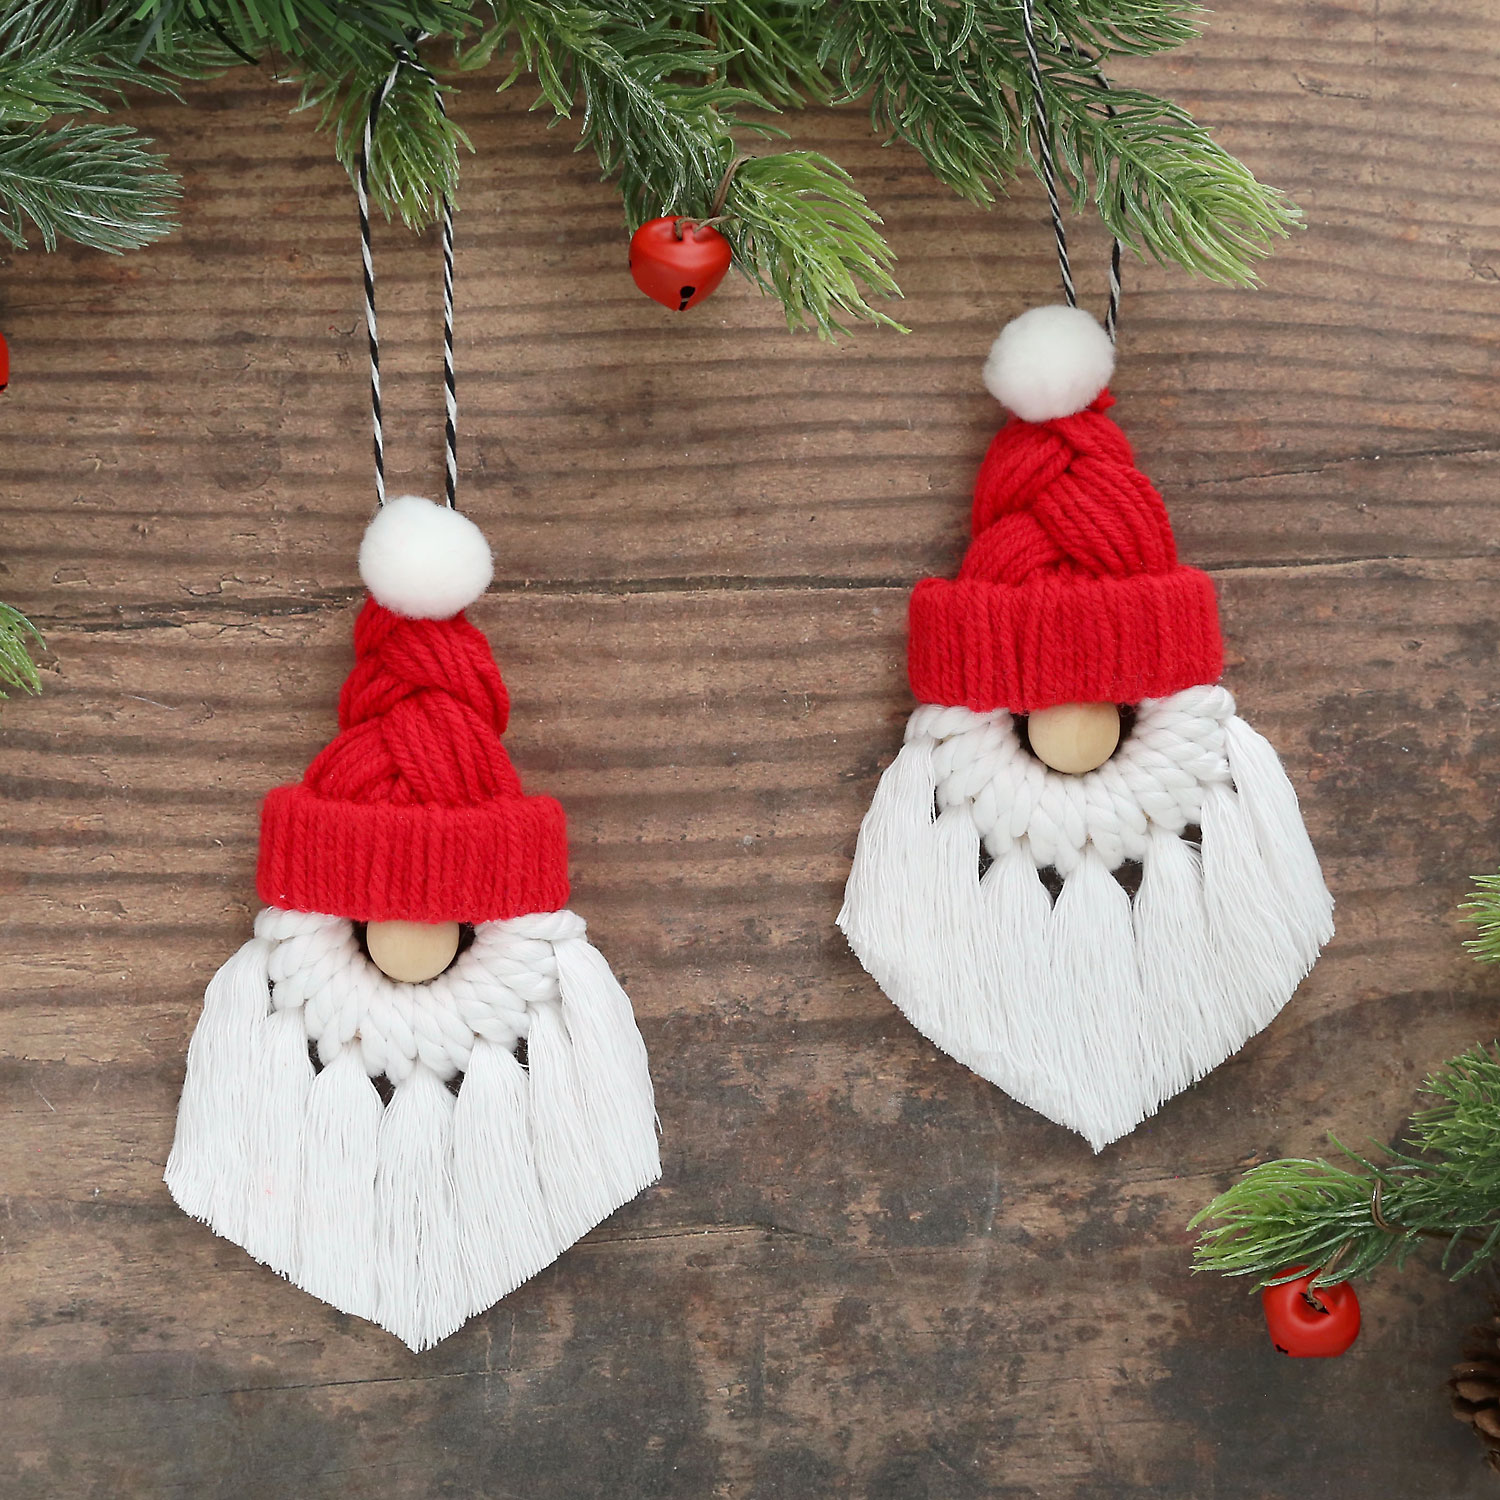
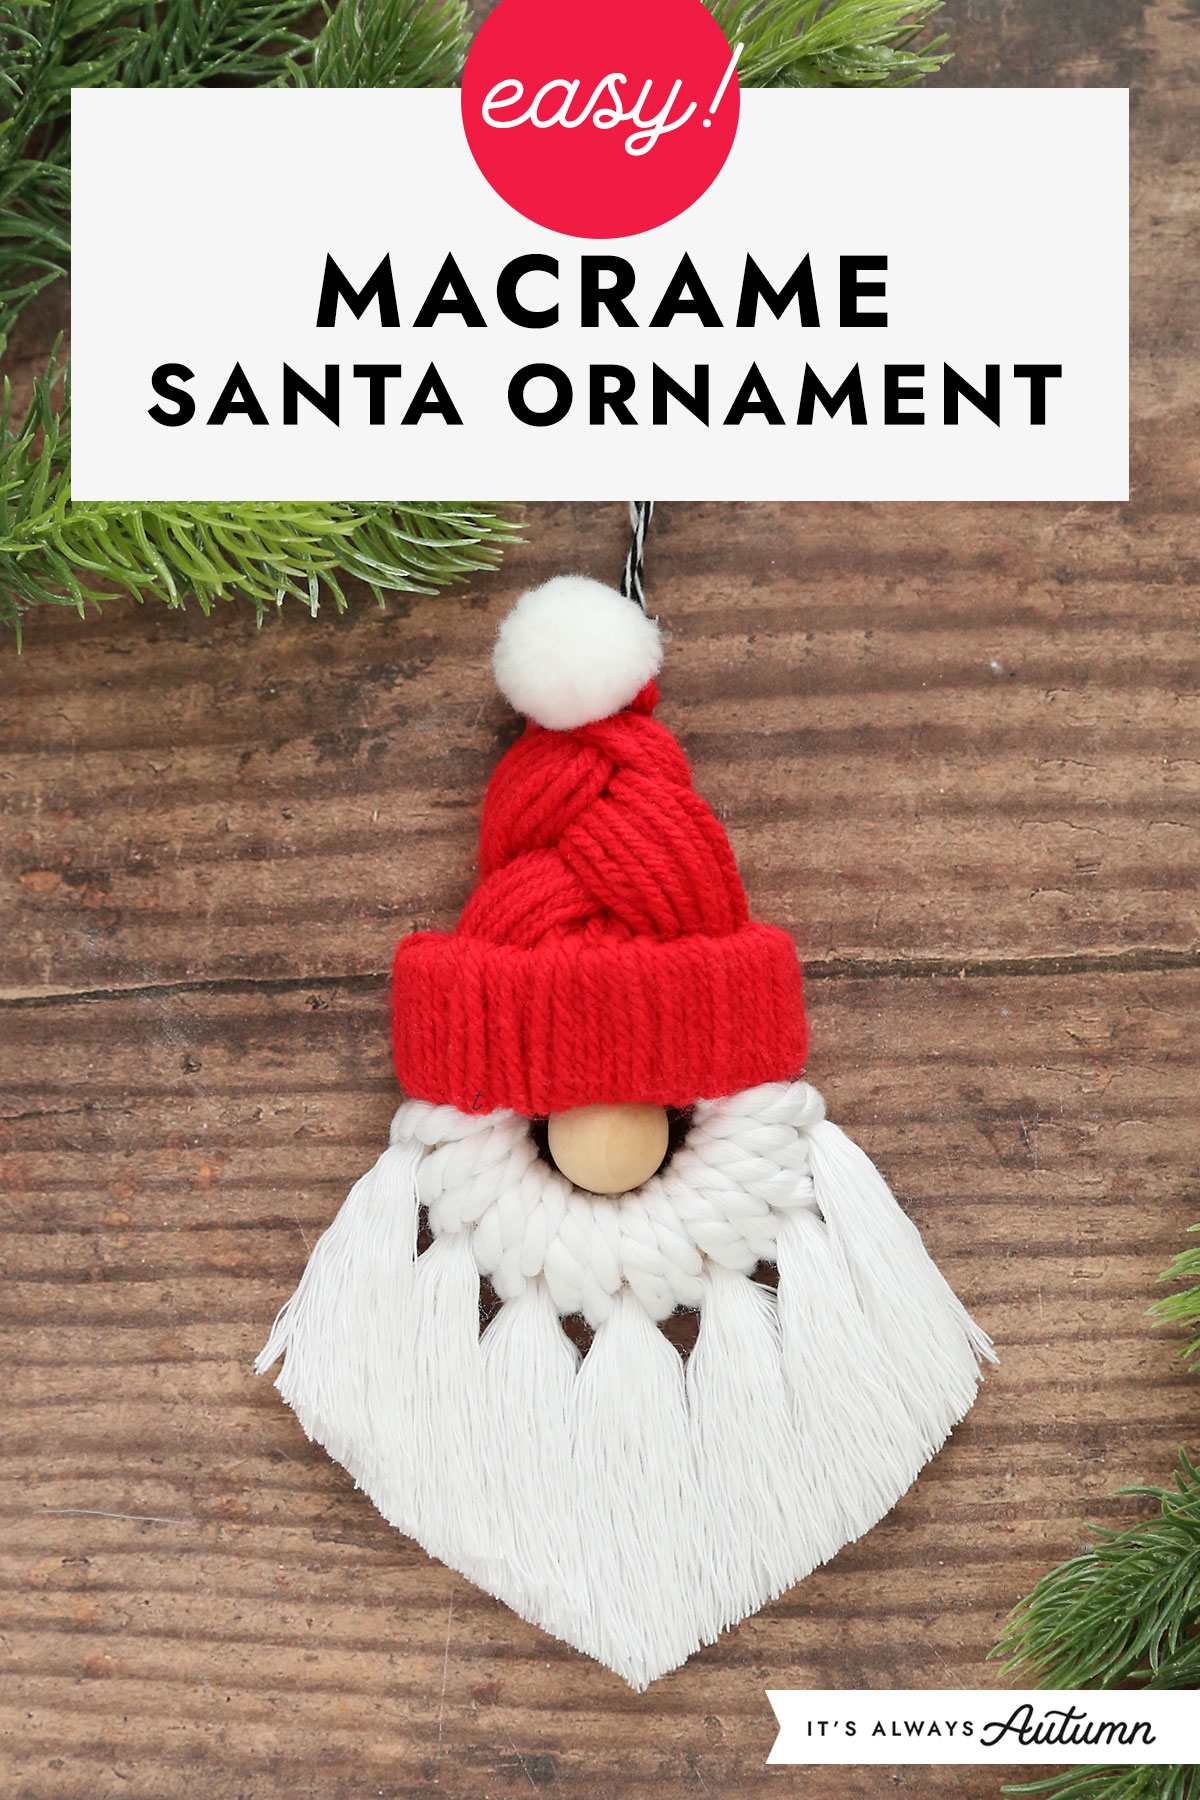
Earlier this year I shared a tutorial for easy macrame gnomes and it went crazy! I knew I needed to make a Christmas version so I did some experimenting and came up with these adorable macrame Santa ornaments. Don’t be intimidated by the fact that they are “macrame” ornaments – the process for making them is very simple. The hard part is not making more and more of them!
Supplies
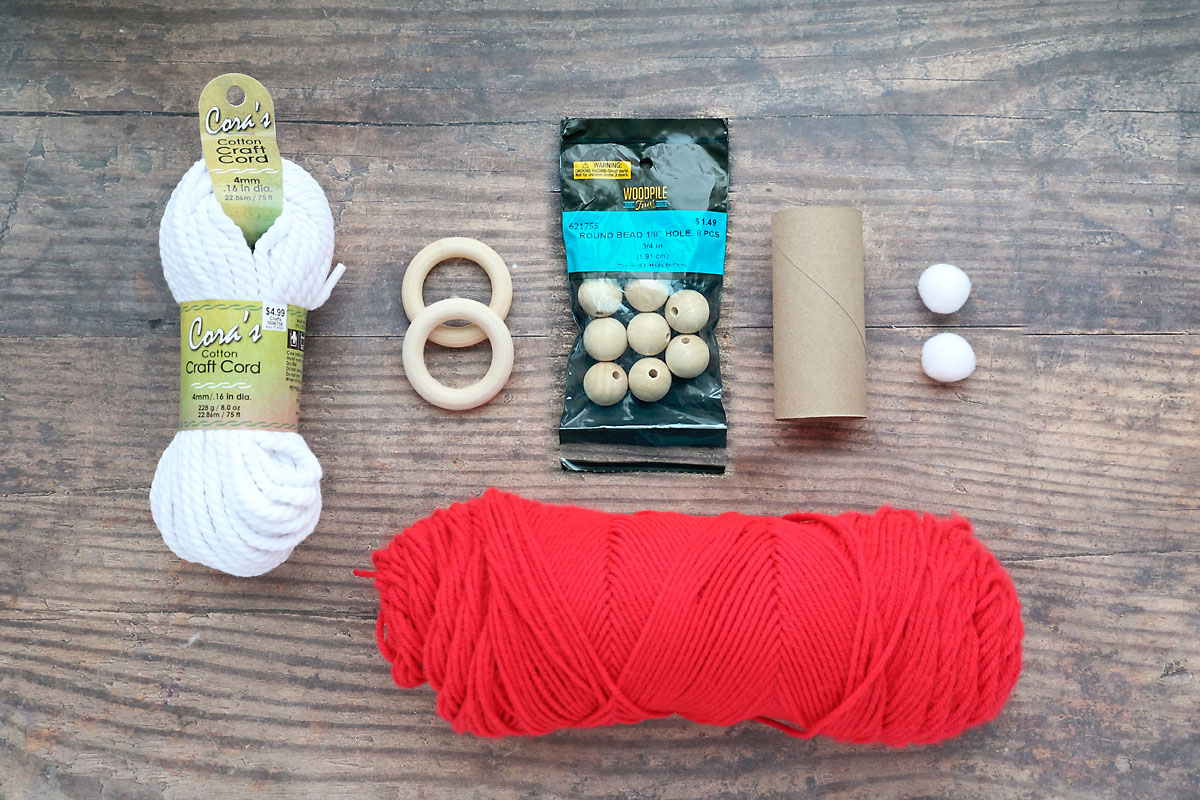
You only need six supplies to make these cute macrame Santas:
- White Macrame Cord: I used 4 mm white craft cord that I found at Hobby Lobby
- Red Yarn: I used standard medium weight (#4) yarn, also from Hobby Lobby
- 3/4 inch Wooden Beads: from, yes, Hobby Lobby
- 55 mm Wooden Rings: these I ordered from Amazon, you can find them here
- White pom poms, 1 inch, again from Hobby Lobby
- An empty toilet paper tube
How to Make Macrame Santas
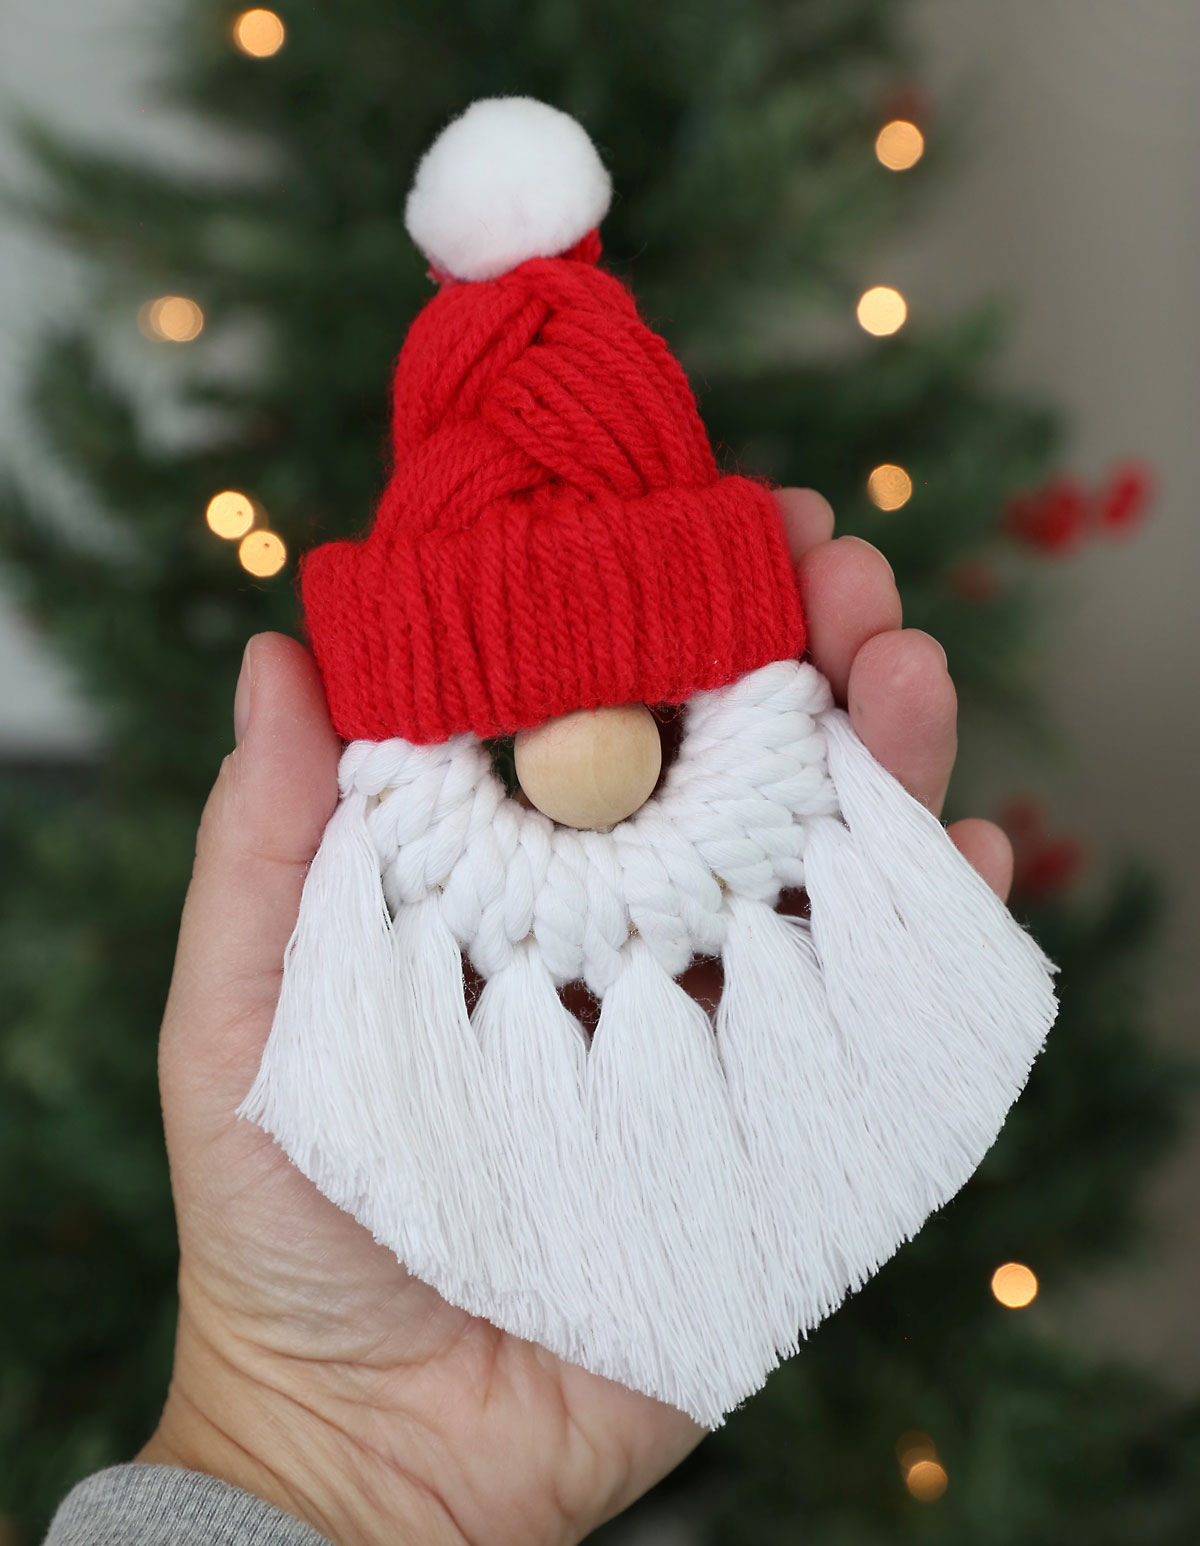
The first Santa you make will probably take about half an hour, but you’ll get faster from there. This is an easy DIY you can complete while listening to a podcast or watching a show. I added a loop of twine so I can hang them up on my Christmas tree, but you could thread a metal ornament hanger through the back instead. They’d look cute strung on a garland and hung up on the mantel!
Make the Hat
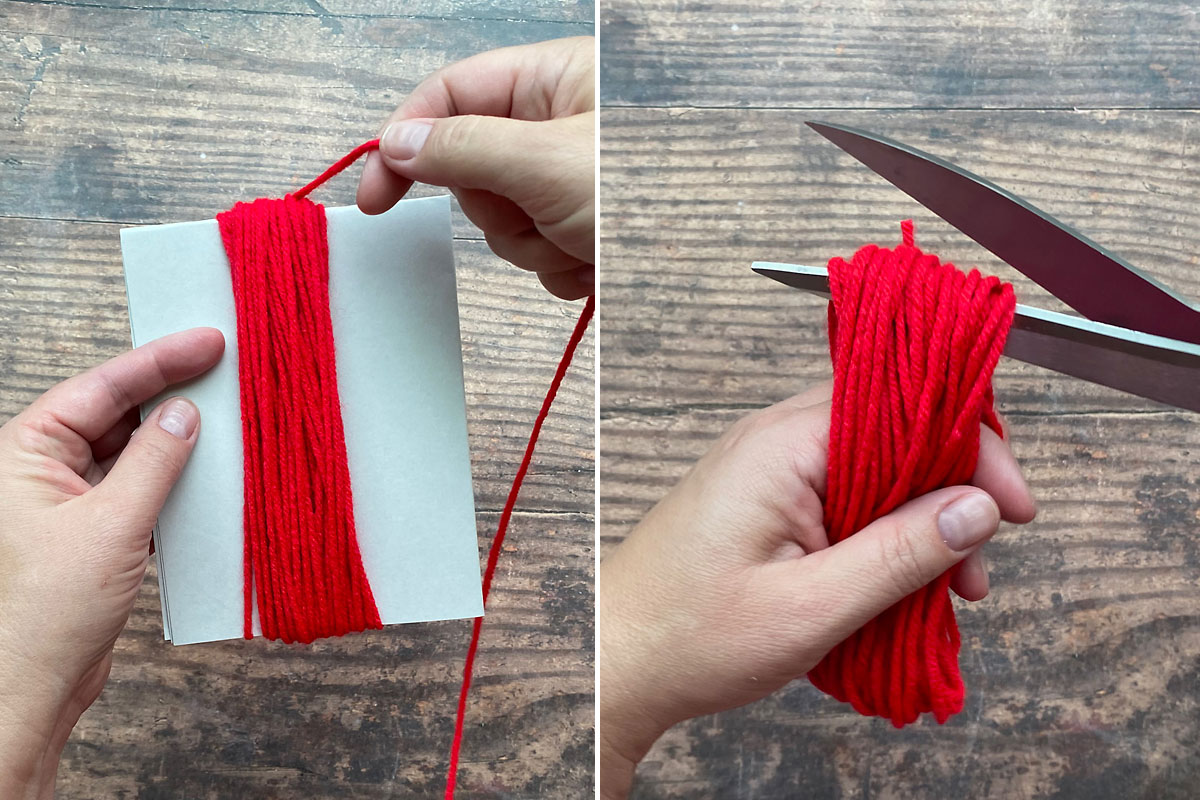
You’ll start by making Santa’s hat. For the hat, you’ll need about 40 pieces of yarn that are 11 inches long. Instead of measuring them out piece by piece, you can fold a sheet of heavy weight paper (like card stock) in quarters to make a template. Loosely wrap the yarn around the template, wrapping 40 times, making sure you are wrapping it around the longer direction. Then slide the yarn off the template and cut through it at the bottom. That will give you 40 pieces of string 11 inches long.
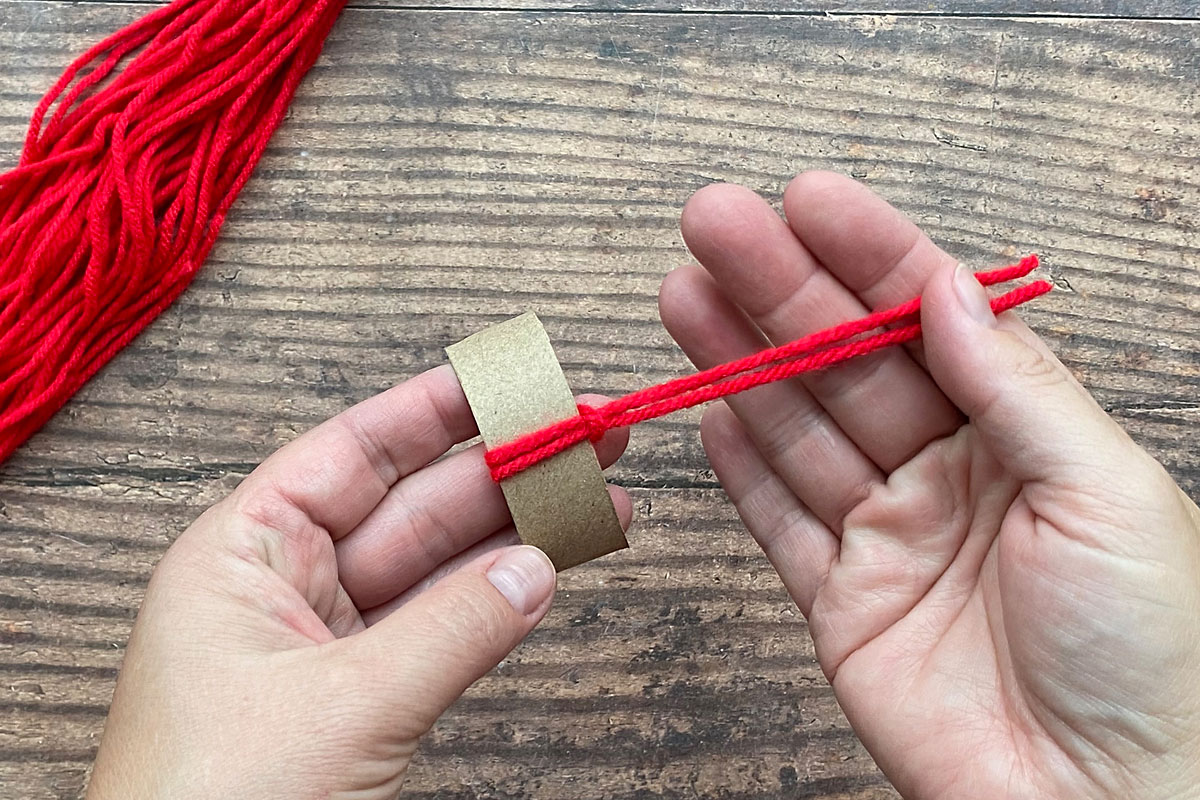
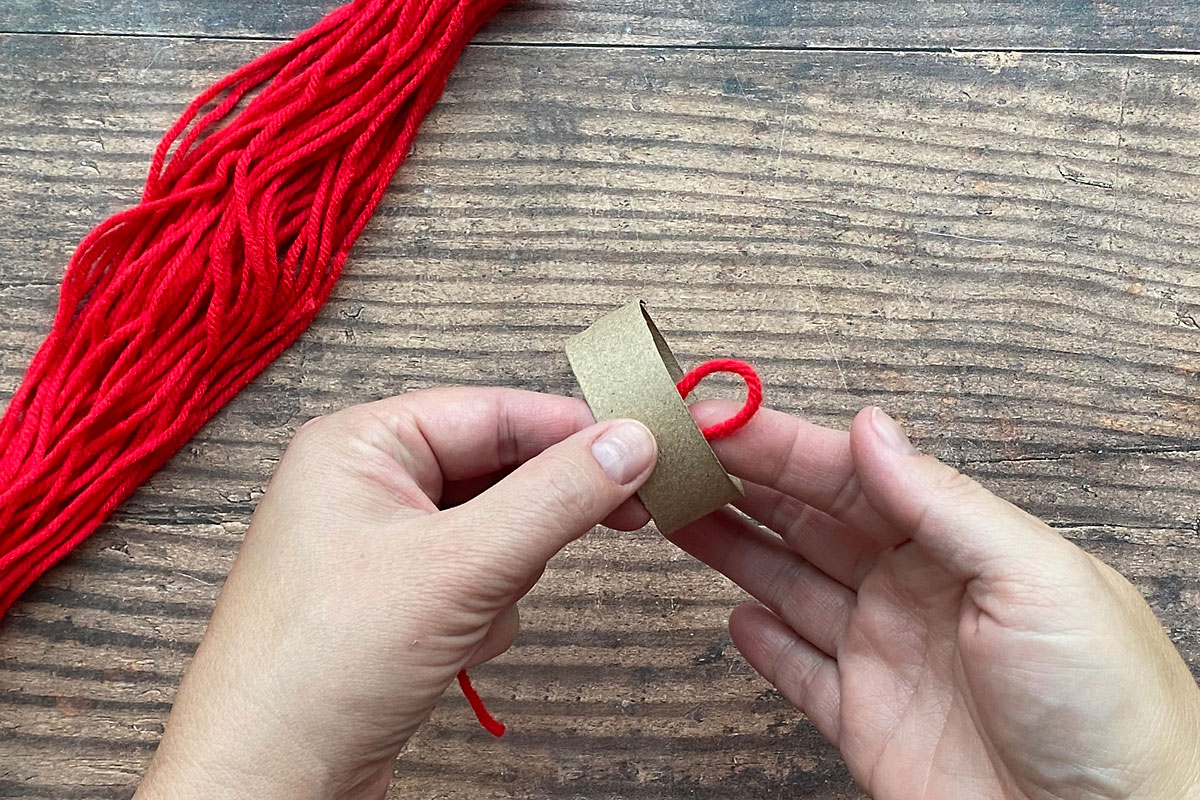
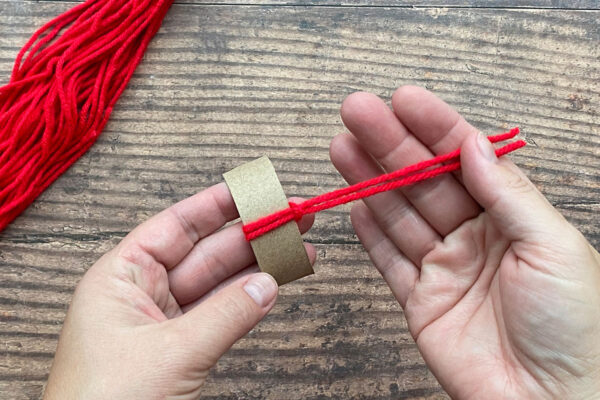
Then reach through the loop with fingers on your right hand and grab the tail ends of the yarn. Pull them through the loop and out to the right as shown.
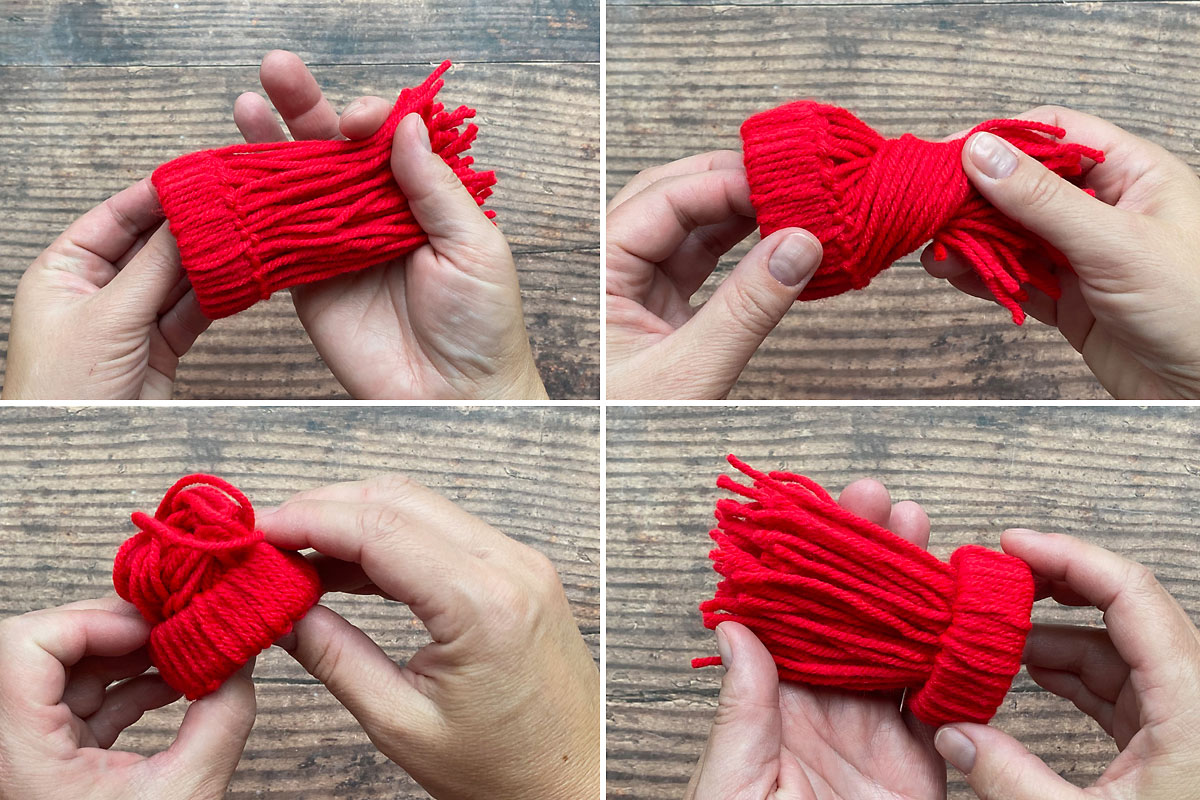
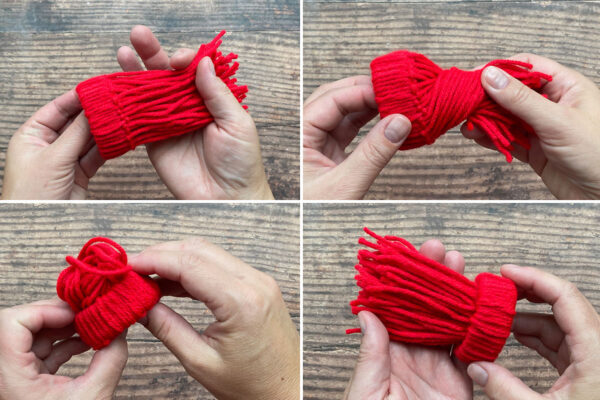
Repeat that process 35-40 times, until yarn completely covers the toilet paper tube. Then grab all the yarn tails in one hand, twist them together and press them through the tube. Pull the tails all the way through and straighten them out a bit. This hides the knots inside the tube, and creates a cuff for the hat.
Make the Beard
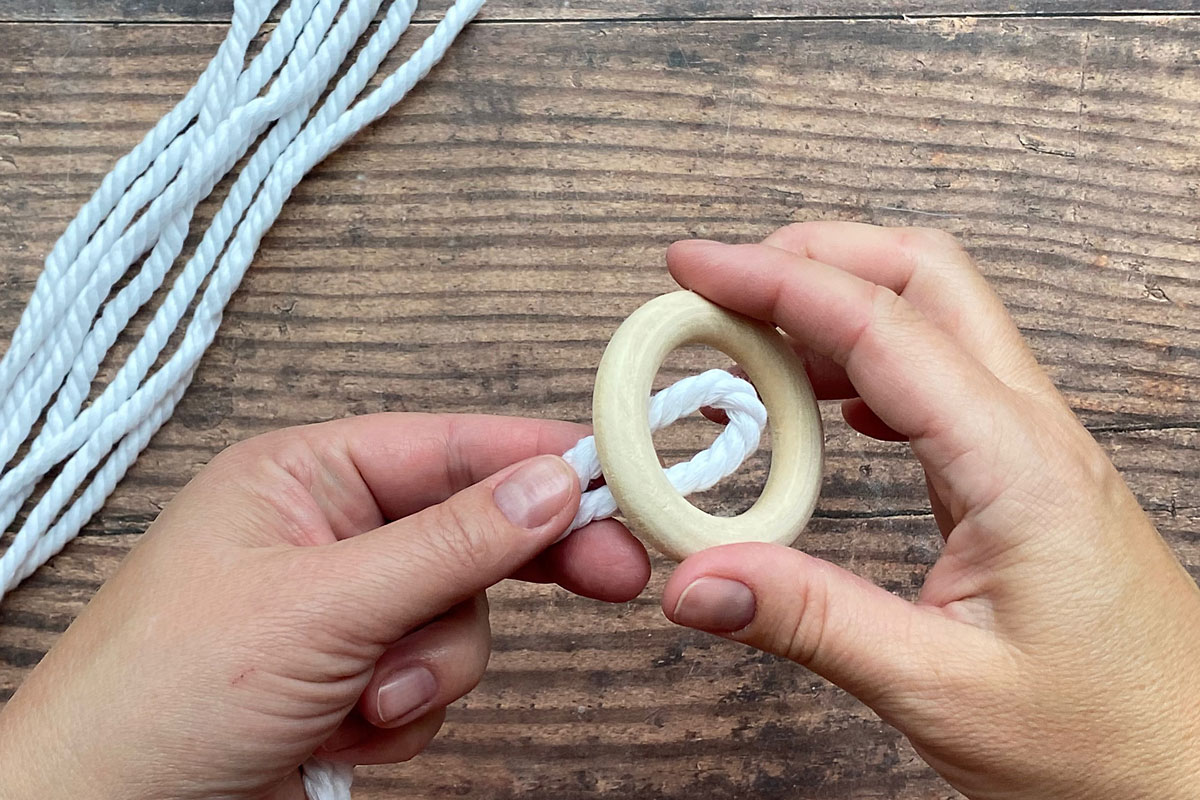
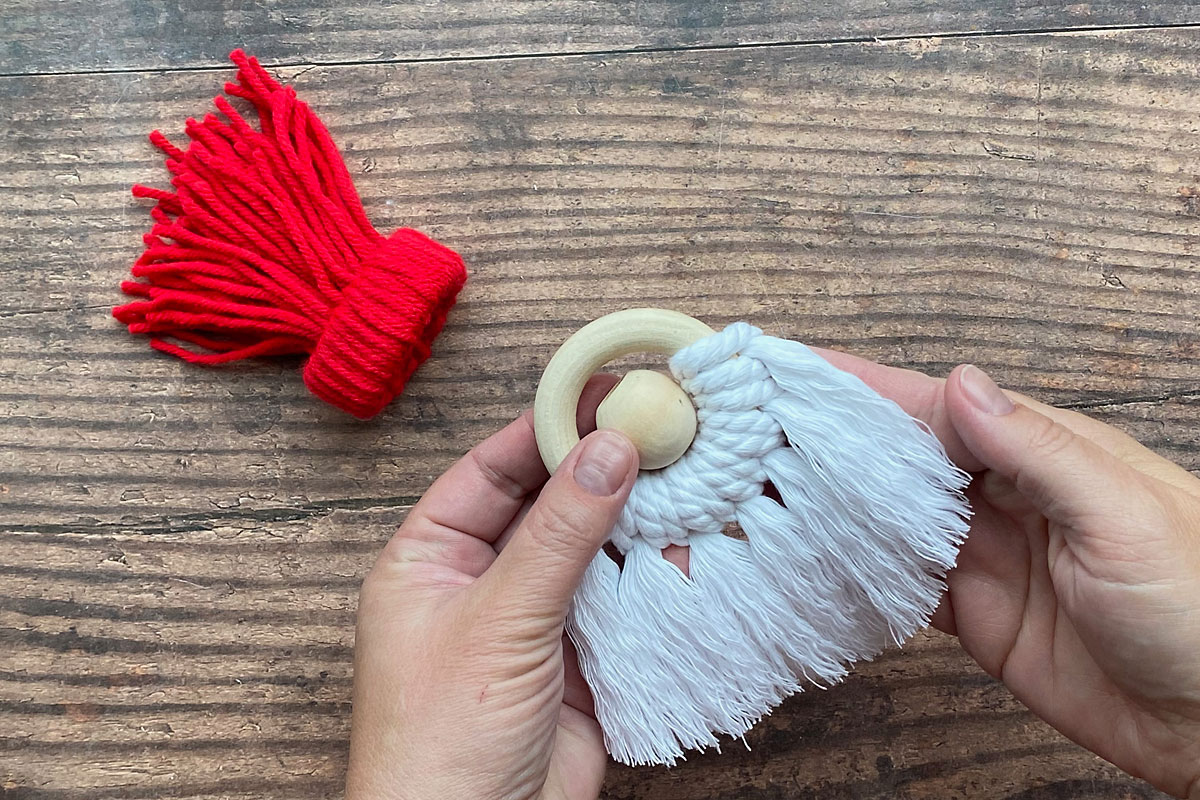
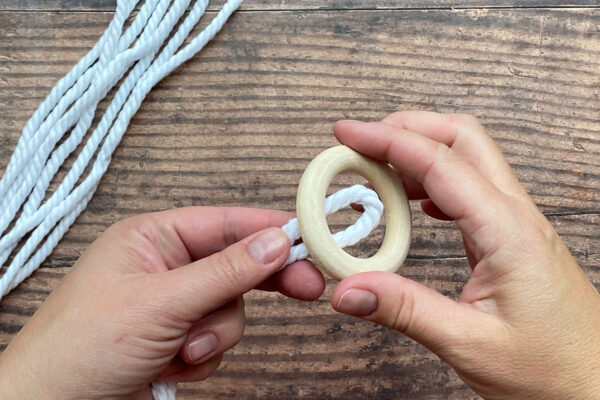
Now you’ll set the hat aside for a moment and make Santa’s beard. We will use the same simple macrame knot to do so. If you are using 4 mm or 5mm macrame cord, you will need 7 pieces of 11 inch long cord. Take one piece of cord and fold it in half, creating a loop. Send the loop through the middle of the wooden ring, as shown.
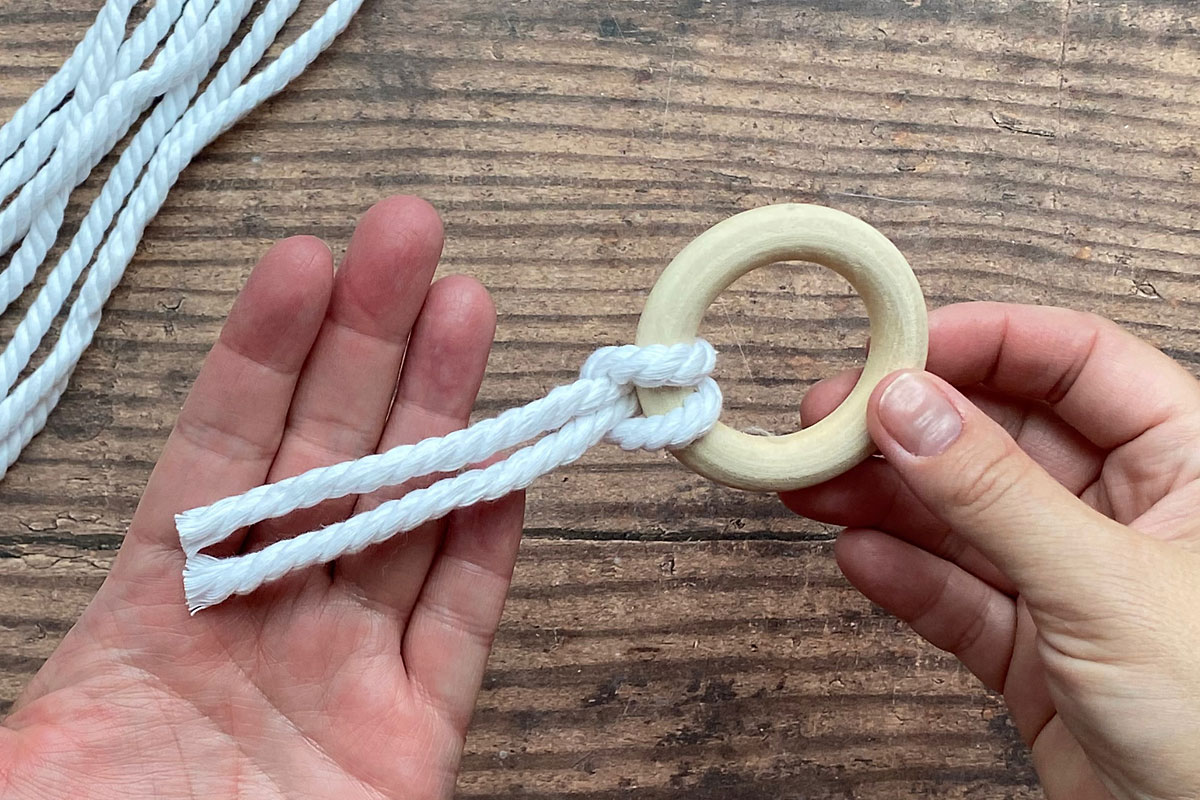
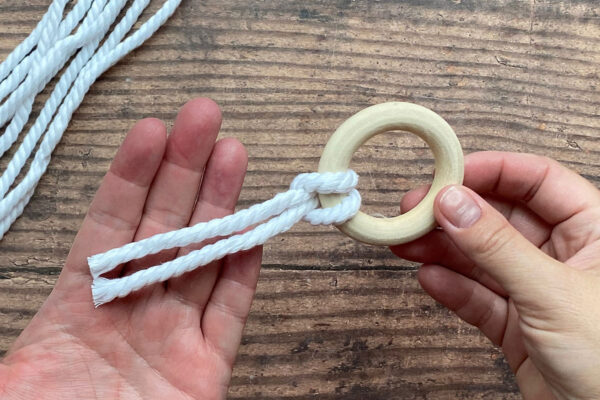
Again, pass the tail ends of the cord through the loop, but this time pull the tails straight out to the left. Give them a good tug to tighten the knot (note: this is called a lark’s head knot).
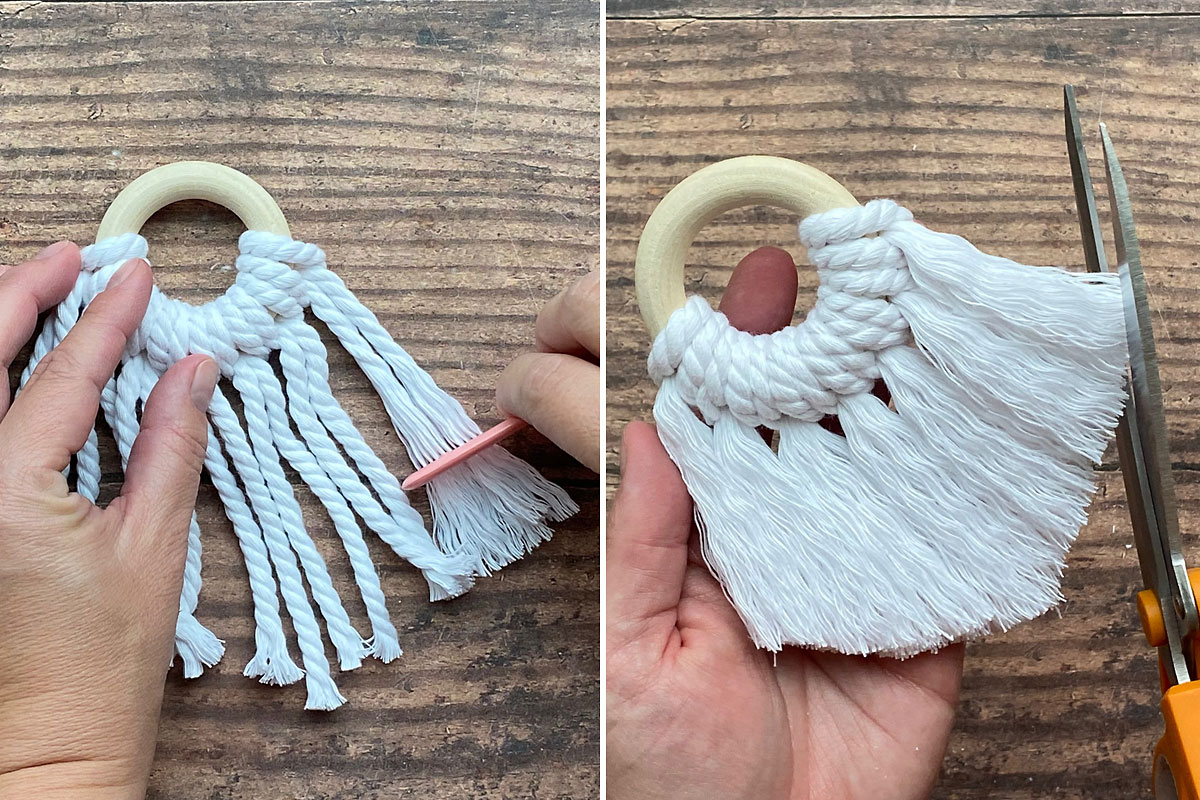
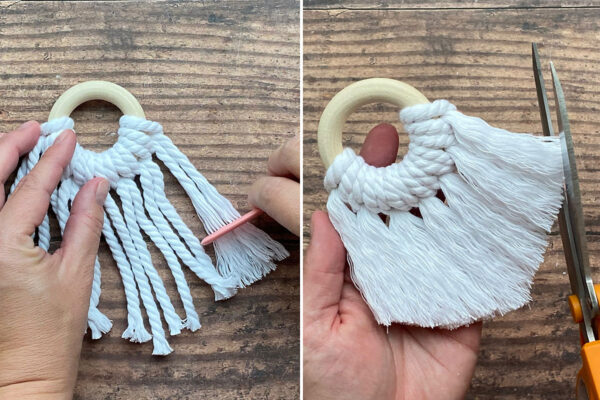
Repeat with the six remaining pieces of macrame cord. Pull all of the beard cords tight, and press them close together. Using a comb and starting at the bottom, begin combing out the macrame cord, separating it into individual strands. It’s easiest to comb out part of the beard at a time. This will only take a few moments. Once the cord is all combed out, use scissors to cut it into a beard shape.
Finish the Hat
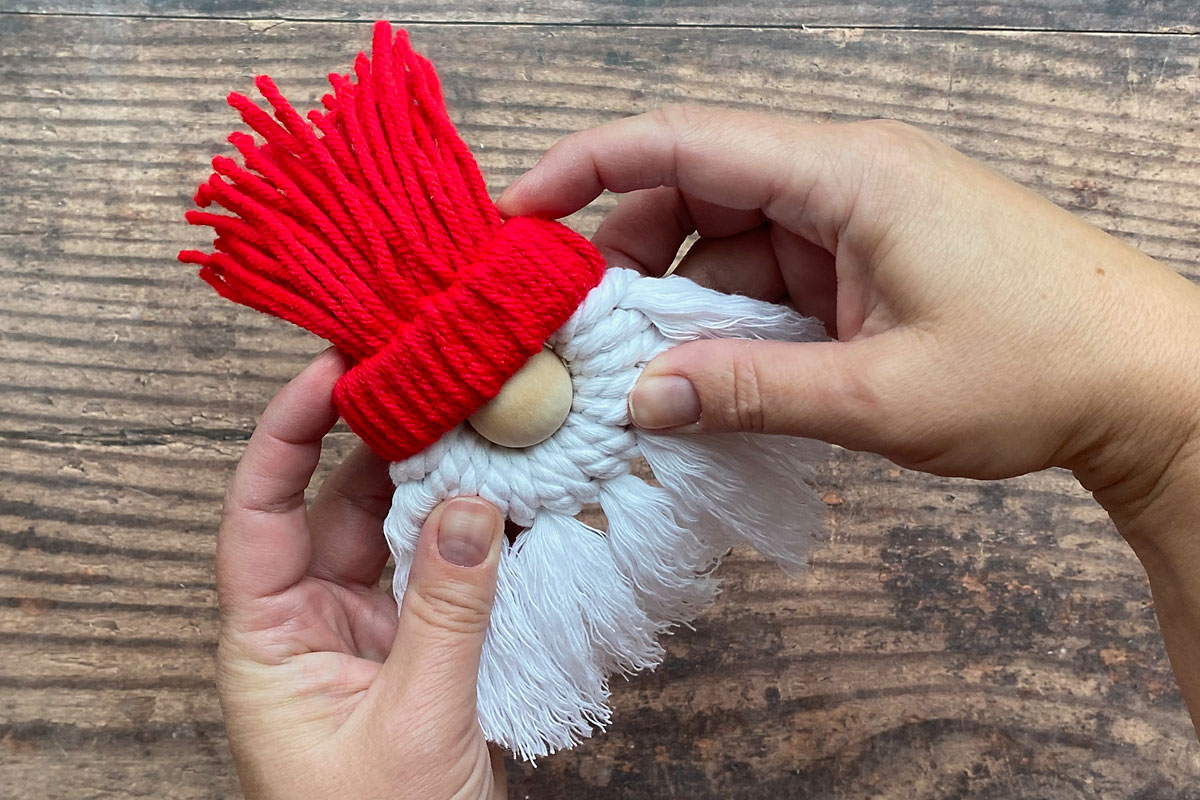
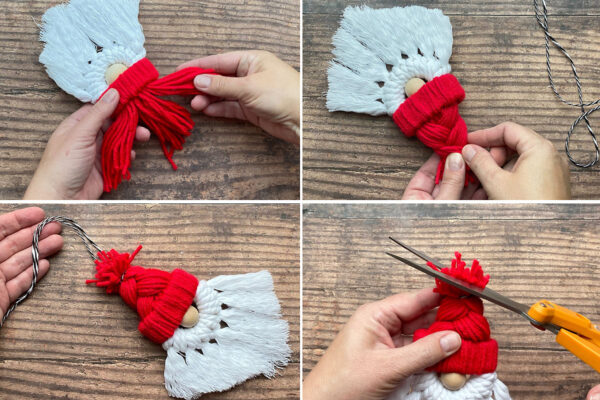
The last step is to make the hat look like a Santa hat and create a loop to hang the ornament from at the same time. Cut a 12 inch piece of yarn or twine. Use your fingers to comb the red yarn of the hat away from the cuff, then split it into three sections. Braid the yarn, pulling it fairly tight – you’ll only be able to braid once or twice with each section and that’s fine. Hold the ends of the yarn tight with one hand and wrap the piece of twine or yarn tightly around it with the other hand. Put it very tight and knot it in the back, leaving long tails. Trim the excess yarn off the hat (but not the long tails from the piece you used to tie it).
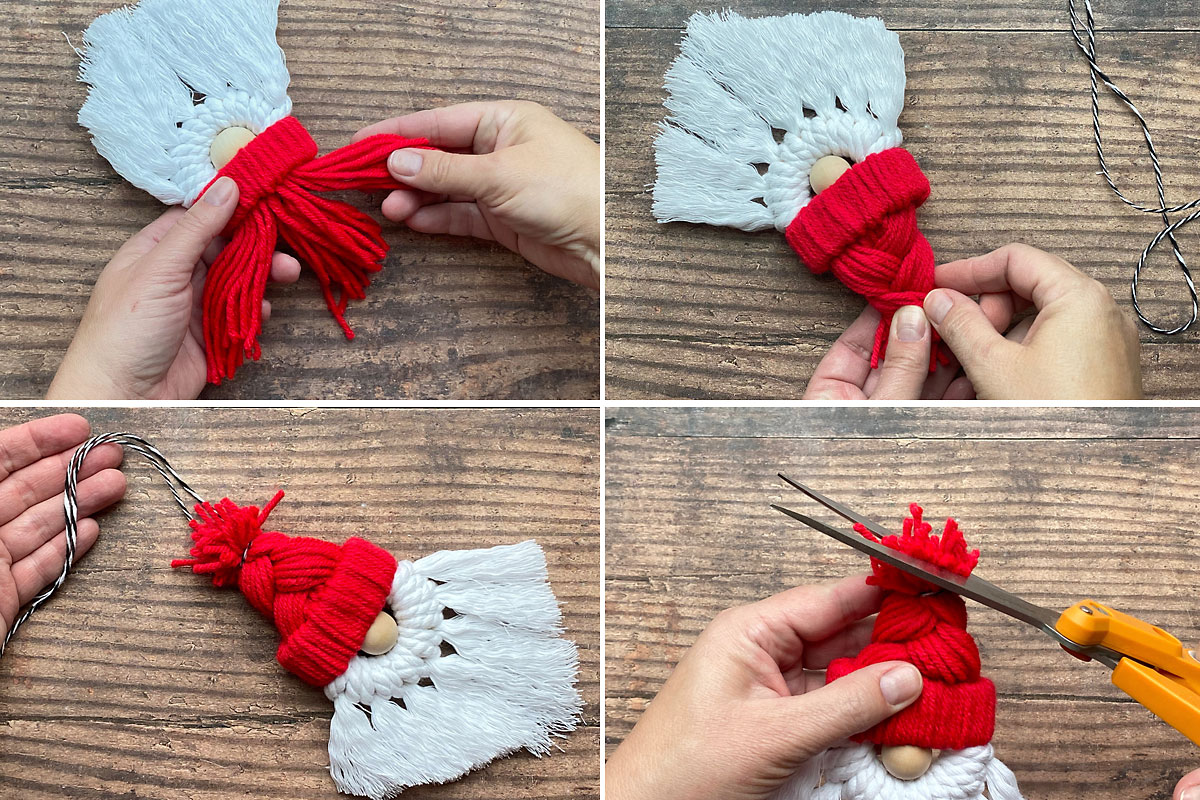
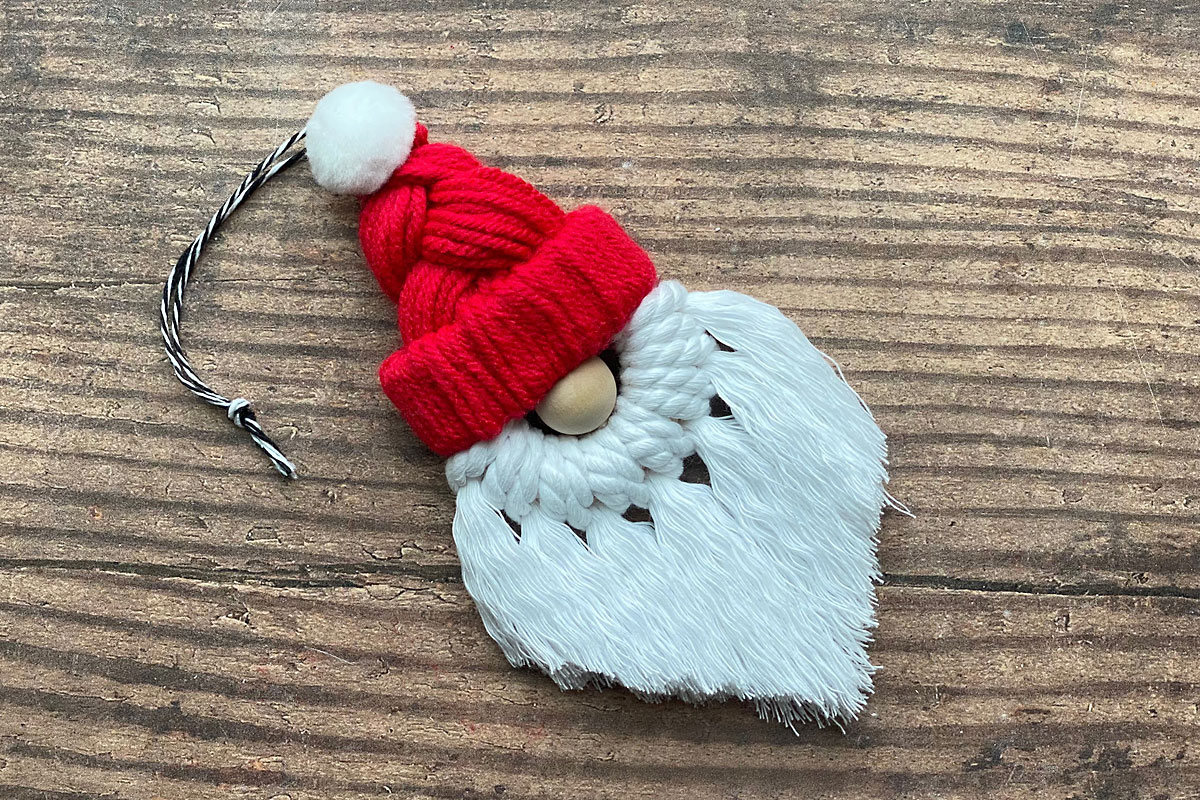
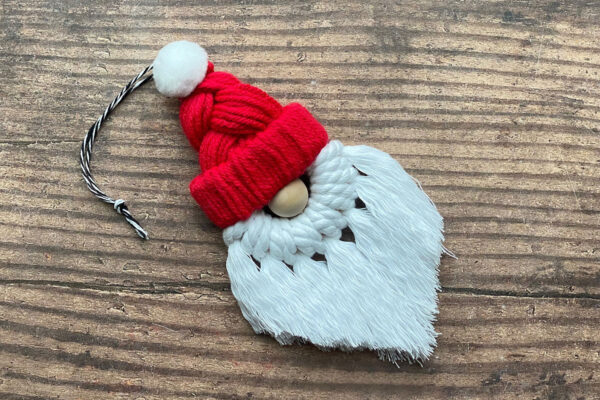
Use hot glue to glue a white pom pom to the top of the hat. Tie the tails of the twine together to create a loop to hang the Santa ornament.
Optional: Secure with Hairspray
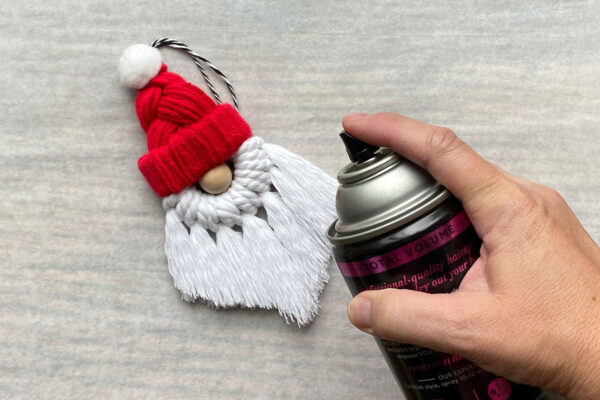
At this point your Santa is complete. If you would like, you can use hairspray to stiffen up the beard and help it stay in place. Place the ornament down on a piece of parchment paper or something else that will protect your table. Comb out the beard so it’s nice and tidy, then gently spray hairspray all over the beard. Allow the hairspray to dry, then flip the Santa over and repeat on the back. Allow the back to dry, then flip it back over and spray the front one more time. The more hairspray you use, the stiffer the beard will end up.
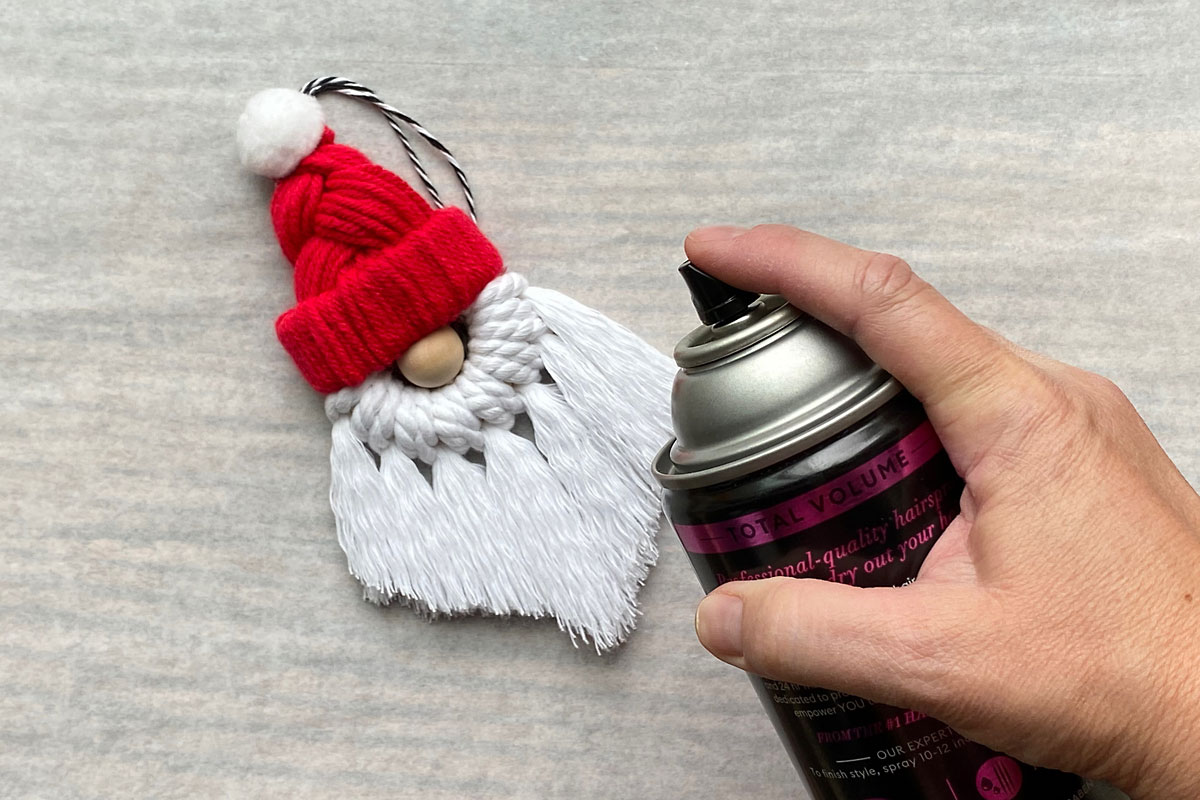
When the beard is completely dry, you’ll probably want to trim the beard one more time to get it in the exact shape you want. The hairspray will help the beard stay stiff and in place, but it won’t last forever. If you use these ornaments year after year you’ll likely need to respray them with hairspray.
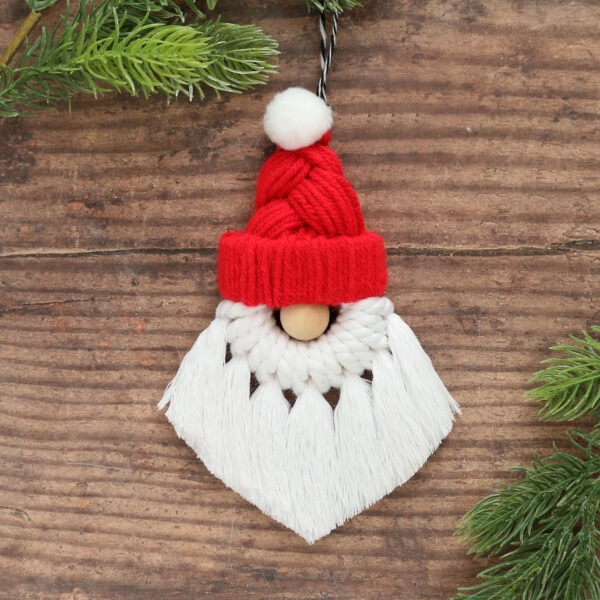
Macrame Santa Ornaments
Supplies
- White Macrame Cord I used 4 mm cord
- Red Yarn I used medium weight #4 yarn
- 5 cm Wood Rings
- 3/4 inch Wood Beads
- 1 inch White Pom Poms
- Toilet Paper Tube
Want more project ideas? Sign up to get my favorite easy crafts and recipes straight to your inbox!
Instructions
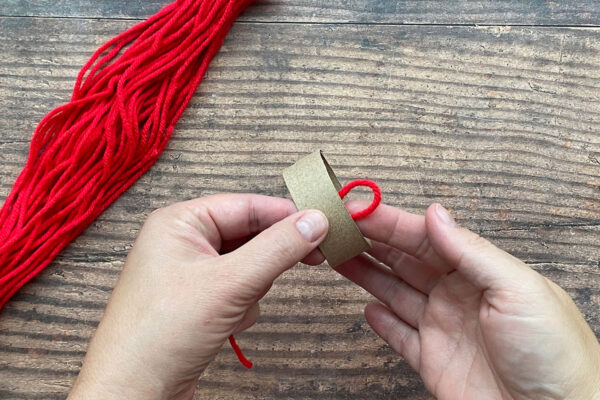
- Cut 40 pieces of yarn at 11 inches. Cut a 3/4 inch wide piece off the end of an empty toilet paper tube. Fold one piece of yarn in half, creating a loop, and place the loop through the center of the tube.
- Reach through the loop to grab the tail ends of the yarn, then pull them through the loop to the right, pulling them tight.
- Repeat 35-40 times until the entire tube is covered with yarn. Then grab all the tails of yarn, twist them together, and push them through the tube. This hides the knots and creates a cuff for the hat.
- Cut 7 pieces of macrame cord at 11 inches. Fold one piece in half, creating a loop. Place the loop through the center of a wooden right.
- Pull the tail ends of the yarn through the loop and then pull them to the left, pulling tight. Repeat with the other pieces of macrame cord.
- Starting from the bottom, comb out the macrame cord to separate it into individual strands. When it is combed out smooth, cut it into a beard shape.
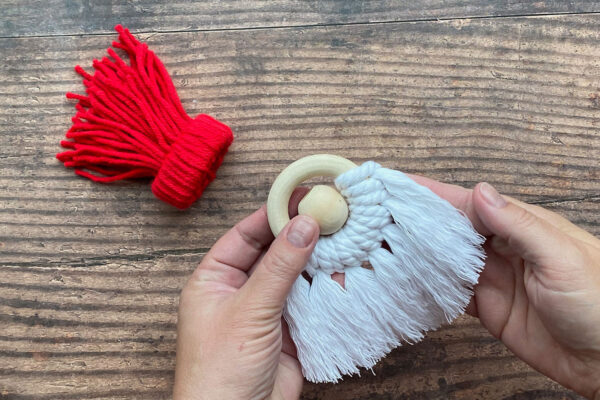
- Glue on the wood bead for a nose.
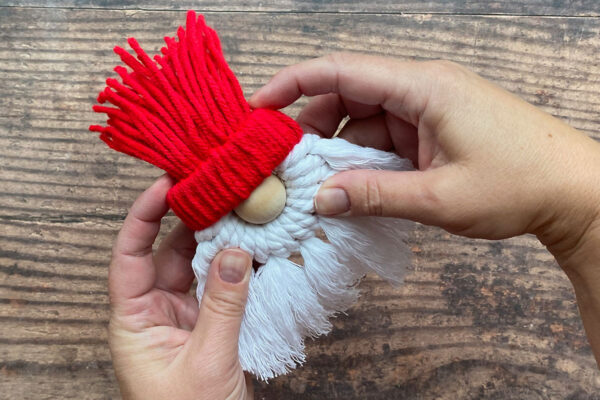
- Place glue on the sides of the wood ring above the beard, then place the hat onto the ring, sliding it down to meet the beard.
- Separate the yarn on the hat into three sections and braid it together once or twice. Tie tightly with a 12 inch piece of yarn or twine.
- Trim the excess yarn. Do not cut the twine you used to tie the hat with – tie the ends together to make a hanging loop. Glue a white pom pom at the top of the hat.
- Optional: To stiffen up the beard and help it stay in place, comb it out again and spray with hair spray. Let it dry, then flip it over and spray again. Repeat. Trim the beard again if needed.






Julie says
I sure hope these are as easy as they look! Sooo cute!