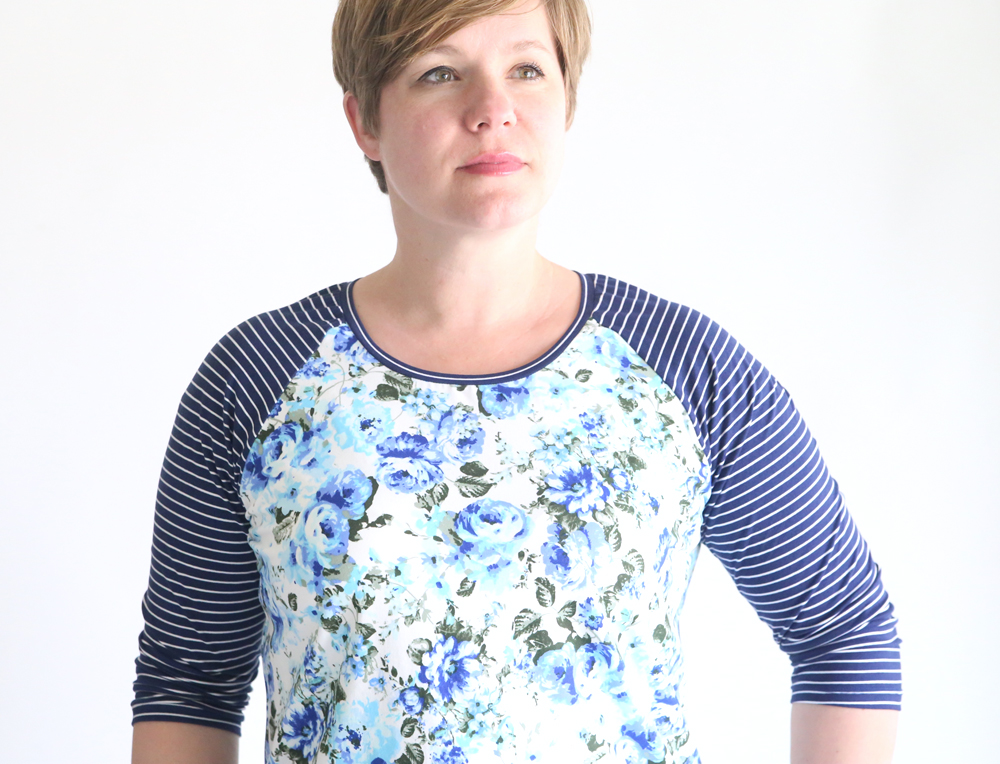
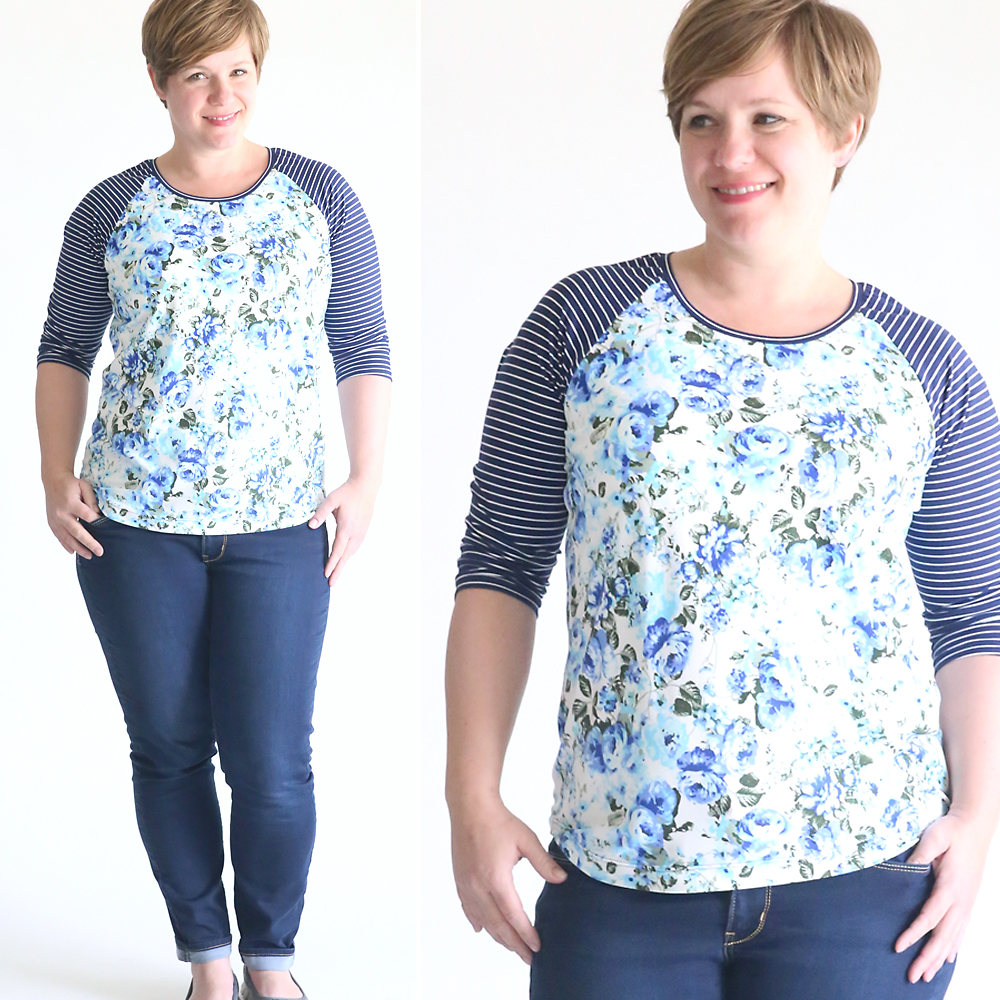
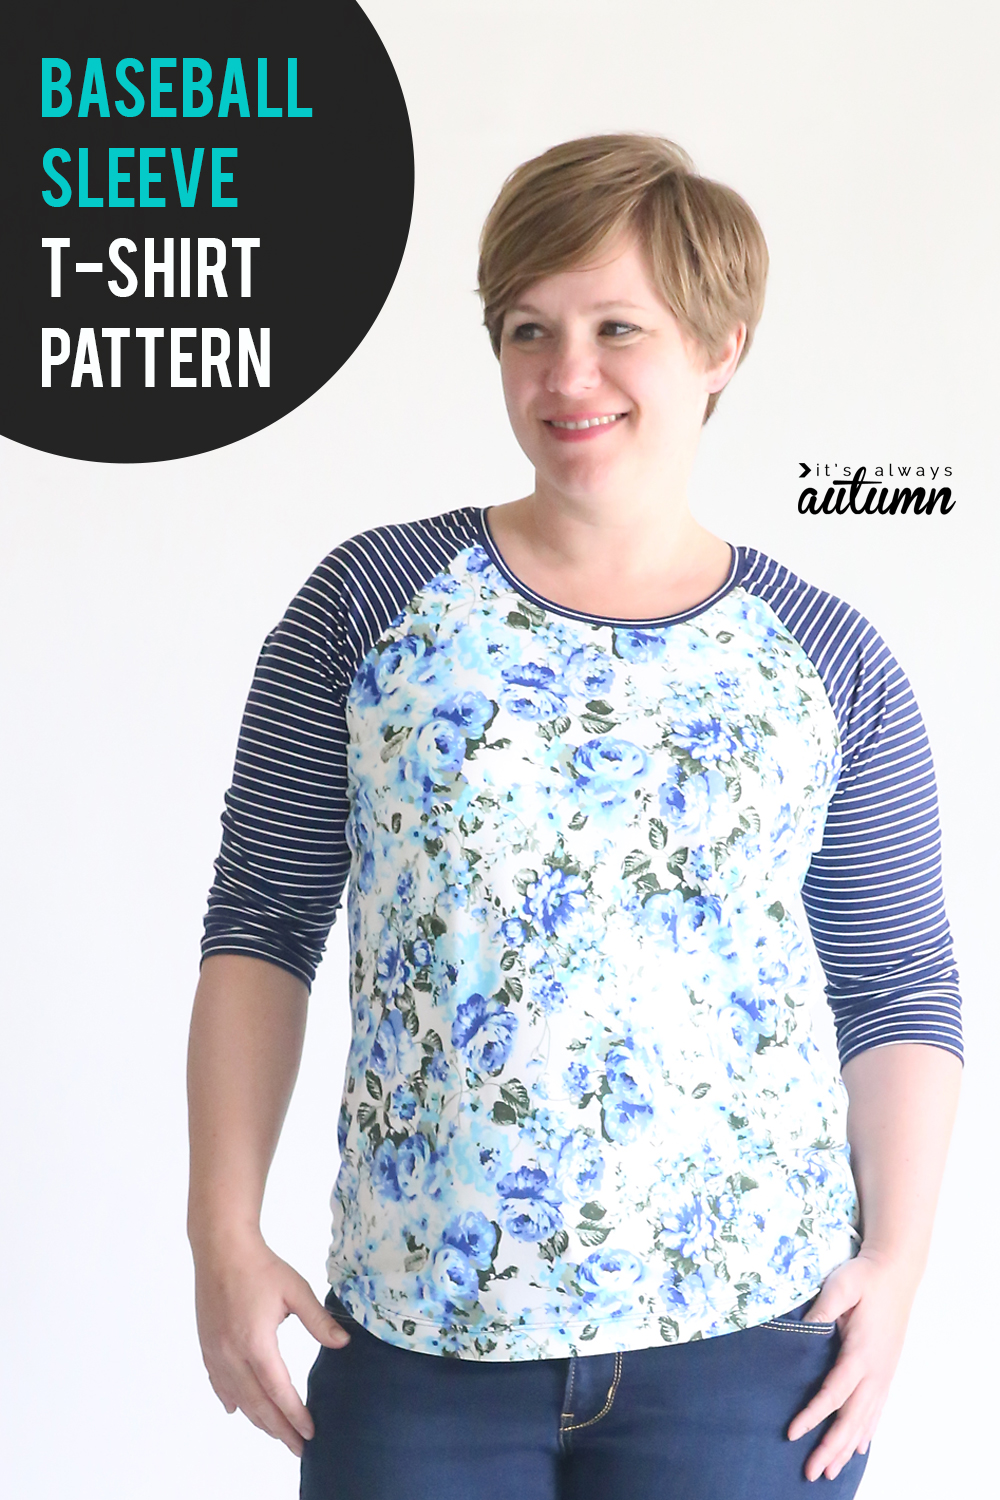
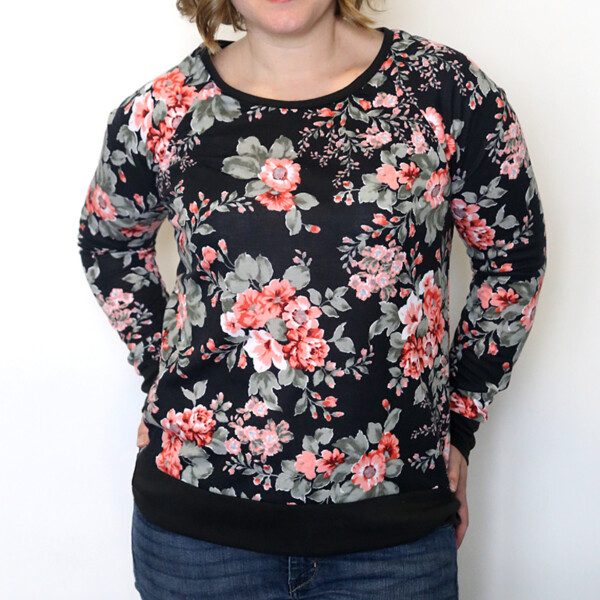
Ok, I have a beef with tee shirts lately. Why are they all made out of thin, clingy fabric? What’s the deal? Don’t the manufacturers know I’m trying to hide my muffin top, not put it on display? Sigh. So I’m sprucing up my spring wardrobe with handmade tops (and a few fun dresses), which means I have a new pattern for all of you lucky enough to be my size: the raglan sleeve tee.
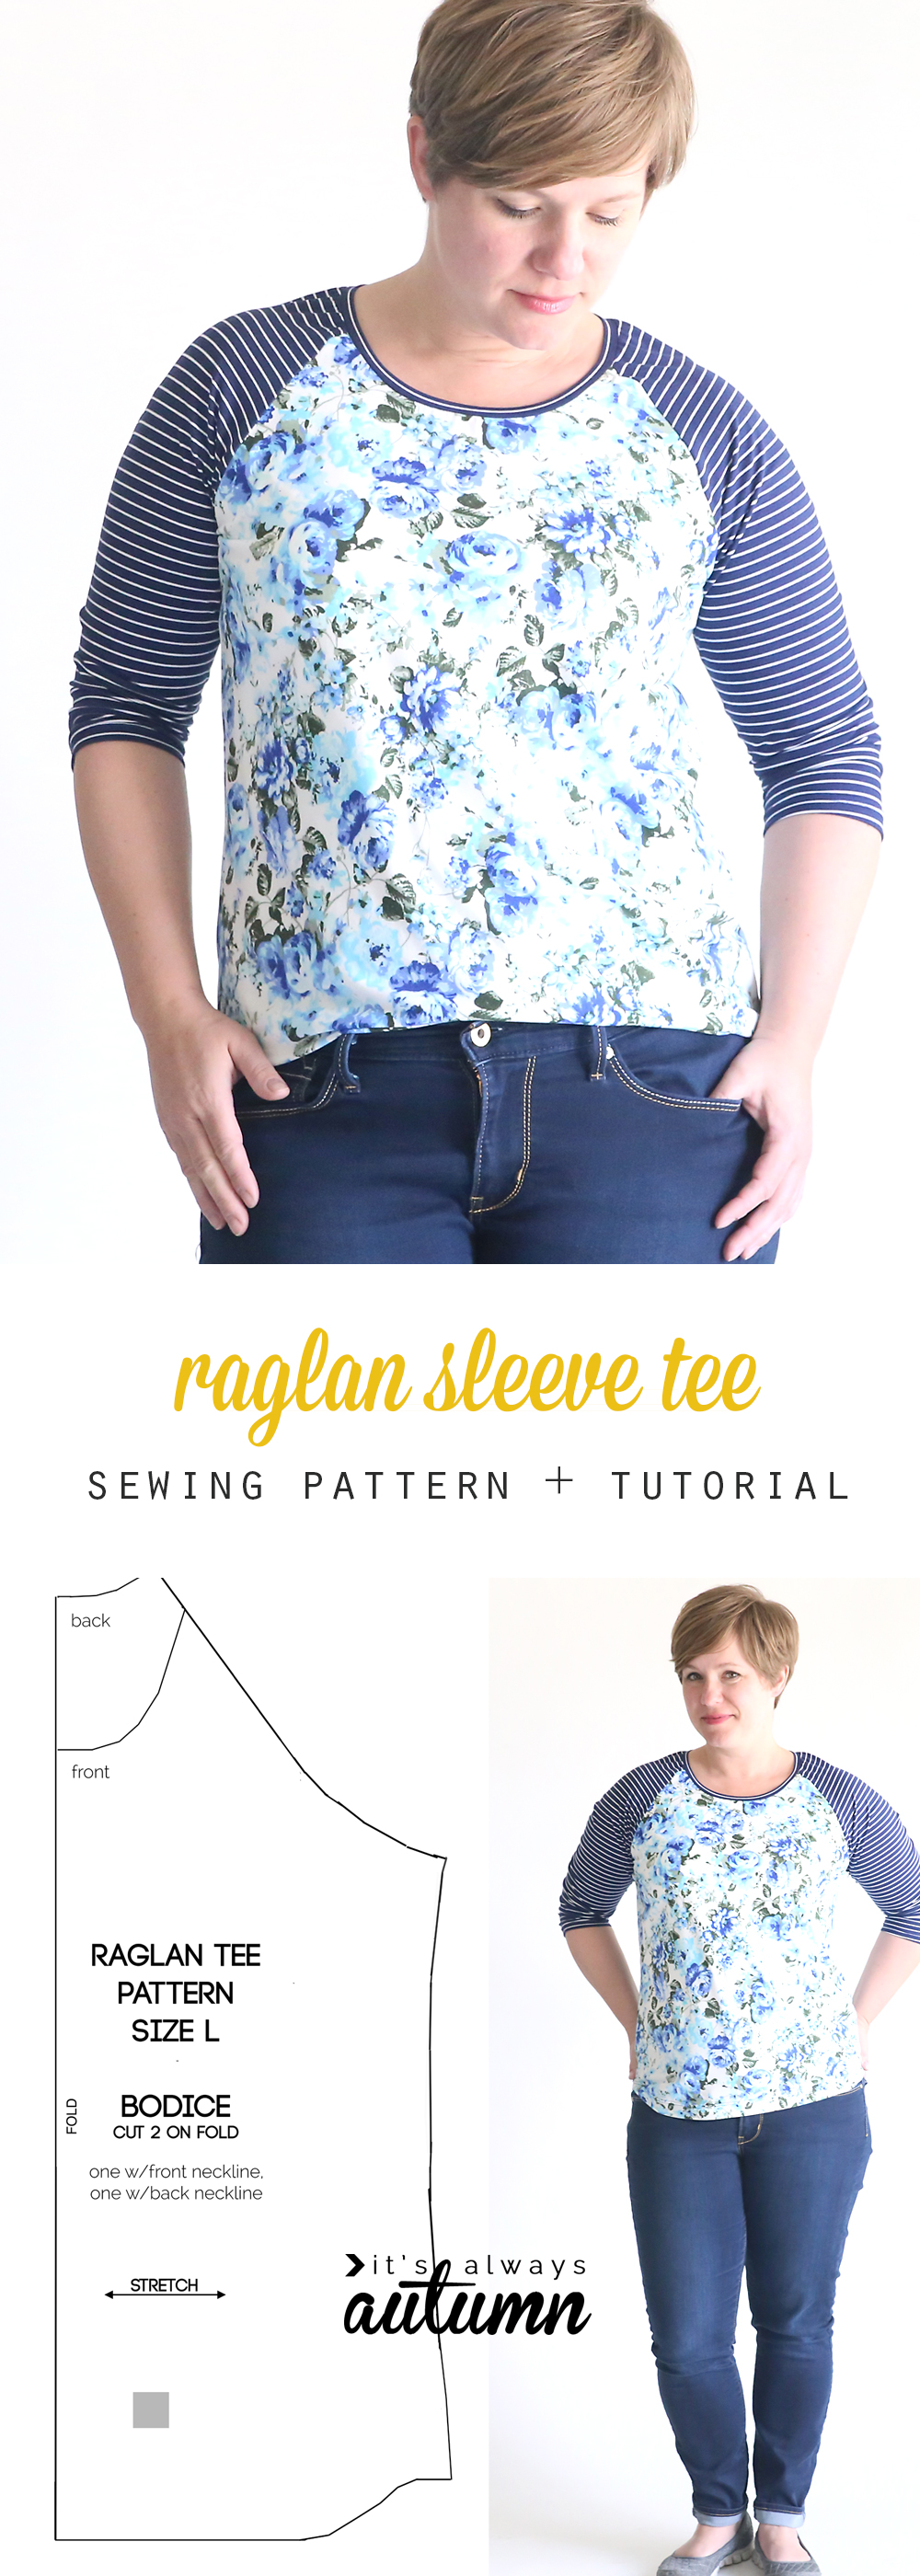
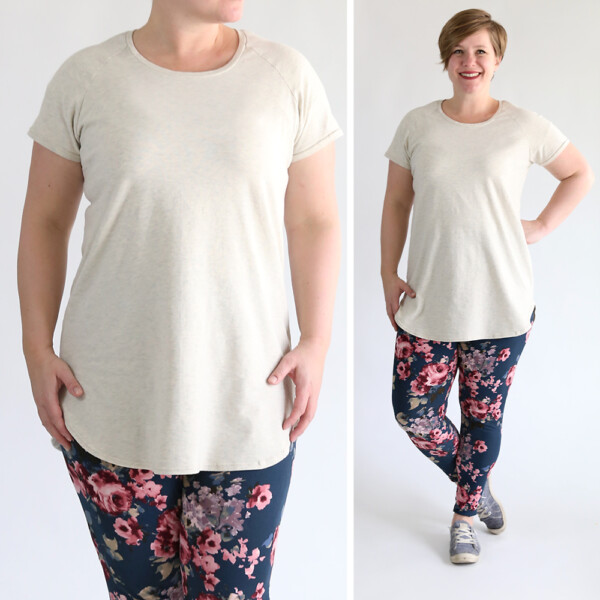
This free pdf pattern is size large (to fit 38 in bust) and I love it because I think it’s pretty flattering. Long time readers (hi mom!) might remember that I posted a raglan tee pattern three or four years ago. This one’s better. It has 4 sleeve lengths: short, elbow, 3/4, and long, and a pretty curved hem. I’m planning to show you lots of variations in the next few months as I sew up more new shirts for myself.
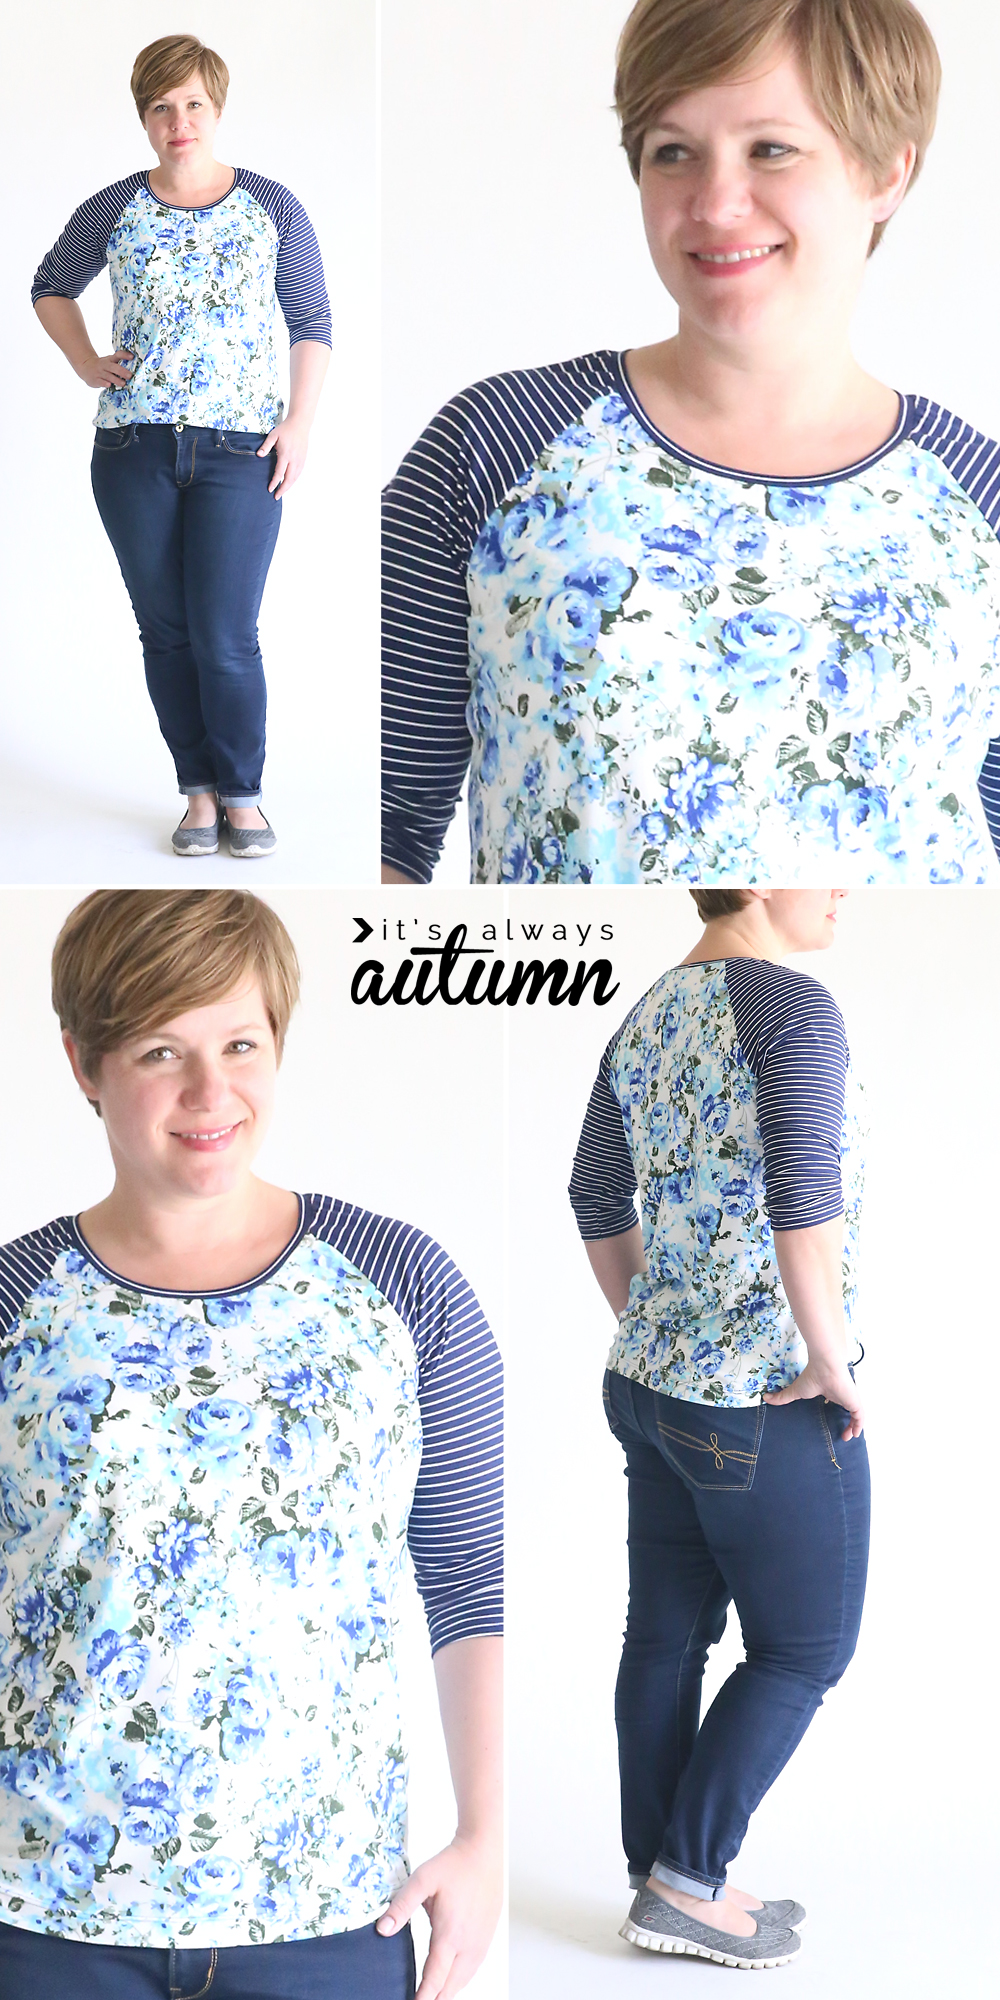
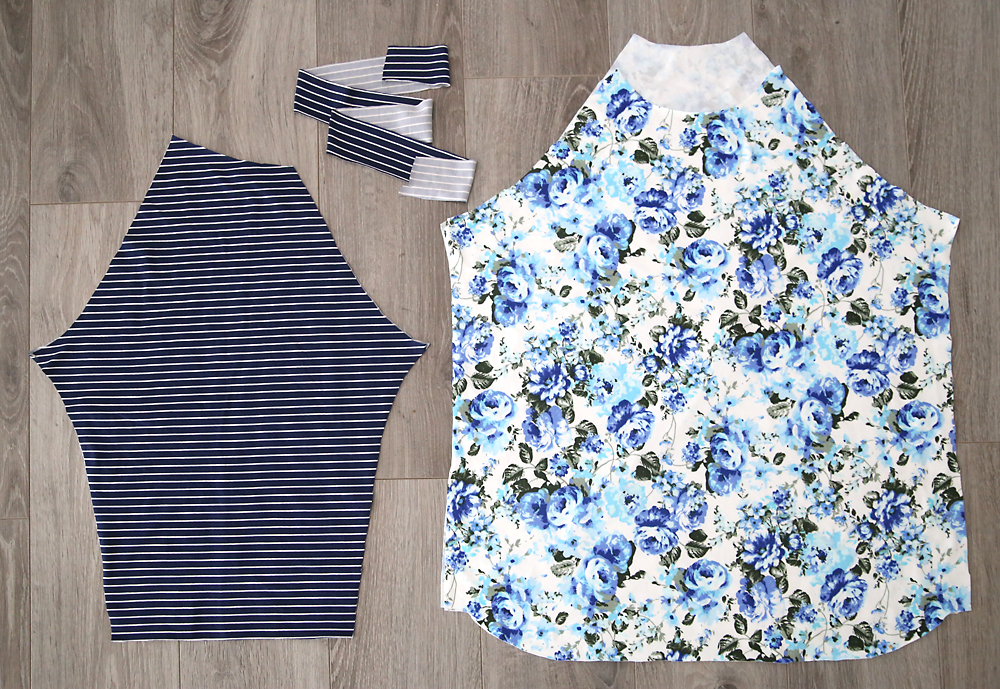
To make this shirt, you’ll need about a yard and a half of knit (stretchy) fabric. If you do different fabrics for the bodice and sleeves, like the shirt I made, you’ll need about 3/4 a yard of each. Make sure you wash and dry your fabric before you begin.
You can download the pattern by clicking here. Print it out at 100% or full size, and make sure the grey squares measure exactly 1 inch. Butt the pages together with no trimming, and tape them together. It takes 12 sheets of 8.5×11 paper and looks like this:
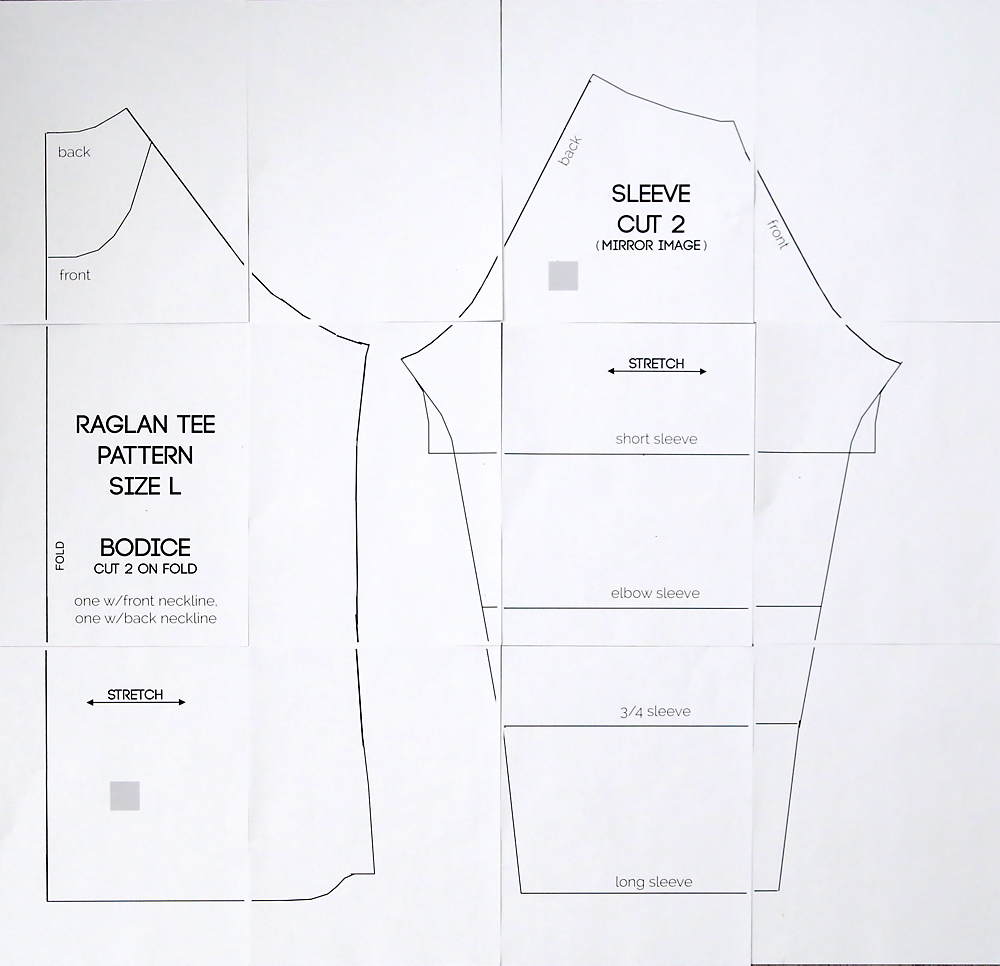
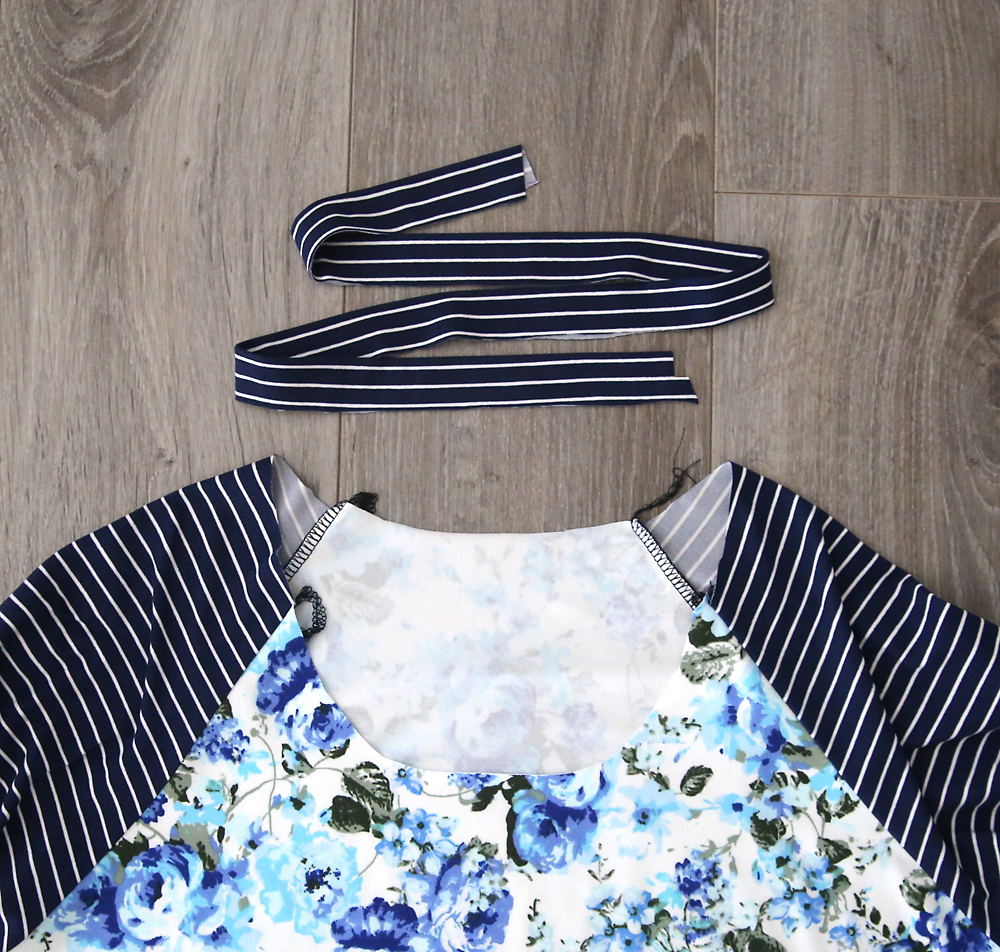
You’re going to cut 2 bodice pieces on the fold, one with the front neckline and one with the back neckline. Then you’ll cut 2 sleeve pieces (not on the fold, but make sure they are mirror images of each other). Finally, you also need a neckband piece, which should be 1.75 inches tall and about 25 inches long (and the stretch needs to go along the length).
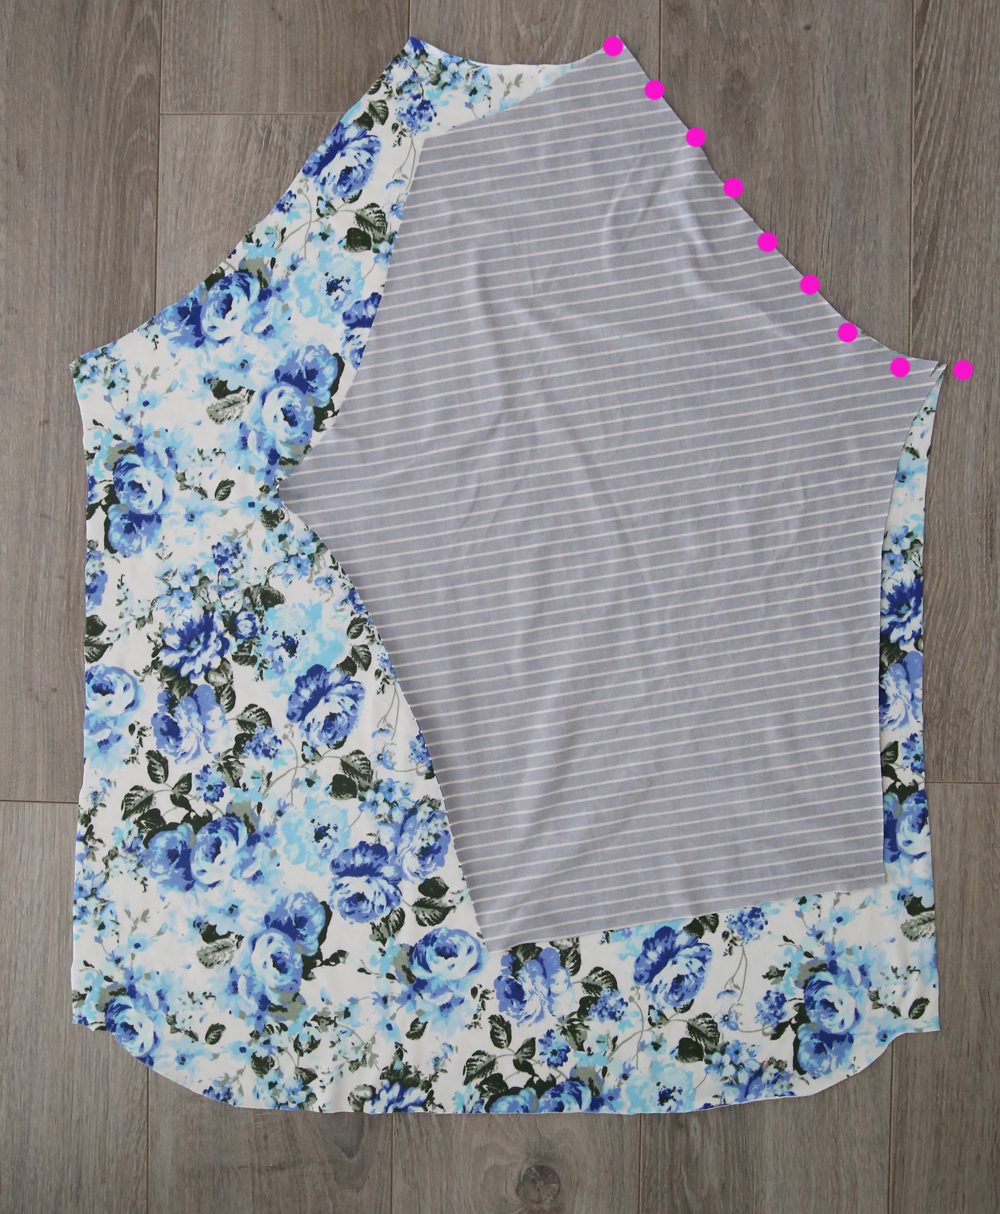
Start by laying the back bodice right side up. Match up one of the sleeve pieces with the bodice piece as shown below. Note that the sleeve pattern shows which side of each sleeve should match up to the back bodice (it’s taller than the side that matches up to the front bodice). Pin and sew, using 1/2 an inch seam allowance.
Repeat with the other sleeve, then press the seams open. You will have something that looks like this:
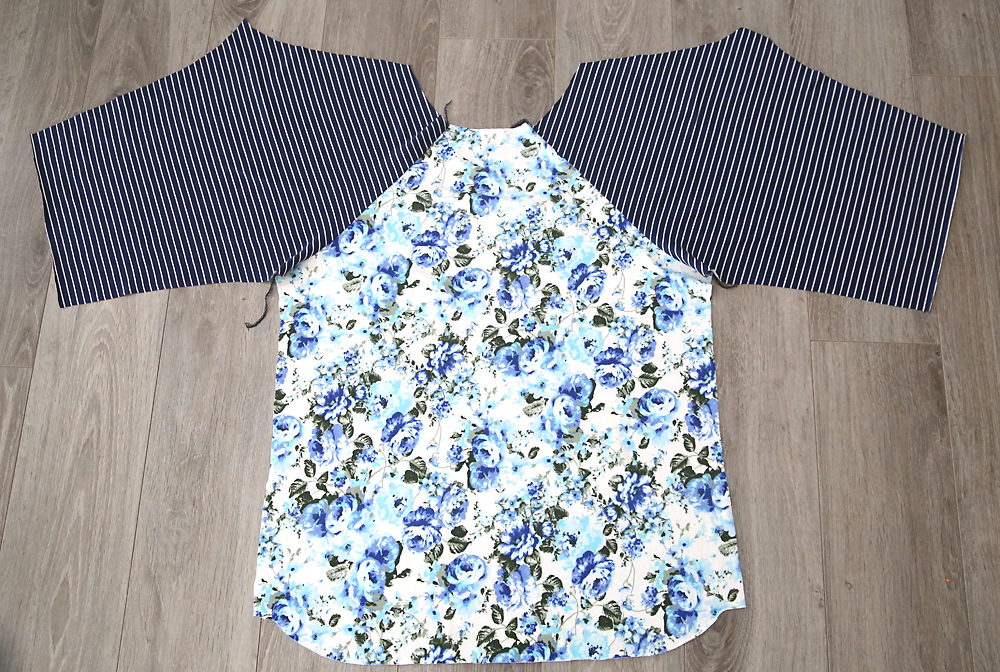
At this point you’ll match up the other sides of each sleeve with the same spot on the front bodice. Pin and sew.
Now your sleeves will be attached to the front and back of the shirt, and when you lay the shirt down it will look like this:
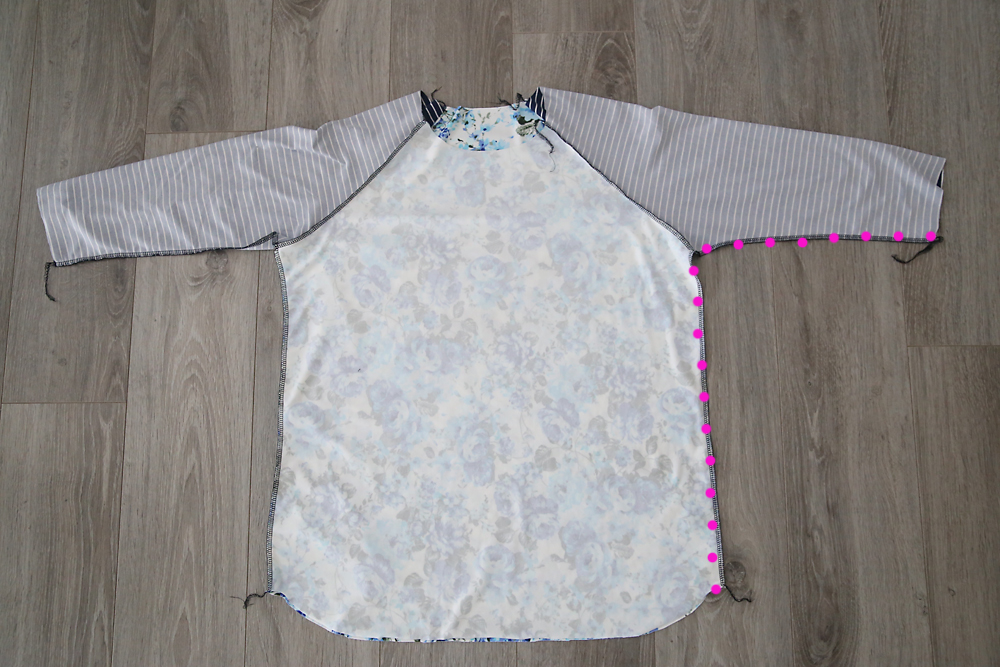
Sew both side seams, starting at the bottom of the sleeve and sewing up, under the arm, and back down the side of the shirt. I like to give the material just a little stretch as I sew the under arm curve to make sure that seam won’t pop later on.
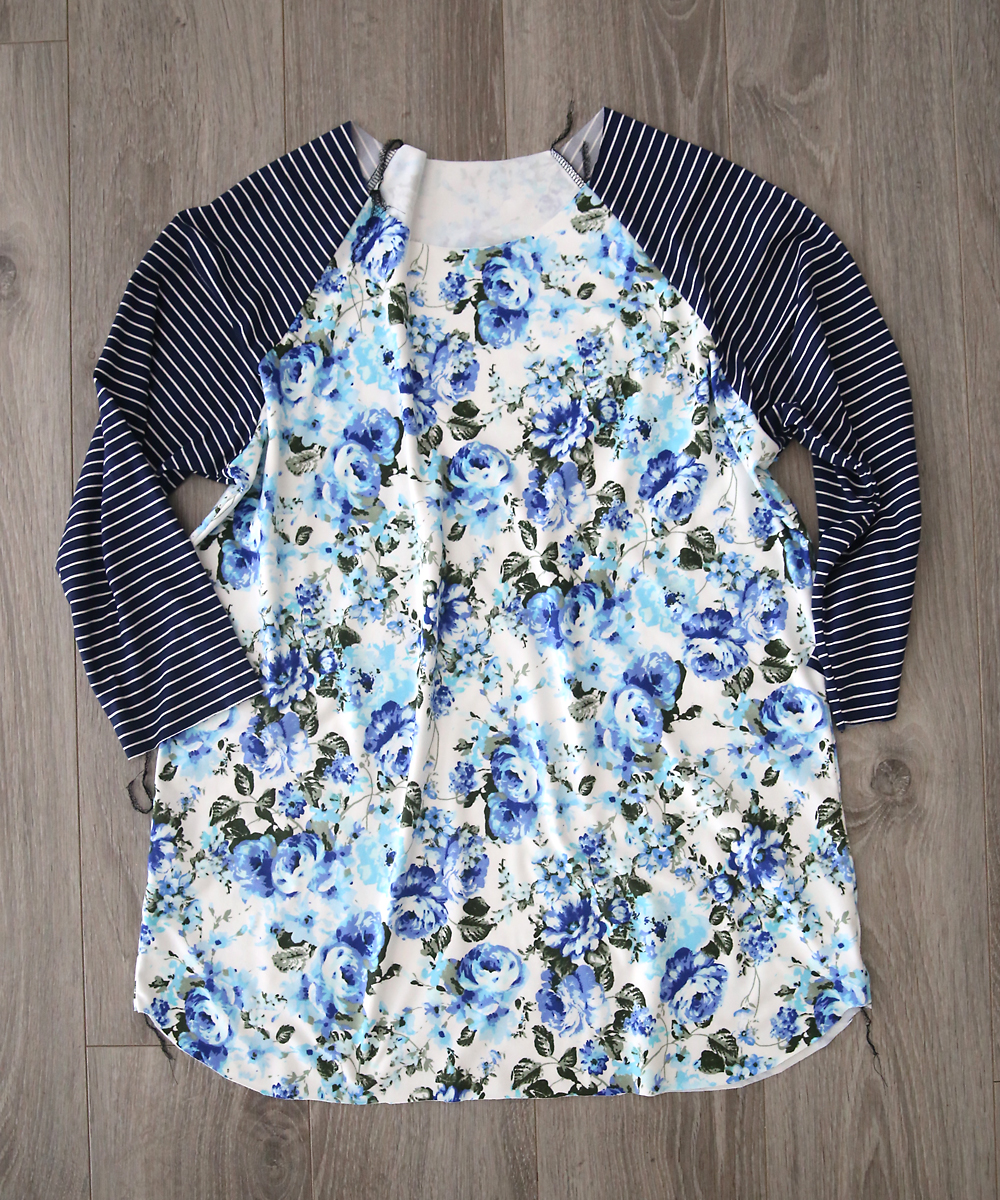
Turned right side out, your shirt now looks like this:
Now it’s time to add the neckbinding. Take your long strip of fabric and fold it in half lengthwise, with wrong sides touching. Press it.
There are a few different methods for attaching a knit neck binding. You can cut the neckbinding to size first, if you’d like. You can click here to see an example of how that works.
I generally prefer to just start pinning the binding to the shirt, stretching it as I go. This is because some knit fabrics are much stretchier than others, and if they are, you’ll want to stretch the binding more as you pin it to the neckline. On the other hand, if your knit fabric is not very stretchy (or has very strong recovery), you won’t want to stretch it quite so much. Honestly, this is one step where you just kind of have to get the feel for it as you sew on different fabrics.
Anyway, I begin by pinning the center of the binding strip to the front center of the neckline, as shown:
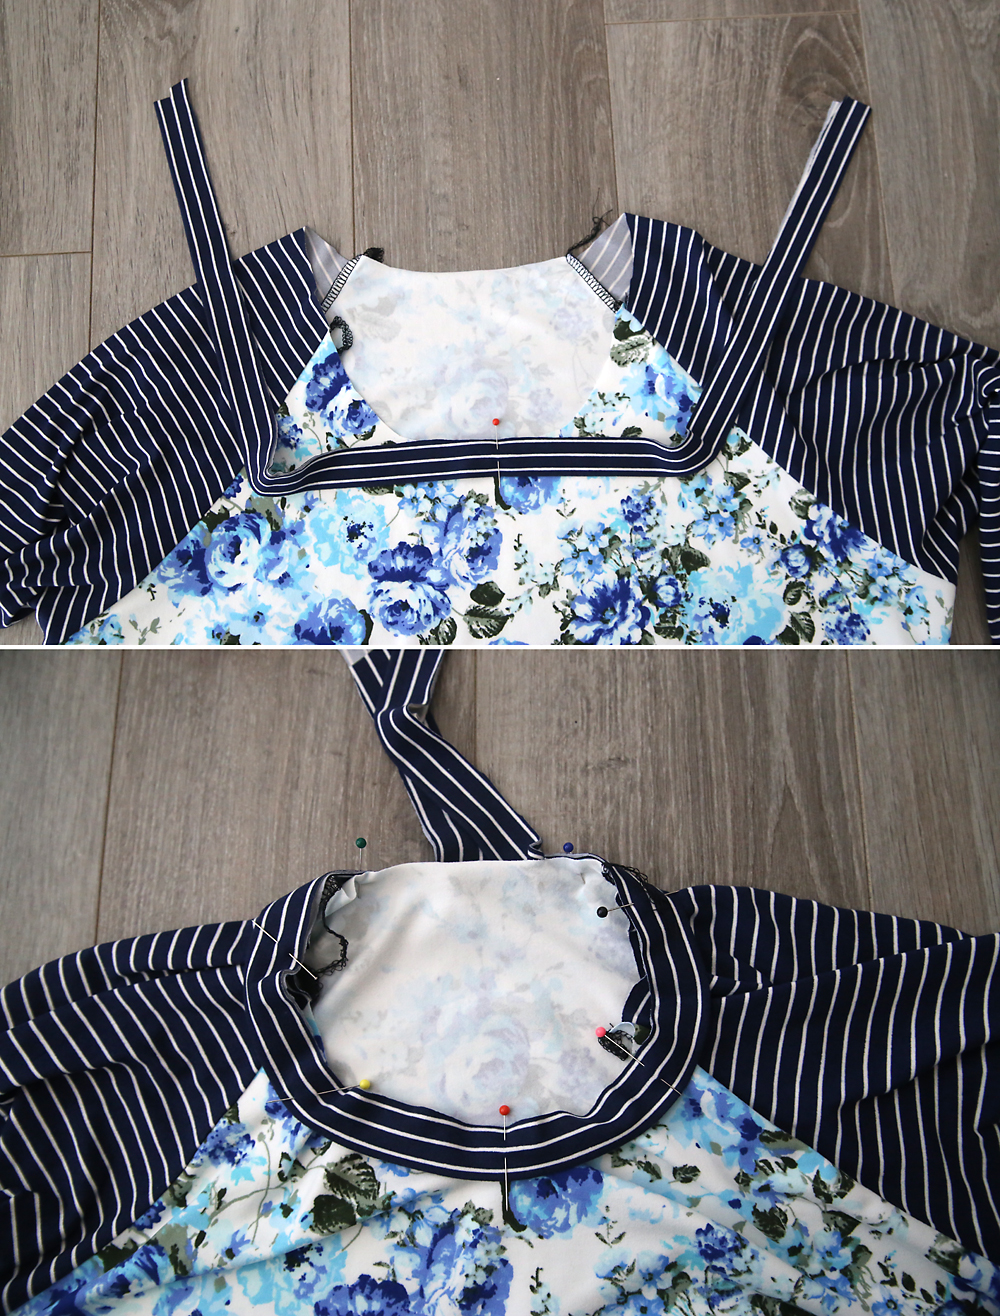
Then I hold the binding piece a few inches down from center and stretch it out a bit, then pin it to the neckline. I continue stretching and pinning until the binding pieces meet in the back, where I unfold them and sew them together.
This means that the binding piece is now pinned all around your neckine, but that it’s shorter than the neckline so the neckline fabric will be bunched up underneath it. You can see that in the photo below:
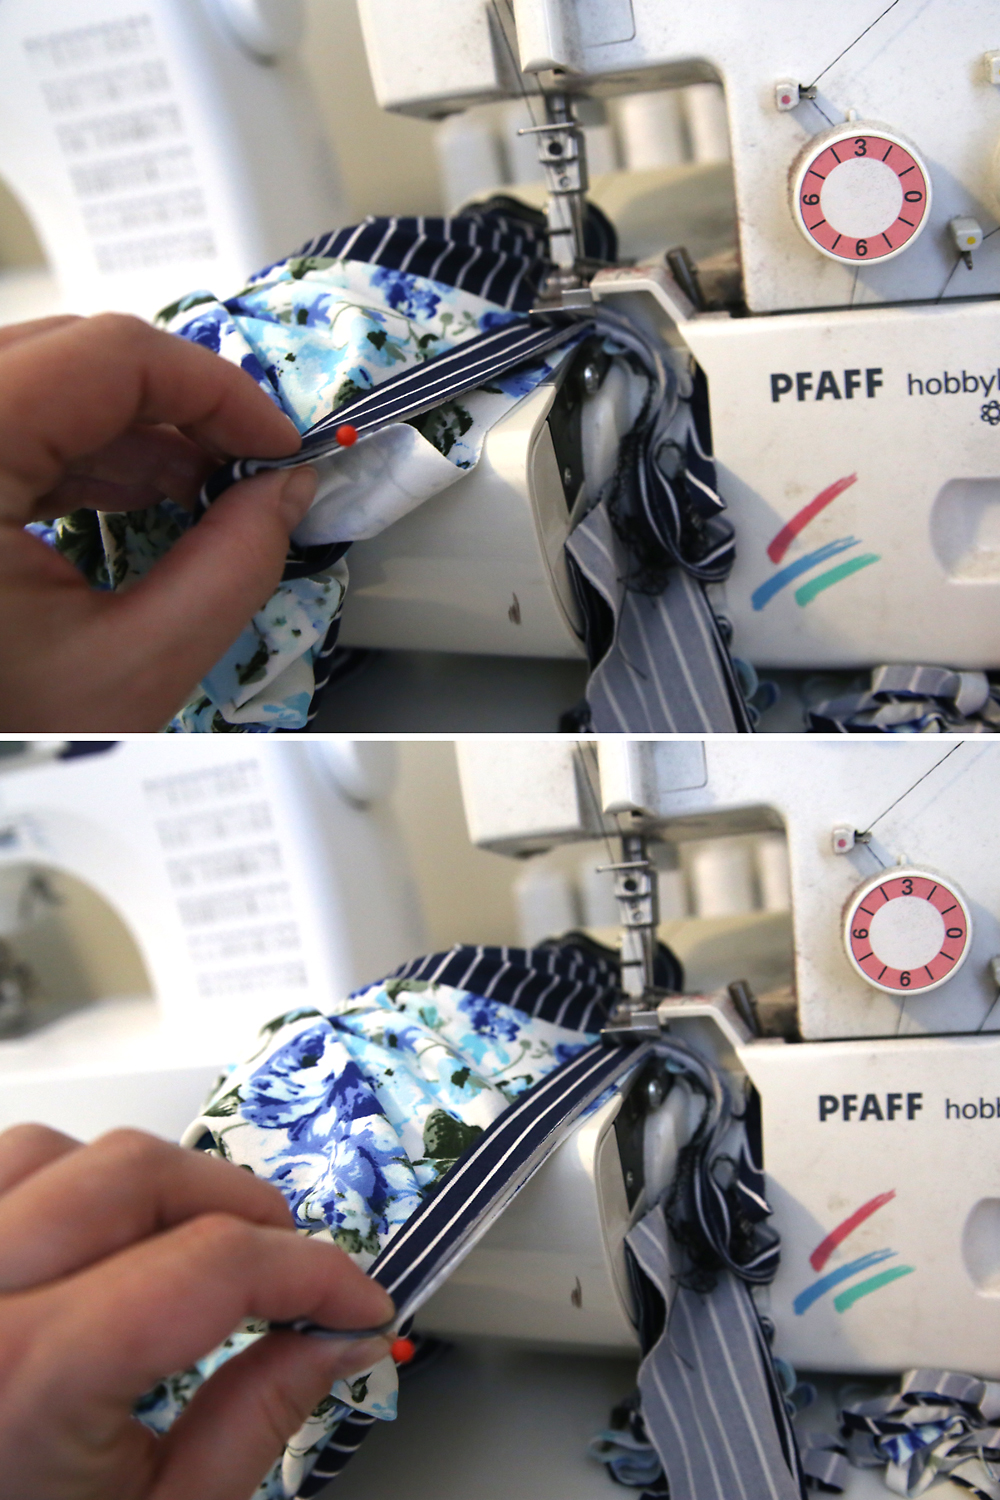
As you sew the binding to the neckline, stretch the binding so it lays flat against the neckline, as you see above. Sew the binding to the neckline with a stitch that will stretch, like a zigzag, stretch stitch, or serger stitch.
(If this is confusing, I found this post which has a pretty thorough explanation of adding a neckbinding to a t-shirt.)
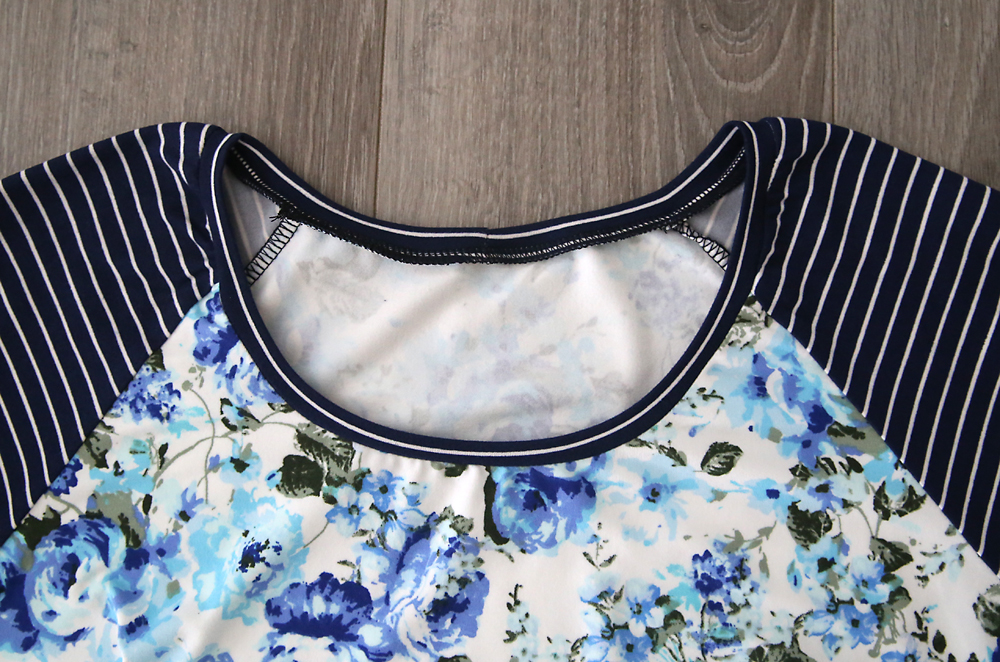
Once the neckline is finished, make sure you give it a good press with a lot of steam so it will lay down flat.
Then you can hem the sleeves and the bottom of the shirt. I like to turn up the sleeves about 1/2 an inch, and the bottom of the shirt closer to 1 full inch, and hem both using a double needle.
Since the bottom hemline has a curve in it, you’ll want to turn it up and press it will lots of steam before you sew the hem to get it to lay flat.
Check back for more variations, and happy sewing!
Pearl says
Hi, is 38 the physical full bust measurement please?
Autumn says
Yep!
Kaye Bird says
Thank you, thank you, and thank you.
I love this pattern and is going to be perfect for me.
I’m off to cut one out as we speak
EB says
I’ve just made a raglan sleeve t shirt from your pattern and it’s great, perfect fit with no tweaking! Shall definitely be using this one again. Thanks!
k osterman says
Thanks for the patterns, always so practical and the ones we wear a lot!
I had a some confusion with the long raglan page–where did those little short curve lines go and where do you bump the pages together–some use arrows or boxes to match up. Could you give future ones with printed page numbers and show a layout diagram?
Would like to see an added/modified front T bodice for neckline interest like tucks, shoulder gathers, lace yoke.
Marcelle E Stay says
I came for the raglan sleeve pattern and feel like I have found a new friend! Thank you for sharing all your patterns and info and funny mom stuff. I appreciate it more than I can say!
Lorri says
Can I make this out of non stretch material such as linen?
autumn says
No, this is made for material that has stretch, sorry!
Clairet says
I am about to start to use a serger like the one you have, never used one before, I’d love to go through your tutorials, i think it will be very helpful to help me understand my new sewing machine!! thanks!!
Olive says
Obsessed with making these now. Thank you so much for such an awesome and free pattern. I recently discovered that Hobby Lobby has a nice selection of cute knits. There are so many unfortunate looking colors and patterns our there that I was beginning to become discouraged that while I could make myself something that fit, it was not pretty.
Christine Koenig says
I really like your explanations. they are simple to follow, but precise and complete. Plus the result is great!
Pauline Simpson says
I cut the top out properly but found I REALLY had to stretch the sleeve to fit the bodice. Is this correct?
Inabobo says
Hello Autumn, nice to know your blog. I really love your size. Make me easy to make without confuse. Thankyou for your all free patterns. Xoxo from Indonesia.
me says
thank you so much for offering your free patterns. i love all the styles.
Jan Blaha says
Hi, all; I would love the option of a v neck as opposed to the rounded one. A v neck is most flattering-I love raglan sleeves and a v neck!
Char Slawson says
Do you have a pattern for plus sizes? Thank you in advance.
Rhonda says
I love this pattern!! I have five in my closet and have sewn some for others as well. I adjusted it to an xl by flaring out the bodice pattern and adding a little width to the sleeve. I even made a maternity version for my sister in law! (Just added some length and gathered up with elastic.) I just love how versatile it can be. Thank you for sharing your sewing wisdom!
Regina says
Great tutorial thank you! Your haircut is adorable~
Cindy Parsons says
Could you please, please, please, please, please post this in a plus size? I’m looking for a pattern for 42″ bust, 35″ waist, 45″ hips. I’ve tried to enlarge your original pattern but I always mess up the neckline.
SewTara says
Hi there! I’m just sitting here figuring out how I’m going to get the bust to 42″ as well. The best way to do it, with the least amount of headache is to start at the two top edges of the neck piece and go down with a big ruler and pretend like you’re going to insert a long tall triangle pizza slice sort of thing. You don’t want to modify the neck line at all, or the curves where the sleeves will go. It will just domino into chaos and you’ll be modifying everything. Make sure the ‘triangle’ adds an inch at the bust in both places, that will give you 2 inches increase in the front and then you can do the same to add some to the back. I’m not sure I’d add 4, 1 in each place, as it’s knit and there might be magic involved in how you would disperse the additions. This is what I’ve done and our measurements are fairly similar (minus my bigger waist! lol) Plan on posting the modifications on my blog, 🙂
Juli Weatherhead says
do you have a pattern for 2XL?? I LOVE your patterns!
Andy says
This looks great! I have some great fabric in my stash. My bust size is a 44, I was wondering how I would enlarge this?
kathy says
Thanks for putting this pattern and download together – I used it make a raglan tee from a Desigual skirt I wasn’t wearing. Super easy and I’m really happy with the result. I only had to redo the neck band once (too tight the first time).
Danielle says
How can I make this tunic length? I like it to fall below my hips.
Karen Bartels says
I’ve been using this pattern to convert beloved but boxy t-shirts into raglans and it is really fun! I am enjoying matching sleeve fabric, and the hem is already in place! Thanks for this!
Peggy Aronson says
Just googled for a raglan tee sewing pattern and found yours. I’ve been sewing for 30 years but have never drafted my own patterns. You’re awesome!!!
Peggy says
Update: I made this pattern yesterday and it was so much fun. A quick sew, the pieces just leapt together–I love it when that happens. It’s very flattering so I’ll be wearing it everywhere. I can’t wait to try some of your patterns. Seriously, this free pattern is one of the best things on the internet!!!
Joanna says
Great pattern and tutorial! I haven’t worked too much with knits, and this was very simple and helpful. Thanks to your information about your bust measurement, I was able to size the pattern down to fit me. I’m excited to try some of your other patterns. Thank you!
Michele Shea says
SInce discovering your site I have made one woven Breezy Tunic and have plans for a Winter version with sleeves and a Raglan Tee and a Breezy Tunic….etc. You seem built like I am, so they seem to fit so very well! Very nicely drafted! Thanks for these patterns and keep up your lovely blog! Thanks again!
sarah says
can’t wait to use this tutorial! bought the prettiest floral knit!
question–how would you size this down for a medium?
Joanna says
I sized the pattern down by using the bust measurement Autumn mentions: 32 (my bust) / 38 ( Autumn’s bust) = 0.84. I ended up printing the pattern at 85%, which was a perfect size small.
Cally says
I would like to know also
Davinia Elwood says
Thanks for the pattern! Made it yday and it was very easy to follow. Wondering where you get your fabric so it’s not so thin. I got some at Girl Charlee and it’s still very thin. Maybe I should have ordered a different type of fabric? Can’t remember the exact name. Anyway it’s still a super pattern which I’ll be using again. Actually altered mine for maternity and it worked fine that way too 🙂 thanks
Sheree says
Hi, i like the bell sleeve in your t-shirt; but the size isn’t me (unfortunately) I need size 18 and need it longer in the body. How can I make the pattern larger? thank you
Jennifer Babel says
I love your adivice on the best uses for different knits. Can you explain how to increase pattern sizes?
Angela says
What a great pattern! It looks like it will fit my friend really well, it’s autumn here now so I will make her a 3/4 sleeve version from merino.
Just a suggestion to put the name of your blog and link to the instructions page on the first page of your PDF so people can find your page again easily if they save the PDF to use it but forget where it comes from when they get around to it…
tiff says
Love this! Where do you purchase your lovely flower fabric? Thank you for this!!!!
Amy says
I love this and love ALL of the cute clothes on your site. So fortunate for me to be a L too! I just came into a bunch of free fabric and I’m so excited to make it all! I made this last night and LOVE LOVE it! Thank you for the fun tutorials.
super mario world says
Such great ideas!
Marilyn says
Oh my gosh, I can’t wait to try these patterns, I too want to hide the muffin top not show it!
Thank you so much for giving this away
Trina says
You read my mind! I love the old pattern and will for sure use this one too! Thanks for all your hard work!
Missy says
Yay!! Thank you! I JUST started using your other pattern, modified to my size, so I’m excited to see how you’ve change it to be better. I just bought 4 adorable fabrics from Girl Charlee for shirts. Thank you again!
Kristie says
Thank you! I’m super bummed I’m out of printer ink, I want to sew me a new one! And I totally agree. I want clothes that hid my muffin top, not emphasize it.
Mary Brady says
Thank You! I made your Easy Tee pattern several times and I like using thicker knit fabrics too!
This is great!!
Catherine Christophe says
Very nice, i’m so excited to try it (to do it !)
Thanks a lot!!!!
Sorry for my english…i’m from Belgium!!!
Catherine
Kristi Andres says
Thanks for the updated pattern. I love your raglan pattern from years ago.
Gynna says
I have to thank you! Last year, this time, I decided I wanted to start sewing for me again, and your patterns were the start! Its been a year and I haven’t bought a RTW top since!
Today on the way to work, I was thinking I needed to get my material out and make a few new tops for this spring.
Thanks for posting this! You are amazing!
amelia says
Oh my, yes. The thinnest fabric ever. All my chubs on display. And I love that old pattern. I’m excited to try this new one. Seriously, I love all of your patterns and thank you for making them available.