
My daughter got invited to a princess birthday party a few weeks ago and she went dressed as Rapunzel. When asked why she liked Rapunzel, my five year old sweetie answered: because she can tie people up with her hair. And I guess that’s what I get for teaching my daughter that what you do is more important than how you look 🙂
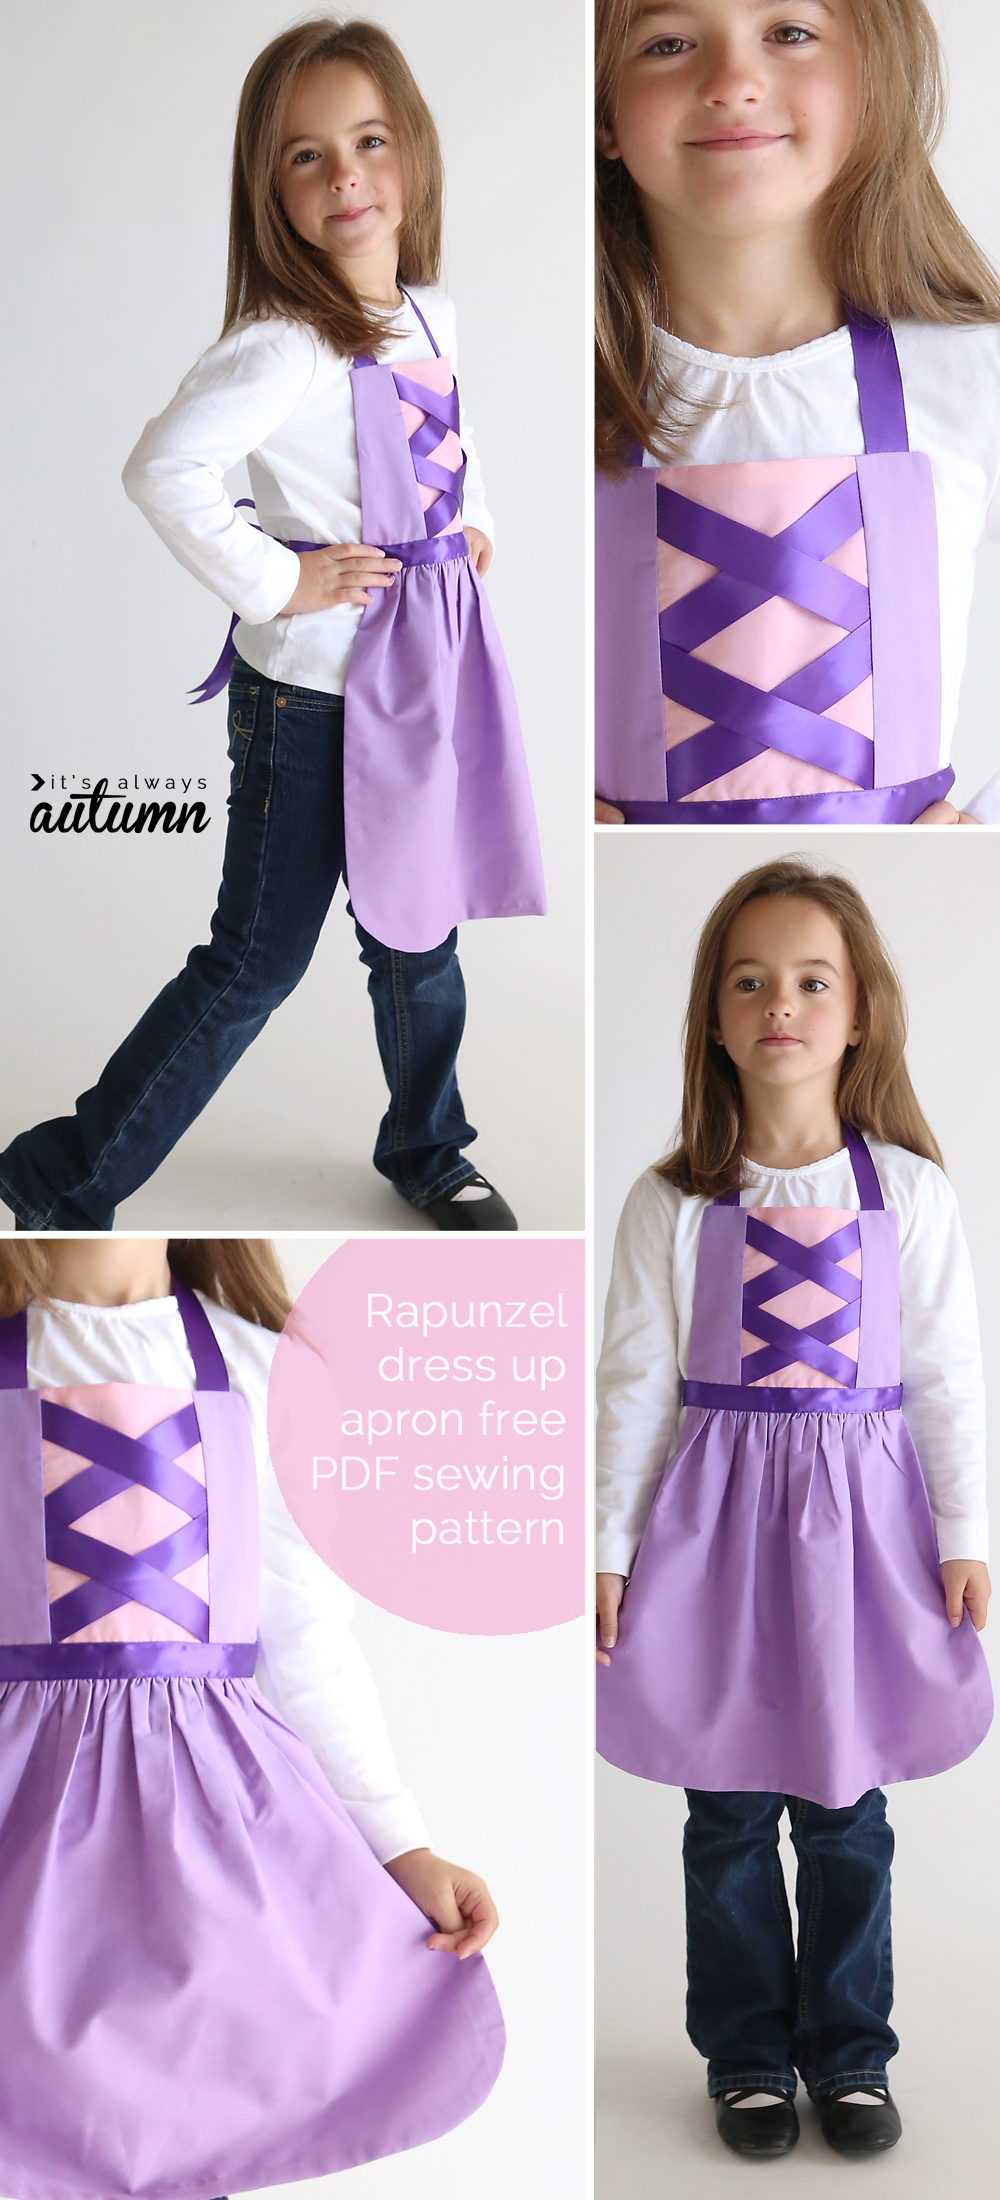
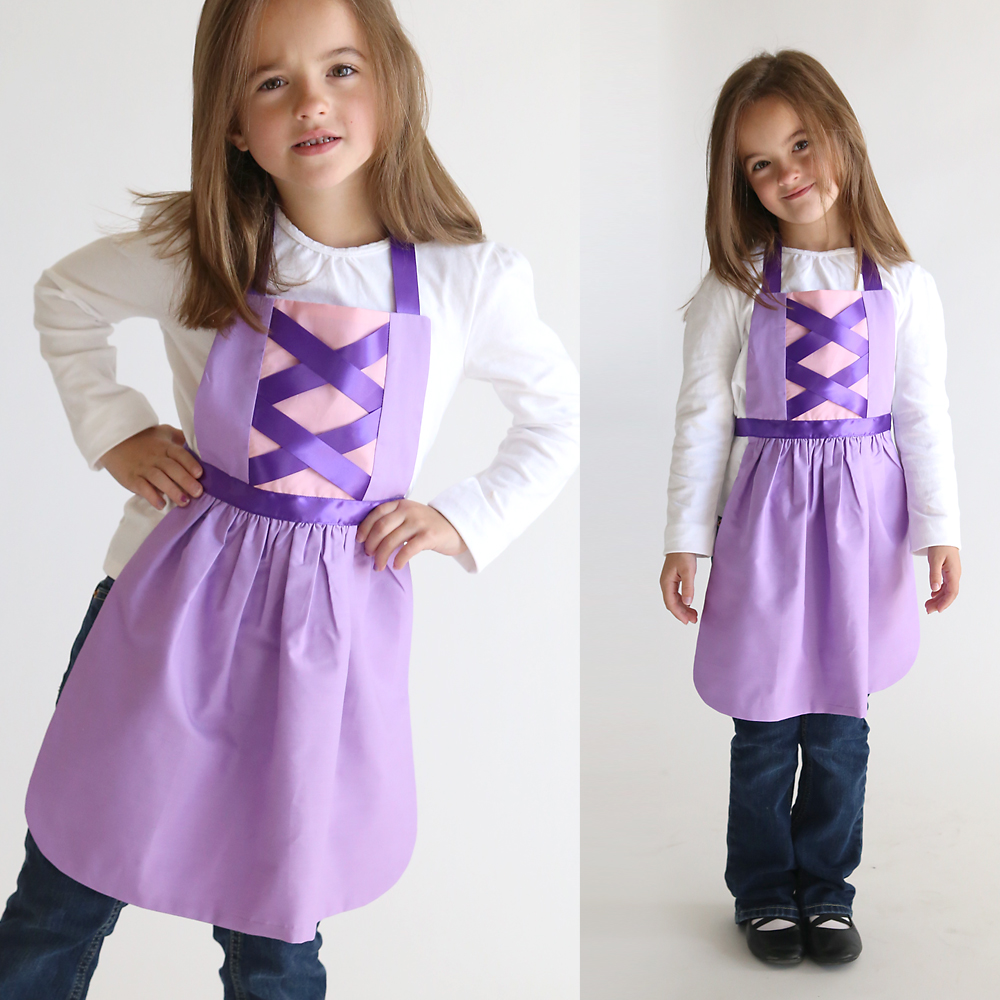
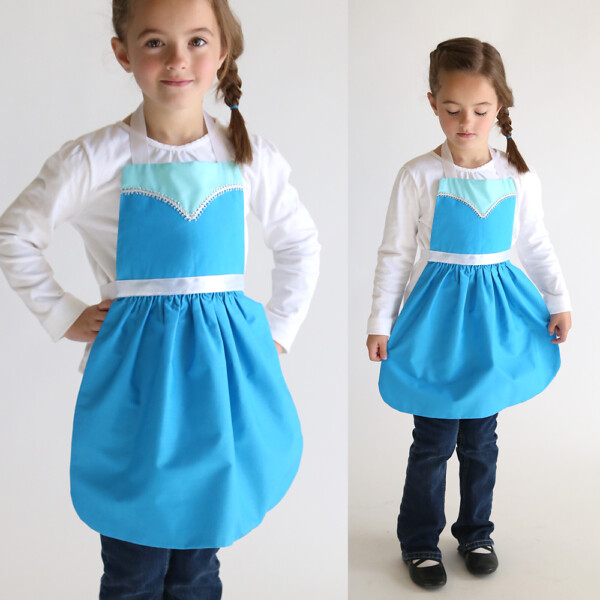
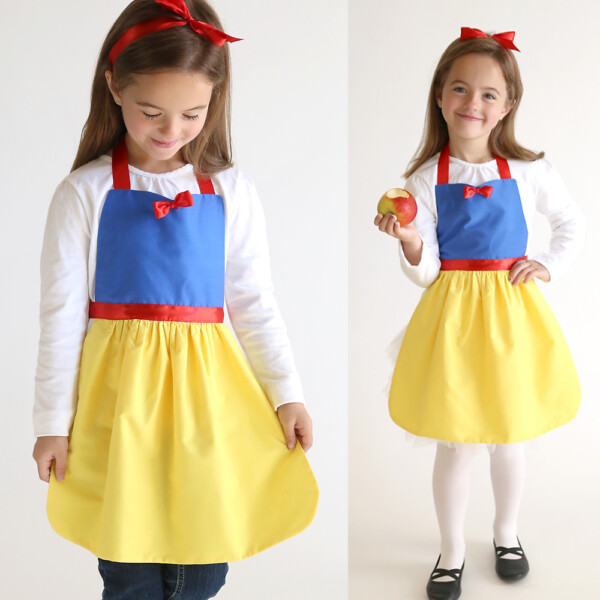
Today’s princess apron pattern is for Rapunzel. This cute dress up apron has a split bodice with criss cross ribbons to make it look just like the feisty princess from Tangled (but don’t worry, it’s still very easy to make). Remember, so far there are 4 different princess apron patterns available (for free!). Click here for the Snow White apron, here for the Rapunzel apron, here for the Elsa apron, and here for the Belle apron.

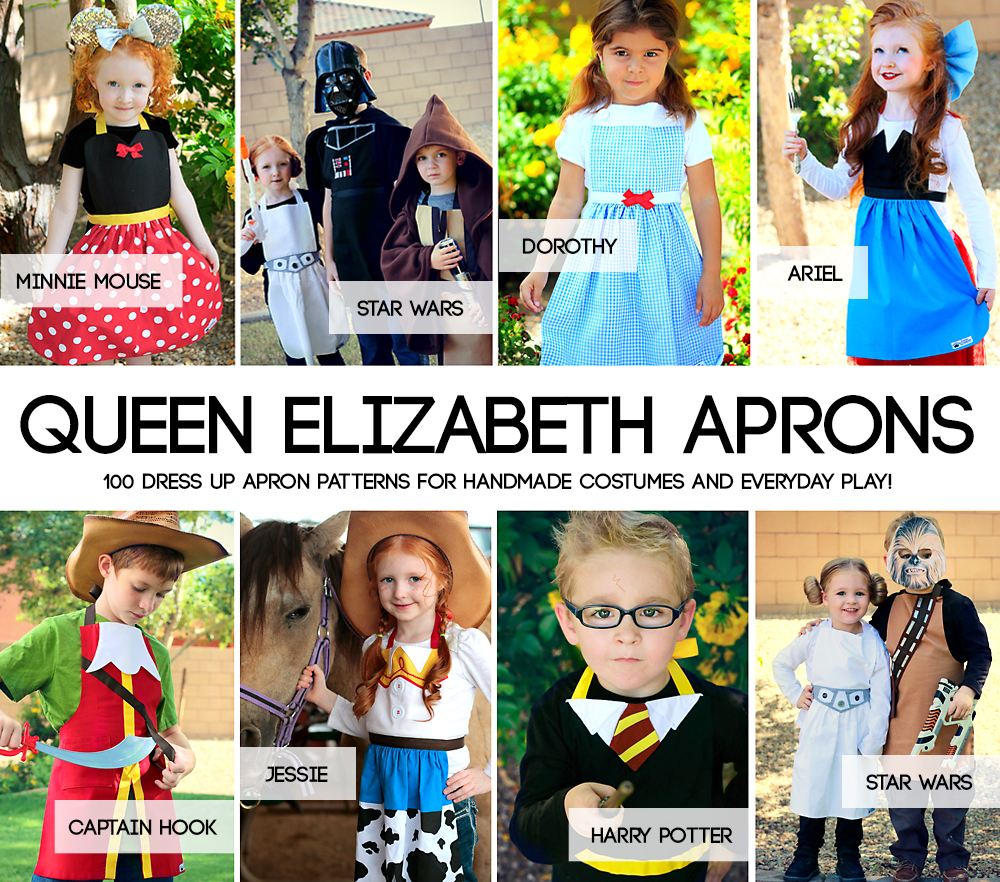
Or, if you’re looking for a different character (plus dress up aprons for boys!), visit QueenElizabethAprons. She offers 100 different apron patterns, which means you’ll be able to find your child’s favorite character, whether it be Minnie Mouse, someone from Star Wars, Harry Potter, Wonder Woman, Alice in Wonderland, and pretty much anyone else you can think of. Plus she offers finished aprons as well for those of you who love this idea but don’t want to sew!
As I mentioned in the first apron post, princess dress up aprons are easy to sew, take less than a yard of fabric, and fit a wide variety of sizes. I even have free PDF sewing patterns in sizes 2/3, 4/5, and 6/8 for each of the princesses. These aprons will hold up to washing better than many commercial princess costumes and are perfect for everyday play. Pair one with a fluffy white skirt (here’s the one I got!) for an easy DIY Halloween costume. These would be great handmade Christmas gifts for any little girl, and I think I’ll be sewing up a few extra to have on hand for birthday gifts, too.
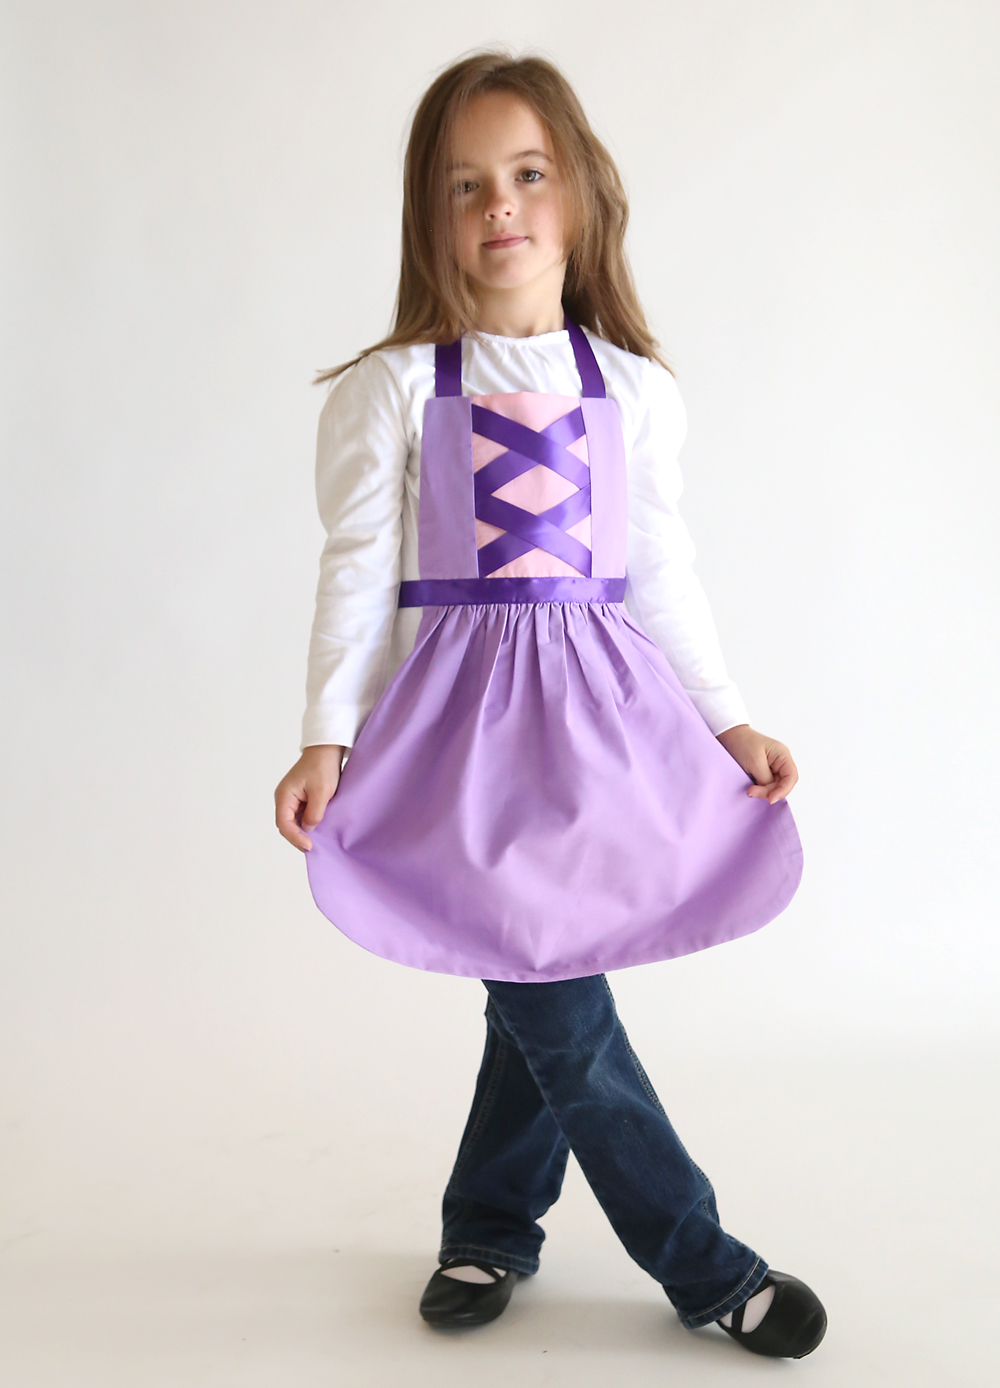
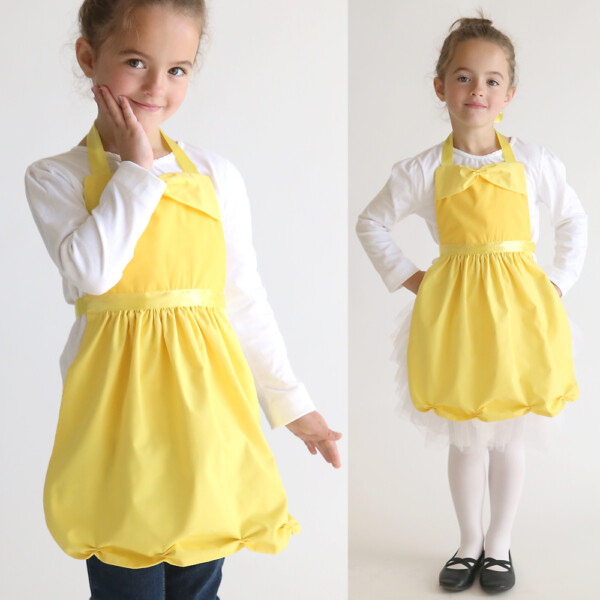
I used a light purple and a light pink fabric for my Rapunzel apron, but you could also use dark and light purple, or even dark purple and dark pink.
Before starting on this apron, please click over to the Snow White apron post and watch the video, which tells you all about which fabric I like to use and walks you through step by step sewing directions. Then come back here to get the details on how to make Rapunzel’s split ribbon bodice.
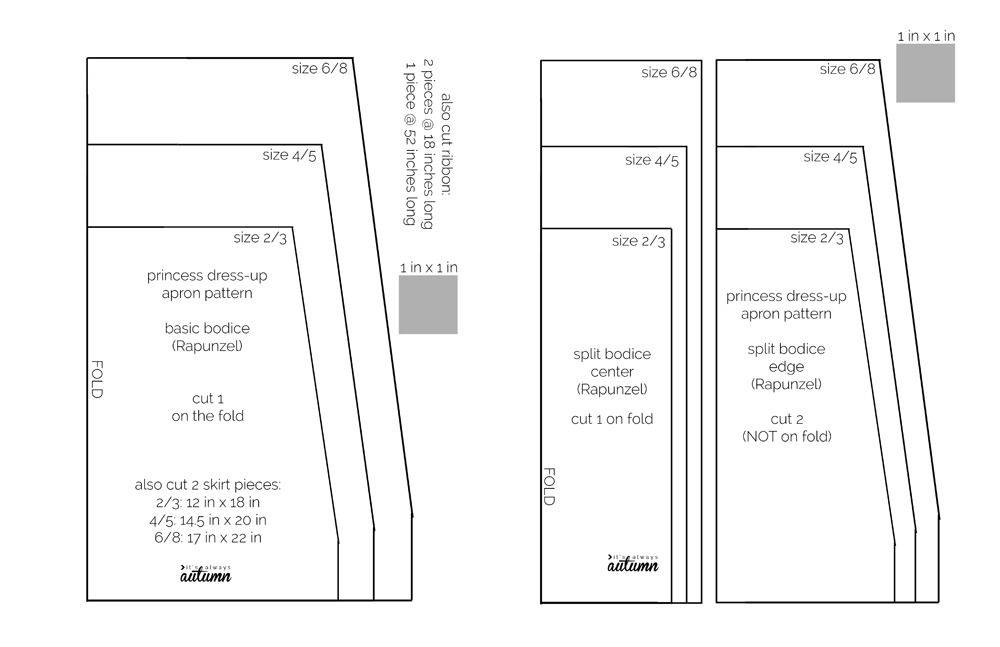
The Rapunzel dress up apron pattern is two pages long and looks like this. You can download it by clicking here. Print it out at 100% or full size and be sure the grey test square measures exactly 1 inch by 1 inch.
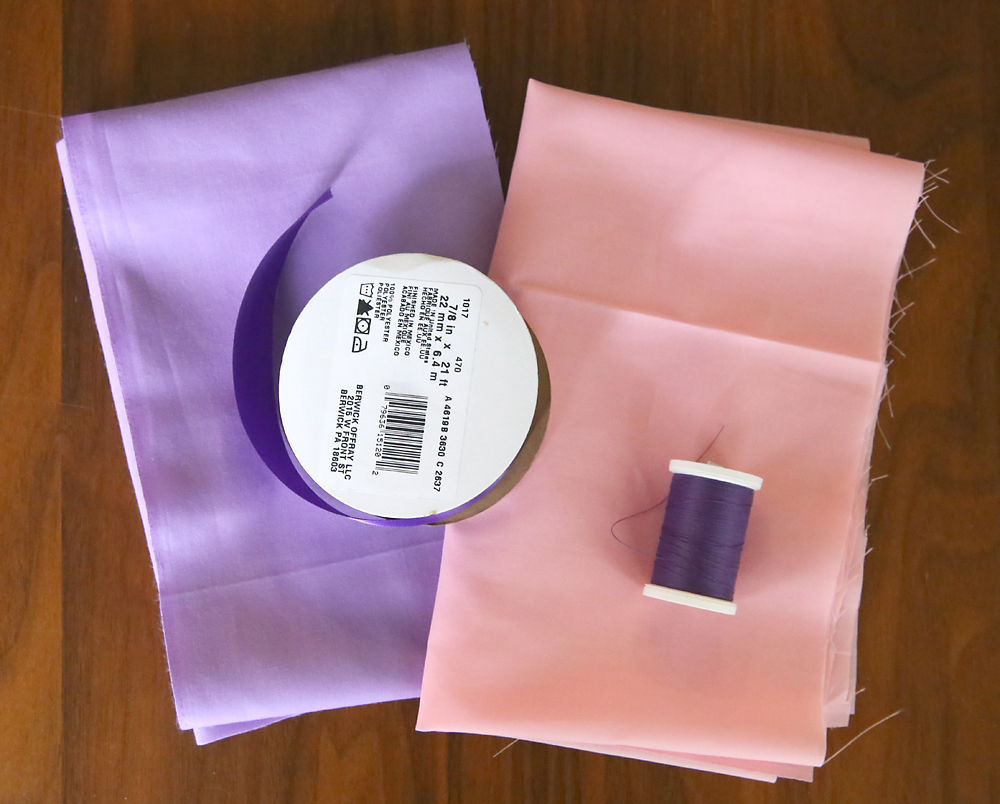
For this apron you’ll need 1/4 yard of the pink fabric and 3/4 yard of the purple fabric. You’ll also need 4 yards of 7/8 inch wide purple ribbon, and matching purple thread.
Cut the skirt pieces and ribbon pieces out as directed on the pattern, rounding the two bottom corners of the skirt piece (refer to the Snow White video).
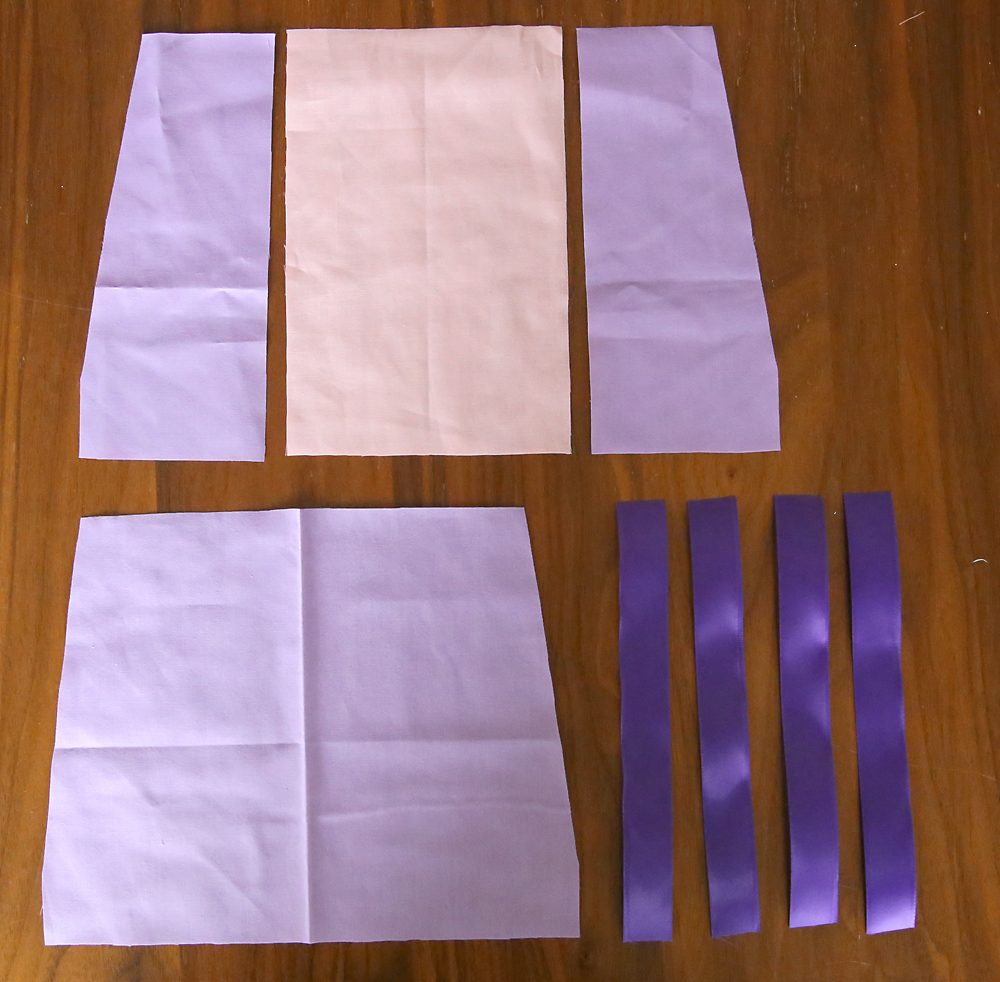
This time the bodice has 3 pieces: 1 full bodice piece, and 2 split bodice pieces. Cut 1 of the full bodice piece out of purple fabric on the fold. Cut 1 of the center split piece out of pink fabric on the fold. Finally, cut two of the edge split pieces out of purple fabric, not on the fold. Also cut 4 additional pieces of ribbon, each 8 inches long.
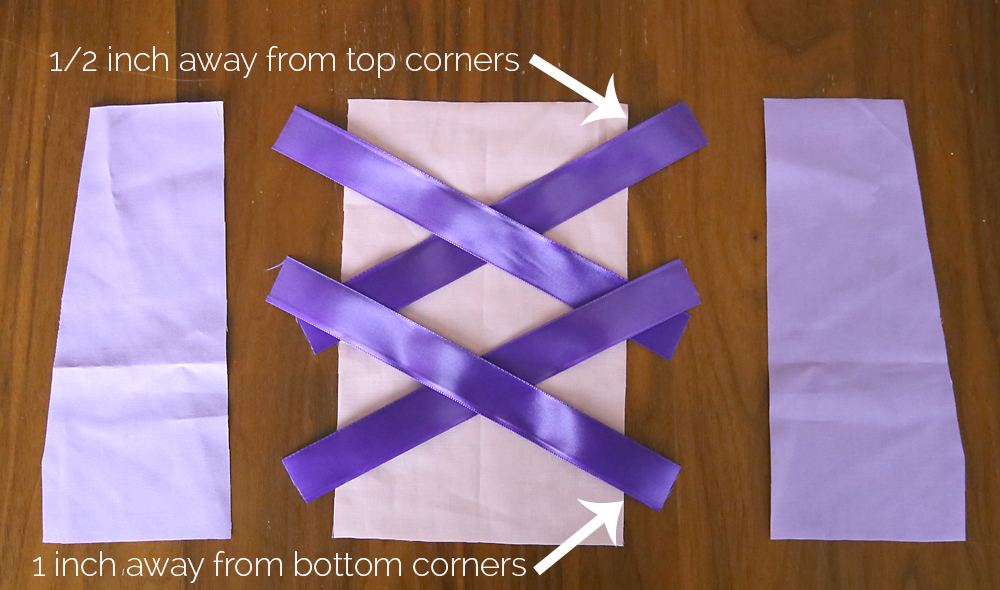
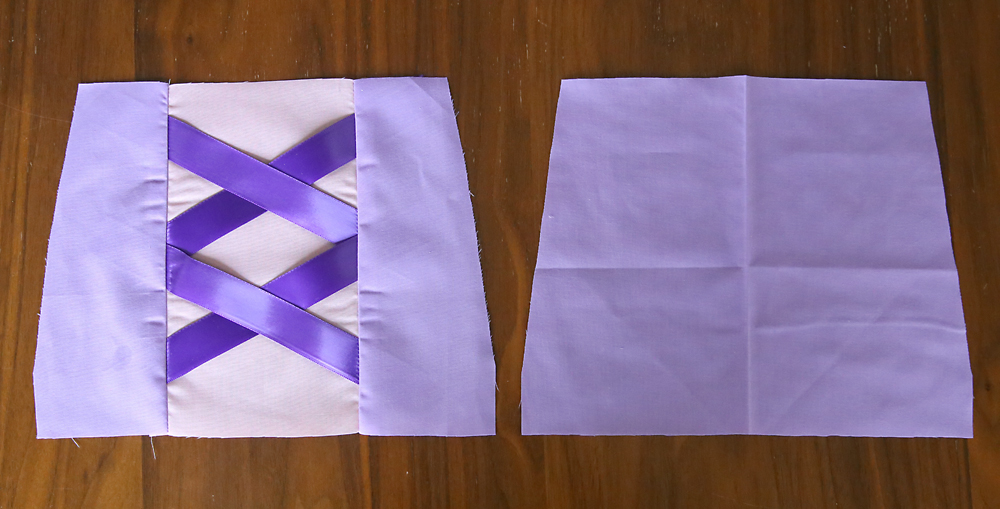
Lay out the pink center piece with purple edge pieces next to it as shown below, right sides up. Then take your four 8 inch pieces of ribbon and criss cross them on the pink center piece, as shown. The ribbons should be 1/2 an inch below the top of the pink piece, and a full inch above the bottom of the pink piece.
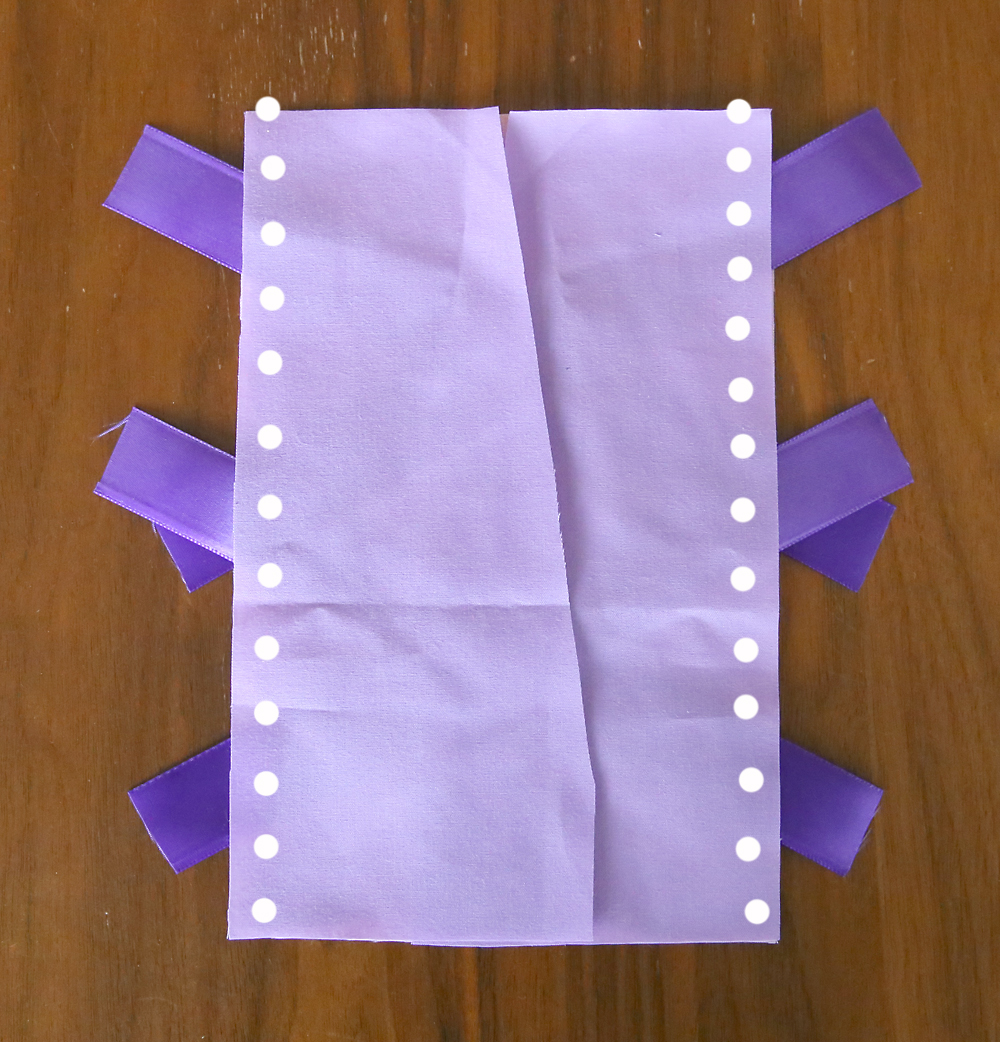
Now pick up the edge pieces and fold them in over the center piece as shown, RST. Pin down the sides, making sure not to mess up the placement of the ribbon. Sew down the sides, using 1/2 inch seam allowance.
Open the split bodice up and press the seams. Now you have a completed ribbon split bodice and a full bodice piece.
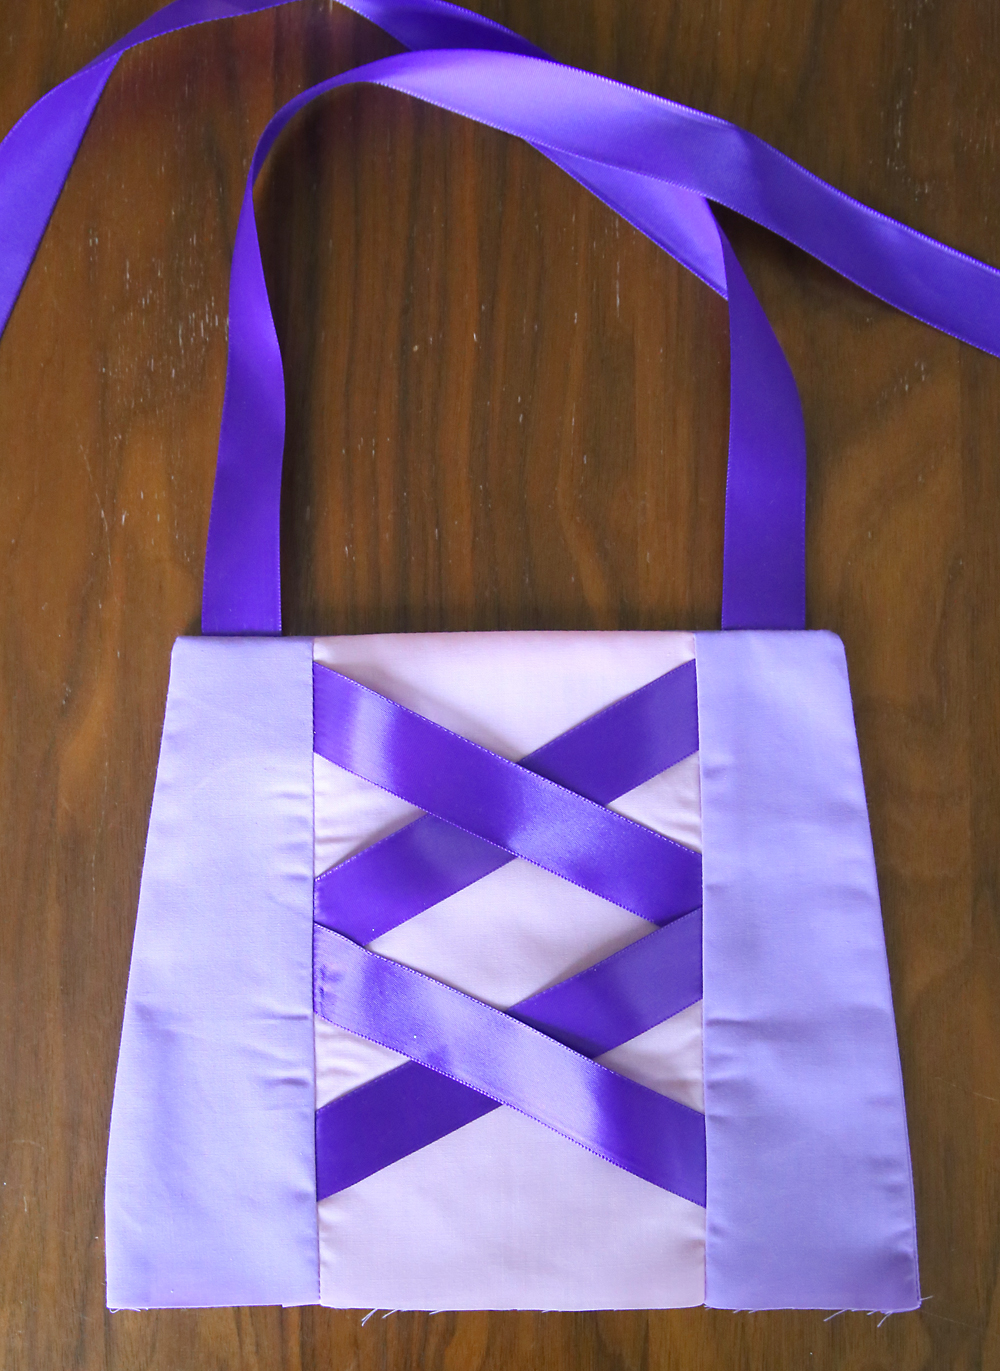
Place the right sides together, sandwiching the 18 inch ribbon pieces between them, just like you see in the Snow White apron video.
A few things to remember:
When you’re sewing the two bodice pieces together, if they’re not exactly the same size, don’t stress. Just trim them so they match before you sew them together.
When adding the ribbons for the neck to the bodice, make sure the ribbons and bodice are right sides together. Here’s what the completed bodice looks like:
When sewing the bodice to the skirt, make sure you have the WRONG SIDE of the bodice touching the skirt. Done!
Want to make other princesses? Click here for the Snow White apron, here for the Rapunzel apron, here for the Elsa apron, and here for the Belle apron.

Myriam says
Hola como estas la falda es doble para q te quede en la parte de la falda quede doladito en tedondo
Renee says
Just wanted to say a massive THANK YOU for these free Princess apron patterns! I have made Snow White, Elsa and Rapunzel but have also adapted the pattern to make Tinkerbell, Cinderella and a cute little Nurse apron. They’re so simple to put together (with a bit of practice) and I’m just loving them, so thank you, thank you, thank you!!!
Natalie says
The PDF for the Rapunzel basic bodice only has “Cut 1 on the fold” should it not be “cut 2 on the fold”?
Natalie says
My mistake… just misplaced the split bodice piece!!!!!
Melissa says
How would this be modified to fit a small/medium adult??
Sarah Knopp says
I made the Rapunzel and the Belle aprons for my 5 year old for Christmas. They are SO fun and so easy!! Thank you for this cost-saving, time-saving, fun way to surprise my daughter who asked for Disney Princess Dress-ups from Santa 🙂