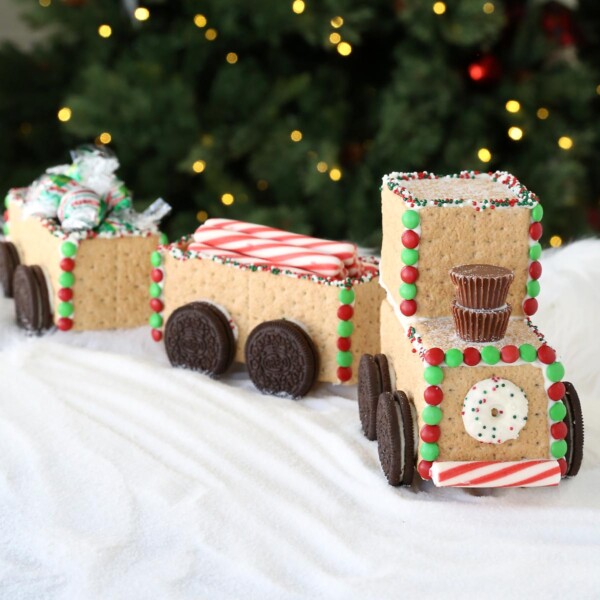
In today’s post: Learn how to make an adorable Christmas candy train out of graham crackers (much easier than gingerbread!).
My kids love making gingerbread houses at Christmas time. It’s a fun tradition, but let me tell you, making a gingerbread house from homemade gingerbread is a labor of love. You gotta mix the gingerbread, and bake the gingerbread, and cut the gingerbread, and let it cool, then make the royal icing and assemble the houses and let them set up and THEN start decorating. It’s a great Christmas tradition IF you have plenty of time and kids that are old enough to actually help (10+).
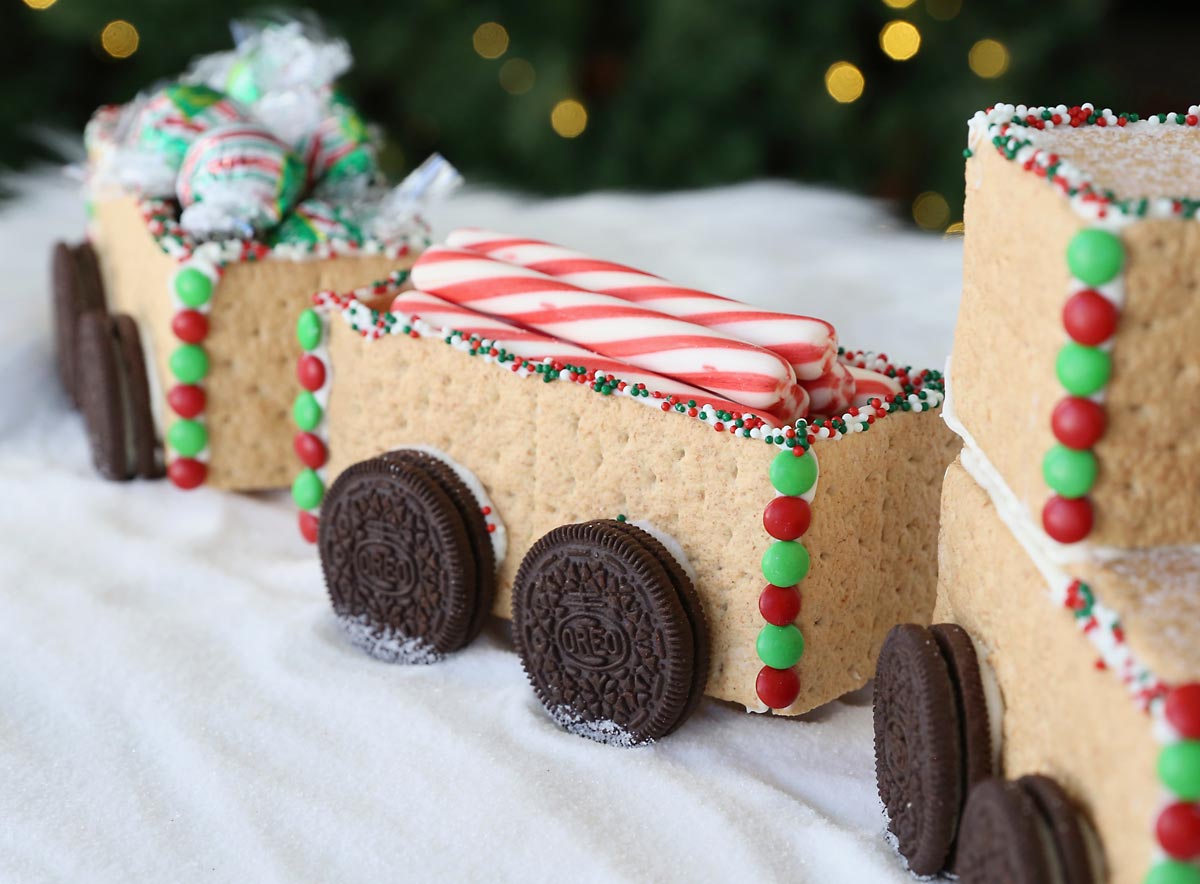
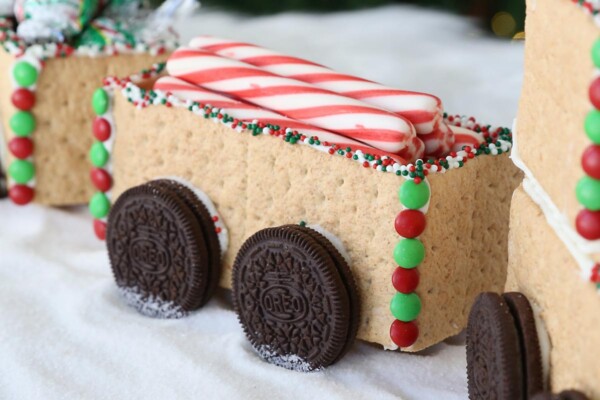
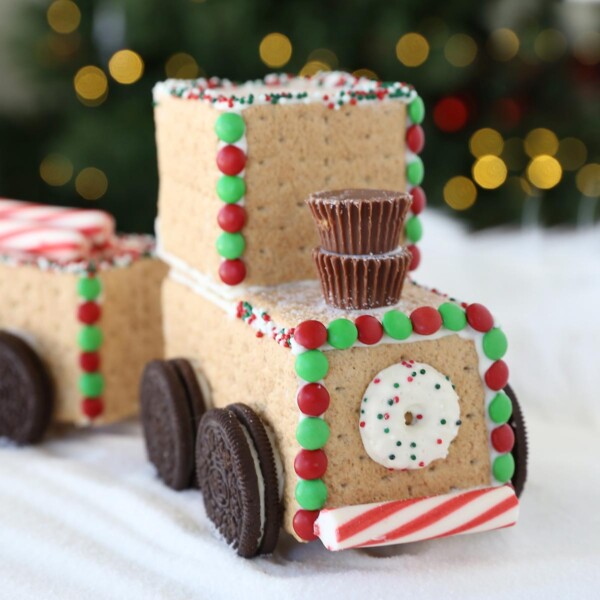
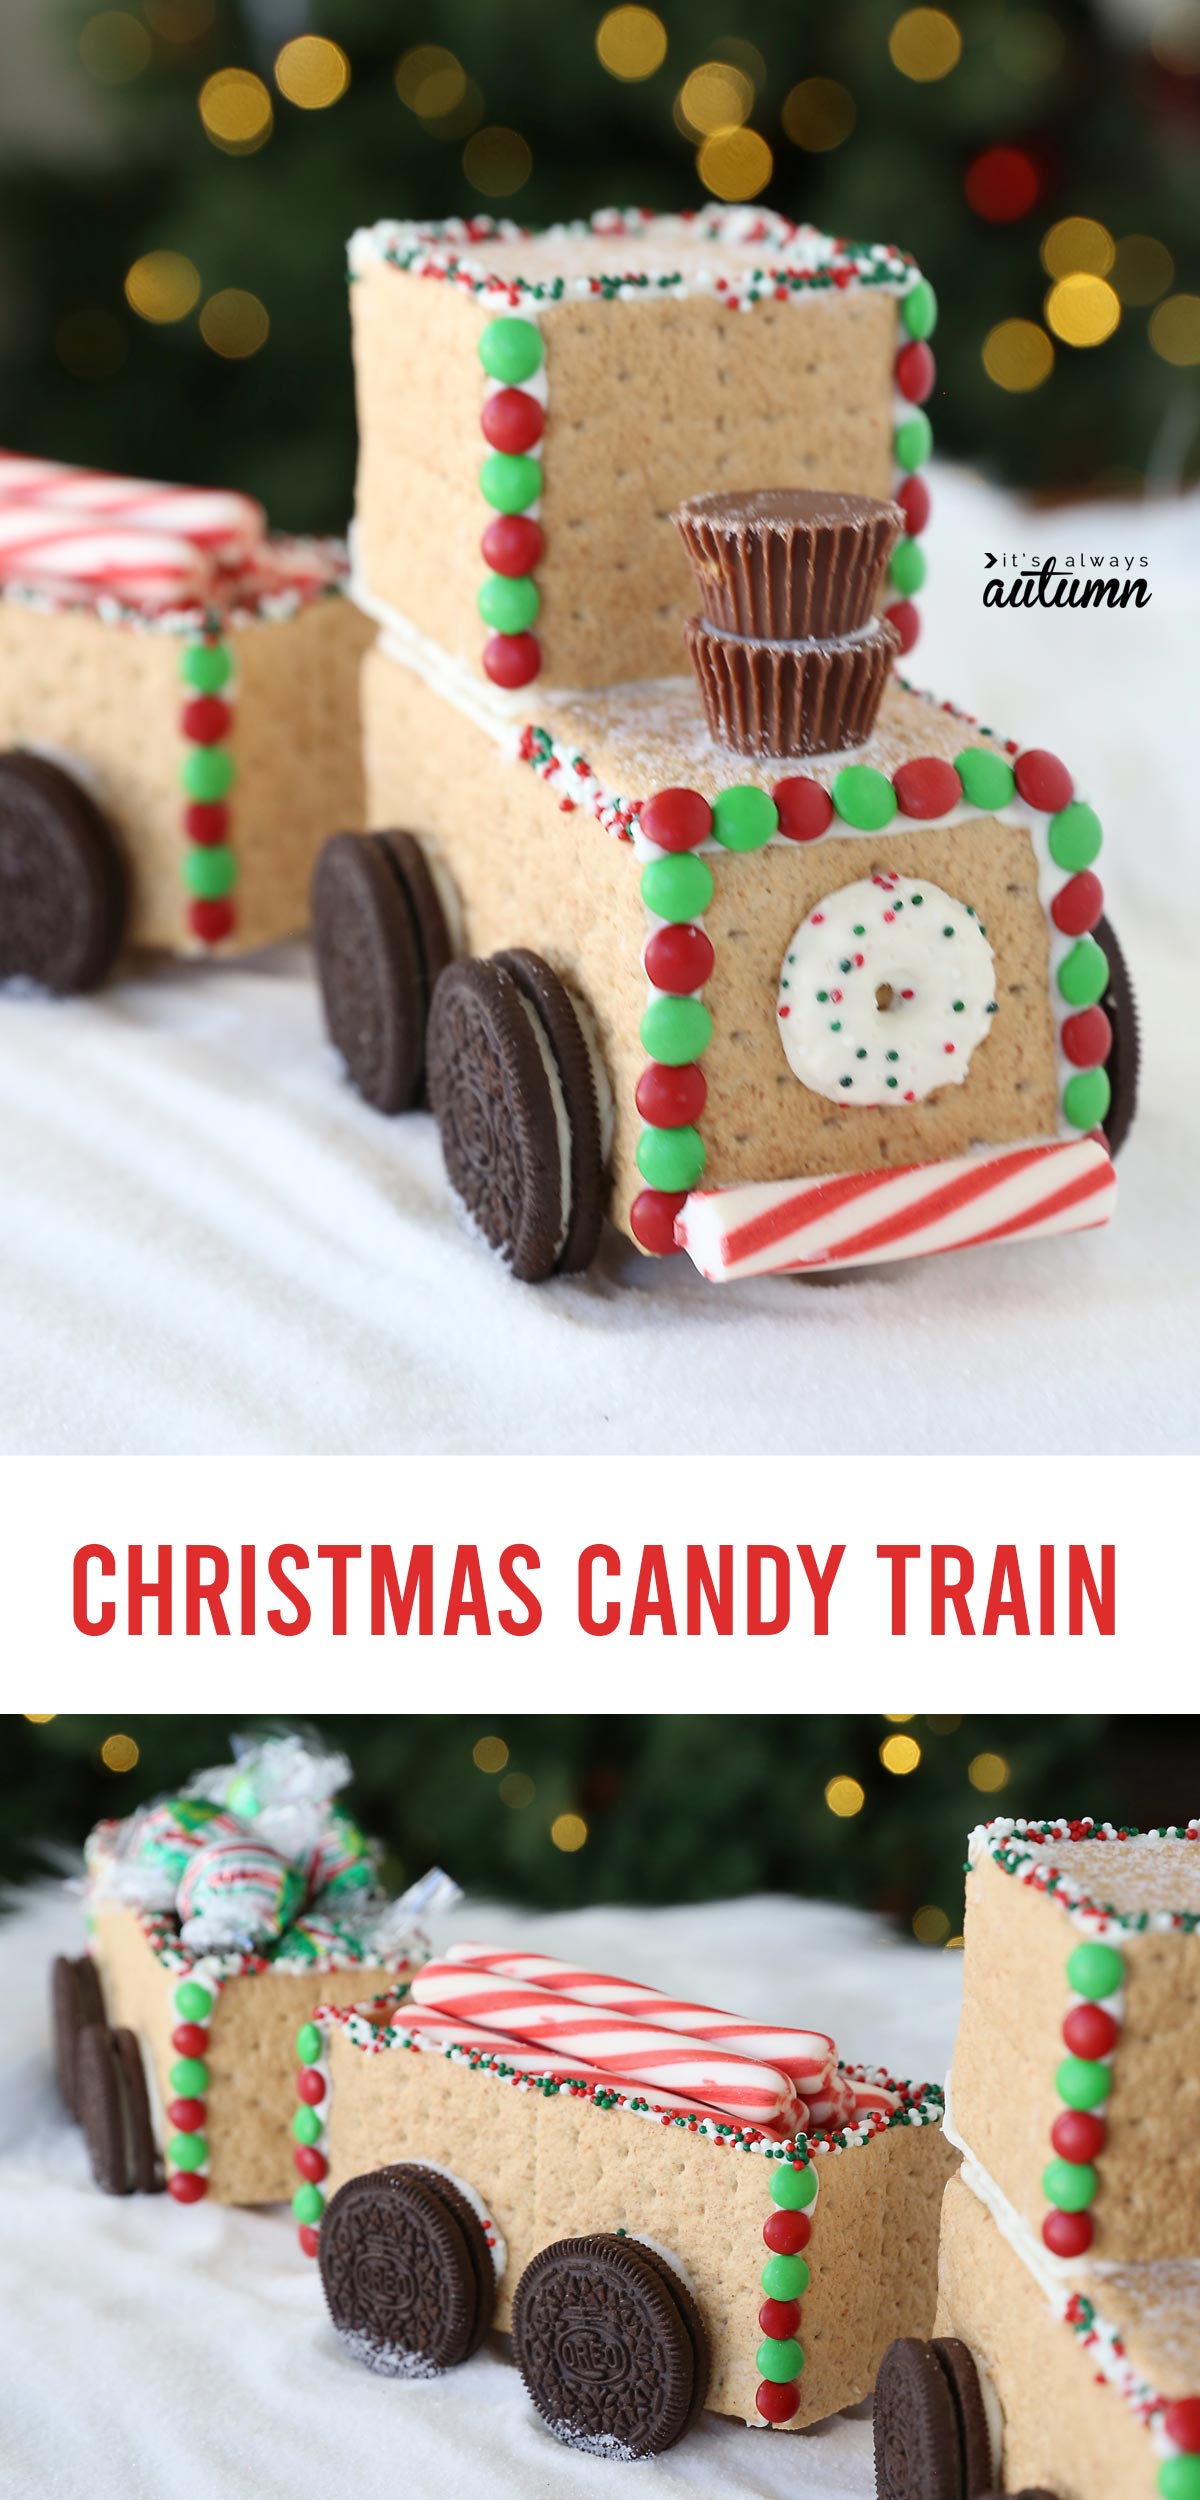
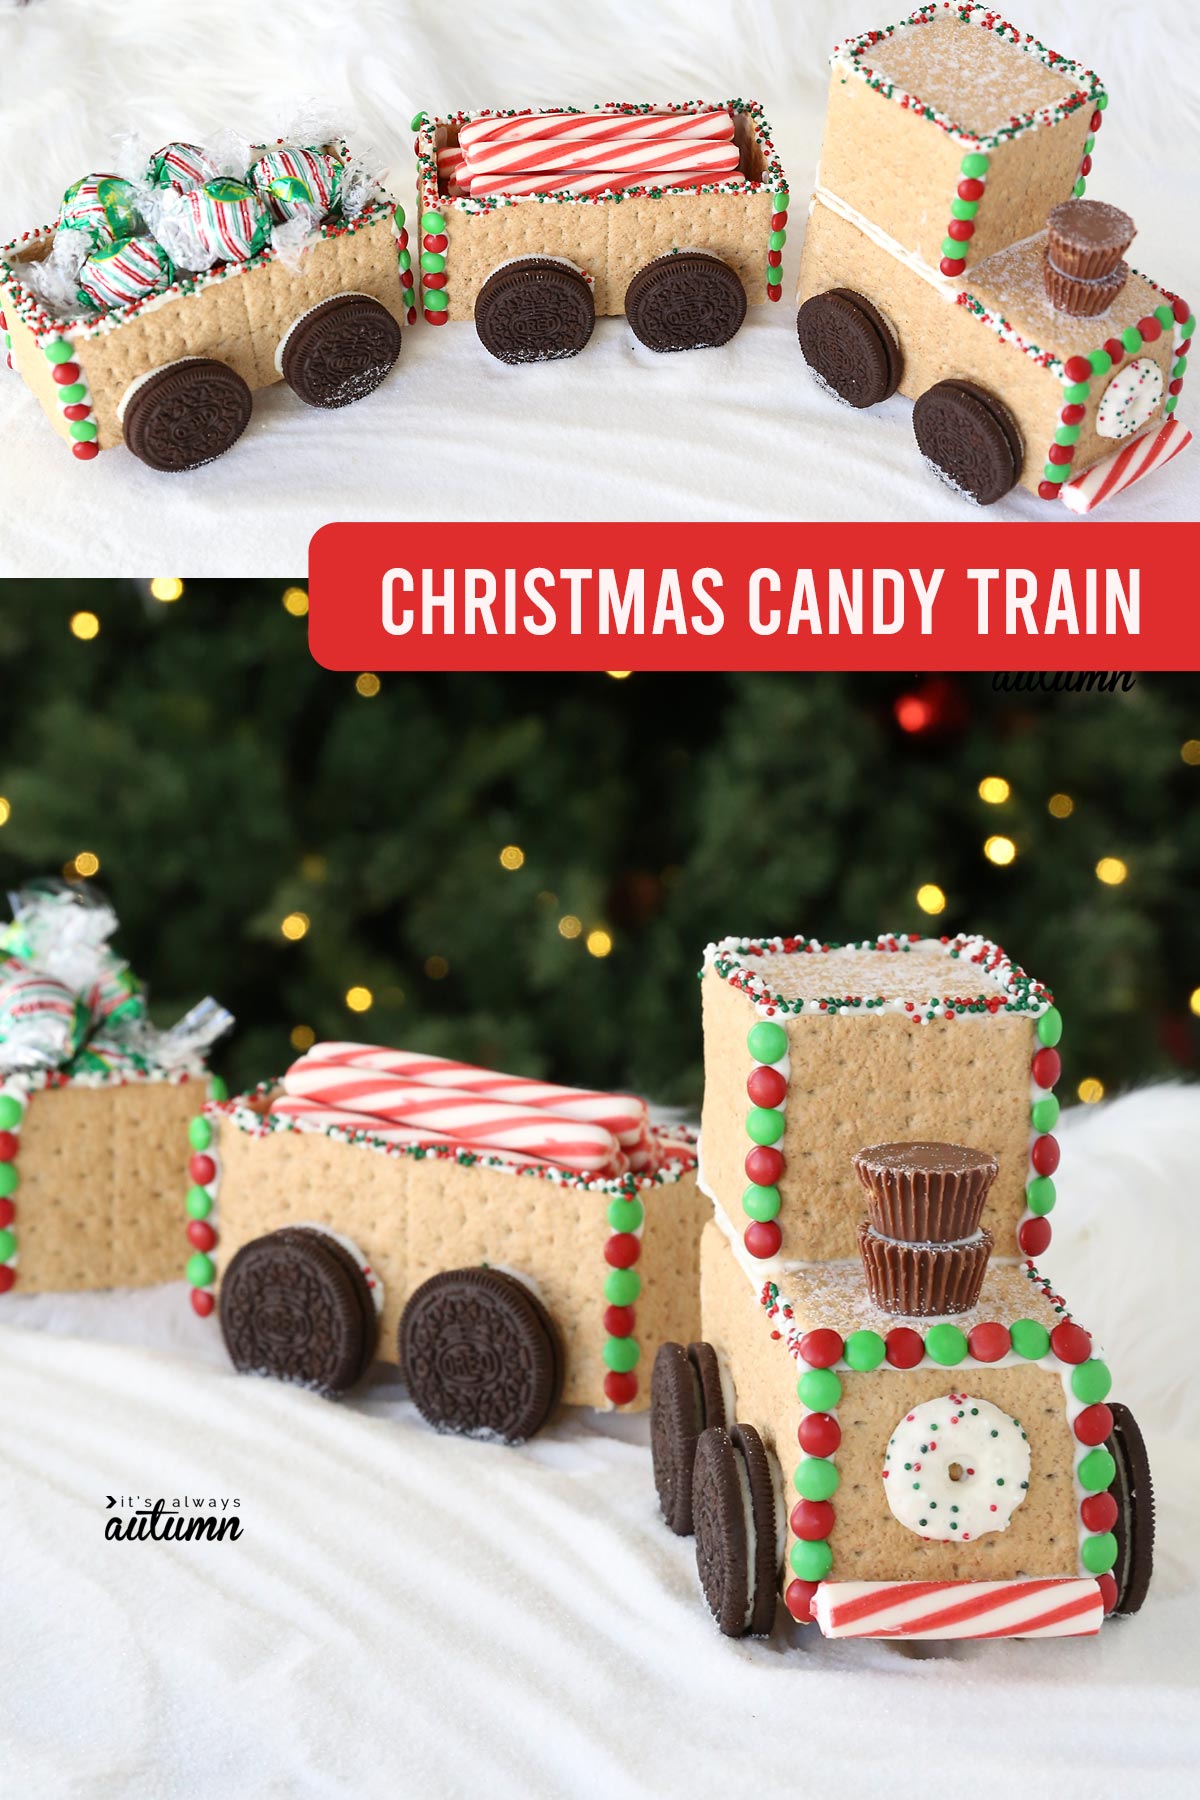
If, on the other hand, you are looking for a gingerbread-house type project that works for younger kids (and won’t take hours of prep), I HIGHLY recommend going the graham cracker route. You can either make a simple graham cracker house like this one we made for Easter OR you can make a graham cracker Christmas Candy Train:
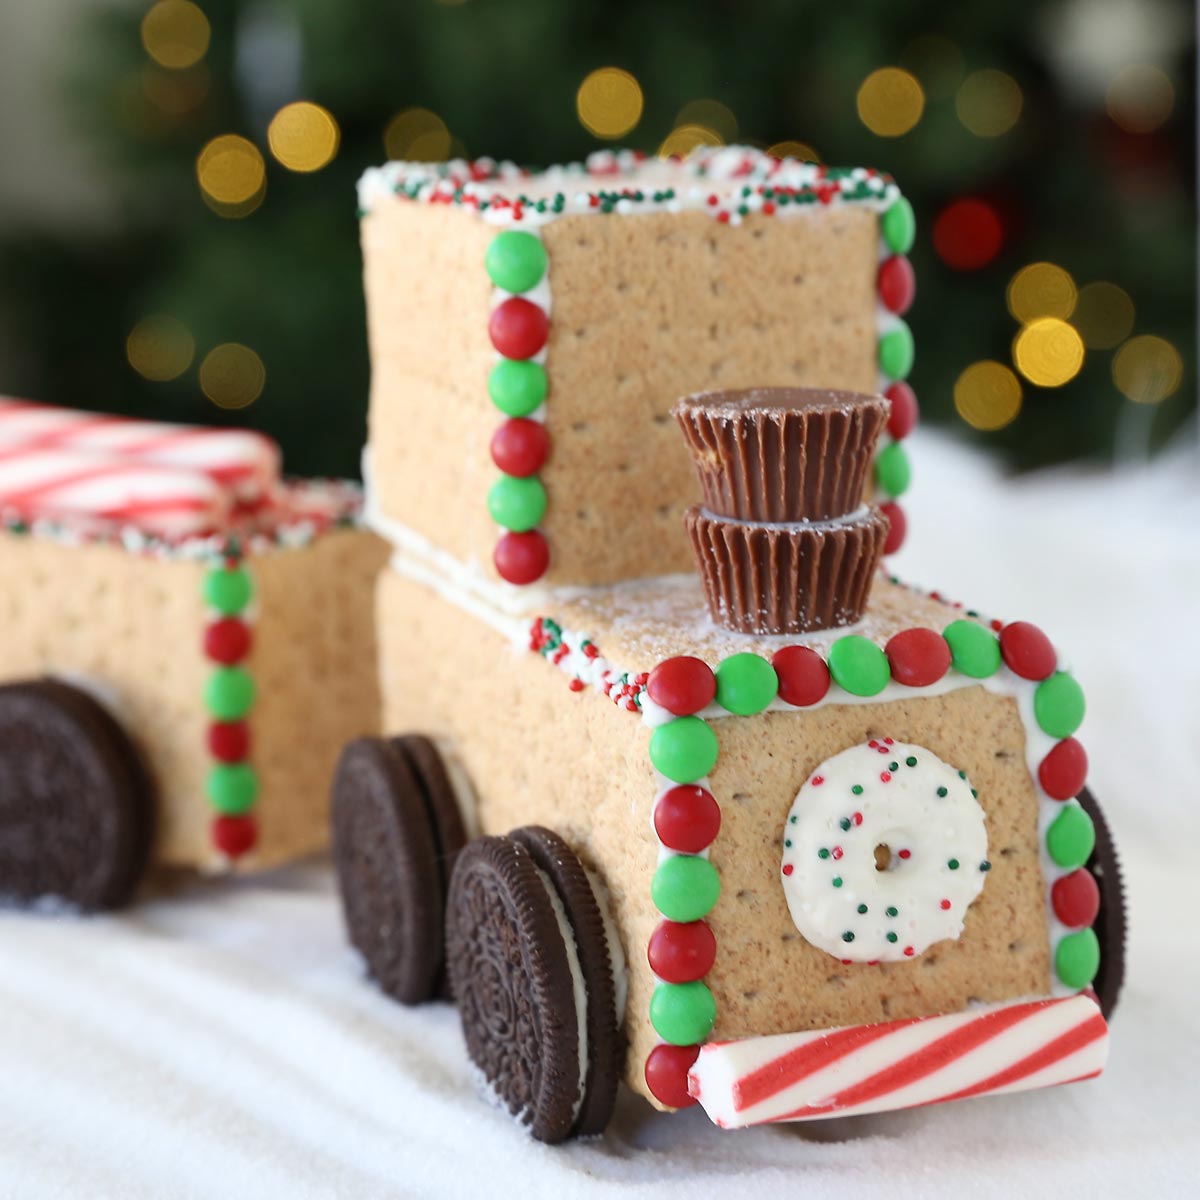
This graham cracker train is super cute and offers lots of decorating possibilities, but it’s quite a bit simpler to put together than a house. The train cars are especially easy, making them perfect for younger kids. The engine takes a bit more constructing, but I’ll tell you exactly how to do it!
PRO TIP: The hardest part about any of these gingerbread or graham cracker creations is waiting a few minutes to let the main structure set up BEFORE decorating. If you have lots of kids to help or are working with very young kids, you should consider building the basic train boxes in advance and letting them set up completely. It can be super frustrating to little kids to try to build a candy train and have it collapse because they can’t wait the 5-10 minutes required for the structure to set up. You can avoid this by building it for them in advance, and then letting your child go straight to decorating, which is what the littlest kids will be most interested in doing anyway.
Also, each child should plan to make one train car or engine. Trying to build an engine plus two cars (as you see in my photos) will take most kids longer than their interest will last.
Christmas Train Supplies
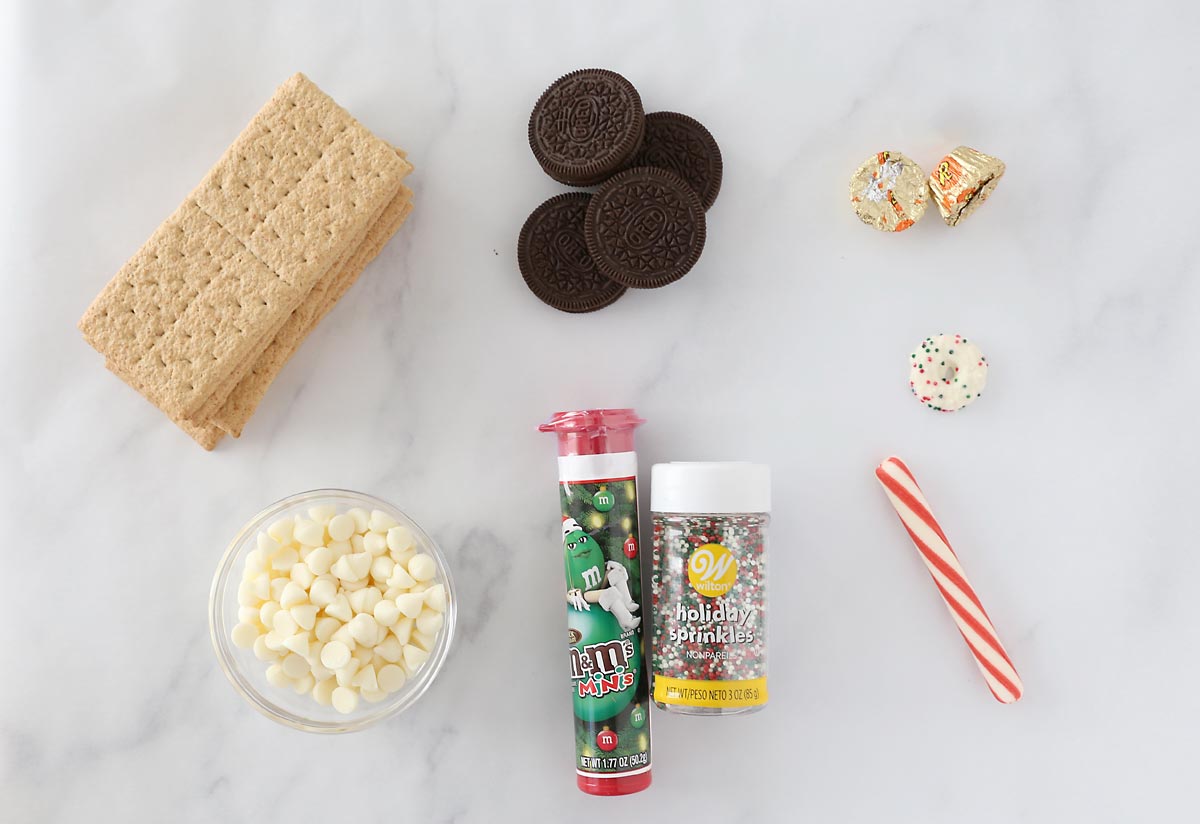
This picture shows everything I used to make my Christmas candy train:
There are 3 basic supplies you need to build a graham cracker Christmas train car or engine:
- Graham crackers for walls
- Oreos for wheels
- White chocolate chips or candy melts for “glue”
To decorate the train cars, I also used:
- Mini M&M’s
- Christmas sprinkles
And to finish off the train engine, I used:
- miniature Reese’s cups to make a smokestack
- a small circular iced cookie and
- a peppermint stick
What should I use to “glue” pieces together?
It’s traditional to use royal icing to construct gingerbread or graham crackers houses, but I have switched to using melted white chocolate chips (or candy melts) instead. Here’s why:
- Melting white chocolate chips is a lot easier than mixing up royal icing
- The chocolate sets up much faster than royal icing does
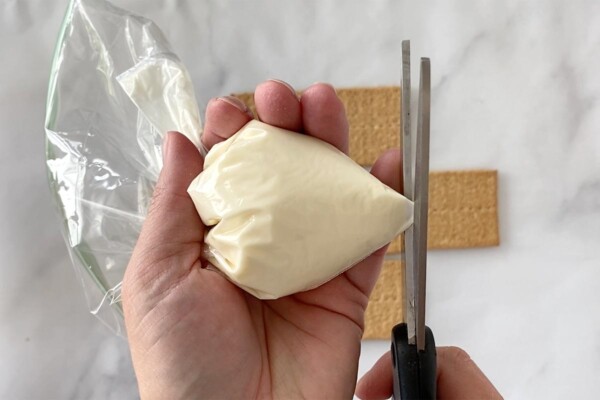
You can place white chocolate chips in a small ziplock bag and microwave it for 30-40 seconds until it’s melted. Snip off a very small corner of the bag, and you are ready to pipe white chocolate “glue”. Once you glue the train box together, it will set up at room temp in under 10 minutes. To set it even faster, you can construct the train box on a paper plate or cutting board and pop it in the freezer – in about 2-3 minutes you’ll be ready to move to the next step.
How to Make a Christmas Candy Train
Christmas Candy Train
Supplies
For Each Train Car
- Graham Cracker Sheets (4 per train car, 8 per engine)
- 4 Oreo Cookies (per car or engine)
- White Chocolate chips or white candy melts
- Mini M&Ms
- Sprinkles
- 2 Miniature Reeses Cups (for the engine chimney)
- 1 Peppermint Stick (to decorate the engine)
- 1 Wreath Shaped Cookie (to decorate the engine)
Want more project ideas? Sign up to get my favorite easy crafts and recipes straight to your inbox!
Instructions
To Make a Train Car
- Place white chocolate chips in a small sandwich bag and microwave for about 40 seconds until melted. Snip a small portion of one corner of the bag off so that you can "pipe" the white chocolate and use it to "glue" the graham crackers together.
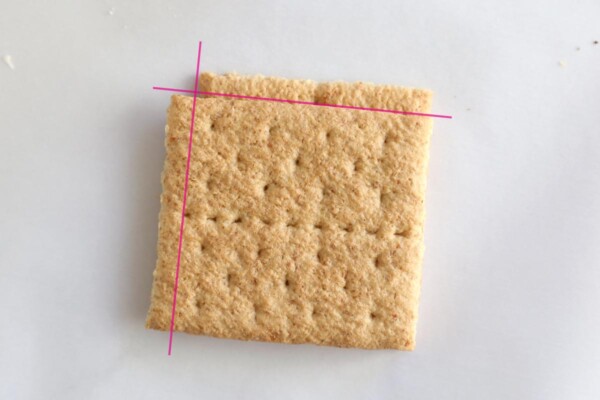
- Break one graham cracker sheet in half. Optional: Use a sharp knife to trim the halves into squares. (Place one half on top of the other, and rotate it 90 degrees. Trim the portion of each cracker that overhangs the other.)
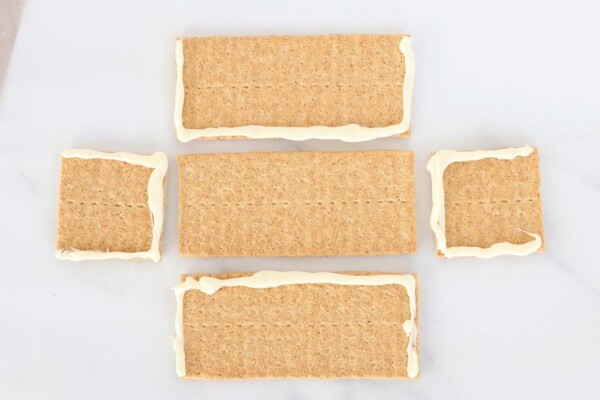
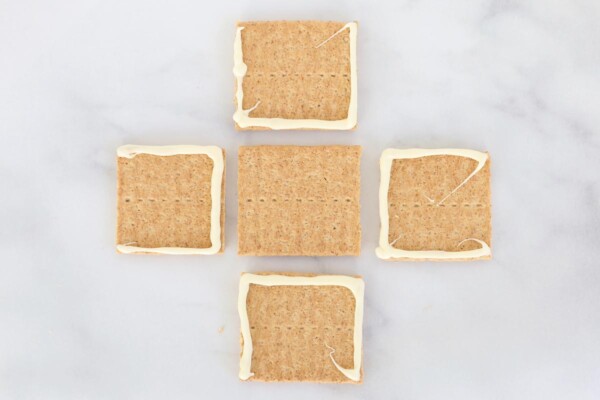
- Place one full graham cracker down in the middle of your work surface, horizontally. Place another full cracker just above it, and a third just below it. Place each of the graham cracker squares to the right and left of the original cracker. Pipe white chocolate onto each of the graham crackers except the center one as you see in the photo (along three sides, leaving the side furthest from the center graham cracker empty).
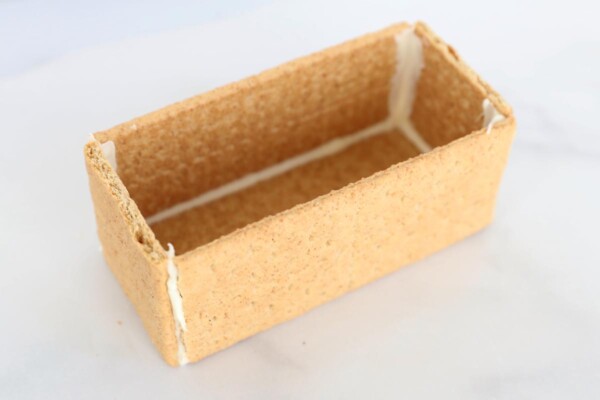
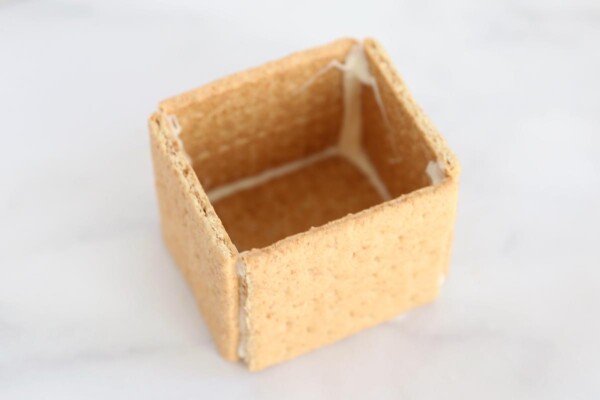
- Lift the outer edge of each of the four outside graham crackers to form a box. It's easiest to fold up the two longer crackers first and hold them both with one hand, then fold up each of the square crackers. Press along the bottom edges of the graham crackers to make sure they are snug against the center cracker, which now acts as the base of the box.
- Wait 5-10 minutes until the chocolate has firmed up before proceeding. If you constructed your box on a paper plate, you can put it in the fridge or freezer to speed this up.
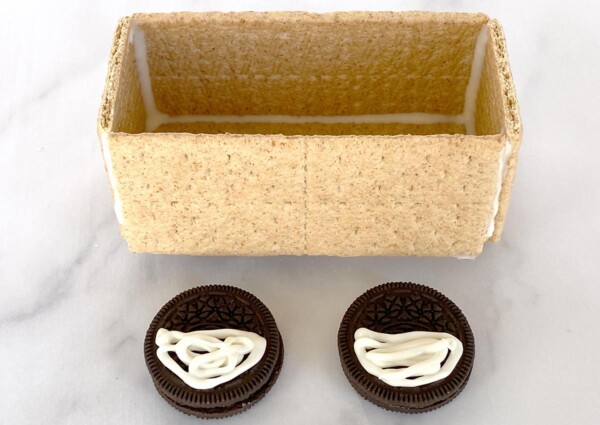
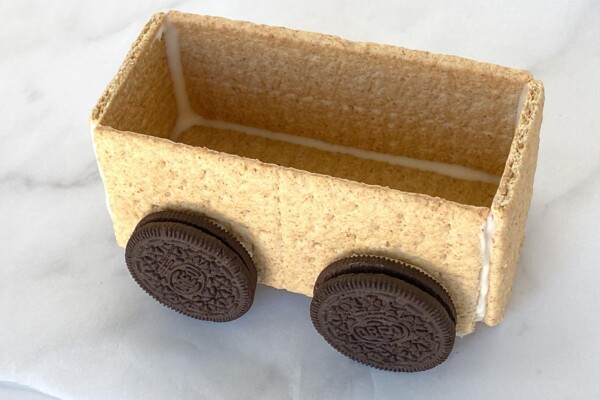
- If you don't care whether the wheels hold the train car up off the ground, simply use more melted chocolate to glue on Oreos for wheels. (This is easier and what I would recommend for young children.) If you DO want the wheels to hold the train car up, break an extra graham cracker into 4 pieces. Stack the pieces 2 high and set the train car on top of it so it is raised off the table. Then pipe chocolate onto the top half of four Oreos, and press the Oreos to the side of the train car.
- Do not move the car until the chocolate holding on the wheels has set (5-10 minutes). However, as long as you don't move the car you can continue to decorate it.
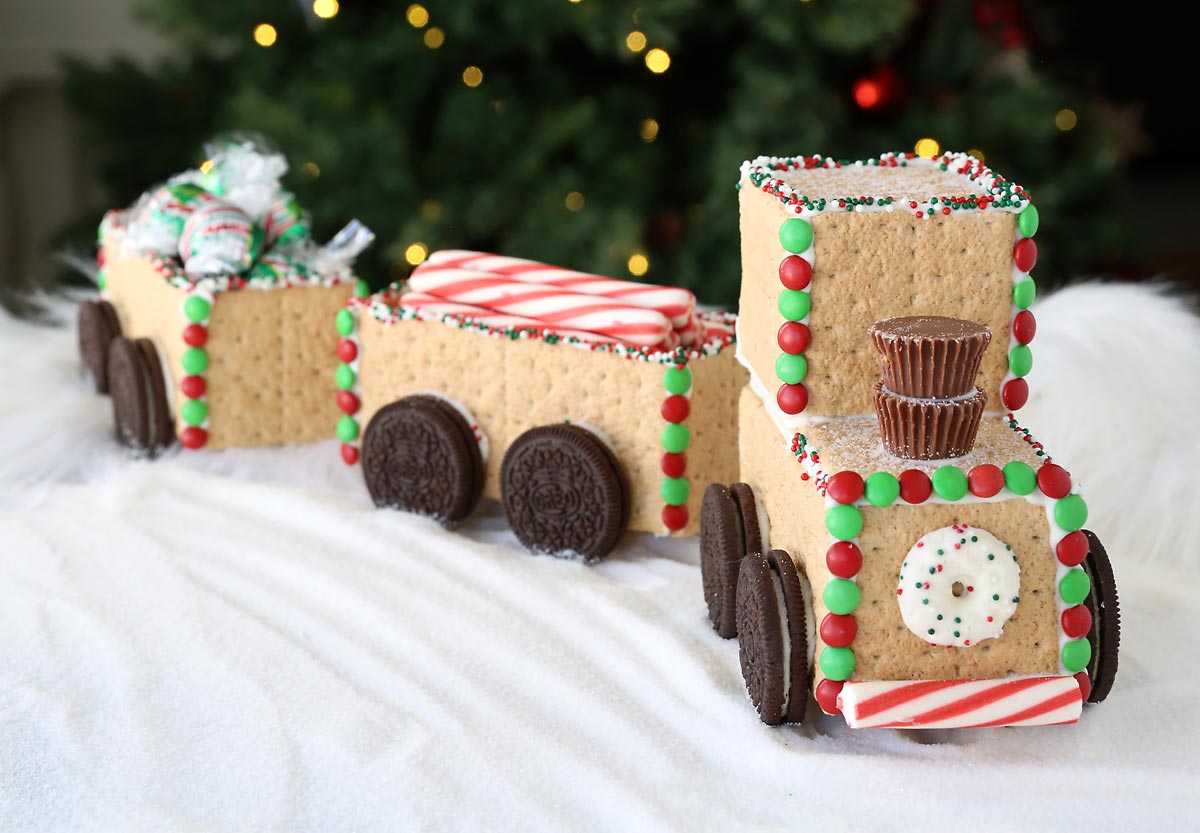
- Decorate train car as desired. We piped chocolate on the seams where the crackers meet and added mini M&Ms. We piped more chocolate along the top edges of the car and decorated with sprinkles. When everything is completely set, fill the train car with candy.
To Make a Train Engine
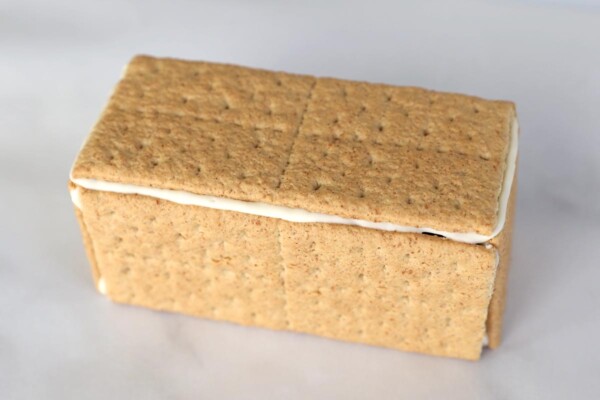
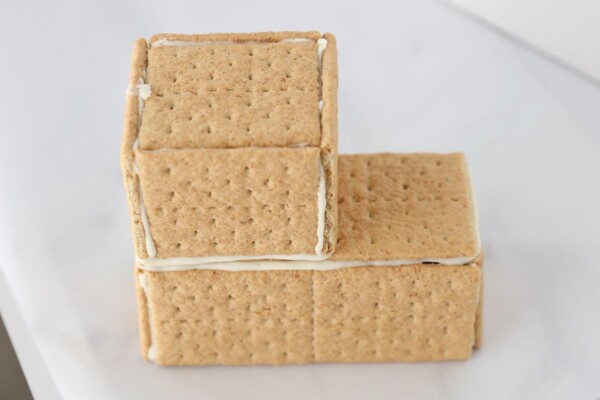
- Begin by repeating steps 1-4 above to create a basic "box" for a train car. Glue a fifth graham cracker on top so you have a closed box.
- Use three more graham crackers to create a smaller "box" that will form the top of the engine. This time use 3 half crackers and 2 crackers that have been trimmed into squares. Lay them out and add chocolate the same way you did for the train car.
- Lift up the outer crackers to form a smaller box the same way you did for the train car.
- Wait 5-10 minutes for the small box to set up, then pipe chocolate along the top edges. Pick it up and place it chocolate side down on the larger box.
- Add wheels the same way you did for the train car.
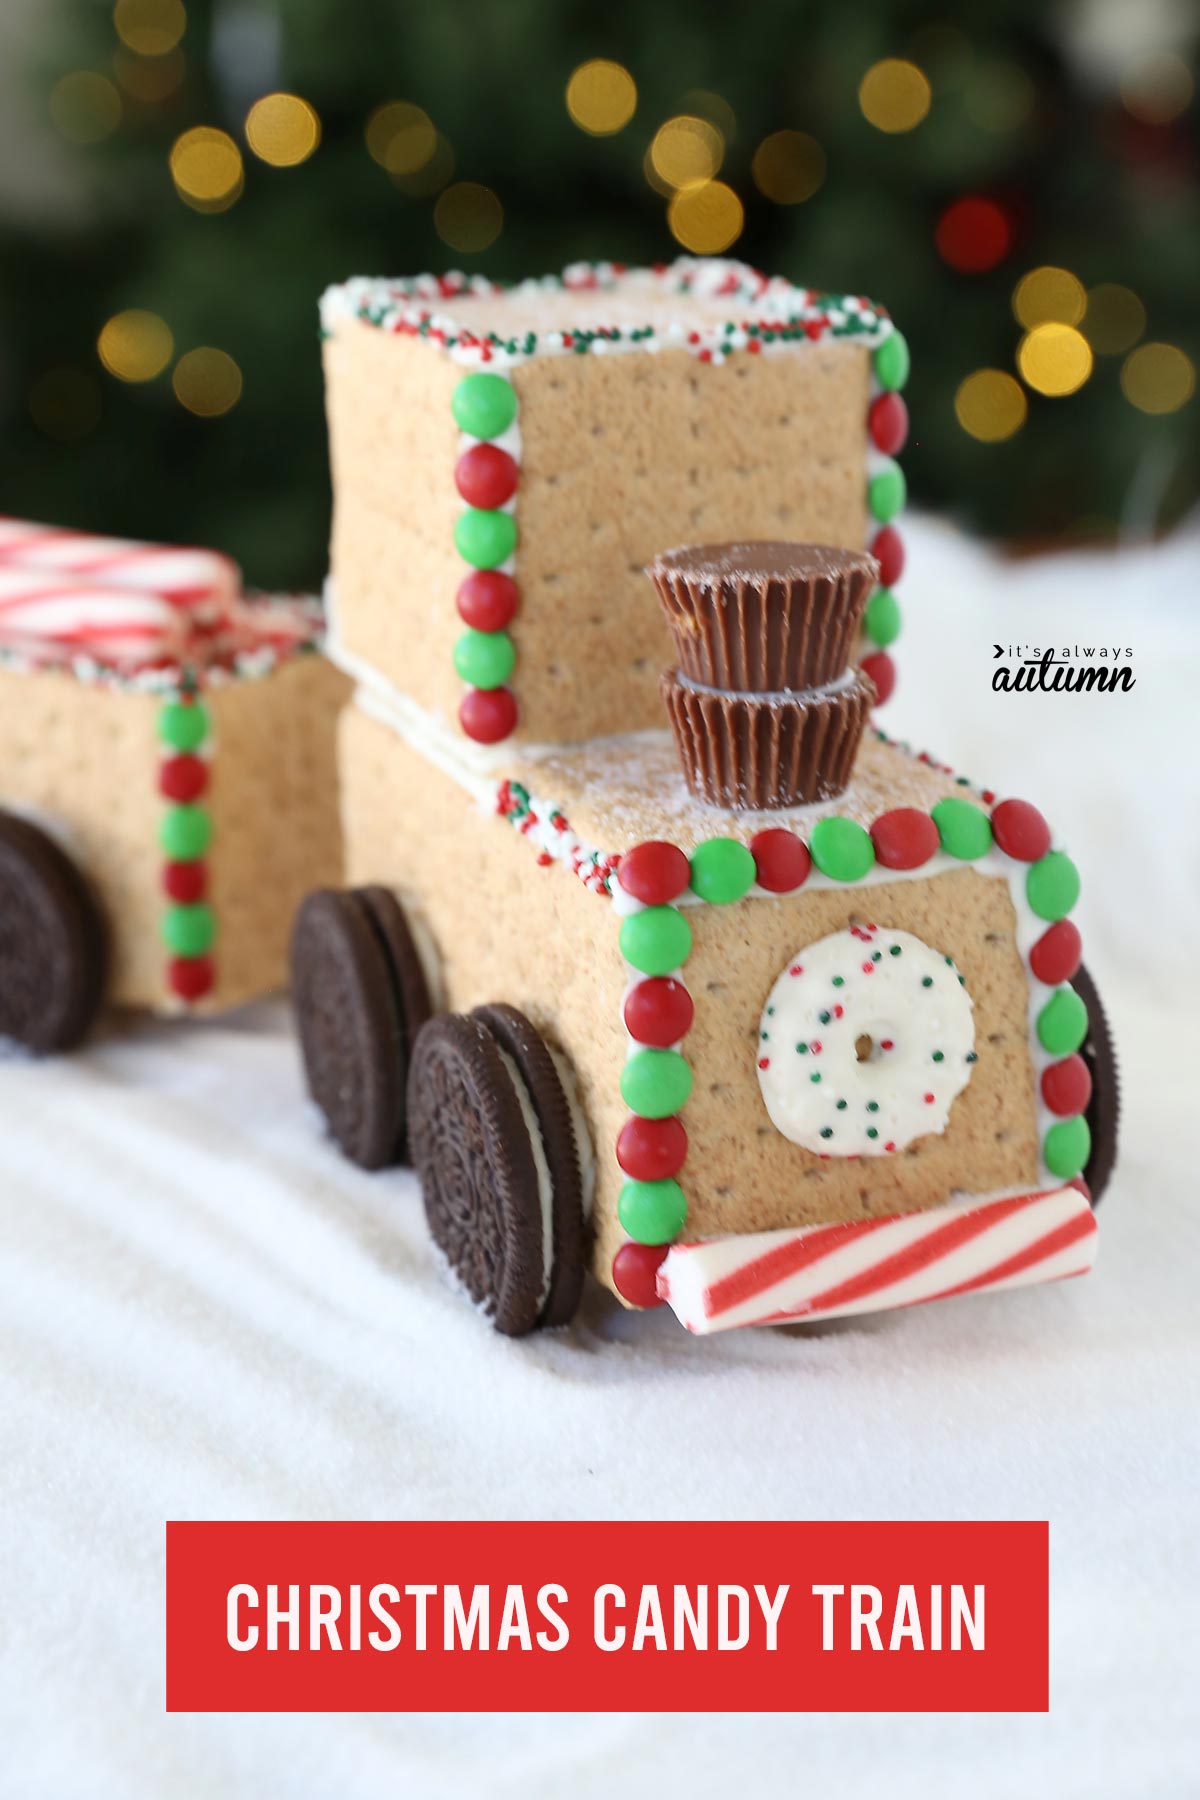
- Decorate the engine as desired. We used chocolate to glue a wreath shaped cookie and peppermint stick on the front of the engine. We also used two miniature Reese's cups to make a chimney. Finally, we added mini M&Ms and sprinkles.




MJ says
This is a great activity for our grandkids, 5, 3 and 1 year olds. They loved it and was easy to prep with the instructions. Thanks!