
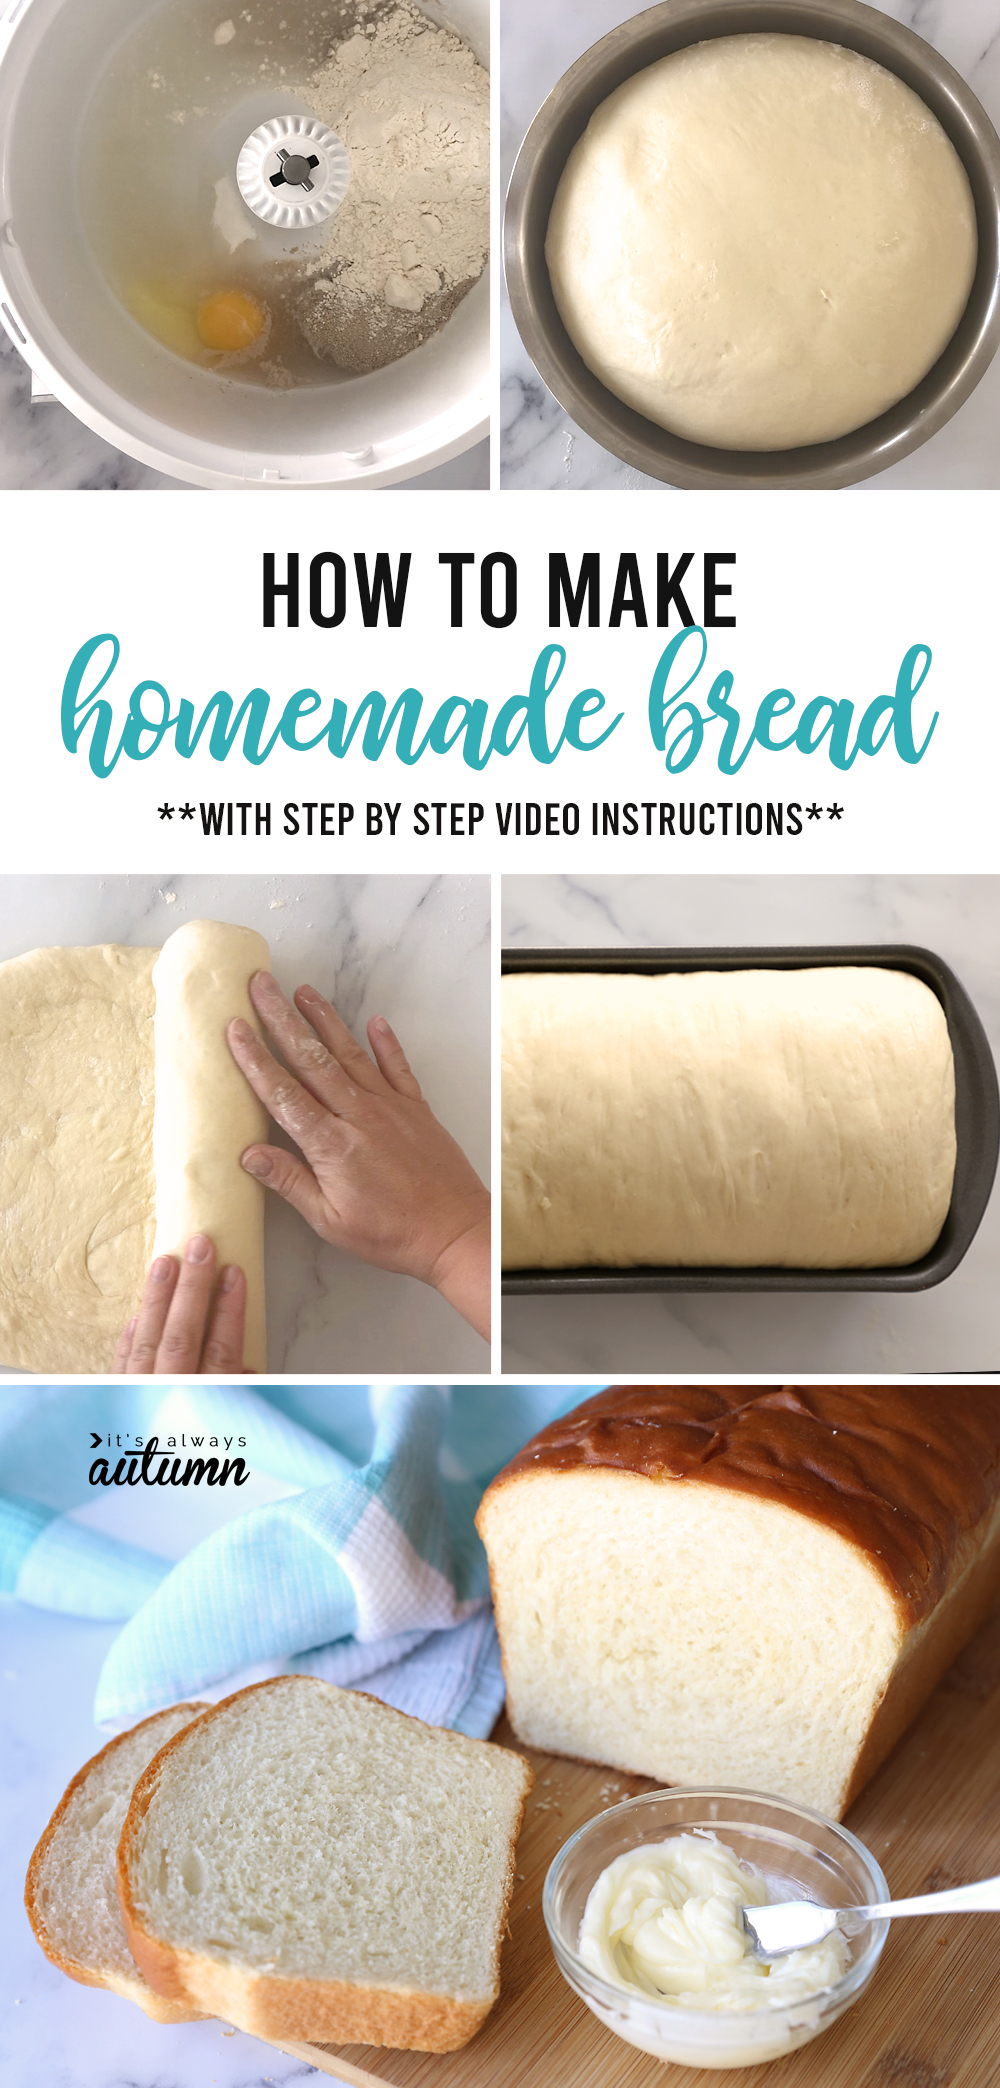
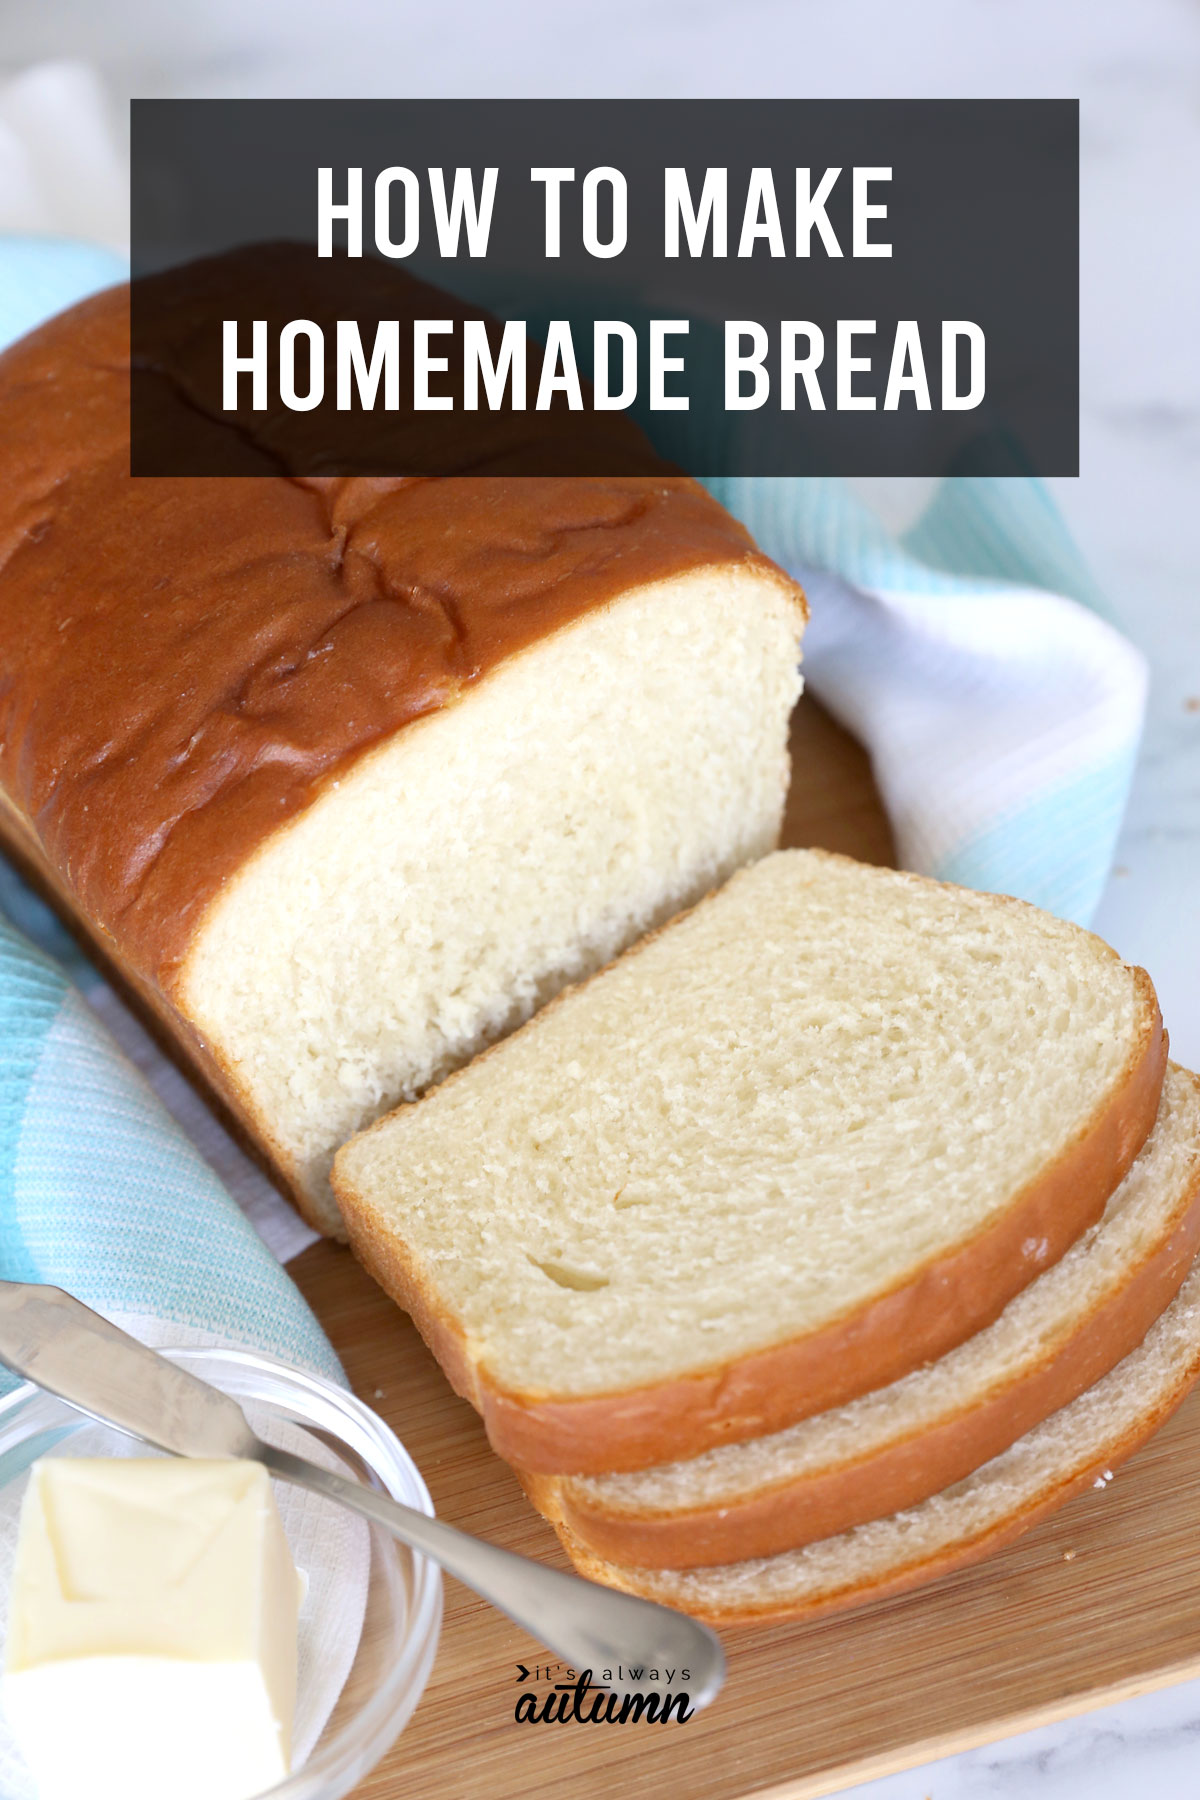
In today’s post: There’s not much that tastes better than homemade bread. Learn everything you need to know to make a beautiful loaf of bread – it’s easier than you think!
I have quite a few recipes on this site that all start with the same AMAZING bread dough. It’s the recipe my mom used when she taught me how to make bread and believe me, it’s a keeper. I figured with so many different posts that all use this same dough it was high time I showed you guys how to make a gorgeous loaf of delicious homemade bread.
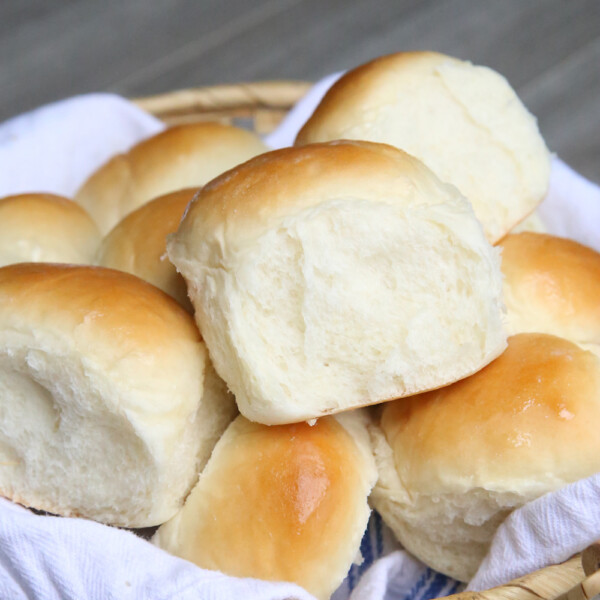
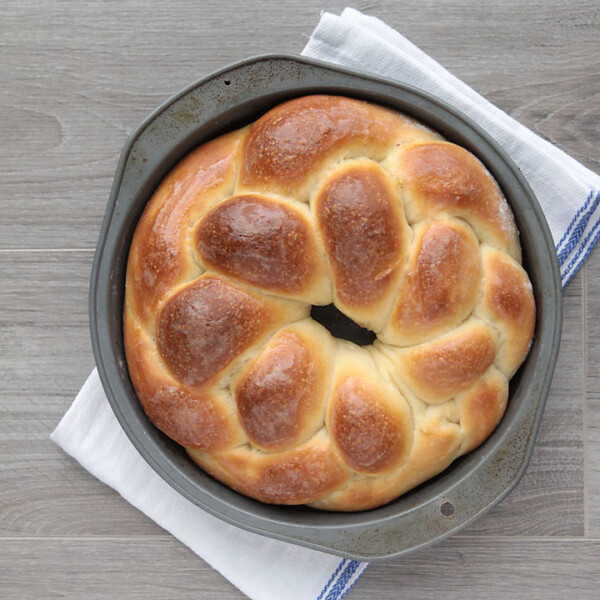
Recipes that use this bread dough: The Best Classic Dinner Rolls | Better than Olive Garden breadsticks | Raspberry Sweet rolls | Buttery Crescents rolls (bigger batch) | Garlic and Herb rolls
I know that making homemade bread is intimidating if you’ve never tried it before. It just feels like there are so many things that can go wrong! But, like just about anything else, once you know what you’re doing it’s really not hard. The entire process does take 3 hours, but very little of that is hands-on time. And it’s worth it. This is the sort of homemade bread (or rolls, or breadsticks) that will make you famous. At least in your own family 😉
If you think making bread is too hard, my goal is to convince you otherwise! So today I’m going to walk you through every step of this delicious homemade bread recipe. I have a step by step video for you to watch as well as lots of photos and extra tips. Let’s dive on in!
If you’re looking for a crazy easy bread recipe that doesn’t even require kneading, check out my 4 ingredient Artisan Bread!
How to make bread: Step by Step Instructions
This step by step video walks you through every part of the bread-making process. The video specifically uses my bread recipe (which you can find below), but most of the tips are applicable to any yeast bread recipe.
Please note that because all of my content is free to readers, my videos are monetized with ads. That means if you are using an ad blocker, the video will not show for you. You can whitelist this site or open a browser that doesn’t have an ad blocker installed. Additionally, there will be a few short ad breaks. I get that no one loves commercials, but this is how I’m able to spend the time it takes to create this content for you, so I appreciate your understanding – thanks!
NOTE: If you’d like to see exactly what this recipe looks like mixed up in a Kitchenaid, you can go to my Dinner Rolls post and watch the video there.
The BEST Homemade Bread recipe
Homemade Bread
Ingredients
- 1 cup Warm Water
- 1 tablespoon Active Dry Yeast
- 2 tablespoons Butter softened
- 1 Egg
- 1/4 cup Sugar
- 1 teaspoon Salt
- 3 1/4 cups All Purpose Flour
Want more project ideas? Sign up to get my favorite easy crafts and recipes straight to your inbox!
Instructions
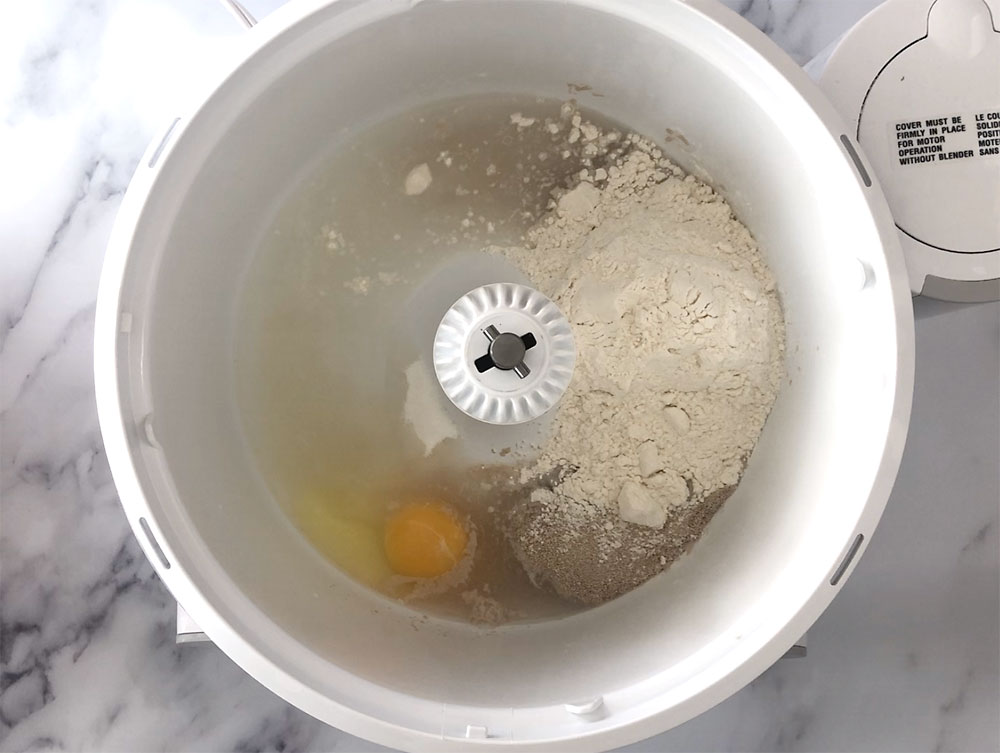
- Add warm water and yeast to the bowl of a stand mixer.
- Add the butter, egg, sugar, salt and 2 cups of flour.
- Using the dough hook attachment, turn the mixer on low and allow ingredients to begin mixing. (Butter does not need to be fully incorporated at this point.)
- Gradually add the 3rd cup of flour as dough continues to mix.
- Dough should begin to pull away from sides of bowl as it mixes. Gradually add approximately 1/4 cup more flour. You want the dough to pull away from the sides of the bowl and come together in a single mass. It will be slightly sticky to the touch.
- Turn mixer up (as directed in mixer instructions for kneading dough) and allow to knead for 5 minutes. Dough should feel smooth and elastic.
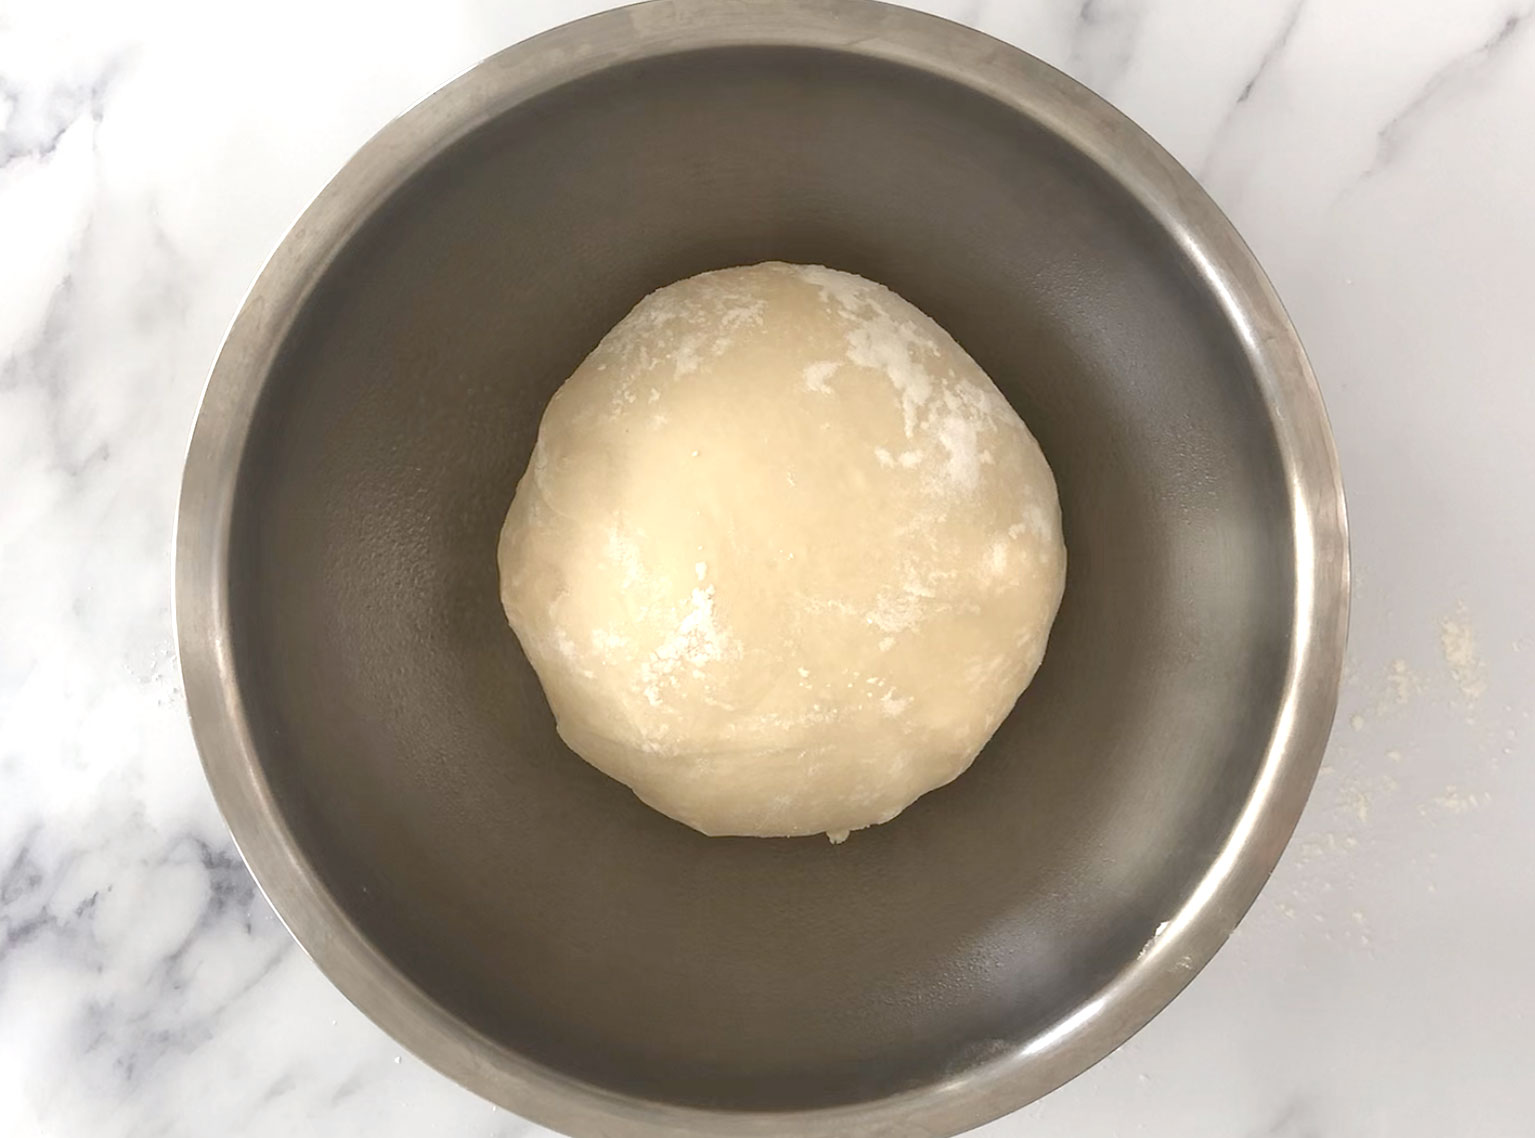
- Turn dough out onto lightly floured surface and pull into a ball. Place in greased bowl and loosely cover with greased plastic wrap. Allow to rise in a warm place until doubled in size, about 60-90 minutes.
- Punch dough down and turn out again onto lightly floured surface. Shape dough into a rectangle that's approx 8x12 inches.
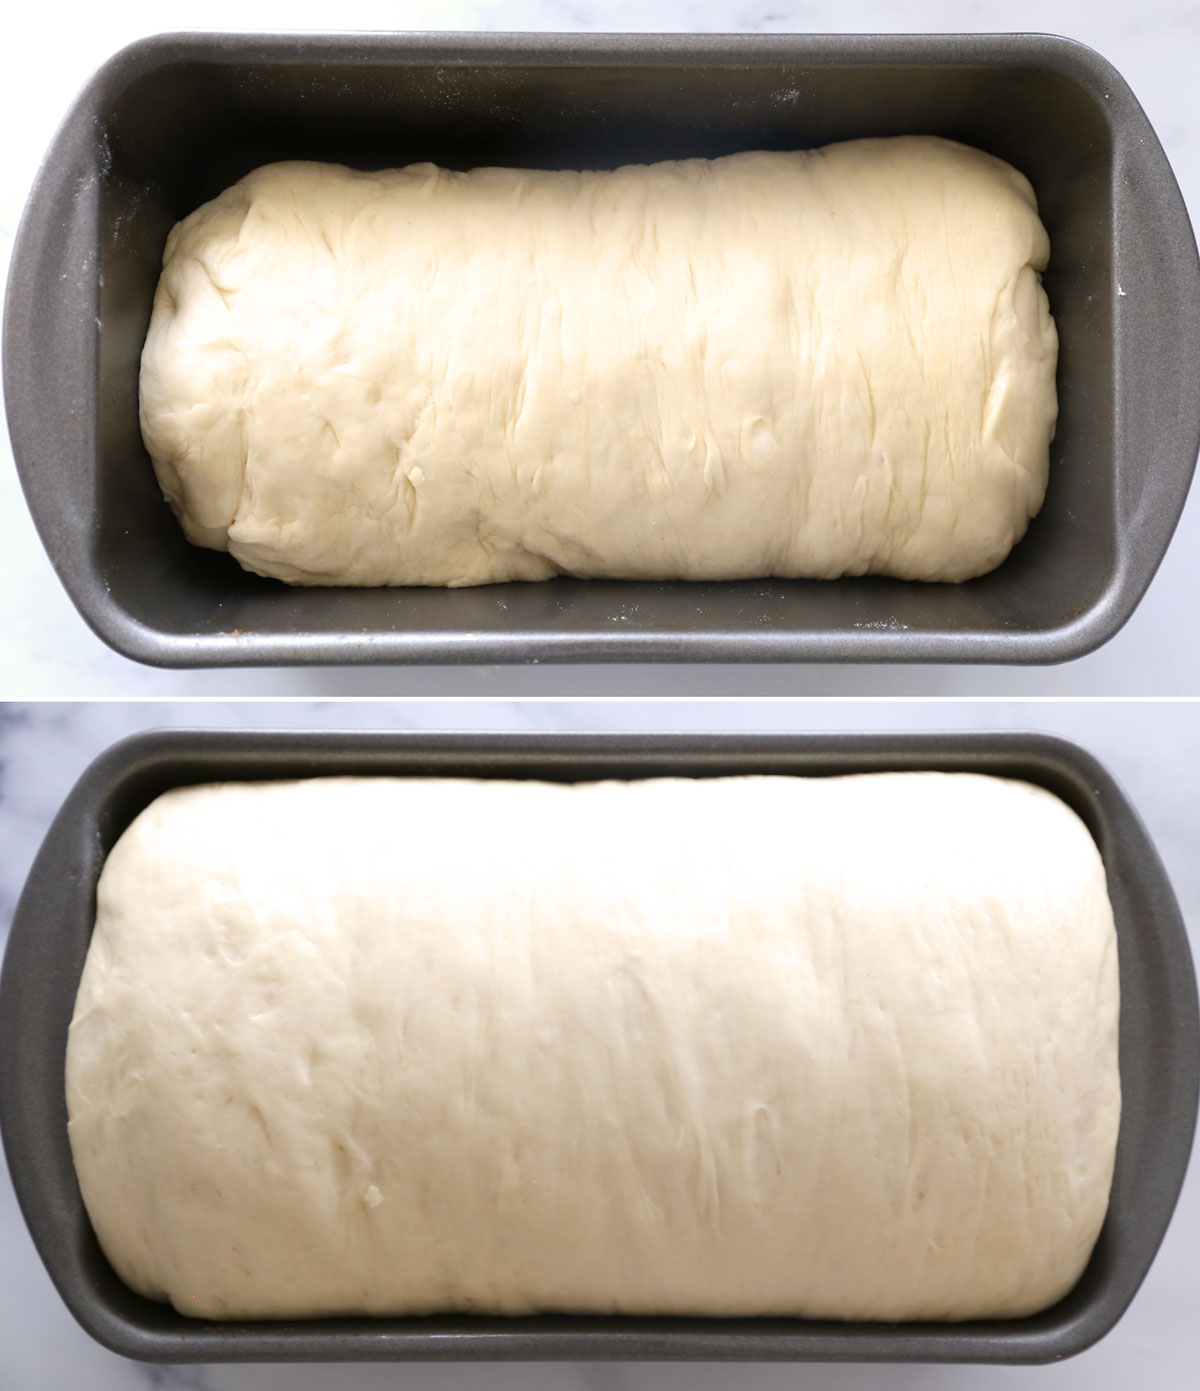
- From one short side, roll dough into log shape and pinch seam. Place in a greased 9x5 loaf pan. Cover loosely with greased plastic wrap.
- Allow dough to rise again until doubled, about 45 minutes. Meanwhile, preheat oven to 375 degrees.
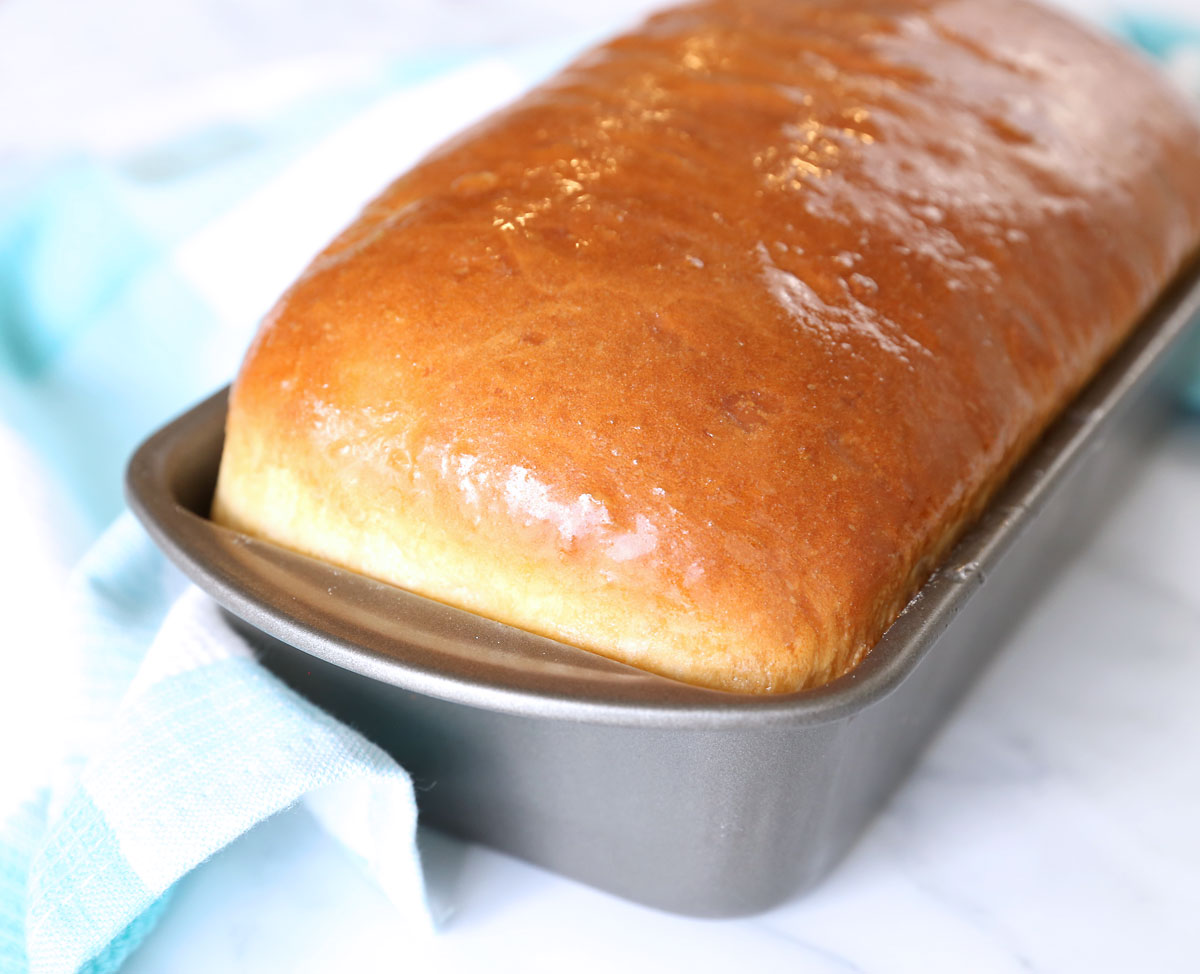
- Bake approximately 30 minutes until top of bread is well browned and loaf sounds hollow when tapped on.
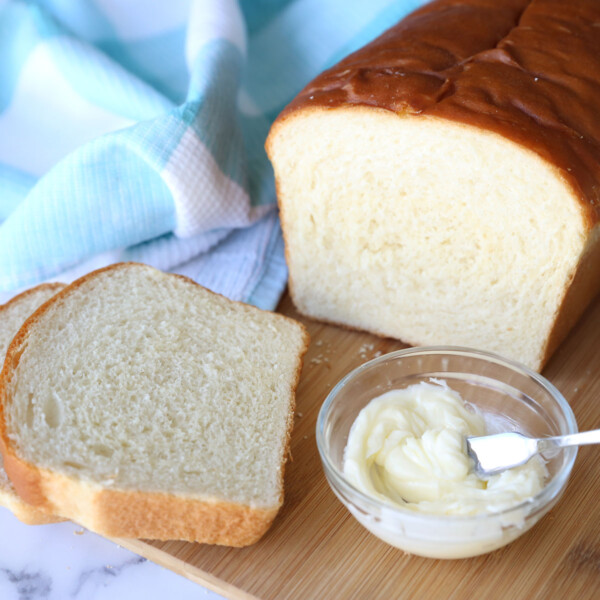
- Turn loaf out onto a cooling rack to cool. Brush top with melted butter if desired. Cool completely before slicing for best results.
Tips
How to make homemade bread without a mixer
People often think they can’t make homemade bread without a Kitchenaid or Bosch mixer. I made homemade bread for years before I had a mixer! It only takes about 10 minutes longer. This is what you’d do:
- Place all the ingredients (but only 2 cups of the flour) in a large mixing bowl. Beat ingredients together with a hand mixer or wooden spoon.
- Add the third cup of flour and stir it in to the other ingredients using a wooden spoon. It will start to look quite shaggy and you probably won’t be able to fully incorporate it. That’s ok.
- Turn the dough out onto a floured surfaced and begin kneading by hand.
- Continue to knead by hand for 5-10 minutes, adding the additional 1/4 of flour as needed. You’ll keep kneading by hand until the dough is smooth and elastic and can pass the windowpane test that I explain in the video.
- Shape, rise, and bake the dough as directed in the recipe.
You can find a great video explaining how to knead by hand here.
Tips for making homemade bread
How much flour will I actually need? This recipe calls for 3 and 1/4 cups of flour, and most of the time you’ll want to stay close to that measurement. However, depending on how humid it is in your home, you may need a little more or less, as explained in the video. Additionally, people measure flour differently, so it’s important to add it gradually and stop adding flour when the dough has come together in a ball that pulls away from the sides of the mixer bowl. Serious bakers insist that you must weigh your flour; I don’t think that’s necessary when making bread because you can just use the method I describe in the video to figure out when to stop adding it.
Remember, as I mention in the video, the dough is going to look a little different in a Bosch mixer than in a Kitchenaid. In a Bosch, the dough will not really stick to the sides or bottom of the bowl once it’s floured well enough. But it a Kitchenaid, you definitely want to see the dough sticking to the bottom of the bowl.
How long should I let the dough rise?
Just like with flour, there’s no hard and fast rule for how long to let the dough rise because rise time is affected by the temperature in your home. For the first rise, you want the dough to double in size. You don’t need to be exact here. Just pay attention to how big the ball of dough looks before it rises (snapping a photo is a good idea so you can compare!):
And then wait until it looks much bigger, or double in size:
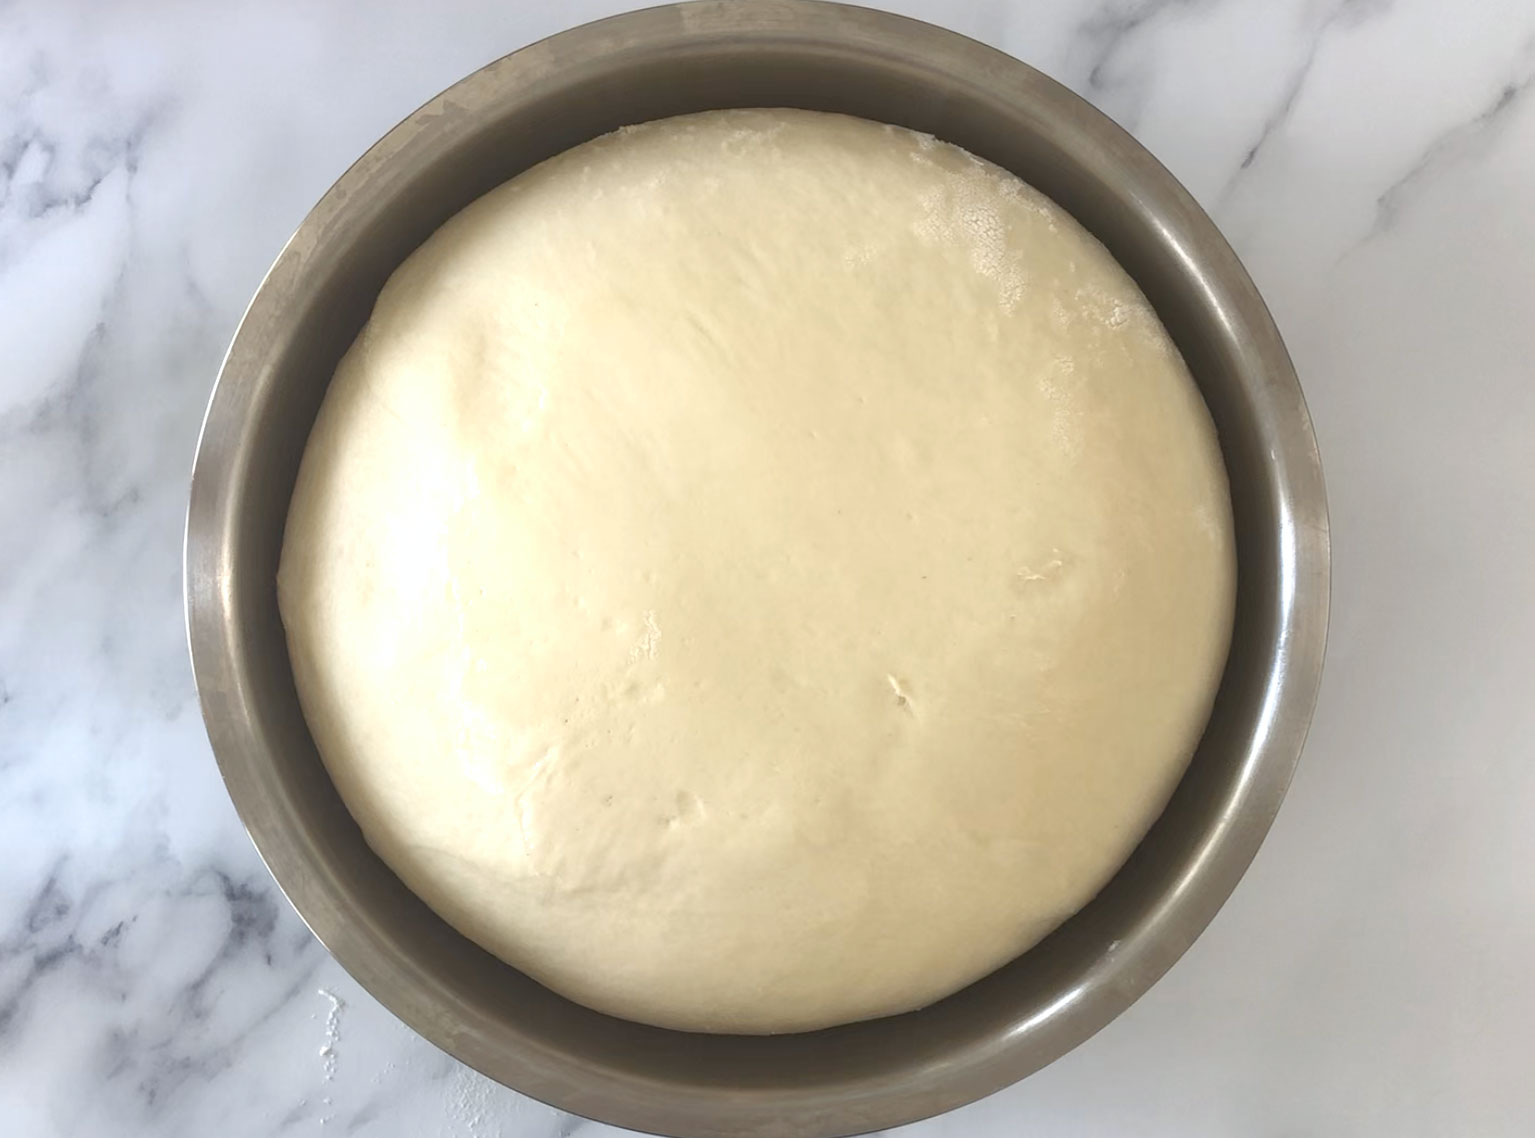
Generally if your house is at low room temp (71 degrees) it’s going to take 90 minutes for the first rise. If your home is warmer than that, it might only take 60 minutes. And on a cold day it can take even longer. It’s ok; the exact time doesn’t matter as much as the fact that the dough doubles in size.
If it’s quite cold in your home, you can let your dough rise in a warm oven. Turn the oven on to the lowest setting and let it warm up for a few minutes. Then turn the heat off. You want it to feel slightly warm inside the oven, but not at all hot. Leave the oven off and place your dough inside to rise. Check it a little earlier than you normally would because it’s hard to tell (without a thermometer) how warm it actually is in there.
For the second rise, you again want the dough to double in size, and it will take about half as long as the first rise. This recipe should be baked in a 9×5 inch loaf pan. After the second rise the dough should be about an inch or an inch and a half above the loaf pan.
How do I know when the bread is done baking?
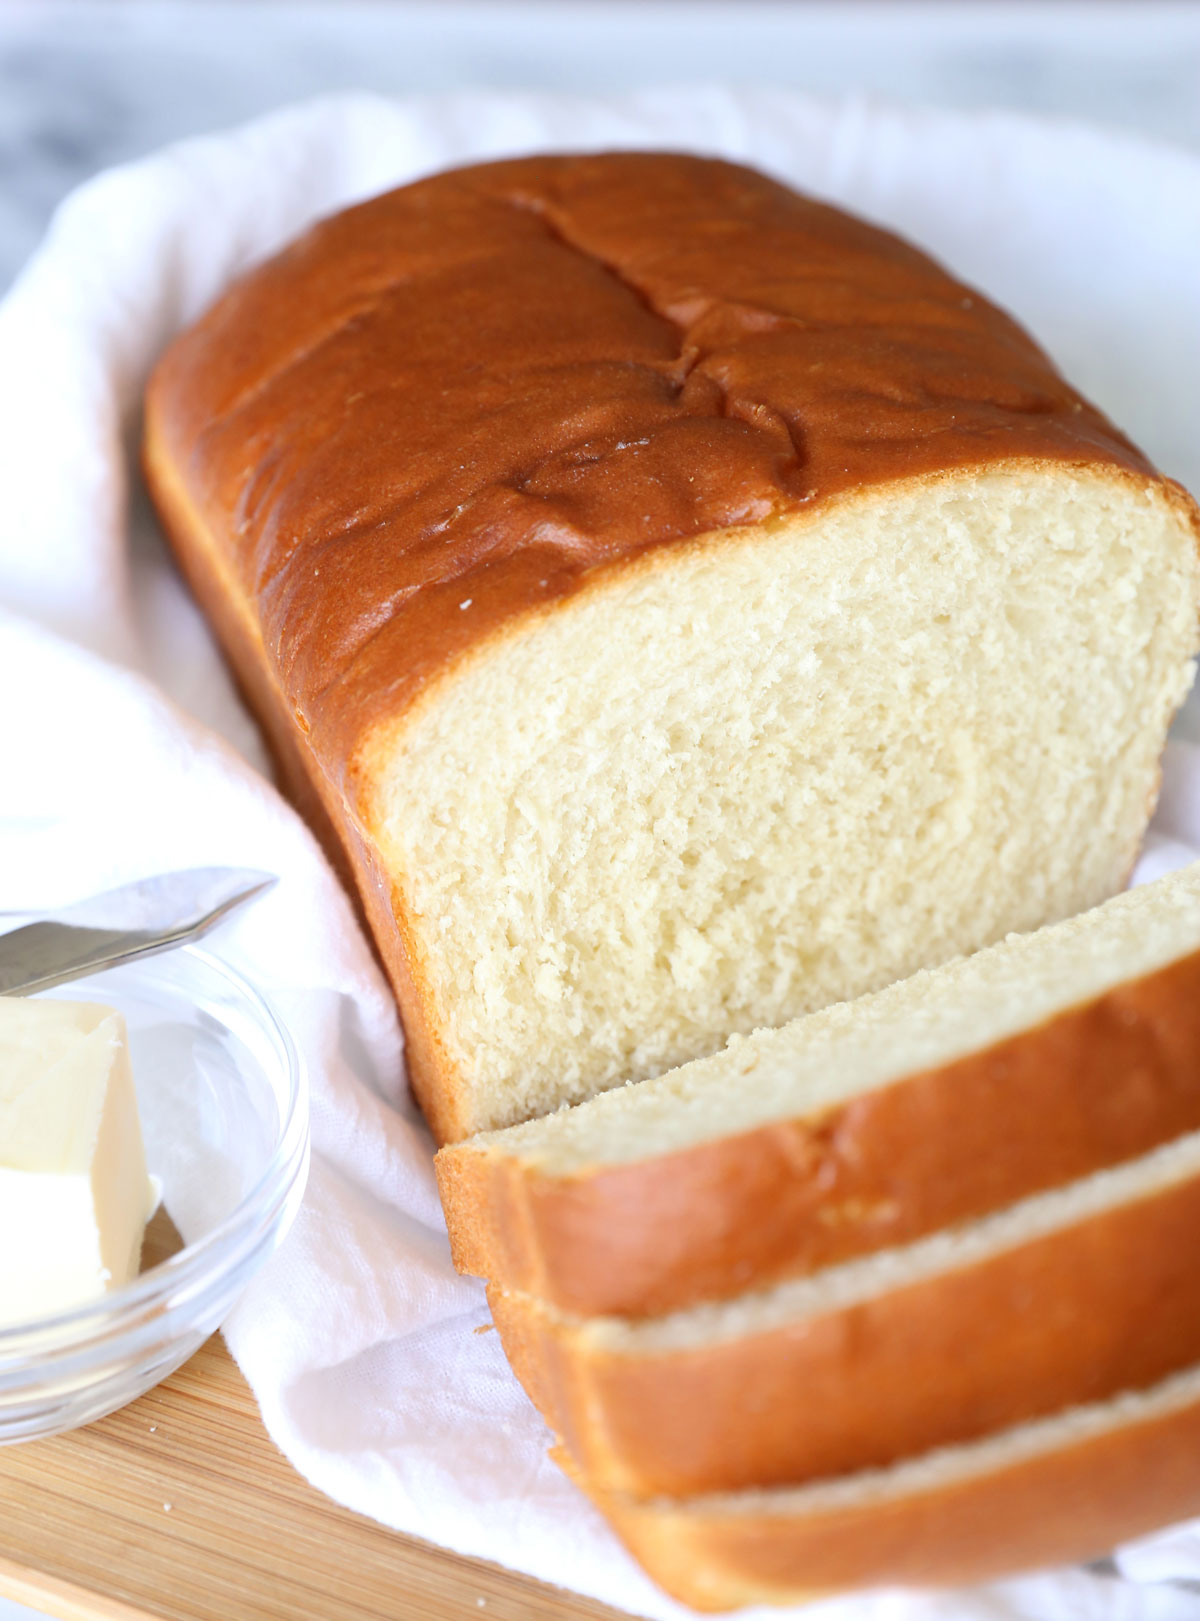
This recipe has a good amount of sugar in it, which means the top will be quite brown when the bread is done. Don’t take it out of the oven when the top is just barely golden brown or it won’t be cooked through. Plan on 30-35 minutes in the oven, but the first time you make it err of the side of baking it a little too long. Overdone bread won’t be quite as soft and may have a thicker crust, but underdone bread is just gross.
I love warm homemade bread, so it’s tempting to slice it right away. However, it’s pretty easy to squish fresh bread when it’s still hot. For clean slices, it’s best to let the bread cool completely before cutting (you can always microwave a slice for a few seconds before eating).
Homemade bread FAQ
Can I use a different type of flour? This recipe calls for All Purpose white flour, and I don’t recommend deciding to use all wheat flour instead. You could use half white and half wheat and probably have a pretty good result, but switching to all wheat flour is going to give you a denser loaf. Bread flour should work just fine, but it’s not necessary.
Can I use a different size loaf pan? This recipe calls for a 9×5 loaf pan, and you really need to use this size. Some loaf pans are 8.5×4.5 and this recipe is just too big to bake correctly in that smaller size pan. However, you can use this recipe to make dinner rolls or breadsticks instead.
What if I accidentally added too much flour? A little bit too much flour won’t be a big deal – it’s possible your bread won’t rise quite as high or be quite as soft, but it’s still going to be good. However, if you’re using a Bosch mixer to knead and you add too much flour, it will not knead correctly. You know you have a problem if the ball of dough is just spinning around the mixer without getting folded in on itself. If this happens you can try sprinkling a little water over the dough and letting it mix for a few minutes. The extra moisture *should* help the dough to grab the sides of the bowl a little so that it starts folding over itself again.
How do I know if the dough has kneaded long enough? Usually 5 minutes in a stand mixer or 10 minutes of kneading by hand *after all the flour has been added* is enough kneading time. You can check by using the Windowpane Test, which I describe in the video. The dough should feel smooth and elastic and should stretch nicely.
Can I double this recipe? Sure! If you’re going to spend the time to make a loaf of bread, you might as well make two at once!
How should I store homemade bread? If the bread won’t all be eaten right away, you’ll want to store it in a plastic bag or other airtight container. (The crust will actually get softer after being stored inside a bag or container.) Homemade bread doesn’t contain preservatives like store bought bread does, so if you want to store it longer than two days I recommend freezing it.
Why is there so much sugar in this recipe? Well, the short answer is that it tastes really good. The long answer is that . . . it tastes really good. This is the same recipe I use for Garlic Breadsticks and commenters have been raving about it for years, and no one thinks it tastes too sweet. But if you want to decrease the sugar you totally can. I probably wouldn’t go below 1 tablespoon, but you can experiment here.


Melody Aboaf says
I just pulled this bread out of the oven about 45 minutes ago, and WOW! So delicious and perfect!! I adjusted the flour quite a bit since I’m at almost 7000ft altitude- I think I used 2.75 cups of flour in total, but otherwise stuck to the recipe. The bread is super soft, fluffy, and perfect. It was so simple to make and your video really helped. This one is definitely a keeper. Thank you!!
Teena Moran says
I made your bread yesterday and it was my first time ever making bread from scratch! It came out perfect and looks just like your loaf in the picture. Wanted to attach a photo of mine here in comments but did not see how to do it. Thank you, all your info is very helpful and your video is great. I used my KA stand mixer and your added info for them really helped me feel confident as I worked thru the recipe. Cant wait to make cinnamon rolls next.
Pam says
Salted or Unsalted butter? Does it matter?
autumn says
Hi! The recipe calls for salted butter – but if you want to use that should be just fine. If you do use unsalted butter you will want to add an addition 1/2 teaspoon of salt. Thanks.
Autumn says
I use salted, but it’s a small enough amount that it won’t really matter.
Deanne says
I love all your recipes. The only problem I have is when I print a copy with the light blue color you have all over your page the printer prints it really light gray not black. It’s very hard to read. Is there a reason for you choosing the color? Other than that I love everything about your site. Thanks.
Judy says
loved it ty