
In today’s post: You won’t believe how easy it is to make this beautiful homemade artisan bread! Only 4 ingredients and about 5 minutes of hands-on time for a gorgeous loaf that looks like it came from a bakery. Perfect for beginners!
Ok, people, I know that baking bread can be intimidating. There’s mixing and kneading and rising and it seems like it’s going to take forever and have a high chance of failure. If you’ve ever thought: “I just can’t make bread” then this easy artisan bread recipe is for you! Seriously, I can’t overstate how easy this recipe is and how beautifully the loaf turns out. Four ingredients, five minutes of work, and no kneading and this is what you’re going to be serving with dinner:

What is Artisan Bread?
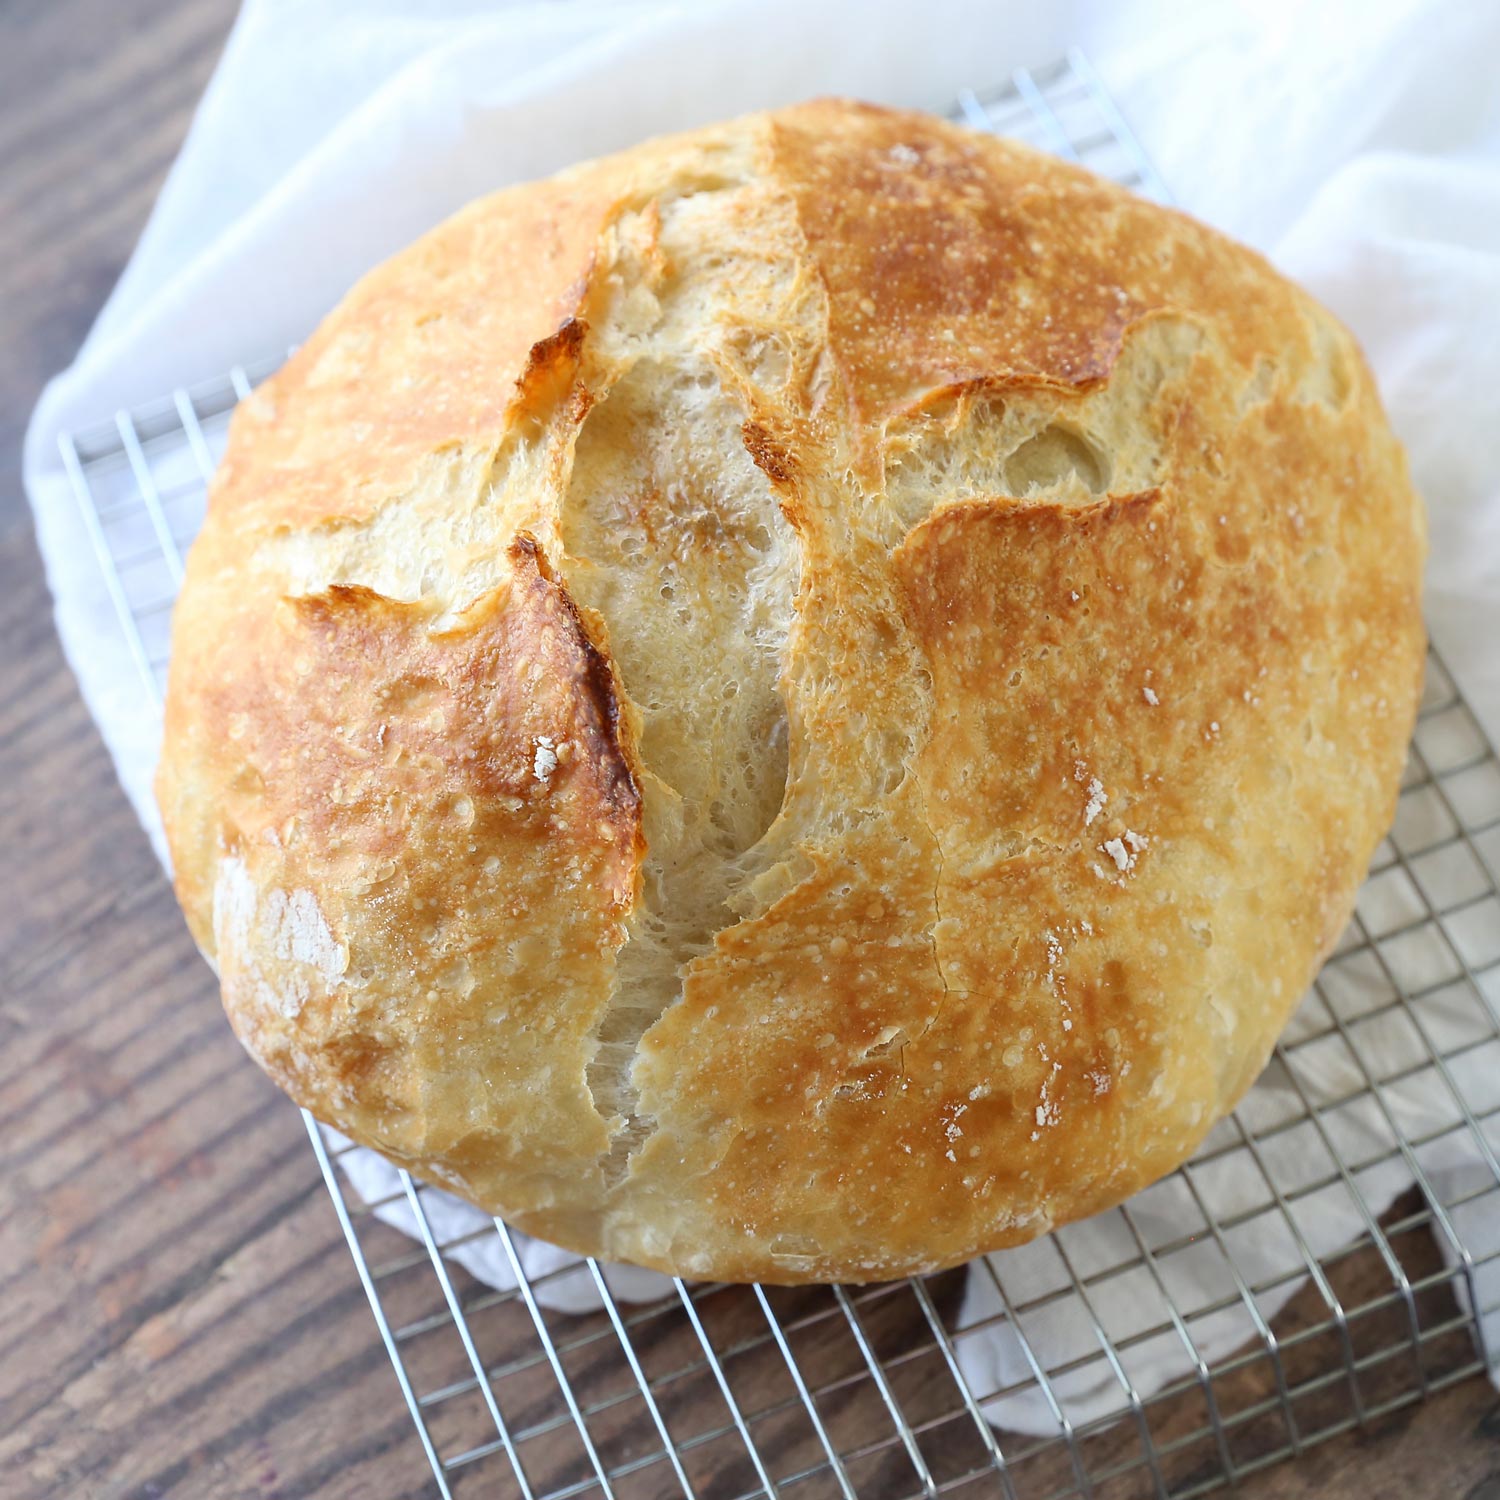
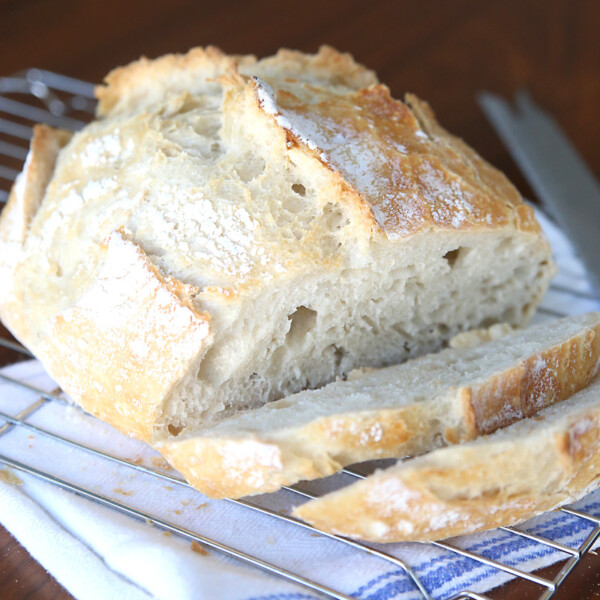
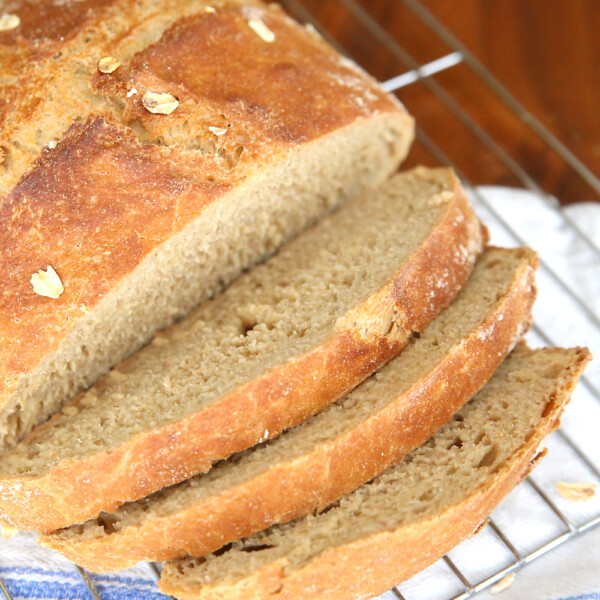
You’ve probably seen loaves like this at your local bakery, often referred to as a “boule”. The outside is crusty and chewy, while the inside has a soft, tender texture with an open crumb. It’s perfect for serving alongside soup, with a creamy dip, or for making hearty sandwiches. Leftovers make great toast!
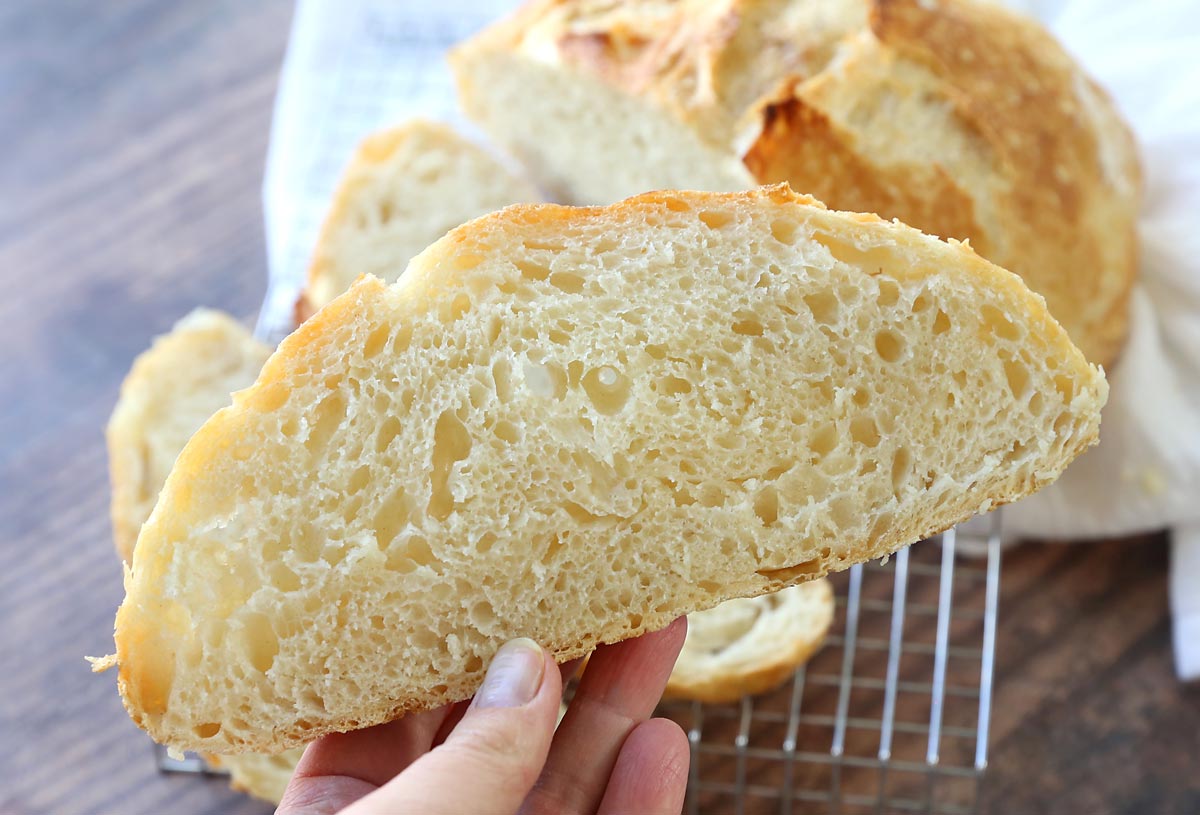
The best part of this recipe is the fact that you don’t have to knead it. Usually making homemade bread requires kneading to build up the structure, but for this bread a long rise time does all the work. You will need to plan ahead, but the rise time is flexible: it can be anywhere between 8 and 24 hours. You can start it the night before you plan to serve, or in the morning before work, and either way it will still turn out great! There is very little hands-on time so I find it’s a lot easier to make on a busy weekday than a traditional loaf. Plus it just looks fancy, which is fun.
Ingredients
You only need four ingredients to make this bread, which is hard to believe because it has so much flavor (thank you long rise time!). Here’s what you’ll use:
- All Purpose Flour: this recipe has been developed for All Purpose white flour. If you’re looking for a recipe using whole wheat, try this one: Whole Wheat Artisan Bread
- Warm Water: I either use water warm from the tap, or microwaved for few seconds. Just don’t use hot water or it could kill the yeast.
- Salt: I use plan table salt here.
- Yeast: I use Active Dry Yeast for this recipe. Because it’s meant to have a long rise time, instant yeast or rapid-rise might not work as well (but if that’s all you have check through the comments to see what has worked for other readers).
How to make artisan bread VIDEO
After lots of happy comments, and lots of questions as well, I decided to make a step-by-step video for you guys showing the entire process for making artisan bread. This should help because you can compare your bread as you make it to what you see in this video. Written instructions follow the video, and you’ll find a printable recipe card below the instructions.
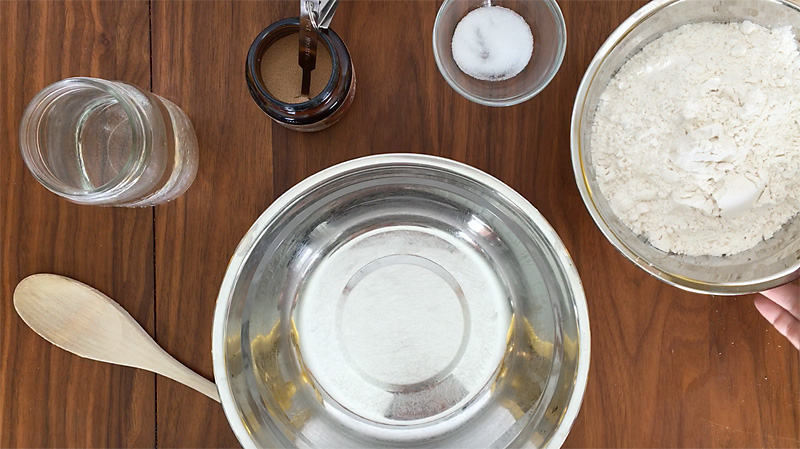
Stir Together Ingredients
You’ll start by mixing 3 cups white flour, 1 teaspoon salt, 1/2 teaspoon yeast, and 1.5 cups of warm water in a bowl.
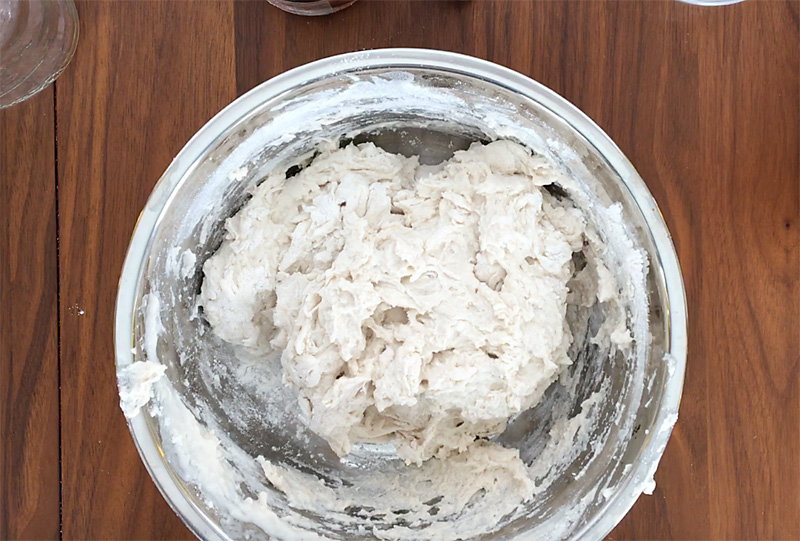
Use a wooden spoon and just mix until everything’s combined, probably less than a minute. Do not knead. It’s not going to look smooth; that’s just fine. The dough should look dry and shaggy at this point; if it seems wet and sticky right now add an additional 1/4 cup of flour.
Let it Rise
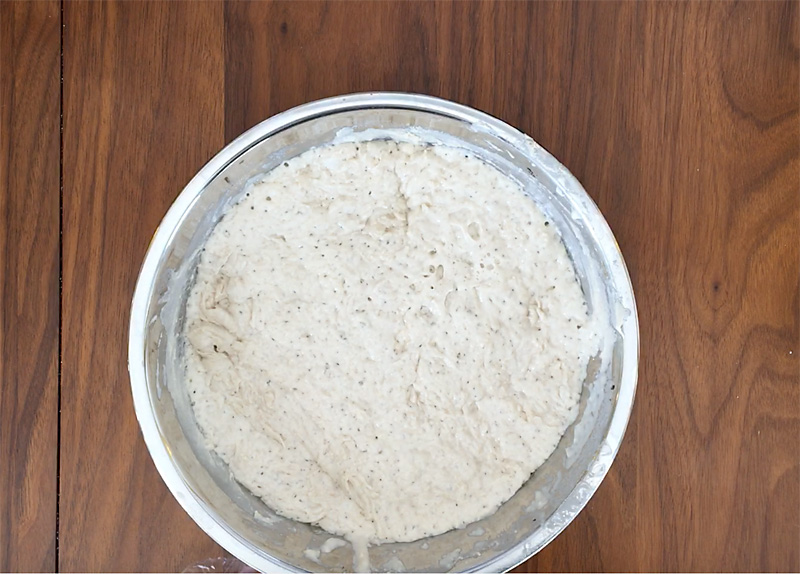
Leave the dough in the bowl you mixed it in and cover the bowl with plastic wrap. Leave at room temperature for 8-24 hours – do not put it in the fridge. It will get all bubbly.
Form a Ball
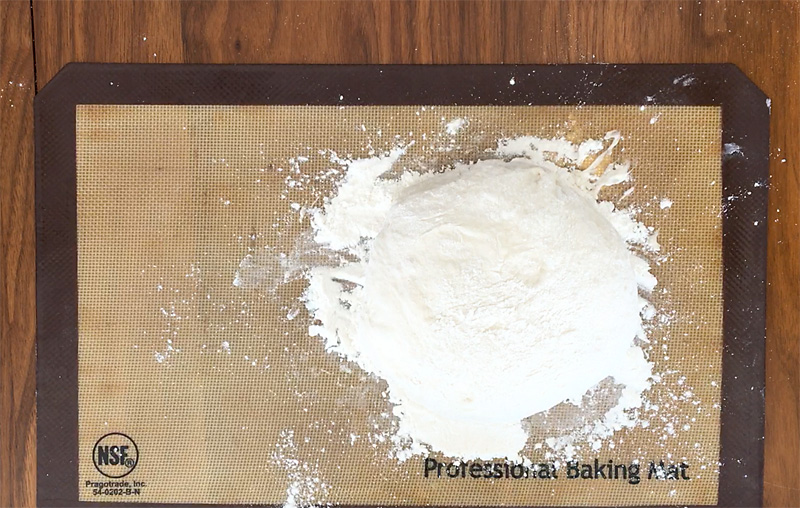
About 90 minutes before you’d like to serve it, turn the dough out onto a well-floured surface. The dough will be very sticky at this point, so use lots of flour. Form it into a rough ball by quickly pulling up the sides (as shown in the video), and let it rest for 30 minutes.
NOTE: Some readers tell me they form the ball on a piece of parchment paper, and then drop the whole thing (dough and paper) into the baking dish to cook. This makes the transfer even simpler!
In the meantime, turn on the oven to 450 degrees and put whatever dish you’ll cook it in inside the oven to preheat. You can use a dutch oven, or a casserole dish with high sides, or an oven safe pot…pretty much anything that’s oven safe and has high sides will work. Check through the comments – some readers have even had success using a baking sheet or pie tin. I just ordered this very pretty enameled dutch oven and it works beautifully (affiliate link)! Here’s another enameled dutch oven option.
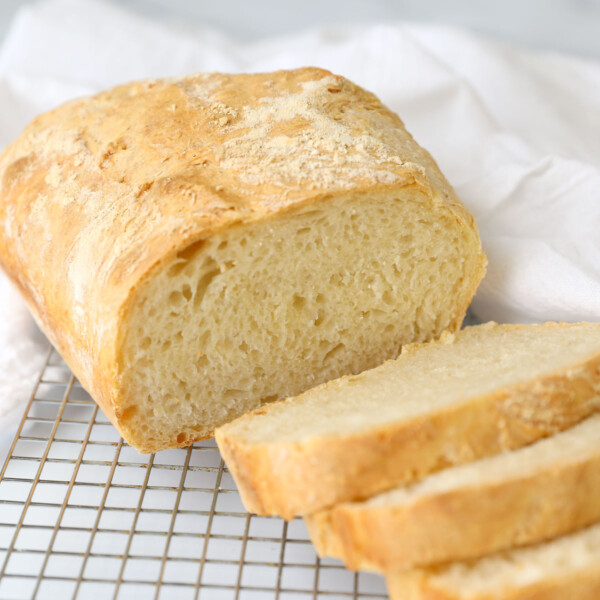
NOTE: I’ve tried cooking this bread in a loaf pan and that works too! See how I did it here: Stuck at Home Bread
Bake
After dough has rested and oven has preheated 30 minutes, use a sharp knife to slash an X across the top of the dough. Pull your hot baking dish out of the oven and give it a quick shot with nonstick spray. Quickly pick up the dough with floured hands, and plop it in the dish. Cover the dish with a lid or aluminum foil, and put it in the oven.
Bake covered for 30 minutes, then uncover and bake 10-15 minutes more until top is nicely browned. This is meant to be a crusty bread, so be sure to bake until the crust has quite a bit of brown color, otherwise the inside will be underdone
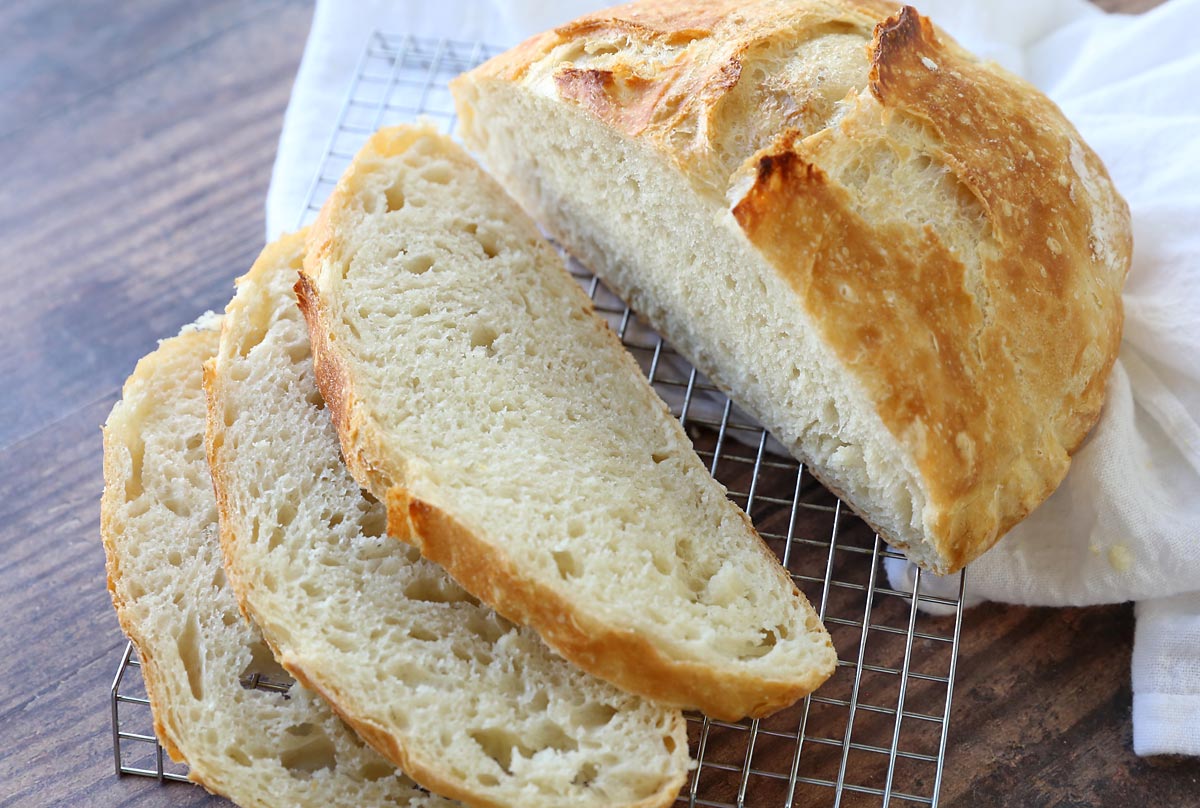
I like to let it cool for at least 15 minutes before I slice it so it doesn’t squish. If you have an electric knife you may be able to cut it sooner; and if you don’t have a sharp serrated knife you might want to wait even longer. It’ll be worth it, I promise! Serve it with plenty of butter for the best bread you’ve ever tasted.
Artisan Bread Recipe
4 Ingredient Easy Artisan Bread
Ingredients
- 3 cups all purpose flour
- 1 teaspoon salt
- 1/2 teaspoon yeast
- 1.5 cups warm water
Want more project ideas? Sign up to get my favorite easy crafts and recipes straight to your inbox!
Instructions
- In a bowl, stir the flour, salt, yeast and water until combined. The dough should look dry and shaggy – if it looks wet and sticky instead stir in an additional 1/4 cup of flour. Cover with plastic wrap and rest at room temperature for 8-24 hours.
- Turn dough out onto a well floured surface and form a ball. (Place on parchment paper if desired.)
- Rest for 30 minutes. Meanwhile, place an oven safe baking dish with high sides into the oven and preheat to 450 degrees.
- Slash an “X” on top of the bread. Carefully transfer to baking dish and cover. (If using parchment paper, you can pick up the edges of the paper and transfer the dough and the paper together into the baking dish.)
- Bake covered 30 minutes. Uncover and bake about 15 more minutes until quite golden brown.
- Cool before slicing.
Video Tutorial
Artisan Bread FAQ
*******YOUR QUESTIONS ANSWERED**********
Ok, I’ve gotten quite a few questions on this post, so I’ll answer them here. Watching the instructional video in the post above should be very helpful!
No. And yes. If you just substitute whole wheat flour for the white flour in this recipe, you’ll end up with a very dense loaf. However, I now have a post on how to adjust the recipe for a great 100% whole wheat version here.
The first rise can be anywhere between 8 and 24 hours, at your convenience. That being said, I think the bread ends up a bit better if you go longer than 12.
Yep!
Yep! This dough is very forgiving – plenty of readers have left comments saying they didn’t think it was going to turn out but then it did.
Well, the dough will be very soft, as you can see in the video, but you should be able to quickly pull up the edges and form it into a soft ball. If you can’t even do that, then maybe you didn’t have enough flour to begin with, so make a note to use more next time. At this point your best bet is probably to dump the dough into a greased loaf pan.
No. All Purpose flour works great.
No, that will not work.
Sure, although you’ll need to experiment and I cannot assure you it will work. Sometimes crushed garlic interferes with the yeast and the loaf doesn’t rise as high, and sometimes adding cheese adds moisture and keeps the loaf a little wet. You can definitely add herbs and spices such as rosemary or an Italian herb blend. I don’t have a recipe for any add-ins, but you should check the comments because some people have left tips there.
I have no idea, since I’ve never cooked with gluten-free flour. However, check the comments because some readers have left tips there.
Many baking dishes actually won’t need to be greased since they are already hot when you put the dough in. However, yours might, and the only way to find out is to try it. So I recommend shooting your baking dish with a quick shot of nonstick spray before adding the dough OR just using parchment paper.
No, you don’t need any type of mixer for this no knead bread, so put the stand mixers away. All you need is a wooden spoon to stir the ingredients together.
No, it’s not. It’s somewhat similar in shape and texture, but since it doesn’t start with a sourdough starter it won’t have the tang of a sourdough bread.
For more questions, please read through the comments because lots of readers have answered each other’s queries there – thanks!
If you want even more info and instructions about artisan bread, check out this book by Jeff Hertzberg M.D. and Zoë François.
Want more bread recipes? Visit these posts:
How to make perfect dinner rolls
The best buttery crescent rolls
Beautiful braided bread recipe


Kathy Smith says
This bread turned out perfectly! I live in a high elevation and it was great.