It's Always Autumn

creative tutorials for everyday life

  • Holidays
  • Holidays
    • back to school
    • birthdays
    • Christmas
    • Easter
    • Halloween
    • July 4th
    • Mother’s Day/Father’s Day
    • teacher appreciation
    • Thanksgiving
    • Valentine’s
  • Crafts
  • Crafts
    • crafts + DIY
    • handmade gifts
    • photo crafts
    • kid crafts + activities
  • Recipes
  • Recipes
    • bread
    • dessert
    • main dish
    • side dish
  • Sewing
  • Sewing
    • free sewing patterns
    • sewing for women
    • sewing for kids
    • how to sew
    • gifts
  • Photography
  • Photography
    • beginning photography tips
    • posing tips
    • photo editing tips
  • Tips
  • Tips
    • parenting tips
    • travel tips
    • books I love
  • FAQ

sewing sewing for kids
September 12, 2012

little man pajamas made from a men’s shirt

little boy wearing pair of pajamas made from a mens XXL shirt

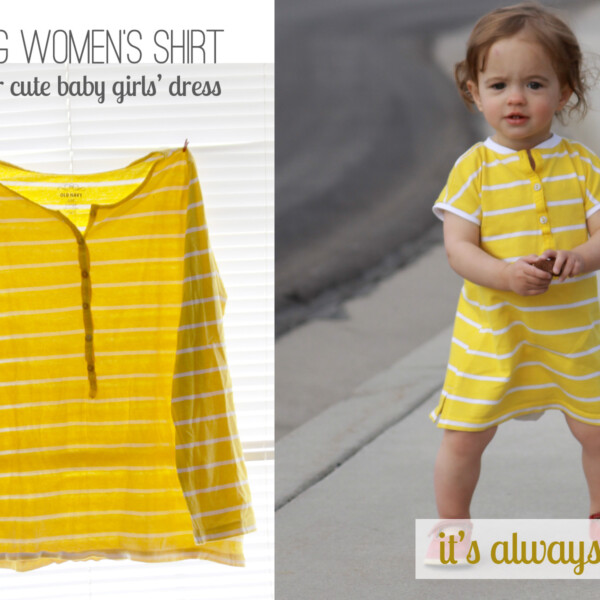
A few weeks ago I made some jammies for my baby girl using a large men’s sweatshirt I’d purchased on clearance for $1. I hit up a few garage sales this past weekend and found a bunch of men’s shirts for 50 cents each, so I decided I’d try to use a similar process to turn one of the shirts into pajamas for my four year old.

A little boy that is wearing DIY pajamas

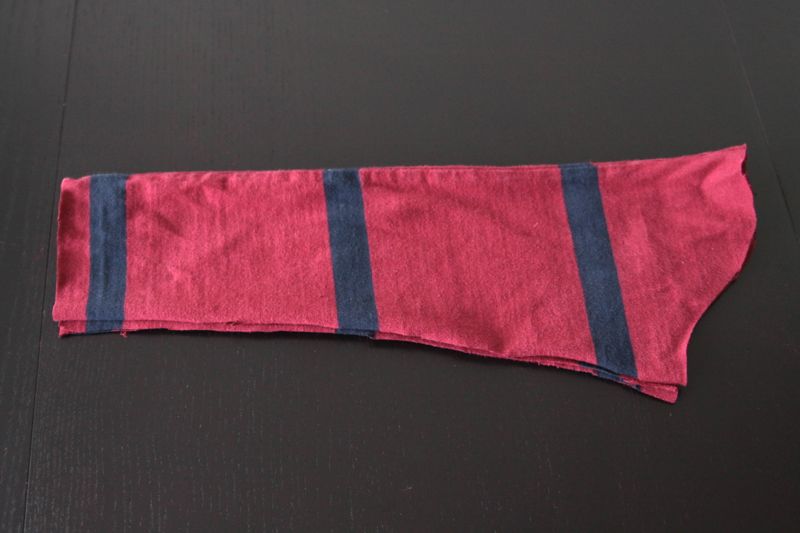
They turned out great. I was able to use the sleeves for pant legs (which resulted in a nicely cuffed leg with no work on my part), the original hem for the bottom of the shirt, and the ribbed polo collar for nice cuffs on the sleeves (again with very little work). I love that refashioning often results in a more professional looking result than sewing from scratch, often for much less money and way less effort. Here’s the before:

Men\'s striped shirt

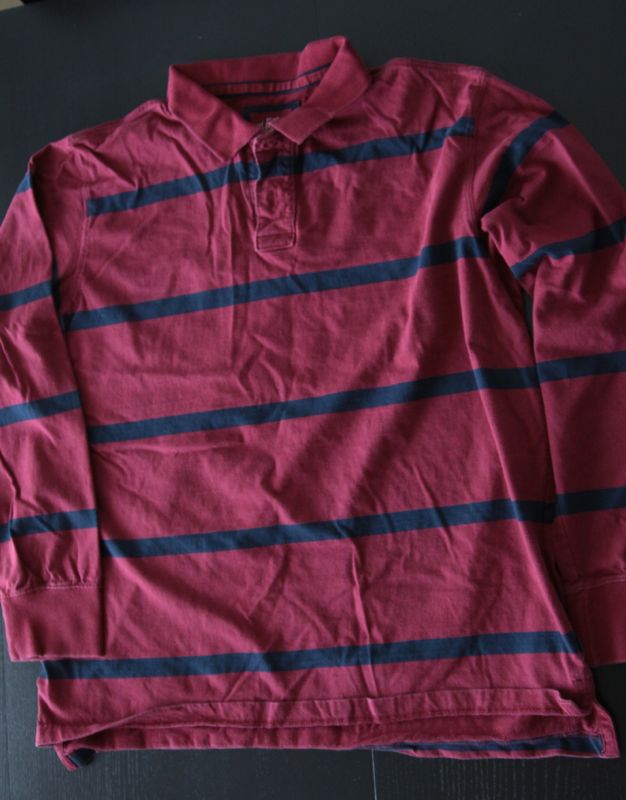
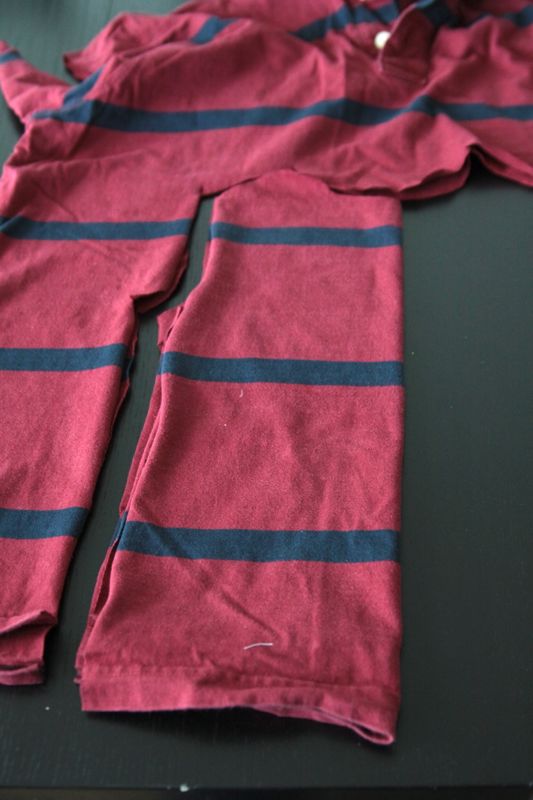
I love stripes for little boys, so as soon as I saw this soft and sturdy polo I knew I’d made something for my little man. I started by cutting off the sleeves and tracing an existing pair of jammie pants. Notice how my existing pair is a little longer at the top? That’s because my sleeves weren’t quite long enough – but it’s no biggie, because instead of turning down the top to add an elastic casing, I added a yoga waistband, just like in the baby girl version. Does it look girly in the end result? Not at all.

Pair of pajama pants laid over pajama pants pieces cut from mens shirt

The pants took about ten minutes because they only need three seams and don’t require hemming (check out the baby girl version for step-by-step photos). All you have to do is sew up the inseam, put the two legs together and sew up the rainbow, and sew on a yoga waistband. Fantastic!

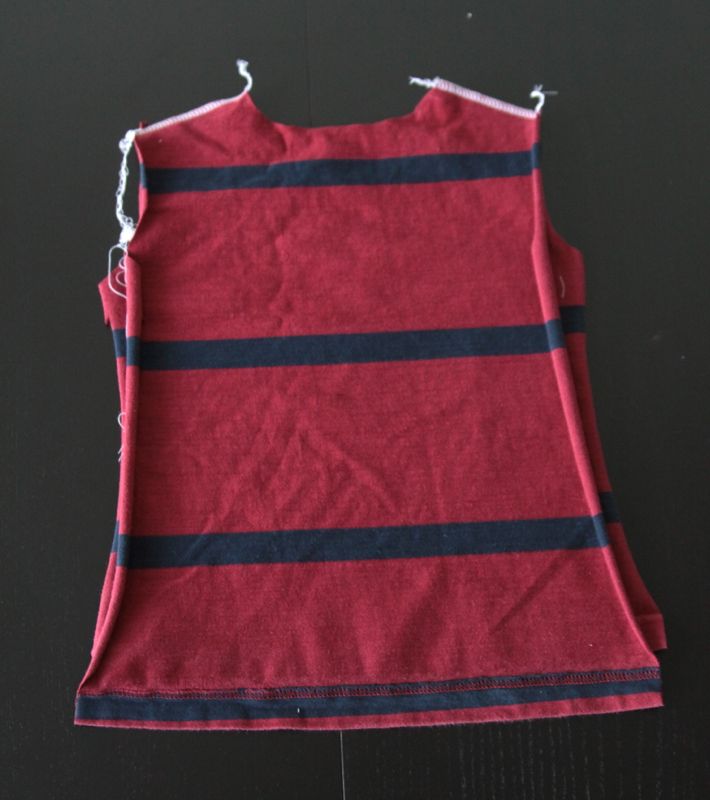
Next, I cut out the bodice of the shirt, again using an existing shirt to get the right shape (remember to add seam allowance when cutting!)

pajama top laid over mens XXL t-shirt to use as a pattern

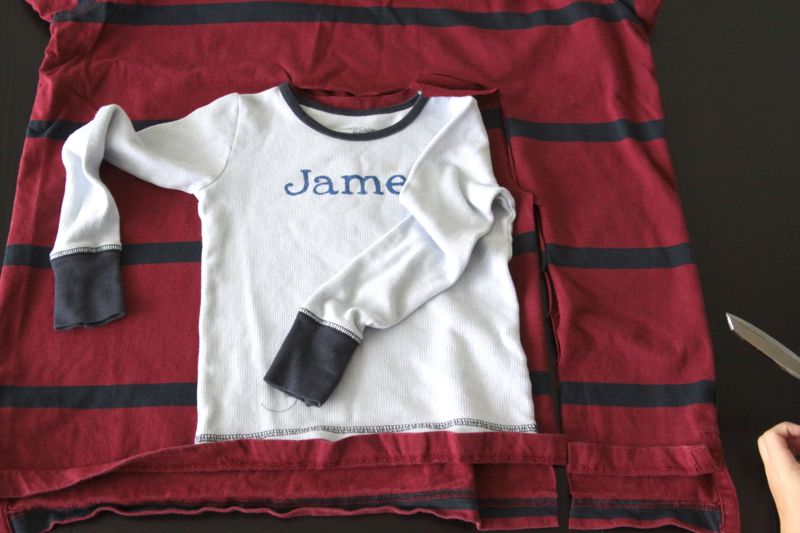
I used the shirt to cut one half of the bodice, then flipped it over and cut down the other side.

pajama top front cut from men\'s t-shirt

I cut sleeves from the rest of the shirt fabric, again getting the shape from an existing shirt.

Pajamas sleeve cut from men\'s t-shirt

Shirt construction is pretty simple as well. Place front and back RST and sew shoulder seams.

Pajama shirt front and back pieces sewn together at the shoulders

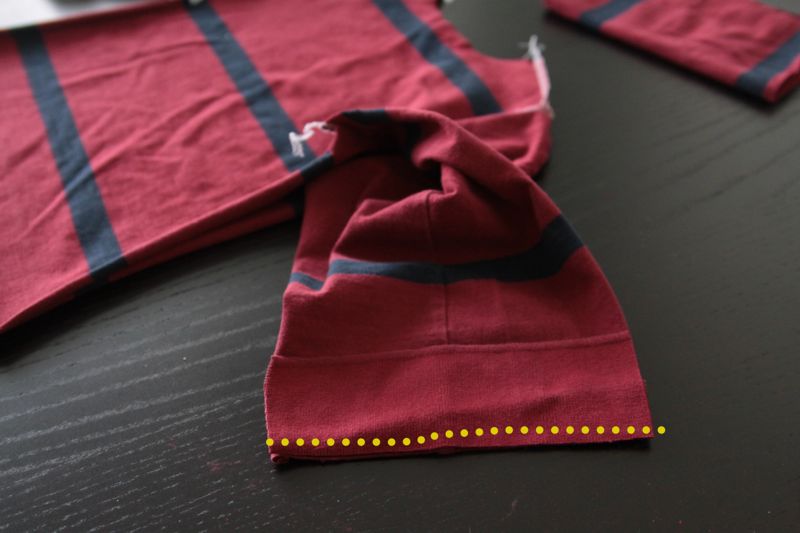
Next, sew on your sleeves (step-by-step photos here). At this point I realized the shirt’s polo collar was the exactly same ribbing material used at the bottom of the sleeves (now pants), so I decided to cut up the collar and use it as a cuff at the bottom of my sleeves. This was so much simpler than hemming! I just place the collar on the right side of each sleeve and sewed along the raw edges, as shown.

piece of shirt collar laid over end of pajama top sleeve and seam marked

Next, you can sew up the sleeve and down the body of the shirt (sorry, the cuff is not on in this photo but it should be!).

Because I started with a polo shirt that had a little longer hem in the back than the front, I sewed down the body but stopped about an inch above the front hem.

Pajama top with underarm and side seam marked

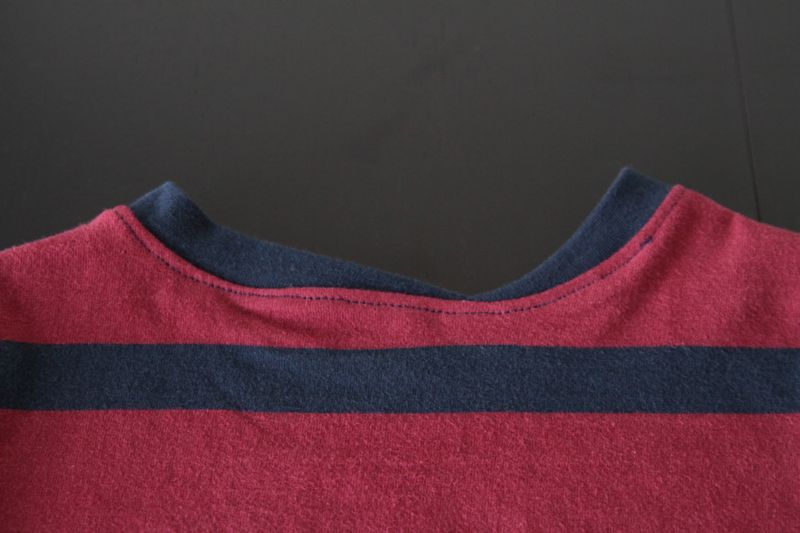
This allowed me to press the side seam open and then add blue detail stitching that you can see below – now the hem of the little shirt looks just like the polo hem of the big shirt – little details like this make your finished project look a little more professional.

Vent in side seam of pajama top

After that all that was left was adding ribbing around the neck. I tried the shirt on my son to make sure the neck hole was large enough to go over his head. Then I grabbed the scraps of the leftover shirt and cut a long narrow strip all the way across, making sure it included one of the blue stripes. I folded my strip right along the stripe line and attached it to the neck, being sure to pull the ribbing tighter than I pulled the neckline of the shirt (step by step pics in this post).

Pajama top neckline finished and bound

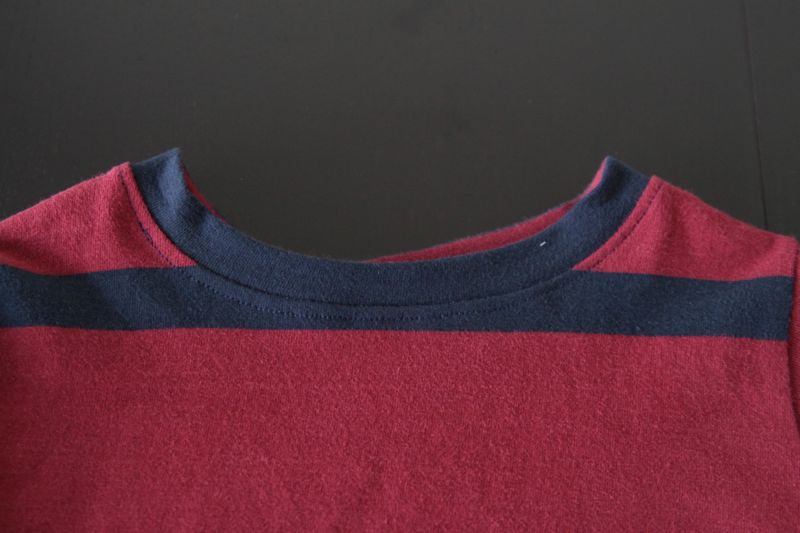
Once the ribbing was attached, I pressed it to the top and went around the neckline again with a blue straight stitch – making sure to streth the entire thing as I sewed so that line of stitching wouldn’t be too tight when my son tried to put it on.

I wanted to taper the ribbing off at the back right in the middle, but I was too lazy to measure and it ended up crooked. That happens. Did I unpick the whole thing and put it together right? No. My son doesn’t mind and no one else will ever notice.

Crooked neckbinding on the back of the shirt

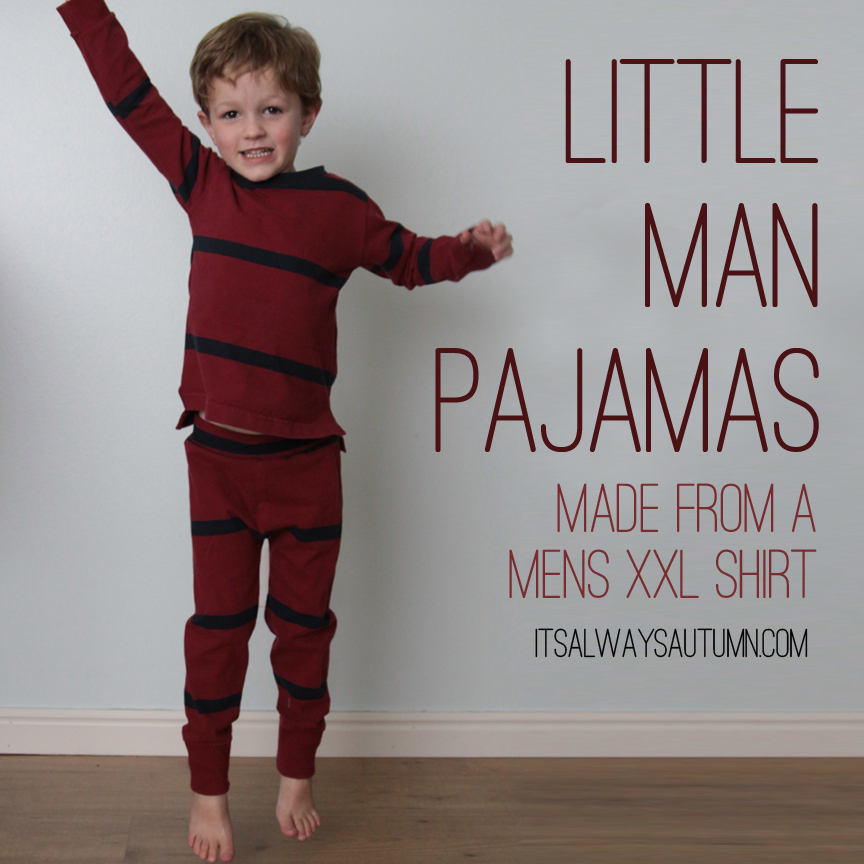
He actually thinks his new pajamas are pretty awesome.

little boy giving a thumbs up

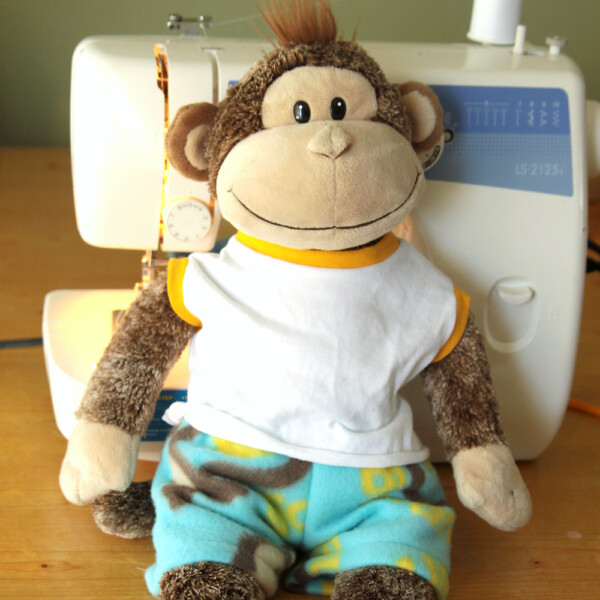
Perfect for snuggling up with his monkey, Jim. (Jim has jammies too – along with a free pattern download for Build-a-Bear sized animals – click here!)

Little boy in pajamas hugging stuffed monkey

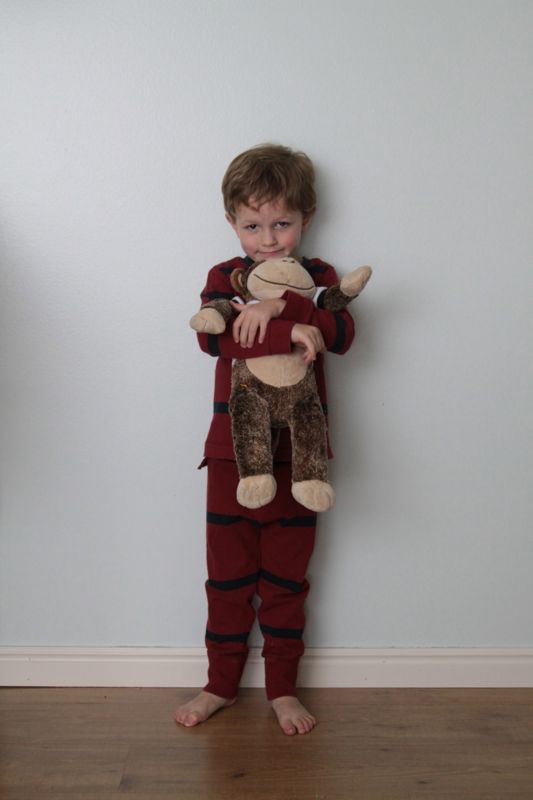
New, cute pajamas for 50 cents. I’m good with that.

A little boy wearing pajamas made from a mens XXL shirt

Share this:

  • Tweet
  • Print

Home » sewing » sewing for kids » little man pajamas made from a men’s shirt


15 Comments

free email series

NO FAIL CRAFTS + RECIPES

Get my favorite EASY craft and recipe ideas straight to your inbox!

« baby girl wrap front pajamas
free template downloads and instructions for treat packaging »

Comments

  1. TESSA says

    November 14, 2015 at 12:24 pm

    Love finding something for boys – thank you! Now I have no excuse not to make them! 😉

    Reply
  2. Nikki says

    October 1, 2015 at 8:39 pm

    These PJs are so cute. Glad I found this tutorial. Thanks for posting it. And your little guy is a cutie!

    Reply
  3. Lynn says

    January 26, 2015 at 1:28 pm

    Love this !!! You make it look so simple and they turned out great. So much better then store bought for sure !! I am a new sewer still learning but I a, definitely going to give this a try ! My husband has a bunch of polos that have been in the closet forever and never get worn. We both do not like getting rid of clothes (very much hoarders in that department) but now that I am taking up sewing I am glad I held on to the old clothes to repurpose. So many items I want to make and no need to buy fabric that I might ruin. Use the old clothes for learning ! Thanks for sharing this !

    Reply
  4. EMily says

    September 23, 2013 at 12:09 am

    so cute!! I’ve done this too, so easy right!??? I’m starting a group pinterest board called Sewing for Kids… I’d love for you to join… I follow you, but you have to follow at least one of my boards for me to add you :o) I’m ntcreations on Pinterest… let me know if you want to join! Emily

    Reply
  5. Bike says

    October 19, 2012 at 12:10 am

    I made a PJ following this tutorial. Thank you very much 🙂

    Reply
  6. Gay Vaughan says

    September 29, 2012 at 12:09 am

    Thank you Autumn for linking to my party! I wanted you to know how great I think these are and that I featured them on my party. Thanks again for joining.
    ~Gay~
    itsahodgepodgelife.blogspot.com

    Reply
  7. Kathy P says

    September 21, 2012 at 12:09 am

    Love the PJs and my Jamsie as well.

    Reply
  8. AngieC says

    September 21, 2012 at 12:09 am

    These are incredible! I’m bookmarking this so I can come back and give them a try! Thanks for sharing 🙂

    Reply
  9. Betsy says

    September 21, 2012 at 12:09 am

    The pj’s are adorable. I may need to try this. We have a lot of unused shirts lying around.

    Reply
  10. Mary Grace says

    September 20, 2012 at 12:09 am

    Your son is ADORABLE! And the pjs look so simple to make, absolutely love it!

    Reply
  11. Mary Jo says

    September 18, 2012 at 12:09 am

    What a great post! I enjoyed your step-by-step directions and definitely want to try this. I need to find a good shirt! 🙂 Also, love your photography!

    Reply
  12. Tarah says

    September 13, 2012 at 12:09 am

    Those are FABULOUS! I would have never in my wildest dreams thought of doing something like that. Its a shame I refuse to learn to sew!

    Reply

Trackbacks

  1. Little Man Pajamas Tutorial | Go To Sew says:
    July 16, 2014 at 7:00 am

    […] You’ll find the tutorial over at It’s Always Autumn. […]

    Reply
  2. T-Shirt Upcycle Tutorials - Andrea's Notebook says:
    July 6, 2014 at 11:40 pm

    […] Make pajamas from a men’s t-shirt with the tutorial by It’s Always Autumn. […]

    Reply
  3. 10 Upcycle Tutorials - Melly Sews says:
    April 4, 2014 at 5:01 am

    […] And It’s Always Autumn shares these pajamas.  […]

    Reply

Leave a Reply Cancel reply

Your email address will not be published. Required fields are marked *

Recipe Rating


Hey, glad you’re here!

I'm Autumn, a mom of five who loves ice cream, Masterpiece Theatre, and clothes that hide the fact that I eat so much ice cream. When I was 18 I got a job at a craft store and told everyone (regularly) how much I hated crafts. Well, things change! Read More…

Find me here

  • Facebook
  • Instagram
  • Pinterest
  • Twitter

free email series

NO FAIL CRAFTS + RECIPES

Get my favorite craft + recipe ideas straight to your inbox!

Popular Posts

101 fun activities that kids can do at home list on a colorful striped background

101 Fun + Easy Activities kids can do AT HOME

50 easy crafts and activities kids can do indoors! Perfect for cold or rainy days.

50 best indoor activities for kids: easy crafts + games

Gorgeous art projects for kids! Easy art that turns out amazing.

20 easy art projects for kids that turn out AMAZING!

Collage of different paper flowers tutorials

How to make GORGEOUS paper flowers

Various flavors of baked mini donuts made from cake mixes

How to make mini donuts! {baked cake mix donuts recipe}

Blog policy

All posts and pictures are copyrighted by Autumn Baldwin and blog content may not be reposted elsewhere. However, linking back to my content is just fine. You may use one photo as long as you link directly back to the specific post. Thank you!

Please view our Privacy Policy here.

Also, please note that this blog is a participant in the Amazon Services LLC Associates Program, an affiliate advertising program designed to provide a means for sites to earn advertising fees by advertising and linking to Amazon.com.

Copyright © 2021 · Divine theme by Restored 316192.168.1.1 router login

Copyright © 2021 · Divine Theme on Genesis Framework · WordPress · Log in